SCHOLTES FP T6.1 Mode D'emploi

SCHOLTES FP T6.1 Mode D'emploi

Masquer les pouces Voir aussi pour FP T6.1:
Table des Matières

Publicité

Les langues disponibles
  • FR

Les langues disponibles

Liens rapides

Publicité

Table des Matières
loading

Sommaire des Matières pour SCHOLTES FP T6.1

  • Page 1: Table Des Matières

    Programmi di cottura Programmi di cottura automatici FP T6.1 Programmare la cottura FM 886.1 MT Consigli pratici di cottura Tabella cottura FP T6.1 GF FM 886.1 G Precauzioni e consigli, 9 Sicurezza generale Smaltimento Risparmiare e rispettare l’ambiente Manutenzione e cura, 10-11 Escludere la corrente elettrica Pulire l’apparecchio...
  • Page 2: Installazione

    Installazione ! È importante conservare questo libretto per poterlo Aerazione consultare in ogni momento. In caso di vendita, di cessione o di trasloco, assicurarsi che resti insieme Per garantire una buona aerazione è necessario all’apparecchio per informare il nuovo proprietario sul eliminare la parete posteriore del vano.
  • Page 3: Collegamento Elettrico

    Collegamento elettrico • la presa sia in grado di sopportare il carico massimo di potenza della macchina, indicato ! I forni dotati di cavo di alimentazione tripolare sono nella targhetta caratteristiche ( vedi sotto ); predisposti per il funzionamento con corrente alternata, con tensione e frequenza indicate nella •...
  • Page 4: Descrizione Dell'apparecchio

    Descrizione dell’apparecchio Vista d’insieme Pannello di controllo GUIDE di scorrimento dei ripiani Ripiano GRIGLIA posizione 5 posizione 4 posizione 3 Ripiano LECCARDA posizione 2 posizione 1 Pannello di controllo Icona ACCENSIONE Icone Icona PROGRAMMI DURATA PANNELLO FINE COTTURA AVVIO Indicatore PORTA BLOCCATA Display...
  • Page 5: Avvio E Utilizzo

    Avvio e utilizzo ! Alla prima accensione fare funzionare il forno a vuoto tasto acceso segnala che il contaminuti è attivo. per almeno un’ora con il termostato al massimo e a ! Il contaminuti non controlla l’accensione e lo porta chiusa. Poi spegnere, aprire la porta del forno spegnimento del forno.
  • Page 6: Programmi

    Programmi Programmi di cottura Girarrosto Per azionare il girarrosto ( vedi ! Tutti i programmi hanno una temperatura di cottura figura ) procedere come segue: preimpostata. Essa può essere regolata manualmente, impostandola a piacere tra 30°C e 250°C. Programma PANE Utilizzare questa funzione per realizzare del pane.
  • Page 7: Programmare La Cottura

    gradi). • Esempio: sono le 9:00 e viene programmata una durata di 1 • Aprite la farina a fontana. ora e 15 minuti. Il programma si arresta automaticamente • Versare il miscuglio di acqua e lievito alle 10:15. • Lavorare fino ad ottenimento di un impasto omogeneo e poco colloso, stirandolo col palmo della mano e Programmare una cottura ritardata ripiegandolo su se stesso per 10 minuti.
  • Page 8: Tabella Cottura

    Tabella cottura Programmi Alimenti Peso Posizione dei Preriscaldamento Temperatura Durata (Kg) ripiani consigliata cottura (°C) (minuti) Crostate 1 o 2 25-35 Torta di frutta 1 o 2 40-50 Plum-cake 1 o 2 170-180 45-55 Cake piccoli su 2 r ipiani 1 e 3 180-190 20-25...
  • Page 9: Precauzioni E Consigli

    Precauzioni e consigli ! L’apparecchio è stato progettato e costruito in che non vengano sorvegliate da una persona conformità alle norme internazionali di sicurezza. responsabile della loro sicurezza o non abbiano Queste avvertenze sono fornite per ragioni di sicurezza ricevuto istruzioni preliminari sull'uso e devono essere lette attentamente.
  • Page 10: Manutenzione E Cura

    Manutenzione e cura Escludere la corrente elettrica Controllare le guarnizioni Prima di ogni operazione isolare l’apparecchio dalla Controllare periodicamente lo stato della guarnizione rete di alimentazione elettrica. attorno alla porta del forno. In caso risulti danneggiata rivolgersi al Centro Assistenza più vicino ( vedi Assistenza ).
  • Page 11: Pulizia Automatica Pirolisi

    3. Fissare i due telai Dispositivi di sicurezza con le guide montate negli appositi fori posti • la porta si blocca automaticamente non appena la sulle pareti del forno temperatura raggiunge valori elevati; ( vedi figura) . I fori per il telaio sinistro sono •...
  • Page 12: Assistenza

    08:00 e i giorni festivi, per chi chiama da telefono fisso. Per chi chiama da radiomobile le tariffe sono legate al piano tariffario dell’operatore telefonico utilizzato. Le suddette tariffe potrebbero essere soggette a variazione da parte dell’operatore telefonico; per maggiori informazioni consultare il sito www.scholtes.com.
  • Page 13 Cooking modes Automatic cooking modes FP T6.1 Programming your cooking FM 886.1 MT Practical cooking advice Cooking advice table FP T6.1 GF FM 886.1 G Precautions and tips, 21 General safety Disposal Respecting and conserving the environment Maintenance and care, 22-23...
  • Page 14: Installation

    Installation ! Before placing your new appliance into operation Ventilation please read these operating instructions carefully. They contain important information for safe use, for To ensure good ventilation, the back panel of the installation and for care of the appliance. cabinet must be removed.
  • Page 15: Electrical Connections

    Electrical connections • The socket can withstand the maximum power of the appliance, which is indicated on the data plate ! Ovens equipped with a three-pole power supply ( see below ). cable are designed to operate with alternating current at the voltage and frequency indicated on •...
  • Page 16: Description Of The Appliance

    Description of the appliance Overall view GUIDES for the Control panel sliding racks GRILL rack position 5 position 4 position 3 DRIPPING PAN position 2 position 1 Control panel DURATION CONTROL PANEL COOKING END TIME COOKING MODE icon POWER icon icons button START...
  • Page 17: Start-Up And Use

    Start-up and use ! The first time you use your appliance, heat the empty ! The timer does not switch the oven on or off. oven with its door closed at its maximum temperature for at least half an hour. Ensure that the room is well Starting the oven ventilated before switching the oven off and opening 1.
  • Page 18: Cooking Modes

    Cooking modes Cooking modes The Rotisserie ! All cooking modes have a default cooking temperature To operate the rotisserie ( see diagram ) proceed as follows: which may be adjusted manually between 30°C and 250°C as desired. BREAD mode Use this function to make bread. Refer to the chapter "Automatic cooking modes"...
  • Page 19: Programming Your Cooking

    • Make a small well in the mound of flour. automatically at 10:15 a.m. • Pour in water and yeast mixture. • Knead dough by stretching and folding it over itself with the Programming delayed cooking palm of your hand for 10 minutes until it has a uniform 1.
  • Page 20: Cooking Advice Table

    Cooking advice table Cooking modes Foods Weight Rack position Preheating Recommended Cooking time (in kg) temperature (minutes) (°C) Tarts 1 or 2 25-35 Fruit cakes 1 or 2 40-50 Sponge cake made with yoghurt 1 or 2 170-180 45-55 Small cakes on 2 racks 1 and 3 180-190 20-25...
  • Page 21: Precautions And Tips

    Precautions and tips ! The appliance was designed and manufactured in (including children) with reduced physical, compliance with international safety standards. The sensory or mental capacities, by inexperienced following warnings are provided for safety reasons individuals or by anyone who is not familiar with and must be read carefully.
  • Page 22: Maintenance And Care

    Maintenance and care Switching the appliance off Inspecting the seals Disconnect your appliance from the electricity Check the door seals around the oven periodically. If supply before carrying out any work on it. the seals are damaged, please contact your nearest After-sales Service Centre ( see Assistance ).
  • Page 23: Automatic Cleaning With The Pyrolysis Function

    3. Secure the two Safety devices frames with the guide rails using the holes • The door is locked automatically as soon as the provided on the oven temperature exceeds a certain value. walls ( see diagram ). The holes for the left •...
  • Page 24: Assistance

    Assistance Warning: The appliance is fitted with an automatic diagnostic system which detects any malfunctions. Malfunctions are displayed by messages of the following type: “ER” followed by numbers. Call for technical assistance should a malfunction occur. Before calling for Assistance: •...
  • Page 25: Italiano, 1 English,13 Français

    Programmes de cuisson automatiques FP T6.1 Programmer la cuisson FM 886.1 MT Conseils de cuisson Tableau de cuisson FP T6.1 GF FM 886.1 G Précautions et conseils, 33 Sécurité générale Mise au rebut Economies et respect de l’environnement Nettoyage et entretien, 34-35 Mise hors tension Nettoyage de l’appareil...
  • Page 26: Installation

    Installation ! Conservez ce mode d’emploi pour pouvoir le consulter à Aération tout moment. En cas de vente, de cession ou de déménagement, veillez à ce qu’il suive l’appareil pour Pour garantir une bonne aération, la cavité d’encastrement informer le nouveau propriétaire sur son fonctionnement et doit être dépourvue de paroi arrière.
  • Page 27: Raccordement Électrique

    Raccordement électrique • la prise est bien munie d’une terre conforme à la loi; ! Les fours munis d’un câble d’alimentation tripolaire sont • la prise est bien apte à supporter la puissance prévus pour un fonctionnement au courant alternatif à la maximale de l’appareil, indiquée sur la plaquette tension et à...
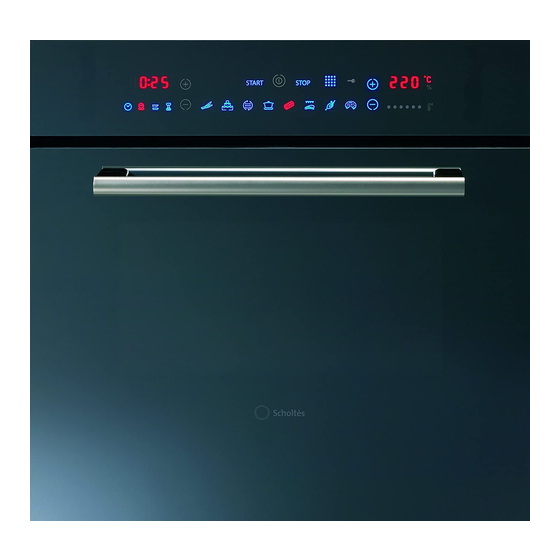
  • Page 28: Description De L'appareil

    Description de l’appareil Vue d’ensemble Tableau de bord GLISSIERES de coulissement niveau 5 niveau 5 niveau 5 niveau 5 niveau 5 Support GRILLE niveau 4 niveau 4 niveau 4 niveau 4 niveau 4 niveau 3 niveau 3 niveau 3 niveau 3 niveau 3 Support LECHEFRITE niveau 2...
  • Page 29: Mise En Marche Et Utilisation

    Mise en marche et utilisation ! Lors de son premier allumage, faire fonctionner le four ! Le minuteur ne contrôle pas l'allumage et l'arrêt du à vide, porte fermée, pendant au moins une heure en four. réglant la température à son maximum. Puis éteindre le four, ouvrir la porte et aérer la pièce.
  • Page 30: Programmes

    Programmes Programmes de cuisson Tournebroche ! Tous les programmes ont une température de cuisson Pour actionner le tournebroche présélectionnée. Vous pouvez la régler manuellement, entre 30°C et ( voir figure ) procédez comme 250°C au choix. suit : Programme PAIN C'est la fonction idéale pour la cuisson du pain.
  • Page 31: Comment Programmer Une Cuisson

    degrés environ). Programmer une cuisson différée • Disposez la farine en fontaine. • Versez le mélange d'eau et de levure 1. Appuyez sur la touche et suivez la procédure de 1 à 3 décrite • Mélangez et travaillez jusqu'à obtenir une pâte homogène et peu pour la durée.
  • Page 32 Tableau de cuisson Programmes Aliments Poids Niveau Préchauffage Température Durée cuisson (Kg) enfournement préconisée (minutes) (°C) Tartes 1 ou 2 25-35 Tarte aux frui t s 1 ou 2 40-50 Cake aux fruits 1 ou 2 170-180 45-55 Petits gâteaux sur 2 nivea ux 1 et 3 180-190 20-25...
  • Page 33: Précautions Et Conseils

    Précautions et conseils ! Cet appareil a été conçu et fabriqué conformément capacités physiques, sensorielles ou mentales sont aux normes internationales de sécurité. Ces conseils réduites, ou des personnes dénuées d’expérience sont fournis pour des raisons de sécurité et doivent ou de connaissance, sauf si elles ont pu bénéficier, être lus attentivement.
  • Page 34: Nettoyage Et Entretien

    Nettoyage et entretien Mise hors tension Contrôle des joints Avant toute opération de nettoyage ou d’entretien Contrôlez périodiquement l’état du joint autour de la coupez l’alimentation électrique de l’appareil. porte du four. S’il est abîmé, adressez-vous au service après-vente le plus proche de votre domicile ( voir Assistance ).
  • Page 35: Nettoyage Automatique Pyrolyse

    3. Fixez les deux Les sécurités cadres à gradins avec glissières assemblées • la porte se verrouille automatiquement dès que la dans les trous prévus température atteint des valeurs élevées; sur les parois du four (voir figure). Les trous • en cas d’anomalie de fonctionnement, l’alimentation pour le cadre de des résistances est automatiquement coupée;...
  • Page 36: Assistance

    Assistance Attention : L’appareil monte un système d’autotest qui permet de détecter toute anomalie de fonctionnement. Ces anomalies sont affichées sous la forme : “ER” suivi de chiffres. Contacter alors un service d’assistance technique. Avant d’appeler le service de dépannage : •...
  • Page 37 Programma’s, 42-44 Kookprogramma’s Automatische kookprogramma's FP T6.1 De kooktijd programmeren Praktische kooktips FM 886.1 MT Kooktabel FP T6.1 GF Voorzorgsmaatregelen en advies, 45 FM 886.1 G Algemene veiligheidsmaatregelen Afvalverwijdering Energiebesparing en milieubesef Onderhoud en verzorging, 46-47 De elektrische stroom afsluiten...
  • Page 38: Het Installeren

    Het installeren ! Bewaar dit boekje zorgvuldig voor eventuele verdere raadpleging. Wanneer u het product weggeeft, verkoopt, Om een goede ventilatie te kunnen garanderen is het of wanneer u verhuist, dient u dit boekje bij de oven te noodzakelijk de achterkant van het meubel te bewaren zodat alle nodige informatie voorhanden blijft.
  • Page 39: Elektrische Aansluiting

    Elektrische aansluiting • het stopcontact geaard is en voldoet aan de geldende normen; • het stopcontact in staat is het maximale vermogen van het apparaat te ! De ovens met driepolige voedingskabel functioneren verdragen, zoals aangegeven op het typeplaatje ( zie onder ); met de wisselstroom, spanning en frequentie die aangegeven staan op het typeplaatje op het apparaat ( zie •...
  • Page 40: Beschrijving Van Het Apparaat

    Beschrijving van het apparaat Algemeen aanzicht Bedieningspaneel GLIJDERS in te schuiven positie 5 positie 5 positie 5 positie 5 positie 5 Rooster GRILL positie 4 positie 4 positie 4 positie 4 positie 4 positie 3 positie 3 positie 3 positie 3 positie 3 Rooster LEKPLAAT positie 2...
  • Page 41: Starten En Gebruik

    Starten en gebruik ! Wij raden u aan bij het eerste gebruik de oven uit. Als de toets aan is betekent dit dat de timer minstens een uur leeg te laten functioneren, op actief is. maximum temperatuur en met de deur dicht. Nadat u de ! De timer heeft geen invloed op het in- of uitschakelen oven heeft uitgedaan, opent u de ovendeur en lucht u van de oven.
  • Page 42: Automatische Kookprogramma's

    Programma’s Kookprogramma’s Het braadspit ! Alle programma’s hebben een vooringestelde kooktemperatuur. Voor het activeren van het braadspit ( zie afb. ) gaat u als Deze kan handmatig worden aangepast,en naar wens worden volgt te werk: ingesteld tussen de 30°C en de 250°C. Programma BROOD Gebruik deze functie voor het bakken van brood Zie "Automatische Programma's"...
  • Page 43: Praktische Kooktips

    • Maak een kuil in het meel. Programmeren van een uitgestelde bereiding • Giet er het mengsel van water en gist in • Kneed het geheel totdat een homogeen deeg is gevormd dat niet 1. Druk op de toets en volg de procedure van de duur van punt plakkerig is, door het deeg 10 minuten lang met de palm van de 1 t/m 3.
  • Page 44 Kooktabel Programma's Gerechten Gewicht Roosterstanden Voorverwarm en Aangeraden Kooktijd (kg) temperatuur (minuten) (°C) Vruchtentaar t (harde bodem) 1 of 2 25-35 Vruchtentaar t 1 of 2 40-50 Cakejes 1 of 2 170-180 45-55 Kleine cakejes op 2 roosters 1 en 3 180-190 20-25 Cake...
  • Page 45: Voorzorgsmaatregelen En Advies

    Voorzorgsmaatregelen en advies ! Dit apparaat voldoet aan de geldende lichamelijk, sensorieel of geestelijk vermogen of internationale veiligheidsvoorschriften. Deze personen die niet de nodige ervaring of kennis aanwijzingen zijn geschreven voor uw veiligheid en u hebben met het apparaat, tenzij onder toezicht dient ze derhalve goed door te nemen.
  • Page 46: Onderhoud En Verzorging

    Onderhoud en verzorging De elektrische stroom afsluiten Controleer de afdichtingen Controleer regelmatig de staat van de afdichting Sluit altijd eerst de stroom af voordat u tot enige rondom de ovendeur. In het geval de afdichtingen handeling overgaat. beschadigd zijn, dient u zich tot de dichtstbijzijnde Technische Dienst te wenden ( zie Service ).
  • Page 47 3. Bevestig de twee Veiligheidssystemen draagrekken, met de glijders gemonteerd, in • de deur wordt automatisch geblokkeerd zodra de temperatuur erg de betreffende gaten hoog wordt; op de wanden van de oven (zie afbeelding). • als er iets onverwachts of vreemds gebeurt zal de verwarming worden De gaten voor het linker onderbroken;...
  • Page 48 Service Belangrijk: Het apparaat is voorzien van een automatisch diagnostisch systeem dat eventuele storingen opspoort. Deze kunt u op het display aflezen met berichten zoals: “ER” gevolgd door nummers. In dit geval moet u de technische dienst inschakelen. Voor u contact opneemt met de Technische Dienst: •...
  • Page 49: Nederlands, Deutsch

    Garprogramme Automatische Garprogramme Programmierung des Garvorgangs FP T6.1 Praktische Back-/Brathinweise FM 886.1 MT Back-/Brattabelle FP T6.1 GF Vorsichtsmaßregeln und Hinweise, 57 Allgemeine Sicherheit FM 886.1 G Entsorgung Energie sparen und Umwelt schonen Reinigung und Pflege, 58-59 Abschalten Ihres Gerätes vom Stromnetz Reinigung des Gerätes...
  • Page 50: Installation

    Installation ! Bewahren Sie diese Bedienungsanleitung bitte sorgfältig Belüftung auf, damit sie jederzeit zu Rate ziehen können. Sorgen Sie dafür, dass sie im Falle eines Verkaufs, eines Umzugs oder Um eine einwandfreie Belüftung zu gewährleisten, muss die einer Übergabe an einen anderen Benutzer das Gerät stets Rückwand des Schrankumbaus abgenommen werden.
  • Page 51: Elektroanschluss

    Elektroanschluss Vor dem Anschluss stellen Sie bitte sicher, dass: ! Die mit einem Dreileiterkabel ausgerüsteten Backöfen • die Steckdose geerdet ist und den gesetzlichen sind für den Betrieb mit Wechselstrom bei der auf dem Bestimmungen entspricht; Typenschild (befindlich auf dem Gerät) angegebenen •...
  • Page 52: Beschreibung Des Gerätes

    Beschreibung des Gerätes Geräteansicht Bedienfeld GLEITFÜHRUNGEN der Einschübe Einschubhöhe 5 Einschubhöhe 5 Einschub Einschubhöhe 5 Einschubhöhe 5 Einschubhöhe 5 BACKOFENROST Einschubhöhe 4 Einschubhöhe 4 Einschubhöhe 4 Einschubhöhe 4 Einschubhöhe 4 Einschubhöhe 3 Einschubhöhe 3 Einschubhöhe 3 Einschubhöhe 3 Einschubhöhe 3 Einschub FETTPFANNE Einschubhöhe 2 Einschubhöhe 2...
  • Page 53: Inbetriebsetzung Und Gebrauch

    Inbetriebsetzung und Gebrauch ! Bei erstmaliger Inbetriebnahme sollte der leere Backofen für Vorgehensweise. Die Taste zeigt an, dass der Kurzzeitwecker etwa eine Stunde bei Höchsttemperatur und geschlossener aktiviert wurde. Backofentür in Betrieb genommen werden. Schalten Sie das ! Der Kurzzeitwecker steuert nicht das Ein- und Ausschalten des Gerät dann aus, öffnen Sie die Backofentür und lüften Sie die Backofens.
  • Page 54: Programme

    Programme G a r p r o g r a m m e D r e h s p i e ß Zur Inbetriebnahme des ! Für alle Programme ist eine Gartemperatur voreingestellt. Drehspießes ( siehe Diese kann von Hand auf einen beliebigen Wert zwischen Abbildung ) verfahren Sie wie 30°C und 250°C verändert werden.
  • Page 55 Rezept für 1000 g Teig: 600 g Mehl, 350 g Wasser, 10 g P r o g r a m m i e r u n g d e r G a r z e i t - D a u e r Salz, 25 g frische Hefe (oder zwei Tütchen 2 Instanthefe) 1.
  • Page 56: Praktische Back-/Brathinweise

    Praktische Back-/Brathinweise E c h t e H e i ß l u f t • Verwenden Sie bitte die Einschubhöhen 2 und 4, wobei ! Verwenden Sie beim Heißluftgaren nicht die die 2. Ebene für die Speisen verwendet werden sollte, Einschubhöhen 1 und 5: Sie sind der Heißluft zu direkt die mehr Hitze verlangen.
  • Page 57: Vorsichtsmaßregeln Und Hinweise

    Vorsichtsmaßregeln und Hinweise ! Das Gerät wurde entsprechend den strengsten Wahrnehmungsfähigkeiten oder aber ohne internationalen Sicherheitsvorschriften entworfen und ausreichende Erfahrung und Produktkenntnis gebaut. Nachstehende Hinweise werden aus geeignet, sofern sie nicht durch eine für ihre Sicherheitsgründen geliefert und sollten aufmerksam Sicherheit verantwortliche Person beaufsichtigt gelesen werden.
  • Page 58: Reinigung Und Pflege

    Reinigung und Pflege Abschalten Ihres Gerätes vom Stromnetz Überprüfung der Dichtungen Vor jeder Reinigung und Pflege ist das Gerät vom Stromnetz zu Kontrollieren Sie in regelmäßigen Abständen den Zustand der trennen. Dichtung rund um die Backofentür. Wenden Sie sich im Falle einer Beschädigung dieser Dichtung an Ihre nächstgelegene Reinigung des Gerätes Kundendienststelle ( siehe Kundendienst ).
  • Page 59: Automatische Reinigung Pyrolyse

    3. Befestigen Sie die mit Sicherheitsvorrichtungen den Gleitschienen • Bei Erreichen hoher Temperaturen wird die versehenen beiden Backofentür automatisch gesperrt; Rahmen in den • Bei Auftreten von Unregelmäßigkeiten wird die entsprechenden Löchern Stromversorgung der Heizelemente unterbrochen; der Backofenrückwand • Nach erfolgter Sperre der Backofentür können die (siehe Abbildung).
  • Page 60: Kundendienst

    Kundendienst 03/2010 - 195067823.03 XEROX FABRIANO Zur Beachtung: Das Gerät ist mit einem Diagnose-System ausgestattet, dank dessen eventuelle Betriebsstörungen erfasst werden können. Diese werden auf dem Display durch Meldungen folgenden Typs angezeigt: „ER“ gefolgt von Nummern. In diesen Fällen ist der Kundendienst anzufordern. Bevor Sie den Kundendienst anfordern: •...

Ce manuel est également adapté pour:

Fm 886.1 mtFp t6.1 gfFm 886.1 g

Table des Matières