Table des Matières
Publicité
Les langues disponibles
Les langues disponibles
Liens rapides
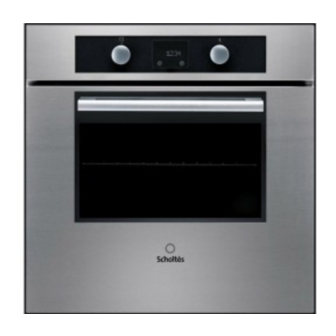
FP E6.1 GF S
Italiano
Istruzioni per l'uso
FORNO
Sommario
Istruzioni per l'uso,1
Descrizione dell'apparecchio,12
Programmi,17
English
Operating Instructions
OVEN
Contents
Operating Instructions,1
Warnings,3
Assistance,7
Description of the appliance,10
Description of the appliance,12
Installation,25
Modes,27
Français
Mode d'emploi
FOUR
Sommaire
Mode d'emploi,1
Avertissements,4
Assistance,7
Description de l'appareil,10
Description de l'appareil,12
Installation,35
Programmes,37
Español
Manual de instrucciones
HORNO
Sumario
Manual de instrucciones,1
Advertencias,4
Asistencia,8
Descripción del aparato,10
Descripción del aparato,13
Instalación,45
Programas,47
Portuges
Instruções para a utilização
FORNO
Índice
Instruções para a utilização,1
Advertências,5
Assistência,8
Descrição do aparelho,10
Descrição do aparelho,13
Instalação,55
Programas,57
Publicité
Table des Matières

Manuels Connexes pour SCHOLTES FP E6.1 GF S


Sommaire des Matières pour SCHOLTES FP E6.1 GF S
-
Page 1: Table Des Matières
FP E6.1 GF S Français Mode d’emploi FOUR Sommaire Mode d’emploi,1 Avertissements,4 Assistance,7 Description de l’appareil,10 Description de l’appareil,12 Installation,35 Mise en marche et utilisation,37 Programmes,37 Précautions et conseils,42 Nettoyage et entretien,42 Italiano Español Istruzioni per l’uso Manual de instrucciones... - Page 2 Deutsch Bedienungsanleitung BACKOFEN Inhaltsverzeichnis Bedienungsanleitung,2 Hinweise,5 Kundendienst,8 Beschreibung Ihres Gerätes,11 Beschreibung Ihres Gerätes,13 Installation,65 Inbetriebsetzung und Gebrauch,67 Programme,67 Vorsichtsmaßregeln und Hinweise,72 Reinigung und Pflege,72 Nederlands Gebruiksaanwijzing OVEN Inhoud Gebruiksaanwijzing,2 Belangrijk,6 Service,9 Beschrijving van het apparaat,11 Beschrijving van het apparaat,14 Het installeren,75 Starten en gebruik,77 Programma’s,77 Voorzorgsmaatregelen en advies,82...
-
Page 3: Avvertenze
AT T E N Z I O N E : A s s i c u r a r s i c h e l’apparecchio sia spento prima di sostituire la lampada per evitare la possibilità di Avvertenze scosse elettriche. ATTENZIONE: Questo apparecchio e le sue parti accessibili diventano molto caldi durante l’uso. -
Page 4: Avertissements
Never use steam cleaners or pressure • ne pas placer de torchons ou de cleaners on the appliance. maniques sur la poignée du four. WARNING: Ensure that the appliance is Lors du nettoyage automatique, les switched off before replacing the lamp to surfaces peuvent devenir chaudes, c’est avoid the possibility of electric shock. -
Page 5: Zur Beachtung
• con una esponja húmeda quite los pode riscar a superfície, provocando a residuos más consistentes del interior ruptura do vidro. del horno. No utilice detergentes; • quite todos los accesorios y el kit guías Antes de activar a função de limpeza deslizables (si existe);... - Page 6 der mit dem Gebrauch des Geräts elementen niet aan te raken. Zorg ervoor verbundenen Gefahren. Erlauben Sie dat kinderen die kleiner dan 8 jaar oud zijn Kindern nicht, mit dem Gerät zu spielen. niet dichtbij het apparaat kunnen komen, Reinigungs- und Wartungsarbeiten tenzij onder constant toezicht.
-
Page 7: Assistenza
Le suddette tariffe potrebbero essere soggette a variazione tecnica. da parte dell’operatore telefonico; per maggiori informazioni consultare il sito www.scholtes.com. Prima di contattare l’Assistenza: • Ve r i f i c a r e s e l ’ a n o m a l i a p u ò e s s e r e r i s o l t a autonomamente;... -
Page 8: Verifique Se A Anomalia Pode Ser Resolvida Autonomamente
! Ne jamais faire appel à des techniciens non agréés. Indiquer : • le type d’anomalie; Assistência • le modèle de l’appareil (Mod.); • son numéro de série (S/N). Atenção: Ces informations figurent sur la plaque signalétique Este aparelho é equipado com um sistema de diagnóstico apposée sur l’appareil que possibilita detectar eventuais mau funcionamentos. - Page 9 Service Belangrijk: Het apparaat is voorzien van een automatisch diagnostisch systeem dat eventuele storingen opspoort. Deze kunt u op het display aflezen met berichten zoals: “F--” gevolgd door cijfers. In dit geval moet u de technische dienst inschakelen. Voor u contact opneemt met de Technische Dienst: •...
-
Page 10: Descrizione Dell'apparecchio
Descrizione dell’apparecchio Descripción del aparato Vista d’insieme Vista en conjunto 1 POSIZIONE 1 1 POSICIÓN 1 2 POSIZIONE 2 2 POSICIÓN 2 3 POSIZIONE 3 3 POSICIÓN 3 4 POSIZIONE 4 4 POSICIÓN 4 5 POSIZIONE 5 5 POSICIÓN 5 6 GUIDE di scorrimento dei ripiani 6 GUÍAS de deslizamiento de las bandejas 7 Ripiano LECCARDA... -
Page 11: Beschreibung Ihres Gerätes
Beschreibung Ihres Gerätes Geräteansicht 1 EINSCHUBHÖHE 1 2 EINSCHUBHÖHE 2 3 EINSCHUBHÖHE 3 4 EINSCHUBHÖHE 4 5 EINSCHUBHÖHE 5 6 GLEITFÜHRUNGEN für die Einschübe 7 Einschub FETTPFANNE 8 Einschub BACKOFENROST 9 Bedienfeld Beschrijving van het apparaat Algemeen aanzicht 1 POSITIE 1 2 POSITIE 2 3 POSITIE 3 4 POSITIE 4... -
Page 12: Afficheur
Descrizione dell’apparecchio Description de l’appareil Pannello di controllo Tableau de bord 1 Manopola PROGRAMMI 1 Bouton PROGRAMMES 2 DISPLAY 2 AFFICHEUR 3 Manopola TERMOSTATO/IMPOSTAZIONE TEMPI 3 Bouton THERMOSTAT/SELECTION TEMPS 4 Tasto IMPOSTAZIONE TEMPI 4 Touche SELECTION TEMPS 5 Tasto PIROLISI 5 Touche PYROLYSE Display Afficheur... - Page 13 Descripción del aparato Beschreibung Ihres Gerätes Panel de control Bedienfeld 1 Mando PROGRAMAS 1 Drehschalter PROGRAMME 2 DISPLAY 2 DISPLAY 3 Mando TERMOSTATO/FIJACIÓN DE TIEMPOS 3 Drehknopf THERMOSTAT/ZEITEINSTELLUNG 4 Botón FIJACIÓN DE TIEMPOS 4 Taste ZEITEINSTELLUNG 5 Botón PIRÓLISIS 5 Taste PYROLYSE Display Display 6 Cifras TEMPERATURA y TIEMPOS...
- Page 14 Beschrijving van het apparaat Bedieningspaneel 1 Knop PROGRAMMA’S 2 DISPLAY 3 THERMOSTAATKNOP/TIJDEN 4 Toets INSTELLEN TIJDEN 5 Toets PYROLYSE Display 6 Cijfers TEMPERATUREN en TIJDEN 7 Symbool KLOK 8 Symbool TIMER 9 Symbool EINDE BEREIDING 10 Symbool DUUR 11 Symbool STOP 12 Aanwijzer DEURBLOKKERING 13 Aanwijzer van de Voorverwarming...
-
Page 15: Installazione
Installazione ! È importante conservare questo libretto per poterlo consultare in ogni momento. In caso di vendita, di cessione o di trasloco, assicurarsi che resti insieme all’apparecchio per informare il nuovo proprietario sul funzionamento e sui relativi avvertimenti. ! Leggere attentamente le istruzioni: ci sono importanti informazioni sull’installazione, sull’uso e sulla sicurezza. -
Page 16: Collegamenti Elettrici
Montaggio del cavo di alimentazione TARGHETTA CARATTERISTICHE larghezza cm 43,5 1. Aprire la morsettiera Dimensioni* altezza cm 32,4 f a c e n d o l e v a c o n u n profondità cm 41,5 cacciavite sulle linguette laterali del coperchio: tirare Volume* lt. -
Page 17: Avvio E Utilizzo
Avvio e utilizzo - modificare il programma di cottura agendo sulla manopola PROGRAMMI; - modificare la temperatura agendo sulla manopola ! Quando si inserisce la TERMOSTATO; griglia assicurarsi che - pianificare la durata e l’ora di fine della cottura il fermo sia nella parte (vedi programmi di cottura);... -
Page 18: Programmi Di Cottura Automatici
• Formare una palla, mettere l’impasto in un’insalatiera Programmi BASSA TEMPERATURA e ricoprirla con pellicola trasparente per evitare che la Questo tipo di cottura consente di lievitare, scongelare, di superficie dell’impasto si secchi. Mettere l’insalatiera nel preparare lo yogurth, riscaldare più o meno rapidamente, forno alla funzione manuale BASSA TEMPERATURA cuocere lentamente a bassa temperatura. -
Page 19: Consigli Pratici Di Cottura
2. ruotare la manopola IMPOSTAZIONE TEMPI verso il per regolare il tempo desiderato; 3. premere nuovamente il tasto per confermare; 4. a tempo scaduto, sul DISPLAY compare la scritta END, il forno termina la cottura e viene emesso un segnale acustico. - Page 20 Tabella cottura in forno PIETANZE ESEMPI FUNZIONE TEMPERATURA SUPPORTI Plum-cake salati plum-cake alle olive, al tonno, ecc. Dolci o Multilivello 160 °C tortiera su leccarda Torte rustiche torte rustiche al formaggio, pasticcio al salmone,… Dolci o Multilivello 200 °C su leccarda stampo da terrine su leccarda Terrine terrine di pesce, carne, verdure, foie gras, ecc.
- Page 21 Tabella cottura in forno PIETANZE ESEMPI FUNZIONE TEMPERATURA SUPPORTI Biscotti (senza lievito) pan di spagna, savoiradi, biscotti arrotolati, Brownie, 200 °C tortiera su leccarda Torte al formaggio bianco 200 °C tortiera su leccarda Crostate in pasta lievitata crostate allo zucchero, torte di pane briosciato alla frutta 180 °C tortiera su leccarda Cottura di basi per crostate...
-
Page 22: Precauzioni E Consigli
Precauzioni e consigli Smaltimento • Smaltimento del materiale di imballaggio: attenersi alle norme locali, così gli imballaggi potranno essere ! L’apparecchio è stato progettato e costruito in conformità riutilizzati. alle norme internazionali di sicurezza. • La direttiva Europea 2002/96/CE sui rifiuti di Queste avvertenze sono fornite per ragioni di sicurezza e apparecchiature elettriche ed elettroniche (RAEE), devono essere lette attentamente. -
Page 23: Pulire La Porta
Pulizia automatica PIROLISI • Gli accessori possono essere lavati come normali stoviglie, anche in lavastoviglie ad eccezione delle guide scorrevoli. Il programma PIROLISI porta la temperatura interna del forno a raggiungere i 500°C e attiva il processo di pirolisi, ! Non utilizzare mai pulitori a vapore o ad alta pressione ossia la carbonizzazione dei residui. - Page 24 Programmare la fine della pulizia automatica 1. Premere il tasto finchè non lampeggiano l’icona e i due digit numerici sul DISPLAY; 2. ruotare la manopola IMPOSTAZIONE TEMPI verso il “ ” e “ ” per regolare l’ora; 3. premere di nuovo il tasto finchè...
-
Page 25: Installation
Installation Ventilation To ensure adequate ventilation, the back panel of the cabinet must be removed. It is advisable to install the oven ! Please keep this instruction booklet in a safe place for so that it rests on two strips of wood, or on a completely future reference. - Page 26 ! Once the appliance has been installed, the power supply Fitting the power supply cable cable and the electrical socket must be easily accessible. 1. Open the terminal board ! The cable must not be bent or compressed. by inserting a screwdriver into the side tabs of the ! The cable must be checked regularly and replaced by cover.
-
Page 27: Start-Up And Use
Start-up and use - change the cooking mode by turning the SELECTOR knob; - adjust the temperature by turning the THERMOSTAT knob; - set the cooking duration and the cooking end time (see ! When inserting the shelf Cooking modes); make sure the backstop is - stop cooking by turning the SELECTOR knob to the “0”... -
Page 28: Automatic Cooking Modes
• Knead the dough by stretching and folding it over itself LOW TEMPERATURE modes with the palm of your hand for 10 minutes until it has a This type of cooking can be used for proving, defrosting, uniform consistency and is not too sticky. preparing yoghurt, heating dishes at the required speed •... -
Page 29: Programming Cooking
Programming cooking PIZZA ! A cooking mode must be selected before programming • Use a lightweight aluminium pizza pan. Place it on the can take place. rack provided. For a crispy crust, do not use the dripping pan as this Programming the duration extends the total cooking duration and prevents the crust 1. - Page 30 Oven cooking advice table DISHES EXAMPLES FUNCTION TEMPERATURE SUPPORT Savoury sponge cake savoury sponge cake with olives, tuna, etc. Baked cakes or Multilevel 160 °C cake tin on dripping pan made with yoghurt Country-style pie cheese country-style pie, salmon pastry, … Baked cakes or Multilevel 200 °C on dripping pan...
-
Page 31: Oven Cooking Advice Table
Oven cooking advice table DISHES EXAMPLES FUNCTION TEMPERATURE SUPPORT sponge cake, sponge fingers, swirled Biscuit cakes (without yeast) 200 °C cake tin on dripping pan biscuits, brownies, etc. White cheese tart 200 °C cake tin on dripping pan Tarts made using leavened sugar pie, fruit brioche loaf, etc. -
Page 32: Precautions And Tips
Precautions and tips • The appliance is not intended to be operated by means of an external timer or separate remote- control system. ! This appliance has been designed and manufactured in compliance with international safety standards. The Disposal following warnings are provided for safety reasons and •... -
Page 33: Cleaning The Oven Door
Automatic cleaning using the PYROLYTIC • The inside of the oven should ideally be cleaned after cycle each use, while it is still lukewarm. Use hot water and detergent, then rinse well and dry with a soft cloth. Do not use abrasive products. During the PYROLYTIC cycle, the internal temperature •... - Page 34 2. Turn the SET TIME KNOB towards “ ” and “ ” to adjust the hour value. 3. Press the button again so that the other two numerical digits on the DISPLAY begin to flash. 4. Turn the SET TIME KNOB towards “ ” and “ ” to adjust the minute value.
-
Page 35: Installation
Installation Aération Pour garantir une bonne aération, la cavité d’encastrement doit être dépourvue de paroi arrière. Il est conseillé ! Conservez ce mode d’emploi pour pouvoir le consulter d’installer le four de manière à ce qu’il repose sur deux à tout moment. En cas de vente, de cession ou de cales en bois ou bien sur un plan d’appui continu qui ait une déménagement, veillez à... - Page 36 ! Il doit être contrôlé périodiquement et ne peut être Montage du câble d’alimentation remplacé que par un technicien agréé (voir Assistance). 1. Pour ouvrir le bornier, ! Nous déclinons toute responsabilité en cas de non faire pression à l’aide d’un tournevis sur les languettes respect des normes énumérées ci-dessus.
-
Page 37: Mise En Marche Et Utilisation
Mise en marche et utilisation préchauffage: il est temps d’enfourner les plats. 4. En cours de cuisson, il est possible à tout moment de : - modifier le programme de cuisson à l’aide du bouton ! Lors de l’introduction PROGRAMMES; de la grille, s’assurer que - modifier la température à... -
Page 38: Comment Programmer Une Cuisson
• Former une boule, la placer dans un saladier et couvrir d’un Programmes BASSE TEMPÉRATURE film plastique pour éviter que la surface de la pâte ne sèche. Ce type de cuisson permet de faire lever les pâtes, de Glisser le saladier dans le four, sélectionner la fonction décongeler, de préparer du yaourt, de réchauffer plus manuelle BASSE TEMPÉRATURE à... -
Page 39: Conseils De Cuisson
2. tourner le bouton SÉLECTION TEMPS pour l’amener sur “ ” ou “ ” et régler la durée désirée ; 3. appuyer à nouveau sur la touche pour confirmer ; 4. à expiration de la durée sélectionnée, l’AFFICHEUR affiche END, le four stoppe la cuisson et un signal sonore retentit. •... - Page 40 Tableau de cuisson au four PLATS EXEMPLES FONCTION TEMPÉRATURE SUPPORTS Gâteaux ou Gâteaux salés Gâteaux aux olives, au thon, etc. 160 °C moule sur lèchefrite multiniveaux Gâteaux ou Gâteaux rustiques gâteaux rustiques au fromage, terrine de saumon,… 200 °C sur lèchefrite multiniveaux moule à...
-
Page 41: Programmes De Cuisson Automatiques
Tableau de cuisson au four PLATS EXEMPLES FONCTION TEMPÉRATURE SUPPORTS génoise, biscuits à la cuiller, biscuits Biscuits (sans levure) 200 °C moule sur lèchefrite roulés, Brownies, Tartes au fromage blanc 200 °C moule sur lèchefrite tartes au sucre, tartes aux fruits à pâte Tartes à... -
Page 42: Précautions Et Conseils
Précautions et conseils Mise au rebut • Mise au rebut du matériel d’emballage : conformez-vous aux réglementations locales, les emballages pourront ! Cet appareil a été conçu et fabriqué conformément aux ainsi être recyclés. normes internationales de sécurité. Ces conseils sont fournis •... -
Page 43: Nettoyage De La Porte
Nettoyage automatique PYROLYSE • Tous les accessoires peuvent être lavés normalement comme de la vaisselle courante et passent au lave- Pendant le programme PYROLYSE, la température à vaisselle, sauf les glissières coulissantes. l’intérieur du four atteint 500°C et lance le processus de ! Ne nettoyez jamais l’appareil avec des nettoyeurs vapeur pyrolyse, autrement dit, la carbonisation des salissures ou haute pression. - Page 44 Programmer la fin du nettoyage automatique 1. Appuyer sur la touche jusqu’à ce que l’icône les deux chiffres de l’AFFICHEUR se mettent à clignoter; 2. tourner le bouton SÉLECTION TEMPS pour l’amener sur “ ” ou “ ” et régler l’heure ; 3.
-
Page 45: Instalación
Instalación ! Una vez empotrado el aparato no se deben permitir contactos con las partes eléctricas. El consumo declarado en la placa de características ha sido ! Es importante conservar este manual para poder medido en una instalación de este tipo. consultarlo en todo momento. -
Page 46: Conexión Eléctrica
Conexión eléctrica ! Una vez instalado el aparato, el cable eléctrico y la toma de corriente deben ser fácilmente accesibles. Los hornos que poseen cable de alimentación tripolar, son fabricados para funcionar con corriente alterna a la tensión ! El cable no debe sufrir pliegues ni compresiones. y frecuencia indicadas en la placa de características que se encuentra en el aparato (ver más adelante). -
Page 47: Puesta En Funcionamiento Y Uso
Puesta en funcionamiento y uso 3. Cuando se apaga el indicador de precalentamiento y se escucha una señal sonora, el precalentamiento ha ! Cuando introduzca la finalizado: introduzca los alimentos. parrilla, controle que el tope 4. Durante la cocción es posible: esté... -
Page 48: Programas De Cocción Automáticos
• Diluya la levadura en el agua ligeramente tibia Programa GRILL-ASADOR ROTATIVO (aproximadamente 35 grados). Se enciende el elemento calentador superior y se pone en • Realice un hueco en el medio de la harina. funcionamiento el asador rotativo. La función es óptima •... -
Page 49: Programar La Cocción
Programar la cocción Consejos prácticos para cocinar ! La programación es posible sólo después de haber ! En las cocciones ventiladas no utilice las posiciones 1 y seleccionado un programa de cocción. 5: son las que reciben directamente el aire caliente lo cual podría quemar las comidas delicadas. - Page 50 Tabla de cocción en el horno COMIDAS EJEMPLOS FUNCIÓN TEMPERATURA SOPORTES Plum-cake salados Plum-cake de aceitunas, de atún, etc. Pasteles o Multinivel 160 ºC Tortera sobre grasera Tortas rústicas Tortas rústicas de queso, pastel de salmón Pasteles o Multinivel 200 ºC Sobre grasera Molde de tarrina en grasera Tarrinas...
-
Page 51: Tabla De Cocción En El Horno
Tabla de cocción en el horno COMIDAS EJEMPLOS FUNCIÓN TEMPERATURA SOPORTES Bizcochuelo, bizcochos de Saboya, Bizcochos (sin levadura) 200 ºC Tortera sobre grasera bizcochos arrollados, Brownie, Tortas de queso blanco 200 ºC Tortera sobre grasera Tartas de masa leudada Tartas de azúcar, bollería a la fruta 180 ºC Tortera sobre grasera Cocción de bases para... -
Page 52: Precauciones Y Consejos
Precauciones y consejos Eliminación • Eliminación del material de embalaje: respete las normas locales, de esta manera los embalajes podrán ser ! El aparato ha sido proyectado y fabricado en conformidad reutilizados. con las normas internacionales de seguridad. • En base a la Norma europea 2002/96/CE de Residuos Estas advertencias se suministran por razones de seguridad de aparatos Eléctricos y Electrónicos (RAEE), los y deben ser leídas atentamente. -
Page 53: Limpiar La Puerta
Limpieza automática PIRÓLISIS • El interior del horno se debe limpiar preferentemente cada vez que se utiliza, cuando todavía está tibio. Utilice El programa PIRÓLISIS eleva la temperatura interior del agua caliente y detergente, enjuague y seque con un horno hasta los 500ºC y activa el proceso de pirólisis, o paño suave. - Page 54 Programar el final de la limpieza automática 1. Presione el botón hasta que centelleen el icono y las dos cifras en la PANTALLA; 2. gire el mando de FIJACIÓN DE TIEMPOS hacia “ ” y “ ” para regular la hora; 3.
-
Page 55: Instalação
Instalação Ventilação Para garantir uma boa ventilação é necessário eliminar a parede traseira do vão. É preferível instalar o forno de ! É importante guardar este folheto para poder consultá-lo a maneira que apoie-se sobre duas ripas de madeira, ou qualquer momento. - Page 56 ! O cabo deve ser verificado periodicamente e substituído Montagem do cabo de fornecimento somente por técnicos autorizados (veja a Assistência Técnica). 1. Para abrir a caixa de ! A empresa exime-se de qualquer responsabilidade se terminais faça alavanca com uma chave de parafuso estas regras não forem obedecidas.
-
Page 57: Início E Utilização
Início e utilização 3. Quando o indicador de pré-aquecimento apagar- se e ouvir-se um sinal acústico, o pré-aquecimento terá terminado: colocar dentro os alimentos. ! Ao inserir a grelha, 4. Durante a cozedura é sempre possível: assegurar-se de que o pino - modificar o programa de cozedura mediante o selector dos PROGRAMAS;... -
Page 58: Programas De Cozedura Automáticos
• D i l u i r o l ê v e d o n a á g u a l e v e m e n t e m o r n a Programa de GRILL-ESPETO ROTATIVO (aproximadamente 35 graus). Activa-se o elemento aquecedor superior e começa a •... -
Page 59: Programação Da Cozedura
Programação da cozedura PIZZA ! É possível programar somente depois de ter seleccionado • Utilize uma forma de alumínio leve, apoie-a na grelha um programa de cozedura. do forno. Se utilizar o tabuleiro de recolha aumentará os tempos de Programação da duração da cozedura cozedura e dificilmente será... - Page 60 Tabela de cozedura no forno ALIMENTOS EXEMPLOS FUNÇÃO TEMPERATURA SUPORTES Bolos salgados bolo de azeitonas, de atum, etc. Bolos ou multinível 160 °C tarteira no tabuleiro de recolha Folhados folhados de queijo, empada de salmão,… Bolos ou multinível 200 °C no tabuleiro de recolha formas para terrinas no tabuleiro de Terrinas...
- Page 61 Tabela de cozedura no forno ALIMENTOS EXEMPLOS FUNÇÃO TEMPERATURA SUPORTES pão de Espanha, biscoitos de champanhe, Biscoitos (sem levedura) 200 °C tarteira no tabuleiro de recolha biscoitos enrolados, Brownies Tartes de requeijão 200 °C tarteira no tabuleiro de recolha tartes de açúcar, tartes de pão de brioche Tartes em massa levedada 180 °C tarteira no tabuleiro de recolha...
-
Page 62: Precauções E Conselhos
Precauções e conselhos Eliminação • Eliminação do material de embalagem: obedeça as regras locais, de maneira que as embalagens possam ! Este aparelho foi projectado e fabricado em conformidade ser reutilizadas. com as normas internacionais de segurança. Estas • A directiva Europeia 2002/96/CE relativa aos resíduos advertências são fornecidas por razões de segurança e de equipamentos eléctricos e electrónicos (REEE) prevê... -
Page 63: Limpeza Da Porta
Limpeza automática PIRÓLISE • O interior do forno deve ser sempre limpo de preferência depois de cada utilização, enquanto ainda estiver morno. Com o programa PIRÓLISE a temperatura interna do forno Utilize água quente e detergente, enxagúe e enxugue chega a 500°C e activa-se o processo de pirólise, ou seja, com um pano macio. - Page 64 Programar o fim da limpeza automática 1. Premir a tecla até o ícone e os dois primeiros algarismos piscarem no VISOR; 2. rode o selector de CONFIGURAÇÃO de TEMPOS para “ ” ou “ ” para regular a hora; 3. pressione de novo a tecla até os outros dois algarismos começarem a piscar no VISOR;...
-
Page 65: Elektroanschluss
Installation ! Bewahren Sie diese Bedienungsanleitung bitte sorgfältig auf, damit Sie sie jederzeit zu Rate ziehen können. Sorgen Sie dafür, dass sie im Falle eines Verkaufs, eines Umzugs oder einer Übergabe an einen anderen Benutzer das Gerät stets begleitet, damit auch der Nachbesitzer die Möglichkeit hat, darin nachschlagen zu können. - Page 66 ! Das Netzkabel darf nicht gebogen oder eingeklemmt Anschluss des Netzkabels werden. 1. Das Klemmengehäuse ! Das Kabel muss regelmäßig kontrolliert werden und darf öffnen, indem die seitlichen Zungen des Deckels mithilfe nur durch autorisiertes Fachpersonal ausgetauscht werden eines Schraubenziehers (siehe Kundendienst).
-
Page 67: Inbetriebsetzung Und Gebrauch
Inbetriebsetzung und Gebrauch Die Temperatur kann mithilfe des Drehschalters THERMOSTAT abgeändert werden. 3. Sobald die Vorheizzeit-Anzeige erlischt, ertönt ein ! Beim Einsetzen des Rosts akustisches Signal. Die Vorheizzeit ist abgelaufen: Gargut darauf achten, dass sich in den Backofen geben. die Arretierung im hinteren 4. - Page 68 Schieben Sie das Gargut in den kalten Ofen. Möchte man Programm GRILL das Gargut in den vorgeheizten Ofen geben, nachdem er Das obere Heizelement schaltet sich ein. Die sehr hohe für eine andere Zubereitung bereits hohe Temperaturen Temperatur und die direkt auf das Grillgut gerichtete Hitze erreicht hat, dann zeigt das Display den Hinweis “Hot”...
-
Page 69: Praktische Back-/Brathinweise
Wasser, 20 g Salz, 20 g Zucker, 10 cl Olivenöl, 20 g frische Die eingeschalteten Symbole zeigen an, dass Hefe (oder zwei Tütchen Instanthefe) eine Programmierung erfolgt ist. Das DISPLAY gibt das • Aufgehen bei Raumtemperatur: 1 Stunde oder manuelle Garende und die Garzeit in Wechselfolge wieder. - Page 70 Tabelle Garen im Backofen HAUPTGERICHTE BEISPIELE FUNKTION TEMPERATUR UNTERLAGE Kuchen oder Plum-Cake (gesalzen) Plum-Cake mit Oliven, Thunfisch usw. 160 °C Form auf Backblech Heißluft Kuchen oder Pikante Kuchen Pikante Kuchen mit Käse, Lachspasteten usw. 200 °C a/ Backblech Heißluft Terrinenform auf Backblech Terrinen Fisch-, Fleisch-, Gemüseterrinen usw.
- Page 71 Tabelle Garen im Backofen HAUPTGERICHTE BEISPIELE FUNKTION TEMPERATUR UNTERLAGE Biskuit, Löffelbiskuit, versch. Plätzchen (ohne Hefe) 200 °C Form auf Backblech Plätzchen, Brownies Käsekuchen 200 °C Form auf Backblech Kuchen mit Hefeteig Süße Kuchen, Streuselkuchen mit Obst 180 °C Form auf Backblech Torten mit frischem Obst (Erdbeeren, Backform a/Backblech Teigböden für Torten (Sandteig)
-
Page 72: Vorsichtsmaßregeln Und Hinweise
Vorsichtsmaßregeln und Hinweise Entsorgung • Entsorgung des Verpackungsmaterials: Befolgen Sie die lokalen Vorschriften; Verpackungsmaterial kann ! Das Gerät wurde entsprechend den strengsten wiederverwertet werden. internationalen Sicherheitsvorschriften entworfen und gebaut. • Gemäß der Europäischen Richtlinie 2002/96/EC Nachstehende Hinweise werden aus Sicherheitsgründen über Elektro- und Elektronik-Altgeräte (WEEE) geliefert und sollten aufmerksam gelesen werden. -
Page 73: Pyrolyse-Selbstreinigung
• Der Backofen sollte möglichst nach jedem Gebrauch, Die Abdeckung wieder anbringen. Darauf achten, dass die solange er noch etwas warm ist, gereinigt werden. Hierzu Dichtung ordnungsgemäß eingelegt wird (siehe Abbildung). warmes Wasser und ein Reinigungsmittel verwenden. ! Die Offenlampe darf nicht als Raumlampe verwendet Mit Wasser nachspülen und mit einem weichen Tuch trocken. - Page 74 • Das Symbol weist darauf hin, dass der Reinigungsvorgang durch das Drücken der Taste jederzeit unterbrochen werden kann. • Bei einer etwaigen Störung wird die Stromversorgung der Heizelemente getrennt. • Die vorgenommenen Einstellungen (Dauer und Programmende) können bei gesperrter Backofentür nicht mehr abgeändert werden.
-
Page 75: Het Installeren
Het installeren ! Bewaar dit boekje zorgvuldig voor eventuele verdere raadpleging. Wanneer u het product weggeeft, verkoopt, of wanneer u verhuist, dient u dit boekje bij het apparaat te bewaren zodat alle nodige informatie voorhanden blijft. ! Lees de gebruiksaanwijzingen zorgvuldig door: er staat belangrijke informatie in over installatie, gebruik en veiligheid. - Page 76 ! Wanneer het apparaat geïnstalleerd is moeten het snoer Monteren voedingskabel en het stopcontact gemakkelijk te bereiken zijn. 1. Licht de lipjes aan de ! De kabel mag niet worden gebogen of samengedrukt. zijkant van het deksel van het klemmenbord op met een ! De kabel moet van tijd tot tijd worden gecontroleerd en schroevendraaier: trek het deksel van het klemmenbord...
-
Page 77: Starten En Gebruik
Starten en gebruik 3. Als de aanwijzer van de voorverwarming uitgaat en u een geluidssignaal hoort, is de voorverwarming compleet: ! Als u het rooster erin zet de etenswaren in de oven. schuift dient u zich ervan 4. Tijdens het koken kunt u nog altijd: t e v e r z e k e r e n d a t d e - het kookprogramma veranderen met behulp van de blokkering zich aan de... -
Page 78: Automatische Kookprogramma's
• Meng het meel en het zout in een grote kom. Programma GRILL-DRAAISPIT • Doe de gist in lauw water (circa 35 graden). Het bovenste verwarmingselement gaat aan en het draaispit • Maak een kuil in het meel. komt in beweging. Deze functie is optimaal voor het braden •... -
Page 79: Praktische Kooktips
MULTILEVEL Programma GEBAK Deze functie kan worden gebruikt voor het koken van • Gebruik de standen 2 en 4, en plaats de gerechten die taarten. Plaats het gerecht in de koude oven. U kunt de meer warmte nodig hebben op stand 2. gerechten eventueel ook in de warme oven plaatsen. - Page 80 Kooktabel oven GERECHTEN VOORBEELDEN FUNCTIE TEMPERATUUR HULPMIDDELEN Gebak- of Hartige plum-cakes plum-cake met olijven, tonijn, enz. 160 °C taartvorm op lekplaat multiniveau Gebak- of Boerentaarten kaastaart, zalmschotel 200 °C op lekplaat multiniveau terrinevorm op lekplaat (au Terrines terrine van vis, vlees, groenten, foie gras, enz. Traditioneel 160 °C bain-marie met warm...
- Page 81 Kooktabel oven GERECHTEN VOORBEELDEN FUNCTIE TEMPERATUUR HULPMIDDELEN taartvorm op Koekjes (zonder gist) cake, lange vingers, opgerolde koekjes, Brownies, 200 °C lekplaat taartvorm op Cheesecake 200 °C lekplaat taartvorm op Vruchtenaart van gistdeeg suikertaart, vlaaien 180 °C lekplaat taartvorm op Bereiding bodem voor vruchtentaarten taart met verse vruchten (aardbeien, frambozen, enz.) 180 °C lekplaat (bruine...
-
Page 82: Voorzorgsmaatregelen En Advies
Voorzorgsmaatregelen en • Het apparaat is niet geschikt om te worden ingeschakeld m.b.v. een externe timer ofwel door advies een gescheiden afstandsbedieningssysteem. Afvalverwijdering Dit apparaat is ontworpen en vervaardigd volgens de • Verwijdering van het verpakkingsmateriaal: houd u aan geldende internationale veiligheidsvoorschriften. Deze de plaatselijke normen, zodat het verpakkingsmateriaal aanwijzingen zijn geschreven voor uw veiligheid en u dient hergebruikt kan worden. -
Page 83: Schoonmaken Van Het Apparaat
Schoonmaken van het apparaat Vervangen van het lampje • De buitenkant, dus zowel het email en het roestvrij staal als de rubberen afdichtingen, kunnen met een spons en Voor het vervangen van het een sopje worden afgenomen. Als de vlekken moeilijk ovenlampje: Ovenruimte te verwijderen zijn, kunt u een speciaal reinigingsmiddel... - Page 84 195102438.02 09/2012 - XEROX FABRIANO Veiligheidssystemen • het verlichte symbool op het display geeft aan dat de ovendeur automatisch is geblokkeerd omdat de temperatuur zeer hoog is geworden; • het symbool geeft aan dat op elk willekeurig moment dat u op de toets drukt u de reinigingscyclus kunt annuleren;...