Titan IMPACT 1040 Notice D'utilisation
Masquer les pouces
Voir aussi pour IMPACT 1040:
- Mode d'emploi (100 pages) ,
- Manuel d'entretien (50 pages) ,
- Notice d'utilisation (11 pages)
Table des Matières
Publicité
Les langues disponibles
Les langues disponibles
Liens rapides
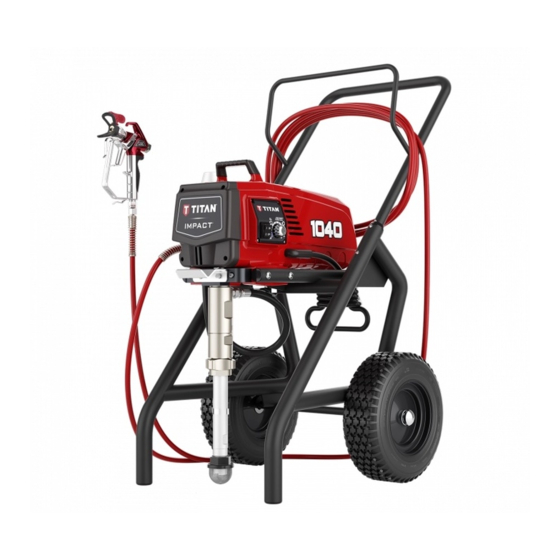
IMPACT 1040
Model
0552600
Register your product online at:
www.titantool.com
_ _ _ _ _ _ _ _ _ _
Serial Number*
* See page 53 for location
Airless Sprayer
Owner's Manual
Notice d'utilisation
Manual del Propietario
Do not use this equipment before
reading this manual!
NOTE: This manual contains important
warnings and instructions. Please
read and retain for reference.
© Titan Tool Inc. All Rights Reserved. Form No. 0552896D
0816
•
Publicité
Chapitres
Table des Matières
Dépannage

Manuels Connexes pour Titan IMPACT 1040


Sommaire des Matières pour Titan IMPACT 1040
-
Page 16: Consignes De Sécurite Important
PrÉVENTIVES : ImPOrTaNT: Quand le pulvérisateur est utilisé avec un générateur de tension de la ligne ou non, l’utilisation de Titan “Line Surge Protector” (P • Ne dirigez pas le pistolet sur et ne pulvérisez pas les personnes ou les / N 800-935) est recommandé. -
Page 17: Specifications
Garantie ..................54 la ventilation, la prévention d’incendies et le fonctionnement. • Les normes de sécurité du gouvernement des États-Unis ont été adoptées dans la loi Occupational safety and Health Act (OSHA). Ces Français © Titan Tool Inc. Tous droits réservés. -
Page 18: Description Générale
Tube de retour 8. Verrouiller le pistolet en mettant le verrou de détente à la position appropriée. Filtre Soupape PRIME/SPRAY Raccord de flexible Liquid Shield™ (118 ml) Piston Lube™ (118 ml) Français © Titan Tool Inc. Tous droits réservés. -
Page 19: Vérifications Préliminaires
évacuer le liquide d’essai par le flexible de retour, nettoyer les embouts ou en effectuer la préparation en jusqu’au contenant de purge. vue d’un nettoyage. 7. Arrêter l’appareil en mettant le commutateur à la position OFF. Français © Titan Tool Inc. Tous droits réservés. -
Page 20: Peinture
NOTa : Les indicateurs de marche et de pression qui clignotent en alternance indiquent que le moteur est en surchauffe. arrêtez la pompe (position « arrÊT ») et laissez-la refroidir. Français © Titan Tool Inc. Tous droits réservés. -
Page 21: Vaporisation
Environ produit. 25 à 30 cm Traînées de peinture Bonne technique Mauvaise technique Français © Titan Tool Inc. Tous droits réservés. -
Page 22: Dégager La Buse De Pulvérisation
Dans le cas de rangement à court terme après utilisation de peinture au latex, remplir tous les composants d’eau mélangée au protecteur Titan Liquid Shield (se reporter à la section accessoires du présent manuel pour obtenir le numéro de pièce de ce produit). -
Page 23: Maintenance
6. Enclenchez à nouveau le pontet sur la corps du pistolet. 4. Pour toute autre question relative à ce vaporisateur à dépression, il suffit de communiquer avec Titan : Service à la clientèle (É.-U.) ......1-800-526-5362 Corps du Télécopieur .......... -
Page 24: Remplacement De L'ensemble De Moteur
7. À l’aide d’une clé plate, dévissez et retirez le transducteur du logement de filtre. Dévissez délicatement le câble du transducteur à travers la plaque d’assemblage. 8. Retirez l’anneau isolant du vieux transducteur et placez-le sur le nouveau. Français © Titan Tool Inc. Tous droits réservés. -
Page 25: Remplacement De La Soupape Prime/Spray
NOTa : En présence de solvant cHauDS, remplacer les joints toriques en Viton par ceux en PTFE (700-897), installés au moyen de l’outil approprié (700-890). Vis du capot du moteur Joint torique en Viton Anneau isolant Transducteur Ensemble de ltre Français © Titan Tool Inc. Tous droits réservés. -
Page 26: Entretien De La Section De Liquide
Remplacez-les si elles sont usées ou endommagées. d’étanchéité en les lubrifiant à 7. Remontez les soupapes en inversant les étapes ci-dessus. Français © Titan Tool Inc. Tous droits réservés. -
Page 27: Remplacement De La Section De Liquide Complet
26. Vissez le tube-siphon/jeu de siphons dans le clapet de pied et vissez jusqu’à ce qu’il soit solidement fixé. Assurez vous de recouvrir les filets de l’adaptateur du tube intérieur/tube- siphon à l’aide de ruban de PTFE avant le montage. Français © Titan Tool Inc. Tous droits réservés. -
Page 28: Dépannage
“Maintenance de la Section des Liquides” décrite au chapitre Maintenance de ce manuel. Le moteur démarre mais ne tourne pas. Faire réparer dans un centre d’entretien agrée par Titan. Fuite de liquide dans la partie Les tampons graisseurs supérieurs sont usés. - Page 29 Français © Titan Tool Inc. Tous droits réservés.
-
Page 45: Ensamblaje De La Sección De Líquidos
Supresor de sobrecarga (no se muestra, schematic) présenté, voir le schéma) consulte el esquema) 805-480 Power cord assembly (not shown) Ensemble de cordon d’alimentation Ensamblaje de cable de alimentación (non présenté) (non présenté) © Titan Tool Inc. All rights reserved. - Page 46 Contrôleur de moteur Controlador de motor 0522027 Capacitor assembly Ensemble condensateur Conjunto de capacitor 770-099 Tie wrap Attache autobloquante Amarras 9802266 Motor controller screw Vis de contrôleur de moteur Tornillo de controlador de motor © Titan Tool Inc. All rights reserved.
- Page 48 © Titan Tool Inc. All rights reserved.
- Page 49 (comprend les articles 2-3, 6-9, 12, empaquetadura (incluye articulos 14, 15, 19 et 21) 2-3, 6-9, 12, 14, 15, 19 y 21) 800-359 Piston insertion tool Outil d’insertion de piston Herramienta de inserción del pistón © Titan Tool Inc. All rights reserved.
- Page 51 NOTa : Tous les travaux d’électricité doivent NOTa: Todo trabajo eléctrico debe performed by an authorized être effectués par le personnel d’un realizarlo un centro de service center. centre de service autorisé. servicio autorizado. © Titan Tool Inc. All rights reserved.
- Page 52 800-359 Piston insertion tool Outil d’insertion de piston Herramienta de inserción del pistón * Go to www.titantool.com for tip sizes / voir www.titantool.com pour les dimensions / visite www.titantool.com para conocer los tamaños © Titan Tool Inc. All rights reserved.
-
Page 53: Product Registration
Enregistrement du produit Enregistrer votre appareil en ligne à www.titantool.com. registro del producto Registre su producto en línea en www.titantool.com. Serial Number Location • Emplacement du numéro de série • Ubicación del número de serie © Titan Tool Inc. All rights reserved. -
Page 54: Garantía
RECLAMOS EN CASO DE INCUMPLIMIENTO DE ESTAS GARANTÍAS. Las Hojas de Datos de Seguridad (Material Safety Data Sheets - MSDS) se encuentran disponibles en el sitio web de Titan o llamando al Servicio al Cliente. United States Sales & Service International international@titantool.com... -
Page 55: Garantie
Les responsabilités de Titan en vertu de cette garantie se limitent au remplacement ou à la réparation sans frais des pièces dont on aura, à la satisfaction raisonnable de Titan, démontré la défectuosité dans un délai de 12 mois après la date d’achat par l’Utilisateur.