Whirlpool WPGI1500XHS Guide D'utilisation Et D'entretien
Table des Matières
Les langues disponibles
Les langues disponibles
Liens rapides
""
®
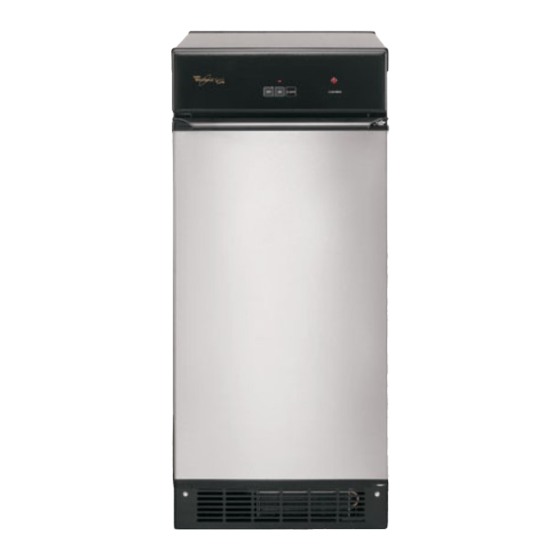
ICE MAKER
Use & Care Guide
For questions about features, operation/performance,
parts, accessories or service, call: 1-800-253-1301.
In Canada, call for assistance 1-800-461-5681, for installation
and service, call: 1-800-807-6777
or visit our website at...
www.whirlpool.com or www.whirlpoolappliances.ca
MACHINE À GLAÇONS
Guide d'utilisation
et d'entretien
Au Canada, pour assistance, composez le 1-800-461-5681, pour
installation ou service, le 1-800-807-6777
ou visitez notre site web à
www.whirlpoolappliances.ca
Table of Contents/Table des matières .................. 2
2313786
Table des Matières
Dépannage

Manuels Connexes pour Whirlpool WPGI1500XHS


Sommaire des Matières pour Whirlpool WPGI1500XHS
-
Page 15: Sécurité De La Machine À Glaçons
SÉCURITÉ DE LA MACHINE À GLAÇONS Votre sécurité et celle des autres est très importante. Nous donnons de nombreux messages de sécurité importants dans ce manuel et sur votre appareil ménager. Assurez-vous de toujours lire tous les messages de sécurité et de vous y conformer. Voici le symbole d’alerte de sécurité. -
Page 16: Spécifications Électriques
■ Choisir un endroit bien aéré où la température est supérieure Il faut un circuit d’alimentation électrique CA seulement de à 55°F (13°C) et inférieure à 100°F (38°C). Pour tirer le 115 volts, 60 Hz, de 15 ampères, mis à la terre conformément meilleur rendement de l’appareil, la température ambiante aux instructions du Code national de l’électricité... -
Page 17: Raccordement De La Canalisation D'eau
3. Pousser vers le haut sur la partie supérieure avant de la Raccordement du tuyau d’eau machine à glaçons pour repérer les vis de nivellement qui se trouvent sur le fond avant de la machine à glaçons. 1. Couper l’alimentation principale en eau. Ouvrir le robinet le 4. -
Page 18: Vue Arrière
■ VUE ARRIÈRE L'installation idéale a un tuyau de rejet à l'égout avec un réducteur de vidange PVC de 1½" (3,81 cm) à 2" (5,08 cm) installé directement sous la sortie du tuyau de vidange comme à l'illustration. Il faut maintenir un écart anti-retour de 1"... -
Page 19: Porte De La Machine À Glaçons
Raccordement du conduit d'évacuation Porte de la machine à glaçons OUTILLAGE NÉCESSAIRE : Après avoir vérifié que le système de vidange est adéquat, il faut Rassembler les outils et pièces nécessaires avant de commencer procéder tel que décrit ci-dessous pour bien mettre la machine à l’installation. -
Page 20: Sons Normaux
Charnière inférieure 5. Retirer la porte des charnières et revisser l’axe supérieur dans la charnière supérieure. 6. Réinstaller le panneau d’accès supérieur sans le serrer sur la machine à glaçons. 7. Inverser les embouts de porte comme suit : ■ Ôter les deux vis et embouts (supérieur et inférieur). -
Page 21: Utilisation De La Machine Àglaçons
5. Les glaçons tombent dans le bac à glaçons. La machine à glaçons s’arrête automatiquement dès que le bac est plein, et UTILISATION DE LA MACHINE À elle se remet en marche lorsqu’il faut plus de glaçons. Le bac à glaçons n’est pas réfrigéré et la glace fondra un peu. Le GLAÇONS degré... - Page 22 9. Remettre le sélecteur en position ON pour recommencer la Nettoyage du système de la machine à glaçons production de glaçons. Les minéraux rejetés par la circulation de l’eau pendant la Condenseur congélation formeront éventuellement un dépôt dur dans le système.
-
Page 23: Nettoyage Des Composants Intérieurs
9. Retirer, nettoyer et réinstaller la pelle à glace et son support. Nettoyage des composants intérieurs ■ Après avoir retiré la pelle à glace, enlever le support en ôtant les deux vis de serrage. 1. Débrancher la machine à glaçons ou déconnecter la source ■... -
Page 24: Précautions À Prendre Avant Les Vacances Ou Déménagement
5. Déconnecter les canalisations d’entrée et sortie sur la vanne Précautions à prendre avant les vacances à eau. Laisser l’eau s’écouler des canalisations, puis reconnecter les canalisations. ou déménagement 6. Réinstaller le panneau de l’ouverture d’accès inférieure et les vis. AVERTISSEMENT 7. -
Page 25: Production De Glaçons
■ Y a-t-il une accumulation de tartre dans la machine à La machine à glaçons semble bruyante glaçons? S'il y a une accumulation blanche de tartre dans le système d'eau ou de congélation de la machine à glaçons, il ■ De l'eau circule-t-elle dans la machine à... -
Page 26: Assistance Ou Service
à mieux répondre à votre Téléphoner au 1-800-807-6777. Les techniciens de service demande. désignés par Whirlpool Canada LP sont formés pour remplir la garantie des produits et fournir un service après la garantie Si vous avez besoin de pièces de rechange partout au Canada. -
Page 27: Garantie
CONFÈRE DES DROITS JURIDIQUES SPÉCIFIQUES ET VOUS POUVEZ ÉGALEMENT JOUIR D'AUTRES DROITS QUI PEUVENT VARIER D'UNE JURIDICTION À UNE AUTRE. À l'extérieur du Canada et des 50 États des États-Unis, cette garantie ne s'applique pas. Contacter votre marchand Whirlpool autorisé pour déterminer si une autre garantie s'applique. - Page 28 All rights reserved. ® Registered Trademark/TM Trademark of Whirlpool, U.S.A., Whirlpool Canada LP Licensee in Canada Printed in U.S.A. Tous droits réservés. ® Marque déposée/TM Marque de commerce de Whirlpool, U.S.A., emploi licencié par Whirlpool Canada LP au Canada Imprimé aux É.-U.