Cembre SD-19BR Notice D'utilisation Et Entretien

Perceuse sur batterie pour traverses en bois

Publicité

Les langues disponibles
  • FR

Les langues disponibles

Liens rapides

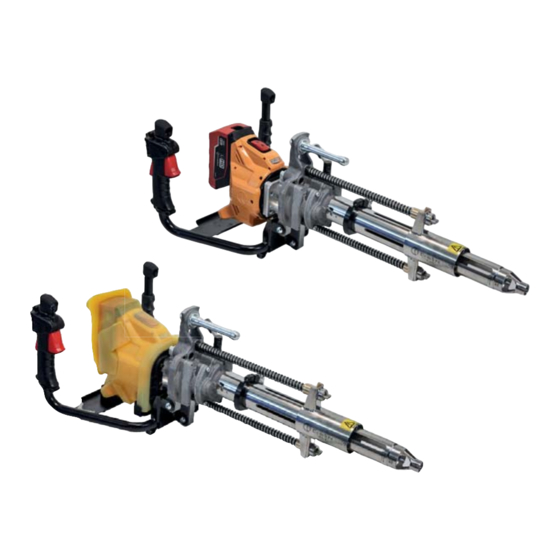
BATTERY DRILLING MACHINE FOR WOODEN SLEEPERS
PERCEUSE SUR BATTERIE POUR TRAVERSES EN BOIS
TALADRO A BATERíA PARA TRAVIESAS DE MADERA
TRAPANO A BATTERIA PER TRAVERSE IN LEGNO
SD-19BR
SD-19BR-RP SD-19BR-RPA SD-19BR2-RPE SD-19BR-RPT
*
* SD-19BR-RP SD-19BR-RPA SD-19BR2-RPE SD-19BR-RPT
ENGLISH
OPERATION AND MAINTENANCE MANUAL ....................................6
FRANÇAIS
NOTICE D'UTILISATION ET ENTRETIEN ........................................... 23
DEUTSCH
BEDIENUNGSANLEITUNG ................................................................... 40
ESPAÑOL
MANUAL DE USO Y MANTENIMIENTO ........................................... 57
ITALIANO
MANUALE D'USO E MANUTENZIONE ............................................. 74
1
AKKU-HOLZSCHWELLENBOHRMASCHINE
SD-19BRA
SD-19BR2E
SD-19BRT

Publicité

Table des Matières
loading

Sommaire des Matières pour Cembre SD-19BR

  • Page 1 TALADRO A BATERíA PARA TRAVIESAS DE MADERA TRAPANO A BATTERIA PER TRAVERSE IN LEGNO SD-19BR SD-19BRA SD-19BR2E SD-19BRT SD-19BR-RP SD-19BR-RPA SD-19BR2-RPE SD-19BR-RPT * SD-19BR-RP SD-19BR-RPA SD-19BR2-RPE SD-19BR-RPT ENGLISH OPERATION AND MAINTENANCE MANUAL ........6 FRANÇAIS NOTICE D’UTILISATION ET ENTRETIEN ........... 23 DEUTSCH BEDIENUNGSANLEITUNG ..............40 ESPAÑOL...
  • Page 2 Version -RP (RAINPROOF) FIG. 1 BILD 1 Dimensioni in mm...
  • Page 3 ❶ FIG. 2 BILD 2 ❷ FIG. 3 ❶ 90° 90° 90° BILD 3 ❷ ❶ ❷ 90° 90° ❶ 90° FIG. 4 BILD 4 ❷ ❷ FIG. 5 BILD 5 ❶...
  • Page 4 Version -RP (RAINPROOF) FIG. / BILD 7    FIG. 6 BILD 6 FIG. 8 BILD 8 SD-19BR...  CS-EU..   ...
  • Page 5 FIG. 10 FIG. 9 BILD 10 BILD 9 FIG. 11 BILD 11...
  • Page 6 – During drilling keep your hands outside the danger area. – Do not use the drilling machine for purposes other than those intended by Cembre. – Never use a drilling machine that is faulty, has been tampered with or which has been modi- fied from its original form.
  • Page 7: General Characteristics

    1.36 max. Vibrations * Using Cembre PV... augers series with standard lenght of 325 mm. Depending on the PV... auger usage, higher drilling thicknesses are possible (Ref. to § 10). ** TPM200-26: suitable for augers having ø max. 20 mm and centering for ø 26 mm plate hole.
  • Page 8 – Usage of the device for its intended purpose also incorporates compliance with the operating manual, including the manufacturer‘s maintenance recommendations and specifications. SD-19BR SD-19BRA SD-19BR2E SD-19BRT : standard version of the drilling machine, the degree of protection of the drilling machine against moisture is classified “ordinary" (EN 50144-1 Standard).
  • Page 9 2.2) Drilling machine (Ref. to Fig. 1): 1- TPM... Guard Nozzle: stainless steel threaded centering device for attachment to the guard (2). Alternative guard nozzle are available with different diameters, to suit different size hole (Ref. to § 10.2). 2 - PRM-UN detachable guard: stainless steel telescopic element, controlled by the return springs, which provides protection for the auger.
  • Page 10 2.3) Accessories supplied with the drilling machine Rechargeable battery type CB3662L 36 V 6,2 Ah Li-Ion, equipped with LED indicators of the remaining battery life at any time by pressing the button. Fast charger type ASC-ULTRA Differs depending on geographic region. Use to quickly charge the Li-Ion batteries supplied: - Minimal current consumption in stand-by mode - Management of the charging process by means of a processor...
  • Page 11 3. CONTROLS / INDICATORS 3.1) ON/OFF/ON Switch (EMERGENCY) Is located on the motor in an easily visible position and can be rapidly activated in case of emergency. There are 3 positions available: CENTRAL POSITION: machine OFF. FORWARD (1): machine in stand-by, ready for drilling (right rotation of the spindle BACKWARD (2): machine in standby, ready for the reverse rotation of the spindle;...
  • Page 12: Oled Display

    3.4) Signalling LED Two LEDs (21 and 22) located under the battery in an easily visible position to the operator provide de- tails on the operating status of the drilling machine: RIGHT LED (21) lights up green when the drilling machine is set for drilling operation (right rota- tion LEFT LED (22) lights up green when the drilling...
  • Page 13: Rechargeable Battery

    Optimal battery storage temperature is between 10 and 30 °C(50 and 86 °F). 4.1) Insertion / Removal of the battery (Ref. to Fig. 6) Only for SD-19BR SD-19BRA SD-19BR2E SD-19BRT standard versions Removal of the battery: Move the switch (8) to the central OFF position.
  • Page 14 Insertion of the battery: Move the switch (8) in central OFF position. Lift the cap (25) and retract the rainproof cover (23) and slide the battery down the guides until in place and locked by the button (P) (Fig. 7b). Carefully and precisely reposition the rainproof cover (23) so as to cover the upper and lower parts of the battery (Fig.
  • Page 15 5. INSTRUCTONS FOR USE Always remove the battery when fitting or removing the auger. Before starting the motor of the -RP rainproof drilling machines always check: • The precise positioning of the rainproof cover, especially around the battery area. • The integrity of the rainproof cover, the absence of cuts or abrasions; a damaged cover must be replaced in order to avoid ingress of water and moisture into the motor and / or the battery.
  • Page 16: Drilling Operation

    Correct operation of the machine and the safe rapid release of the augers in the event of an emergency is only guaranteed when using original Cembre PV augers. To rapidly remove the machine during a drilling operation, proceed as follows: Immediately release the start button (19).
  • Page 17: Navigation Menu

    BATTERY BATTERY Battery charge level. BATTERY BATTERY SD-19BR FW S1K250... SD-19BR SD-19BR FAULT Cembre logo, drilling machine model. FW S1K250... SD-19BR FAULT FW S1K250... FAULT FW S1K250... Firmware version of the electronic control card. DRIVER DRIVER DRIVER 6.2) Main screen (white frame)
  • Page 18 Remove and re-insert the battery, then re-start orem ipsum MOTOR DRIVER motor. the motor. FAULT If the problem persists, please contact Cembre. FAULT MOTOR BATTERY rem ipsum Overheating of the electronic control Wait for the electronic card to cool down.
  • Page 19: Lubrication

    The maintenance procedures described may be carried out by the operator. For any eventual fine tuning or repairs, return to Cembre (Ref. to § 11). 8.1) ORDINARY MAINTENANCE OF THE DRILLING MACHINE...
  • Page 20 The optimum storage temperature of the batteries is between 10 °C and 30 °C. For better protection Cembre recommends the use of the VAL-SD metal case (ref. to designed for this purpose, which enable to store the drilling machine with disassembled PRM-UN detachable guard, canvas bag for batteries and battery charger.
  • Page 21 Interchangeable with standard MND standard spindle, featuring an automatic quick lock mechanism suitable for augers with a Ø 16 mm shank. MND 1 10.4) VAL-SD metal case Steel case suitable for storing the complete drilling ma- chine (disassembled detachable guard) and accessories. VAL-SD PRM-UN SD-19BR..
  • Page 22 Centre; if possible, attach a copy of the Test Certificate supplied by Cembre together with the machine or fill in and attach the form available in the “ASSISTANCE” section of the Cembre website.
  • Page 23: Avertissements

    AVERTISSEMENTS – Avant d’utiliser la perceuse, lire attentivement les instructions de cette notice. CONSERVEZ CES INSTRUCTIONS: cette notice contient d'importantes instructions relatives à la sécurité et au bon fonctionnement de la perceuse. – Utiliser des équipements de protection individuelle (EPI) appropriés.
  • Page 24: Caracteristiques Generales

    1,36 maxi. Vibrations * Pour des mèches de perçage Cembre de la série PV ... d'une longueur standard de 325 mm. En fonction de la mèche PV ... utilisée, il est possible d’avoir des épaisseurs de perçage supérieures (voir § 10).
  • Page 25: Chargeur De Batterie

    – Pour une utilisation adéquate, le suivi du manuel d'utilisation ainsi que les conseils d'entre- tien et de révision du fabricant sont primordiaux. SD-19BR SD-19BRA SD-19BR2E SD-19BRT: perceuse en version standard considérée comme un « outil ordinaire » selon l’indice de protection contre l’humidité (norme EN 50144-1).
  • Page 26: Perceuse Pour Traverses En Bois

    2.2) Perceuse pour traverses en bois (Voir Fig. 1): 1- Embout de centrage type TPM...: élément de centrage en acier inox. L'embout est fourni monté sur la protection mobile (2) et peut être remplacé en cas de besoin par des embouts ayant des diamètres de centrage différents (Voir §...
  • Page 27: Accessoires Fournis Avec La Perceuse

    2.3) Accessoires fournis avec la perceuse Batterie rechargeable type CB3662L 36 V 6,2 Ah Li-Ion, est équipée d’indicateurs à LED qui permettent de contrôler, à tout moment, son autonomie résiduelle en appuyant sur la touche. Chargeur de batterie rapide type ASC-ULTRA Différent en fonction de la version de la perceuse.
  • Page 28: Interrupteur De Commande On/Off (Urgence)

    3. COMMANDES / INDICATEURS 3.1) Interrupteur de commande ON/OFF (URGENCE) L'interrupteur (8) est situé sur le moteur, de manière bien visible, et peut être rapidement actionné en cas d’urgence. Il peut avoir 3 positions stables: POSITION CENTRAL: OFF, machine éteinte. AVANT (1) : machine en attente, prête pour le perçage.
  • Page 29 3.4) Leds de signalisation Deux leds (21 et 22) situées sous la batterie dans une position bien visible pour l'opérateur donnent des informations sur l'état de fonctionnement de la perceuse: La LED DROITE (21) s'allume en vert lorsque la perceuse est prête pour le perçage (sens de ro- tation droit La LED GAUCHE (22) s'allume en vert lorsque la perceuse est prête pour la rotation inverse (sens...
  • Page 30: Batterie Rechargeable

    La température idéale pour le stockage des batteries est comprise entre +10°C et +30°C. 4.1) Insertion/ Retrait de la batterie (Voir Fig. 6) Seulement pour SD-19BR SD-19BRA SD-19BR2E SD-19BRT Retrait de la batterie Mettre l'interrupteur (8) sur la position centrale (OFF).
  • Page 31: Utilisation Du Chargeur De Batterie

    Insertion de la batterie: Mettre l'interrupteur (8) sur la position centrale (OFF). Soulevez le capuchon (25) et déplacer la protection imperméable (23) en la rétractant, puis à l’aide du bouton (P) faire coulisser la batterie dans la glissière jusqu’en butée (Fig. 7b). Repositionner correctement la protection imperméable (23) de manière à...
  • Page 32: Instructions Pour Utilisation

    5. INSTRUCTIONS POUR UTILISATION Retirez toujours la batterie avant d’effectuer le changement de la mèche. Pour perceuses dans la version -RP avant utilisation toujours vérifier: • Le bon positionnement de la protection imperméable, surtout dans la zone de la batterie. •...
  • Page 33: Emploi De La Perceuse Sur Chariot-Support

    5.5) Décrochage de secours Le fonctionnement correct de la perceuse ainsi que le débrochage sûr et rapide des mèches de perçage, en cas de nécessité, ne sont garantis qu’avec l’utilisation des mèches Cembre de la série PV. Pour éloigner rapidement la perceuse de la zone de travail en cas d’urgence au cours d’une opé- ration de perçage, procéder de la façon suivante:...
  • Page 34: Menu De Navigation

    BATTERY Niveau de charge de la batterie. BATTERY BATTERY SD-19BR FW S1K250... SD-19BR SD-19BR FAULT FW S1K250... logo Cembre, type de perceuse. SD-19BR FAULT FW S1K250... Version du firmware de la carte électronique. FAULT FW S1K250... DRIVER DRIVER DRIVER 6.2) Écran principal (cadre blanc) L’...
  • Page 35 Absorption anormale de courant du Retirez et réinsérez la batterie. m ipsum MOTOR moteur. Redémarrez le moteur. FAULT FAULT Si le problème persiste, contacter Cembre. MOTOR BATTERY MOTOR m ipsum Surchauffe de de la carte électron- Attendre que a carte électronique se re- ..
  • Page 36: Entretien

    Nous suggérons le contrôle fonctionnel au moins une fois par an, quelle que soit la fréquence d'utilisation. Les opérations d’entretien décrites ci-après peuvent être effectuées par l’utilisateur de manière autonome; en revanche, contacter Cembre pour toute mise au point ou réparation (voir § 11).
  • Page 37: Rangement De La Perceuse

    La température idéale pour le stockage des batteries est comprise entre 10°C et 30°C. Pour une meilleure protection, Cembre conseille l’utilisation du coffret métallique VAL-SD qui permet de ranger la perceuse et les sacoches des batteries et chargeur.
  • Page 38: Embout De Centrage Tpm... Interchangeables Avec L'embout Standard

    Interchangeable avec la broche standard “MND” et apte au montage des mèches avec queue d’accouplement de MND1 16 mm Ø et 325 mm de long. 10.4) Coffret VAL-SD Coffret métallique robuste pour ranger la perceuse complète (avec protection mobile démontée) et des accessoires. VAL-SD PRM-UN SD-19BR..
  • Page 39: Envoi En Revision A Cembre

    échéant vous donnera les instructions nécessaires pour envoyer l’appa- reil à notre Centre de Service le plus proche. Dans ce cas, joindre une copie du Certificat d’Essai livré par Cembre avec l’appareil ou remplir et joindre le formulaire disponible dans la section “ASSISTANCE” du site web Cembre.
  • Page 40 WARNHINWEISE – Vor Inbetriebnahme der Bohrmaschine die Bedienungsanleitung sorgfältig durchlesen. BEWAHREN SIE DIESE HINWEISE GUT AUF: diese Bedienungsanleitung enthält wichtige Sicherheits- und Gebrauchsanweisungen für die Bohrmaschine. – Zum persönlichen Schutz ist es vorgeschrieben, typenge- prüfte Schutzausrüstung (PSA) zu tragen, wie Schutzbrille, Arbeitshandschuhe, Sicherheitsschuhe etc.
  • Page 41: Allgemeine Eigenschaften

    1,36 max. Vibrationen * Bei Verwendung von Cembre-Bohrern der PV-Serie ... mit einer Standardlänge von 325 mm. Je nach verwendetem PV-Bohrer sind größere Materialdicken möglich (siehe Punkt 10). ** TPM200-26: geeignet für Bohrer mit einem max. Durchmesser von 20 mm, zentriert auf Rippenplatte mit 26 mm Loch.
  • Page 42: Beschreibung

    – Zur bestimmungsgemäßen Verwendung des Gerätes gehört auch die Einhaltung der Betriebs- anleitung, einschließlich der Wartungsempfehlungen und -spezifikationen des Herstellers. SD-19BR SD-19BRA SD-19BR2E SD-19BRT: Standardversion der Bohrmaschine wird, gemäß der Feuchtigkeits-Schutzklasse als ein „gewöhnliches Werkzeug" angesehen (Norm EN 50144-1) Die Bohrmaschine vor Regen und Feuchtigkeit schützen; Das Eindringen von Wasser in das Werkzeug, beschädigt den Motor.
  • Page 43 Bohrmaschine 2.2) (siehe Bild 1) 1- Endstück Typ TPM...: Die Zentrierspitze des beweglichen Schutzrohres entspricht dem Durch- messer der Bohrung in der Rippenplatte. Das Endstück wird auf der Schutzvorrichtung PRM-UN montiert geliefert und kann im Bedarfsfall mit Endstücken mit unterschiedlichen Zentrier- durchmessern ausgewechselt werden (siehe Pkt.
  • Page 44: Lieferumfang

    2.3) Lieferumfang Wiederaufladbare Akkus Typ CB3662L 36 V 6,2 Ah Li-Ion. Der Akku ist mit LED-Anzeigen ausgestattet, der jederzeit über die verbleibende Akkulaufzeit Auskunft gibt, indem man auf die Taste drückt (siehe Pkt. 4). Schnellladegerät Typ ASC-ULTRA Unterschiedlich je nach Version der Bohrmaschine. Um die Li-Ion-Akkus des Lieferumfangs schnell zu laden: - Minimale Stromaufnahme im Standby Modus.
  • Page 45 3. STEUERUNGEN / BERICHTE 3.1) Sicherheitsschalter ON/OFF/ON Der Sicherheitsschalter (8), befindet sich auf dem Motor in einer gut sichtbaren Position und kann in einem Notfall rechtzeitig betätigt werden. Es gibt drei mögliche Positionen: MITTE: OFF, Maschine ausgeschaltet. VORNE (1): Maschine im Standby-Modus, bereit zum Bohren. (Spindel nach rechts drehend HINTEN (2): Maschine in Standby-Modus, bereit zum Zurück- drehen der Spindel, z.B.
  • Page 46 3.4) LED-Anzeigen Zwei LED-Anzeigen (21 und 22) befinden sich, für Benutzer gut sichtbar, unterhalb des Akkus und zeigen Details über den Betriebsstatus der Boh- rmaschine an: RECHTE LED-ANZEIGE (21): leuchtet grün, wenn der Bohrer zum Bohren bereit ist (rechtsdrehend LINKE LED-ANZEIGE (22): leuchtet grün, wenn der Bohrer zum Drehen in die entgegen- gesetzte Richtung bereit ist (linksdrehend Sollten FEHLER oder ablaufbezogene...
  • Page 47 Die optimale Lagerungstemperatur für Akkus liegt zwischen 10 °C und 30 °C. 4.1) Einführen/Entnehmen des Akkus: (siehe Bild 6) Nur für Standardversionen SD-19BR SD-19BRA SD-19BR2E SD-19BRT Entnehmen des Akkus: Bringen Sie den Schalter (8) in die mittlere Position. Den Akku durch Drücken der Taste (P) entsperren und von oben herausziehen.
  • Page 48 Einführen des Akkus: Bringen Sie den Schalter (8) in die mittlere Position. Heben Sie die Kappe an (25) und schieben die Schutzabdeckung (23) nach hinten, indem Sie diese abziehen. Lassen Sie dann den Akku durch die Führungen gleiten, bis zum Einrasten (Bild 7b).
  • Page 49 5. BEDIENUNGSHINWEISE Der Akku der Bohrmaschine ist stets zu entfernen, vor Einsetzen oder Auswechseln des Bohrers. Für Bohrmaschinen in der RP-Version, muss immer vor Gebrauch, folgendes überprüft werden: • Die einwandfreie Positionierung der Schutzabdeckung, vor allem im Akkubereich. • Die Unversehrtheit der Abdeckung, diese darf keine Schnitte oder einen Verschleiß auf- weisen;...
  • Page 50 5.5) Entrieglungsvorrichtung des Bohrers bei Gefahr Für eine sichere Handhabung der Maschine und ein schnelles Lösen der Maschine vom Bohrer (im Notfall), ist nur bei der Verwendung von Cembre Originalbohrern vom Typ PV… gewährleistet. Um die Bohrmaschine im Notfall während einer Bohrung umgehend vom Gefahrenbereich ent- fernen zu können, sind folgende Schritte einzuhalten:...
  • Page 51 Anzahl der momentanen Spindeldrehzahl. BATTERY BATTERY Ladezustand des Akkus. BATTERY BATTERY SD-19BR FW S1K250... SD-19BR SD-19BR FAULT FW S1K250... Cembre-Logo, Bohrermaschinen Typ. SD-19BR FAULT FW S1K250... FAULT FW S1K250... Firmware-Version der elektronischen Karte. DRIVER DRIVER DRIVER 6.2) Startbildschirm (weißer Rahmen) MOTOR Der "Hauptbildschirm"...
  • Page 52: Fehlermeldungen

    Motors. erneut ein. Den Motor erneut starten. BATTERY MOTOR orem ipsum Wenn das Problem weiter besteht, bitte FAULT BATTERY FAULT Cembre kontaktieren. rem ipsum MOTOR MOTOR ..Überhitzung der Steuereinheit Warten die Abkühlung der Steuereinheit ab. DRIVER DRIVER verursacht durch intensive Nutzung.
  • Page 53 Wartung, kann die Wirksamkeit der Bohrmaschine erheblich vermindern und das Risiko von schweren Unfällen erhöhen. Die im Folgenden beschriebenen Wartungsarbeiten, kann der Benutzer eigenständig durchführen. Im Falle von eventuellen Einstellungen, ist Cembre zu kontaktieren (siehe Pkt. 11). 8.1) REGULÄRE WARTUNG DER BOHRMASCHINE Täglich: Vor Benutzung der Bohrmaschine ist folgendes zu kontrollieren: Bohrmaschine in ihrer Gesamtheit (Befestigung der verschiedenen Komponenten).
  • Page 54 Feuchtigkeit, Frost oder möglichen Beschädigungen zu schützen. Die optimale Lagertemperatur der Akkus liegt zwischen 10° C und 30° C. Für einen optimalen Schutz empfiehlt Cembre, die Verwendung des stabilen Metallkoffers Typ VAL-SD, in dem folgende Teile aufbewahrt werden können, Schwellenbohrmaschine bei demon- tiertem bewegliches PRM-UN Schutzrohr, Segeltuchtasche für Akkus und Ladegerät.
  • Page 55 Schnellspannfutter mit automatischer Blockierung für Bohrer mit einem 16 mm Schaftdurchmesser und einer Länge von 325 mm. MND 1 10.4) Metallkoffer Typ VAL SD Stabiler Metallkoffer für die komplette Schwellenbohr- maschine (bewegliches Schutzrohr demontiert) und für das Zubehör. VAL-SD PRM-UN SD-19BR..
  • Page 56 Sie gerne beraten und Ihnen alle nötigen Informationen zum Einsenden des Gerätes an unseren Hauptsitz geben wird. Wenn vorhanden, legen Sie dem Gerät bitte eine Kopie des von Cembre mitgelieferten Zertifikates bei oder füllen das, unter dem Bereich “SUPPORT“ der Cembre Web- site, verfügbare Formular aus und fügen es bei.
  • Page 57 – Durante la perforación, mantener las manos fuera de la zona de peligro. – No utilice la máquina para fines diferentes a los previstos por el fabricante Cembre. – Nunca utilice una máquina defectuosa, dañada o que haya sido modificada respecto a su estado original.
  • Page 58: Características Generales

    Vibraciones * Teniendo en cuenta el uso de las barrenas Cembre de la serie PV ... con una longitud estándar de 325 mm. Dependiendo de la barrena PV ... utilizada, es posible un mayor grosor de perforación (Ref. a § 10).
  • Page 59: Uso Adecuado

    – El uso indicado incluye asimismo el cumplimiento de las instrucciones de uso, incluidas las recomendaciones/disposiciones de mantenimiento aportadas por el fabricante. SD-19BR SD-19BRA SD-19BR2E SD-19BRT: taladro en versión estándar, se considera como una herramienta "común" según el nivel de protección contra la humedad (Normativa EN 50144-1).
  • Page 60 2.2) Taladro para traviesas (Ref. a Fig. 1): 1- Terminación TPM...: elemento de centrado de acero inoxidable que se inserta en los taladros correspondientes de las placas. La terminación es montada sobre la protección móvil (2) y puede ser reemplazada en caso de necesidad con terminaciones que tengan diá- metros diferentes (Ref.
  • Page 61 2.3) Accesorios suministrados con el taladro Batería recargable tipo CB3662L 36 V 6,2 Ah Li-Ion, provista de indicadores de led que permiten saber la autonomía restante en cualquier momento pulsando el botón (Ref. al § 4). Cargador de batería rápido ASC Ultra Diferente según la versión del taladro.
  • Page 62 3. COMANDOS / SEÑALIZACIÓN 3.1) Interruptor ON/OFF/ON EMERGENCIA El interruptor (8) está situado en el motor en una posición bien visible y se puede activar manera urgente en caso de emergencia. Puede adoptar 3 posiciones estables: CENTRAL: OFF (apagado), máquina apagada. SIGUIENTE (1): máquina en espera lista para taladrar (standby).
  • Page 63 3.4) LED de señalización Dos LED (21 y 22) colocados debajo de la batería en una posición claramente visible para el operador, proporcionando detalles sobre el estado de fun- cionamiento del taladro: LED DERECHO (21) se ilumina en verde cuando el taladro está...
  • Page 64: Batería Recargable

    La temperatura óptima de almacenaje de las baterías se sitúa entre los 10°C y 30°C. 4.1) Introducción / Extracción de la batería (Ref. a Fig. 6) Solo versiones SD-19BR SD-19BRA SD-19BR2E SD-19BRT Extracción de la batería: Poner el interruptor (8) en la posición central.
  • Page 65 Introducción de la batería: Poner el interruptor (8) en la posición central. Levante la tapa (25) y mueva la cubierta impermeable (23) retirándola, inserte la batería desde arriba sobre las guías hasta que se bloquee (Fig. 7b). Vuelva a colocar correctamente la cubierta impermeable (23) de manera que cubra la batería tanto por arriba como por abajo (Fig.
  • Page 66 5. INSTRUCCIONES DE USO Quitar siempre la batería antes de insertar o reemplazar la barrena. Para los taladros en versión -RP, verifique siempre antes de su uso: • Que la cubierta impermeable esté bien colocada, especialmente en la zona de la batería. •...
  • Page 67 5.5) Disparo de emergencia El correcto funcionamiento de la máquina y el desenganche seguro y rápido de las barrenas, en caso de necesidad, sólo son garantizados si se utilizan barrenas originales Cembre de la serie PV. Para mover rápidamente la taladradora de la zona de trabajo en caso de emergencia durante una operación de perforación, actuar de la manera siguiente:...
  • Page 68: Menú De Navegación

    BATTERY Nivel de carga de la batería. BATTERY BATTERY SD-19BR SD-19BR FW S1K250... SD-19BR FAULT FW S1K250... Logo Cembre, modelo de taladro SD-19BR FAULT FW S1K250... FAULT FW S1K250... Versión de firmware de la tarjeta electrónica. DRIVER DRIVER DRIVER 6.2) Pantalla principal (marco blanco)
  • Page 69 MOTOR MOTOR Autodiagnóstico con resultado nega- Sacar y colocar la batería, arrancar el motor ..FAULT ..tivo 001..003 errores en el firmware. nuevamente. Si el problema persiste, ponerse en contacto con Cembre..BATTERY DRIVER BATTERY BATTERY...
  • Page 70 Las operaciones de mantenimiento que se describen a continuación son las que el usuario puede realizar de forma autónoma. Para posibles revisiones y reparaciones, póngase en contacto con Cembre (Ref. al § 11). 8.1) MANTENIMIENTO ORDINARIO DEL TALADRO Cada día Antes de usar, comprobar lo siguiente: Todo el taladro (fijación de los diferentes componentes).
  • Page 71: Accesorios Suministrados Por Separado

    La temperatura óptima de almacenaje de las baterías se sitúa entre los 10°C y 30°C. Para una mejor protección, Cembre recomienda el uso de la caja metálica VAL-SD en la cual se pueden guardar el taladro, la protección móvil PRM-UN desmontada y las bolsas de tela para contener las baterías y el cargador.
  • Page 72 Intercambiable con el mandril estándar MND y apto para montar barrenas con macho de unión de Ø 16 mm. MND1 10.4) Caja VAL-SD Sólida caja metálica para guardar el taladro (con la protección móvil desmontada) y los accesorios. VAL-SD PRM-UN SD-19BR..
  • Page 73 En tal caso, adjuntar a ser posible una copia del Certificado de Ensayo entregado en su día por Cembre con la máquina o completar y adjuntar el formulario disponible en la sección “ASISTENCIA” del sitio web Cembre.
  • Page 74: Avvertenze

    AVVERTENZE – Prima di usare il trapano, leggere attentamente le istruzioni contenute in questo manuale. CONSERVARE QUESTE ISTRUZIONI: il presente manuale contiene im- portanti istruzioni per la sicurezza e il corretto funzionamento del trapano. – Utilizzare adeguati dispositivi di protezione personale (DPI) quali: occhiali protettivi, guanti da lavoro, scarpe antiinfortunistiche.
  • Page 75: Caratteristiche Generali

    1,36 max. Vibrazioni * Considerando l'utilizzo di punte di foratura Cembre della serie PV... con lunghezza standard di 325 mm. In funzione della punta PV... utilizzata, sono possibili spessori di foratura superiori (Rif. al § 10). ** TPM200-26: adatta a punte di foratura ø max. 20 mm, centraggio per piastre con foro ø 26 mm.
  • Page 76: Uso Conforme

    Non esporre il trapano alla pioggia e all’umidità; l’eventuale infiltrazione d'acqua all'interno danneggerebbe motore, scheda elettronica e batteria. SD-19BR-RP SD-19BR-RPA SD-19BR2-RPE SD-19BR-RPT: trapano in versione RP RAINPRO- OF provvisto di una guaina impermeabile in silicone che protegge il gruppo motore-batteria da infiltrazioni d'acqua e umidità.
  • Page 77 2.2) Trapano foratraverse (Rif. a Fig. 1): 1- Terminazione tipo TPM...: elemento di centraggio in acciaio inossidabile da inserire nelle corri- spondenti forature delle piastre o dei cuscinetti di comune impiego ferroviario. La terminazione è avvitata sulla protezione mobile (2) e può essere sostituita in caso di necessità con termina- zioni aventi diametri di centraggio differenti (Rif.
  • Page 78 2.3) Accessori forniti a corredo Batteria ricaricabile tipo CB3662L 36 V 6,2 Ah agli Ioni di Litio, provvista di indicatori a led che consentono, premendo il relativo pulsante, di conoscerne l’autonomia residua in qualsiasi momento. (Rif. al § 4) Caricabatteria rapido ASC Ultra Differente in base alla versione del trapano, permette di caricare rapidamente le batterie Li-Ion a corredo.
  • Page 79: Manopola Di Comando

    3. COMANDI / SEGNALAZIONI 3.1) Interruttore ON/OFF/ON EMERGENZA L'interruttore (8) è posto sul motore in posizione ben visibile e può essere azionato tempestivamente in caso di emergenza. Può assumere 3 posizioni stabili: POSIZIONE CENTRALE: OFF, macchina spenta. AVANTI (1): macchina in standby pronta per la foratura. (rotazione destra del mandrino).
  • Page 80 3.4) Led di segnalamento Due Led (21 e 22) posti sotto la batteria in posizio- ne ben visibile all'operatore forniscono dettagli sullo stato di funzionamento del trapano: LED DESTRO (21) si illumina di verde quando il trapano è predisposto per la foratura (senso di rotazione destro LED SINISTRO (22) si illumina di verde quando il trapano è...
  • Page 81: Batteria Ricaricabile

    La temperatura ottimale di immagazzinaggio delle batterie è compresa fra 10°C e 30°C. 4.1) Inserimento/Rimozione batteria (Rif. a Fig. 6) Solo per SD-19BR SD-19BRA SD-19BR2E SD-19BRT Rimozione della batteria: Portare l'interruttore (8) in posizione centrale. Sbloccare la batteria agendo sul pulsante (P) e sfilarla dall'alto.
  • Page 82: Utilizzo Del Caricabatteria

    Inserimento della batteria: Portare l'interruttore (8) in posizione centrale. Sollevare la cuffia (25) e spostare la copertura impermeabile (23) ritraendola sufficientemente da poter inserire la batteria dall'alto nelle guide, fino al suo blocco (Fig. 7b). Riposizionare correttamente la copertura impermeabile (23) in modo da ricoprire la batteria sia sopra che sotto (Fig.
  • Page 83 5. ISTRUZIONI PER L'USO Rimuovere sempre la batteria prima di prima di inserire o sostituire la punta di foratura. Per trapani in versione -RP, verificare sempre prima dell'uso: • Il perfetto posizionamento della copertura impermeabile, specialmente nella zona della batteria. •...
  • Page 84 5.5) Sgancio di emergenza Il corretto funzionamento del trapano e lo sgancio sicuro e veloce delle punte sono garantiti solo con l'utilizzo di punte originali Cembre della serie PV. Per rimuovere rapidamente il trapano dalla zona di lavoro per una emergenza durante un’opera- zione di foratura, operare come segue: Rilasciare immediatamente il pulsante (19).
  • Page 85: Struttura Del Menù

    BATTERY livello di carica della batteria. BATTERY BATTERY SD-19BR FW S1K250... SD-19BR SD-19BR FAULT FW S1K250... logo Cembre, modello tapano. SD-19BR FAULT FW S1K250... FAULT FW S1K250... versione firmware della scheda elettronica. DRIVER DRIVER DRIVER 6.2) Schermata principale (cornice bianca) MOTOR La "schermata principale"...
  • Page 86 BATTERY Assorbimento anomalo di corrente del em ipsum BATTERY Riavviare il motore. MOTOR em ipsum motore. FAULT Se il problema persiste contattare la Cembre. BATTERY FAULT MOTOR em ipsum MOTOR DRIVER ..Sovratemperatura della scheda Attendere il raffreddamento della scheda.
  • Page 87: Lubrificazione

    Le operazioni di manutenzione descritte di seguito sono quelle che l’utilizzatore può effettuare in autonomia, per eventuali messe a punto e riparazioni rivolgersi a Cembre (Rif. al § 11). 8.1) MANUTENZIONE ORDINARIA DEL TRAPANO Giornalmente Prima dell’uso controllare:...
  • Page 88 PV160-465 PV170 PV170L PV170-465 PV180 PV190 PV200 PV210 PV220 PV250 PV280 Il corretto funzionamento del trapano e lo sgancio sicuro e veloce delle punte in caso di necessità, sono garantiti solo con l'utilizzo di punte originali Cembre della serie PV.
  • Page 89 CAT. 744 / PROG. 490 CAT. 744 / PROG. 492 CAT. 744 / PROG. 491 CAT. 744 / PROG. 493 10.4) Custodia metallica VAL-SD Robusta cassa metallica per il contenimento del tra- pano completo (protezione mobile smontata) e degli accessori. VAL-SD PRM-UN SD-19BR..
  • Page 90 In caso di guasto contattare il nostro Agente di Zona il quale vi consiglierà in merito e fornirà le istruzioni necessarie per l’invio dell’utensile alla nostra Sede; se possibile, allegare copia del Certi- ficato di Collaudo a suo tempo fornito dalla Cembre con l’utensile oppure, compilare ed allegare il modulo disponibile nella sezione “ASSISTENZA” del sito web Cembre.
  • Page 91 Dimensions in mm...
  • Page 92 CS 92014 - 91423 Morangis Cédex E-mail: sales@cembre.com E-mail: sales@cembre.co.uk E-mail: info@cembre.fr www.cembre.com www.cembre.co.uk www.cembre.fr Cembre España S.L.U. Cembre GmbH IKUMA GmbH & Co. KG Cembre Inc. Calle Verano 6 y 8 Heidemannstraße 166 Boschstraße 7 Raritan Center Business Park 28850 Torrejón de Ardoz...

Table des Matières