Publicité

Les langues disponibles
  • FR

Les langues disponibles

  • FRANÇAIS, page 15

Liens rapides

DO924DV
Handleiding
Mode d'emploi
Gebrauchsanleitung
Instruction booklet
Manual de instrucciones
Návod k použití
Návod na použitie
Diepvriezer
Congélateur
Gefrierschrank
Freezer
Congelador
Mraznička šuplíková
Mraznička
PRODUCT OF

Publicité

Table des Matières
loading

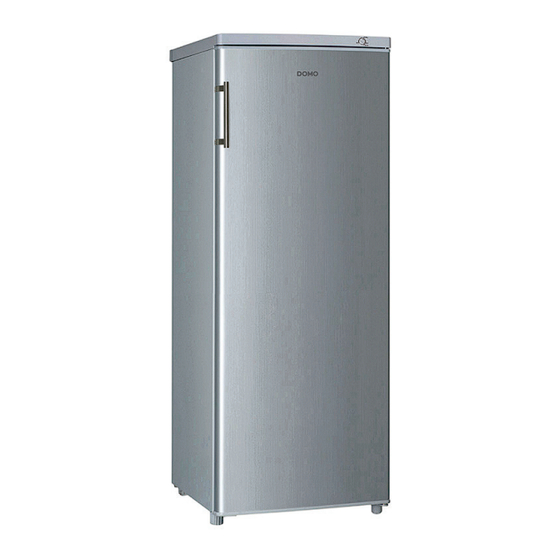
Sommaire des Matières pour Linea 2000 Domo DO924DV

  • Page 1 DO924DV Handleiding Diepvriezer Mode d’emploi Congélateur Gebrauchsanleitung Gefrierschrank Instruction booklet Freezer Manual de instrucciones Congelador Návod k použití Mraznička šuplíková Návod na použitie Mraznička PRODUCT OF...
  • Page 2 Lees aandachtig alle instructies - bewaar deze handleiding voor latere raadpleging. Lisez attentivement les instructions - gardez le mode d’emploi pour utilisation ultérieur. Lesen Sie genau die Anweisungen - bewahren Sie die Gebrauchsanleitung für spätere heranziehung. Read all instructions carefully - save this instruction manual for future reference. Lea detenidamente todas las instrucciones - Conserve este manual para futura referencia.
  • Page 3: Garantie

    GARANTIE Geachte klant, Al onze producten ondergaan steeds een strenge kwaliteitscontrole, alvorens ze aan je worden aangeboden. Mocht je desondanks toch nog problemen hebben met jouw toestel, dan betreuren wij dit ten zeerste. In dat geval verzoeken wij je contact op te nemen met onze klantendienst. Onze medewerkers zullen je met plezier verder helpen.
  • Page 4: Veiligheidsvoorschriften

    VEILIGHEIDSVOORSCHRIFTEN · Lees alle instructies voor gebruik. · Dit toestel mag gebruikt worden door kinderen vanaf 16 jaar en ouder, en door personen met een fysieke of sensoriële beperking of mensen met een beperkte mentale capaciteit of gebrek aan ervaring of kennis, op voorwaarde dat deze personen toezicht krijgen of instructies hebben gekregen over het gebruik van het toestel op een veilige manier en dat ze ook de gevaren kennen bij het gebruik van het toestel.
  • Page 5 · De fabrikant is niet verantwoordelijk voor ongelukken die een gevolg zijn van verkeerd gebruik van het toestel, of het niet naleven van de regels zoals ze vermeld zijn in deze handleiding. · Alle herstellingen, buiten het gewone onderhoud van het toestel, moeten uitgevoerd worden door de fabrikant of zijn dienst na verkoop.
  • Page 6: Installatie

    ONDERDELEN Temperatuurregelaar Laden Stelvoetjes INSTALLATIE · Verwijder alle verpakkingsmateriaal, zowel binnenin als aan de buitenkant. Maak de buitenkant van het toestel schoon met een droge doek. De binnenkant kan je reinigen met een zachte, vochtige doek. · Vermijd direct zonlicht en warmte. Zonlicht kan de buitenkant van de diepvriezer aantasten.
  • Page 7: Draairichting Van De Deur Wijzigen

    · Voor oneffen oppervlakken kunnen de voorste stelvoetjes op één lijn worden gebracht. · Installeer de handgreep. · Laat het toestel 2 uur staan vooraleer het aan te zetten. Zo kan het koelmiddel zich zetten. · Laat het apparaat gedurende 6 uur werken zonder levensmiddelen zodat de kast tot de gepaste temperatuur afkoelt.
  • Page 8 ews at rear side of top cover. unscrew ews at rear side of top cover. Haal het bovendeksel en de temperatuurregelaar van de diepvriezer af. unscrew er and thermostat knob, then place it aside. er and thermostat knob, then place it aside. er and thermostat knob, then place it aside.
  • Page 9 Screw Unscrew move the bottom hinge pin, turn the bracket over and replace it. Bevestig de schroeven, scharnierbeugel en het stelvoetje aan de andere kant van de bodem. move the bottom hinge pin, turn the bracket over and replace it. Screw Unscrew move the bottom hinge pin, turn the bracket over and replace it.
  • Page 10: Het Apparaat Verplaatsen

    HET APPARAAT VERPLAATSEN · Als het apparaat voor welke reden dan ook wordt uitgeschakeld, wacht 10 minuten voordat je het opnieuw inschakelt. De druk in het koelsysteem dient eerst te worden gestabiliseerd. · Schakel het apparaat uit en haal de stekker uit het stopcontact. Verwijder alle levensmiddelen.
  • Page 11: Diepvriesproducten Bewaren

    · Indien mogelijk, transporteer diepgevroren levensmiddelen in een thermische tas en plaats de levensmiddelen snel in de diepvriezer. Vers voedsel invriezen Vries alleen vers en onbeschadigd voedsel in. Om de best mogelijke voedingswaarde, smaak en kleur te behouden, blancheer groenten voordat je ze invriest. Aubergines, paprika’s, courgettes en asperges moeten niet worden geblancheerd.
  • Page 12: Reiniging En Onderhoud

    Nooit vergeten: · Als je verse levensmiddelen met een minimale houdbaarheidsdatum invriest, moet je deze voor het verstrijken van deze datum invriezen. · Controleer of de levensmiddelen vroeger reeds niet werden ingevroren. Ingevroren levensmiddelen die volledig ontdooid zijn, mogen niet opnieuw worden ingevroren. ·...
  • Page 13 1. Haal al het voedsel uit de diepvriezer. 2. Verwijder de stekker uit het stopcontact. 3. Reinig de diepvriezer grondig. 4. Laat de deur open om schimmelvorming en slechte geuren te vermijden. STROOMPANNE · De meeste stroompannes worden hersteld in 1 of 2 uur en zullen de temperatuur van de diepvriezer niet veranderen.
  • Page 14 MILIEURICHTLIJNEN Dit symbool op het product of op de verpakking wijst erop dat dit product niet als huishoudafval mag worden behandeld. Het moet naar een plaats worden gebracht waar elektrische en elektronische apparatuur wordt gerecycleerd. Als je ervoor zorgt dat dit product op de correcte manier wordt verwijderd, voorkom je mogelijk voor mens en milieu negatieve gevolgen die zich zouden kunnen voordoen in geval van verkeerde afvalbehandeling.
  • Page 15 GARANTIE Cher client, Tous nos produits sont soumis à des contrôles qualité stricts avant d’être proposés à la vente. Si vous deviez toutefois rencontrer un problème avec votre appareil, nous le déplorons vivement. Dans ce cas, nous vous invitons à prendre contact avec notre service à la clientèle. Nos collaboratrices se feront un plaisir de vous aider ! +32 14 21 71 91 info@linea2000.be...
  • Page 16: Consignes De Sécurité

    CONSIGNES DE SÉCURITÉ · Veuillez lire toutes les instructions avant d’utiliser l’appareil. · Cet appareil peut être utilisé par des enfants âgés d’au moins 16 ans et par des personnes ayant des capacités physiques, sensorielles ou mentales réduites ou dénuées d’expérience ou de connaissance, s’ils (si elles) sont correctement surveillé(e)s ou si des instructions relatives à...
  • Page 17 · N’immergez jamais le cordon électrique, la fiche ou l’appareil lui-même dans l’eau ou tout autre milieu liquide. · Veillez à ce que les enfants ne puissent pas toucher à l’appareil ou au cordon électrique. · Tenez le cordon éloigné de rebords tranchants et de pièces brûlantes ou d’autres sources de chaleur.
  • Page 18 INSTALLATION · Ôtez tout le matériel d’emballage, tant à l’intérieur qu’à l’extérieur. Nettoyez l’extérieur de l’appareil à l’aide d’un chiffon sec. Vous pouvez nettoyer l’intérieur de l’appareil à l’aide d’un chiffon doux et humide. · Évitez la lumière directe du soleil et la chaleur. La lumière du soleil risque de dégrader l’extérieur du réfrigérateur.
  • Page 19: Changement Du Sens D'ouverture De La Porte

    · Après installation, laissez l’appareil reposer pendant 2 heures avant de le mettre sous tension. Le gaz réfrigérant pourra ainsi se stabiliser. · Après installation, laissez l’appareil reposer pendant 6 heures avant de le mettre sous tension. Le gaz réfrigérant pourra ainsi se stabiliser. CHANGEMENT DU SENS D’OUVERTURE DE LA PORTE La porte du congélateur est réversible.
  • Page 20: Reverse Door

    Retirez la vis du bas, le support de charnière et le pied réglable du bas de l’appareil. hinge. Then remove the adjustable feet from both Reverse Door Détachez la goupille de la charnière-étrier. Retournez l’arceau, puis fixez la goupille. 5. Unscrew and remove the bottom hinge pin, turn the bracket over and replace it. move the bottom hinge pin, turn the bracket over and replace it.
  • Page 21: Déplacement De Votre Congélateur

    p hinge. r and fix it with 2 screws on the back. screw r and fix it with 2 screws on the back. screw Replacez le sélecteur de température. at knob. at knob. DÉPLACEMENT DE VOTRE CONGÉLATEUR · Si l’appareil est éteint pour une raison quelconque, attendez 10 minutes avant de le remettre en marche.
  • Page 22: Congélation Et Conservation Des Aliments Dans Le Congélateur

    par l’emplacement du congélateur, par la fréquence d’ouverture de la porte et par la température ambiante de la pièce où est installé l’appareil. · Lorsque vous utilisez l’appareil pour la première fois ou après un dégivrage, réglez le bouton de contrôle de la température jusqu’à la position maximale pendant au moins 2 heures avant d’insérer des aliments, puis réglez de nouveau le bouton sur la position moyenne.
  • Page 23: Nettoyage Et Entretien

    Placez les aliments dans des emballages. Retirez l’air. Scellez l’emballage. Étiquetez l’emballage avec le contenu et la date de congélation. Emballage approprié: Film plastique, film tubulaire de polyéthylène, papier d’aluminium, récipients de congélation. Durée de stockage des aliments surgelés recommandée dans le congélateur Ces durées varient en fonction du type d’aliment.
  • Page 24: Dégivrage Du Congélateur

    Replacez les aliments dans l’appareil. DÉGIVRAGE DU CONGÉLATEUR Une couche de givre dans le congélateur nuira à la réfrigération des aliments congelés et augmentera la consommation d’énergie. Retirez régulièrement la couche de givre. Ne retirez pas le givre ou la glace avec un couteau ou un objet pointu. Cela pourrait endommager les tubes réfrigérants.
  • Page 25: Problèmes Et Leurs Solutions

    PROBLÈMES ET LEURS SOLUTIONS Lorsqu’un problème survient à votre réfrigérateur, contrôlez aussi les questions ci-dessous avant de prendre contact avec nôtre service après-vente. L’appareil ne fonctionne pas. · L’appareil ne reçoit pas de courant, contrôlez si l’alimentation de courant est en ordre. ·...
  • Page 26: Mise Au Rebut

    MISE AU REBUT Ce symbole sur le produit ou son emballage indique que ce produit ne peut être traité comme déchet ménager. Il doit plutôt être remis au point de ramassage concerné, se chargeant du recyclage du matériel électrique et électronique.
  • Page 27 GARANTIE Sehr geehrter Kunde, Sämtliche unserer Produkte unterliegen einer strengen Qualitätskontrolle, bevor Sie Ihnen angeboten werden. Sollten dennoch Probleme mit Ihrem Gerät auftreten, bedauern wir dies zutiefst. Wir möchten Sie in diesem Fall bitten, unseren Kundenservice zu kontaktieren. Unsere Mitarbeiter helfen Ihnen gern weiter! +32 14 21 71 91 info@linea2000.be Montag –...
  • Page 28: Sicherheitsvorkehrungen

    SICHERHEITSVORKEHRUNGEN · Bitte alle Anweisungen vor dem Gebrauch durchlesen. · Dieses Gerät darf von Kindern ab 16 Jahren oder älter gebraucht werden. Ebenso dürfen Personen mit körperlicher bzw. leichter geistiger Behinderung sowie Personen mit eingeschränkter Erfahrung das Gerät betätigen. Dies unter der Voraussetzung, dass diese Personen ausreichende Anweisungen sowohl zum Gebrauch des Gerätes, als auch zu den hiermit verbundenen Gefahren erhalten haben.
  • Page 29 Gebrauch des Geräts oder Nichtbefolgen der in dieser Anleitung aufgeführten Regeln entstehen. · Sämtliche Reparaturen, abgesehen von der gewöhnlichen Pflege, sind durch den Hersteller oder dessen Kundendienst zu übernehmen. · Das Gerät, das Kabel oder den Stecker niemals in Wasser oder in andere Flüssigkeiten tauchen.
  • Page 30 TEILE Tempeaturregler Gefrierschubladen Stellfüße INSTALLATION · Das Verpackungsmaterial sowohl innen als auch außen entfernen. Die Außenseite des Apparats mit einem sauberen, feuchten Tuch reinigen. Die Innenseite kann mit einem weichen, feuchten Tuch gereinigt werden. · Direktes Sonnenlicht und Wärme vermeiden. Sonnenlicht kann die Außenseite des Kühlschranks angreifen.
  • Page 31: Öffnungsrichtung Der Tür Ändern

    · Bei unebenen Oberflächen können die vorderen Stellfüße zur Ausrichtung verwendet werden. · Montieren Sie den Griff. · Lassen Sie das Gerät nach dem Aufstellen 2 Stunden stehen, bevor Sie es einschalten. So kann sich das Kühlmittel verteilen. · Das Gerät nach dem Aufstellen vor dem Einschalten 6 Stunden stehen lassen. So kann das Kühlmittel sich verteilen.
  • Page 32 d must be saved to do the reinstallation of the door. it flat as this may damage the coolant system. ews at rear side of top cover. 2 people handle the unit during assembly. unscrew Entfernen Sie die obere Abdeckung und den Temperaturregler vom Gefrierschrank. ews at rear side of top cover.
  • Page 33 Screw Unscrew move the bottom hinge pin, turn the bracket over and replace it. Befestigen Sie die Schrauben, den Scharnierbügel und den Stellfuß an der gegenüberliegenden Seite des Bodens. Schrauben Sie diese leicht an. move the bottom hinge pin, turn the bracket over and replace it. Screw Unscrew fitting the bottom hinge pin.
  • Page 34: Versetzen Des Geräts

    VERSETZEN DES GERÄTS · Wen Sie das Gerät, unabhängig aus welchem Grund, ausschalten, warten Sie 10 Minuten, bis Sie es erneut einschalten. Der Druck im Kühlsystem muss zunächst stabilisiert werden. · Schalten Sie das Gerät aus und ziehen Sie den Netzstecker aus der Steckdose. Sämtliche Lebensmittel entnehmen.
  • Page 35 Tiefkühlwaren kaufen · Die Verpackung darf nicht beschädigt sein. · Innerhalb des Mindesthaltbarkeitsdatums verbrauchen. · Transportieren Sie Tiefkühlware nach Möglichkeit in einer Kühltasche und legen Sie diese schnell in den Gefrierschrank. Einfrieren von frischen Lebensmitteln Frieren Sie nur frische und unbeschädigte Lebensmittel ein. Zur Erhaltung des bestmöglichen Nährwertes, des Geschmacks und der Farbe blanchieren Sie Gemüse, bevor Sie es einfrieren.
  • Page 36: Reinigung Und Wartung

    Schinken, Kuchen, Rindfleisch und Lammkoteletts, Geflügelteile 4 Monate Butter, Gemüse (blanchiert), komplettes Ei und Dotter, gekochter 6 Monate Flusskrebs, Gehacktes (roh), Schweinefleisch (roh) Obst (trocken oder in Sirup), Eiweiß, Rindfleisch (roh), ganzes Huhn, 12 Monate Lammfleisch (roh), Obstkuchen Niemals vergessen: ·...
  • Page 37: Probleme Und Deren Lösung

    Stecken Sie den Stecker in die Steckdose und stellen Sie den Temperaturregler in der gewünschten Temperatur ein. Legen Sie die eingefrorenen Lebensmittel wieder in das den Tiefkühlschrank. URLAUB Falls Sie für eine kurze Zeit in Urlaub gehen, kann das Gerät eingeschaltet bleiben. Falls Sie für längere Zeit in Urlaub gehen, kann wie folgt verfahren werden : ·...
  • Page 38 · Das Gerät steht zu nah an einer Wärmequelle. Eisbildung auf der Türdichtung. · Die Türdichtung schließt nicht vollständig. Tauen Sie das Eis ab und formen Sie mit der Hand den Gummi wieder so, dass die Tür vollständig schließt. Ungewohnte Geräusche. ·...
  • Page 39 WARRANTY Dear client , All of our products are always submitted to a strict quality control before they are sold to you. Should you nevertheless experience problems with your device, we sincerely regret this. In that case, we kindly request you to contact our customer service. Our staff will gladly assist you.
  • Page 40: Safety Instructions

    SAFETY INSTRUCTIONS · Read all instructions before use. · This appliance may be used by children from the age of 16 and up, and also by persons with a physical or sensorly limitation, as well as mentally limited persons or persons with a lack of experience and knowledge.
  • Page 41 · Never immerse the appliance, the cord or the plug in water or any other liquid. · Make sure that children do not touch the cord or appliance. · Keep the cord away from sharp edges and hot parts or other heat sources. ·...
  • Page 42: Door Conversion

    · Avoid very moist places. · Before connecting your refrigerator to the power supply, check that the voltage stated on the rating label of your appliance corresponds to the voltage in your home. A different voltage could damage the appliance. ·...
  • Page 43 lips screwdriver, Flat bladed screwdriver, Hexagonal spanner. a technician. s unplugged and empty. off, it is necessary to tilt the unit backwards. You should rest the unit on something solid Before you reverse the door, you should ensure the appliance is unplugged and empty. lips screwdriver, Flat bladed screwdriver, Hexagonal spanner.
  • Page 44 Reverse Door Take the hinge pin out of the hinge bracket. Turn the bracket around and tighten the pin again. 5. Unscrew and remove the bottom hinge pin, turn the bracket over and replace it. move the bottom hinge pin, turn the bracket over and replace it. Screw Unscrew Screw...
  • Page 45: Moving Your Appliance

    screw Replace the temperature control. at knob. MOVING YOUR APPLIANCE · If the appliance is turned off for any reason, wait for 10 minutes before turning it back on. This will allow the refrigeration system pressures to equalise before restarting. ·...
  • Page 46 · To make ice cubes. · To freeze food. Note: Ensure that the freezer door has been closed properly. Avoid opening the freezer drawers unnecessarily. Purchasing frozen food · Packaging must not be damaged. · Use by the ‘use by /best before/best by/’ date. ·...
  • Page 47: Cleaning And Maintenance

    Ham, cakes, biscuits, beef and lamb chops, poultry pieces 4 months Butter, vegetables (blanched), eggs whole and yolks, cooked crayfish, 6 months minced meat (raw), pork (raw) Fruit (dry or in syrup), egg whites, beef (raw), whole chicken, lamb 12 months (raw), fruit cakes Never forget: ·...
  • Page 48: Power Failure

    · Remove all foods. · Disconnect from electrical outlet. · Clean the refrigerator thoroughly, including defrost pan. · Leave door open to avoid possible formations of condensate, mold or odors. POWER FAILURE · Most power failures are corrected within an hour or two and will not affect your refrigerator temperatures.
  • Page 49 ENVIRONMENTAL GUIDELINES This symbol on the product or on its packaging indicates that this product may not be treated as household waste. Instead it must be brought to the applicable collection point for recycling of electrical and electronic equipment. By ensuring this product is disposed of correctly, you will help prevent potential negative consequences for the environment and human health, which could otherwise be caused by...
  • Page 50 GARANTIA Este aparato tiene un periodo de garantía de 2 años a partir de la fecha de compra. Durante el periodo de garantía, el distribuidor será completamente responsable de los defectos directamente asignables a errores del material y fabricación. Cuando se detecten este tipo de errores, y siempre que se estime necesario, el aparato se sustituirá...
  • Page 51: Instrucciones De Seguridad

    INSTRUCCIONES DE SEGURIDAD · Lea todas las instrucciones antes del uso. · Este aparato está diseñado para ser utilizado por niños a partir de 16 años de edad y por personas con discapacidades físicas, sensoriales o mentales, o por personas que no dispongan de suficiente experiencia y conocimientos, a no ser que sean supervisados o instruidos inicialmente en la utilización segura del aparato y los posibles peligros.
  • Page 52 efectuadas por el fabricante o por su servicio post-venta. · No sumerja nunca el aparato, el cable o el enchufe en agua o cualquier otro líquido. · Asegúrese de que los niños no puedan tocar el cable eléctrico o el aparato. ·...
  • Page 53 INSTALACIÓN · Retire todo el material de embalaje, tanto del interior como del exterior. Limpie el exterior del aparato con un paño seco. El interior puede limpiarlo con un paño suave y húmedo. · Evite la luz directa del sol y el calor. La luz solar puede deteriorar el exterior del frigorífico. El calor aumentará...
  • Page 54 · Deje que el aparato repose 2 horas antes de encenderlo. Esto permite que el refrigerante se asiente. · Deje el aparato después de la instalación 6 horas antes de encenderlo. Así se puede asentar el refrigerante. CAMBIO DE DIRECCIÓN DE LA PUERTA El congelador tiene una puerta reversible.
  • Page 55 hinge. Then remove the adjustable feet from both Reverse Door Suelte el pasador de la bisagra de la abrazadera de la bisagra. De la vuelta a la abrazadera y vuelva a fijar el pasador. 5. Unscrew and remove the bottom hinge pin, turn the bracket over and replace it. move the bottom hinge pin, turn the bracket over and replace it.
  • Page 56 p hinge. r and fix it with 2 screws on the back. screw r and fix it with 2 screws on the back. screw Vuelva a colocar el regulador de temperatura. at knob. at knob. DESPLAZAR SU APARATO · Si el aparato se apaga por cualquier motivo, espere 10 minutos antes de volver a encenderlo.
  • Page 57 · El tiempo de funcionamiento y la temperatura dependen del lugar donde se utilice el congelador, el número de veces que se abra la puerta y la temperatura de la habitación donde se encuentre el congelador. · Cuando ponga en marcha el aparato o tras descongelarlo, sitúe el control durante un mínimo de 2 horas en la posición más fría antes de introducir los alimentos y, a continuación, seleccione la posición media.
  • Page 58: Limpieza Y Mantenimiento

    Añada al envase una etiqueta con su contenido y la fecha de congelación. Envases adecuados: película de plástico, rollo de película de polietileno, papel de aluminio o recipientes aptos para el congelador. Tiempo de conservación en el congelador recomendado para los productos congelados Este tiempo puede variar según el tipo de alimento.
  • Page 59: Problemas Y Sus Soluciones

    alimentos congelados y genera un mayor consumo energético. Elimine con regularidad la capa de hielo. No raspe el hielo con un cuchillo u otro objeto con punta. El serpentín refrigerador podría resultar dañado. Saque los alimentos congelados del congelador y guárdelos provisionalmente en un lugar frío.
  • Page 60: Directrices Medioambientales

    · Compruebe que se está utilizando el voltaje adecuado. El aparato congela demasiado. · La temperatura ajustada es demasiado fría. Ajuste la temperatura un poco más alta. La comida no está congelada. · La temperatura no se ha ajustado correctamente. Vuelva a ajustar la temperatura. ·...
  • Page 61 ZÁRUKA Pro záruku začínající dnem prodeje spotřebiče platí na území ČR tyto podmínky: 1. trvání záruky: 2 roky 2. poskytování záruky: a) záruční opravu provedeme podle našeho zvážení opravou nebo výměnou vadných dílů, jestliže tyto závady vznikly prokazatelně vadou materiálu nebo chybou při výrobě b) záruční...
  • Page 62: Bezpečnostní Pokyny

    BEZPEČNOSTNÍ POKYNY · Přístroj nesmí být používán dětmi věku mezi 0-16let. Děti starší 16 let smí přístroj používat pouze pod dohledem. Osoby se sníženou psychickou, motorickou nebo mentální schopností smí používat přístroj pouze za neustálého dohledu odpovědné osoby, která je seznámena s pravidly používání...
  • Page 63: Před Prvním Použitím

    · Větrací otvory a průduchy na přístroji udržujte vždy čisté. Nikdy nesmí být ničím zakryty. · Nikdy nepoužívejte žádný jiný elektrický přístroj uvnitř mrazničky. · Před prvním použitím si důkladně zkontrolujte zda je mraznička v pořádku a zda nebyla nijak poškozena při přepravě. ·...
  • Page 64 · Přístroj okolo sebe musí mít stále dostatečné místo na cirkulaci vzduchu. Zadní stěna přístroje musí být alespoň 13 cm od zdi, k tomu napomůžou zarážky na zadní straně, které Vám nedovolí přístroj přímo přitisknout na zeď. Tyto zarážky najdete v balení a před spuštěním je přišroubujte na zadní...
  • Page 65 s unplugged and empty. off, it is necessary to tilt the unit backwards. You should rest the unit on something solid lips screwdriver, Flat bladed screwdriver, Hexagonal spanner. slip during the door reversing process. s unplugged and empty. d must be saved to do the reinstallation of the door. off, it is necessary to tilt the unit backwards.
  • Page 66 Reverse Door Povolte závěsný kolík pantu, vyndejte otočte a kolík opět dotáhněte. 5. Unscrew and remove the bottom hinge pin, turn the bracket over and replace it. move the bottom hinge pin, turn the bracket over and replace it. Screw Unscrew Screw move the bottom hinge pin, turn the bracket over and replace it.
  • Page 67: Temperature Setting

    screw Na závěr přemístěte i kontrolku teploty. at knob. Daily Use Daily Use PŘEMISŤOVÁNÍ MRAZNIČKY First use Cleaning the interior · Pokud se mraznička z jakéhokoli důvodu vypnula, tak před jejím opětovným zapnutím Before using the appliance for the first time, wash the interior and all internal accessories with lukewarm počkejte alespoň...
  • Page 68 ZAMRAZOVÁNÍ A SKLADOVÁNÍ V MRAZÁKU Přístroj můžete využít: · uchovávat hluboce zamražené potraviny. · výroba kostek ledu. · zamražovat potraviny. UPOZORNĚNÍ: vždy se přesvědčte, že jste důkladně zavřeli dveře. Uchování mražených potravin · Obal ani krabička potravin nesmí být poškozen. ·...
  • Page 69: Čištění A Údržba

    Doporučená doba uchování v mrazáku Níže zmíněné časy jsou orientační a závisí na typu potraviny. Jídlo obecně může být v mrazáku 1-12 měsíců (při teplotě pod -18 °C) Druh potraviny Doba Slanina, dušené maso se zeleninou, mléko 1 měsíc Chleba, zmrzlina, párky, koláče, předvařené měkkýše, tučné ryby 2 měsíce Málo tučné...
  • Page 70: Výpadek Proudu

    ZABEZPEČENÍ PŘI ODJEZDU NA DELŠÍ DOVOLENOU Při krátkodobém odjezdu nechte vše tak jak je. Pokud plánuje odjet na delší čas, tak nezapomeňte: · vyndat z mrazničky všechno jídlo · odpojit přístroj z el. sítě · vytřít vnitřek mrazničky · nechat otevřené dveře, aby se vyvětrala vlhkost VÝPADEK PROUDU ·...
  • Page 71 Neobvyklý zvuk. · Spotřebič se dotýká zdi nebo dalších objektů. · Zkuste mírně posunout a spotřebič lépe usadit. OHLED NA ŽÍVOTNÍ PROSTŘEDÍ Symbol na přístroji či na jeho obalu znamená, že s tímto výrobkem není možno nakládat jako s běžným domovním odpadem, nýbrž...
  • Page 72 ZÁRUKA Pre záruku začínajúcich dňom predaja spotrebiča platí na území SR tieto podmienky: 1. trvania záruky: 2 roky 2. poskytovanie záruky: a) záručnú opravu vykonáme podľa nášho zvážení opravou alebo výmenou chybných dielov, ak tieto závady vznikli preukázateľne chybou materiálu alebo chybou pri výrobe b) záručná...
  • Page 73: Bezpečnostné Pokyny

    BEZPEČNOSTNÉ POKYNY · Prístroj nesmie byť používaný deťmi veku medzi 0-16let. Deti staršie ako 16 rokov môžu používať prístroj iba pod dohľadom. Osoby so zníženou psychickou, motorickú alebo mentálnou schopnosťou smie používať prístroj len za neustáleho dohľadu zodpovednej osoby, ktorá je oboznámená s pravidlami používania a prípadným rizikom. ·...
  • Page 74: Pred Prvým Použitím

    ochrannými ani reklamnými polepy nesmie hrať. · Vetracie otvory a prieduchy na prístroji udržujte vždy čisté. Nikdy nesmie byť ničím zakryté. · Nikdy nepoužívajte žiadny iný elektrický prístroj vnútri chladničky. · Pred prvým použitím si dôkladne skontrolujte či je chladnička v poriadku a či sa nepoškodila pri preprave.
  • Page 75 · Prístroj okolo seba musí mať stále dostatočné miesto na cirkuláciu vzduchu. Zadná stena prístroja musí byť aspoň 13 cm od steny, k tomu napomôžu zarážky na zadnej strane, ktoré Vám nedovolia prístroj priamo pritlačiť na stenu. Tieto zarážky nájdete v balení a pred spustením je priskrutkujte na zadnú...
  • Page 76 s unplugged and empty. off, it is necessary to tilt the unit backwards. You should rest the unit on something solid lips screwdriver, Flat bladed screwdriver, Hexagonal spanner. slip during the door reversing process. s unplugged and empty. d must be saved to do the reinstallation of the door. off, it is necessary to tilt the unit backwards.
  • Page 77 Unscrew Screw move the bottom hinge pin, turn the bracket over and replace it. Unscrew move the bottom hinge pin, turn the bracket over and replace it. 6. Refit the bracket fitting the bottom hinge pin. Replace both adjustable Upevnite spodný pánt na druhú stranu (tam kam chcete umiestniť dvere). Použite feet.
  • Page 78 PREMIESTŇOVANIE MRAZNIČKA · Ak sa chladničky z akéhokoľvek dôvodu vypla, tak pred jej opätovným zapnutím počkajte aspoň 10 min. Tento čas napomôže k tomu, aby sa vyrovnali tlaku vo vnútri chladiaceho systému. · Mraznička vypnite a vypojte z el. siete. Odstráňte všetko jedlo a nápoje. Z chladničky vyberte aj všetky police a pohyblivé...
  • Page 79 Zamrazovanie čerstvých potravin Zamrazujte iba čerstvé ovocie v 100% kvalite. Aby sa zachovala čo najlepšiu chuť, farba i výživová hodnota, odporúčame všetku zeleninu pred zmrazením ľahko z blanšírovať. Baklažán, papriky, cukety ani špargľa blanšírovanie nepotrebujú. POZNÁMKA: Potraviny, ktoré sa chystáte mraziť, držte mimo už zamrazené suroviny. ·...
  • Page 80: Čistenie A Údržba

    ČISTENIE A ÚDRŽBA ČISTENIE Nepoužívajte žiadna drsná čistidlá, ktoré môžu poškodiť povrch prístroja. Najskôr prístroj vypnite -vypojte zástrčku z el. siete. Všetko jedlo z prístroja vyberte a nechajte niekde v chlade. Mraznička vytierajte jemnou vlhkou handričkou. Môžete použiť aj čistiaci prostriedok. Dôkladne utrite aj tesnenia na dverách.
  • Page 81 svoju kvalitu. · Ak už nejaké potraviny kompletne sa rozpustili, nikdy ich nezmrazujte späť. RIEŠENIE MOŽNÝCH PROBLÉMOV Stáva sa, že nastane problém, ktorý sa dá ľahko vyriešiť aj bez odbornej pomoci. Najskôr skontrolujte nižšie, či sa nejedná práve o tento typ problému. Prístroj nepracuje.
  • Page 82 OHĽAD NA ŽIVOTNÉ PROSTREDIE Symbol na prístroji alebo na jeho obale znamená, že s týmto výrobkom nie je možné nakladať ako s domovým odpadom, ale musí byť odovzdaný na miestach určených na zber a likvidáciu elektrických a elektronických zariadení. Dodržaním tohto odporúčania chránite životné prostredie a zdravie spoluobčanov.
  • Page 83 www.domo-elektro.be DO924DV...
  • Page 84 über: webshop.domo-elektro.be or scan here: oder hier scannen: of scan hier: ou scannez ici: LINEA 2000 bvba - Dompel 9 - 2200 Herentals - Belgium - Tel: +32 14 21 71 91 - Fax: +32 14 21 54 63...

Table des Matières