Faber INCA HC Instructions D'installation
Masquer les pouces
Voir aussi pour INCA HC:
- Instructions d'installation (57 pages) ,
- Instructions d'installation (37 pages)

Manuels Connexes pour Faber INCA HC


Sommaire des Matières pour Faber INCA HC
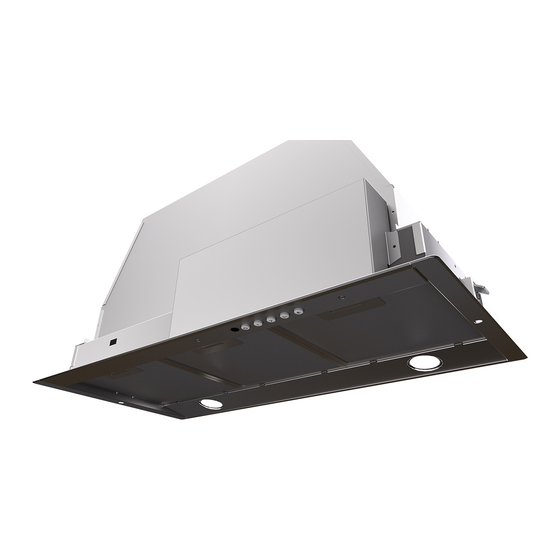
- Page 1 INCA HC Installation Instructions Use and Care Information Instructions d'installation Utilisez et d'entretien INHC29SS600-B INHC29SS400...
-
Page 18: Veuillez Lire Et Conserver La Présente Notice Avant De Commencer L'installation De La Hotte De Cuisine
VEUILLEZ LIRE ET CONSERVER LA PRÉSENTE NOTICE AVANT DE COMMENCER L'INSTALLATION DE LA HOTTE DE CUISINE AVERTISSEMENT:-POUR RÉDUIRE LE RISQUE D'UN FEU DE GRAISSE SUR LA TABLE DE CUISSON : a) Ne laissez jamais sans surveillance les éléments de la surface de cuisson à température élevée. Les bouillonnements excessifs peuvent provoquer de la fumée et les débordements de graisse peuvent s 'enflammer. L 'huile d oit ê... -
Page 19: Installation Dans Les Climats Froids
Lorsque vous faites une ouverture ou percez dans un mur ou le plafond, veillez à ne pas endommager les fils électriques ou d'autres dispositifs cachés. Les ventilateurs canalisés doivent toujours être raccordés à l'extérieur. TOUTE OUVERTURE DANS LE MUR OU LE PLANCHER À PROXIMITÉ DE LA HOTTE DOIT ÊTRE SCELLÉE. Un espace libre d'au moins 24" est requis entre le bas de la hotte et la surface de cuisson ou le comptoir. - Page 20 AVERTISSEMENT • Une mise à la terre électrique est requise pour cette hotte. • N'UTILISEZ PAS un tuyau d'eau froide pour la mise à la terre si celui-ci est branché par des joints en plastique, par des rondelles non métalliques ou d'autres matériaux. •...
-
Page 21: Dimensions De La Hotte
DIMENSIONS DE LA HOTTE 47 " Min. 24" - 30"... -
Page 22: Pièces Principales
PIÈCES PRINCIPALES Composants Réf. Qté Composants du produit Bâti de la hotte, avec : Com- mandes, é clairages, fi ltres, v entila- teur. Câble d'alimentation Grille d'évent de recirculation Registre ø 5 " Réf. Qté Composants d'installation Vis 1/8" x 3/8" (pour montage de la grille de recir- culation) Qté... -
Page 23: Options D'installation Avec Ventilation Canalisée
Pour installation avec ventilation canalisée uniquement Installez le registre inclus avec la hotte avant de la raccorder aux conduits. Choisissez la méthode de canalisation Options d'installation avec Sans canalisation - Option de ventilation canalisée recirculation Verticale 6" Exige l'achat de Hori- l'accessoire zontale... -
Page 24: Installation Avec Canalisation Verticale
LATION Fitting the Hood canopy Notice d'installation FORE FITTING THE HOOD TO THE WALL UNIT, PROCEED AS FOLLOWS: the wires to the Commands at the connectors. the wires to the Light at the con- Pratiquez l'ouverture sur la face inféri- eure de can be installed directly on the l'armoire,... - Page 25 Horizontal Ducting Installation ” > Pour l'installation d'une canalisation horizontale (à l'arrière), un espace d'au moins 2 1/2" est requis entre l'arrière de la hotte encastrable et le mur. Pour l'installation d'une canalisation horizontale, le moteur doit d'abord être détaché. Pour ce faire, retirez les 12 vis comme illustré.
- Page 26 Option non canalisée avec recirculation d'air Pour la ventilation avec recirculation sans canalisation, dirigez les conduits à un emplacement au-dessus de la hotte où l'air évacué est retourné dans la pièce. Utilisez la grille d'évent de recirculation pour couvrir l'ouverture. Fixez la grille à...
-
Page 27: Installation Électrique Avec Câble De Connexion
WIREBOX connexion pour hotte indiquée, underside of the wall unit (Minimum 650 mm (acheté séparément) no d'article WIREBOX, fabriquée par Faber. from the Cooker Hob). • Create an opening in the bottom of the wall unit, as shown. -
Page 28: Dimensions De La Caisse
30” for maximum effectiveness. Also consult the cooktop Smart. Pour l'installation avec le modèle Inca HC SS, la section supplémentaire perforée doit être retirée. ant : La hauteur recommandée pour installer cette hotte au-des- n minimum de 24”... -
Page 29: Pour L'installation Avec Caisses
1. The custom/wood hood must have a sturdy base (3/4" plywood recommended) to LINER WITH THE INCA HC SS PRÉCOUPÉE LORSQUE VOUS INS- accomodate the cut-out for the Inca HC SS. The base must be recessed to accomodate MODEL. 1. L'habillage de hotte sur mesure/en bois doit présenter the height of the Liner (see LINER DIMENSIONS on Page 4). -
Page 30: Pour De Meilleurs Résultats
INFORMATIONS POUR L'UTILISATION ET L'ENTRETIEN Pour de meilleurs résultats Activez la hotte quelques minutes avant de commencer à cuisiner pour créer un flux d'air adéquat. Laissez la hotte fonctionner quelques minutes après avoir fini de cuisiner pour absorber toute la fumée et les odeurs de la cuisine. T1. -
Page 31: Nettoyage Des Filtres À Graisse Métalliques
fixing pin lever. Nettoyage des filtres à graisse métalliques Les filtres à graisse métalliques peuvent être lavés dans une solution d'eau chaude savonneuse ou dans le lave-vaisselle. Ils • Remove grease filters. devraient être nettoyés tous les 2 mois, ou plus fréquemment en cas d'utilisation particulièrement intensive. •... - Page 32 Schéma de câblage 991.0350.534 H90-254 r1...
-
Page 33: Garantie Limitée Et Service Faber
état de marche. Pour bénéficier de services prévus par la garantie, veuillez communiquer avec le détaillant auprès duquel vous avez acheté la hotte de cuisine, ou encore avec le distributeur Faber de votre région. Si vous n'êtes pas en mesure de localiser un distributeur Faber dans votre région, veuillez communiquer avec nous au 508-358-5353 pour connaître le nom d'un distributeur à... - Page 36 991.0379.328_06 - 180109 D00001421_05...