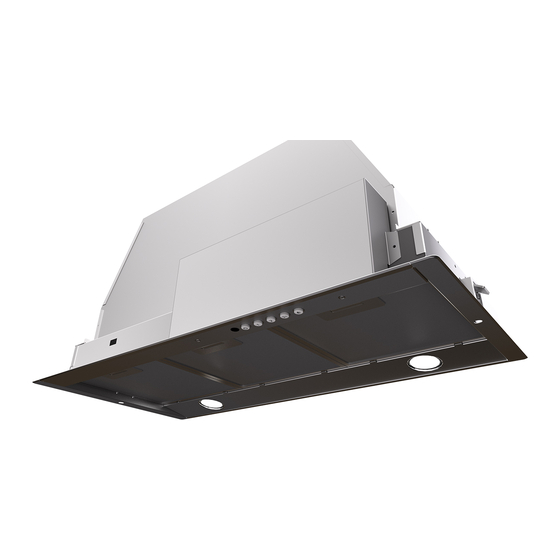
Faber INCA HC Instructions D'installation
Masquer les pouces
Voir aussi pour INCA HC:
- Instructions d'installation (37 pages) ,
- Instructions d'installation (57 pages)

Manuels Connexes pour Faber INCA HC


Sommaire des Matières pour Faber INCA HC
-
Page 18: Veuillez Lire Et Conserver La Présente Notice Avant De Commencer L'installation De La Hotte De Cuisine
All manuals and user guides at all-guides.com VEUILLEZ LIRE ET CONSERVER LA PRÉSENTE NOTICE AVANT DE COMMENCER L'INSTALLATION DE LA HOTTE DE CUISINE AVERTISSEMENT:-POUR RÉDUIRE LE RISQUE D'UN FEU DE GRAISSE SUR LA TABLE DE a) Ne laissez jamais sans surveillance les éléments de la surface de cuisson à température élevée. Les bouillonnements excessifs peuvent provoquer de la fumée et les débordements de graisse b) Assurez-vous de toujours mettre en marche le ventilateur de la hotte lorsque vous cuisinez c) Nettoyez régulièrement les ventilateurs d'aspiration. -
Page 19: Critères De Ventilation
All manuals and user guides at all-guides.com Lorsque vous faites une ouverture ou percez dans un mur ou le plafond, veillez à ne pas Un espace libre d'au moins 24 " est requis entre le bas de la hotte et la surface de d'installation de la surface de cuisson ou de la hotte fournie par le fabricant avant de pratiquer des ouvertures. - Page 20 All manuals and user guides at all-guides.com AVERTISSEMENT...
-
Page 21: Dimensions De La Hotte
All manuals and user guides at all-guides.com DIMENSIONS DE LA HOTTE 47 " Min. 24"... -
Page 22: Pièces Principales
All manuals and user guides at all-guides.com PIÈCES PRINCIPALES Composants Réf. Qté Composants du produit Bâti de la hotte, avec : Com- teur. Câble d'alimentation Grille d'évent de recirculation Registre ø 5 " Réf. Qté Composants d'installation Vis 1/8" x 3/8" (pour montage de la grille de recir- culation) Qté... - Page 23 All manuals and user guides at all-guides.com Pour installation avec ventilation canalisée uniquement Installez le registre inclus avec la hotte avant de la raccorder aux conduits. Choisissez la méthode de canalisation Options d'installation avec Sans canalisation - Option de ventilation canalisée recirculation Verticale 6"...
-
Page 24: Installation Avec Canalisation Verticale
All manuals and user guides at all-guides.com Notice d'installation Pratiquez l'ouverture sur la face inféri- eure de l'armoire, comme il- lustré à la Figure 1. encastrable avant de l'installer dans l'armoire. • Screw the Frame into place Installation avec canalisation verticale Installez le clapet de toiture ou le clapet mural acheté... - Page 25 All manuals and user guides at all-guides.com Horizontal Ducting Installation ” > Pour l'installation d'une canalisation horizontale (à l'arrière), un espace d'au moins 2 1/2" est requis entre l'arrière de la hotte encastrable et le mur. Pour l'installation d'une canalisation horizontale, le moteur doit d'abord être détaché.
- Page 26 All manuals and user guides at all-guides.com Option non canalisée avec recirculation d'air Pour la ventilation avec recirculation sans canalisation, dirigez les conduits à un emplacement au-dessus de la hotte où l'air évacué est retourné dans la pièce. Utilisez la grille d'évent de recirculation pour couvrir l'ouverture.
-
Page 27: Installation Électrique Avec Câble De Connexion
Boîtier de connexion directe, utilisez uniquement la trousse de boîtier de no d'article WIREBOX connexion pour hotte indiquée, (acheté séparément) no d'article WIREBOX, fabriquée par Faber. Pour option non canalisée avec recirculation d'air charbon à la grille noire de chaque... -
Page 28: Dimensions De La Caisse
36”. Remarque : Les caisses standards sont précoupées pour l'installation du modèle Inca Smart. Pour l'installation avec le modèle Inca HC SS, la section supplémentaire perforée doit être retirée. - Important : Il est recommandé d'installer cette hotte à... -
Page 29: Pour L'installation Avec Caisses
(contre-plaqué de 3/4" recommandé) AVEC LE MODÈLE INCA HC SS. pour permettre l'ouverture pour la hotte Inca HC SS. La Tenez compte de la forme, de la base doit être amincie pour accueillir la hauteur de la dimension et du poids de la hotte Inca caisse (consultez DIMENSIONS DE LA CAISSE à... -
Page 30: Informations Pour L'utilisation Et L'entretien
All manuals and user guides at all-guides.com INFORMATIONS POUR L'UTILISATION ET L'ENTRETIEN Pour de meilleurs résultats absorber toute la fumée et les odeurs de la cuisine. T1. Bouton Arrêt du ventilateur : éteint le ventilateur. Le ventilateur peut être allumé en ap- puyant sur l'un ou l'autre des boutons de réglage. - Page 31 All manuals and user guides at all-guides.com solution d'eau chaude savonneuse ou dans le lave-vaisselle. Ils devraient être nettoyés tous les 2 mois, ou plus fréquemment • Remove grease filters. en cas d'utilisation particulièrement intensive. • l'arrière de l'appareil et en le tirant vers le bas. •...
-
Page 32: Schéma De Câblage
All manuals and user guides at all-guides.com Schéma de câblage... -
Page 33: Garantie Limitée Et Service Faber
état de marche. Pour bénéficier de services prévus par la garantie, veuillez communiquer avec le détaillant auprès duquel vous avez acheté la hotte de cuisine, ou encore avec le distributeur Faber de votre région. Si vous n'êtes pas en mesure de localiser un distributeur Faber dans votre région, veuillez communiquer avec nous au 508-358-5353 pour connaître le nom d'un distributeur à...