Télécharger Imprimer la page

Publicité

Les langues disponibles

Les langues disponibles

Liens rapides

IT
Guida pratica all'uso
User instructions
EN
Mode d'emploi
FR
Bedienungsanleitung
DE
CDSM 2D62B
CDSM 2D62W
CDSM 2D62X
LAVASTOVIGLIE
DISHWASHER
LAVE-VAISSELLE
GESCHIRRSPÜLER

Publicité

loading

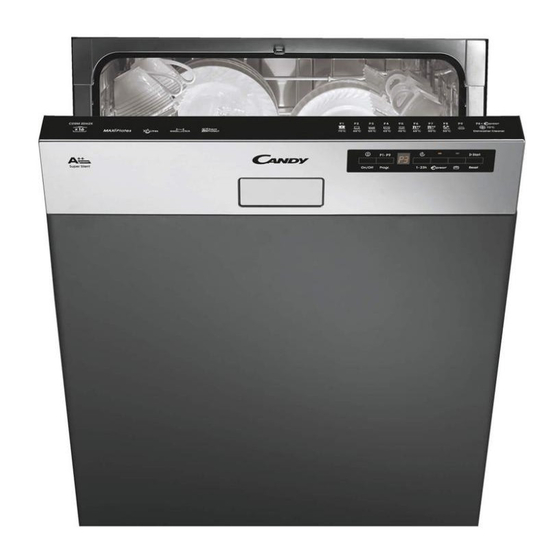
Sommaire des Matières pour Candy CDSM 2D62B

  • Page 1 Guida pratica all’uso User instructions Mode d’emploi Bedienungsanleitung CDSM 2D62B CDSM 2D62W CDSM 2D62X LAVASTOVIGLIE DISHWASHER LAVE-VAISSELLE GESCHIRRSPÜLER...
  • Page 2 Candy, Lei ha dimostrato di non accettare compromessi: Lei vuole il meglio. Candy è lieta di proporLe questa nuova lavastoviglie, frutto di anni di ricerche e di esperienze maturate sul mercato, a contatto diretto con i Consumatori.
  • Page 3 INDICE Norme generali di sicurezza pag. 4 Alimentazione idrica pag. 7 Caricare il sale pag. 9 Regolazione del cesto superiore pag. 10 Caricamento delle stoviglie pag. 11 Informazioni per laboratori di prova pag. 13 Caricamento detersivo pag. 14 Tipi di detersivo pag.
  • Page 4 scano i pericoli del suo utilizzo. NORME GENERALI DI Evitare che i bambini giochino con SICUREZZA l’apparecchio o che si occupino della sua pulizia e manutenzione Questo apparecchio è destinato senza supervisione. ad un uso in ambienti domestici e simili come per esempio: I bambini dovrebbero essere - nelle aree ristoro di negozi, uffici e supervisionati per assicurarsi che...
  • Page 5 In generale è sconsigliabile l'uso di Per il numero massimo di coperti adattatori, prese multiple e/o pro- fare riferimento alla tabella "DATI lunghe. TECNICI". Non tirare il cavo di alimentazione, o l'apparecchio stesso, per stac- care la spina dalla presa di cor- ATTENZIONE! rente.
  • Page 6 Questo apparecchio è confor- Qualora fosse necessario traspor- me alle Direttive Europee: tare manualmente la macchina disimballata, non impugnare la 2006/95/EC (LVD); porta in basso, ma aprire legger- 2004/108/EC (EMC); mente la porta e sollevare impu- gnando il ripiano superiore. 2009/125/EC (ErP);...
  • Page 7 ALIMENTAZIONE IDRICA IMPORTANTE L’apparecchio deve essere connesso alla rete idrica, solo con i nuovi tubi di carico forniti in dotazione. I vecchi tubi di carico non devono essere riu- tilizzati. I tubi di carico e scarico possono esse- re orientati indifferentemente verso destra o verso sinistra.
  • Page 8 L'estremità ricurva del tubo di scarico Collegamento allo scarico può essere appoggiata al bordo di un d'acqua lavello, ma non deve rimanere immersa nell'acqua, per evitare il risucchio nell'apparecchio durante il programma di lavaggio (fig. 4Y). Infilare il tubo nell'impianto di scarico, senza creare pieghe (fig.
  • Page 9 CARICARE IL SALE Il contenitore ha una capacità di circa 1,5÷1,8 kg di sale e, per una efficace utilizzazione dell'apparecchio, è neces- sario riempirlo periodicamente a secon- La comparsa di macchie biancastre do della regolazione del proprio impian- sulle stoviglie è generalmente un indice to di decalcificazione.
  • Page 10 REGOLAZIONE DEL CESTELLO SUPERIORE Utilizzando abitualmente piatti da 29 cm a 32,5 cm di diametro, caricarli nel cesto infe- riore dopo aver spostato quello superiore nella posizione più alta, procedendo nel seguente modo: 1. Estrarre il cesto superiore; 2. Impugnare il cesto da entrambi i lati e tirarlo verso l’alto (fig.
  • Page 11 Un carico standard giornaliero è rappre- CARICAMENTO DELLE sentato nelle fig. 1, 2 e 3. STOVIGLIE Cesto superiore (fig. 1) Utilizzo del cesto superiore A = piatti fondi B = piatti piani Il cesto superiore è dotato di supporti C = piatti dessert mobili agganciati alla sponda laterale, in D = sottotazze grado di assumere 4 posizioni.
  • Page 12 - POSIZIONE "B": per piatti di forma par- Cesto superiore (fig. 3) ticolare anche se di dimensioni standard A = bicchieri (fondine molto profonde, quadrate o B = sottotazze senza bordo, ecc…). C = tazze D = coppa piccola - POSIZIONE "C": per piatti piani più E = coppa media grandi della media e/o di forma particola- F = coppa grande...
  • Page 13 Richiedere le informazioni necessarie per effettuare i test comparativi e le misure di rumuore, secondo le Norme EN, al seguente indirizzo: testinfo-dishwasher@candy.it Nella richiesta, si prega di specificare il modello ed il numero di matricola della lavastoviglie (vedere targhetta dati).
  • Page 14 CARICAMENTO DETERSIVO Il detersivo IMPORTANTE Utilizzare esclusivamente detersivi in polvere, liquidi o in pastiglie spe- cifici per lavastoviglie. Nella lavastoviglie si trova una confezione campione di ”FINISH” che assicura ottimi risultati di lavaggio. Dopo aver versato il detersivo nel contenitore, richiudete lo sportellino, prima Detersivi non idonei (come quelli per il spingendolo (1) ed infine premendo lavaggio a mano) non contengono gli...
  • Page 15 e alle avvertenze indicate sulla confezione TIPI DI DETERSIVO del detersivo combinato che si intende utilizzare; Detersivi in pastiglie l’efficacia dei prodotti che rendono non I detersivi in pastiglie di differenti produttori necessario l’utilizzo del sale dipende si sciolgono a velocità diverse, quindi nei dalla durezza dell’acqua di alimentazione programmi brevi,...
  • Page 16 CARICAMENTO BRILLANTANTE Il brillantante Questo additivo, che viene immesso automaticamente nell'ultima fase di risciacquo, favorisce una rapida asciugatura delle stoviglie evitando il formarsi di macchie e sedimenti opachi. Caricare il brillantante Alla sinistra della vaschetta del detersivo, si trova contenitore brillantante (fig.
  • Page 17 PULIZIA DEI FILTRI Il sistema filtrante (fig. A "4") è costituito da: Bicchierino centrale, che trattiene le parti- celle più grosse di sporco; Piastra, che filtra continuamente l'acqua di lavaggio; Microfiltro, posto sotto la piastra, che trat- tiene anche le particelle di sporco più pic- cole assicurando un'ottimo risciacquo.
  • Page 18 CONSIGLI PRATICI Consigli utili per risparmiare Consigli per ottenere ottimi Nel caso si volesse lavare a pieno cari- co, riponete le stoviglie nella macchina risultati di lavaggio appena terminati i pasti, sistemandole in più riprese, effettuando eventualmen- Prima di disporre le stoviglie nella mac- te il programma AMMOLLO per ammor- china, asportare i residui di cibo (ossici- bidire lo sporco ed eliminare i residui...
  • Page 19 PULIZIA E MANUTENZIONE ORDINARIA Per pulire l'esterno della lavastoviglie non si devono usare, né solventi (sgras- santi) né abrasivi, ma solo un panno imbevuto di acqua tiepida. La lavastoviglie non richiede alcuna manutenzione speciale, poichè la vasca di lavaggio è autopulente. Pulire regolarmente la guarnizione in gomma dello sportello con un panno umido, eliminando accuratamente even-...
  • Page 20 DESCRIZIONE DEI COMANDI Pulsante "ON/OFF" Pulsante "START"/"RESET" (avvio/annullamento programma) Pulsante "SELEZIONE PROGRAMMA" Spie "SELEZIONE OPZIONE" Pulsante "PARTENZA DIFFERITA" Display digitale Pulsante opzione "EXPRESS" Descrizione programmi Pulsante opzione "ALL IN 1" DIMENSIONI Larghezza x Altezza x Profondità (cm) 59,8 x 81,8 ÷ 89,8 x 57 Ingombro con porta aperta (cm) DATI TECNICI Coperti (EN 50242)
  • Page 21 SCELTA DEL PROGRAMMA Interruzione di un programma E FUNZIONI PARTICOLARI Sconsigliamo l’apertura dello sportello durante lo svolgimento del programma, in Impostazione dei programmi particolare durante la fase centrale del lavaggio e del risciacquo finale caldo. Tuttavia, se a programma avviato si apre lo Aprire lo sportello ed introdurre le stovi- sportello (per esempio perché...
  • Page 22 Svolgimento del programma ATTENZIONE! Una volta selezionata, l'opzione resta attiva (spia corrispondente accesa) Durante lo svolgimento del programma, nel anche per successivi programmi di display viene visualizzato il tempo rima- lavaggio e potrà essere disattivata nente a fine ciclo che si aggiornerà auto- (spia corrispondente spenta) solo maticamente col trascorrere dei minuti.
  • Page 23 Se si desidera annullare la partenza ritar- Memorizzazione dell'ultimo data procedere nel seguente modo: programma utilizzato Tenere premuto per almeno 3 secondi il Per abilitare la memorizzazione dell'ultimo pulsante "RESET". Sul display verrà programma utilizzato procedere visualizzato "00" e verranno emessi dei seguente modo: segnali acustici.
  • Page 24 La lavastoviglie è in grado di segnalare una serie di anomalie visualizzate sul display SEGNALAZIONE AUTOMATICA DI ANOMALIE ANOMALIA CAUSA RIMEDIO Mancanza acqua (rubinetto dell'ac- Spegnere la lavastoviglie, aprire il Sul display compare qua chiuso). rubinetto e reimpostare il ciclo. accompagnato da un breve segnale acustico.
  • Page 25 AQUAPROTECT – TUBO DI CARICO PROTETTO IL tubo di carico dell’acqua primario è inserito in una guaina di contenimento traspa- rente. In caso di perdita d’acqua dal tubo primario interno, la stessa viene contenuta tra il tubo e la guaina trasparente. La presenza d’acqua nella guaina trasparente è visual- mente riconoscibile.
  • Page 26 ELENCO DEI PROGRAMMI Lavaggio con prelavaggio Per i programmi con prelavaggio, si consiglia di aggiungere una seconda dose di detersivo (MAX. 10 grammi) direttamente nella lavastoviglie. Programma Descrizione Ciclo con azione antibatterica, adatto a lavare ed Igienizzante 75°C igienizzare stoviglie (anche particolarmente incrostate) biberon, ecc…...
  • Page 27 Durata Funzioni Operazioni da compiere Svolgimento del Programma media in Facoltative Minuti • • • • • 75°C • • • • 60°C • • • • 55°C • • • • • 45°C • • • • 45°C • •...
  • Page 28 IMPIANTO DI DECALCIFICAZIONE La regolazione è stata impostata dalla fabbrica al livello 4 (d4) in quanto questo L'acqua contiene in misura variabile, a soddisfa la maggior parte dell'utenza. seconda delle località, sali calcarei e minera- li che si possono depositare sulle stoviglie A seconda del livello di appartenenza della lasciando macchie e depositi biancastri.
  • Page 29 RICERCA PICCOLI GUASTI Se la Vostra lavastoviglie non funzionasse, prima di chiamare il Servizio Assistenza, fare i seguenti controlli: ANOMALIA CAUSA RIMEDIO Spina corrente elettrica non inserita Inserire spina nella presa 1 - Non funziona con qualsiasi Tasto O/I non inserito Inserire tasto programma Sportello aperto...
  • Page 30 ANOMALIA CAUSA RIMEDIO Vedi cause 5 Controllare Fondo di pentole non Croste troppo tenaci, da ammorbidire perfettamente lavato prima del lavaggio in lavastoviglie Bordo di pentole non Posizionare meglio la pentola perfettamente lavato Smontare i bracci di lavaggio, Spruzzatori parzialmente otturati svitando le ghiere di fissaggio in senso orario e lavare il tutto sotto un getto d’acqua...
  • Page 31 Congratulations! CUSTOMER SERVICE AND GUARANTEE Thank you for choosing a Candy Your new appliance is fully guaranteed appliance; quality dishwashers which by the manufacturer for 12 months guarantee high performance and against electrical/mechanical break- reliability. down excluding: Candy manufacture a vast range of domestic appliances: washing A.
  • Page 32 CONTENTS pag. General safety rules Water connection pag. Loading the salt pag. pag. Adjusting the upper basket pag. Loading the dishes pag. Information for test laboratories pag. Loading the detergent Types of detergent pag. Loading the rinse aid pag. Cleaning the filters pag.
  • Page 33 above and persons with reduced GENERAL SAFETY RULES physical, sensory or mental capabilities or lack of experience This appliances is intended to be and knowledge if they have been used in household and similar given supervision or instruction applications such as: concerning use of the appliance in a safe way and understand the - staff kitchen areas in shops,...
  • Page 34 In general it is not advisable to use For the maximum place loading, adaptors, multiple plugs and/or please refer to the "TECHNICAL extension cables. DATA" table/section. Do not remove the plug from the mains supply socket by pulling the WARNING ! mains cable or the machine itself.
  • Page 35 Appliance complies with If it you need to move the machi- European Directives: ne after removing the packaging, do not try to lift it by the bottom of the door. 2006/95/EC (LVD); Open the door slightly and lift the 2004/108/EC (EMC); machine by holding on the top.
  • Page 36 WATER CONNECTION IMPORTANT The appliance must be connected to the water mains using new hose-sets. The old hose-sets should not be reused. The inlet and drain hoses can be directed to left or right. IMPORTANT The dishwasher can be connected to either cold or hot water, as long as it is no hotter than 60°C.
  • Page 37 The hose can be hooked over the side of Connecting the outlet hose the sink, but it must not be immersed in water, in order to prevent water from being syphoned back to the machine The outlet hose should disharge into a when this is in operation (fig.
  • Page 38 The salt dispenser has a capacity of LOADING THE SALT between 1.5 and 1.8 kg and, for efficient use of the appliance, it should be refilled from time to time according to the The appearance of white stains on dishes regulation of the water softener unit.
  • Page 39 ADJUSTMENT OF THE UPPER BASKET If 29 cm to 32,5 cm plates are normally used, load them onto the lower basket after the upper basket has been placed in its upper position and proceed as detailed below: 1. Pull out the upper basket; 2.
  • Page 40 LOADING DISHES A standard daily load is represented in figs. 1, 2 and 3. Using the upper basket Upper basket (fig. 1) The upper basket is provided with A = soup plates mobile racks hooked to the sides of the B = dinner plates basket, which can be regulated into 4 C = dessert plates...
  • Page 41 Upper basket (fig. 3) - POSITION “B”: for dishes which, although standard size, have a particular A = glasses shape (very deep bowls, square dishes B = saucers or ones without borders etc.). C = cups D = small bowl - POSITION “C”: for larger than average E = medium bowl flat plates and/or ones with non-...
  • Page 42 LABORATORIES Please ask information required for comparison testing and measuring noise levels, according to EN normative, to the following address: testinfo-dishwasher@candy.it In the request, please specify model name and number of the dishwasher (see rating plate). Lower basket (fig. 8)
  • Page 43 LOADING THE DETERGENT The detergent IMPORTANT It is essential to use a detergent that is specifically designed for dishwashers either in powder, liquid or tablet form. After pouring the detergent into the container, close the lid, firstly pushing (1) and then “FINISH”...
  • Page 44 TYPES OF DETERGENT the effectiveness of detergents containing the built in water softener/salt depends on the hardness of your water supply. Detergent tablets Check that the hardness of your water supply is within the effective range given Detergent tablets of different manufacturers on the detergent packaging.
  • Page 45 LOADING THE RINSE AID The rinse aid The rinse aid, which is automatically released during the last rinsing cycle, helps the dishes to dry quickly and prevents spots and stains forming. Filling the rinse aid container The rinse aid container can be found to the left of the detergent container (fig.
  • Page 46 CLEANING THE FILTERS The filter system (fig.A “4”) consists of: a central container that traps the larger particles; a flat gauze that continuously filters the wash water; a micro filter, located beneath the gauze, that traps the tiniest particles ensuring a perfect rinse.
  • Page 47 PRATICAL HINTS How to make savings How to get really good wash If you want the dishwasher to give a complete wash, place the dishes in the results dishwasher at the end of each meal and if necessary turn on the COLD RINSE Before placing the dishes in the cycle to soften the food remains and dishwasher, remove any remaining...
  • Page 48 CLEANING AND MAINTENANCE To clean the dishwasher outside, do not use solvents (degreasing action) neither abrasives, but only a cloth soaked with water. The dishwasher does not require special maintenance, because the tank is self-cleaning. Regularly wipe the door gasket with a damp cloth to remove any food remains or rinse aid.
  • Page 49 DESCRIPTION OF THE CONTROL PANEL "ON/OFF" button "START"/"RESET" button (start/cancelling programme) "PROGRAMME SELECTION" button "OPTION SELECTION" lights "DELAY START" button "EXPRESS" option button DIGITAL DISPLAY "ALL IN 1" option button Programme guide DIMENSIONS 59,8 x 81,8 ÷ 89,8 x 57 Width x Height x Depth (cm) Depth with door open (cm) TECHNICAL DATA...
  • Page 50 PROGRAMME SELECTION Programme interruption AND SPECIAL FUNCTIONS Opening the door when a programme is (Use in conjunction with programme guide) running is not recommended especially during the main wash and final hot rinse phases. However, if the door is opened while a Programme settings programme is running (for example, to add dishes) the machine stops automatically and...
  • Page 51 Programme operations WARNING! Once selected, this option keeps Whilst a programme is running, the display being on (light on) also for next shows the time remaining to the end of the washing cycles and it can be de-activate cycle, which is automatically updated. (light off) only by pressing the button once again.
  • Page 52 Proceed as follows to cancel a delayed To turn the alarm on again, follow the same start: procedure. Hold the "RESET" button down for at Memorization of the last least 3 seconds. "00" will appear on the display and some audible signals will programme used sound.
  • Page 53 The dishwasher is able to signal a series of faults in the display. AUTOMATIC FAULT SIGNALS FAULTS CAUSE SOLUTION No water (inlet hose closed). Turn off the dishwasher, open the appears on the display and inlet hose and reset the cycle. the alarm sounds.
  • Page 54 PROGRAMME GUIDE Wash with prewash For wash programmes with prewash, it is advisable to add a second dose of detergent (max. 10 g) directly in the machine. Programme Description An antibacterial cycle, intended for washing and Hygienic sterilising dishes (even heavily stained ones) 75°C babies’...
  • Page 55 Avarage Special function Programme contents Check list duration buttons in minutes available • • • • • 75°C • • • • 60°C • • • • 55°C • • • • • 45°C • • • • 45°C • •...
  • Page 56 AQUAPROTECT – PROTECTED INCOMING WATER PIPE The main inlet pipe is contained within a protective transparent hose. In the event of damage occurring to the main inlet pipe any water leakage is retained within the transparent hose. If water has leaked from the main inlet pipe there will be a visible sign within the transparent hose.
  • Page 57 WATER SOFTENER UNIT * The softener unit is set in the factory at level 4 (d4) as this satisfies the requirements of the majority of users. Depending on the source of the supply, water contains varying amounts of limestone and minerals which are deposited on the dishes leaving whitish stains and marks.
  • Page 58 IDENTIFYING MINOR FAULTS Should the dishwasher fail to operate, before contacting the Service Centre, make the following checks: FAULT CAUSE REMEDY Plug is not connected to wall Connect electric plug socket O/I button has not been pressed Press button 1 - Machine completely dead Door is open Close door No electricity...
  • Page 59 FAULT CAUSE REMEDY See causes for no. 5 Check Bottom of saucepans have not Burnt on food remains must been washed well be soaked before putting pans in dishwasher Edge of saucepans have not Reposition saucepans been washed well Spray arms are partially blocked Remove spray arms by unscrewing ring nuts clockwise and wash under running water...
  • Page 60 éxigence: contacter gratuitement l’assistance vous voulez le meilleur. technique. Candy est heureux de vous proposer cette nouvelle machine, fruit d’années Veuillez garder votre ticket d’achat et le mettre dans un endroit sûr en cas de recherches d’expériences...
  • Page 61 INDICE pag. 62 Règles générales de sécurité pag. 65 Branchement hydraulique pag. 67 Chargement du sel pag. 68 Réglage du panier supérieur pag. 69 Chargement de la vaisselle pag. 71 Information pour les tests laboratoire pag. 72 Chargement du produit de lavage pag.
  • Page 62 handicap physique, moteur ou RÈGLES GÉNÉRALES mental, et manquant de connais- DE SÉCURITÉ sance sur l’utilisation de l’appareil, Cet appareil a pour vocation d’être si elles sont sous la surveillance utilisé au sein du foyer, ou dans d’une personne, donnant des ces différentes situations: instructions pour une utilisation en toute sécurité...
  • Page 63 L'utilisation de prises multiples Pour un chargement maximal, et/ou rallonges est déconseillée veuillez vous référer à la section et dégage le constructeur de "DONNÉES TECHNIQUES". toutes responsabilités. Ne pas tirer sur le câble ATTENTION! d'alimentation de l'appareil pour couteaux autres débrancher la prise du courant.
  • Page 64 Le produit a été conçu et fabri- Si vous avez besoin de déplacer qué en avec les directives la machine après avoir enlevé Européenne suivantes: l'emballage, n’essayez pas de le soulever par le bas de la porte. Ouvrez la porte et soulevez 2006/95/EC (LVD);...
  • Page 65 BRANCHEMENT HYDRAULIQUE IMPORTANT L'appareil doit être relié à l'arrivèe d'eau, exclusivement avec le tuyaux fournis. Ne pas réutiliser les anciens tuyaux. Les tuyaux de vidange et de remplissage peuvent être orientés façon indifférente vers la droite ou vers la gauche. IMPORTANT Le lave-vaisselle peut-être relié...
  • Page 66 L'extrémité recourbée du tuyau de Raccordement à la vidange vidange peut être accrochée au bord d'un évier, mais ne doit pas rester immergée, pour éviter le siphonnage de Pour la vidange, introduire le tuyau dans l'appareil pendant le programme de l'installation de vidange, en prenant soin lavage (fig.
  • Page 67 CHARGEMENT DU SEL Pour utilisation optimale l’appareil, le réservoir à sel, dont la capacité varie de 1,5 à 1,8 kg, doit être L’apparition de taches blanches sur la rempli de temps en temps en fonction du vaisselle est généralement un signe qui réglage opéré...
  • Page 68 RÉGLAGE DU PANIER SUPÉRIEUR Quand on utilise habituellement des assiettes de 29 à 32,5 cm de diamètre, charger celles-ci dans le panier inférieur après avoir mis le panier supérieur à sa position la plus haute en procédant comme suit: 1. Faire glisser le panier supérieur vers l’exterieur;...
  • Page 69 CHARGER LA VAISSELLE Un chargement standard journalier est indiqué dans les fig. 1, 2 et 3. Utilisation du panier supérieur Le panier supérieur est pourvu de Panier supérieur (fig. 1) supports mobiles accrochés au bord A = assiettes creuses latéral et pouvant occuper 4 positions. B = assiettes plates C = assiettes à...
  • Page 70 Panier supérieur (fig. 3) - POSITION "B": pour les assiettes de formes particulières même si sont de A = verres dimensions standards (assiettes creuses B = soucoupes très profondes, assiettes carrées, assiettes C = tasses sans rebords etc…). D = coupe petite E = coupe moyenne - POSITION "C": pour les assiettes plates, F = coupe grande...
  • Page 71 (selon les normes EN), merci de vous adresser: testinfo-dishwasher@candy.it Dans votre, demande, merci de spécifier le modèle ainsi que le numéro de série du lave-vaisselle (cf. étiquette données). Panier inférieur (fig. 8)
  • Page 72 CHARGEMENT DU PRODUIT DE LAVAGE Le produit de lavage IMPORTANT Il est indispensable d'utiliser de la lessive en poudre, liquide ou en pastilles spécialement destiné aux machines à laver la vaisselle. Après le versement du détergent dans le "CALGONIT" donne les meilleurs résultats bac à...
  • Page 73 TYPES DE PRODUITS DE Produits de lavage combinés LAVAGE “Tout en un” Si vous envisagez d’utiliser des produits lessiviels combinés "Tout en un" ("3 en 1"/"4 en 1"/"5 en 1", etc…) par exemple ceux Produits de lavage en tablettes composés de sel et/ou d’ agents de rinçage, nous vous conseillons de: Les produits de lavage en tablettes des lire attentivement et de suivre les...
  • Page 74 CHARGEMENT DU PRODUIT DE RINÇAGE Le produit de rinçage additif introduit automatiquement à la dernière opération de rinçage, assure le séchage rapide de la vaisselle et évite la formation sur celle-ci de taches blanchâtres. Charger le produit de rinçage A la gauche du bac à lessive se trouve le réservoir du produit de rinçage (fig.
  • Page 75 NETTOYAGE DES FILTRES Le système de filtrage (fig. A ’’4’’) est constitué par: un réservoir central qui retient les grosses particules; plaque métallique filtre continuellement l’eau de lavage; un micro filtre autonettoyant, situé sous la plaque métallique, qui piège les micro salissures pour garantir un rinçage parfait.
  • Page 76 CONSEILS PRATIQUES Que faire pour economiser Au cas où l'on voudrait laver à pleine Que faire pour avoir charge, ranger la vaisselle dans le lave-vaisselle dès que le repas est d'excellents résultats de lavage terminé et en effectuant éventuellement le programme TREMPAGE (ou RINCAGE A FROID) pour ramollir la saleté...
  • Page 77 NETTOYAGE EXTERNE ET de laine d'acier. Le lave-vaisselle possède un adoucisseur et il est conseillé l'usage ENTRETIEN de sel pour éviter la formation de dépôt blanchâtre sur la vaisselle. Pour le nettoyage externe de la machine, ne pas utiliser de détergent ni d’abrasifs présence taches mais uniquement un chiffon avec du...
  • Page 78 DESCRIPTION DE LA MACHINE Touche "ON/OFF" Touche "START"/"RESET" ("MARCHE/ARRÊT") (départ/annulation programme) Touche "PROGRAMMES" Voyants "SÉLECTION D’OPTION" Touche "DEPART DIFFERE" AFFICHEUR Touche option "EXPRESS" Description des programmes Touche option "ALL IN 1" (“TOUT EN UN”) DIMENSIONS Largeur x Hauteur x Profondeur (cm) 59,8 x 81,8 ÷...
  • Page 79 SELECTION DES PROGRAMMES Interruption du programme ET FONCTIONS SPÉCIALES Nous vous déconseillons d’ouvrir la porte pendant l’exécution du programme, surtout Choix des programmes pendant la phase centrale du lavage et celle du rinçage chaud final. Cependant, si vous ouvrez la porte lorsque le Ouvrez la porte et rangez la vaisselle à...
  • Page 80 Déroulement du programme ATTENTION! Une fois sélectionnée, l'option reste Durant le déroulement du programme, active (voyant correspondant allumé) l’écran affiche le temps restant avant la fin pour programmes de lavage suivants du cycle. Temps qui se met à jour et pourra être désactivée (voyant automatiquement.
  • Page 81 Pour réactiver la sonnerie, suivez la même Si vous désirez annuler le départ différé, procédure. procédez de la manière suivante: Mémorisation du dernier Enfoncez la touche "RESET" sans la programme utilisé lâcher pendant au moins 3 secondes. "00" apparaîtra sur l'écran et des La mémorisation du dernier programme signaux sonores retentiront.
  • Page 82 Le lave-vaisselle est en mesure de signaler sur l’afficheur plusieurs anomalies. SIGNAL AUTOMATIQUE D’ANOMALIE ANOMALIE CAUSE SOLUTION Manque d’eau (robinet d’eau fermé). Eteignez le lave-vaisselle, ouvrez le apparaît sur l’afficheur, robinet et reconfigurez le cycle. accompagné par un bref signal acoustique.
  • Page 83 AQUAPROTECT – PROTECTION DU TUYAU D’ARRIVEE D’EAU Le tuyau principal d’arrivée d’eau est protégé par un tuyau transparent. Dans le cas où le tuyau principal d’arrivée d’eau est endommagé, toute fuite d’eau est retenue à l’intérieur du tuyau transparent. Si le tuyau principal d’arrivée d’eau fuit, il y aura un signe visible à l’intérieur du tuyau transparent.
  • Page 84 LISTE DES PROGRAMMES Lavage précédé d'un prélavage Pour les programmes précédés d'un prélavage, nous vous conseillons de mettre une seconde dose de détergent (max. 10 grammes) directement dans le lave-vaisselle. Programme Description Cycle avec action anti-bactérienne, adapté pour Hygiénique laver et stériliser la vaisselle (même très 75°C incrustée), les biberons, etc…...
  • Page 85 Durée Fonctions moyenne Déroulement du programme Opérations à accomplir facultatives minutes • • • • • 75°C • • • • 60°C • • • • 55°C • • • • • 45°C • • • • 45°C • • • • •...
  • Page 86 ADOUCISSEUR D’EAU * L'adoucisseur d'eau est pré réglé en usine sur le niveau 4 (d4) car ce niveau répond à la majorité des Selon la source d’approvisionnement, besoins. l’eau contient des quantités variables de calcaire et de minéraux qui se déposent Pour régler la position de l'adoucisseur sur la vaisselle en laissant des taches et d'eau en fonction du degré...
  • Page 87 IDENTIFICATION D’ANOMALIES MINEURES Si votre lave-vaisselle ne fonctionne pas, avant d’appeler votre revendeur faire les contrôles suivants: ANOMALIES CAUSES REMEDES Prise de courant mal branchée Brancher la prise Touche M/A non appuyée Appuyer sur la touche 1 - La machine ne fonctionne sur aucun programme Pas de courant Contrôler...
  • Page 88 ANOMALIES CAUSES REMEDES Voir causes du N. 5 Contrôler Le fond des casseroles n’est Incrustations trop tenaces pas lavé parfaitement qu’il faut enlever avant le lavage dans la machine Le bord des casseroles n’est Positionner mieux les pas parfaitement lavé casseroles Orifices partiellement bouchés Démonter les bras de lavage en...
  • Page 89 Bitte schauen Sie in den mitgelieferten Hinsicht überzeugen werden. Garantieunterlagen nach. Die Candy-Produktpalette umfasst den gesamten Haushaltsgerätebereich - und alles in der hochwertigen Candy-Qualität: Waschautomaten, Geschirrspülmaschinen, Wäschetrockner, Gas- und Elektro-Herde in allen Ausstattungsniveaus, Kühlschränke und Gefriergeräte. Eine Bitte: Lesen Sie diese Broschüre mit größter Aufmerksamkeit, denn sie...
  • Page 90 INHALTSVERZEICHNIS Seite Generelle Sicherheitshinweise Wasseranschluss Seite Einfüllen des Salzes Seite Oberkorb verstellen Seite Geschirr einordnen Seite Informationen für Normtests Seite 100 Spülmittel einfüllen Seite 101 Die verschiedenen Spülmittel Seite 102 Klarspülmittel einfüllen Seite 103 Filterreinigung Seite 104 Praktische Hinweise Seite 105 Wartung und Pflege Seite 106 Beschreibung der Bedienelemente...
  • Page 91 Unerfahrenheit oder Unkenntnis GENERELLE nicht in der Lage sind, die SICHERHEITSHINWEISE Waschmaschine sicher zu bedie- nen, dürfen die Waschmaschine Dieses Gerät ist ausschließlich nicht ohne Aufsicht oder für Haushaltsgebrauch Anweisung durch eine verantwor- konzipiert bzw. für den haushalt- tliche Person benutzen, sich in der snahen Gebrauch, wie z.B: Nähe aufhalten oder das Gerät - Teeküchen für das Personal von...
  • Page 92 Den Netzstecker niemals am Nach der Installation, sollte das Kabel aus der Steckdose ziehen, Gerät so positioniert sein, dass sondern am Stecker selbst. der Stecker frei zugänglich ist. Für die maximale Beladung des Setzen Gerät keinen Geschirrspülers, beziehen Sie Witterungseinflüssen (Regen, sich bitte auf die Tabelle/den Sonne usw.) aus.
  • Page 93 Geräte erfüllen die europäi- Falls Sie die Maschine nach dem schen Richtlinien: Entfernen der Verpackung bewe- gen müssen, versuchen Sie nicht, diese an der Unterseite der Tür 2006/95/EC (LVD); anzuheben. Öffnen Sie die Tür lei- 2004/108/EC (EMC); cht und heben Sie die Maschine, 2009/125/EC (ErP);...
  • Page 94 WASSERANSCHLUSS WICHTIG Gerät muss Wasserversorgung neuen Schläuchen angeschlossen werden. Alte Schläuche dürfen nicht wiederverwendet werden. Die Anordunung der Schläuche für den Zu- und Ablauf des Wassers kann wahlweise nach rechts oder links erfolgen. WICHTIG Der Geschirrspüler kann nach Bedarf sowohl an einem Kalt- als auch einem Warmwasseranschluss angeschlossen werden.
  • Page 95 Das gebogene Schlauchende kann auch Anschluss an den Wasserablauf am Spülbeckenrand eingehängt werden. Achten Sie darauf, dass der Schlauch Das Schlauchende in dem festen Ablauf nicht im Wasser getaucht wird, um einen befestigen. Rücklauf des Wassers beim Spülen zu Der Schlauch darf nicht geknickt werden, verhindern (Abb.
  • Page 96 EINFÜLLEN DES SALZES Der Behälter faßt ca. 1,5 – 1,8 kg Salz. Um das Gerät effizient zu nutzen, muss der Salzbehälter regelmäßig, je nach Das Auftreten von weißen Flecken auf Einstellung der Enthärteranlage häufiger Geschirr Regel oder seltener, nachgefüllt werden. Warnsignal, dass der Salzbehälter neu aufgefüllt werden muss.
  • Page 97 EINSTELLUNG DER HÖHE DES OBEREN GESCHIRRKORBES Teller zwischen 29 cm und 32,5 cm Durchmesser werden in den unteren Geschirrkorb eingeordnet. Hierzu muss der Geschirrkorb folgendermaßen bis zur höchsten Position verstellt werden: 1. Den oberen Korb herausziehen; 2. Dann den Korb an beiden Seiten halten und hochziehen (Abb.
  • Page 98 EINORDNEN DES GESCHIRRS Eine Standardbeladung für tägliches Spülen ist in den Abb. 1, 2 und 3 dargestellt. Beladen des oberen Geschirrkorbes Oberer Geschirrkorb (Abb. 1) A = tiefe Teller Die klappbaren Geschirrablagen des B = flache Teller oberen Geschirrkorbes ermöglichen C = Dessertteller eine flexible...
  • Page 99 Oberer Geschirrkorb (Abb. 3) - POSITION "B": ist für Teller mit besonderen Formen geeignet, auch A = Gläser wenn Maße Standards B = Untertassen entsprechen (z.B. besonders tiefe Teller, C = Tassen eckige oder randlose Teller). D = Kleine Schalen - POSITION "C": ist für Teller gedacht, die E = Mittlere Schalen überdurchschnittlich groß...
  • Page 100 Sie können die notwendigen Informationen zur Ausführung von Vergleichstests und Geräuschpegelmessungen (lt. Normen) an folgende Adresse anfordern: testinfo-dishwasher@candy.it Bitte geben Sie bei Ihrer Anfrage unbedingt die Modellbezeichnung und die komplette Unterer Geschirrkorb (Abb. 8) Matrikel- und Seriennummer des Gerätes A = tiefe Teller lt.
  • Page 101 SPÜLMITTEL EINFÜLLEN Das Spülmittel WICHTIG Spülmittel fürs Spülen mit der Hand eignen sich nicht für Spülmaschine, wichtige Bestandteile fehlen, die für beste Spülergebnisse notwendig sind. Nach Einfüllen des Spülmittels in den Behälter bitte den Deckel schließen, indem Sie ihn zuerst zurück über die Öffnung Außerdem beeinträchtigen schieben (1) und dann bis zum spürbaren...
  • Page 102 überflüssig macht, sind die folgenden DIE VERSCHIEDENEN SPÜLMITTEL Hinweise unbedingt zu beachten: Tabs Lesen Sie die Gebrauchshinweise des Spülmittelherstellers sorgfältig durch Spülmittel Tablettenform und wenden Sie das Geschirrspülmittel unterschiedlichen Herstellern lösen sich genau so, wie dort angegeben ist; unterschiedlich schnell auf. Als Folge davon könnten manche Tabs bei den Die Wirksamkeit von Geschirrspülmitteln, die auch den Einsatz von Maschinensalz...
  • Page 103 KLARSPÜLMITTEL EINFÜLLEN Das Klarspülmittel Klarspülmittel erleichtert Trocknung des Geschirrs und vermeidet die Bildung von Flecken und matten Ablagerungen. Die benötigte Menge des Klarspülers wird beim letzten Spülen automatisch zugegeben, ein voller Behälter reicht für mehrere Male. Klarspülmittel einfüllen In der Innentür links vom Spülmittelbehälter befindet sich der Klarspülmittelbehälter (Abb.
  • Page 104 FILTERREINIGUNG Das Filtersystem (Abb. A “4”) besteht aus: dem zentralen Filterkorb zum Auffangen von groben Teilchen; der Siebplatte zum ständigen Filtern des Spülwassers; dem Mikrofilter unterhalb der Siebplatte, der auch die kleinsten Schmutzpartikelchen auffängt und so eine optimale Spülung garantiert. Um stets beste Spülergebnisse zu erzielen, ist es ratsam, das Filtersystem vor jeder Benutzung zu kontrollieren...
  • Page 105 PRAKTISCHE HINWEISE Hinweise zum Sparen Um zu sparen, sollte die Spülmaschine Hinweise zur Optimierung der immer komplett befüllt werden, bevor gespült wird. Das Geschirr wird jeweils Spülergebnisse nach dem Essen in die Spülmaschine gefüllt, bis diese voll ist. Eventuell kann zwischen Beladungen Um optimale Spülresultate zu erhalten,...
  • Page 106 ÄUßERE REINIGUNG UND PFLEGE Bitte benutzen Sie zur Reinigung des Gerätes von außen stets nur ein feuchtes Tuch und niemals Reinigungs- und Scheuermittel. Innenbehälter bedarf keiner besonderen Reinigung. Bitte reinigen Sie die Türdichtungen regelmäßig mit einem feuchten Tuch, um evtl. anhaftende Lebensmittelreste und Klarspülerrückstände zu entfernen.
  • Page 107 BESCHREIBUNG DER BEDIENELEMENTE Taste "ON/OFF" Taste "START"/"RESET" (Programm starten/löschen) Taste "PROGRAMMWAHL" Leuchtanzeigen "OPTIONSWAHL" Taste "STARTVERZÖGERUNG" Digitaldisplay Optionstaste "EXPRESS" Programmbeschreibung Optionstaste "ALL IN 1" ABMESSUNGEN Breite x Höhe x Tiefe (cm) 59,8 x 81,8 ÷ 89,8 x 57 Tiefe bei geöffneter Tür (cm) TECHNISCHE DATEN 16 Maßgedecke Fassungsvermögen (EN 50242)
  • Page 108 PROGRAMMWAHL UND SONDERFUNKTIONEN WICHTIG Die "intermittierende" Funktion der Umwälzpumpe ist KEIN Zeichen für eine Fehlfunktion, sondern ist die besondere Programm einstellen Eigenschaft impulsbetriebenen Spültechnik und weist somit auf eine Öffnen Sie die Tür und ordnen Sie das völlig korrekte Durchführung Geschirr ein.
  • Page 109 Laufendes Programm ändern Options-Tasten Taste "EXPRESS" Möchten Sie das laufende Programm löschen oder ändern, gehen Sie wie folgt vor: Diese Taste ermöglicht je nach gewähltem Programm eine Zeit- und Stromersparnis von bis zu 25%. Dabei werden beim letzten Halten Taste "RESET"...
  • Page 110 Taste "STARTVERZÖGERUNG" Akustisches Signal für PROGRAMMENDE ausschalten Startzeit gewählten Reinigungsprogramms kann zwischen 1-23 Stunden verzögert werden. akustische Signal Programmende auszuschalten, gehen Sie wie folgt vor: Hierzu gehen Sie bitte wie folgt vor: Drücken Taste WICHTIG "STARTVERZÖGERUNG" (Im Display Die Einstellungsprozedur muss IMMER erscheint die Anzeige "00").
  • Page 111 anzuzeigen, dass die Speicherung Das zuletzt gewählte aktiviert wurde). Programm speichern 5. Schalten Sie den Geschirrspüler durch Um das zuletzt gewählte Programm zu Drücken der Taste "ON/OFF" aus, um speichern, gehen Sie wie folgt vor: Ihre Einstellung zu speichern. Um die Speicherung wieder zu deaktivieren, WICHTIG befolgen sie die gleiche Prozedur.
  • Page 112 LISTE DER PROGRAMME Spülen mit Vorspülgang Für alle Programme mit Vorspülgang wird empfohlen, eine zusätzliche Spülmittelmenge (max. 10 Gramm) direkt in den Geschirrspüler zu geben. Programm Beschreibung Programm mit antibakterieller Wirkung, geeignet Hygiene zum hygienischen Spülen von Geschirr (auch 75°C besonders verkrustet), Fläschchen usw.
  • Page 113 Durchschnit- Arbeitsgänge Programmabläufe Zusatzfunktionen tliche Programmdauer in Minuten • • • • • 75°C • • • • 60°C • • • • 55°C • • • • • 45°C • • • • 45°C • • • • • 65°C •...
  • Page 114 WATERPROTECT – ZULAUFSCHLAUCH MIT WASSERSCHUTZ Der eigentliche Zulaufschlauch ist von einem durchsichtigen Sicherheitsschlauch umgeben. Bei einer eventuellen Undichtigkeit des inneren Zulaufschlauchs wird das Wasser zwischen Innenschlauch und äußerem Sicherheitsschlauch zurückgehalten. Durch den durchsichtigen Außenschlauch kann man sehen, daß sich Wasser angesammelt hat.
  • Page 115 WASSERENTHÄRTER Der Enthärter ist werksseitig auf der Stufe 4 eingestellt (d4) und damit den Das Wasser enthält kalkhaltige Salze und Bedürfnissen der meisten Haushalte Mineralien in je nach Wohngebieten entsprechend. unterschiedlich hoher Menge. Diese Substanzen setzen sich auf dem Geschirr Regulieren Sie den Wasserenthärter je ab und hinterlassen Flecken und weißliche nach Härtestufe Ihres Wassers wie folgt:...
  • Page 116 FEHLERSUCHE Kleine Störungen selbst beheben! Sollte Ihr Geschirrspüler einmal nicht zu Ihrer Zufriedenheit arbeiten, kontrollieren Sie die folgenden Punkte, bevor Sie den Kundendienst rufen: FEHLER GRUND FEHLER -BESEITIGUNG Stecker nicht richtig in der Stecker in die Steckdose Steckdose Ein/Aus-Taste nicht gedrückt Ein/Aus-Taste betätigen 1 - Die Programme Kein Strom vorhanden...
  • Page 117 FEHLER GRUND FEHLER -BESEITIGUNG Siehe Gründe 5) Kontrollieren Das Geschirr ist zu dicht Geschirr richtig anordnen angeordnet Das Ende des Ablaufschlauches Der Ablaufschlauch darf nicht im liegt im Wasser Wasser liegen Spülmittel ist nicht richtig dosiert, Dosis erhöhen u. ggf. neues 7 - Das Spülgut wird nur verklumpt oder hart Spülmittel benutzen...
  • Page 118 Questo elettrodomestico è marcato conformemente alla Direttiva Europea 2012/19/UE sui Rifiuti da Apparecchiature Elettriche ed Elettroniche (RAEE). I RAEE contengono sia sostanze inquinanti (che possono cioè avere un impatto negativo anche molto pesante sull’ambiente) sia materie prime (che possono essere riutilizzate). E’ perciò necessario sottoporre i RAEE ad apposite operazioni di tratta- mento, per rimuovere e smaltire in modo sicuro le sostanze inquinanti ed estrarre e riciclare le materie prime.
  • Page 119 Cet appareil est commercialisé en accord avec la directive européenne 2012/19/EU sur les déchets des équipements électriques et électroniques (DEEE). Les déchets des équipements électriques et électroniques (DEEE) contiennent des substances polluantes (ce qui peut entraîner des conséquences négatives pour l’environnement) et des composants de base (qui peuvent être réutilisés). Il est important de traiter ce type de déchets de manière appropriée afin de pouvoir éliminer correctement tous les polluants et de recycler les matériaux.

Ce manuel est également adapté pour:

Cdsm 2d62wCdsm 2d62x