Candy CDIN 2D360PBR Mode D'emploi
Les langues disponibles
Les langues disponibles
Liens rapides

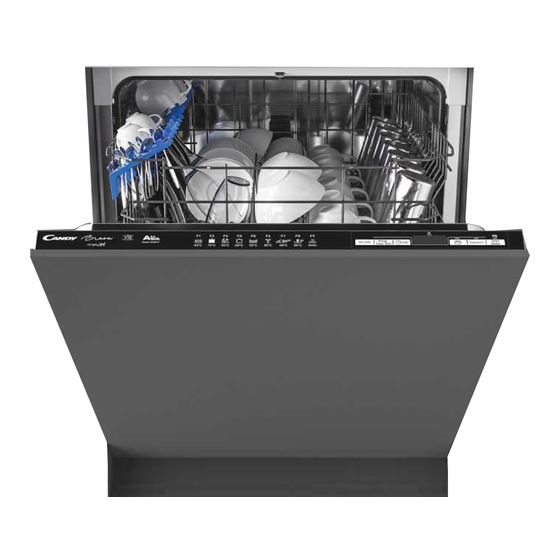
Manuels Connexes pour Candy CDIN 2D360PBR


Sommaire des Matières pour Candy CDIN 2D360PBR
- Page 109 Nous vous remercions d’avoir choisi un Index lave-vaisselle Candy. Nous sommes certains qu'il vous assistera fidèlement en 1. RÈGLES GÉNÉRALES DE SÉCURITÉ lavant tous les jours votre vaisselle en toute sécurité. 2. ALIMENTATION EN EAU Lisez attentivement cette notice pour 3.
- Page 110 Cet appareil peut être utilisé 1. RÈGLES GÉNÉRALES l par des enfants âgés de 8 ans et DE SÉCURITÉ plus, et des personnes présentant Cet appareil a pour vocation l des capacités physiques, motrices d’être utilisé au sein du foyer, ou ou mentales réduites ou bien dans ces différentes situations: manquant de connaissances et...
- Page 111 La pression hydraulique doit fabricant décline toute l être comprise entre 0,08 MPa responsabilité pour et 0,8 MPa. blessures dégâts matériels imputables à Les ouvertures de ventilation et mauvais raccordement de la l la base de l'appareil ne doivent ligne de terre. en aucun cas être obstruées S'assurer que le lave-vaisselle l...
- Page 112 S'il y a un dispositif d'adoucissement l Installation de l'eau dans l'habitation, il n'est pas nécessaire d'ajouter Sortir tous les éléments de l du sel dans l'adoucisseur monté l’emballage. dans le lave-vaisselle. ATTENTION En cas de panne ou de l Conserver matériaux mauvais...
- Page 113 2. ALIMENTATION EN EAU l Si la machine est branchée à des tuyauteries L'appareil doit être relié à l'arrivèe neuves, ou qui n'ont pas étéutilisées pendant d'eau, exclusivement avec le tuyaux une longue période, faire couler l'eau fournis. Ne pas réutiliser les anciens pendant quelques minutes...
- Page 114 Dispositifs de sécurité hydraulique Tous les lave-vaisselle sont équipés d’un dispositif de sécurité anti-débordement qui, si l’eau dépasse les niveaux normaux en raison de dysfonctionnements, bloque automatiquement le débit d’eau et/ou vidange les quantités excessives. l AQUASTOP (fig. 4): dispositif situé...
- Page 115 Raccordement à la vidange l l Pour la vidange, introduire le tuyau dans L'extrémité recourbée tuyau vidange peut être accrochée au bord d'un l'installation de vidange, en prenant soin de ne pas le plier car l'écoulement des évier, mais ne doit pas rester immergée, eaux s'en trouverait perturbé...
- Page 116 3. REMPLISSAGE DU SEL Après avoir chargé le sel, vous DEVEZ lancer un cycle de lavage complet ou le (Fig. A "1") programme PRE-LAVAGE/TREMPAGE/ RINCAGE. l L’apparition de taches blanches sur la vaisselle est généralement un signe qui l Pour une utilisation optimale de l’appareil, permet savoir que le sel est manquant.
- Page 117 4. RÉGLAGE DU PANIER Type "B": (UNIQUEMENT LES MODÈLES AVEC DÉCLIC FACILE): SUPÉRIEUR 1. Enlevez le panier supérieur; 2. Tenez le panier des deux côtés et l Si vous utilisez régulièrement des assiettes soulevez-le vers le haut (fig. 1). d’un diamètre compris entre 29 cm et Les plats mesurant plus de 20 cm* de 32,5 cm, placez-les dans le panier diamètre ne peuvent plus être placés dans...
- Page 118 l 5. MISE EN PLACE DE LA Le panier supérieur a été conçu pour permettre souplesse maximum VAISSELLE d'utilisation. Il peut n'être chargé qu'avec des assiettes placées sur deux rangées, Utilisation du panier supérieur 24 pièces maximum, avec des verres sur cinq rangées, 30 pièces maximum, ou l...
- Page 119 Pour toute demande d’informations relatives aux essais comparatifs et aux mesures sonores (selon les normes EN), merci de vous adresser: testinfo-dishwasher@candy.it Dans votre, demande, merci de spécifier le modèle ainsi que le numéro de série du lave-vaisselle (cf. étiquette données).
- Page 120 7. REMPLISSAGE DU DÉTERGENT (Fig. A "2") Le produit de lavage Il est indispensable d'utiliser de la lessive en poudre, liquide ou en pastilles spécialement destiné aux machines à laver la vaisselle. Après le versement du détergent dans le bac à lessive, fermer le couvercle, tout Les lessives non adaptées (comme cettes d’abord en le glissant vers la gauche (1) pour le lavage à...
- Page 121 8. TYPES DE DÉTERGENTS 1"/"4 en 1"/"5 en 1", etc…) par exemple ceux composés de sel et/ou d’agents de rinçage, nous vous conseillons de: Produits de lavage en tablettes l Lire attentivement et de suivre les Les produits de lavage en tablettes des instructions du fabricant, notées sur les différents producteurs se dissolvent à...
- Page 122 9. REMPLISSAGE DU PRODUIT DE RINÇAGE (Fig. A "3") Le produit de rinçage Cet additif qui est introduit automatiquement à la dernière opération de rinçage, assure le séchage rapide de la vaisselle et évite la formation sur celle-ci de taches blanchâtres. Charger le produit de rinçage A la gauche du bac à...
- Page 123 10. NETTOYAGE DES FILTRES (Fig. A "4") Le système de filtrage (fig.A "4") est constitué par: A. un réservoir central qui retient les grosses particules; B. un micro filtre autonettoyant, situé sous la plaque métallique, qui piège les micro salissures pour garantir rinçage parfait;...
- Page 124 TREMPAGE (ou RINCAGE A FROID) 11. CONSEILS PRATIQUES pour ramollir la saleté et éliminer les résidus les plus gros entre chaque Que faire pour avoir d'excellents charge-ment en attendant d'effectuer le résultats de lavage programme de lavage complet. l l Avant de ranger la vaisselle dans la En présence de saleté...
- Page 125 l 12. ENTRETIEN ET La cuve, ainsi que la contre-porte sont en acier inoxydable. Si toutefois vous devez NETTOYAGE constater des taches d'oxydation, celles- ci seraient imputables seulement à une (Fig. A “5”) présence importante de sels de fer en suspension dans l'eau.
- Page 126 1. Exécuter un programme de lavage sans 5. Laisser la porte légèrement ouverte. vaisselle avec lessive pour dégraisser 6. Laisser l'intérieur de la machine propre. la machine. 7. Si la machine est laissée dans des pièces où la température est inférieure 2.
- Page 127 13. DESCRIPTION DU 14. DONNÉES TECHNIQUES PANNEAU DE COMMANDE ...
- Page 128 l 15. SÉLECTION DU Appuyez sur "DÉPART/ANNUL" et vous entendrez un signal acoustique, le voyant PROGRAMME ET correspondant au programme sélectionné FONCTIONS SPÉCIALES restera allumé et le voyant de lavage s’allumera. Bouton MARCHE/ARRÊT l Fermez la porte (après que le signal l...
- Page 129 l message "CONFIGURATIONS" Programmes «IMPULSE» s’affichera à l’écran et les voyants des (uniquement sur certains modèles) boutons "SMART DOOR/EXPRESS" et "TABS" seront allumés. Les programmes «IMPULSE» utilisent une technologie de lavage par impulsion, qui l En appuyant sur le bouton "Progr." vous réduit la consommation et le bruit tout en pouvez sélectionner les paramètres à...
- Page 130 Interruption d’un programme Uniquement pour les modèles avec l’option "SMART DOOR", durant la L’ouverture de la porte quand un programme phase de séchage la porte s’ouvrira est en cours est déconseillée, en particulier automatiquement vous devrez durant les phases centrales de lavage et de attendre le signal de fin de cycle avant rinçage chaud final.
- Page 131 Le bouton d’option doit être activé après avoir choisi le programme de lavage. ATTENTION Quand cette option est sélectionnée, Si vous choisissez une option non vous devez empêcher compatible avec le programme sélectionné, l’ouverture ou la fermeture de la porte le voyant de l’option clignote, puis s’éteint.
- Page 132 Si le départ différé n’est pas validé en Afin de garantir le fonctionnement correct du voyant du sel, VOUS DEVEZ appuyant sur le bouton "DÉPART/ ANNUL", au bout de 10 secondes TOUJOURS REMPLIR ENTIÈREMENT LE environ, le départ différé sera supprimé. COMPARTIMENT DU SEL.
- Page 133 l l Le message "CONFIGURATIONS" s’affichera Éteignez le lave-vaisselle en appuyant à l’écran et les voyants des boutons sur le bouton "MARCHE/ARRÊT" pendant "SMART DOOR/EXPRESS" et "TABS" 3 secondes pour valider la nouvelle seront allumés. configuration. l En appuyant sur le bouton "Progr." Pour allumer à...
- Page 134 3. Appuyez simultanément sur les boutons Le lave-vaisselle doit TOUJOURS être «Progr.» et «DÉPART DIFFÉRÉ» éteint quand vous démarrez cette procédure. pendant 5 secondes. 1. Ouvrez la porte. 4. «MODE DÉMO ÉTEINT» s’affichera. 2. Allumez l’appareil électroménager au 5. Éteignez l’appareil. moyen du bouton MARCHE/ARRÊT.
- Page 135 Appairage de la machine avec l’appli L’enregistrement a échoué. Si l’inscription échoue (ou n’a pas lieu dans l Téléchargez l’appli Candy simply-Fi sur les 5 min): votre dispositif. l "RÉESSAYER" s’affichera à l’écran. L’appli Candy simply-Fi est disponible l...
- Page 136 Voyant du "Wi-Fi" DÉSACTIVATION CONTRÔLE À DISTANCE l Indique l’état de la connexion du produit au réseau Wi-Fi de votre domicile. Il peut: l Pour quitter le contrôle à distance, appuyez à nouveau sur "Progr. 3sec - CLIGNOTER LENTEMENT: contrôle WiFi"...
- Page 137 17. LÉGENDE DES PROGRAMMES Programme Description Programme pour vaisselle normalement sale (le plus efficace en termes de consommations ÉCO combinées d’énergie et d’eau pour ce type de vaisselle). Programme normalisé EN 50242. Conçu pour le lavage des casseroles et de toute INTENSIF autre vaisselle particulièrement sale.
- Page 138 Fonctions facultatives Programme ● ÉCO ● ■ INTENSIF NUIT ● ■ UNIVERSEL AUTO 55-65 75-95 QUOTIDIEN ■ DÉLICAT ● RAPIDE 24’ - - - PRÉLAVAGE ● = Lessive prélavage ■ = Programmes "IMPULSE" = uniquement sur certains modèles N/A = OPTION NON DISPONIBLE 1) Avec de l’eau froide (15 °C) - Tolérance ±10 %- Si vous utilisez de l’eau chaude, le temps restant jusqu’à...
- Page 139 18. UNITÉ ADOUCISSEUR DE L’EAU En fonction de la source d’alimentation, Réglez la configuration de votre unité l’eau contient différentes quantités de tartre adoucisseur d’eau en fonction de la dureté et de sels minéraux qui se déposent sur la de votre eau, comme suit: vaisselle en laissant des marques et des taches blanchâtres.
- Page 140 19. DÉPANNAGE ET GARANTIES Si vous pensez que le lave-vaisselle ne fonctionne pas correctement, consultez le guide rapide fourni ci-dessous avec certaines astuces pratiques sur la manière de résoudre les problèmes les plus courants. Si le dysfonctionnement persiste ou se produit à nouveau, contactez le centre d’assistance technique.
- Page 141 Uniquement les modèles sans afficheur Si des dysfonctionnements ou des pannes ont lieu quand un programme est en cours, le voyant correspondant au cycle sélectionné clignotera rapidement et vous entendrez un signal sonore intermittent. Dans ce cas-là, éteignez le lave-vaisselle en appuyant sur le bouton «MARCHE/ARRÊT».
- Page 142 PANNE CAUSE SOLUTION Réduisez la quantité de détergent Quantité excessive de détergent Utilisez un détergent adapté 5. Vous n’entendez Un élément empêche la rotation pas les bras de Contrôlez des bras lavage tourner La plaque de filtration et le filtre Nettoyez la plaque de filtration et le sont très sales filtre...
- Page 143 PANNE CAUSE SOLUTION Laissez la porte du lave-vaisselle 11. La vaisselle entrouverte à la fin du programme Flux d’air inadéquat n’est pas de lavage pour permettre à la vaisselle de sécher naturellement entièrement Remplissez le compartiment du sèche Absence du produit de rinçage produit de rinçage N.B.: si l’une des situations ci-dessus entraîne de mauvaises performances de lavage ou un rinçage insuffisant, ôtez les restes de nourriture de la vaisselle à...
- Page 144 20. CONDITIONS AMBIANTES l Cet appareil est commercialisé en Les DEEE ne doivent pas être traités accord avec la directive européenne comme les déchets ménagers; 2012/19/EU déchets des équipements électriques et électroniques (DEEE). l Les DEEE doivent être remis aux points Les déchets des équipements électriques et collecte enregistrés.
- Page 145 Con la presente la , dichiara che questo apparecchio marcato è conforme ai requisiti essenziali dalla Direttiva 2014/53/EU. Per ricevere copia della dichiarazione di conformità, contattare il costruttore al sito: www.candy-group.com WLAN-PARAMETER: WLAN- Standard - Frequenz-bereich - Maximale Sendeleistung - Minimale Empfangsempfindlichkeit - Magnetfeldstärke...
- Page 146 fk hldsk...
- Page 147 fk hldsk...
- Page 148 - CDIN D -...