Rohl Riobel LT801SS Mode D'emploi
INS13036 - 10/19
I N S T R U C T I O N M A N U A L
M O D E D ' E M P L O I
M A N U A L D E I N S T R U C C I O N E S
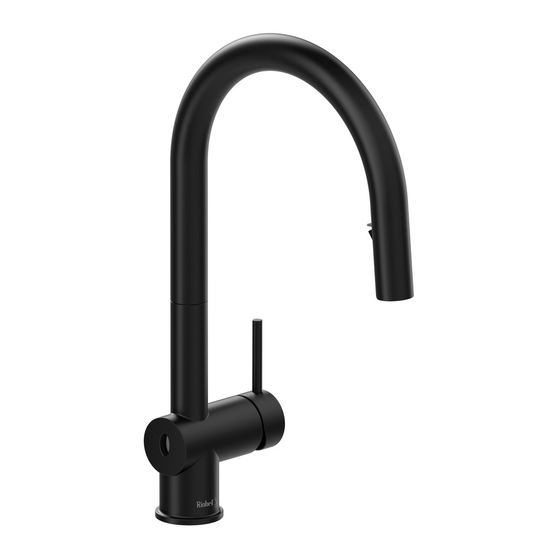
KITCHEN FAUCET
ROBINET DE CUISINE
LLAVE PARA FREGADERO
HELPFUL TOOLS
For safety and ease of installation, the use of these
helpful tools is recommended.
OUTILS UTILES
Pour des raisons de sécurité et de facilité
d'installation, l'utilisation de ces outils utiles est
recommandée.
HERRAMIENTAS ÚTILES
Por seguridad y facilidad de instalación, se
recomienda el uso de estas útiles herramientas.
Adjustable Wrenches
Tape Measure
Safety Glasses
Phillips Screwdriver
Clés adjustable
Ruban à mesurer
Lunettes de sécurité
Tournevis Philips
Llaves ajustable
Cinta de medir
Gafas de seguridad
Desarmador de cruz
A D I S T I N C T I V E M E M B E R O F T H E H O U S E O F R O H L
U N M E M B R E D I S T I N C T I F D E H O U S E O F R O H L
INS13036- 10/8 - Rev 00
M I E M B R O D I S T I N T I V O D E L A F A M I L I A H O U S E O F R O H L
Table des Matières

Manuels Connexes pour Rohl Riobel LT801SS


Sommaire des Matières pour Rohl Riobel LT801SS
- Page 1 INS13036 - 10/19 I N S T R U C T I O N M A N U A L M O D E D ’ E M P L O I M A N U A L D E I N S T R U C C I O N E S KITCHEN FAUCET ROBINET DE CUISINE LLAVE PARA FREGADERO...
-
Page 2: Parts List
Parts List Faucet H. Spray Wand Handle Spray Wand O-Ring Deck Gasket Spray Wand Screen Pulldown Hose Spray Wand Cap Hose Protective Cap Electronic Sensor Data Cable Hose Swivel Cover Hose Weight Locator AA. Gasket Mark Liste des pièces Robinet H. - Page 3 Parts List M. Mounting Washer V. Hook & Loop Fastener N. Mounting Nut (x2) O. Hose Guide Nut W. Zip Ties (x3) P. Control Box & Electronic X. Filter Screen (x2, comes pre-installed in hose end) Q. Installation Tool Label R.
- Page 5 1. Assemble O-ring Seal (C) to Gasket (AA). 2. Install Gasket onto Faucet (A). 3. Insert Data Cable (F) through hole in sink. 1. Assembler le oint d’étanchéité de plateforme (C) avec le joint d’étanchéité (AA). 2. Installer le joint d'étanchéité sur le corps du robinet (A). 3.
- Page 6 Tighten mounting nut (N) with Installation Tool (Q). Use Phillips screwdriver Thread Hose Guide Nut (O) to Faucet (A) mounting shank. through hole in Installation Tool (Q) to tighten firmly. Visser l’écrou du guide-tuyau (O) sur la tige de montage du robinet (A). Serrer l’écrou de montage (N) avec l’outil d’installation (Q).
- Page 7 Ensure O-ring (I) and Screen (J) are in place within Spray Wand (H). Install wand to upper connection of pulldown hose (D). Using an adjustable wrench, tighten hose flush with spray wand. DO NOT overtighten. S’assurer que le joint torique (I) et le filtre (J) sont bien installés dans le bec de pulvérisation (H). Installer le bec de pulvérisation sur le raccord supérieur du tuyau rétractable (D). À l’aide d’une clé ajustable, serrer le tuyau jusqu’à...
- Page 8 Optional Left Position Recommended/Recommandé/Recomendado Position à gauche optionnelle Posición opcional del lado izquierdo Control Box (P) may also be attached from the left hand side as shown for optional Attach Control Box (P) onto Hose Guide Nut (O) until it snaps into place. This is the recommended mounting.
- Page 9 Battery holder location Emplacement du porte-piles Ubicación del portapilas Remove cover from Battery Holder (T) and install six AA Batteries (U). Use only non- Select location for Battery Holder (T). Before installation, verify that the battery holder rechargeable alkaline batteries. Reinstall battery holder cover. wire will reach connection on bottom of Control Box (P).
- Page 10 Turn on water supplies. Insert Battery Holder (T) cable into Control Box (P) power port. Ensure cable is pushed all the way into the control box. Ouvrir l’alimentation en eau. Insérer le câble du porte-piles (T) dans le port d’alimentation du boîtier de contrôle Cierre el suministro de agua.
-
Page 11: Mode Pulvérisation
Handle Check Vérification de la poignée Verificación del monomando Check to ensure electronic sensor (L) is working properly. Move hand over electronic Turn on water with Handle (B) to test both hot and cold water. sensor to test that water will turn on. Move hand over electronic sensor again to turn water off. - Page 12 Low Flow Steps Étapes - Faible débit Etapas - Flujo bajo 1. Disconnect both supply lines. If low flow, turn off water at stops before cleaning filters. 2. Remove supply lines. Si le débit est faible, couper l’alimentation en eau aux robinets d’arrêt avant de 1.
- Page 13 Optional Optionnel Opcional Insert each Filter Screen (X) into a cup of water. Agitate screen by hand for 15 Reassemble Filter Screen (X) into housing using needle nose pliers or by hand. seconds then drain excess water from screen. Repeat process for both supply Push back up into hose ends (snaps into place).
- Page 14 Troubleshooting If faucet does not appear to be functioning Data properly, repeat the faucet startup process Startup process definition: Disconnect the battery holder cable (T) and leave disconnected Hot Side for 10 seconds. Reinsert battery holder cable (T) and ensure cable is pushed all the way into the control box (P) (Refer to step 14).
-
Page 15: Résolution De Problèmes
Résolution de problèmes Si le robinet ne semble pas fonctionner correctement, recommencer le processus Données de démarrage du robinet. Définition du processus de démarrage : Côté eau Débrancher le câble du porte-piles (T) et le chaude laisser débranché pendant dix (10) secondes. Détecteur de Réinsérer le câble du porte-piles (T) et vous mouvement... -
Page 16: Resolución De Problemas
Resolución de Problemas Si la mezcladora no parece estar Datos funcionando correctamente, repita el proceso de puesta en marcha de la mezcladora. Lado Definición de proceso de puesta en marcha: caliente Desconecte el cable del soporte para pilas (T) y déjelo desconectado durante 10 segundos. Filtro Reinserte el cable del soporte para pilas (T) y Sensor... - Page 17 Note: This equipment has been tested and found to comply Remarque : Cet équipement a été testé et s’est avéré se Nota: Este equipo ha sido probado y cumple con los límites with the limits for a Class B digital device, pursuant to part 15 conformer aux limites d’un dispositif numérique de catégorie para un dispositivo digital Clase B, conforme al apartado 15 de of the FCC Rules.
- Page 20 U.S.A. QUEBEC / WEST CANADA / ATLANTIC CANADA ONTARIO HOUSEOFROHL.COM HOUSEOFROHL.CA HOUSEOFROHL.CA 1-800-777-9762 1-866-473-8442 1-888-287-5354 A D I S T I N C T I V E M E M B E R O F T H E H O U S E O F R O H L U N M E M B R E D I S T I N C T I F D E H O U S E O F R O H L M I E M B R O D I S T I N T I V O D E L A F A M I L I A H O U S E O F R O H L INS13036 - 10/8 - Rev 00...