Becker R8/17PS Notice D'utilisation
Table des Matières
Les langues disponibles
Les langues disponibles
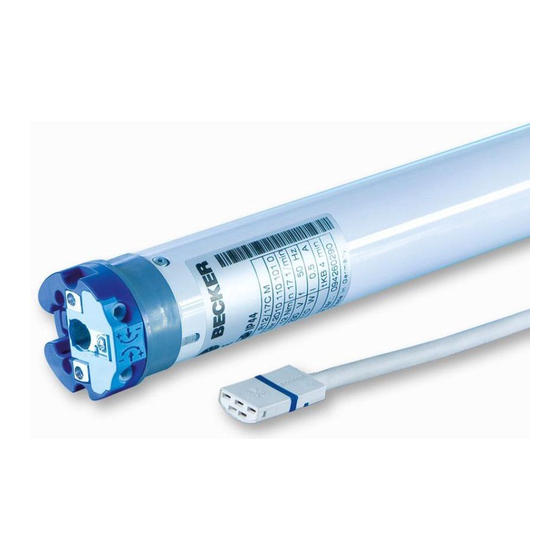
R8/17PS(+) - R120/11PS(+)
Bedienungsanleitung
Operating Instructions
Notice d'utilisation
Gebruiksaanwijzing
Rohrantriebe
für Sonnenschutz
Tubular drives
for sunshades
Moteurs tubulaires
pour stores
Buismotoren
voor Zonwering
Wichtige Informationen für den Elektroanschluss.
Important information about the electric supply connection.
Informations importantes pour le branchement électrique.
Belangrijke informaties voor de elektrische aansluitingen.
DE
GB
FR
NL
Chapitres
Table des Matières

Manuels Connexes pour Becker R8/17PS


Sommaire des Matières pour Becker R8/17PS
- Page 1 R8/17PS(+) - R120/11PS(+) Bedienungsanleitung Operating Instructions Notice d’utilisation Gebruiksaanwijzing Rohrantriebe für Sonnenschutz Tubular drives for sunshades Moteurs tubulaires pour stores Buismotoren voor Zonwering Wichtige Informationen für den Elektroanschluss. Important information about the electric supply connection. Informations importantes pour le branchement électrique.
- Page 3 Sommaire Page Introduction ............................................... Garantie ................................................Consignes de sécurité ............................................. Utilisation conforme aux prescriptions ..................................... Instructions de montage ..........................................Programmation des positions finales ......................................Que faire quand... ? ............................................Caractéristiques techniques .......................................... Remarques à l’attention du spécialiste en installations électriques ..........................Exemples de raccordement ...........................................
-
Page 28: Introduction
Garantie Becker-Antriebe GmbH est dégagé de la garantie et de la responsabilité du fait du produit si, sans notre autorisation préalable, des modifications de construction sont effectuées et/ou des installations inadéquates sont exécutées ou engagées à l’encontre de nos directives de montage prescrites. -
Page 29: Consignes De Sécurité
• Respecter toutes les normes et prescriptions en vigueur pour l’installation électrique. • Seul les pièces de rechange, outils et dispositifs accessoires autorisés par la société Becker doivent être utilisés. • Concernant les produits non autorisés issus d’autres fabricants ou les modifications apportées aux accessoires, le fabri- cant ou le revendeur n’assument aucune garantie pour les dommages corporels et matériels, ainsi que pour les dommages... -
Page 30: Utilisation Conforme Aux Prescriptions
Utilisation conforme aux prescriptions Les moteurs tubulaires R8/17PS - R120/11PS sont conçus exclusivement pour les stores, les screens et les protections solaires de vérandas. L’utilisation dans des installations couplées est seulement possible si toutes les parties de l’installation fonctionnent de manière synchrone et atteignent la position finale au même moment. - Page 31 Ne cognez jamais sur le moteur tubulaire et veillez à ne pas le laisser tomber lors de son introduction dans le tube! La Sté Becker recommande de viser également l’embout au tube. 5. Fixez la tête moteur à sa pièce de fixation et insérez l’ensemble dans le tube.
-
Page 32: Programmation Des Positions Finales
Notice d’utilisation Programmation des positions finales Il y a 2 possibilités programmer les positions finales: a) Sortie et fermeture sans butée b) Sortie sans butée et fermeture pour store cassette, rideaux et grilles à enroulement Important Au cas où le moteur tubulaire viendrait à arrêter sa course trop tôt lors de la sortie ou de la rentrée en raison d’un obstacle, il est possible de dégager le store en faisant marcher le moteur pour un court instant dans le sens opposé, d’éliminer l’obstacle et de programmer la position finale désirée en effectuant un nouveau mouvement de rentrée ou de sortie. - Page 33 Notice d’utilisation b) Sortie sans butée et fermeture pour store cassette, rideaux et grilles à enroulement Amenez les deux interrupteurs en position d’effacement. Donnez une brève instruction de marche. Sortez le store dans la position «sortie» désirée. Poussez l’interrupteur du sens de rotation «sortie» de la position d’effacement en position de programmation.
- Page 34 Notice d’utilisation Programmation des positions finales à l’aide du kit de programmation Attention Le kit de programmation n’est pas prévu pour l’utilisation permanente, mais seulement pour la mise en service. Connectez les fils du moteur tubulaire à ceux du kit de programmation (n° d’art. 4935 200 011 0) en tenant compte des couleurs et mettez sous tension .
- Page 35 Notice d’utilisation Effacement des positions finales à l’aide du kit de programmation Action Réaction a) Effacer les positions finales une à une Amenez le store dans la position finale que vous voulez effacer. 1. Appuyez pendant une seconde sur la tou- che de remise à...
-
Page 36: Caractéristiques Techniques
Notice d’utilisation Caractéristiques techniques e i t r t ( ) n i l a ’ i t a s s i é t é t i é p e r i . n i i t c t è e i t r t ( ) n i... -
Page 37: Que Faire Quand
Remarques à l’attention du spécialiste en installations électriques Les moteurs tubulaires Becker avec commutation électronique de fin de course peuvent être montés en parallèle. En l’occurrence, il faut respecter la charge maximale de contact du dispositif de commutation (horloge, commande à relais, inverseur, etc.). -
Page 38: Exemples De Raccordement
Notice d’utilisation Exemples de raccordement Activation d’un ou plusieurs moteurs au moyen d’un commutateur ou d’une touche 230V Touche individuelle Commande centrale, de groupes ou individuelle avec le Centronic UnitControl UC42 Centrale L1 N PE Auto- matisme Réseau 230V / 50Hz soleil-vent Alimentation centrale 230V / 50Hz... - Page 39 Notice d’utilisation Sous réserve de modifications techniques...
- Page 52 Becker-Antriebe GmbH 35764 Sinn/Germany...