Télécharger Imprimer la page

Publicité

Les langues disponibles

Les langues disponibles

Liens rapides

Setup and Reference Guide
Manuel d'installation et guide de référence
FR
Guia de configuração e referência
PT
21
‫اإلعداد والدليل المرجعي‬
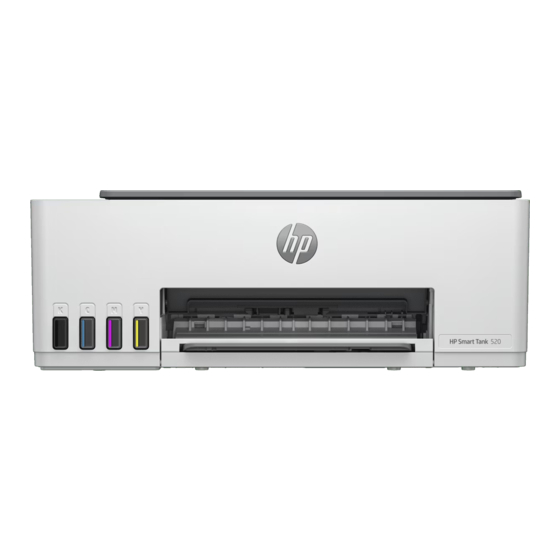
HP Smart Tank
520, 540 series
9
15
AR

Publicité

loading

Sommaire des Matières pour HP Smart Tank 520 Serie

  • Page 1 Setup and Reference Guide Manuel d’installation et guide de référence Guia de configuração e referência ‫اإلعداد والدليل المرجعي‬ HP Smart Tank 520, 540 series...
  • Page 3 USB connectivity issues during setup (Windows) section in this guide. 4.    V iew animations to fill ink tanks, install printheads, load paper, and perform printheads alignment in HP Smart. Option 2: Manual setup Follow the illustrations in this guide to set up the hardware and install the HP Smart software. With HP Smart, you can print, scan, and access all printer features.
  • Page 4 Manual Setup 1 Fill the ink tanks 1. Open the front door. 2.  Open the cap of the ink tank you want to fill. 3. Twist open the ink bottle. 4. Place the bottle upside down onto the tank and click into place. Wait for the ink to fill the tank.  Note: The black bottle will have leftover ink. 5. ...
  • Page 5 Before installing printheads, ensure the following: Install printheads • You have closed the front door • The printer is on. for approximately 15 seconds • All four ink tanks are filled. after filling ink. 1. Open the front door. Make sure the print carriage 2. Remove the orange tape from the printhead cover. has moved to the center;...
  • Page 6 1. Install the HP Smart software from 123.hp.com on your computer. 123.hp.com 2. Open HP Smart. If prompted, create or sign in to an HP account. 3. On the Home screen, choose the option to add a printer and follow the onscreen instructions.
  • Page 7 Place the front of ID card on scanner glass. Out of ink. Printheads related issues. Place the back of ID card on scanner glass. Note: Do not open the printhead cover unless instructed. For more information on lights and errors, visit hp.com/support...
  • Page 8 • You might need to restart your computer after the update. 2. After the update, open the HP software and select Add Printer to search again. 3. Select the printer when it appears. Follow the instructions in the software to complete setup.
  • Page 9 Câble USB. Branchez et allumez l’imprimante. Laissez-la allumée pendant l’installation. 2 Choisissez le mode de configuration souhaité pour votre imprimante Recommandé Option 1 : Configuration guidée avec l’application HP Smart 1. Rendez-vous sur 123.hp.com pour télécharger et installer l’application HP Smart sur votre ordinateur. 123.hp.com 2. Ouvrez HP Smart. Créez un compte HP ou connectez-vous, le cas échéant. 3. Sur l’écran d’accueil, cliquez sur Ajouter une imprimante et suivez les instructions. Si le logiciel ne parvient pas à trouver votre imprimante, consultez la section Résolution des problèmes de connectivité...
  • Page 10 Configuration manuelle 1 Remplissage des réservoirs d’encre 1. Ouvrez le panneau avant. 2. Ouvrez le capuchon du réservoir d’encre que vous souhaitez remplir. 3. Ouvrez la bouteille d’encre. 4. Retournez la bouteille, placez-la au-dessus du réservoir puis insérez-la correctement dans le goulot du réservoir.
  • Page 11         Avant d’installer les têtes d’impression, assurez-vous que :  Installation • L’imprimante est allumée. • Vous avez refermé le panneau avant des têtes pendant environ 15 secondes une fois  • Les quatre réservoirs le remplissage d’encre terminé. d’encre sont remplis. d’impression 1. Ouvrez le panneau avant. Assurez-vous que le chariot 2. Retirez la languette orange du capot de la tête d’impression s’est déplacé au centre de l’imprimante ; ...
  • Page 12 3. Appuyez sur le bouton clignotant “Copie” pour numériser la page. La lettre “A” clignote sur l’écran de l’imprimante pendant la numérisation et disparaît une fois l’alignement terminé. La configuration matérielle de l’imprimante est terminée après l’alignement de la tête d’impression. 5 Installation de l’application HP Smart 1. Rendez-vous sur 123.hp.com pour télécharger et installer le logiciel HP Smart sur votre ordinateur. 123.hp.com 2. Ouvrez HP Smart. Créez un compte HP ou connectez-vous, le cas échéant.
  • Page 13 Problèmes liés aux têtes d’impression. Placez le verso de la carte d’identité sur la Remarque : N’ouvrez pas le capot de la tête vitre du scanner. d’impression, sauf indication contraire. Pour en savoir plus sur les voyants et les erreurs, consultez le site hp.com/support...
  • Page 14 Si le logiciel ne parvient pas à trouver votre imprimante pendant la configuration, vérifiez les conditions suivantes pour résoudre le problème. Problème potentiel Solution Le logiciel HP ne détecte pas l’imprimante 1. Relancez la recherche et attendez. Vous devez terminer l’installation du pilote pour que le logiciel puisse trouver l’imprimante. Cette opération peut prendre une dizaine de minutes. 2. Pour vérifier le statut d’installation du pilote : a.
  • Page 15 1. Acesse 123.hp.com em seu computador para instalar o software HP Smart. 123.hp.com 2. Abra o HP Smart. Se solicitado, crie ou faça login em uma conta da HP. 3.    N a tela inicial, escolha a opção de adicionar uma impressora e siga as instruções na tela. Se o software não  conseguir encontrar sua impressora, consulte a seção Ajuda para problemas de conectividade USB durante a configuração (Windows) deste guia.
  • Page 16 Configuração Manual 1 Abastecer os tanques de tinta 1. Abra a porta frontal. 2. Abra a tampa do tanque de tinta a ser abastecido. 3. Gire a tampa do frasco de tinta, para abri-lo. 4. Coloque o frasco de cabeça para baixo no tanque e encaixe o frasco no lugar.
  • Page 17           A ntes de instalar as cabeças de impressão, assegure-se do  Instalar as seguinte: • Você deixou a porta frontal fechada cabeças de por aproximadamente 15 segundos • A impressora está ligada. impressão depois de carregar a tinta. • Todos os quatro tanques de tinta estão cheios. 1.    A bra a porta frontal. Verifique se o carro  2. ...
  • Page 18 5 Instalar o aplicativo HP Smart 1. Instale o software HP Smart de 123.hp.com no seu computador. 123.hp.com 2. Abra o HP Smart. Se solicitado, crie ou faça login em uma conta da HP. 3.      N a tela inicial, escolha a opção de adicionar uma impressora e siga as instruções na tela.  Se o software não conseguir encontrar sua impressora, consulte a seção Ajuda para problemas de conectividade USB durante a configuração (Windows) deste guia.
  • Page 19 Coloque a frente da identidade no vidro Sem tinta. do scanner. Problemas relacionados às cabeças de impressão. Coloque o verso da identidade no vidro Observação: Não abra a tampa da cabeça  do scanner. de impressão, a menos que seja instruído  a isso. Para mais informações sobre luzes e erros, acesse hp.com/support...
  • Page 20 Abra o Painel de Controle no seu computador com Windows. b. Selecione Dispositivos e Impressoras para localizar sua nova impressora. Um ícone de carregamento será exibido durante a instalação. Quando a  instalação estiver completa, você receberá uma notificação do Windows. 3. Volte ao software HP e procure novamente. 4. Selecione a impressora quando ela aparecer. Siga as instruções no software para concluir a configuração. O sistema operacional Windows Se o software HP ainda não conseguir localizar a impressora após você seguir ...
  • Page 21 123.hp.com 123.hp.com .‫ أو سج ِّ ل الدخول إليه‬HP ‫. إذا تمت مطالبتك، فأنشئ حساب‬HP Smart ‫2. افتح برنامج‬ ‫3. من الشاشة "الرئيسية"، حدد خيار إضافة طابعة، واتبع اإلرشادات الظاهرة على الشاشة. إذا تعذر على البرنامج‬ ‫) الوارد في‬Windows ‫ أثناء اإلعداد (على نظام‬USB ‫العثور على طابعتك، ف ر اجع قسم تعليمات بخصوص مشلكات اتصال‬...
  • Page 22 ‫اإلعداد اليدوي‬ ‫1 ملء خ ز انات الحبر‬ .‫2. افتح غطاء خ ز ان الحبر الذي تريد ملئه‬ .‫1. افتح الباب األمامي‬ ‫4. ضع الزجاجة في وضع مقلوب على الخ ز ان، واضغط عليها‬ .‫3. قم بتدوبر زجاجة الحبر لفتحها‬ .‫حتى...
  • Page 23 :‫تأكد مما يلي قبل تركيب رؤوس الطباعة‬ ‫2 تر كيب رؤوس الطباعة‬ ‫• إغالق الباب األمامي لمدة‬ .‫• تشغيل الطابعة‬ ‫51 ثانية تقريب ً ا بعد ملء‬ ‫• امتالء جميع خ ز انات الحبر‬ .‫الحبر‬ .‫األربعة‬ .‫2. قم بإ ز الة الشريط البرتقالي من غطاء ر أس الطباعة‬ ‫1.
  • Page 24 123.hp.com 123.hp.com .‫ أو سج ِّ ل الدخول إليه‬HP ‫. إذا تمت مطالبتك، فأنشئ حساب‬HP Smart ‫2. افتح برنامج‬ .‫3. من الشاشة "الرئيسية"، حدد خيار إضافة طابعة، واتبع اإلرشادات الظاهرة على الشاشة‬ )Windows ‫ أثناء اإلعداد (على نظام‬USB ‫إذا تعذر على البرنامج العثور على طابعتك، ف ر اجع قسم تعليمات بخصوص مشلكات اتصال‬...
  • Page 25 .‫زجاج الماسحة الضوئية‬ .‫مشلكات تتعلق برؤوس الطباعة‬ ‫مالحظة: ال تفتح غطاء ر أس الطباعة ما لم‬ ‫ضع الوجه الخلفي لبطاقة الهوية على‬ .‫ي ُ طلب منك ذلك‬ .‫زجاج الماسحة الضوئية‬ hp.com/support ‫للحصول على مزيد من المعلومات حول المصابيح واألخطاء، زر موقع‬...
  • Page 26 .‫، وابحث مرة أخرى‬HP ‫3. عد إلى برنامج‬ .‫حدد الطابعة عندما تظهر. اتبع اإلرشادات الواردة في البرنامج إلكمال اإلعداد‬ ‫ ال ي ز ال يتعذر عليه العثور على الطابعة بعد اتباع الخطوات المذكورة‬HP ‫إذا اكن برنامج‬ ‫ قديم‬Windows ‫نظام تشغيل‬...
  • Page 28 © Copyright 2022 HP Development Company, L.P. Microsoft is a registered trademark of Microsoft Corporation in the United States and/or other countries. All third party trademarks are the property of their respective owners. Microsoft est une marque déposée de Microsoft Corporation aux États-Unis et/ou dans d’autres pays.
Ce manuel est également adapté pour:

Smart tank 540 serie