Table des Matières
Publicité
Les langues disponibles
Les langues disponibles
Liens rapides
OWNER'S MANUAL
GUIDE D'UTILISATION
Model
Modèle
•
DBD5L
CAUTION:
Read and follow all safety rules
and operating instructions
before first use of this product.
PRÉCAUTION :
Veuillez lire attentivement les
consignes de sécurité et les
instructions d'utilisation avant
l'utilisation initiale de ce
produit.
1 800 26 DANBY
R
Beverage Dispenser
Owner's Manual
Table of Contents . . . . . . . . . . . . . . . . . . . . . . . . 3
Distributeur de Breuvage
Guide d'utilisation
Table des matières . . . . . . . . . . . . . . . . . . . . . ..22
Danby Products Limited, Guelph, Ontario Canada N1H 6Z9
Danby Products Inc., Findlay, Ohio USA 45839-0669
R
R
1.08.08
Publicité
Chapitres
Table des Matières
Dépannage

Manuels Connexes pour Danby DBD5L

Sommaire des Matières pour Danby DBD5L
- Page 1 Table des matières ..... ..22 1 800 26 DANBY Danby Products Limited, Guelph, Ontario Canada N1H 6Z9 Danby Products Inc., Findlay, Ohio USA 45839-0669...
-
Page 2: Need Help
WELCOME Welcome to the easy-to-use manual experience these Danby family. We’re and you’ll hear it in values each time you proud of our quality the friendly voices of use your Beverage products and we our consumer service Dispenser. That’s believe in dependable department. -
Page 3: Table Des Matières
TABLE OF CONTENTS Important Safety Information Grounding Instructions Handling Beer Kegs Safety Precautions Important Notice Features Product Features & Accessories Accessories Parts & Setting Up Your Beverage Dispenser How the Beverage Dispenser Works Disposal of Packaging Location Installation Instructions Connecting the Beverage Dispenser Preparing a Standard 5 Liter Mini Keg Getting the Dispenser Ready Turning on the Air Pressure... -
Page 4: Important Safety Information
IMPORTANT SAFETY INFORMATION READ ALL SAFETY INFORMATION BEFORE USING • This appliance must be grounded. In the event of a GROUNDING malfunction or breakdown, grounding will reduce the risk INSTRUCTIONS of electric shock by providing a path of least resistance for electric current. -
Page 5: Important Notice
NOTICE Alcohol is easily available with Danby's new Beverage Dispenser, however, it is not intended to be available to people under the legal age to consume alcohol. Danby does not assume liability for the unlawful use or consumption of alcohol. -
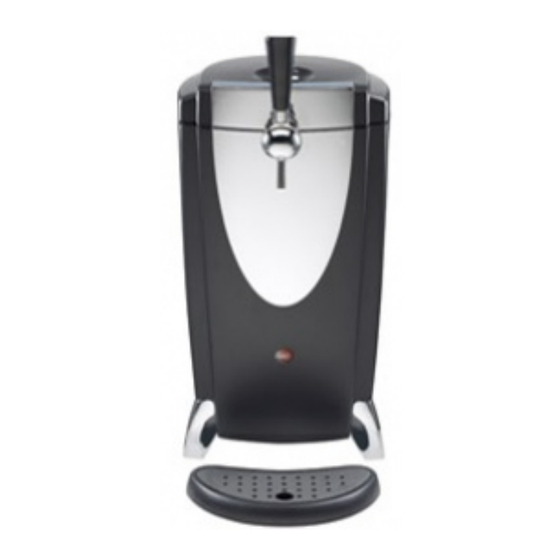
Page 6: Product Features & Accessories
PRODUCT FEATURES AND ACCESSORIES 1. DRIP TRAY 6. ON /OFF SWITCH 2. TAP 7. TEMPERATURE CONTROL 3. TAP HANDLE 8. POWER SUPPLY CORD 4. HANDLE TO OPEN DISPENSER LID 5. TEMPERATURE DISPLAY... -
Page 7: Parts & Accessories
In the event any of the ACCESSORIES accessories are missing and/or not in good condition, please call Danby TOLL FREE at the number listed below to speak with one of our Customer Service Representatives. 1. 1 YELLOW RISING TUBE 2. -
Page 8: Setting Up Your Beverage Dispenser
SETTING UP YOUR BEVERAGE DISPENSER How the Beverage Dispenser Works. IMPORTANT This appliance is a beverage cooler and dispenser. Standard 5 liter mini kegs, and the Beverage Container are cooled • Ensure that all included to the desired temperature in the cooling compartment accessories are present and in of the appliance. -
Page 9: Location Of The Beverage Dispenser
SETTING UP YOUR BEVERAGE DISPENSER LOCATION OF THE BEVERAGE DISPENSER Find a suitable area for the dispenser. Do not place the dispenser outside, in direct sunlight, or in any other location where the dispenser will be exposed to water or other harsh conditions. The dispenser should not be placed in environments where the ambient temperature drops below 65°F (18°C) or goes above 85°F (29°C). -
Page 10: Connecting The Beverage Dispenser
CONNECTING THE BEVERAGE DISPENSER Preparing A Standard 5 Liter Mini Keg USING THE YELLOW ADAPTOR To connect the Yellow Adapter to a standard 5 liter mini keg, follow these instructions. NOTE: MAKE SURE ALL COMPONENTS ARE PROPERLY SANITIZED PRIOR TO EACH USE. PREPARING THE STANDARD 5 LITER MINI KEG FASTEN RISING PIPE... - Page 11 CONNECTING THE BEVERAGE DISPENSER Preparing A Standard 5 Liter Mini Keg (cont’d) USING THE YELLOW ADAPTER (continued) DISPENSING TUBE FOR YELLOW ADAPTER The DISPENSING TUBE will be pre-assembled, but if assembling is required please follow these instructions: DISPENSING TUBE WITH BLACK STOPPER YELLOW MALE CONNECTOR METAL CLIP YELLOW MALE CONNECTOR...
-
Page 12: Turning On The Air Pressure
CONNECTING THE BEVERAGE DISPENSER Preparing A Standard 5 Liter Mini Keg (cont’d) USING THE YELLOW ADAPTER (continued) CONNECTING THE MINI KEG TO THE To connect dispensing tube to DISPENSER Yellow adapter 13. Insert the 5 liter mini keg (with the ADAPTER connected) into the dispenser. -
Page 13: Preparing The Beverage Container
CONNECTING THE BEVERAGE DISPENSER Preparing the Beverage Container USING THE WHITE BEVERAGE CONTAINER ADAPTER To connect the WHITE ADAPTER to the 5L Beverage Container, follow these instructions. NOTE: MAKE SURE ALL COMPONENTS ARE PROPERLY SANITIZED PRIOR TO EACH USE. PREPARING THE BEVERAGE CONTAINER FASTEN To prepare the Beverage Container, please follow these RISING... - Page 14 CONNECTING THE BEVERAGE DISPENSER Preparing The Container USING THE WHITE ADAPTER (continued) CONNECTING THE CONTAINER TO THE BEVERAGE DISPENSER 6. Insert the container into the center of the unit. 7. Attach the AIR-CONNECT TUBE to the “AIR IN” valve in the WHITE ADAPTER (See Figure 15 ). DRINK OUT 8.
-
Page 15: Operating The Beverage Dispenser
OPERATING THE BEVERAGE DISPENSER Switching On The Power CAUTION: Switch on the beverage dispenser only when the mini keg or the container is properly connected (See “ Connecting the Beverage Disenser ” on pages 10-14). Make sure to clean up any liquids that have spilled in and around the beverage dispenser. - Page 16 OPERATING THE BEVERAGE DISPENSER Using The Dispensing Tap You can begin dispensing your beverage immediately after the 5 liter mini keg or the container has been connected to the dispenser. However, it is recommended that you wait until the beverage has reached the desired set temperature. Beer, in particular, can foam excessively if the temperature is too high.
- Page 17 OPERATING THE BEVERAGE DISPENSER Depressurize To Disconnect the Mini Keg & the Container It is very important to depressurize the mini keg or container when you are finished using them. If the pressure is not released, remaining high pressure could lead to spraying or spilling. Follow these directions to ensure proper depressurization.
-
Page 18: Care And Cleaning
CARE AND CLEANING CAUTION: DO NOT USE A DISHWASHER TO CLEAN THE BEVERAGE DISPENSER, SPARE PARTS OR ACCESORIES. NOTE: Handling beverages requires very special attention to cleanliness and hygiene. Clean the beverage dispenser, spare parts, and accesories thoroughly after each use. CLEANING THE OUTSIDE OF THE BEVERAGE DISPENSER Always unplug the beverage dispenser before cleaning. -
Page 19: Defrosting The Beverage Dispenser
CARE AND CLEANING DEFROSTING THE BEVERAGE DISPENSER If frost builds up in and around the beverage dispenser, that means there is too much humidity near the unit. Move the unit to a less humid location. NOTE: DO NOT USE A HEATER OR ANY SHARP UTENSILS TO REMOVE FROST OR CLEAN THE BEVERAGE DISPENSER Unplug the beverage dispenser and, once the frost melts, carefully wipe down the outside or inside of the unit. -
Page 20: Before You Call For Service
BEFORE YOU CALL FOR SERVICE TROUBLE SHOOTING Problem Possi b l e Causes What To Do 1) No power supply 1)The beverage 1) Make sure the dispenser is plugged into a 3 prong outlet dispenser is not 1a) Low voltage 1a) Make sure the dispenser is plugged into a proper cooling 120V outlet... - Page 22 Ces numéros se trouvent de la couverture arrière de de guide. Il sur l’étiquette au dos de l’appareil. sera requis pour faire une réclamation de la garantie. Numéro de modèle DBD5L Numéro de série ____________ Date d’achat ____________ EN CAS DE BESOIN D’ASSISTANCE...
- Page 23 TABLE DES MATIÈRES Renseignements importants sur la sécurité Instructions de mise à la terre Manipulation des fûts de bière Consignes de sécurité Avis important Caractéristiques Caractéristiques du produit et Accessoires Accessoires compris Installation de votre Glacière de bière en fût Fonctionnement de l'appareil Mise aux rebuts de l'emballage Emplacement...
-
Page 24: Informations De Sécurité Importantes
INFORMATIONS DE SÉCURITÉ IMPORTANTES Lisez toute l'information de sûreté avant utilisation • Cet appareil doit être mis à latterre. Branchez le seulement dans INSTRUCTIONS une prise correctement mise à la terre. DE MISE À LA • Ne faites pas fonctionner cet appareil s’il a un cordon ou fiche TERRE électrique endommagé, s’il ne fonctionne pas correctement, ou si l’appareil a été... -
Page 25: Consignes De Sécurité
L'alcool est facilement disponible avec le nouveau Distributeur de Breuvage du Danby, cependant, on ne le prévoit pas pour être à la disposition des gens plus jeunes que l'âge légal de consommer l'alcool. Danby n'assume pas la responsabilité à l'utilisation ou à la consommation illégale de l'alcool Buvez s'il vous plaît de manière responsable et ne buvez pas s'il vous plaît et... -
Page 26: Caractéristiques Du Produit Et Accessoires
CARACTÉRISTIQUES DU PRODUIT ET ACCESSOIRES 1. PLATEAU DE GOUTTE COMMUTATEUR "MARCHE/ARRÊT" 2. ROBINET 7. CONTRÔLE DE TEMPÉRATURE 3. POIGNÉE DE ROBINET 8. CORDE D'ALIMENTATION ÉLECTRIQUE 4. POIGNÉE POUR OUVRIR LE COUVERCLE 5. ÉTALAGE DE TEMPÉRATURE... -
Page 27: Accessoires Compris
ACCESSOIRES COMPRIS Enlevez et inspectez que tous les accessoires fournis avec ACCESSOIRES cette unité sont inclus et en bon état. Si les accessoires l'uns INCLUS des sont absents, ou ne sont pas en bon état, appelez sil vous plait le numéro de téléphone sans frais pour parler avec un Representative du Service Client. -
Page 28: Fonctionnement De L'appareil
FONCTIONNEMENT DE L'APPAREIL IMPORTANT Fonctionnement de l'appareil. Cet appareil sert à rafraîchir et distribuer des breuvages. Les • Assurez-vous que tous les minis fûts standard de 5 litres, et le Réservoir de breuvages accessoires sont présents et en sont refroidis à la température souhaitée dans le bon état(Voir le "Accessoires compartiment de réfrigération de l'appareil. -
Page 29: Le Fait De Monter Votre Distributeur De Breuvage
LE FAIT DE MONTER VOTRE DISTRIBUTEUR DE BREUVAGE EMPLACEMENT DU DISTRIBUTEUR DE BREUVAGE Trouvez un endroit approprié pour le distributeur. Ne placez pas le distributeur à l'extérieur, directement aux rayons du soleil, ou dans tout autre endroit où le distributeur sera en contact avec de l'eau ou d'autres conditions difficiles. -
Page 30: Relier Le Distributeur De Breuvage
RELIER LE DISTRIBUTEUR DE BREUVAGE Préparer le mini fût standard de 5 litres UTILISATION DE L'ADAPTATEUR JAUNE Pour brancher l'Adaptateur Jaune à un mini fût standard de 5 litres, suivez ces instructions. AVERTISSEMENT : ASSUREZ-VOUS QUE TOUS LES COMPOSANTS SOIENT DÉSINFECTÉS AVANT CHAQUE UTILISATION. -
Page 31: Préparer Le Mini Fût Standard De 5 Litres (Suite)
RELIER LE DISTRIBUTEUR DE BREUVAGE Préparer le mini fût standard de 5 litres (suite) UTILISATION DE L'ADAPTATEUR JAUNE (suite) TUBE DE DISTRIBUTION POUR L'ADAPTATEUR JAUNE Le TUBE DE DISTRIBUTION sera préassemblé, mais si le montage est nécessaire, veuillez suivre les instructions suivantes : CONNECTEUR MASCULIN JAUNE TUBE DE DISTRIBUTION AVEC UN BOUCHON NOIR... -
Page 32: Mise En Marche De L'air Comprimé
RELIER LE DISTRIBUTEUR DE BREUVAGE Préparer le mini fût standard de 5 litres (suite) UTILISATION DE L'ADAPTATEUR JAUNE (suite) BRANCHEMENT DU MINI FÛT AU Brancher le tube de distribution à DISTRIBUTEUR l'adaptateur jaune 13. Insérez le mini fût de 5 litres (avec l'ADAPTATEUR branché) dans le distributeur. -
Page 33: Préparer Le Réservoir De Breuvages
RELIER LE DISTRIBUTEUR DE BREUVAGE Préparer le Réservoir de breuvages UTILISATION DE L'ADAPTATEUR BLANC DU RÉSERVOIR DE BREUVAGE Pour brancher l'ADAPTATEUR BLANC au Réservoir de Breuvage de 5 litres, suivez ces instructions. AVERTISSEMENT : ASSUREZ-VOUS QUE TOUS LES COMPOSANTS SOIENT DÉSINFECTÉS AVANT CHAQUE UTILISATION. -
Page 34: Préparer Le Réservoir
RELIER LE DISTRIBUTEUR DE BREUVAGE Préparer le Réservoir UTILISATION DE L'ADAPTATEUR BLANC (suite) BRANCHER LE RÉSERVOIR AU DISTRIBUTEUR DE BREUVAGE 6. Insérez le réservoir dans le centre de l'appareil. 7. Attachez le TUBE DE CONNECTION D'AIR à la valve d'ENTRÉE D'AIR dans l'ADAPTATEUR BLANC La boisson (voir Figure 15 ). -
Page 35: Exploiter Le Distributeur De Breuvage
EXPLOITER LE DISTRIBUTEUR DE BREUVAGE Mise en marche MISE EN GARDE : Mettez en marche le distributeur de breuvage seulement quand le mini fût ou le réservoir est correctement branché (voir " Consignes d'assemblage " aux pages 30-34). Assurez-vous de nettoyer tous les liquides qui sont renversés dedans ou autour du distributeur de breuvage. -
Page 36: Utilisation Du Robinet Distributeur
EXPLOITER LE DISTRIBUTEUR DE BREUVAGE Utilisation du robinet distributeur Vous pouvez commencer à distribuer votre bière immédiatement après le mini fût de 5 litres ou le réservoir ont été branchés au distributeur. Cependant, il est recommandé que vous attendiez jusqu'à ce que le breuvage ait atteint la température réglée désirée. -
Page 37: Fonctionnement Du La Distributeur De Breuvage
FONCTIONNEMENT DU LA DISTRIBUTEUR DE BREUVAGE Dépressurisez pour débrancher le mini fût et le réservoir Il est important de dépressuriser le mini fût ou le réservoir lorsque vous avez terminé de les utiliser. Si la pression n'est pas libérée, la haute pression restante pourrait provoquer la vaporisation ou le renversement. Suivez ces instructions pour vous assurer une dépressurisation correcte. -
Page 38: Nettoyage Et Entretien
NETTOYAGE ET ENTRETIEN DÉCONGELATION DU DISTRIBUTEUR DE BREUVAGE Si la grive s'accumule dedans et autour le distributeur de breuvage, cela signifie qu'il y a trop d'humidité près de l'appareil. Déplacez l'appareil vers un emplacement moins humide. AVERTISSEMENT : N'UTILISEZ PAS UN APPAREIL DE CHAUFFAGE OU TOUT UTENSILE ACÉRÉ... - Page 39 NETTOYAGE ET ENTRETIEN MISE EN GARDE : N'UTILISEZ PAS UN LAVE-VAISSELLE POUR NETTOYER LE DISTRIBUTEUR DE BREUVAGE, LES PIÈCES DE RECHANGE OU LES ACCESSOIRES. AVERTISSEMENT : La manipulation des breuvages exige une attention particulière au sujet de la propreté et l'hygiène. Nettoyez le distributeur de breuvage, pièces de rechange et les accessoires complètement après chaque utilisation.
-
Page 40: Avant De Placer Un Appel De Service
AVANT DE PLACER UN APPEL DE SERVICE DÉPANNAGE Problème Cause pooide Ce qu’il faut faire 1) Le distributeur de 1) Pas d'alimentation 1) Assurez-vous que le distributeur soit branché dans breuvage ne une prise à 3 lames 1a) Tension faible 1a) Assurez-vous que le distributeur soit branché... - Page 42 : • Type de modèle • Numéro du modèle • Description des pièces Danby Products Limited, Guelph, Ontario Canada N1H 6Z9 Danby Products Inc., Findlay, Ohio USA 45839-0669 Printed in China (P.R.C.) Imprimé en Chine (R.P.C.)