Télécharger Imprimer la page
Proline PROHP81 Manuel D'utilisation

Proline PROHP81 Manuel D'utilisation

Sèche-linge à pompe à chaleur

Publicité

Les langues disponibles

Les langues disponibles

Liens rapides

Publicité

loading

Sommaire des Matières pour Proline PROHP81

  • Page 3 TABLE DES MATIÈRES MISES EN GARDE IMPORTANTES..........2 CONSEILS D’ÉCONOMIE D’ ÉNERGIE..........6 DÉBALLAGE DE L’APPAREIL............6 DESCRIPTION DU PRODUIT............7 AVANT D’INSTALLER L’APPAREI..........9 INSTALLATION................9 CONNEXION ÉLECTRIQUE..............12 REMARQUES CONCERNANT L’ENTRETIEN DU LING....13 AVANT LA PREMIÈRE UTILISATION..........14 FONCTIONNEMENT DU SÈCHE-LINGE..........15 NETTOYAGE ET ENTRETIEN............21 GUIDE DE DEPANNAGE..............24 FICHE PRODUIT................25 SPÉCIFICATIONS................26 MISE AU REBUT................27...
  • Page 4 MISES EN GARDE IMPORTANTES MERCI DE BIEN VOULOIR LIRE LES CONSIGNES DE SÉCURITÉ ATTENTIVEMENT AVANT D’UTILISER L’APPAREIL ET CONSERVER POUR RÉFÉRENCE ULTÉRIEURE. Avertissements • Lisez la notice d’utilisation. • Cet appareil est destiné à un usage domestique uniquement. Toute utilisation autre que celle prévue pour cet appareil, ou pour une autre application que celle prévue, par exemple une application commerciale, est interdite.
  • Page 5 publique prévus à cet effet. • Installation et mise en service : L’appareil doit être installé sur le sol, sur une surface plane et horizontale en s’assurant que les ouvertures d’aération sont correctement dégagées. Ne jamais essayer de remplacer ou de réparer vous même une partie ou un composant de l’appareil, demandez de l’aide à...
  • Page 6 assouplissants. • Retirer des poches tous les objets tels que briquets et allumettes. • MISE EN GARDE: Ne jamais arrêter un sèche-linge à tambour avant la fin du cycle de séchage, à moins que tous les articles ne soient retirés rapidement et étalés, de telle sorte que la chaleur soit dissipée.
  • Page 7 Precautions de securite • Cet appareil n’est pas destine a une utilisation en plein air.. • Ne touchez pas l’appareil avec les mains ou les pieds humides ou mouilles. • Ne vous appuyez pas sur la porte lors du chargement de la machine et n’utilisez pas la porte pour sou lever ou deplacer la machine.
  • Page 8 CONSEILS D’ÉCONOMIE D’ ÉNERGIE Pour éviter un temps de séchage trop longe et une trop forte consommation d’énergie : • Assurez-vous que votre linge est complètement essoré avant le séchage. • Chargez le linge selon la quantité optimale recommandée pour le programme utilisé...
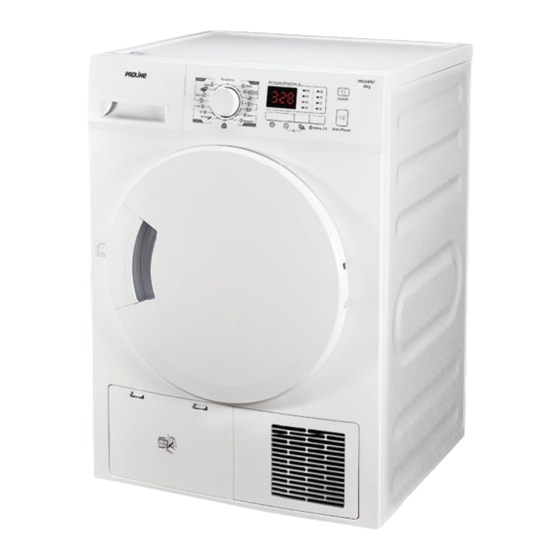
  • Page 9 DESCRIPTION DU PRODUIT Couvercle supérieur Panneau de contrôle Cuve à eau Porte Câble d’alimentation Tambour Filtre à peluches Entrée d’air Base du filtre Couvercle d’entretien Panneau de contrôle 1. Bouton de selection du programme 2. Affichage Cet écran est utilise pour afficher les réglages. Temps de séchage restant estimé...
  • Page 10 Bouton de durée Bouton anti-froissage Bouton de intensité de séchage / programme favori Boutons de sécurité enfants 8. Indicateurs lumineux des le temps de anti-froissage 9. Indicateurs lumineux Vider le reservoir Sécurité enfants Nettoyer le filtre Niveau de séchage d’eau Bouton marche/arrêt Bouton démarrage/pause...
  • Page 11 AVANT D’INSTALLER L’APPAREIL Avant de brancher votre sèche-linge à une prise électrique, vérifies que la tension indiquée sur la plaque signalétique de votre appareil correspond à la tension du secteur de votre logement. Une tension différente pourrait endommager l’appreil. La prise du câble d’alimentation sert de dispositive de déconnexion de l’appareil du secteur et doit donc toujours rester accessible.
  • Page 12 Mise à niveau du sèche-linge Le sèche-linge doit être parfaitement mis à niveau pour assurer un fonctionnement sûr et adéquat. Si le sèche-linge n’est pas bien à plat sur le sol, ajustez les pieds réglables comme souhaité. NE placez PAS de pieces en bois, ni aucun autre objet sous les pieds de l’appareil. Si l’appareil est installé...
  • Page 13 Installation d’accessoires Si votre sèche-linge comporte les pieces suivantes, veuillez porter des gants et les installer conformément aux instructions ci-dessous. Support de tuyau Tuyau de vidange Connecteur Remontez le tuyau de vidange Raccordez le tuyau de Mettez le tuyau de vidange supérieur.
  • Page 14 CONNEXION ÉLECTRIQUE Danger : Pour effectuer la connexion électrique de votre appareil : La connexion à l’alimentation secteur doit être conforme aux norms et règlements en vigueur. N’utilisez pas de rallonge électrique, ni d’adaptateur ou autre dispostif similarie. La prise doit être facilement accessible après l’installation de l’appareil. En case de doute sur l’état de votre connexion, consultez un électricien qualifié.
  • Page 15 REMARQUES CONCERNANT L’ENTRETIEN DU LINGE Étiquettes d’entretien des vêtements Les vêtements ont leur propre etiquette d’entretien de lavage et il est recommandé de suivre les indications de séchage expliquées ci-dessous. Séchage au Ne pas sécher dans un Séchage Ne pas sécher sèche-linge sèche-linge Séchage à...
  • Page 16 Vêtements infroissables Sortez les vêtements infroissables dès que le sèche-linge s’arrête pour réduire les plis. Vêtements tricotés Certains vêtements tricotés, tells que les T-shirts et sous- vêtements ont tendance à rétrécir en function de leur qualité. Ne faites pas trop sécher ces textiles.
  • Page 17 FONCTIONNEMENT DU SÈCHE-LINGE Ouvrez la porte. Vérifiez si le filtre et le tambour sont propres. • Si ce n’est pas le cas, nettoyez-les en vous référant au paragraphe “Nettoyage et entretien”. Placez le linge dans le tambour après l’avoir trié. • Les vêtements doivent être triés en fonction de leur type de fibres et du niveau de séchage requis.
  • Page 18 Sélectionnez la fonction anti-froissage si nécessaire. Vous pouvez utiliser cette fonction pour empêcher le linge de se froisser si vous ne retirez pas le linge une fois le programme terminé. Vous pouvez appuyer sur pour sélectionner 30, 60, 90 ou 120 minutes. Cette fonction n’est pas disponible pour les programmes Vous pouvez activer la fonction d’intensité...
  • Page 19 Ouvrez la porte et enlevez le linge. Attention ! L’intérieur du tambour peut encore être chaud. Vérifiez que tous les articles ont été retirés du tambour. Si vous laissez des articles dans le sèche-linge, ceux-ci risquent d’être endommagés par uncycle de séchage supplémentaire lorsque le sèche-linge sera à...
  • Page 20 Tableau des programmes Pour savoir quelle quantité de linge vous pouvez charger en fonction du programme sélectionné, veuillez vous référer aux recommandations ci-dessous. Les valeurs dans le tableau ci-dessous sont fournies à titre d’information seulement. Programme de Capacité Durée de séchage Type de linge Articles à...
  • Page 21 Remarque ! • Ce symbole signifie le programme d’essai d’efficacité énergétique «programme coton standard», qui est conforme à la norme EN 61121 applicable et qui convient le mieux pour sécher une charge de coton normale à la capacité de charge nominale. •...
  • Page 22 Verrouillage securite-enfants Vous pouvez utiliser cette fonction pour empecher les enfants de jouer avec votre seche-linge Le bouton de programme et tous les boutons sauf le bouton sont desactives lorsque la fonction de securite enfant est active. Pour activer cette fonction, maintenez enfonces les boutons simultanement pendant environ 3 secondes Le voyant de verrouillage enfant...
  • Page 23 NETTOYAGE ET ENTRETIEN Éteignez toujours l’appareil et débranchez-le toujours de la prise secteur avant toute procédure de nettoyage ou d’entretien. N’utilisez jamais de nettoyant chimique ou abrasif. Nettoyage externe Essuyez regulierement l’exterieur de la machine avec un chiffon legerement humide. Puis sechez-le com pletement. Nettoyage de la surface intérieure de la porte Nettoyez toujours la surface intérieure de la porte après chaque processus de séchage.
  • Page 24 Vidange du réservoir d’eau Videz le réservoir d’eau a près chaque processus de séchage. Pour vider le réservoir d’eau : 1. Tirez réservoir d’eau retirez-le soigneusement. 2. Videz l’eau du réservoir. 3. Remettez le réservoir d’eau en place . L’eau condensée n’est pas potable ! Ne retirez jamais le réservoir d’eau lorsque l’appareil fonctionne ! Si vous oubliez de vider le réservoir d’eau, l’appareil s’arrêtera pendant le séchage lorsque le réservoir d’eau est plein et l’indicateur lumineux d’avertissement...
  • Page 25 4. Si nécessaire, nettoyez l’échangeur de chaleur une fois tous les 2 mois. Ne touchez pas l’échangeur de chaleur avec les mains ! Retirez les peluches de l’échangeur de chaleur à l’aide d’un aspirateur équipé d’une brosse à poussière fixée. Nettoyez l’échangeur de chaleur sans appliquer de pression.
  • Page 26 GUIDE DE DÉPANNAGE Problèmes Solutions possibles Contrôlez la porte et vérifiez qu'elle est correctement fermée. Le sèche-linge ne démarre Vérifiez que le programme est défini. pas. Vérifiez que le bouton de démarrage a été pressé. Vérifiez si l'alimentation électrique est activée Vérifiez si la fiche électrique est insérée.
  • Page 27 La fiche produit de ce sèche-linge est conforme à la directive européenne N° 392/2012. Marque Proline Modèle PROHP81 Capacité nominale du linge en coton pour le programme « coton 8 kg standard » à pleine charge Type de séchage Condensateur Classe d’efficacité énerétique...
  • Page 28 Le « programme coton standard » utilisé à pleine charge et à demi-charge est le programme de séchage standard auquel se rapportent les informations qui figurent sur l’étiquette et sur la fiche. Ce programme convient pour le séchage de textiles en coton normalement humides et il constitue le plus efficace en terme de consommation d’énergie pour le coton.
  • Page 29 MISE AU REBUT En tant que distributeur responsable, nous accordons une grande importance à la protection de l’environnement. Nous vous encourageons à respecter les procédures correctes de mise au rebut de votre appareil, des piles et des éléments d’emballage. Cela aidera à préserver les ressources naturelles et à...
  • Page 30 En raison des mises au point et améliorations constamment apportées à nos produits, de petites incohérences peuvent apparaître dans ces instructions. Veuillez nous excuser pour la gêne occasionnée. Etablissements Darty & fils ©, 9 Rue des Bateaux-Lavoirs, 94200 Ivry-sur-Seine, France 11/03/2022...
  • Page 31 INHOUDSOPGAVE BELANGRIJKE VEILIGHEIDSINSTRUCTIES........30 ENERGIEBESPARINGSTIPS.............33 HET APPARAAT UITPAKKEN............33 PRODUCTBESCHRIJVING..............34 VOOR INSTALLATIE VAN HET APPARAAT......36 INSTALLATIE................36 ELEKTRISHCE AANSLUITING............39 OPMERKINGEN OVER HET WASSEN...........40 VOOR INGEBRUIKNAME..............41 DE DROOGTROMMEL GEBRUIKEN..........42 REINIGINE EN ONDERHOUD............48 PROBLEEMOPLOSSING..............51 PRODUCTFICHE................52 SPECIFICATIES................53 VERWIJDERING................54...
  • Page 32 BELANGRIJKE VEILIGHEIDSINSTRUCTIES LEES DE VOLGENDE VEILIGHEIDSINSTRUCTIES AANDACHTIG DOOR VOORDAT U HET APPARAAT IN GEBRUIK NEEMT EN BEWAAR ZE VOOR TOEKOMSTIG GEBRUIK. Waarschuwingen • Lees de instructies. • Dit apparat is alleen bedoeld voor huishoudelijk gebruik en mag niet voor andere doeleinden of toepassingen worden doeleinden of toepassingen worden gebruikt, zoals niet-huishoudelijk worden gebruikt, zoals niet-huishoudelijk gebruik of in een commerciële omgeving.
  • Page 33 • Voor installatie, onderhoud : Het apparaat moet op een horizontale vloer worden geplaatst en de ventilatie vrij houden. Probeer geen componenten zelf te vervangen of te repareren, vraag indien nodig het servicebureau om hulp. • Voor behandeling : Behandel het apparaat altijd om schade te voorkomen. •...
  • Page 34 regelmatig wordt in-en uitgeschakeld. • Houd kinderen jonger dan 3 jaar altijd uit de buurt of houd er continu toezicht op. • Een tapijt mag de openingen niet verhinderen. • Uitllatlucht dient niet afgevoerd te worden in een rookkanaal dat gebruikt wordt om gassen aft e voeren van apparaten die gas of andere brandstoffen branden.
  • Page 35 ENERGIEBESPARINGSTIPS Om onnodig lange droogtijden en een hoog energieverbruik te voorkomen: • Zorg dat uw wasgoed grondig is gecentrifugeerd voordat u het droogt. • Laad het apparaat volgens de indeale hoeveelheid wasgoed die voor het gebruikte programma is aanbevolen (Zie Programmatabel).
  • Page 36 PRODUCTBESCHRIJVING Bovenste deksel Bedieningspaneel Waterreservoir Deur Netsnoer Trommel Filter voor pluizen Luchtinlaat Filterbasis Onderhoudsdeksel Bedieningspaneel 1. Knop voor programmakeuze 2. Display Dit display wordt gebruikt voor het weergeven van de instellingen Geschatte resterende droogtijd /Foutcodes Vertaagde start Uitgestelde start knop...
  • Page 37 Tijd knop Anti-kreuk knop Droogintensiteit / Favoriete programma knop Kinderslot knops 8. Indicatielampjes voor anti-kreuktijd 9. Indicatie lichten Waterreservoir Kinderslot Filter reinigen Droogniveau ledigen Aan/Uit-knop Start/Pauze-knop...
  • Page 38 VOOR INSTALLATIE VAN HET APPARAAT Controleer voordat u uw droogtrommel op de netvoeding aansluit of de spanning op het typeplaatje van uw apparaat overenstemt met de spanning bij u thuis. Een andere spanning kan het apparaat beschadigen. De stekker is de enige manier om het apparaat van de voeding te ontkoppelen, zorg dat deze altijd makkelijk bereikbaar is.
  • Page 39 Het apparaat nivelleren Zorg dat de droogtrommel perfect vlak staat voor een veilige en juiste werking. Als de droogtrommel niet perfect vlak staat, pas de stelvoetjes aan zoals vereist. Plaats GEEN houten blokjes of ander voorwerp onder de voetjes. Als het apparaat op vloerbekleding wordt geplaatst, pas de voetjes aan zodat er lucht onder het apparaat kan circuleren.
  • Page 40 Installeren van accessoires Als u de volgende onderdelen heeft, draag dan handschoenen en installeer deze volgens onderstaande instructies. Slanghouder Afvoerslang Stekker Trek de bovenste afvoerslang Sluit de externe Stop de externe omhoog. afvoerslang aan op de afvoerslang in de waterpomp. vloerafvoer.
  • Page 41 ELEKTRISHCE AANSLUITING Gevaar: Om de elektrische aansluiting naar uw apparaat te maken: De installatie naar de netvoeding dient in overeenstemming te zijn met de locale richtlijnen en voorschriften. Gebruik geen verlengsnoer, een adapterstekker, etc. De stekker moet na het installeren van het apparaat eenvoudig bereikbaar zijn.
  • Page 42 OPMERKINGEN OVER HET WASSEN Waslabels Kledingstukken hebben hun eigen waslabels. Drogen in overeenstemming met onderstaande waslabels is aldus aanbevolen. Niet in droogtrommel Droog Machinaal drogen Niet drogen drogen Aan de waslijn / han- Druipdroog Vlak laten drogen In de schaduw gend drogen Chemisch reinigen, alle Chemisch reinigen,...
  • Page 43 Kreukvrije kledingstukken Verwijder kreukvrije kledingstukken zodra de droogtrommel stopt om kreuken te beperken. Lusvorm geweven kledingstukken Bepaalde lusvorm geweven kledingstukken, zoals T-shirts en ondergoed, hebben de neiging om te krimpen, afhankelijk van de kwaliteit. Droog deze kledingstukken niet te veel. Laadvermogen De volgende gewichten dienen uitsluitend ter referentie.
  • Page 44 DE DROOGTROMMEL GEBRUIKEN Open de deur. Controleer of de filter en trommel schoon zijn. • Als dit niet het geval is, reinig deze zoals vermeld in de sectie ‘Reiniging en onderhoud’. Plaats het wasgoed losjes in de trommel na het sorteren. • Sorteer de kledingstukken volgens het type vezel en het nodig droogniveau.
  • Page 45 Indien nodig, selecteer de anti-kreukfunctie. U kunt deze functie gebruiken om te voorkomen dat het wasgoed kreukt als u het wasgoed niet uit de machine haalt nadat het programma is afgelopen. U kunt op drukken om 30, 60, 90 of 120 minuten te selecteren. Deze functie is niet beschikbaar voor de programma’s.
  • Page 46 Open de deur en haal het wasgoed uit. Voorzichtig ! De binnenkant van de trommel kan nog warm zijn. Controleer of alle items uit de trommel zijn gehaald. Als er zich nog items in de droogtrommel bevinden, kunnen deze tijdens de volgende droogcyclus door overmatig drogen beschadigd raken.
  • Page 47 Programmatabel Volg de aanbevolen lading met wasgoed wanneer u een bepaald programma gebruikt. De waarden, die in onderstaande tabel zijn vermeld, zijn louter informatief. Droog- Capaciteit Droogtijd Type wasgoed Voor het drogen van programma (kg) (minuten) Katoenen stiffen zoals handdoeken, T-shirts, ondergoed en beddengoed Striijken Katoen...
  • Page 48 Opmerking! • Dit symbool betekent het energie-efficiëntie-testprogramma “standaard katoenprogramma”, dat in overeenstemming is met de toepasselijke EN 61121-norm en het meest geschikt is om normale katoenlading bij nominaal laadvermogen te drogen. • Dikke of meerlagige stoffen, b.v. beddengoed, jeans enz. zijn niet gemakkelijk te drogen.
  • Page 49 Kinderslot U kunt deze functie gebruiken om te voorkomen dat kinderen met uw droger spelen. De programmaknop en alle knoppen behalve de knop warden gedeactiveerd wanneer de het kinderslot actief is. Om deze functie te activeren houdt U tegelijkertijd ongeveer 3 seconden ingedrukt. Op het display verschijnt het kinderslotsymbool.
  • Page 50 REINIGINE EN ONDERHOUD Schakel het apparaat uit en haal de stekker uit het stopcontact voordat u het schoonmaakt. Schakel het apparaat uit en haal de stekker uit het stopcont Externe reiniging Veeg de buitenkant van het apparaat af met een vochtige doek. Droog grondig af. Reinigen van de binnenkant van de deur Reinig na elk droogprogramma de binnenkant van de deur.
  • Page 51 Legen van het waterreservoir Laat het waterreservoir na elk droogproces leeglopen. Om het waterreservo1r _ af te tappen: 1. Trek aan het waterreservoir en verwijder het voorzichtig. 2. Laat het water in het reservoir weglopen. 3. Plaats het waterreservoir terug in de machine. Het condenswater is geen drinkwater! Verwijder nooit het waterreservoir als het apparaat in werking is! Als u vergeet het waterreservoir af te tappen, stopt het apparaat tijdens het...
  • Page 52 4. Maak de warmtewisselaar indien nodig één keer per 2 maanden schoon. Raak de warmtewisselaar niet aan met uw handen! Verwijder de pluisjes van de warmtewisselaar met behulp van een stofzuiger met daarop een afstofborstel. Reinig de warmtewisselaar zonder druk uit te oefenen. 5.
  • Page 53 PROBLEEMOPLOSSING Problemen Mogelijke oplossing Controleer of de deur goed gesloten is. Drager start niet. Controleer of het program ma is ingesteld. Controleer of de startknop is ingedrukt. Controleer of de stroomvoorziening in orde is. Controleer of de stekker in het stopcontact zit. Display staat niet aan.
  • Page 54 PRODUCTFICHE De productfiche van deze droogtrommel is opgesteld in overeenstemming met EU-verordeningsnr. 392/2012. Merk Proline Model PROHP81 Nominale capaciteit voor het standaard katoenprogramma bij volledige 8 kg belading Drogertype Condensdroger Energie-efficientieklasse Gewogen jaarlijks energieverbruik (AEc) 235 kWh/annum Droogproces Automatische droger...
  • Page 55 Het ‘standaard katoenprogramma’, dat bij volle en gedeeltelijke lading wordt gebruikt, is het standaard droogprogramma waar de informatie op het etiket en de fiche naar verwijst. Dit programma is geschikt voor het drogen van normaal nat katoenen wasgoed en is het meest efficiënte programma op het gebied van energieverbruik voor katoen.
  • Page 56 VERWIJDERING Als verantwoordelijke handelaar dragen we zorg voor het milieu. We moedigen u aan om de juiste verwijderingsprocedure voor uw apparaat en verpakkingsmateriaal te volgen. Dit draagt bij tot het behoud van de natuurlijke rijkdommen door deze te recyclen zodat zowel de menselijke gezondheid en het milieu worden beschermd.
  • Page 57 TABLE OF CONTENTS IMPORTANT SAFETY INSTRUCTIONS..........56 ENERGY SAVING TIPS..............59 UNPACKING THE APPLIANCE............59 PRODUCT DESCRIPTION..............60 BEFORE INSTALLING THE APPLIANCE........62 INSTALLATION................62 ELECTRICAL CONNECTION..............65 NOTES ON LAUNDRY CARE............65 BEFORE FIRST USE...............67 OPERATING THE DRYER..............68 CLEANING AND MAINTENANCE..........73 TROUBLESHOOTING................76 PRODUCT FICHE................77 SPECIFICATIONS................78 DISPOSAL................79...
  • Page 58 IMPORTANT SAFETY INSTRUCTIONS PLEASE READ THE FOLLOWING SAFETY WARNINGS AND THE INSTRUCTIONS CAREFULLY BEFORE USING THE APPLIANCE AND KEEP FOR FUTURE REFERENCE. Warnings • Read the instructions. • This appliance is intended for domestic household use only and should not be used for any other purpose or in any other application, such as for non-domestic use or in a commercial environment.
  • Page 59 • For handling : Always handle the appliance to avoid any damage. • The tumble dryer is not to be used if industrial chemicals have been used for cleaning. • The lint trap has to be cleaned frequently. • Lint must not be allowed to accumulate around the tumble dryer. •...
  • Page 60 the tumble dryer, in such a way that a full opening of the tumble dryer door is restricted. • The plug must be remained easily accessible after installation of the appliance. • The surfaces are liable to get hot during use. •...
  • Page 61 ENERGY SAVING TIPS To avoid unnecessarily long drying time and high consumption of energy: • Make sure that your laundry is thoroughly spun before drying. • Load according to the optimum amount of laundry recommended for the program being used (see Program Chart). •...
  • Page 62 PRODUCT DESCRIPTION Top cover Control panel Water container Door Power cord Drum Lint filter Air inlet Filter base Maintenance cover Control Panel 1. Program selection knob 2. Display This display is used for displaying settings. Estimated remaining drying time / Error codes Delayed start time Delayed start button...
  • Page 63 Time button Anti-crease button Drying intensity /Favourite program button Child lock buttons 8. Indicator lights for anti-crease time 9. Indicator lights Child lock Clean filer Empty water tank Intensity On/Off button Start/Pause button...
  • Page 64 BEFORE INSTALLING THE APPLIANCE Before connecting your dryer to the power supply, check that the voltage stated on the rating label of your appliance corresponds to the voltage in your home. A different voltage could damage the appliance. The plug is the only way to unplug the appliance and should therefore be accessible at all times.
  • Page 65 Levelling the appliance The dryer must be perfectly level to ensure safe and proper operation. If the dryer is not properly level, adjust the levelling feet as necessary. DO NOT insert pieces of wood of any other object under the feet. If the appliance is installed on a carpeted floor, please adjust the feet in order to allow air to circulate freely under the appliance.
  • Page 66 Installing accessories If you dryer has following parts, please wear gloves and install them as per the instruction below. Hose holder Drain hose Connector Pull up the upper drain hose. Connect the external Put the external drain hose drain hose to the water into the floor drain.
  • Page 67 ELECTRICAL CONNECTION Danger: To make the electrical connection to your appliance : The installation to the mains supply must conform to the local standards and regulations. Do not use an extension cord, an adapter or the like. The plug must be easily accessible after installing the appliance. If there is any doubt about the condition of your connection, consult a qualified electrician.
  • Page 68 New dark coloured garments should be washed and dried separately from light coloured garments to avoid the danger of colours running and discolouring other garments or even plastic components in the dryer. Dark coloured fibres can also settle on light coloured garments and vice versa. Rubber and plastics Do not dry any items made from or containing rubber or plastics such as: a.
  • Page 69 Handdoek Hemden (900g) (300g) BEFORE FIRST USE In order to remove any residues which may have been left during production, wipe the dryer drum with a damp cloth or carry out a brief drying cycle with damp clothes in the dryer.
  • Page 70 OPERATING THE DRYER Open the door. Check the filter and drum are clean. • If not, clean them referring to the section Cleaning and Maintenance. Place laundry loosely into the drum after sorting. • The clothes should be sorted according to the types of fibres and the drying level required. All the strings and belts of clothes should be well tied and fixed before being put into the drum.
  • Page 71 The drying time will increase by 10 minutes. The indicator light will illuminate. To deactivate this function, press again and the indicator light will go out. NOTE: This function can be selected with the programs shown below. Press After the cycle is finished, you can hear beeps and the display will show “0:00”. Open the door and remove the laundry.
  • Page 72 Program chart Please follow the recommended laundry load when you use the assigned program. The values in the table below are for information purpose only Type of Drying Capacity Drying time For drying Laundry program (kg) (minutes) Cotton fabrics such as towels, T-shirts, underwear and bed linen Iron Cotton...
  • Page 73 Note ! • This symbol means the energy efficiency test program “standard cotton program”, which is in accordance with the applicable EN 61121 standard and most suitable to dry normal cotton load at rated load capacity. • Thick or multi-layered fabrics, e.g. bed linen, jeans, etc, are not easy to dry. It is recommended to choose Cotton Extra program.
  • Page 74 Child lock You can use this function to prevent children from playing with your dryer. The program knob and all buttons except the button are deactivated when the child lock function is active. To activate this function, press and hold at the same time for about 3 seconds.
  • Page 75 CLEANING AND MAINTENANCE Turn off and unplug the appliance from the mains socket before carrying out any maintenance or cleaning. Never use any abrasive or chemical cleaning agent. External Cleaning Regularly wipe the outside of the appliance with a slightly soft damp cloth. Dry thoroughly.
  • Page 76 Draining the Water Tank Drain the water tank after each drying process. To drain the water tank: 1. Pull the water tank and remove it carefully. 2. Drain the water in the tank. 3. Place the water tank back into position. Condensed water is not drinkable! Never remove the water tank when the appliance is operating! If you forget to drain the water tank, the appliance will stop during drying when...
  • Page 77 4. If necessary, clean the heat exchanger once every 2 months. Do not touch the heat exchanger with your hand! Remove the fluff from the heat exchanger using a vacuum cleaner with a dusting brush attached. Clean the heat exchanger without applying any pressure. 5.
  • Page 78 TROUBLESHOOTING Problems Possible Solutions Check the door has closed properly. Dryer does not start. Check the program has set. CCheck the start button is pressed. Check if the power supply works. Check if the mains plug is inserted. Display is not on. Check the program has set.
  • Page 79 PRODUCT FICHE This tumble dryer’s product fiche has been setup in conformity with EU Regulation No 392/2012. Brand Proline Model PROHP81 Rated capacity of cotton laundry for the standard cotton programme at 8 kg full load Dry type Condenser Energy efficiency class...
  • Page 80 The ‘standard cotton programme’ used at full and partial load is the standard drying programme to which the information in the label and fiche relates, that this programme is suitable for drying normal wet cotton laundry and that it is the most efficient programme in terms of energy consumption for cotton. From A (most efficient) to G (least efficient) SPECIFICATIONS Rated voltage /frequency...
  • Page 81 DISPOSAL As a responsible retailer we care about the environment. As such we urge you to follow the correct disposal procedure for the appliance and packaging materials. This will help conserve natural resources and ensure that it is recycled in a manner that protects health and the environment. You must dispose of this appliance and its packaging according to local laws and regulations.
  • Page 82 Etablissements Darty & fils ©, 9 Rue des Bateaux-Lavoirs, 94200 Ivry-sur-Seine, France...