Télécharger Imprimer la page

Publicité

Les langues disponibles

Les langues disponibles

Liens rapides

Betriebsanleitung
Operating instruction
Mode d'emploi
KERN ABP / ABP-A
Version 1.2
2022-06
KERN & Sohn GmbH
Ziegelei 1
D-72336 Balingen
E-Mail: info@kern-sohn.com
Tel: +49-[0]7433- 9933-0
Fax: +49-[0]7433-9933-149
Internet: www.kern-sohn.com
TABP-BA-def-2212

Publicité

loading

Sommaire des Matières pour KERN&SOHN ABP Serie

  • Page 1 KERN & Sohn GmbH Ziegelei 1 Tel: +49-[0]7433- 9933-0 D-72336 Balingen Fax: +49-[0]7433-9933-149 E-Mail: info@kern-sohn.com Internet: www.kern-sohn.com Betriebsanleitung Operating instruction Mode d’emploi KERN ABP / ABP-A Version 1.2 2022-06 TABP-BA-def-2212...
  • Page 2 Weitere Sprachversionen finden Sie online unter www.kern-sohn.com/manuals Más versiones de idiomas se encuentran online bajo www.kern-sohn.com/manuals Vous trouverez d’autres versions de langue online sous www.kern-sohn.com/manuals Further language versions you will find online under www.kern-sohn.com/manuals Trovate altre versioni di lingue online in www.kern-sohn.com/manuals Inne wersje językowe znajdą...
  • Page 3 KERN ABP Version 1.2 2022-06 Betriebsanleitung Analysenwaage Inhaltsverzeichnis Technische Daten ..................5 Konformitätserklärung ................10 Geräteübersicht ................... 11 Komponenten ......................... 11 Tastatur ........................... 13 3.2.1 Numerische Eingabe ........................ 15 Anzeige ............................ 16 Grundlegende Hinweise (Allgemeines) ............19 Bestimmungsgemäße Verwendung ..................19 Sachwidrige Verwendung ......................
  • Page 4 10.1 Standardwägemodus aktivieren ................... 44 10.2 Einfaches Wägen ........................44 10.3 Tarieren ........................... 45 10.4 Funktionen der ABP-A-Serie (Standard-Wägemodus) ............46 10.4.1 Messen mit der automatischen Türfunktion (Positionsspeicherfunktion) ......46 10.4.2 Messen mit dem IR-Sensor (berührungslose Funktion) ............47 10.5 Einstellbare Windschutzplatte (nur bei ABP-A Halb-Micro-Modellen) ......
  • Page 5 14.2.5 Umschalten zwischen Prozent- und Wägemodus ............... 94 14.3 Dichtebestimmung von Feststoffen und Flüssigkeiten ............. 94 14.4 Summieren ..........................95 14.5 Rezeptieren ..........................98 14.5.1 Freies Rezeptieren ....................... 98 14.5.2 Rezepte definieren und abarbeiten ..................101 14.5.3 Rezept ändern ........................105 14.5.4 Musterprotokoll (KERN YKB-01N): ..................
  • Page 6 1 Technische Daten KERN ABP 100-4M ABP 100-5DM ABP 100-5M Artikelnummer / Typ TABP 100-4M-A TABP 100-5DM-A TABP 135-5M-A Ablesbarkeit (d) 0,0001 g 0,00001 g/0,0001 g 0,00001 g Wägebereich (Max) 120 g 52 g/120 g 135 g Mindestlast (Min) 0,01 g 0,001 g 0,001 g Eichwert (e)
  • Page 7 KERN ABP 200-4M ABP 200-5DM ABP 200-5M Artikelnummer / Typ TABP 200-4M-A TABP 200-5DM-A TABP 220-5M-A Ablesbarkeit (d) 0,0001 g 0,00001 g/0,0001 g 0,00001 g Wägebereich (Max) 220 g 102 g/220 g 220 g Mindestlast (Min) 0,01 g 0,001 g 0,001 g Eichwert (e) 0,001 g...
  • Page 8 KERN ABP 300-4M Artikelnummer / Typ TABP 300-4M-A Ablesbarkeit (d) 0,0001 g Wägebereich (Max) 320 g Mindestlast (Min) 0,01 g Eichwert (e) 0,001 g Eichklasse Reproduzierbarkeit 0,00015 g Linearität ± 0,0003 g Einschwingzeit Justiergewicht intern Anwärmzeit Wägeeinheiten mg, g, ct (geeicht) 1mg (unter Laborbedingungen*) Kleinstes Teilegewicht beim Stückzählen...
  • Page 9 KERN ABP 100-5DAM ABP 100-5AM ABP 200-4AM Artikelnummer / Typ TABP 120-5DAM-A TABP 135-5AM-A TABP 220-4M-A Ablesbarkeit (d) 0,00001 g/0,0001 g 0,00001 g 0,0001 g Wägebereich (Max) 52 g/120 g 135 g 220 g Mindestlast (Min) 0,001 g 0,001 g 0,01 g Eichwert (e) 0,001 g...
  • Page 10 KERN ABP 200-5DAM ABP 200-5AM ABP 300-4AM Artikelnummer / Typ TABP 220-5DM-A TABP 220-5M-A TABP 320-4AM-A Ablesbarkeit (d) 0,00001 g/0,0001 g 0,0001 g 0,0001 g Wägebereich (Max) 102 g/220 g 220 g 320 g Mindestlast (Min) 0,001 g 0,001 g 0,01 g Eichwert (e) 0,001 g...
  • Page 11 * Kleinstes Teilegewicht beim Stückzählen - unter Laborbedingungen: ➢ Es herrschen ideale Umgebungsbedingungen für hochauflösenden Zählungen ➢ Die Zählteile haben keine Streuung ** Kleinstes Teilegewicht beim Stückzählen - unter Normalbedingungen: ➢ Es herrschen unruhige Umgebungsbedingungen (Windzug, Vibrationen) ➢ Die Zählteile streuen 2 Konformitätserklärung Die aktuelle EG/EU-Konformitätserklärung finden Sie online unter: www.kern-sohn.com/ce...
  • Page 12 3 Geräteübersicht 3.1 Komponenten Modelle d = 0,0001 g Modelle d = 0,00001 g (nur ABP-A Serie) Pos. Bezeichnung Pos. Bezeichnung Tastatur Träger Multifunktionswägeplatte Anzeige Multifunktionswägeplatte Ionisatortaste Reagenzglashalter (nur ABP 200-5M / ABP 200-5AM) Libelle Führungsschiene interner Windschutz Fußschraube Einstellbarer interner Windschutz Steuerungstasten + IR Sensoren Wägeplatte...
  • Page 13 Rückansicht: Modelle d = 0,0001 g Modelle d = 0,00001 g (nur ABP-A Serie) Pos. Bezeichnung Pos. Bezeichnung Serielle Schnittstelle RS232 Power Pack USB-Geräteanschluss Anschluss für Netzadapter (Ionisator) Anschluss für Ionisator Hauptschalter (Ionisator) Anschluss für Netzadapter Anschluss für Waage Befestigungspunkt für Diebstahlsiche- Anschluss für Netzadapter rung Befestigungsöse für Diebstahlschutz-...
  • Page 14 3.2 Tastatur ABP Serie ABP-A Serie Funktion Taste Bezeichnung Kurzer Tastendruck Langer Tastendruck Im Menü Umschalten zwi- Zurück in den [ON/OFF] schen Betriebs- und Wägemodus Standby-Modus. Ablesbarkeit [1d/10d] ändern Setup Menü [CAL] Justierung starten „Justierung“ aufrufen Datenausgabe an ex- Setup Menü...
  • Page 15 • Applikationsspe- Zurück in den [MENU] zifische Einstel- Wägemodus lungen aufrufen • Statistik aufrufen Ionisator starten Setup Menü Ionisator [Ionizer] (ABP Serie Factory aufrufen Option) (Factory Option) Eingabe [OK] bestätigen Reaktionseinstellung Menüpunkt an- der Anzeige ändern wählen. Navigationstaste  Wägemodus: [UNIT] Wägeeinheit um-...
  • Page 16 3.2.1 Numerische Eingabe Taste Bezeichnung Funktion Blinkende Ziffer (0 – 9) oder  Navigationstaste Zeichen (, [blank], -, A – Z) erhöhen Blinkende Ziffer (0 – 9) oder  Navigationstaste Zeichen (, [blank], -, A – Z) verringern ➔ Ziffernanwahl nach rechts Navigationstaste Navigationstaste ...
  • Page 17 3.3 Anzeige Neben der Anzeige des Wägeresultats kann von ihr aus auf alle Funktionen des Menüs zugegriffen werden. Die Anzeige variiert, je nachdem, ob sich die Waage im Betriebs- modus oder Einstellmodus befindet. Spezielle Tasten (z.B. CAL-, TARE-, PRINT-Taste) ermöglichen einen schnellen und gezielten Zugriff auf das jeweilige Setup Menü.
  • Page 18 Statusanzeige Aktuelle Einstellungen Minimaleinwaage Stabilitäts- und Reaktionseinstellungen Drucker-Einstellungen Auto-print Funktion aktiv Blinkt während der autom. Ausgabe Kontinuierliche Ausgabe aktiv Blinkt während der kont. Ausgabe Wägeeinstellungen Dosiermodus Zero tracking (Autom. Nullpunktkorrektur) Statistik Fehlermeldungen Justierung erforderlich (PSC-Funktion) Stromversorgung mangelhaft USB-Anschluss mangelhaft Anzeigenbeispiel Einstellmodus: Nach Drücken der MENU-Taste im Wägemodus wechselt die Anzeige in den Einstell- modus.
  • Page 19 Symbol Beschreibung Applikations-Symbole Wägemodus Applikation wählen Stückzählen Level 1 Prozentbestimmung Dichtebestimmung <Feststoffe> Dichtebestimmung <Flüssigkeiten> as Symbol der ge- wählten Applikation Summieren wird angezeigt Rezeptieren Rezeptur Zubereitung Pufferlösung Zubereitung Probenzubereitung Symbol Beschreibung Applikations-Symbole Symbol der gewählten Die verfügbaren Einstellungen werden in Applikation Level 1 angezeigt.
  • Page 20 4 Grundlegende Hinweise (Allgemeines) 4.1 Bestimmungsgemäße Verwendung Die von Ihnen erworbene Waage dient zum Bestimmen des Wägewertes von Wäge- gut. Sie ist zur Verwendung als „nichtselbsttätige Waage“ vorgesehen, d.h. das Wä- gegut wird manuell, vorsichtig und mittig auf die Wägeplatte aufgebracht. Nach Errei- chen eines stabilen Wägewertes kann der Wägewert abgelesen werden.
  • Page 21 4.4 Prüfmittelüberwachung Im Rahmen der Qualitätssicherung müssen die messtechnischen Eigenschaften der Waage und eines eventuell vorhandenen Prüfgewichtes in regelmäßigen Abständen überprüft werden. Der verantwortliche Benutzer hat hierfür ein geeignetes Intervall so- wie die Art und den Umfang dieser Prüfung zu definieren. Informationen bezüglich der Prüfmittelüberwachung von Waagen sowie der hierfür notwendigen Prüfgewichte sind auf der KERN- Hompage (www.kern-sohn.com) verfügbar.
  • Page 22 6.2 Verpackung/Rücktransport  Alle Teile der Originalverpackung für einen eventuell not- wendigen Rücktransport aufbewahren.  Für den Rücktransport ist nur die Originalverpackung zu verwenden.  Vor dem Versand alle angeschlossenen Kabel und lo- sen/beweglichen Teile trennen. Abbildungsbeispiel Modelle d = 0,0001 g ...
  • Page 23  Waage mit beiden Händen anheben (nur ABP-A Serie) TABP-BA-d-2212...
  • Page 24 7 Auspacken, Aufstellung und Inbetriebnahme 7.1 Aufstellort, Einsatzort Die Waagen sind so konstruiert, dass unter den üblichen Einsatzbedingungen zuver- lässige Wägeergebnisse erzielt werden. Exakt und schnell arbeiten Sie, wenn Sie den richtigen Standort für Ihre Waage wäh- len. Beachten Sie deshalb am Aufstellort folgendes: •...
  • Page 25 Lieferumfang / Serienmäßiges Zubehör Nur Modelle d = 0,00001 g Nur Modelle d = 0,00001 g TABP-BA-d-2212...
  • Page 26 Pos. Bezeichnung Pos. Bezeichnung Waage Anschlagknöpfe [3] Wägeplatte Verbindungskabel Ionisator Träger Wägeplatte Netzadapter Ionisator Zentrierring Reinigungspinsel Ionisator (nur Modelle d = 0,0001 g) Arbeitsschutzhaube Netzkabel Ionisator Halter für Adapterkabel Externe Elektronikbox (nur Modelle d = 0,0001 g) Glastüre (links) Einstellbarer interner Windschutz Glastüre (rechts) Schutzblech Netzadapter Waage...
  • Page 27 7.3 Aufstellen 7.3.1 Installieren der Glaswindschutztüren (nur ABP-A Serie) Vergewissern Sie sich, dass die Anschlagknöpfe an den Glastüren (oben, links, rechts) angebracht sind, bevor Sie das Gerät einschalten. Andernfalls könnten die Glastüren beschädigt werden. Installation der Glaswindschutztüre (oben) Führen Sie den Griff der Glastür (oben) zur Vorderseite des Oberteils hinein und befestigen Sie den Anschlagknopf von der Innenseite des Wägeraums aus so,...
  • Page 28 7.3.2 Montieren des internen Windschutzes (nur ABP-A Halb-Micro-Modelle) Öffnen Sie die Glastür vollständig (oben) Halten Sie den Griff der verstellba- Führen Sie den Stift in der unteren Führen Sie die unteren ren Windschutzscheibe mit Ihrer be- Mitte des internen Windschutzes Stifte (auf beiden Seiten) in vorzugten Hand.
  • Page 29 7.3.4 Wägeplatte installieren Zur Genauigkeit der Wägeresultate von hochauflösenden Analysenwaagen trägt der richtige Standort entscheidend bei (s. Kap.7.1). 1. Halter für Adapterkabel befestigen (nur Modelle d = 0,0001 g)  Schutzfolie abziehen und lt. Abbildung befestigen. 2. Wägeplatte installieren Modelle d = 0,0001 g ...
  • Page 30 Modelle d = 0,00001 g  Zentrierring, Träger der Wägeplatte und Wägeplatte der Reihenfolge nach anbringen.  Arbeitsschutzhaube befestigen  Schutzblech vorsichtig in die Wägekammer legen TABP-BA-d-2212...
  • Page 31 3. Multifunktionswägeplatte installieren (nur Modelle d = 0,00001 g)  Waage von der Stromversorgung  Multifunktionswägeplatte mit dem trennen Träger installieren. Auf Zentrierung achten!  Standardwägeplatte lt. Abb. entfernen. Anwendungsbeispiele: Nach dem Tausch der Wägeplatte ist eine Justierung erforderlich, Durchführung s. Kap. 8 Standardwägeplatte Träger Multifunktionswägeplatte 4.
  • Page 32 5. Nivellieren  Die Waage mit den Fußschrauben nivellieren, bis sich die Luftblase in der Li- belle im vorgeschriebenen Kreis befindet.  Nivellierung regelmäßig überprüfen 7.4 Netzanschluss Länderspezifischen Netzstecker auswählen und am Netzgerät einstecken. Kontrollieren, ob die Spannungsaufnahme der Waage richtig eingestellt ist.
  • Page 33 7.4.1 Einschalten der Stromversorgung Modelle d = 0,0001 g Modelle d = 0,00001 g Waage über den Netzadapter mit Strom versorgen. Die Anzeige leuchtet auf und die Waage führt einen Selbsttest durch. Eine interne Justierung wird au-  tomatisch gestartet (s. Kap. 8.3.2). Das Motorengeräusch des Ladesystems für das interne Justiergeweicht ist hörbar.
  • Page 34 7.6 Anschluss von Peripheriegeräten Vor Anschluss oder Trennen von Zusatzgeräten (Drucker, PC) an die Datenschnitt- stelle muss die Waage unbedingt vom Netz getrennt werden. Verwenden Sie zu Ihrer Waage ausschließlich Zubehör und Peripheriegeräte von KERN, diese sind optimal auf Ihre Waage abgestimmt. 8 Justierung Da der Wert der Erdbeschleunigung nicht an jedem Ort der Erde gleich ist, muss jede Waage –...
  • Page 35 8.1 Automatische Justierung durch PSC Funktion Kraftkompensierte Waagen reagieren empfindlich auf Temperaturveränderungen. Je höher die Empfindlichkeit der Waage ist, desto ausgeprägter ist dieser Effekt. Durch die temperaturgesteuerte PSC-Funktion ist die Waage in der Lage den Einfluss einer Temperaturänderung vollautomatisch zu korrigieren. PSC bedeutet Perfect Self Calibration und ermöglicht eine vollautomatische interne Waagenjustierung mittels eines internen Gewichts, basierend auf Zeit und / oder Temperatur-Kriterien.
  • Page 36 • Die PSC-Funktion ist immer aktiv und kann nicht abgeschaltet werden. • Während der automatischen Justierung können keine Messungen durchge- führt werden. • Blinkt das Gewichtssymbol bei belasteter Wägeplatte erscheint folgende Meldung  Wägeplatte entlasten • Um zu verhindern, dass die Justierung möglicherweise mitten in einer Messreihe gestartet wird, ON/OFF-Taste betätigen, sobald das Gewichts- symbol erscheint.
  • Page 37 8.2 Zeitgesteuerte Automatische Justierung Die Waage kann so eingerichtet werden, dass sie mit Hilfe ihres internen Justierge- wichtes und ihrer eingebauten Uhr zu festgelegten Uhrzeiten (bis zu drei Mal täglich) eine automatische Justierung vornimmt. Diese Funktion ist besonders dann sehr nützlich, wenn Justierberichte über regelmäßige Justierungen gewünscht werden oder Justierungen in Pausenzeiten durchgeführt werden sollen, um Unterbrechungen der Messtätigkeiten auszuschließen.
  • Page 38 8.3 Manuelle Justierung per Tastendruck [CAL-Taste] 8.3.1 Justierfunktion der CAL-Taste einstellen Sie können ein voreingestelltes Justierverfahren starten, ohne in das Menü gehen zu müssen. Das eingestellte Justierverfahren kann durch einfache Betätigung der [CAL]-Taste aus dem Wägemodus heraus ausgeführt werden CAL-Taste ca. 3 sec. lang gedrückt halten, das Menü...
  • Page 39 8.3.3 Justiertest mit internem Gewicht Während des Justiertests vergleicht die Waage den gespeicherten Wert des Justier- gewichtes mit dem tatsächlichen. Es findet nur eine Überprüfung statt, d.h. es wer- den keine Werte verändert. Sicherstellen, dass die CAL-Taste mit der Funktion < Justiertest intern > belegt ist, s.
  • Page 40 8.3.5 Justiertest mit externem Gewicht Sicherstellen, dass die CAL-Taste mit der Funktion <External Weight Test> belegt ist, s. Kap. 8.3.1. CAL-Taste drücken, der Gewichtswert für das Justiergewicht wird blinkend angezeigt. (Zum Ändern des Gewichtswertes MENU- Taste drücken und den Anweisungen der ...
  • Page 41 8.5 Regelmäßige Inspektionskontrolle Die ABP Serie unterstützt die regelmäßige Inspektion Ihrer Waage. Mit dieser Funk- tion können die Wiederholbarkeit, die außermittige Belastung (Ecklastfehler) und die Linearität überprüft werden. Die Anweisungen im Display unterstützen bei der Durch- führung der einzelnen Schritte.
  • Page 42 3. Einstellungen Linearisierung Einstellungen auf dieselbe Art und Weise wie bei „Punkt 1 Wiederholbar- keit“ ausführen. Prüfablauf ausführen: Menü aufrufen: CAL-Taste ca. 3 sec. lang gedrückt halten, das Menü <CAL-Taste def.> wird angezeigt. Mit den Navigationstasten <Zyklische Überprüfung> wählen und mit OK- Taste bestätigen.
  • Page 43 9 Eichung Allgemeines: Nach der EU-Richtlinie 2014/31EU müssen Waagen geeicht sein, wenn sie wie folgt verwendet werden (gesetzlich geregelter Bereich): a) Im geschäftlichen Verkehr, wenn der Preis einer Ware durch Wägung bestimmt wird. b) Bei der Herstellung von Arzneimitteln in Apotheken sowie bei Analysen im me- dizinischen und pharmazeutischen Labor.
  • Page 44 Position Siegelmarken TABP-BA-d-2212...
  • Page 45 10 Basisbetrieb 10.1 Standardwägemodus aktivieren Status Waage Aktion Waage befindet sich im ON/OFF-Taste drücken. Stand-by-Modus Waage befindet sich in einer F-Taste drücken anderen Betriebsart oder   ] ] Waage befindet sich im Menü ON/OFF-Taste drücken Nach numerischer Eingabe ON/OFF-Taste wiederholt drücken 10.2 Einfaches Wägen Eine Anwärmzeit zur Stabilisierung ist erforderlich (siehe Kap.
  • Page 46 Ausdruckbeispiel bei deaktivierter GLP-Funktion (s. Kap. 15.8.3): 19,999[8]g Wägewert 10.3 Tarieren Das Eigengewicht beliebiger Wägebehälter lässt sich auf Knopfdruck wegtarieren, damit bei nachfolgenden Wägungen das Nettogewicht des Wägegutes angezeigt wird.  Wägebehälter auf die Wägeplatte stellen und Windschutztüren schließen.  Warten bis die Stabilitätsanzeige ( ) erscheint, dann TARE drücken.
  • Page 47 10.4 Funktionen der ABP-A-Serie (Standard-Wägemodus) 10.4.1 Messen mit der automatischen Türfunktion (Positionsspeicherfunktion) Diese Funktion öffnet und schließt auto- matisch die Glastüren (oben, links, rechts), wenn die Tasten Tür öffnen und schließen gedrückt werden. Die zu öffnenden und zu schließenden Glastüren und der Anteil, um den die Glastüren öffnen sollen, können je nach Anwendung angepasst werden.
  • Page 48 Tarieren Nullstellen [TARE] Ionisator starten (ABP Serie Factory Option) [Ionizer] Die Taste zum Öffnen und Schließen der Tür (links) kann nur dem linken IR-Sensor zugewiesen werden, während die Taste zum Öffnen und Schließen der Türe (rechts) nur dem rechten IR-Sensor zugewiesen werden.
  • Page 49 Verwendung des IR-Sensors Wenn Sie mit der Hand über den rechten oder linken Sensor streichen, leuchtet die blaue LED für den entsprechenden Sensor auf. leuchtet die blaue LED für den entsprechenden Sensor auf und leuchtet weiter, wäh- rend der Sensor aktiv erfasst wird. Sensor Sensor links...
  • Page 50 10.6 Unterflurwägung Mit Hilfe der Unterflurwägung können Gegenstände, welche aufgrund ihrer Größe oder Form nicht auf die Waagschale gestellt werden können, gewogen werden. Gehen Sie wie folgt vor:  Waage ausschalten.  Verschlussdeckel (1) am Waagenboden öffnen.  Waage über eine Öffnung stellen. ...
  • Page 51 10.7 Waage ausschalten  ON/OFF-Taste drücken. Die Waage befindet sich im Stand-by-Modus, d.h. die Waage befindet sich im be- triebsbereiten Zustand. Sie ist sofort nach dem Ein- schalten (beliebige Taste drücken) ohne Anwärmzeit betriebsbereit.  Um die Waage komplett auszuschalten, Waage von der Stromversorgung trennen.
  • Page 52 10.10 Tara / Netto / Brutto anzeigen Im Wägemodus MENU -Taste drücken. <Tara/Netto/Brutto-Display> wählen und mit OK-Taste bestätigen. Einstellung <ein> wählen und mit OK-Taste bestätigen. Anzeige bei Einstellung <Ein> Anzeige bei Einstellung <Aus> TABP-BA-d-2212...
  • Page 53 10.11 Dezimalpunkt als Punkt oder Komma anzeigen <Systemeinstellungen> wählen mit OK-Taste bestätigen.     <Anzeige Dezimalstelle> wählen und mit OK- Taste bestätigen. Gewünschte Einstellung [Punkt] oder [Komma] wählen und mit OK-Taste bestäti- gen. Mit ON/OFF-Taste zurück in den Wägemo- ...
  • Page 54 11 Menü 11.1 Navigation im Menü Menü aufrufen Menüblock anwählen Mit den Navigationstasten lassen sich die einzelnen Menüb- löcke der Reihe nach anwählen. Mit Navigationstaste vorwärts blättern. Mit Navigationstaste rückwärts blättern. Menüpunkt anwählen Ausgewählten Menüblock mit bestätigen. Der erste Menüpunkt des ausgewählten Menüblockes wird angezeigt. Mit den Navigationstaste lassen sich die einzelnen Menü- punkte der Reihe nach anwählen.
  • Page 55 Anzeigenbeispiele: Allgemeine Navigation: Alle wählbaren Funktionen und Einstellungen auf dem Display erreichen Sie indem Sie mit den Pfeiltasten [, ,,➔] navigieren und mit der OK-Taste bestätigen. Die Umrandung zeigt die aktive Auswahl Bei Anzeige des Symbols ist nach Drückern der S-Taste ein Untermenü verfügbar. Bei Anzeige einer Scroll-Leiste können mit den Navigationstasten , ...
  • Page 56 2. Statistik Bei Anzeige des Symbols ist nach Drü- ckern von ein Untermenü verfügbar. Mit den Navigationstasten gewünschte ,  Einstellungen wählen und mit OK-Taste bestätigen. zurück ins vorige Menü 11.1.2 Wägeeinstellungen TABP-BA-d-2212...
  • Page 57 Die Liste der verfügbare Einstellungen wird angezeigt. Mit OK-Taste bestätigen. Die Umrandung zeigt die aktive Auswahl an. Mit der F-Taste gewünschte Einstellungen wählen. Auswahl mit der OK-Taste zur Änderung aufrufen. ,  Mit den Navigationstasten gewünschte Einstellungen wählen und mit OK-Taste bestätigen. Mit der F-Taste weitere Einstellungen wählen und wie zuvor beschrieben ändern.
  • Page 58 11.1.3 Systemeinstellungen Die Liste der verfügbare Menüblöcke wird angezeigt. Mit OK-Taste bestätigen. Die Umrandung zeigt die aktive Auswahl an. Mit den Navigationstasten ,  gewünschten Menüblock wählen (z.B. Systemeinstellungen). Auswahl mit der OK-Taste bestätigen Die Liste der verfügbare Einstellungen wird angezeigt. TABP-BA-d-2212...
  • Page 59 ,  Mit den Navigationstasten gewünschte Einstellung (z.B. Helligkeit) wählen . Auswahl mit der OK-Taste zur Änderung aufrufen. ,  Mit den Navigationstasten gewünschte Einstellung und mit OK-Taste bestätigen. Mit der F-Taste weitere Einstellungen wählen und wie zuvor beschrieben ändern. TABP-BA-d-2212...
  • Page 60 11.1.4 Applikationseinstellungen   Die verfügbareApllikationen werden angezeigt. OK -Taste drücken und mit den Navigationstasten ,  gewünschte Applikation wählen, z. B. Stückzählen. . Die Umrandung zeigt die aktive Auswahl an. Mit OK-Taste bestätigen, die applikaionsspezifischen Einstellungen werden angezeigt Die applikaionsspezifischen Einstellungen werden in den jeweiligen Kapiteln beschrieben. 11.2 Menü-Übersicht Die Menü-Übersicht ist als separates Dokument im Lieferumfang der Waage enthalten.
  • Page 61 11.3 Menürückstellung Mit dieser Funktion können Sie sämtliche Waageneinstellungen auf Werkseinstellungen zurücksetzen. • Die Werkseinstellungen sind in der Menü-Übersicht durch ein “ ” gekennzeichnet. • Bei aktivierter Benutzerverwaltung kann die Menürückstellung nur von einem berechtigten Benutzer ausgeführt werden. 1. Systemeinstellungen aufrufen ...
  • Page 62 11.4 Menüsperre Um versehentliche Änderungen der Menüeinstellungen zu verhindern, können Ein- stellvorgänge gesperrt werden. Diese Menüsperre wird auf nachfolgend beschrie- bene Art und Weise aktiviert: 1. Systemeinstellungen aufrufen  s. Kap. 11.1.3     2. Funktion aktivieren / deaktivieren Mit den Navigationstasten , ...
  • Page 63 • Bei aktivierter Funktion wird das Symbol angezeigt. • Wägungen und Justierung können trotz Menüsperre ausgeführt werden. • Die Berechtigung zur Ausführung dieser Funktion kann jedem Benutzer zugewiesen werden. • Wenn Sie bei aktivierter Menüsperre versuchen, ein Menüelement auszuwählen, erscheint die Meldung “LOCKED” und die Menüaus- wahl wird unterbunden.
  • Page 64 11.6 Menü Historie Mit dieser Funktion werden die letzten zehn Menüschritte angezeigt.  Mit den Navigationstasten ,  < > wählen, die letzten zehn Menüschritte werden angezeigt TABP-BA-d-2212...
  • Page 65 12 Beschreibung einzelner Funktionen 12.1 Nullstell- und Tarierfunktionen Wählbare Funktionen: Beschreibung 1. Nullnachführung Mit dieser Funktion werden kleine Gewichtsschwan- kungen, die direkt nach dem Einschalten auftreten s. Kap. 12.2 automatisch korrigiert. Werden kleine Mengen vom Wägegut entnommen oder zugeführt, so können durch die in der Waage vorhan- dene „Stabilitätskompensation“...
  • Page 66 12.3 Auto Tare Funktion 1. Funktion aufrufen  s. Kap. 11.1.2 oder    TARE-Taste lange drücken Mit den Navigationstasten ,  <Auto Tara> wählen und mit OK-Taste bestätigen. 2. Funktion aktivieren / deaktivieren Mit den Navigationstasten ,  Funktion aktivieren (Ein) / deaktivieren (Aus) und mit OK-Taste bestätigen.
  • Page 67 12.4 Stabilitäts- und Reaktionseinstellungen Es besteht die Möglichkeit, die Stabilität der Anzeige und den Reaktionsgrad der Waage auf die Anforderungen bestimmter Anwendungen oder die Umgebungsbedin- gungen abzustimmen. Messungen können überwiegend mit den Werkseinstellungen durchgeführt werden. Im Standardwägemodus haben Stabilität und Reaktion dieselbe Priorität. Für be- stimmte Anwendungen wie z.B.
  • Page 68 12.5 Dosieren Nutzen Sie diese Funktion, wenn Sie die Anzeigegeschwindigkeit erhöhen wollen, z. B. beim Dosieren. Beachten Sie jedoch, dass die Waage sehr empfindlich auf die Umgebungsbedingungen reagiert. Bei aktivierter Funktion wird das Symbol angezeigt. 1. Funktion aufrufen  s. Kap. 11.1.2 ...
  • Page 69 12.6 Stillstandsbreite Leuchtet die Stabilitätsanzeige ( ) auf, so ist das Wägeergebnis innerhalb des durch die Stillstandsbreite angegebenen Bereichs stabil. Bereich für die Stabilitätsermittlung einstellen: 1. Funktion aufrufen  s. Kap. 11.1.2    Mit den Navigationstasten ,  <Stabilität Erkennungsbereich>...
  • Page 70 12.7 Wägeeinheiten Mit dieser Funktion legen Sie fest, mit welchen Wägeeinheiten Sie arbeiten möchten. Durch Drücken der UNIT-Taste kann die Anzeige in die zuvor im Menü aktivierten Einheiten umgeschaltet werden. Bei Waagen mit Bauartzulassung kann in folgende Einheiten umgeschaltet werden: [g] →...
  • Page 71 a) Funktion aktivieren / deaktivieren Log-in Funktion [off] Log-in Funktion [on] Alle Benutzer haben Administratorrechte Es gibt nur einen Administrator und und vollen Zugriff (Werkseinstellung). max. 10 Benutzer 1. Systemeinstellungen aufrufen  s. Kap. 11.1.3     Mit den Navigationstasten ,  <Benutzerdefiniert>...
  • Page 72 b) Benutzerprofil erstellen Nur der Administrator kann neue Benutzerprofile erstellen und Zugriffsrechte erteilen. Ein Benutzerprofil kann auch nur von dem Administrator geändert werden. 1. Administrator bzw. Benutzer wählen Mit den Navigationstasten ,  Administrator bzw. Benutzer <Administrator oder User 01 - 10> wählen und mit OK-Taste bestätigen.
  • Page 73 c) Passwort festlegen Abhängig vom Benutzer oder Administrator sind verschiedene Passwörter erforderlich. Administrator Passwort Benutzer Passwort Werkseinstellung für das 9999 0000 Passwort Log-in Administrator ID Benutzer ID Zugriffsrechte alle Funktionen und Eingeschränkte Rechte, Rechte welche im Benutzerprofil festgelegt werden. Bei Werkseinstellung [0000] ist keine Passwort Eingabe erforderlich.
  • Page 74 d) Benutzerrechte vergeben Der Administrator legt fest, welche der folgenden Tätigkeiten der Benutzer ausführen darf. <Einstellungen ändern> Einstellungen im Menü vornehmen <Ausgabe Wägewert> Datenausgabe an externe Geräte <USB benutzen> Zugriff auf USB-Speicher <Justierung> Justiereinstellungen ändern <Test> Regelmäßige Inspektionskontrolle durchführen Mit den Navigationstasten ,  Aktion wählen z.B <Einstellung ändern>, auf welche das Zugriffsrecht vergeben oder verweigert werden soll.
  • Page 75 e) Benutzername ändern Mit den Navigationstasten ,  <Anwendername> wählen und mit OK-Taste bestätigen. Gewünschten Benutzername eingeben (numerische Eingabe, s. Kap. 3.2.1) Eingabe mit OK-Taste bestätigen. Die Waage kehrt zurück ins Menü. Hier können die Einstellungen nachfolgender Beschreibung vorgenommen werden. Der Benutzername wird während des Betriebs ober rechts auf dem Display angezeigt, solange das jeweilige Benutzerprofil aktiviert ist.
  • Page 76 f) Einloggen Bei aktivierter Log-in Funktion wird beim Einschalten die Benutzerauswahl angezeigt. Mit den Navigationstasten ,  Benutzer wählen und mit OK-Taste bestätigen. Die Passwortabfrage wird angezeigt. Passwort eingeben und mit OK-Taste bestätigen (numerische Eingabe, s. Kap. 3.2.1). Bei Anmeldung eines Benutzers mit Standardpasswort [0000] erfolgt keine Passwortabfrage.
  • Page 77 13 Waageneinstellungen 13.1 Bildschirmschoner Bei aktivierter Funktion wechselt die Waage nach einer definierten Zeit ohne Last- wechsel oder Bedienung automatisch in den Standby Modus. Sie können die Funk- tion ausschalten oder eine Zeit definieren, nach der die Waage in den Standby Mo- dus wechselt.
  • Page 78 13.2 Anzeigeneinstellungen im Betriebsmodus Systemeinstellungen aufrufen, s. Kap. 11.1.3 Mit den Navigationstasten ,  <Betriebsarten Display> wählen und mit OK- Taste bestätigen. Mit den Navigationstasten ,  gewünschte Einstellung wählen und mit OK- Taste bestätigen. Mit der ON/OFF-Taste zurück in den Wäge- modus 13.3 Waagenidentifikations–Nr.
  • Page 79 13.5 Datumsformat Systemeinstellungen aufrufen, s. Kap. 11.1.3 Mit den Navigationstasten ,  <Ausgabeformat Datum> wählen und mit OK- Taste bestätigen. Mit den Navigationstasten ,  Ausgabeformat einstellen und mit OK-Taste bestätigen. YY/MM/DD Jahr/Monat/Tag MM/DD/YY Monat/Tag/Jahr DD/MM/YY Tag/Monat/Jahr Mit der ON/OFF-Taste zurück in den Wäge- modus 13.6 Helligkeit der Anzeige Systemeinstellungen aufrufen, s.
  • Page 80 13.7 Akkustisches Signal bei Tastendruck und Stabilitätsanzeige Systemeinstellungen aufrufen, s. Kap. 11.1.3 Mit den Navigationstasten ,  <akkustisches Signal> wählen und mit OK- Taste bestätigen. Mit den Navigationstasten ,  Einstellung [Ein] oder [Aus] wählen und mit OK-Taste bestätigen Mit der ON/OFF-Taste zurück in den Wäge- modus 13.8 Bedienersprache Systemeinstellungen aufrufen, s.
  • Page 81 Tarieren Nullstellen [TARE] Ionisator starten (ABP Serie Factory option) [Ionizer] Die Taste zum Öffnen und Schließen der Tür (links) kann nur dem IR-Sensor zugewiesen werden, während die Taste zum Öffnen und Schließen der Tür (rechts) nur dem rechten IR-Sensor zugewiesen werden kann. Die Einstellun- gen IR- Sensors werden nicht zurückgesetzt, auch wenn die Stromversor-...
  • Page 82 13.10.1 Umschalten der Betriebsart der IR-Sensors Die ABP-A-Serie verfügt über einen Multifunktionsmodus, in dem den IR-Sensoren maximal 4 Funktionen zugewiesen werden können. Die Betriebsarten der IR-Senso- ren variieren je nachdem, ob dieser Modus ein- oder ausgeschaltet ist. Der Multifunktionsmodus ist standardmäßig eingeschaltet. IR-Sensorbetrieb bei aktiviertem Multifunktionsmodus Wenn der Multifunktionsmodus aktiviert ist, können den IR-Sensoren maximal 4 Funktionen zugewiesen werden.
  • Page 83 Berührungsloser Sensorbetrieb bei deaktiviertem Multifunktionsmodus Die Deaktivierung des Multifunktionsmodus ermöglicht eine schnellere Bedienung der IR-Sensoren als bei aktiviertem Multifunktionsmodus. Wenn der Multifunktions- modus deaktiviert ist, können 2 Funktionen zugewiesen werden, die in nachfolgender Abbildung dargestellt sind. Rechter IR-Sensor (sofort) Streichen Sie mit der Hand oder den Fingern über den Sensor, leuchtet die LED auf Linker IR-Sensor (sofort)
  • Page 84 Konfigurieren der Zuweisung von berührungslosen Funktionen Systemeinstellungen aufrufen, s. Kap. 11.1.3 Mit den Navigationstasten ,  <berührungslose Multifunktionszuweisung> wählen und mit OK-Taste bestätigen. Mit den Navigationstasten ,  <Rechter IR-Sensor (kurz)> wählen und mit OK-Taste bestätigen Mit den Navigationstasten ,  Funktion wählen, welche Sie dem rechten IR- Sensor (kurz) zuweisen wollen und mit OK- Taste bestätigen.
  • Page 85 Überprüfen der den berührungslosen Sensoren zugewiesenen Funktionen (nur wenn der Multifunktionsmodus aktiviert ist) (1) Streichen Sie im Gewichtswägemodus mit der Hand über den rechten und linken IR-Sensoren, um die LEDs ca. 2 Sekunden lang aufleuchten zu lassen. (2) Der Status der Funktionszuweisung wird auf dem Anzeigefeld angezeigt. Wenn die Einstellungen der IR-Sensoren nicht korrekt sind, konfigurieren Sie die Ein- stellungen neu.
  • Page 86 14 Applikationsfunktionen Übersicht der verfügbaren Applikationen: Kombinierbare Funktionen Symbol Funktion Statistik Checkweighing Minimaleinwaage Stückzählen       Prozentbestimmung Dichtebestimmung    <Feststoffe> Dichtebestimmung    <Flüssigkeiten>  Summieren  Freies Rezeptieren  Rezeptur Zubereitung  Pufferlösung Zubereitung ...
  • Page 87 14.1 Stückzählen Beim Stückzählen können Sie entweder Teile in einen Behälter einzählen oder Teile aus einem Behälter herauszählen. Um eine größere Menge von Teilen zählen zu können, muss mit einer kleinen Menge (Referenzstückzahl) das durchschnittliche Gewicht pro Teil ermittelt werden. Je größer die Referenzstückzahl, desto höher ist die Zählgenauigkeit.
  • Page 88 3. Referenz setzen Referenzstückzahl eingeben und und mit OK-Taste bestätigen.  Anzahl Teile entsprechend der gewählten Re- ferenzstückzahl auflegen. Stabilitätsanzeige abwarten, dann mit OK-Taste bestätigen.  Die Waage ermittelt das durchschnittliche Stückgewicht und zeigt dieses an. Mit OK-Taste bestätigen Stückgewicht als Zahlenwert eingeben ...
  • Page 89 14.1.2 Anzeige einstellen  Im Zählmodus MENU-Taste drücken.  Mit den Navigationstasten ,  <Anzeige mit Gewichtswert> wählen und mit OK-Taste bestätigen.   Einstellung <on> oder <off> wählen und mit OK-Taste bestätigen. Einstellung <Aus> Einstellung <Ein> 14.1.3 Teile zählen ...
  • Page 90 14.1.4 Einstellungen ändern  Im Zählmodus Menu-Taste drücken.  <Anwender wechseln> wählen und mit OK-Taste bestätigen. Folgende Änderungen können vergenommen werden: Produkt-Name: Name ändern und mit und mit OK-Taste bestätigen. Referenzstückzahl: Referenzstückzahl ändern und mit OK- Taste bestätigen. Referenzgewicht: Gewicht auflegen und mit OK-Taste bestätigen.
  • Page 91 14.2 Prozentbestimmung Das Prozentwägen ermöglicht die Gewichtsanzeige in Prozent, bezogen auf ein Re- ferenzgewicht. Die Waage bietet zwei Möglichkeiten: 1. Aufgelegtes Referenzgewicht = 100 % 2. Aufgelegtes Referenzgewicht = benutzerdefiniert 14.2.1 Einstellungen Funktion aktivieren Applikation wählen (s. Kap. 11.1.4)  ...
  • Page 92 Bei Ersteingabe erscheint die Anzeige zur Eingabe einesSpeichernamens. Mit den Navigationstasten ,  Speicherplatz wählen und mit OK-Taste bestätigen. Ggfs. Bezeichnung ändern und mit OK-Taste bestätigen. Zum Überschreiben einer gespeicherten Referenz weiter bei Kap. 14.2.4 Weitere Schritte:  Aufgelegtes Referenzgewicht = 100 % oder ...
  • Page 93 Aufgelegtes Referenzgewicht = benutzerdefiniert [%]  ANYPER1 oder 2 (oder eigene Bezeichnung) wählen und mit OK-Taste bestätigen  Prozentwert Ihrer Wahl mit den Navigati- onstasten eingeben und mit OK-Taste be- stätigen.  Falls nötig, leeren Behälter auf die Waage stellen und tarieren. ...
  • Page 94 14.2.3 Prozentbestimmung durchführen  Im Prozentmodus eine gespeicherte Referenz wählen und OK-Taste bestätigen (Kap. 14.2.1).  Leeren Behälter auf die Waage stellen und tarieren.  Wägegut in den Behälter füllen. Das Ge- wicht des Wägeguts wird in Prozent ange- zeigt. 14.2.4 Einstellungen ändern ...
  • Page 95 14.2.5 Umschalten zwischen Prozent- und Wägemodus  14.3 Dichtebestimmung von Feststoffen und Flüssigkeiten Für die Dichtebestimmung empfehlen wir Ihnen mit dem optional erhältlichen Dichte- bestimmungsset zu arbeiten. Das Set enthält alle erforderlichen Aufbauten und Hilfsmittel, die Sie für eine komfor- table und präzise Dichtebestimmung benötigen.
  • Page 96 14.4 Summieren Bei dieser Funktion werden beliebig viele Einzelwägungen automatisch zu einer Ge- samtsumme addiert. Nach erfolgter Stillstandskontrolle ( ) wird der Wägewert automatisch an einen opti- onalen Drucker oder PC ausgegeben. Der Anzeigewert wird in den Summenspeicher addiert. Anschließend erfolgt die automatische Tarierung. Dieser Vorgang wiederholt sich für jede Probe, die nachfolgend auf die Waagschale gelegt wird.
  • Page 97  Vorgange für jede weitere Komponente wiederholen  Zum Abschließen des Vorgangs und zur Anzeige der Gesamtsumme PRINT-Taste drücken.  Zum Start eines neuen Summiervorgangs OK-Taste drücken Datenausgabe:  Im Summiermodus MENU-Taste drücken.  Mit den Navigationstasten ,  <Drucken> wählen und mit OK-Taste bestätigen.
  • Page 98 2. Gesamtgewicht <TOTAL> ausgeben  Mit den Navigationstasten ,  <Ausgabe Gesamtgewicht> wählen und mit OK-Taste bestätigen.   Einstellung <Ein> oder <Aus> wählen und mit OK-Taste bestätigen. Musterprotokoll Musterprotokoll Ausgabe Gesamtgewicht <Ein> Ausgabe Gesamtgewicht <Aus> ADDON MODE ADDON MODE N001 = 1,004[1]g N001 =...
  • Page 99 14.5 Rezeptieren 14.5.1 Freies Rezeptieren Mit dieser Funktion lassen sich verschiedene Komponenten einer Mischung zuwie- gen. Zur Kontrolle kann das Gewicht aller Komponenten (N001, N002 usw.), sowie das Gesamtgewicht (TOTAL) an einen optionalen Drucker oder PC ausgegeben wer- den. Die Waage arbeitet mit einem getrennten Speicher für das Gewicht des Wägebe-häl- ters und der Rezepturbestandteile.
  • Page 100  Weitere Komponenten wie vorstehend beschrieben einwiegen  Zum Abschließen der Rezeptur PRINT- Taste drücken. Das Gesamtsumme wird angezeigt und ausgegeben.  Zum Start einer neuen Rezeptur OK-Taste drücken Datenausgabe:  Im Rezepturmodus MENU-Taste drücken.  Mit den Navigationstasten ,  <Einstellungen Drucken>...
  • Page 101 2. Gesamtgewicht <TOTAL> ausgeben  Mit den Navigationstasten ,  <Ausgabe Gesamtgewicht> wählen und mit OK-Taste bestätigen.   Einstellung <Ein> oder <Aus> wählen und mit OK-Taste bestätigen. Musterprotokoll Musterprotokoll Ausgabe Gesamtgewicht <Ein> Ausgabe Gesamtgewicht <Aus> FORMULATION MODE FORMULATION MODE N001 = 49,998[2]g 49,998[2]g...
  • Page 102 14.5.2 Rezepte definieren und abarbeiten Die Waage verfügt über einen internen Speicher für komplette Rezepturen mit allen Komponenten und den dazugehörigen Parametern (z. B. Rezeptname, Toleranzen, autom. Tarieren). Beim Abarbeiten dieser Rezepturen führt Sie die Waage Schritt für Schritt durch das Einwägen der Komponenten. Rezept definieren 1.
  • Page 103 Rezepturname z.B. MiHo-Creme eingeben und mit OK-Taste bestätigen. 4. Manuelle oder automatische Tarierung nach Übernahme der einzelnen Komponenten  Mit den Navigationstasten ,  <Tarawert abziehen> wählen und mit OK- Taste bestätigen.  Gewünschte Einstellung wählen Manuell: Nach Übernahme des Wägewerts der Komponente mit der OK-Taste erfolgt eine Tarierung nach Drücken der TARE-Taste.
  • Page 104 Wägeeinheit  Wägeeinheit wählen und mit OK-Taste be- stätigen  Komponenten-Gewicht  Gewicht eingeben und mit OK-Taste bestätigen  Toleranz der Komponente  Toleranz eingeben und mit OK-Taste bestätigen  Schritt 5 für alle Komponenten der Rezeptur wiederholen  Mit der ON/OFF-Taste zurück in den Rezepturmodus TABP-BA-d-2212...
  • Page 105 Rezept abarbeiten 1. Applikation wählen  s. Kap. 11.1.4    Die verfügbaren Applikationen werden angezeigt. Mit den Navigationstasten ,  <Rezeptur Zubereitung> wählen. Die Umrandung zeigt die aktive Auswahl an. Mit OK-Taste bestätigen. 2. Rezeptur wählen  Mit den Navigationstasten ,  gewünschte Rezeptur z.B.
  • Page 106  Weitere Komponenten wie bei der ersten Komponente beschrieben einwägen. Bei jeder Übernahme mit der OK-Taste wird der ermittelte Einzelwert abgespeichert.   4. Rezeptierung beenden  Bei Übernahme der letzten Komponente wird das Resultat der Rezeptur angezeigt und automatisch ausgegeben. ...
  • Page 107 14.5.4 Musterprotokoll (KERN YKB-01N): RECEIPE FUNCTION NAME Rezeptname MIHO-CREME N001 1. Komponente MILCH TGT= 47,000[0]g Sollwert RNG= 0,100[0]g Toleranz WEI= 47,014[1]g Einwaage DIF= 0,014[1]g Abweichung zum Sollwert N002 2. Komponente MANDELOEL TGT= 95,000[0]g Sollwert RNG= 0,100[0]g Toleranz WEI= 95,005[7]g Einwaage DIF= 0,005[7]g Abweichung zum Sollwert...
  • Page 108 14.6 Pufferlösungen zubereiten Werkseitig bietet die Waage folgende 13 Rezepturen zur Herstellung von Pufferlö- sungen an. Stoffmengen- Puffersystem pH-Wert konzentration 100mM Phosphorsäure (Natrium) pH = 2,1 10 mM Phosphorsäure (Natrium) pH = 2,6 50mM Phosphorsäure (Natrium) pH = 2,8 100mM Phosphorsäure (Natrium) pH = 6,8 10mM...
  • Page 109 2. Puffersystem wählen  Mit den Navigationstasten ,  gewünschten Puffer aus der Liste wählen und mit OK-Taste bestätigen. 3. Toleranz der Komponente  MENU-Taste drücken  <Zulässige Fehler> wählen und mit OK- Taste bestätigen.  Toleranz eingeben und mit OK-Taste bestätigen, wählbar 0,0001g –...
  • Page 110 5. Komponenten hinzufügen  Angezeigte Komponente einwägen. Die grafische Einwägehilfe mit den Toleranzmarken erleichtert die Einwaage auf den Sollwert.  Stabiltitätsanzeige ( ) abwarten Das er-  reichte Sollgewicht mit der OK-Taste über- nehmen.  Angezeigtes Volumen der zweiten Kompo- nente mit Hilfe einer Pipette dazugeben.
  • Page 111 14.7 Probenzubereitung Mit Hilfe dieser Funktion können Standardlösungen mit einem speziellen Bestandteil auf Basis von Hydrochlorid- oder Hydratverbindungen automatisch berechnet und hergestellt werden. Folgende Probenarten sind verfügbar. Molekulargewicht Salze Zielgewicht (g)= x Wirkstoff (g) (Hydrochlorid) Molekulargewicht - Salzgewicht x 36,45 Molekulargewicht Molekulargewicht Zielgewicht (g)=...
  • Page 112 Bei Ersteingabe erscheint die Anzeige zur Eingabe einesSpeichernamens. Mit den Navigationstasten ,  Speicherplatz wählen und mit OK-Taste  bestätigen. Ggfs. Bezeichnung ändern und mit OK-Taste bestätigen.  Zum Überschreiben einer gespeicherten Probe weiter bei Kap. 14.7.1  Mit den Navigationstasten ,  Probenart wählen wählen und mit OK- Taste bestätigen.
  • Page 113 Probe zubereiten 1. Applikation <Probenzubereitung> wählen  siehe vorigen Abschnitt „Probenzuberei- tung“ definieren 2. Probe wählen  Mit den Navigationstasten ,  gewünschte Probe wählen und mit OK- Taste bestätigen. 3. Komponente einwägen  Komponente solange einwägen bis das Zielgewicht identisch mit dem Bruttoge- wicht ist.
  • Page 114 14.8 Statistik Die Statistik-Funktion ermöglicht die statistische Auswertung von Wägewerten. Kombinierbare Funktionen: Standardwägemodus, Stückzählen, Prozentbestimmung, Tierwägen, Dichte-bestim- mung <Feststoffe>, Dichtebestimmung <Flüssigkeiten> 1. Applikation wählen, auf welche die Sta- tistik angewendet werden soll  s. Kap. 11.1.4 Die verfügbaren Applikationen werden angezeigt.
  • Page 115 Musterprotokoll Probennumer drucken <ein> STATISTICS N001 = 1,0047g 1. Wägewert N002 = 0,9990g 2. Wägewert N003 = 0,9984g 3. Wägewert N004 = 0,9983g 4. Wägewert N005 = 0,9989g 5. Wägewert ..<RESULT>..Anzahl Proben Summe = 4,9993 g...
  • Page 116 14.9 Kontroll- und Zielwägen Mit Hilfe dieser Funktionen können Sie die Übereinstimmung eines Wägewertes mit vorgegebenen Kontrollwerten ermitteln. Kontrollwerte können exakte Sollwerte sein (Zielwägen) oder die Grenzwerte eines Toleranzbereiches (Kontrollwägen), innerhalb dessen der Wägewert liegen soll. 14.9.1 Zielwägen Dieser Modus dient z.B. zum Abwiegen konstanter Flüssigkeitsmengen oder zur Be- urteilung von Fehlmengen und Überschüssen.
  • Page 117  <Zielwert> wählen und mit OK-Taste bestätigen.  Zielwert eingeben und mit OK-Taste bestätigen. 4. Toleranz einstellen  <Toleranzbereich> wählen und mit OK- Taste bestätigen.  Toleranz eingeben und mit OK-Taste bestätigen.  Mit der ON/OFF-Taste zurück in den Ziel- wägemodus Zielwägen durchführen ...
  • Page 118 Die Toleranzmarken liefern folgende Information: Bedingung Einstufung Status Optisches Beispiel: Zielwert 100g Toleranzmarke Signal Toleranz 0,0010g blinkt langsam Große Differenz < 150 g Gewicht größer zum Zielwert (Zyklus: 1,5 - 2 s) als das Sollge- wicht und ober- halb der oberen Kleine Differenz blinkt schnell Toleranz...
  • Page 119 Einstellungen 1. Wägeeinstellungen aufrufen Im Wägemodus MENU-Taste drücken. R-Taste drücken und mit den Navigationstasten ,  Wägeinstellungen] wählen und mit OK- Taste bestätigen. 2. Funktion aktivieren Mit den Navigationstasten ,  <Pass-/fail -Auswertung> wählen und mit OK- Taste bestätigen.  Einstellungen <Ein>...
  • Page 120 Kontrollwägen durchführen  Falls nötig, leeren Behälter auf die Waage stellen und tarieren.  Wägegut auflegen, warten bis die Tole- ranzmarke oder scheint. Anhand der Toleranzmarken prü- fen, ob das Wägegut innerhalb des fest- gelegten Toleranzbereiches liegt. Eingabebeispiel: Obere Bereichsgrenze 40.0000 g Oberer Grenzwert 30.0000 g...
  • Page 121 15 Schnittstellen Über die Schnittstellen können Wägedaten mit angeschlossenen Peripheriegeräten ausgetauscht werden. Die Ausgabe kann an einen Drucker, PC oder Kontrollanzeigen erfolgen. Umgekehrt können Steuerbefehle und Dateneingaben über die angeschlossenen Geräte (z.B. PC, Tastatur, Barcodeleser) erfolgen. 15.1 Drucker anschließen Waage und Drucker ausschalten. Waage mit einem geeigneten Kabel mit der Schnittstelle eines Druckers verbinden.
  • Page 122 15.3 Serielle Geräte / speicherprogrammierbare Steuerung (SPS / PLC) anschließen Waage und Gerät ausschalten. Waage mit einem geeigneten RS232C Kabel mit der Schnittstelle des Gerätes verbinden. Der fehlerfreie Betrieb ist nur mit dem ent- sprechenden KERN-Schnittstellenkabel (Op- tion) sichergestellt. Waage und Gerät einschalten. Kommunikationsparameter von Waage und Geräte anpassen, s.
  • Page 123 15.5 Datenübertragungsformat 1. Standard Format Beispiel [-123,4567 ]     Posi- ASCII 2DH 31H 32H 33H 2EH 34H 35H 36H 37H 20H 67H 20H 0DH Daten Beschreibung  Vorzeichen [ ˽ ] positive Werte (Leerzeichen) [ - ] negative Werte ...
  • Page 124 Status der Stabilitätsanzeige wird bei der fortlaufenden Ausgabe den Daten angehängt (U: instabil; S: stabil). Einmalige Ausgabe Automatische Ausgabe Einmalige Ausgabe. Status der Stabilitätsanzeige wird bei der Ausgabe den Daten angehängt (U: instabil; S: stabil). (nur ABP Serie) Einmalige Ausgabe bei stabilem Wägewert Ausgabe abbrechen 2. Tastenoperationen Befehl...
  • Page 125 3. Applikationseinstellungen Befehl Funktion Standardwägemodus Standardwägemodus verlassen Stückzählen Funktion aufrufen (?: Nr. 1- 5) UW?=XX.XXXX Stückgewicht durch Wägen ermitteln ?: Nr. 1- 5 XX.XXXX: Wägewert Teile zählen (?: Nr. 1- 5) UB=XXXXX Stückgewicht als Zahlenwert [XXXXX] eingeben (?: Nr. 1- 5) Teile zählen (?: Nr.
  • Page 126 4. Kontroll-und Zielwägen Befehl Funktion Zielwägen TRGT Funktion aufrufen TARGET=XX.XXXX Zielgewicht wählen LIMIT=XX.XXXX Toleranz wählen Kontrollwägen CHKW Funktion aufrufen OVR.RNG=XX.XXXX Max. Sollgewicht wählen HI.LIM=XX.XXXX Oberer Toleranz wählen LO.LIM =XX.XXXX Untere Toleranz wählen UND.RNG=XX.XXXX Min. Sollgewicht wählen Toleranzkontrolle starten HL: Außerhalb des oberen Toleranzbereichs HI: Gewicht größer als das Sollgewicht OK: Gewicht innerhalb der Toleranz LO: Gewicht kleiner als das Sollgewicht...
  • Page 127 6. Systemeinstellungen Befehl Funktion Software Waage ID=XXXX Waagenindentifikations-Nr. wählen (Werkseinstellung [0 0 0 0] Waagenindentifikations-Nr. anzeigen STATE Liste der aktuellen Menüeinstellungen ausdrucken TIME Datum- / Uhrzeit anzeigen Benutzerverwaltung LOGIN=XXXX: YYYY Einloggen XXXX: Beutzername (max. 20 Zeichen) YYYY: Passwort (4 Zeichen) LOGOUT Ausloggen Aktuell eingeloggten Benutzer anzeigen...
  • Page 128 8. Automatische Tür Befehle (nur ABP-A) Befehl Funktion RO=LLLRRRUUU Einstellungen der Öffnungsposition für jede Tür LLL: Öffnungsposition der linken Tür. Einstellwert zwischen 20 und 100 (%). RRR: Öffnungsposition der rechten Tür. Einstellwert zwi- schen 20 und 100 (%). UUU: Offene Position der oberen Tür. Einstellwert zwischen 20 und 100 (%).
  • Page 129 15.7 Kommunikationsparameter Durch Aufruf einer Standardeinstellung sind alle Kommunikationsparameter bereits voreingestellt (s. Kap.15.7.1). Die entsprechende Standardeinstellung ist passend zum Drucker auszuwählen (De- tails siehe nachfolgend Tabelle). Selbstverständlich können alle Parameter auch benutzerspezifisch eingestellt wer- den (s. Kap. 15.7.2). Menüaus- Effektiv Erweitert Typ M Type S...
  • Page 130 2. Einstellung wählen Die verfügbaren Einstellungen werden an- gezeigt, s. Kap.15.7 ➢ Effektiv ➢ Erweitert ➢ Typ M ➢ Typ S ➢ Typ A ➢ Benutzerdefiniert Gewünschte Einstellung mit den Navigati- onstasten wählen und mit OK-Taste bestäti- gen. Mit ON/OFF-Taste zurück in den Wägemo- 15.7.2 Benutzerdefinierte Einstellungen (Anzeigenbeispiel für KERN YKB-01N Im Menüpunkt „User setting“...
  • Page 131 1. Kommunikationsgeschwindigkeit (Baudrate) Mit den Navigationstasten < Baud-Rate > wählen und mit OK-Taste be- stätigen. Einstellung wählen und mit OK-Taste bestäti- gen. 2. Parität Mit den Navigationstasten < Parität > wählen und mit OK-Taste bestäti- gen. Einstellung wählen und mit OK-Taste bestätigen.
  • Page 132 Format 1 KERN Standard Format 2 Mettler Extended Format 3 Sartorius Standard A&D Standard Format 4 wählbar: FREE byte 1 -99, Data length 1 -99 6. Endezeichen Mit den Navigationstasten <Begrenzer> wählen und mit OK-Taste be- stätigen. Einstellung wählen und mit OK-Taste bestätigen.
  • Page 133 Ausgabebedingung einstellen: Mit den Navigationstasten <Einstellungen Datenausgabe> wählen und mit OK-Taste bestätigen. Mit den Navigationstasten gewünschte Ein- stellung wählen und mit OK-Taste bestätigen. Stabiler/ positiver Wert Einmalige Ausgabe bei stabilem und positivem Wägewert. Einmalige Ausgabe bei stabilem und positivem oder negativem Wäge- Stabiler/ negativer Wert wert.
  • Page 134 Funktion aufrufen: PRINT-Taste ca. 3 sec. lang gedrückt halten. <Print> mit OK-Taste bestätigen. Einstellungen <Intervall-Taktung> wählen und mit OK-Taste bestätigen. Einstellungen <Ein> wählen und mit OK- Taste bestätigen. Ausgabeintervall einstellen: Mit den Navigationstasten <Einstellungen Datenausgabe> wählen und mit OK-Taste bestätigen. Mit den Navigationstasten Intervall wählen und mit OK-Taste bestätigen, ...
  • Page 135 15.8.3 GLP Output Funktion Mit der GLP Output Funktion werden Ausdrucke von Wägeergebnissen mit einer Kopf- und Fußzeile ergänzt. Der Inhalt der Kopf- und Fußzeile sind wählbar. Funktion aufrufen: CAL-Taste ca. 3 sec. lang gedrückt halten. <GLP output> mit OK-Taste bestätigen. Einstellungen <on>...
  • Page 136 15.8.4 Ausgabedetails definieren Bei aktivierter Funktion können neben dem Wägewert Datum, Uhrzeit, Barcode ID und Probenbezeichnung mit ausgegeben werden. Funktion aufrufen: PRINT-Taste ca. 3 sec. lang gedrückt halten. <Drucken> mit OK-Taste bestätigen. Ausgabedetails einstellen: Mit den Navigationstasten der Reihe nach gewünschte Details aktivieren [on] und je- weils mit OK-Taste bestätigen.
  • Page 137 15.10 USB-Anschluss Über die USB-Schnittstellen können Justier- und Wägedaten ausgegeben werden. Umgekehrt können Steuerbefehle und Dateneingaben über die angeschlossenen Geräte (PC, Tastatur, Bardcodeleser) eingegeben werden. Geräte anschließen: Waage ausschalten USB-Geräte lt. Abb. anschließen Waage einschalten. USB-Anschluss USB Equipment und Anwendung. Wägedaten und Justierprotokolle Dateneingabe...
  • Page 138 15.10.1 Wägedaten, Justierprotokolle und Screenshots an USB-Speicherme- dium ausgeben + Vorbereitung Funktion aufrufen Systemeinstellungen aufrufen, s. Kap. 11.1.3     Mit den Navigationstasten ,  <Einstellung Datensicherung> wählen und mit OK-Taste bestätigen. Die verfügbaren Menüpunkte werden angezeigt. ➢ Messwerte auf USB sichern ➢...
  • Page 139 + Anzeigenwert als Screenshot speichern Systemeinstellungen aufrufen     Mit den Navigationstasten ,  <Drucken> wählen und mit OK-Taste bestätigen. oder PRINT-Taste lange drücken. Zur Aktivierung für <Bild gesp.> Einstellung <Ein> wählen und mit OK-Taste bestätigen Verbinde die Waage mit einem USB Stick Scrennshot mit Druck Taste auf USB Stick speichern.
  • Page 140 + Internen Speicher ausgeben Menüpunkt <Internen Speicher ausgeben> wie zuvor unter „Vorbereitung“ beschrieben aufrufen. Mit OK-Taste bestätigen OK-Taste drücken, die Daten werden ausgegeben. Zurück in den Wägemodus: ON/OFF-Taste drücken. TABP-BA-d-2212...
  • Page 141 15.10.2 Datentransfer mittels Barcodeleser Systemeinstellungen aufrufen, s. Kap. 11.1.3     OK-Taste drücken Mit den Navigationstasten ,  <Bar-Code Menü> wählen und mit OK-Taste bestätigen. Die verfügbaren Menüpunkte werden angezeigt. ➢ Transfer: alle Daten ➢ ohne Befehle ➢ keine Übertragung Gewünschte Einstellung mit OK-Taste übernehmen.
  • Page 142 16 Wartung, Instandhaltung, Entsorgung 16.1 Reinigen Vor allen Wartungs-, Reinigungs- und Reparaturarbeiten das Gerät von der Betriebsspannung trennen. Modelle d = 0,00001 g/0,0001 g Abb. 1: Waage reinigen 1. Anzeige Keine aggressiven Reinigungsmittel (Lösungsmittel o.Ä.) verwen- den, sondern nur ein mit milder Seifenlauge angefeuchtetes Tuch.
  • Page 143 1. Schirmring, Wägeplatte und Träger der Wägeplatte entfernen 2. Plastikgriff durch Drehen entfernen. Aufnahme der Wägeplatte nicht berühren. Die Waage könnte dadurch beschädigt werden. 3. Glastüre vorsichtig lt. Abb. entfernen. Abb. 2: Glastüren entfernen 4. Glastüre in umgekehrter Reihenfolge wieder anbringen. Zur Sicherung der Glastüren den Plastikgriff unbedingt wieder anbringen.
  • Page 144 16.3 Entsorgung Die Entsorgung von Verpackung und Gerät ist vom Betreiber nach gültigem nationa- lem oder regionalem Recht des Benutzerortes durchzuführen. 17 Kleine Pannenhilfe Mögliche Fehlerursachen: Bei einer Störung im Programmablauf sollte die Waage kurz ausgeschaltet und vom Netz getrennt werden. Der Wägevorgang muss dann wieder von vorne begonnen werden.
  • Page 145 Menüeinstellungen können • Menü ist gesperrt. Menüsperre aufheben. nicht geändert werden. • Der Strom wird eingeschaltet, während ein Fremd- körper in der Tür eingeklemmt ist oder ein Fremd- Die Glastür funktioniert nicht körper während des Betriebs in der Tür einge- normal.
  • Page 146 18 Ionisator 18.1 Allgemeines Der Ionisator ist für die ABP-Serie als Factory Option verfügbar. In der ABP-A Serie ist dieser standardmäßig eingebaut. Der Ionisator besitzt mit Hochspannung versorgte leitfähige Spitzen, die durch Koro- naentladung in der unmittelbaren Umgebung positiv und negativ geladene Ionen er- zeugen.
  • Page 147 Schäden durch Fallenlassen, Vibration oder Schock verhindern, siehe Aufkleber an der linken Seite. Nur das Original-Netzteil verwenden. Der aufgedruckte Spannungswert muss mit der örtlichen Spannung übereinstimmen. Verletzungsgefahr, die Spitzen der Ionenquelle sind sehr scharf schnei- dend Der Ionisator erzeugt giftiges Ozon, auf ausreichende Belüftung achten. Bei Instandhaltungs- und Reinigungsarbeiten Ionisator vom Netz tren- nen.
  • Page 148 18.3 Technische Daten Technologie Koronaentladung Entladezeit 1 Sekunde (+1000V  +100V) Ozonkonzentration 0.06ppm (150 mm ab Ionenquelle) 0- 40 °C, 25 – 80 % Luftfeuchtigkeit (nicht kondensdierend) Umgebungsbedingungen Stromversorgung Netzadapter: Eingang AC 100V - 240V, 0.58 A, 50 - 60 Hz Ausgang DC 24V, 1 A Ionisator: 200 mA...
  • Page 149 Stecken Sie den angeschlossenen Ionisa- tor-Netzadapter und das Netzkabel in den DC IN-Anschluss (für den Ionisator). Schließen Sie den Netzstecker des Ioni- sators an eine Steckdose an. Verbinden Sie die Anschlüsse des Ionisa- tors (2 Anschlüsse) auf der Rückseite des Ionisators mit dem Ionisator-Anschlusska- bel.
  • Page 150 Ionisierung Sicherstellen, dass die grüne LED [Power] leuchtet. Windschutztüren schließen. -Taste (ABP) / -Taste (ABP-A) drücken, die Inoisierung wird gestart. Während der Ionisierung leuchtet die blaue LED [RUN]. Die Dauer ist abhängig von der Menüeinstellung <Systemeinstellungen  Ionen Bestrahlungszeit>. Ionen Bestrahlungszeit einstellen Systemeinstellungen aufrufen, s.
  • Page 151 18.5 Wartung und Reinigung Ionisator regelmäßig warten und reinigen Ionenquelle reinigen: Nach 1 000 Stunden Ionenquelle austauschen: Nach 30 000 Stunden WARNUNG Vor Reinigung das Gerät vom Netz trennen. Ionisator nicht auseinanderbauen. Ionenquelle vorsichtig reinigen. Darauf achten, dass die Spitzen nicht verbogen werden. Reinigen Zur Reinigung des Gehäuses keine aggressiven Reinigungsmittel (Lösungsmittel o.Ä.), sondern nur ein mit milder Seifenlauge angefeuchtetes Tuch benutzen.
  • Page 153 KERN ABP Version 1.2 2022-06 Operating instructions Analytical balance Contents Technical data ....................5 Declaration of conformity ................10 Appliance overview ..................11 Components ..........................11 Keyboard ..........................13 3.2.1 Numeric entry ........................... 15 Display ............................. 16 Basic Information (General) ................ 19 Proper use ..........................
  • Page 154 10.1 Activate standard weighing mode ..................44 10.2 Simple weighing ........................44 10.3 Taring ............................45 10.4 Functions of the ABP-A series (Standard weighing mode) ..........46 10.4.1 Measuring with the automatic door function (Position memory function) ......46 10.4.2 Measuring with the IR sensor (touchless function) ..............
  • Page 155 14.2.5 Switching between percentage and weighing mode ............94 14.3 Determining the density of solid matter and fluids ............94 14.4 Totalization ..........................95 14.5 Recipe composition ....................... 98 14.5.1 Free recipe composition ....................... 98 14.5.2 Define and process recipes....................101 14.5.3 Change recipe ........................
  • Page 156 1 Technical data KERN ABP 100-4M ABP 100-5DM ABP 100-5M Item no./ Type TABP 100-4M-A TABP 100-5DM-A TABP 135-5M-A Readability (d) 0.0001 g 0.00001 g/0.0001 g 0.00001 g Weighing range (max) 120 g 52 g/120 g 135 g Minimum load (Min) 0.01 g 0.001 g 0.001 g...
  • Page 157 KERN ABP 200-4M ABP 200-5DM ABP 200-5M Item no./ Type TABP 200-4M-A TABP 200-5DM-A TABP 220-5M-A Readability (d) 0.0001 g 0.00001 g/0.0001 g 0.00001 g Weighing range (max) 220 g 102 g/220 g 220 g Minimum load (Min) 0.01 g 0.001 g 0.02 g Verification value (e)
  • Page 158 KERN ABP 300-4M Item no./ Type TABP 300-4M-A Readability (d) 0.0001 g Weighing range (max) 320 g Minimum load (Min) 0.01 g Verification value (e) 0.001 g Verification class Reproducibility 0.00015 g Linearity ± 0.0003 g Stabilization time Adjustment weight internal Warm-up time Weighing Units...
  • Page 159 KERN ABP 100-5DAM ABP 100-5AM ABP 200-4AM Item no./ Type TABP 120-5DAM-A TABP 135-5AM-A TABP 220-4M-A Readability (d) 0.00001 g/0.0001 g 0.00001 g 0.0001 g Weighing range (max) 52 g/120 g 135 g 220 g Minimum load (Min) 0.001 g 0.001 g 0.01 g Verification value (e)
  • Page 160 KERN ABP 200-5DAM ABP 200-5AM ABP 300-4AM Item no./ Type TABP 220-5DM-A TABP 220-5M-A TABP 320-4AM-A Readability (d) 0.00001 g/0.0001 g 0.00001 g 0.0001 g Weighing range (max) 102 g/220 g 220 g 320 g Minimum load (Min) 0.001 g 0.001 g 0.01 g Verification value (e)
  • Page 161 * Smallest component weight for part counting - under lab conditions: ➢ There are ideal ambient conditions for high-resolution counting ➢ The parts to be counted are not scattered ** Smallest component part for part counting – under normal conditions: ➢...
  • Page 162 3 Appliance overview 3.1 Components Models d = 0.0001 g Models d = 0.00001 g (only ABP-A series) Pos. Designation Pos. Designation Keyboard Support multi-function weighing plate Display Multi-function weighing plate Ionizer button Test tube holder (ABP 200-5M / ABP 200-5AM only) Bubble level Guide rail internal windshield (Models d = 0.0001 g of ABP-A only)
  • Page 163 Rear view: Models d = 0.0001 g Models d = 0.00001 g (only ABP-A series) Pos. Designation Pos. Designation Serial interface (RS232) Power Pack USB device Connector for AC adapter (ionizer) Port for ionizer Main switch (ionizer) Connector for AC adapter Connection for balance Fastening point for anti-theft device Connector for AC adapter...
  • Page 164 3.2 Keyboard ABP series ABP-A series Function Button Designation Short key pressing Long key pressing In menu Switching between Return to [ON/OFF] operating and weighing mode standby mode [1d/10d] Readability change Call setup menu [CAL] Start adjustment "Adjustment" TABP-BA-e-2212...
  • Page 165 Data output to Call setup menu [PRINT] external device "Print" (weighing mode) Taring Call setup "Zero [TARE] Zeroing Setting / Taring" • Call up menu • Call application Return to [MENU] specific settings weighing mode • Call Statistics Call Setup Menu Starting the ionizer Ionizer [Ionizer]...
  • Page 166 3.2.1 Numeric entry Button Designation Function Flashing digit (0 – 9) or Navigation key  increase character (, [blank], -, A – Z) Flashing digit (0 – 9) or Navigation key  reduce character (, [blank], -, A – Z) Navigation key ➔...
  • Page 167 3.3 Display Apart from the display of the weighing result, all functions of the menu may be accessed from here. The display will vary, depending on the weighing scale being either in operating or setting mode. Special keys (e.g. CAL-, TARE-, PRINT-key) provide fast and purposeful access to the individual setup menu.
  • Page 168 Status display Current settings Minimum initial weight Settings for Stability and Response Printer settings Auto Print function active Flashing during automatic Output continuous output enabled Flashing during continuous Output Weighing settings Dispensing mode Zero tracking (auto. zero point correction) Statistics Error messages Adjustment required (PSC-function) Inadequate power supply...
  • Page 169 Symbol Description Application icons Weighing mode Selecting an application Piece counting Level 1 Percent determination Density determination <Solid matter> The icon for the Density determination <Liquid> application selected will be shown Totalization Recipe composition Recipe preparation Buffer solution preparation Sample preparation Symbol Description Application icons...
  • Page 170 4 Basic Information (General) 4.1 Proper use The balance you purchased is intended to determine the weighing value of material to be weighed. It is intended to be used as a “non-automatic balance”, i.e. the material to be weighed is manually and carefully placed in the center of the weighing pan.
  • Page 171 4.4 Monitoring of Test Resources In the framework of quality assurance the measuring-related properties of the balance and, if applicable, the testing weight, must be checked regularly. The responsible user must define a suitable interval as well as type and scope of this test. Information is available on KERN’s home page (www.kern-sohn.com) with regard to the monitoring of balance test substances and the test weights required for this.
  • Page 172 6.2 Packaging / return transport  Keep all parts of the original packaging for a possibly required return.  Only use original packaging for returning.  Prior to dispatch disconnect all cables and remove loose/mobile parts. Image example models d = 0.0001 g ...
  • Page 173  Lift scale with both hands (only ABP-A series) (only ABP-A series) (only ABP series) TABP-BA-e-2212...
  • Page 174 7 Unpacking, Installation and Commissioning 7.1 Installation Site, Location of Use The balances are designed in a way that reliable weighing results are achieved in common conditions of use. You will work accurately and fast, if you select the right location for your balance. Therefore, observe the following for the installation site: •...
  • Page 175 Scope of delivery / serial accessories Models d = 0.00001 g only: Models d = 0.00001 g only: TABP-BA-e-2212...
  • Page 176 Pos. Designation Pos. Designation Balance Stopper knobs [3] Weighing pan Connecting cable ionizer Carrier weighing pan AC adapter ionizer Centring ring Cleaning brush ionizer (Models d = 0.0001 g only) Protective hood Net cable ionizer Holder for adapter cable Power Pack (Models d = 0.0001 g only) Glass door (left) Adjustable internal windshield...
  • Page 177 7.3 Placing 7.3.1 Installing the glass windshield doors (only ABP-A series) Make sure that the stopper knobs are attached to the glass doors (top, left, right) before switching-on the device. Otherwise the glass doors could be damaged. Installation of the glass windshield door (top) Insert the handle of the glass door (top) from the front side of the upper part and fasten the stopper knob from inside of...
  • Page 178 7.3.2 Assembly of the internal windshield (only ABP-A Semi-Micro models) Open the glass door completely (top) Take hold of the handle of the Introduce the pin in the lower middle Introduce the lower pins (on adjustable windshield pane with of the internal windshield from front both sides) into the guide your preferred hand.
  • Page 179 7.3.4 Installation of weighing plate The right place is decisive for the accuracy of the weighing results of high- resolution precision balances (see chap. 7.1). 1. Attach holder for adapter cable (Models d = 0.0001 g only)  Pull off protective film and attach as shown on image. 2.
  • Page 180 Models d = 0.00001 g  Attach centering ring, carrier of weighing plate and weighing plate in order.  Attach the safety hood  Place the guard plate carefully in the weighing chamber TABP-BA-e-2212...
  • Page 181 3. Install the multi-function weighing plate (models d = 0.00001 g only)  Disconnect scale from power  Install multi-function weighing plate supply. together with the support. Pay due attention to centering!  Remove standard weighing plate as shown on illustration. Application examples: Adjustment will be required after exchanging the weighing plate, for instructions see chap.
  • Page 182 5. Levelling  Level balance with foot screws until the air bubble of the water balance is in the prescribed circle.  Check levelling regularly 7.4 Mains connection Select a country-specific power plug and insert it in the mains adapter. Check, whether the voltage acceptance on the scales is set correctly.
  • Page 183 7.4.1 Turning On the Power Models d = 0.0001 g Models d = 0.00001 g Supply power to balance via mains adapter. The display lights up and the balance carries out a selftest. Internal adjustment will be started automatically  (See chap.8.3.2).
  • Page 184 7.6 Connection of peripheral devices Before connecting or disconnecting of additional devices (printer, PC) to the data interface, always disconnect the balance from the power supply. With your balance, only use accessories and peripheral devices by KERN, as they are ideally tuned to your balance. 8 Adjustment As the acceleration value due to gravity is not the same at every location on earth, each balance must be coordinated - in compliance with the underlying physical...
  • Page 185 8.1 Automatic adjustment via PSC function Force-compensated scales react sensitively to changes in temperature. The higher the sensitivity of the scale, the more pronounced the effect. The temperature controlled PSC function enables the scale to automatically correct this effect. PCS stands for Perfect Self Calibration and facilitates fully automatic internal scale adjustment by means of an internal weight, based on time and/or temperature criteria.
  • Page 186 • The PSC function is always active and cannot be disabled. • Also, no measurements can be made during automatic adjustment. • When the weight symbol starts flashing while the weighing plate is loaded the following message will appear  Unload weighing plate •...
  • Page 187 8.2 Time-controlled automatic adjustment With the help of its internal adjustment weight and integrated clock the balance can be set to carry out an automatic adjustment at set times (up to three times daily). This function is a very convenient function, when adjustment reports are desired to be made for regular adjustments, or when wishing span adjustments during break times to avoid interruption of measurement work.
  • Page 188 8.3 Manual adjustment via key [CAL-key] 8.3.1 Setting adjustment function for CAL-key It is possible to start the preset adjustment procedure without having to access the menu. The Set Adjustment procedure may be set by simply pressing the [CAL]-key when in weighing mode. Press and hold the CAL-key for approx.
  • Page 189 8.3.3 Adjustment test with internal weight During adjustment tests the balance automatically compares the saved value of the adjustment weight with the actual value. This is only a check, i.e. no values are changed. Ensure that the CAL-key is allocated with the <Internal adjustment test> function, see chap.
  • Page 190 8.3.5 Adjustment test with external weight Ensure that the CAL-key is assigned to the <External Weight Test> function, see chap. 8.3.1. Press the CAL-key and the weight value for the adjustment weight will be flashing on the display. (To change the weight value, press the MENU button and follow the instructions ...
  • Page 191 8.5 Regular inspections The ABP series supports regular inspection of your scale. This function may be used to check repeatability, off-center stress (off-center load errors) and linearity. The instructions on the display support the implementation of individual steps. Parameter setting: Call up menu: Press and hold the CAL-key for approx.
  • Page 192 3. Settings linearization Repeat these operating steps for Settings as shown for "Item 1 Repeatability". Performing test sequence: Call up menu: Press and hold the CAL-key for approx. 3 sec, the <CAL key setting> setting menu will appear. Use the navigation keys to select <...
  • Page 193 9 Verification General: According to EU directive 2014/23/EU balances must be officially verified if they are used as follows (legally controlled area): a) For commercial transactions if the price of goods is determined by weighing. b) For the production of medicines in pharmacies as well as for analyses in the medical and pharmaceutical laboratory.
  • Page 194 Position of the official seals TABP-BA-e-2212...
  • Page 195 10 Basic Operation 10.1 Activate standard weighing mode Status balance Action The balance is now in stand- Press the ON/OFF button. by mode Scale is in a different Press F -key operating mode   ] ] Balance is in menu Press the ON/OFF key After numeric input Repeatedly press the ON/OFF key.
  • Page 196 Print-out example with disabled GLP function (see chap. 15.8.3): 19.999[8] g Weighing value 10.3 Taring The dead weight of any weighing container may be tared away by pressing a button, so that the following weighing procedures show the net weight of the goods to be weighed.
  • Page 197 10.4 Functions of the ABP-A series (Standard weighing mode) 10.4.1 Measuring with the automatic door function (Position memory function) This function opens and closes the glass doors (top, left, right) automatically when the buttons „open and close door“ are actuated. The glass doors to be opened and to be closed and the percentage by which the glass doors shall open, can be adapted...
  • Page 198 10.4.2 Measuring with the IR sensor (touchless function) The same process can be repeated with the IR sensors, without pressing a button. The following four functions can be carried out with the IR sensors, without pressing a button. see chap. 13.10.1. Function Button Designation...
  • Page 199 Using the IR sensor If you run your hand over the right or the left sensor, the blue LED for the corresponding sensor will light up. The blue LED lights up for the corresponding sensor and continues lighting, whilst the sensor is actively recorded. Sensor Sensor Left...
  • Page 200 10.6 Underfloor weighing Objects unsuitable for placing on the weighing scale due to size or shape may be weighed with the help of the flush-mounted platform. Proceed as follows:  Switch off the balance.  Open closing cover (1) at the balance bottom. ...
  • Page 201 10.7 Switch off the balance  Press the ON/OFF button. The balance is in standby mode, that means that the balance is now in state ready- for-operation. Immediately after switching-on it is ready for operation (press any key) without warm-up time. ...
  • Page 202 10.10 Display Tare / Net / Gross In weighing mode press MENU button. Select <Tare/Net/Gross display> and confirm using the OK-key. Select <on> setting and confirm using the OK-key. Display for setting <On> Display for setting <Off> TABP-BA-e-2212...
  • Page 203 10.11 Display decimal dot as point or comma Select <System settings> and confirm using the OK-key.     Select <Display decimal point> and confirm using the OK-key. Select desired setting [Point] or [Comma] and confirm using the OK-key. Use the ON/OFF button to return into weighing mode ...
  • Page 204 11 Menu 11.1 Navigation in the menu Call up menu Select menu block Use the navigation buttons to select the individual menu blocks one by one. Use the navigation key to scroll down. Use the navigation key to scroll up. Select menu item Confirm selected menu block by pressing .
  • Page 205 Display examples: General navigation: All selectable functions and settings may be accessed by navigating the arrow keys [, ,,➔] and confirming by pressing the OK-key. The framing will indicate the current selection. When the icon is displayed you can press the S-key to access a submenu. If a scroll bar is shown, further parameters may be displayed by using the navigation keys , .
  • Page 206 2. Statistics A submenu will be available by pressing if the icon is displayed. Use the navigation keys to select the desired ,  setting and confirm using the OK-key. Return to menu by 11.1.2 Weighing settings TABP-BA-e-2212...
  • Page 207 The list of available settings will be displayed. Confirm using the OK-key. The framing will indicate the current selection. Select the desired settings using the F-key. To change your selection, press the OK-key. Use the navigation keys ,  to select the desired settings and confirm using the OK-key. Press the F-key to select additional settings and make changes as described above.
  • Page 208 11.1.3 System Settings The list of available menu blocks will be displayed. Confirm using the OK-key. The framing will indicate the current selection. Use the navigation keys ,  to select the desired menu block (such as system settings). Confirm selection by pressing the OK-key. The list of available settings will be displayed.
  • Page 209 Use the navigation keys ,  to select the desired setting (such as brightness). To change your selection, press the OK-key. ,  Use the navigation keys to select the desired setting and confirm using the OK-key. Press the F-key to select additional settings and make changes as described above. TABP-BA-e-2212...
  • Page 210 11.1.4 Application settings   The available applications will be displayed. Press the OK-key and use the navigation keys ,  to select the desired application, such as part counting. The framing will indicate the current selection. Confirm using the OK-key and the application specific settings will be displayed. The application-specific settings are described in the respective chapters.
  • Page 211 11.3 Resetting the menu Using this function, you can reset all balance settings to factory default. • Factory settings are marked by a “ ” in the menu oversight. • If user management is enabled, menu resetting may only be made by an authorised user.
  • Page 212 11.4 Menu Lock The menu setting operations can be locked so that the settings cannot be inadvertently changed. This menu lock is set with the following procedure. 1. Call System Settings  see chap. 11.1.3.     2. Enable/disable function Use the navigation keys , ...
  • Page 213 • The icon will be displayed while the function is enabled. • Weighing and adjustment can take place despite menu lock. • Authorisation for performing this function may be allocated to any user. • To disable the menu block, select Settings [off]. 11.5 Log menu settings When an optional printer is connected, a list of the current menu settings can be printed out.
  • Page 214 11.6 Menu history This function is applied to display the last 10 menu steps.  Use the navigation keys ,  to select < > and the last 10 menu steps will be displayed. TABP-BA-e-2212...
  • Page 215 12 Description of individual functions 12.1 Zero setting and tare function Selectable functions: Description 1. Zero tracking This function is used to correct automatically small weight variations which appear directly after see chap. 12.2. switching-on. In the event that small quantities are removed or added to the material to be weighed, incorrect weighing results can be displayed due to the “stability compensation“.
  • Page 216 12.3 Auto Tare function 1. Call function  see chap. 11.1.2.    Press and hold the TARE-key for a long time Use the navigation keys ,  to select <Auto tare> and confirm using the OK-key. 2. Enable/disable function Use the navigation keys , ...
  • Page 217 12.4 Settings for Stability and Response Exists the possibility to tune the stability of the display and the degree of response of the balance to the requirements of certain applications or the environmental conditions. Most measurements may be carried out by using default settings. In standard weighing mode, stability and response have the same priority.
  • Page 218 12.5 Dosing Use this function if you wish to increase display speed, e.g. during apportioning. However, please note that the balance is very susceptible to ambience conditions. icon will be displayed while the function is enabled. 1. Call function  see chap. 11.1.2. ...
  • Page 219 12.6 Standstill width If the stability display lights up ( ), the weighing result will be stable within the range indicated by the standstill width. Set range for stability determination: 1. Call function  see chap. 11.1.2.    Use the navigation keys , ...
  • Page 220 12.7 Weighing Units This function is used to define which weighing units you wish to apply. By pressing the UNIT key, the display can be switched over to the units enabled before in the menu. Scales with type approval allow you to change to the following units: [g] →...
  • Page 221 a) Enable/disable function Login function [off] Login function [on] All users have administrator rights and There is only one administrator and full access (default setting). maximal 10 users. 1. Call System Settings  see chap. 11.1.3.     Use the navigation keys to select , ...
  • Page 222 b) Creating a user profile Only the administrator may create new user profiles and grant access rights. A user profile may only be changed by the administrator. 1. Select administrator or user Use the navigation keys ,  to select Administrator or User <Administrator or User 01 - 10>...
  • Page 223 c) Define password Different passwords are required according to user or administrator. Type Administrator password User Password Default setting for 9999 0000 password Log-in Administrator ID User ID Access rights All functions and rights Limited rights defined in user profile. No password will be required if default setting [0000] is used.
  • Page 224 d) Granting user rights The administrator defines which of the following activities may be performed by the user. <Change settings> Make settings in menu <Output weighing value> Data output to external devices <Make use of USB> Access to USB storage space <Adjustment>...
  • Page 225 e) Change user name Use the navigation keys ,  to select <User name> and confirm using the OK-key. Enter desired user name (For numeric entry see chap. 3.2.1) Confirm selection by pressing the OK-key. Weighing balance returns to menu. Here you may change settings as described below.
  • Page 226 f) Login When the log-in function is enabled, the list of users will be displayed on log-in. Use the navigation keys ,  to select User and confirm using the OK-key. Password prompt will be displayed. Enter password and confirm using the OK-key (For numeric entry see chap.
  • Page 227 13 Balance settings 13.1 Screen saver While this function is enabled the balance display will automatically turn dark change after a defined time without a change in load or conditions. You can turn off the function (ABP series only) or define a time after which the balance display turn dark. To restart press any key.
  • Page 228 13.2 Display settings in operating mode For calling system settings see chap. 11.1.3 Use the navigation keys ,  to select <Operating modes display> and confirm using the OK-key. Use the navigation keys ,  to select the desired setting and confirm using the OK-key. Use the ON/OFF button to return into weighing mode 13.3 Balance identification no.
  • Page 229 13.5 Date format For calling system settings see chap. 11.1.3 Use the navigation keys ,  to select <Date output style> and confirm using the OK-key. Use the navigation keys ,  to set output format and confirm using the OK-key YY/MM/DD Year/ month/ day MM/DD/YY...
  • Page 230 13.7 Acoustic signal on pressing key and display of stability For calling system settings see chap. 11.1.3 Use the navigation keys ,  to select <Acoustic signal> and confirm using the OK- key. Use the navigation keys ,  to select setting [On] or [Off] and confirm using the OK- Use the ON/OFF button to return into weighing mode...
  • Page 231 13.10 Configuration methods of the IR sensors (only ABP-A series) In this section we explain how you can switch-over the operating modes for the IR sensors and how you can assign functions to every IR sensor. After having configured the operating modes of the IR sensor, assign functions to the configured operating modes.
  • Page 232 13.10.1 Switch-over the operating mode of the IR sensors The ABP-A series has a multifunctional mode, in which four functions maximum can be assigned to the IR sensors. The operating modes of the IR sensors vary depending on whether this mode is turned on or turned off. The multifunction mode is enabled as per standard.
  • Page 233 Touchless sensor operation with disabled multifunctional mode Disabling the multifunctional mode permits a faster operation of the IR sensors than with enabled multifunctional mode. When the multifunctional mode is disabled, two functions may be assigned which are shown in the following illustration. Right IR sensor (immediate) Run your hand or your fingers over the sensor, the LED will light up...
  • Page 234 Assignment configuration of touchless functions For calling system settings see chap. 11.1.3 Use the navigation keys ,  to select <Touchless multifunction assignment> and confirm using the OK-key. Use the navigation keys ,  to select <Right IR sensor (short)> and confirm using the OK-key.
  • Page 235 Checking the functions assigned to the touchless sensors (only when the multifunctional mode is enabled) (1) Run your hand in load weighing mode over the right and the left IR sensors, to make the LEDs light up for approx. 2 seconds. (2) The function allocation status is shown on the display field.
  • Page 236 14 Application Functions Overview of available applications: Combinable functions Symbol Function Statistic Check weighing Minimum initial weight    Parts counting    Percent determination Density determination    <Solid matter> Density determination    <Liquid> ...
  • Page 237 14.1 Parts counting With parts counting you can either count parts into a container or remove parts from a container. To count a greater number of parts the average weight per part has to be determined with a small quantity (reference quantity). The larger the reference quantity, the higher the counting exactness.
  • Page 238 3. Set reference Enter reference quantity and confirm using the OK-key.  Load the number of parts corresponding to the selected reference quantity. Wait until stability display has settled, then confirm using the OK-key.  The scale will calculate the average single weight and display the result.
  • Page 239 14.1.2 Setting the display  In counting mode, press MENU-key.  Use the navigation keys ,  to select <Display with weight value> and confirm using the OK-key.   Select <on> or <off> and confirm using the OK-key. Setting <Off> Setting <On>...
  • Page 240 14.1.4 Change settings  In counting mode, press Menu-button.  Select <Changing registration> and confirm using the OK-key. The following changes may be made: Product name: Change name and confirm using the OK- key. Reference quantity: Change reference piece weight and confirm using the OK-key.
  • Page 241 14.2 Percent determination Percent weighing allows to display weight in percent, in relation to a reference weight. The balance offers two possibilities: 1. Loaded reference weight = 100 % 2. Loaded reference weight = user defined 14.2.1 Settings Activate function Selecting application (see chap.
  • Page 242 For the first input the display for entering a memory name will appear. Use the navigation keys ,  to select a memory space and confirm using the OK-key. If required, change name and confirm using the OK-key. To overwrite a stored reference continue by referring to chap. 14.2.4 Further steps: ...
  • Page 243 Loaded reference weight = user defined [%]  Select ANYPER1 or 2 (or own description) and confirm using the OK-key  Use the navigation keys to enter a percentage value of your choice and confirm using the OK-key.  If required, place empty container on scale and tare.
  • Page 244 14.2.3 Performing calculation of percentage  In percentage mode, select stored reference and confirm using the OK-key (chap. 14.2.1).  Put empty container on the scale and tare.  Fill weighed good into container. The weight of the weighed good will be displayed in percent.
  • Page 245 14.2.5 Switching between percentage and weighing mode  14.3 Determining the density of solid matter and liquids For density determination we recommend working with the optionally available density determination set. The set contains all the accessories and aids required for easy and precise density determination.
  • Page 246 14.4 Totalization This function is used to automatically add any number of single weighings to a total sum. When the standstill control ( is complete the weighing value is automatically issued to an optional printer or a PC. The displayed value is added into the total adding memory.
  • Page 247  Repeat this sequence for each additional component.  To complete the sequence and to display the total, press the PRINT-key.  To start another add-up sequence, press the OK-key. Data output:  In totalizing mode press MENU button.  Use the navigation keys to select ,  <Print>...
  • Page 248 2. Edit total weight <TOTAL>  Use the navigation keys ,  to select <Total weight output> and confirm using the OK-key.   Select setting <On> or <Off> and confirm using the OK-key. Sample log Sample log Edit total weight <On> Edit total weight <Off>...
  • Page 249 14.5 Recipe composition 14.5.1 Free recipe composition This function can be applied to add weighing different components of a compound. For monitoring purposes the weight of all components (N001, N002 etc.) as well as the total weight may be issued to an optional printer or PC. The balance works with a separated memory for the weight of the weighing container and of the recipe components.
  • Page 250  Weigh additional components as described above.  To complete the recipe, press the PRINT- key. The total will be displayed and issued.  To start a new recipe, press the OK-key. Data output:  In recipe mode, press the MENU-key. ...
  • Page 251 2. Edit total weight <TOTAL>  Use the navigation keys ,  to select <Edit total weight> and confirm using the OK-key.   Select setting <On> or <Off> and confirm using the OK-key. Sample log Sample log Edit total weight <On> Edit total weight <Off>...
  • Page 252 14.5.2 Define and process recipes The scale has an internal memory for complete recipes and their components as well as the corresponding parameters (such as recipe name, tolerances, automatic taring etc.). During the processing of these recipes the scale will guide you step-by-step through the initial weighing process of components.
  • Page 253 Enter the recipe name such as MiHo-Creme and confirm using the OK-key. 4. Manual and automatic taring after importing individual components.  Use the navigation keys ,  to select <Subtract tare value> and confirm using the OK-key.  Select desired setting Manual: After taking-over the weighing value of a component by pressing the OK-key taring...
  • Page 254 Weighing unit  Select weighing unit and confirm using the OK-key  Component weight  Enter weight and confirm using the OK-  Tolerance of components  Enter tolerance and confirm using the OK-  Repeat step 5 for all components of the recipe ...
  • Page 255 Process recipe 1. Selecting an application  see chap. 11.1.4.    The available applications will be displayed. Use the navigation keys ,  to select <Recipe preparation>. The framing will indicate the current selection. Confirm using the OK-key. 2.
  • Page 256  Further components can be weighed as described for the first component. All determined single values taken-over by the OK-key will be saved.   4. Completing a recipe composition  Once the last component has been taken- over, the result of the recipe will be displayed and issued automatically.
  • Page 257 14.5.4 Sample log (KERN YKB-01N): RECIPE FUNCTION NAME Recipe name MIHO-CREME N001 1. Component MILK TGT= 47,000[0] g Target value RNG= 0.100[0] g Tolerance WEI= 47.014[1] g Weighed-in quantity DIF= 0.014[1] g Deviation from target value N002 2. Component ALMOND OIL TGT= 95,000[0] g Target value...
  • Page 258 14.6 Preparing buffer solutions The factory setting provides the scale with the following 13 recipes for preparing buffer solutions. Substance Buffer system pH value amount concentration 100mM Phosphoric acid (sodium) pH = 2.1 10 mM Phosphoric acid (sodium) pH = 2.6 50mM Phosphoric acid (sodium) pH = 2.8...
  • Page 259 2. Selecting a buffer system  Use the navigation keys ,  to select the desired buffer solution from the list and confirm using the OK-key. 3. Tolerance of components  Press MENU button  Select <Admitted errors> and confirm using the OK-key.
  • Page 260 5. Add components  Weigh displayed component. The weighing aid diagram with its tolerance marks facilitates the determination of the initial weight as a target value.  Wait for stability sign ( ). Apply the  achieved target value by pressing the OK- key.
  • Page 261 14.7 Sample preparation This function is used to calculate automatically and to prepare standard solutions with a special component based on hydrochloride or hydrate compounds. The following sample types are available. Molecular weight Salts Target weight (g) x active substance (g) (Hydrochloride) Molecular weight –...
  • Page 262 For the first input the display for entering a memory name will appear. Use the navigation keys ,  to select a memory space and confirm using the OK-  key. If required, change name and confirm using the OK-key. ...
  • Page 263 Preparing a sample 1. Select application <Sample preparation>  See previous paragraph Define “Sample preparation” 2. Select sample  Use the navigation keys ,  to select the desired sample and confirm using the OK-key. 3. Determine initial weight for component ...
  • Page 264 14.8 Statistics The Statistics function facilitates the statistical evaluation of weighing values. Combinable functions: Standard weighing mode, parts counting, percentage determination, animal weighing, density determination <Solids>, density determination <Liquids> 1. Select application to be applied to statistics  See chap. 11.1.4 The available applications will be displayed.
  • Page 265 Sample log Print sample number <On> STATISTICS N001 = 1,0047g 1. Weighing value N002 = 0,9990g 2. Weighing value N003 = 0,9984g 3. Weighing value N004 = 0,9983g 4. Weighing value N005 = 0,9989g 5. Weighing value ..<RESULT>..Number of samples = 4,9993 g Total...
  • Page 266 14.9 Control weighing and target weighing This function is used to determine the matching of a weighing value to the specified control values. Control values can be exact target values (target weighing) or the limits set for the tolerance range (control weighing) within which the weighing value is to be kept. 14.9.1 Target weighing This mode e.g.
  • Page 267  Select <Target value> and confirm using the OK-key.  Enter target value and confirm using the OK-key. 4. Setting tolerance  Select <Tolerance range> and confirm using the OK-key.  Enter tolerance and confirm using the OK- key.  To return to target weighing mode, press the ON/OFF-key.
  • Page 268 The tolerance marks provide the following information: Condition Grading Status Optical signal Example: Target value 100g Tolerance Tolerance 0.0010g mark flashes slowly Great difference < 150 g Weight more than to target value (Cycle: 1,5 - 2 s) the nominal weight and above the upper Small difference...
  • Page 269 Settings 1. Call up weighing settings In weighing mode press MENU button. Press the R-Taste key and use the navigation keys ,  to select [ Weighing Settings] and confirm using the OK-key. 2. Activate function Use the navigation keys ,  to select <Pass/fail evaluation>...
  • Page 270 Perform control weighing  If required, place empty container on scale and tare.  Place weighed goods and wait until the tolerance mark appears. Apply the tolerance marks to check whether the weighed good is within the set tolerance range. Input example: Upper range limit 40.0000 g...
  • Page 271 15 Interfaces Via the interfaces weighing data may be exchanged with connected peripheral devices. Issue may be made to a printer, PC or check displays. In the same way, control commands and data inputs may occur via the connected devices (such as PC, keyboard, barcode reader).
  • Page 272 15.3 Connect serial devices / connect programmable controller (SPS / PLC) Turn off scale and device. Connect scale to interface of device, using a suitable RS232C cable. Faultless operation requires an adequate KERN interface cable (optional). Turn on scale and device. Adapt communication parameter of scale and device, see chap.
  • Page 273 15.5 Data transmission format 1. Standard format example [-123.4567 ]     Positon ASCII Data Description  Signs [ ˽ ] positive values (blanks) [ - ] negative values  Weighing value Numeric weighing value is displayed in eight positions. Not required positions = space character 20H Possible overload, presented in 2 positions with O L.
  • Page 274 15.6 Interface commands The weighing balance recognises the commands listed below. 1. Data output Order Function Continuous data output of stable weighing values Status of stability display is attached to the data in the continuous output (U: instable; S: stable). Single output Automatic output Single output.
  • Page 275 3. Application settings Order Function Standard weighing mode Quit standard weighing mode Piece counting Call function (?: no. 1- 5) UW?=XX.XXXX Determine single weight by weighing ?: Nr. 1- 5 XX.XXXX: Weighing value Count parts (?: no. 1- 5) UB?=XXXXX Enter single weight as numeric value [XXXXX] (?: no.
  • Page 276 4. Control weighing and target weighing Order Function Target weighing TRGT Call function TARGET=XX.XXXX Select target weight LIMIT=XX.XXXX Select tolerance Checkweighing CHKW Call function OVR.RNG=XX.XXXX Select max target weight HI.LIM=XX.XXXX Select upper tolerance LO.LIM =XX.XXXX Select lower tolerance UND.RNG=XX.XXXX Select min target weight Start tolerance check HL: Outside upper tolerance range HI: Weight greater than target weight...
  • Page 277 6. System Settings Order Function Software scale ID=XXXX Select scale ID no. (default setting [0 0 0 0]) Display scale ID no. STATE Printout list of current menu settings TIME Display date / time User administration LOGIN=XXXX: YYYY Login XXXX : User name (max 20 characters) YYYY: Password (4 characters) LOGOUT Logout...
  • Page 278 8. Automatic door commands (only ABP-A) Order Function RO=LLLRRRUUU Settings of the open position for each door LLL: open position of the left door. Set value between 20 and 100 (%). RRR: open position of the right door. Set value between 20 and 100 (%).
  • Page 279 15.7 Communication parameters All communication parameters will be set (see chap. 15.7.1) by calling a standard setting. The subsequent standard setting must be selected according to the printer (details see the following table). All parameters may be of course also set in a user specific way (See chap. 15.7.2). Menu Effective Enhanced...
  • Page 280 2. Select setting The available settings will be displayed, see chap. 15.7 ➢ Effective ➢ Enhanced ➢ Type M ➢ Type S ➢ Type A ➢ User-defined Select desired setting with the help of the navigation keys and confirm using the OK- key.
  • Page 281 1. Communication speed (Baudrate) Use the navigation keys to select <Communication Speed> and confirm using the OK-key. Select setting and confirm using the OK-key. 2. Parity Use the navigation keys to select <Parity> and confirm using the OK-key. Select setting and confirm using the OK-key. None No parity, 8 bit Odd parity, 7 bit...
  • Page 282 Format 1 KERN Standard Format 2 Mettler Extended Format 3 Sartorius Standard A&D Standard Format 4 Options: FREE byte 1 -99, Data length 1 -99 6. Final character Use the navigation keys to select <Limiter> and confirm using the OK-key. Select setting and confirm using the OK-key.
  • Page 283 Set output condition: Use the navigation keys <Settings data output> and confirm using the OK-key. Use the navigation keys to select the desired setting and confirm using the OK-key. Stable/positive value Single output for stable and positive weighing value. Stable/negative value Single output for stable and positive or negative weighing value.
  • Page 284 Call function: Press and hold PRINT-key for approx. 3 sec. Confirm <Print> using the OK-key. Select Settings <Interval clocking> and confirm using the OK-key. Select Settings <On> and confirm using the OK-key. Setting output interval: Use the navigation keys to select <Settings data output>...
  • Page 285 15.8.3 GLP Output Function With the GLP Output function the printouts of weighing results are completed with a bottom row and a head line. The content of the header and footer are selectable. Call function: Press and hold the CAL-key for approx. 3 sec.
  • Page 286 15.8.4 Defining output details When the function is enabled you can in addition to weighing value issue the date, time, barcode ID and sample name. Call function: Press and hold PRINT-key for approx. 3 sec. Confirm <Printing> by pressing the OK-key. Setting output details: Use the navigation keys to enable [on] the desired details one by one [on], confirming...
  • Page 287 15.10 USB connection The USB interfaces are used to issue adjustment and weighing data. In the same way control commands and data entries may be entered via the connected devices (PC keyboard, barcode reader). Connecting devices: After connecting the USB device, connect power supply.
  • Page 288 15.10.1 Edit weighing data, adjustment logs and screenshots to USB medium + Preparation Call function For calling system settings see chap. 11.1.3     Use the navigation keys ,  to select <Setting data backup> and confirm using the OK-key.
  • Page 289 + Save displayed value as screenshot Call System Settings     Use the navigation keys to select ,  <Print> and confirm using the OK-key. Press the PRINT key long time. To enable <Screen Capture> select setting <On> and confirm using the OK-key Connect the scale to a USB stick.
  • Page 290 + Issue internal memory Call Menu Item <Internal memory output> as described above under "Preparation". Confirm using the OK-key Confirm using the OK-key, data will be issued. Return to weighing mode: Press the ON/OFF button. TABP-BA-e-2212...
  • Page 291 15.10.2 Data transfer by means of barcode reader For calling system settings see chap. 11.1.3     Press OK button. Use the navigation keys ,  to select <Bar code menu> and confirm using the OK- key. The available menu items will be displayed. ➢...
  • Page 292 16 Servicing, maintenance, disposal 16.1 Cleaning Before any maintenance, cleaning and repair work disconnect the appliance from the operating voltage. Models d = 0.00001 g/0.0001 g Fig.1: Clean the balance 1. Display Please do not use aggressive cleaning agents (solvents or similar agents), but a cloth dampened with mild soap suds.
  • Page 293 1. Remove, screening ring, weighing plate and carrier of weighing plate 2. Remove the plastic handle by turning. Do no touch the support of the weighing plate. This could cause damage to the balance. 3. Remove glass door carefully acc. to fig. Fig.2: Remove the glass doors 4.
  • Page 294 16.3 Disposal Disposal of packaging and appliance must be carried out by operator according to valid national or regional law of the location where the appliance is used. 17 Instant help for troubleshooting Possible causes of errors: In case of an error in the program process, briefly turn off the balance and disconnect from power supply.
  • Page 295 The menu settings cannot • The menu is locked. Remove the menu lock. be changed. • The current is switched on while a foreign body is stuck in the door or a foreign body during operation The glass door does not has been trapped in the door.
  • Page 296 18 Ionizer 18.1 General hints The ionizer is available for the ABP-series as Factory Option. In the ABP-A series it is installed as per standard. The ionizer has conductive peaks supplied by high voltage which, based on corona discharge, generate positively and negatively charged ions in the immediate vicinity. These are attracted by the electrostatic charge of goods to be weighed and, thus, neutralize the interfering electrostatic charge.
  • Page 297 Prevent damage caused by dropping, vibration or shock; see sticker on the left side. Always use the genuine power pack. The stated voltage value must be the same as the local voltage. Risk of injury! The peaks of the ion source are very sharp and cutting. The ionizer generates poisonous ozone;...
  • Page 298 18.3 Technical data Technology AC Corona discharge Discharge time 1 second (+1000V  +100V) Ozone concentration 0.06ppm (150 mm from ion source) 0- 40 °C, 25 – 80 % air humidity (non-condensing) Environmental conditions Electric Supply Mains adapter: Input AC 100V - 240V, 0.58 A, 50 - 60 Output DC 24V, 1 A Ionizer: 200 mA Degree of pollution...
  • Page 299 Plug the connected ionizer-AC adapter and the net cable into the DC IN- connection (for the ionizer). Connect the power plug of the ionizer on a plug-in socket. Connect the connections of the ionizer (2 connections) on the backside of the ionizer with the ionizer connecting cable.
  • Page 300 Ionization Make sure that the green LED [Power] is lighting. Close windshield doors. Press -button (ABP) / -button (ABP-A) , ionization is started. During ionization the blue LED [RUN] is lighting. The length of time depends on the menu setting <System Settings  Ion irradiation time>. Set irradiation time for ions For calling system settings see chap.
  • Page 301 18.5 Maintenance & Cleaning Maintain and clean the ionizer at regular intervals Clean the ion source: After 1000 hours Exchange ion source: After 30000 hours WARNING Disconnect the device from mains before cleaning. Do not dismantle the ionizer. Clean the ion source with care. Take care that the peaks are not bent.
  • Page 303 KERN ABP Version 1.2 2022-06 Notice d’utilisation Balance analytique Table des matières Caractéristiques techniques ................. 5 Déclaration de conformité ................10 Aperçu de l’appareil ..................11 Composants ..........................11 Clavier ............................13 3.2.1 Saisie numérique ........................15 Afficheur ..........................16 Indications fondamentales (généralités) ...........
  • Page 304 10.1 Activer le mode de pesage standard ..................44 10.2 Pesage simple ......................... 44 10.3 Tarage ............................45 10.4 Fonctions de la série ABP-A (mode de pesée standard) ........... 46 10.4.1 Mesurer avec la fonction de porte automatique (fonction mémoire de position) ....46 10.4.2 Mesure avec le capteur IR (fonction sans contact) ..............
  • Page 305 14.2.5 Basculer entre mode pourcentage et mode de pesage ............94 14.3 Détermination de la densité de corps solides et de liquides ..........94 14.4 Totalisation ..........................95 14.5 Composition de recettes......................98 14.5.1 Composition libre des recettes ..................... 98 14.5.2 Définir et traiter des recettes ....................
  • Page 306 1 Caractéristiques techniques KERN ABP 100-4M ABP 100-5DM ABP 100-5M Numéro d'article / Type TABP 100-4M-A TABP 100-5DM-A TABP 135-5M-A Lisibilité (d) 0,0001 g 0,00001 g / 0,0001 g 0,00001 g Plage de pesée (max) 120 g 52 g / 120 g 135 g Charge minimale (Min) 0,01 g...
  • Page 307 KERN ABP 200-4M ABP 200-5DM ABP 200-5M Numéro d'article / Type TABP 200-4M-A TABP 200-5DM-A TABP 220-5M-A Lisibilité (d) 0,0001 g 0,00001 g / 0,0001 g 0,00001 g Plage de pesée (max) 220 g 102 g / 220 g 220 g Charge minimale (Min) 0,01 g 0,001 g...
  • Page 308 KERN ABP 300-4M Numéro d'article / Type TABP 300-4M-A Lisibilité (d) 0,0001 g Plage de pesée (max) 320 g Charge minimale (Min) 0,01 g Echelon d’étalonnage (e) 0,001 g Classe d’étalonnage Reproductibilité 0,00015 g Linéarité ± 0,0003 g Temps de stabilisation Poids d'ajustage interne Temps de préchauffage...
  • Page 309 KERN ABP 100-5DAM ABP 100-5AM ABP 200-4AM Numéro d'article / Type TABP 120-5DAM-A TABP 135-5AM-A TABP 220-4M-A Lisibilité (d) 0,00001 g / 0,0001 g 0,00001 g 0,0001 g Plage de pesée (max) 52 g / 120 g 135 g 220 g Charge minimale (Min) 0,001 g 0,001 g...
  • Page 310 KERN ABP 200-5DAM ABP 200-5AM ABP 300-4AM Numéro d'article / Type TABP 220-5DM-A TABP 220-5M-A TABP 320-4AM-A Lisibilité (d) 0,00001 g / 0,0001 g 0,00001 g 0,0001 g Plage de pesée (max) 102 g / 220 g 220 g 320 g Charge minimale (Min) 0,001 g 0,001 g...
  • Page 311 * Poids de pièce le plus petit pour le comptage de pièces – sous conditions de laboratoire: ➢ Il y a des conditions d’environnement idéales pour des comptages à haute résolution ➢ Les pièces de comptage n’ont pas de dispersion ** Poids de pièce le plus petit pour le comptage de pièces –...
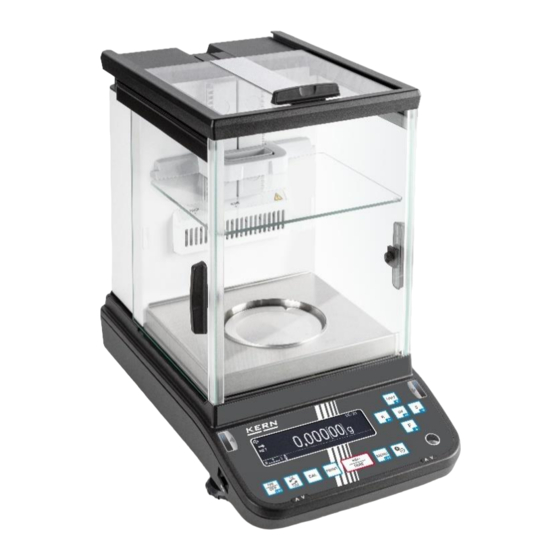
  • Page 312 3 Aperçu de l’appareil 3.1 Composants Modèles d = 0,0001 g Modèles d = 0,00001 g (seulement série ABP-A) Pos. Désignation Pos. Désignation Clavier Vecteur plateau de pesage multifonctions Afficheur Plateau de pesage multifonctions Touche de l’ionisateur Support du tube à essais (seulement ABP 200-5M / ABP 200-5AM) Bulle d’air Rail de guidage brise-vent interne...
  • Page 313 Vue dorsale: Modèles d = 0,0001 g Modèles d = 0,00001 g (seulement série ABP-A) Pos. Désignation Pos. Désignation Interface sériel RS232 Power Pack Raccord USB Branchement pour adaptateur réseau électrique (Ionisateur) Raccord ionisateur Interrupteur principal (Ionisateur) Branchement pour adaptateur réseau Branchement de la balance électrique Point de fixation pour sécurisation anti-vol...
  • Page 314 3.2 Clavier Série ABP Série ABP-A Fonction Touche Désignation Brève pression sur la Pression prolongée Dans le menu touche sur la touche Basculement entre mode de Retour en mode [ON/OFF] fonctionnement et de pesage d‘arrêt. Modifier lisibilité [1d/10d] Menu configuration Démarrer l’ajustage [CAL] Appeler "Ajustage"...
  • Page 315 Edition des données Menu configuration [PRINT] sur appareil externe Appeler "Impression" (mode de pesée) Menu configuration Tarage [TARE] Appeler "Mise à zéro Remise à zéro tarage" • Appel du menu • Appeler de réglages Retour au mode [MENU] spécifiques de pesage d‘application •...
  • Page 316 3.2.1 Saisie numérique Touche Désignation Fonction Augmenter chiffres clignotants (0 – 9) ou Touche de navigation  caractères (, [blank], -, A – Z) Diminuer chiffres clignotants (0 – 9) ou caractères Touche de navigation  (, [blank], -, A – Z) Touche de navigation Sélection des chiffres de gauche à...
  • Page 317 3.3 Afficheur En plus de l’affichage du résultat de pesage, on peut accéder ici à toutes les fonctions du menu. L’affichage varie selon que la balance se trouve en mode de fonctionnement ou de réglage. Des touches spécifiques (par ex. touches CAL, TARE, PRINT) permettent un accès rapide et ciblé...
  • Page 318 Affichage du Réglages actuels statut Pesée minimale Paramétrage de la stabilité et de la réponse Réglages imprimante Fonction Auto Print active Clignote pendant l'édition automatique Edition Edition continuelle active Clignote pendant l' édition continue Réglages de pesage Mode de dosage Tracé...
  • Page 319 Symboles d‘applications Symbole Description Mode de pesage Sélectionner l'application Comptage de pièces Niveau 1 Détermination du pourcentage Détermination densité <Corps solides> Le symbole de Détermination densité <Liquides> l’application sélectionnée est affiché Totalisation Composition de recettes Préparation de la recette Préparation de la solution tampon Préparation d‘échantillon Symboles d‘applications Symbole...
  • Page 320 4 Indications fondamentales (généralités) 4.1 Utilisation conforme La balance que vous avez achetée sert à la détermination de la valeur pondérale de matières devant être pesées. Elle est conçue pour être utilisée comme „balance non automatique“, c´à d. que les matières à peser seront posées manuellement et avec précaution au milieu du plateau de pesée.
  • Page 321 4.4 Vérification des moyens de contrôle Les propriétés techniques de mesure de la balance et du poids de contrôle éventuellement utilisé doivent être contrôlées à intervalles réguliers dans le cadre des contrôles d´assurance qualité. A cette fin, l’utilisateur responsable doit définir un intervalle de temps approprié...
  • Page 322 6.2 Emballage / réexpédition  Conservez tous les éléments de l’emballage d’origine en vue d’un éventuel transport en retour.  L’appareil ne peut être renvoyé que dans l’emballage d’origine.  Avant expédition démontez tous les câbles branchés ainsi que toutes les pièces détachées et mobiles. Exemple de représentation modèle d = 0,0001 g ...
  • Page 323  Soulever la balance avec les deux mains (seulement série ABP-A) TABP-BA-f-2212...
  • Page 324 7 Déballage, installation et mise en service 7.1 Lieu d’installation, lieu d’utilisation La balance a été construite de manière à pouvoir obtenir des résultats de pesée fiables dans les conditions d’utilisation d’usage. Vous pouvez travailler rapidement et avec précision à condition d’installer votre balance à...
  • Page 325 Etendue de la livraison / accessoires de série Uniquement pour modèles d = 0,00001 g Uniquement pour modèles d = 0,00001 g TABP-BA-f-2212...
  • Page 326 Pos. Désignation Pos. Désignation Balance Boutons de butée [3] Plateau de pesée Câble de connexion ionisateur Vecteur du plateau de pesée Adaptateur réseau ionisateur Bague de centrage Pinceau de nettoyage ionisateur (uniquement pour modèles d = 0,0001 g) Capot de protection de travail Câble de réseau ionisateur Support pour câble d’adaptateur Boîtier électronique externe...
  • Page 327 7.3 Implantation 7.3.1 Installer les portes brise-vent vitrées (seulement série ABP-A) S’assurer que les boutons de butée sur les portes en verre (en haut, gauche, droite) sont installés, avant de mettre en marche l’appareil. Autrement les portes vitrées peuvent être endommagées. Installation de la porte brise-vent vitrée (haut) Introduisez la poignée de la porte vitrée (haut) par le côté...
  • Page 328 7.3.2 Montage du brise-vent interne (seulement les modèles ABP-A demi-Micro) Ouvrez la porte vitrée complètement (haut) Saisissez la poignée de la lunette Introduisez la goupille dans le Introduisez les goupilles brise-vent réglable avec votre main centre inférieur du brise-vent interne inférieures (sur les deux préférée.
  • Page 329 7.3.4 Installer le plateau de pesée La précision des résultats de pesée sur des balances de précision à haute définition dépend de façon décisive du lieu d’implantation correct (voir chap. 7.1). 1. Fixer le support du câble d’adaptateur (uniquement modèles d = 0,0001 g) ...
  • Page 330 Modèles d = 0,00001 g  Monter dans l’ordre la bague de centrage, le vecteur du plateau de pesée et le plateau de pesée.  Fixer le capot de protection de travail  Poser doucement la tôle de protection dans la chambre de pesée TABP-BA-f-2212...
  • Page 331 3. Installer plateau de pesage multifonctions (uniquement modèles d = 0,00001 g)  Déconnecter la balance de  Installer plateau de pesage l’alimentation en courant multifonctions avec le vecteur. Attention au centrage!  Enlever le plateau de pesage standard selon l’illustration. Exemples d’utilisation: Après le remplacement du plateau de pesage, un ajustage est nécessaire, exécution v.
  • Page 332 5. Mise à niveau  Procéder à la mise à niveau de la balance à l´aide des vis des pieds, jusqu´à ce que la bulle d´air du niveau se trouve dans le cercle prescrit.  Contrôler périodiquement la mise à niveau 7.4 Branchement secteur Sélectionner une fiche secteur spécifique au pays et l'enficher dans le bloc d'alimentation.
  • Page 333 7.4.1 Mise sous tension Modèles d = 0,0001 g Modèles d = 0,00001 g Alimenter la balance en électricité par l’intermédiaire de l’adaptateur. L’affichage s’illumine et la balance réalise une vérification automatique. Un  ajustage interne est démarré automatiquement (v. chap. 8.3.2). Le bruit du moteur du système de chargement pour le poids d'ajustage interne est audible.
  • Page 334 7.6 Raccordement d’appareils périphériques Avant le raccordement ou le débranchement d´appareils supplémentaires (imprimante, PC) à l´interface de données, la balance doit impérativement être coupée du secteur. N´utilisez avec votre balance que des accessoires et des périphériques livrés par KERN, ces derniers étant adaptés de manière optimale à votre balance. 8 Ajustage Etant donné...
  • Page 335 8.1 Ajustage automatique par la fonction PSC Les balances à compensation de force réagissent de manière sensible aux changements de température. Plus la sensibilité de la balance est grande, plus cet effet est fort. Par la fonction PSC contrôlée par la température, la balance est capable de corriger de manière complètement automatique l’influence d’un changement de température.
  • Page 336 • La fonction PSC est toujours active et ne peut pas être désactivée. • De plus, aucune mesure ne peut être faite pendant l'ajustage automatique. • S’il y a lors du plateau de balance chargée clignote le symbole de poids et le message suivant apparaît ...
  • Page 337 8.2 Ajustage automatique commandé par le temps La balance peut être réglée de manière à ce qu’elle exécute au moyen de son poids interne et de son horloge incorporée un ajustage automatique à des heures définies (jusqu’à trois fois par jour). Cette fonction est très pratique, lorsque les rapports de ajustage sont désirés pour des ajustages réguliers, ou lorsque vous désirez effectuer un ajustage pendant une pause pour éviter d’interrompre un travail de pesée.
  • Page 338 8.3 Ajustage manuel par appui de touche [touche CAL] 8.3.1 Régler la fonction d'ajustage de la touche CAL Vous pouvez faire démarrer une procédure d’ajustage sans passer par le menu. Le procédé d'ajustage réglé peut être effectué par le simple appui de touche [CAL] à partir du mode de pesage Tenir appuyée pendant env.
  • Page 339 8.3.3 Test d’ajustage avec un poids interne Pendant le test d’ajustage, la balance compare la valeur enregistrée du poids d’ajustage avec la valeur réelle. Une seule vérification est effectuée, c’est à dire qu’aucune valeur ne se voit modifiée. S’assurer que la touche CAL est affectée avec la fonction <Essai d’ajustage interne>, v.
  • Page 340 8.3.5 Test d’ajustage avec poids externe S’assurer que la touche CAL est affectée avec la fonction <External Weight Test>, voir chap. 8.3.1. Appuyer sur la touche CAL, la valeur de poids pour le poids d'ajustage est affichée en clignotant. (Pour modifier la valeur pondérale, enfoncer la touche MENU et suivre les instructions de l‘affichage).
  • Page 341 8.5 Contrôle d’inspection régulier La série ABP supporte l’inspection régulière de votre balance. Avec cette fonction, on peut vérifier la reproductibilité, la charge excentrique (erreur de charge excentrée) et la linéarité. Les instructions sur l’écran aident lors de l’exécution des différentes étapes.
  • Page 342 3. Réglages linéarisation Effectuer les réglages de la même manière comme pour le "Point 1 Reproductibilité". Effectuer procédé de vérification: Appel du menu: Tenir appuyée pendant env. 3. sec. la touche CAL, le menu <Touche CAL def.> sera affiché. Sélectionner sur les touches de navigation <Vérification cyclique>...
  • Page 343 9 Etalonnage Généralités: D´après la directive UE 2014/31EU, les balances doivent faire l´objet d´un étalonnage officiel lorsqu´elles sont utilisées tel qu´indiqué ci-dessous (domaine régi par la loi): a) Dans le cadre de relations commerciales, lorsque le prix d´une marchandise est déterminé par pesée. b) Dans le cas de la fabrication de médicaments dans les pharmacies ainsi que pour analyses...
  • Page 344 Position des cachets TABP-BA-f-2212...
  • Page 345 10 Opérations de base 10.1 Activer le mode de pesage standard Etat balance Action La balance se trouve alors en Appuyez sur la touche ON/OFF. mode d’attente. La balance se trouve dans un Appuyez sur la touche F. autre mode de fonctionnement ...
  • Page 346 Exemple d’édition avec fonction GLP désactivée (voir au chap. 15.8.3): 19,999[8] g Valeur pondérale 10.3 Tarage Le poids propre d’un quelconque récipient de pesage peut être saisi par la tare sur simple pression d’un bouton, afin que le pesage consécutif affiche le poids net de l’objet pesé.
  • Page 347 10.4 Fonctions de la série ABP-A (mode de pesée standard) 10.4.1 Mesurer avec la fonction de porte automatique (fonction mémoire de position) Cette fonction ouvre et ferme las portes vitrées automatiquement (haut, gauche, droite), si les touches Ouvrir porte et Fermer porte sont enfoncées.
  • Page 348 10.4.2 Mesure avec le capteur IR (fonction sans contact) Le même processus peut être répété autant de fois que souhaité à l’aide des capteurs IR, sans enfoncer aucune touche. Les 4 fonctions suivantes peuvent être réalisées avec les capteurs IR sans devoir enfoncer aucune touche.
  • Page 349 Utilisation du capteur IR Si vous passez la main par-dessus du capteur droit ou gauche, la DEL bleue du capteur respectif est illuminée. La DEL bleue du capteur correspondant est allumée et continue illuminée pendant que le capteur actif est enregistré. Capteur Capteur gauche...
  • Page 350 10.6 Pesage en sous-sol Grâce au pesage en sous-sol il est possible de peser des objets, qui par suite de leurs dimensions ou de leur forme ne peuvent pas être posés sur le plateau de la balance. Procédez de la manière suivante: ...
  • Page 351 10.7 Mettre la balance à l’arrêt  Appuyez sur la touche ON/OFF. La balance se trouve en mode Stand-by, c'est-à-dire la balance est prête à entrer en service. Elle est immédiatement opérationnelle après mise en marche (appuyer sur une touche quelconque) sans temps de préchauffage.
  • Page 352 10.10 Afficher tare / net / brut Appuyer brièvement sur la touche MENU en mode de pesée. Sélectionner <Afficheur Tare/Net/Brut>et confirmer sur la touche OK. Sélectionner Réglage <On> et confirmer sur la touche OK. Affichage dans le réglage <ON> Affichage dans le réglage <OFF> TABP-BA-f-2212...
  • Page 353 10.11 Afficher le point décimal comme point ou comme virgule Sélectionner <Réglages de système> et confirmer sur la touche OK.     Sélectionner <Affichage position décimale> et confirmer sur la touche OK. Sélectionner le réglage souhaité [Point] ou [Virgule] et confirmer sur la touche OK.
  • Page 354 11 Menu 11.1 Navigation dans le menu Appel du menu Appeler le bloc de Sur les touches de navigation peuvent être appelés menu successivement les différents blocs de menu les uns après les autres. Feuilleter en avant sur la touche de navigation Feuilleter en arrière sur la touche de navigation Appeler point de menu...
  • Page 355 Exemples d‘affichage: Navigation générale: Vous pouvez accéder à toutes les fonctions et réglages sélectionnables sur l’écran avec les touches de flèche [, ,,➔] et confirmer sur la touche Le cadre indique le choix actif. Lors de l’affichage du symbole , un sous-menu est disponible en appuyant sur la touche Lors de l’affichage d’une barre dérouillant, on peut afficher avec les touches de navigation , ...
  • Page 356 2. Statistique A l’affichage du symbole , un sous-menu est disponible après un appui sur Sélectionner avec les touches de navigation les réglages souhaités ,  et confirmer sur la touche OK Retour au menu sur 11.1.2 Réglages de pesage continus TABP-BA-f-2212...
  • Page 357 La liste des réglages disponibles est affichée. Confirmer sur la touche OK. Le cadre indique le choix actif. Sélectionner les réglages souhaités sur la touche F. Appeler la sélection pour modification avec la touche OK. Sélectionner avec les touches de navigation ,  les réglages souhaités et confirmer sur la touche OK.
  • Page 358 11.1.3 Réglages système La liste des blocs de menu disponibles est affichée. Confirmer sur la touche OK. Le cadre indique le choix actif. Sélectionner avec les touches de navigation ,  le bloc menu souhaité (par ex. réglages de système). Confirmer la sélection avec la touche OK La liste des réglages disponibles est affichée.
  • Page 359 Sélectionner avec les touches de navigation ,  le réglage souhaité (par ex. luminosité). Appeler la sélection pour modification avec la touche OK. Sélectionner avec les touches de navigation ,  le réglage souhaité et confirmer sur la touche OK. Sélectionner avec la touche F d’autres réglages et les modifier comme décrit plus haut.
  • Page 360 11.1.4 Réglages des applications   Les applications disponibles sont affichées. Appuyer sur la touche OK et sélectionner avec les touches de navigation ,  l’application souhaitée, par ex. comptage de pièces. Le cadre indique le choix actif. OK, les réglages spécifiques à l’application seront affichés Confirmer sur la touche Les réglages spécifiques de l’application sont décrits dans les chapitres respectifs.
  • Page 361 11.3 RAZ du menu Grâce à cette fonction vous pouvez remettre tous les réglages de la balance aux réglages d’usine. • Les réglages d’usine portent un astérisque “ ” sur la vue d’ensemble du menu. • En cas d’administration activée d’utilisateur, la réinitialisation du menu ne peut être effectuée que par un utilisateur autorisé.
  • Page 362 11.4 Verrouillage du menu Les opérations de paramétrage du menu peuvent être verrouillées afin d’éviter des changements de paramètres non souhaités. Le verrouillage de menu se configure de la manière suivante: 1. Appeler les réglages système  voir chap. 11.1.3 ...
  • Page 363 • En cas de fonction activée, le symbole est affiché. • Les pesages et l'ajustage peuvent être effectués malgré le blocage du menu. • L’autorisation pour exécuter cette fonction peut être affectée à tout utilisateur. • Si un choix de menu sélectionné est configuré comme verrouillé, le message “LOCKED”...
  • Page 364 11.6 Menu Historique Avec cette fonction, les dix derniers pas de menu sont affichés.  Sélectionner avec les touches de navigation ,  < > , les derniers dix pas de menu sont affichés TABP-BA-f-2212...
  • Page 365 12 Description des différentes fonctions 12.1 Fonctions de mise à zéro et de tarage Fonctions sélectionnables: Description 1. Ajustement Cette fonction permet de corriger automatiquement automatique du zéro les petites fluctuations de poids, qui interviennent directement après la mise en marche. voir chap.
  • Page 366 12.3 Fonction Auto Tare 1. Appel de la fonction  voir chap. 11.1.2    Appuyez longuement sur la touche TARE Sélectionner avec les touches de navigation ,  <Auto tare> et confirmer sur la touche 2. Activer / Désactiver la fonction Activer (on) / désactiver (off) la fonction sur les touches de navigation , ...
  • Page 367 12.4 Paramétrage de la stabilité et de la réponse Il y a la possibilité d’adapter la stabilité de l’affichage et le degré de réponse de la balance aux exigences de certaines applications ou aux conditions de l’environnement. Les mesures peuvent être effectuées pour la plupart avec les réglages d‘usine. En mode de pesée standard, la stabilité...
  • Page 368 12.5 Dosage Recourez à cette fonction si vous voulez accélérer la vitesse d’affichage, p. ex. pour le dosage. Prenez cependant en compte que la balance va réagir de façon très sensible aux conditions environnementales. En cas de fonction activée, le symbole est affiché.
  • Page 369 12.6 Etendue d’arrêt Lorsque l’affichage de la stabilité ( ) s’allume, le résultat de la pesée reste stable à l’intérieur de la gamme indiquée par l’étendue d’arrêt. Régler la gamme de détermination de la stabilité: 1. Appel de la fonction ...
  • Page 370 12.7 Unités de pesage Grâce à cette fonction vous déterminez avec quelles unités de pesage vous voulez travailler. Par appel de la touche UNIT, l’affichage peut de nouveau être commuté dans les unités préalablement activées dans le menu. Pour des balances avec homologation de modèle, on peut commuter vers les unités suivantes: [g] →...
  • Page 371 a) Activer / Désactiver la fonction Fonction Log-in [off] Fonction Log-in [on] Il n’y a qu’un administrateur et au Tous les utilisateurs ont des droits d’administrateur et un accès complet maximum 10 utilisateurs (réglage d’usine). 1. Appeler les réglages système ...
  • Page 372 b) Créer profil d‘utilisateur Uniquement l’administrateur peut créer de nouveaux profils d’utilisateur et affecter des droits d‘accès. Un profil d’utilisateur ne peut être modifié que par l‘administrateur. 1. Sélectionner administrateur ou utilisateur Sélectionner avec les touches de navigation ,  Administrateur ou Utilisateur <Administrateur ou utilisateur 01 - 10>...
  • Page 373 c) Définir mot de passe Selon l’utilisateur ou l’administrateur, différents mots de passe sont nécessaires. Type Mot de passe Mot de passe utilisateur administrateur Réglage usine pour le mot 9999 0000 de passe Log-in ID Administrateur Utilisateur ID Droits d’accès Toutes les fonctionnalités Droits restreints définis et droits...
  • Page 374 d) Accorder des droits d’utilisateur L’administrateur définit quelles activités a le droit d’effectuer l‘utilisateur. <Changer les réglages> Effectuer des réglages dans le menu <Edition valeur Édition de données vers des appareils externes pondérale> <Utiliser USB> Accès à des mémoires USB Modifier des réglages d‘ajustage <Ajustage>...
  • Page 375 e) Changer nom d'utilisateur Sélectionner avec les touches de navigation ,  <Nom d’usager> et confirmer sur la touche OK. Indiquer le nom d’utilisateur souhaité (saisie numérique, v. chap. 3.2.1) Confirmer la saisie sur la touche OK. La balance retourne au menu. On peut effectuer ici les réglages de description suivante.
  • Page 376 f) Connexion En cas de fonction Log-in activée, la sélection d’utilisateur est affichée lors de la mise en route. Sélectionner avec les touches de navigation ,  l’utilisateur et confirmer sur la touche La demande du mot de passe est affichée. Saisir le mot de passe et confirmer sur la touche OK (saisie numérique, v.
  • Page 377 13 Réglages de la balance 13.1 Economiseur d’écran En cas de fonction activée, la balance bascule après un temps déterminé sans changement de charge ou manipulation en mode veille (Standby). Vous pouvez désactiver la fonction ou définir un temps après lequel la balance change en mode veille.
  • Page 378 13.2 Réglages d’affichage en mode de fonctionnement Appeler les réglages de système, v. chapitre 11.1.3 Sélectionner avec les touches de navigation ,  <Régimes de fonctionnement Affichage> et confirmer sur la touche OK. Sélectionner avec les touches de navigation ,  le réglage souhaité et confirmer sur la touche OK.
  • Page 379 13.5 Format de date Appeler les réglages de système, v. chapitre 11.1.3 Sélectionner avec les touches de navigation ,  <Format d’édition date> et confirmer sur la touche OK. Régler avec les touches de navigation ,  le format d’édition et confirmer sur la touche YY/MM/DD Année / Mois / Jour MM/DD/YY...
  • Page 380 13.7 Signal acoustique lors de l’appui de touche et affichage de stabilité Appeler les réglages de système, v. chapitre 11.1.3 Sélectionner avec les touches de navigation ,  <Signal acoustique> et confirmer sur la touche OK. Sélectionner avec les touches de navigation , ...
  • Page 381 13.10 Méthodes de configuration des capteurs IR (seulement série ABP-A) Dans ce paragraphe on explique comment vous pouvez commuter le régime de fonctionnement des capteurs IR et comment attribuer des fonctions à chaque capteur IR. Après avoir configuré les modes opératoires du capteur IR, attribuez des fonctions aux régimes de fonctionnement configurés.
  • Page 382 13.10.1 Commutation du régime de fonctionnement des capteurs IR La série ABP-A dispose d’un mode multifonctionnel, où on peut attribuer 4 fonctions comme maximum aux capteurs IR. Les régimes de fonctionnement des capteurs IR varient si ce mode est activé ou désactivé. Le mode multifonctionnel est allumé de standard. Exploitation du capteur IR avec mode multifonctionnel activé...
  • Page 383 Fonctionnement sans contact du capteur avec mode multifonctionnel désactivé La désactivation du mode multifonctionnel permet une utilisation plus rapide des capteurs IR qu’avec mode multifonctionnel activé. Si le mode multifonctionnel est désactivé, on peut attribuer deux fonctions qui sont présentées sur l’illustration suivante.
  • Page 384 Configurer l’attribution des fonctions sans contact Appeler les réglages de système, v. chapitre 11.1.3 Sélectionner avec les touches de navigation ,  <Attribution multifonctionnelle sans contact> et confirmer sur la touche OK. Sélectionner avec les touches de navigation ,  <Capteur IR droit (court)> et confirmer sur la touche OK.
  • Page 385 Vérification des fonctions attribuées aux capteurs sans contact (uniquement si le mode multifonctionnel est activé) (1) En mode de pèse-poids, passez la main par dessus des capteurs IR droit et gauche afin de faire allumer les DELs pour env. 2 secondes. (2) Le statut de l’attribution des fonctions est affiché...
  • Page 386 14 Fonctions d’application Vue d'ensemble des applications disponibles Fonctions combinables Symbole Fonction Statistiq Checkweighing Pesée minimale    Comptage de pièces Détermination du    pourcentage Détermination densité    <Corps solides> Détermination densité    <Liquides>...
  • Page 387 14.1 Comptage de pièces Lors du comptage de pièces, il vous est possible, soit d’additionner le nombre de pièces placées dans un récipient, soit de soustraire le nombre de pièces retirées d’un récipient. Afin de pouvoir compter une quantité importante de pièces, le poids moyen par pièce doit être déterminé...
  • Page 388 3. Fixer la référence Saisir le nombre référentiel de pièces et confirmer sur la touche  Placer le nombre de pièces selon le nombre de référence de pièces sélectionné. Attendre l’affichage de stabilité, confirmer ensuite sur la touche OK.  La balance détermine le poids moyen de pièce et affiche celui-ci.
  • Page 389 14.1.2 Régler l‘affichage  Appuyer en mode de comptage sur la touche MENU.  Sélectionner avec les touches de navigation ,   <Affichage avec valeur pondérale> et confirmer sur la touche OK.  Sélectionner réglage <on> ou <off> et confirmer sur la touche Réglage <Off>...
  • Page 390 14.1.4 Changer les réglages  Appuyer en mode de comptage sur la touche Menu.  Sélectionner <Changer usager> et confirmer sur la touche OK. Les modifications suivantes peuvent être effectuées: Nom de produit: Changer le nom et confirmer sur la touche Quantité...
  • Page 391 14.2 Détermination du pourcentage Le mode pesée à pourcentage permet l’affichage du poids en pourcent, rapporté à un poids de référence. La balance offre deux possibilités: 1. Poids de référence placé = 100 % 2. Poids de référence placé = défini par l‘utilisateur 14.2.1 Réglages Activer la fonction Sélection de l'application, voir au chap.
  • Page 392 A la première saisie l’affichage pour la saisie d’un nom de stockage apparaît. Sélectionner avec les touches de navigation ,  l’espace de stockage et confirmer sur la touche OK. Modifier la désignation si nécessaire et confirmer sur la touche Pour surcharger une référence enregistrée, continuer au chap.
  • Page 393 Poids de référence placé = défini par l‘utilisateur [%]  Sélectionner ANYPER1 ou 2 (ou sa propre désignation) et confirmer sur la touche  Saisir la valeur de pourcentage de votre choix avec les touches de navigation et confirmer sur la touche OK. ...
  • Page 394 14.2.3 Réaliser la détermination du pourcentage  Sélectionner en mode pourcentage une référence enregistrée et confirmer sur la touche OK (chap.14.2.1).  Poser le récipient vide sur la balance et tarer.  Remplir le produit à peser dans le récipient. Le poids du produit à peser est affiché...
  • Page 395 14.2.5 Basculer entre mode pourcentage et mode de pesage  14.3 Détermination de la densité de corps solides et de liquides Pour la détermination de la densité nous vous recommandons de travailler avec le kit de détermination de la densité en option. Le kit contient toutes les structures et ressources nécessaires pour une détermination confortable et précise de la densité.
  • Page 396 14.4 Totalisation Avec cette fonction des pesages individuels à volonté sont automatiquement totalisés en une somme totale. Après contrôle de la stabilité ( la valeur pesée est automatiquement éditée sur une imprimante ou PC en option. La valeur d’affichage est ajoutée à la mémoire de somme.
  • Page 397  Répéter le procédé pour chaque autre composant  Pour terminer le procédé et pour afficher la somme totale, appuyer sur la touche PRINT.  Pour démarrer un nouveau procédé de totalisation, appuyer sur la touche OK Edition de données: ...
  • Page 398 2. Imprimer le poids total <TOTAL>  Sélectionner avec les touches de navigation ,  <Edition du poids total> et confirmer sur la touche OK.   Sélectionner réglage <On> ou <Off> et confirmer sur la touche OK. Protocôle modèle Protocôle modèle Edition poids total <On>...
  • Page 399 14.5 Composition de recettes 14.5.1 Composition libre des recettes Cette fonction permet d’additionner différents composants d’un mélange au pesage. Pour contrôle, le poids de tous les composants (N001, N002 etc.) ainsi que le poids total (TOTAL) peut être imprimé sur une imprimante en option ou un PC. La balance fonctionne avec une mémoire séparée pour le poids du récipient de pesage et des composants de la recette.
  • Page 400  Peser d’autres composants comme décrit plus haut  Pour terminer la recette, appuyer sur la touche PRINT. La somme totale est affichée et imprimée.  Pour démarrer une nouvelle recette, appuyer sur la touche OK Edition de données:  En mode recette, appuyer sur la touche MENU.
  • Page 401 2. Imprimer le poids total <TOTAL>  Sélectionner avec les touches de navigation ,  <Edition du poids total> et confirmer sur la touche OK.   Sélectionner réglage <On> ou <Off> et confirmer sur la touche OK. Protocôle modèle Protocôle modèle Edition poids total <On>...
  • Page 402 14.5.2 Définir et traiter des recettes La balance dispose d’une mémoire interne pour des recettes complètes avec tous les composants et les paramètres associés (par ex. nom de recette, tolérances, tarage automatique). Lors du traitement de ces recettes, la balance vous guide pas à pas par le pesage des composants.
  • Page 403 Saisir le nom de recette, par ex. MiHo-Creme et confirmer sur la touche OK. 4. Tarage manuel ou automatique après la reprise des différents composants  Sélectionner avec les touches de navigation ,  <Soustraire valeur tare> et confirmer sur la touche OK. ...
  • Page 404 Unité de pesage  Sélectionner l’unité de pesage et confirmer sur la touche  Poids du composant  Saisir le poids et confirmer sur la touche  Tolérance du composant  Saisir la tolérance et confirmer sur la touche  Répéter l‘étape 5 pour tous les composants de la recette ...
  • Page 405 Traiter la recette 1. Sélectionner l'application  voir chap. 11.1.4    Les applications disponibles sont affichées. Avec les touches de navigation ,  choisir <Recette Préparation>. Le cadre indique le choix actif. Confirmer sur la touche OK. 2. Sélectionner la recette ...
  • Page 406  Peser les autres composants comme décrit pour le premier composant. A chaque reprise avec la touche OK, la valeur individuelle déterminée est enregistrée.   4. Terminer l’élaboration de recette  Lors de la reprise du dernier composant, le résultat de la recette est affiché...
  • Page 407 14.5.4 Protocole modèle (KERN YKB-01N): RECIPE FUNCTION NAME Nom de la recette MIHO-CREME N001 1. Composant LAIT TGT= 47.000[0] g Valeur de consigne RNG= 0,100[0] g Tolérance WEI= 47,014[1] g Pré-pesage DIF= 0,014[1] g Ecart de la valeur de consigne N002 2.
  • Page 408 14.6 Préparer des solutions tampons De réglage par défaut d’usine, la balance propose les 13 recettes suivantes pour la fabrication de solutions tampons. Concentration Système tampon Valeur du de quantités de matière 100mM Acide phosphorique (sodium) pH = 2,1 10 mM Acide phosphorique (sodium) pH = 2,6 50mM...
  • Page 409 2. Sélectionner le système tampon  Sélectionner avec les touches de navigation ,  le tampon souhaité dans la liste et confirmer sur la touche 3. Tolérance du composant  Appuyer sur la touche MENU  Sélectionner <Erreurs admises> et confirmer sur la touche OK.
  • Page 410 5. Ajouter composants  Peser le composant affiché. L'assistance graphique pour la pesée avec les repères de tolérances facilite la pesée par rapport à la valeur de consigne.  Attendre l’indicateur de stabilité  Reprendre le poids de consigne atteint avec la touche OK.
  • Page 411 14.7 Préparation d‘échantillon A l’aide de cette fonction, des solutions standard avec un composant spécial sur la base d’hydrochlorure ou hydrate peuvent être calculées et fabriquées automatiquement. Les types d’échantillon suivants sont disponibles. Poids moléculaire Sels Poids cible (g)= x substance active (g) (Hydrochlorure) Poids moléculaire –...
  • Page 412 A la première saisie s’ouvre l’affichage pour la saisie d’un nom de stockage. Sélectionner avec les touches de navigation ,  l’espace de stockage et  confirmer sur la touche Modifier évtl. la désignation et confirmer sur la touche  Pour remplacer un échantillon enregistré, continuer au chap.
  • Page 413 Préparer l‘échantillon 1. Sélectionner l’application <Préparation d’échantillons>  Voir paragraphe précédent Définir "Préparation d’échantillon" 2. Sélectionner l‘échantillon  Sélectionner avec les touches de navigation ,  l’échantillon souhaité et confirmer sur la touche 3. Peser le composant  Peser le composant jusqu’à ce que le poids cible est identique au poids brut.
  • Page 414 14.8 Statistique La fonction statistique permet l'exploitation statistique des valeurs pondérales. Fonctions pouvant être combinées: Mode de pesage standard, comptage pièces, détermination pourcentage, pesée d‘animaux, détermination densité <Matières solides>, détermination densité <Liquides> 1. Sélectionner l’application sur laquelle doit être appliquée la statistique ...
  • Page 415 Protocôle modèle Imprimer Numéro d’échantillon <On> STATISTICS N001 = 1,0047g 1. Valeur pondérale N002 = 0,9990g 2. Valeur pondérale N003 = 0,9984g 3. Valeur pondérale N004 = 0,9983g 4. Valeur pondérale N005 = 0,9989g 5. Valeur pondérale ..<RESULT>..Nombre d'échantillons Somme = 4,9993 g...
  • Page 416 14.9 Pesage de contrôle et cible A l’aide de ces fonctions, vous pouvez déterminer la concordance d’une valeur pondérale avec des valeurs de contrôle prédéfinies. Les valeurs de contrôle peuvent être des valeurs de consignes exactes (pesées cibles) ou des valeurs limite d’une zone de tolérance (pesées de contrôle) dans laquelle doit se trouver la valeur pondérale.
  • Page 417  Sélectionner <Valeur cible> et confirmer sur la touche OK.  Saisir la valeur cible et confirmer sur la touche OK. 4. Régler tolérance  Sélectionner <Gamme de tolérance> et confirmer sur la touche OK.  Saisir la tolérance et confirmer sur la touche OK.
  • Page 418 Les repères de tolérance fournissent l’information suivante: Condition de Classement Statut Signal visuel Exemple: Valeur cible 100g transfert Repère de Tolérance 0,0010g tolérance Grande Clignotements différence par lents < 150 g Poids supérieur rapport à la au poids de (Cycle: 1,5 - 2 s) valeur ciblée consigne et au- delà...
  • Page 419 Réglages 1. Appeler les réglages de pesée Appuyer sur la touche MENU en mode de pesée. Appuyer sur la touche R et sélectionner avec les touches de navigation ,  [ Réglages de pesée] et confirmer sur la touche 2. Activer la fonction Sélectionner avec les touches de navigation , ...
  • Page 420 Effectuer une pesée de contrôle  Si besoin, placer le récipient vide sur la balance et le tarer.  Mettre le produit à peser, attendre que le repère de tolérance apparaisse. Vérifier à l’aide des repères de tolérance si le produit pesé se trouve dans la zone de tolérance définie.
  • Page 421 15 Interfaces Par le truchement des interfaces peuvent être échangées les données de pesée au moyen des appareils de périphérie raccordés. L’édition peut être effectuée vers une imprimante, PC ou affichages de contrôle. Inversement, des commandes et saisies de données peuvent être effectuées à travers les appareils connectés (par ex.
  • Page 422 15.3 Connecter des appareils sériels / commande à mémoire programmable (SPS / PLC) Eteindre la balance et l‘appareil. Relier la balance avec un câble RS232C adapté à l’interface de l‘appareil. Seul un câble d’interface (en option) KERN correspondant vous assure une exploitation sans panne.
  • Page 423 15.5 Format de transfert des données 1. Exemple format standard [-123,4567 ]     Position ASCII 2DH 31H 20H 0DH Données N° Description  Signe [ ˽ ] valeurs positives (caractère espace) [ - ] valeurs négatives  Valeur pondérale La valeur pondérale numérique est représentée par 8 positions.
  • Page 424 15.6 Ordres d'interface Les ordres suivants sont reconnus par la balance 1. Edition de données Commande Fonction Edition permanente de données valeurs de pesées stables Le statut de l’affichage de la stabilité est annexé lors de l’édition continue des données (U: instable; S: stable). Edition unique Edition automatique Edition unique.
  • Page 425 3. Réglages des applications Commande Fonction Mode de pesage standard Quitter le mode de pesage standard Comptage de pièces Appeler fonction (?: No. 1- 5) UW?=XX.XXXX Déterminer le poids de pièce par pesage ?: No. 1- 5 XX.XXXX: Valeur pondérale Compter pièces (?: No.
  • Page 426 4. Pesage de contrôle et cible Commande Fonction Pesée cible TRGT Appel de la fonction TARGET=XX.XXXX Sélectionner poids cible LIMIT=XX.XXXX Sélectionner tolérance Pesée de contrôle CHKW Appel de la fonction OVR.RNG=XX.XXXX Sélectionner poids de consigne max. HI.LIM=XX.XXXX Sélectionner tolérance supérieure LO.LIM =XX.XXXX Sélectionner tolérance inférieure UND.RNG=XX.XXXX Sélectionner poids de consigne min.
  • Page 427 6. Réglages système Commande Fonction Logiciel balance Sélectionner le No. d’identification de la balance ID=XXXX (réglage usine par défaut [0 0 0 0] Afficher le No. d’identification de la balance STATE Imprimer liste des réglages menu actuels TIME Afficher date / heure Gestion de l’usager LOGIN=XXXX: YYYY Connexion...
  • Page 428 8. Commandes automatiques de porte (uniquement ABP-A) Commande Fonction Réglages de la position d’ouverture pour chaque porte RO=LLLRRRUUU LLL : position ouverte de la porte gauche. Valeur de consigne comprise entre 20 et 100 (%). RRR : position ouverte de la porte droite. Valeur réglée entre 20 et 100 (%).
  • Page 429 15.7 Paramètres de communication Par l’appel d’un réglage standard, tous les paramètres de communication sont déjà préréglés (v. chap.15.7.1). Sélectionner le réglage standard respectif en fonction de l’imprimante (pour de plus amples détails voir le tableau ci-dessous). Evidemment, tous les paramètres peuvent aussi être réglés spécifiquement pour l‘utilisateur (v.
  • Page 430 2. Sélectionner réglage Les réglages disponibles sont affichés, voir chap. 15.7 ➢ Efficace ➢ Elargi ➢ Type M ➢ Type S ➢ Type A ➢ Défini par l’utilisateur Sélectionner le réglage souhaité avec les touches de navigation et confirmer sur la touche OK.
  • Page 431 1. Vitesse de communication (vitesse bauds) Sélectionner sur les touches de navigation <Taux baud> et valider sur la touche OK. Sélectionner le réglage et confirmer sur la touche 2. Parité Sélectionner avec les touches de navigation <Parité> et confirmer sur la touche OK. Sélectionner le réglage et confirmer sur la touche...
  • Page 432 Format 1 KERN Standard Format 2 Mettler Extended Format 3 Sartorius Standard A&D Standard Format 4 en option: FREE byte 1 -99, Data length 1 -99 6. Délimiteur Sélectionner avec les touches de navigation <Délimiteur> et confirmer sur la touche OK. Sélectionner le réglage et confirmer sur la touche...
  • Page 433 Régler les conditions d’édition: Sélectionner sur les touches de navigation <Réglage édition de données> et valider sur la touche OK. Sélectionner sur les touches de navigation le réglage souhaité et valider sur la touche OK. Valeur stable / positive Edition unique avec valeur pondérale stable et positive. Valeur stable / négative Edition unique en cas de valeur pondérale stable et positive ou négative.
  • Page 434 Appel de la fonction Rester appuyé pendant env. 3 sec sur la touche PRINT. Confirmer <Print> avec la touche OK. Sélectionner réglages <Cadencement d’intervalle> et confirmer sur la touche OK. Sélectionner Réglages <On> et confirmer sur la touche OK. Régler l’intervalle d’édition: Sélectionner sur les touches de navigation <Réglage édition données>...
  • Page 435 15.8.3 Fonction GLP Output Dans la fonction GLP Output les éditions des résultats de pesée sont complétées par un entête et un pied de page. Le contenu de l’entête et pied de page peut être sélectionné. Appel de la fonction Rester appuyé...
  • Page 436 15.8.4 Définir détails d'édition En cas de fonction activée, on peut éditer à côté de la valeur pondérale la date, l’heure, l’ID code barre et la désignation de l‘échantillon. Appel de la fonction Rester appuyé pendant env. 3 sec sur la touche PRINT.
  • Page 437 15.10 Raccord USB Par les interfaces USB, des données d’ajustage et de pesage peuvent être éditées aussi. Inversement, des commandes et entrées de données peuvent être entrées par les appareils connectés (PC, clavier, lecteur code barre). Connecter des appareils: Mettre la balance à l’arrêt Connecter appareils USB selon schéma représenté...
  • Page 438 15.10.1 Editer des données de pesage, protocoles d‘ajustage et copies d’écran sur un média d’enregistrement USB + Préparation Appel de la fonction Appeler les réglages de système, v. chapitre 11.1.3     Sélectionner avec les touches de navigation , ...
  • Page 439 + Enregistrer la valeur d’affichage en tant que copie d’écran Appeler les réglages système     Sélectionner avec les touches de navigation ,  <Imprimer> et confirmer sur la touche Appuyer longtemps sur la touche PRINT. Pour activer pour <Illustr.mémor.> sélectionner réglage <On>et valider sur la touche OK Relier à...
  • Page 440 + Edition de la mémoire interne Appeler le point de menu <Editer mémoire interne> comme décrit auparavant sous "Préparation". Confirmer sur la touche OK Appuyer sur la touche OK, les données seront éditées. Retour en mode de pesée: Appuyez sur la touche ON/OFF. TABP-BA-f-2212...
  • Page 441 15.10.2 Transfert de données à l’aide d’un lecteur code barre Appeler les réglages de système, v. chapitre 11.1.3     Appuyer sur la touche OK Sélectionner avec les touches de navigation ,  <Menu code à barres> et confirmer sur la touche OK.
  • Page 442 16 Maintenance, entretien, élimination 16.1 Nettoyage Avant tout travail de maintenance, de nettoyage et de réparation couper la tension de régime de l‘appareil. Modèles d = 0,00001 g / 0,0001 g: Fig. 1 : Nettoyer la balance 1. Afficheur N´utiliser pas de produits de nettoyage agressifs (dissolvants ou produits similaires) mais uniquement un chiffon humidifié...
  • Page 443 1. Enlever la bague de blindage, le plateau de pesée et le vecteur du plateau de pesée 2. Retirer la poignée en plastique en la tournant. Ne toucher pas au siège du plateau de pesée. Sinon, la balance pourrait être endommagée.
  • Page 444 16.3 Elimination L’élimination de l’emballage et de l’appareil doit être effectuée par l’utilisateur selon le droit national ou régional en vigueur au lieu d’utilisation. 17 Aide succincte en cas de panne Causes possibles des erreurs: En cas d’une panne dans le déroulement du programme, la balance doit être arrêtée pendant un court laps de temps et coupée du secteur.
  • Page 445 • Le menu est verrouillé Enlevez le verrouillage du Les paramètres du menu ne peuvent pas être modifiés. menu. • Le courant est allumé, pendant qu’un corps étranger est coincé dans la porte ou un corps La porte vitrée ne fonctionne étranger est coincé...
  • Page 446 18 Ionisateur 18.1 Généralités L’ionisateur est disponible comme Factory Option pour la série ABP. Dans la série ABP-A il est installé de façon standard. L’ionisateur possède des pointes conductibles alimentées en haute tension, qui par leur décharge par effet de couronne produit des ions à charge positive et négative dans son entourage immédiat.
  • Page 447 Ne jamais désassembler ou modifier l’ionisateur. Evitez les dommages à la suite de chutes, vibrations ou de chocs, voir étiquette du côté gauche. N’utilisez que le bloc d’alimentation d’origine. La valeur de tension imprimée sur l’appareil doit concorder avec la tension locale. Danger de blessures, les pointes de la source d’ions sont très coupantes L’ionisateur produit l’ozone toxique, veillez à...
  • Page 448 18.3 Caractéristiques techniques Technologie Déchargement coronal Temps de déchargement 1 seconde (+1000V  +100V) Concentration d’ozone 0.06ppm (150 mm à partir de source d’ions) 0- 40 °C, 25 – 80 % humidité de l’air (non condensant) Conditions environnementales Alimentation en courant Adaptateur réseau : Entrée AC 100V - 240V, 0.58 A, 50 - 60 Hz Sortie DC 24V, 1 A Ionisateur:...
  • Page 449 Enfichez l’adaptateur réseau de l’ionisateur branché et le câble-réseau dans le connecteur DC IN (pour l’ionisateur). Branchez la fiche-réseau de l’ionisateur dans une prise de courant. Reliez les connexions de l’ionisateur (2 connexions) par le câble de branchement de l’ionisateur sur le côté arrière de l’ionisateur.
  • Page 450 Ionisation S’assurer que la DEL verte [Power] est allumée. Fermer portes de brise-vent. , l’ionisation démarre. Appuyer sur touche (ABP) / touche (ABP-A) Pendant l’ionisation la DEL bleue [RUN] est allumée. La durée dépend du réglage de menu <Réglage de système  Durée d’irradiation d‘ions>. Régler durée d’irradiation d‘ions Appeler les réglages de système, v.
  • Page 451 18.5 Maintenance et nettoyage Entretien et nettoyage à intervalles réguliers de l’ionisateur. Nettoyer la source d’ions: Après 1.000 heures Changer la source d’ions Après 30.000 heures AVERTISSEMENT Séparez l’appareil su secteur avant le nettoyage. Ne démontez pas l’ionisateur. Nettoyer avec précaution la source d’ions. Veiller à...