Panasonic LUMIX DC-GH5M2 Manuel D'utilisation
Masquer les pouces
Voir aussi pour LUMIX DC-GH5M2:
- Manuel d'utilisation (812 pages) ,
- Manuel d'utilisation (140 pages)
Table des Matières
Publicité
Les langues disponibles
Les langues disponibles
Liens rapides
Operating Instructions <Quick Start Guide>
Digital Camera
Bedienungsanleitung <Kurzleitfaden>
Digital-Kamera
Manuel d'utilisation <Guide de prise en main rapide>
Appareil photo numérique
Istruzioni d'uso <Guida rapida>
Fotocamera digitale
Instrucciones de funcionamiento <Guía de inicio rápido>
Cámara digital
Model No. / Modell Nr. / Modèle / Modello N. / Modelo N.
More detailed operating instructions are available in "Operating Instructions
<Complete Guide>" (HTML format / PDF format).
Detailliertere Anweisungen finden Sie in der "Bedienungsanleitung <Vollständiger
Leitfaden>" (HTML-Format / PDF-Format).
Pour des instructions plus détaillées, veuillez consulter le "Manuel d'utilisation <Guide
complet>" (Format HTML / format PDF).
Istruzioni d'uso più dettagliate sono disponibili nelle "Istruzioni d'uso <Guida
completa>" (formato HTML / formato PDF).
En "Instrucciones de funcionamiento <Guía completa>" (Formato HTML / formato
PDF) están disponibles instrucciones de funcionamiento más detalladas.
https://panasonic.jp/support/dsc/oi/GH5M2/index.html
E
Web Site: http://www.panasonic.com
DC-GH5M2
DVQX2187ZA
M0421KZ0
Publicité
Chapitres
Table des Matières

Manuels Connexes pour Panasonic LUMIX DC-GH5M2


Sommaire des Matières pour Panasonic LUMIX DC-GH5M2
- Page 1 Istruzioni d’uso più dettagliate sono disponibili nelle “Istruzioni d’uso <Guida completa>” (formato HTML / formato PDF). En “Instrucciones de funcionamiento <Guía completa>” (Formato HTML / formato PDF) están disponibles instrucciones de funcionamiento más detalladas. https://panasonic.jp/support/dsc/oi/GH5M2/index.html Web Site: http://www.panasonic.com DVQX2187ZA M0421KZ0...
- Page 2 Dear Customer, We would like to take this opportunity to thank you for purchasing this Panasonic Digital Camera. Please read this document carefully and keep it handy for future reference. Please note that the actual controls and components, menu items, etc.
- Page 3 (HTML format / PDF format) Explains all functions and operation methods in detail. This can be viewed with a PC or smartphone. https://panasonic.jp/support/dsc/oi/GH5M2/index.html URL and QR code can also be checked on the [Online Manual] of the [Setup] menu. ...
-
Page 4: Table Des Matières
Contents About Operating Instructions ................3 Information for Your Safety ................5 Cautions for Use ....................7 Introduction Before Use ......................10 Standard Accessories ..................12 Names of Parts ....................15 Camera ......................15 Lens ....................... 20 Viewfinder / Monitor Displays ................21 Getting Started / Basic Operations Attaching a Shoulder Strap ................ -
Page 5: Information For Your Safety
Bottom Declaration of Conformity (DoC) Hereby, “Panasonic Corporation” declares that this product is in compliance with the essential requirements and other relevant provisions of Directive 2014/53/EU. Customers can download a copy of the original DoC to our RE products from our DoC server: http://www.ptc.panasonic.eu... -
Page 6: About The Battery Pack
Information for Your Safety ■ About the battery pack CAUTION • Danger of explosion if battery is incorrectly replaced. Replace only with the type recommended by the manufacturer. • When disposing of the batteries, please contact your local authorities or dealer and ask for the correct method of disposal. -
Page 7: Cautions For Use
• Do not use any other USB connection cables except the one supplied with the camera or the battery charger (DMW-BTC15: optional). • Always use a genuine Panasonic Shutter Remote Control (DMW-RS2: optional). • Always use a genuine Panasonic Tripod Grip (DMW-SHGR1: optional). - Page 8 Information for Your Safety • Before cleaning the camera, remove the battery or the DC coupler (DMW- DCC17: optional), or disconnect the power plug from the outlet. • Do not press the monitor with excessive force. • Do not press the lens with excessive force. •...
- Page 9 Information for Your Safety • The battery is not charged when the camera is shipped. Charge the battery before use. • The battery is a rechargeable lithium ion battery. If the temperature is too high or too low, the operating time of the battery will become shorter. •...
-
Page 10: Introduction
– Touch operations may be incorrectly recognized. When using in low temperatures (–10 °C to 0 °C (14 °F to 32 °F)) – Before use, attach a Panasonic lens with a minimum recommended operating temperature of –10 °C (14 °F). - Page 11 Introduction Splash Resistant Splash Resistant is a term used to describe an extra level of protection this camera offers against exposure to a minimal amount of moisture, water or dust. Splash Resistant does not guarantee that damage will not occur if this camera is subjected to direct contact with water.
-
Page 12: Standard Accessories
Introduction Standard Accessories Digital camera body USB connection cable (This is referred to as camera in this document.) K1HY24YY0026 Cable holder 1PP1A561Z Shoulder strap Check that all the accessories are supplied before using the camera. DVPW1029Z (Product numbers correct as of May Body Cap ... - Page 13 Introduction Items Supplied with DC-GH5M2L (Lens Kit Product) Lens cap Interchangeable Lens (LEICA DG VARIO- ELMARIT 12–60mm/ SYF0083 F2.8–4.0 ASPH./ H-ES12060 Lens rear cap POWER O.I.S.) Lens hood VFC4605 1ZE4Z260Z Items Supplied with DC-GH5M2M (Lens Kit Product) Lens cap ...
- Page 14 Introduction • The memory card is optional. • Consult the dealer or Panasonic if you lose the supplied accessories. (You can purchase the accessories separately.) • Please dispose of all packaging appropriately. • Keep small parts in a safe place out of the reach of children.
-
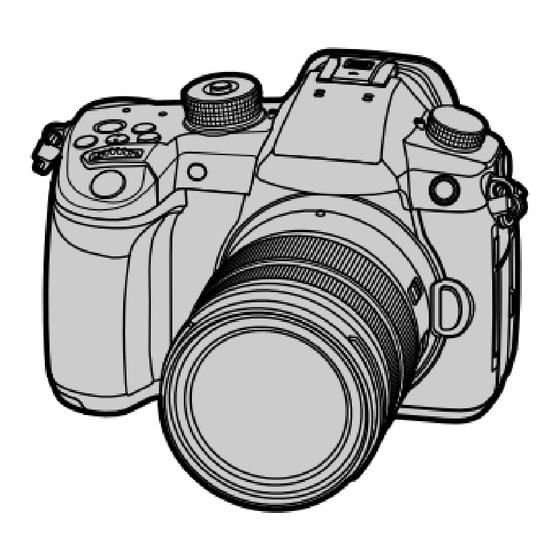
Page 15: Names Of Parts
Introduction Names of Parts Camera Stereo microphone ] (Exposure compensation) • Do not block the microphone button with a finger. Audio will be Video rec. button difficult to record. ] (Photo style) button Drive mode dial Charging light / Hot shoe (hot shoe cover) NETWORK connection lamp •... - Page 16 Introduction [LVF] button [DISP.] button Shoulder strap eyelet ] (AF mode) button [Q] (Quick menu) button ] (Playback) button Joystick / Cursor buttons / Fn buttons Fn buttons Center: Fn8, : Fn9, : Fn10, : Fn13, : Fn14, : Fn15, : Fn11, : Fn12 : Fn16...
- Page 17 Introduction Eye cup [REMOTE] socket • Keep the eye cup out of reach of Card access light 1 children to prevent swallowing. Card slot 1 Viewfinder Card slot 2 Eye sensor Card access light 2 Diopter adjustment dial Battery door release lever Speaker Battery door Card door...
- Page 18 DC Coupler cover Battery grip connector (cover for • When using an AC adaptor, the battery grip connector) ensure that the Panasonic DC • Keep the cover for the battery Coupler (DMW-DCC17: optional) grip connector out of reach of and AC Adaptor (DMW-AC10E: children to prevent swallowing.
- Page 19 Introduction Self-timer light / Sensor AF assist light [MIC] socket Front dial Headphone socket Shutter button • Excessive sound pressure from earphones and headphones can Lens fitting mark cause hearing loss. Grip [HDMI] socket Preview button / USB port Fn button (Fn2) Cable holder mount Contact points •...
-
Page 20: Lens
Introduction Lens H-ES12060 H-FS12060 3 4 5 Lens surface [AF/MF] switch • When either the [AF/MF] switch Tele of the lens or the setting of the Focus ring camera is set to [MF], Manual Zoom ring Focus (MF) is enabled. Wide Contact point O.I.S. -
Page 21: Viewfinder / Monitor Displays
Introduction Viewfinder / Monitor Displays At the time of purchase, the viewfinder/monitor displays the following icons. • For information about the icons other than those described here, refer to “Operating Instructions <Complete Guide>”. Viewfinder Monitor 60 60 60 60 Photo Style Shutter speed Level gauge Aperture value... -
Page 22: Getting Started / Basic Operations
Getting Started / Basic Operations • When preparing, make sure the camera on/off switch is [OFF]. Attaching a Shoulder Strap Attach a shoulder strap to the camera with the following procedure to prevent it from dropping. • Pull the shoulder strap and check that it will not come out. •... -
Page 23: Charging The Battery
Getting Started / Basic Operations Charging the Battery You can charge the battery either using the supplied charger, or in the camera body. You can also use the battery charger (DMW-BTC15: optional). • The battery that can be used with the camera is DMW-BLK22 / DMW-BLF19E. (As of May 2021) –... - Page 24 Getting Started / Basic Operations Connect the charger and the AC adaptor with the USB connection cable. • Check the direction of the terminals and plug in/out straight holding onto the plug. (Inserting these at an angle may cause deformation or malfunction) Connect the AC adaptor to an electrical outlet.
-
Page 25: Battery Insertion
Getting Started / Basic Operations Battery Insertion • Always use genuine Panasonic batteries (DMW-BLK22 / DMW-BLF19E). – DMW-BLF19E (optional) has a smaller battery capacity than DMW-BLK22. • If you use other batteries, we cannot guarantee the quality of this product. - Page 26 Getting Started / Basic Operations Set the camera on/off switch to [OFF]. Insert the battery into the camera. Connect the camera USB port and the AC adaptor using the USB connection cable. • Check the direction of the terminals and plug in/out straight holding onto the plug.
-
Page 27: Power Supply
Getting Started / Basic Operations Power Supply When the battery is inserted into the camera for charging and the camera is turned on, you can record while the camera is being supplied with power. • [ ] is displayed in the screen while power is being supplied. •... - Page 28 • When recording 400 Mbps video, use cards compatible with Video Speed Class 60 or higher. • For the latest information on memory cards with confirmed operation, check the following support site: https://panasonic.jp/support/global/cs/dsc/ (English only) Card slot 1 Card slot 2 •...
-
Page 29: Attaching A Lens
You can also use the Leica M Mount interchangeable lens by attaching the M Mount Adaptor (DMW-MA2M: optional). • Refer to catalogs/websites for most current information regarding supported lenses. https://panasonic.jp/support/global/cs/dsc/ (English only) Lens fitting marks Removing a Lens •... -
Page 30: Adjusting The Monitor Direction And Angle
Getting Started / Basic Operations Attaching a Lens Hood When attaching the lens hood (flower shape) supplied with the interchangeable lens (H-ES12060/H-FS12060) Align mark A ( ) on the lens hood with the mark on the tip of the lens. Rotate the lens hood in the direction of the arrow until it clicks and then align the mark B ( ) on the lens hood with the mark on the tip of the lens. -
Page 31: Setting The Clock (When Turning On For The First Time)
Getting Started / Basic Operations Setting the Clock (When Turning On for the First Time) When you turn the camera on for the first time, a screen to set the time zone and clock appears. Follow the message to make the settings. •... -
Page 32: Menu Operation Methods
Getting Started / Basic Operations Menu Operation Methods Menu levels Main tabs Move between menu levels Sub tabs Select Menu items Setting items • If you press [DISP.] while a menu item or setting item is selected, a description about the item is displayed on the screen. •... -
Page 33: Materials
[This battery cannot be used] • Use a genuine Panasonic battery. If this message is displayed even when a genuine Panasonic battery is used, contact the dealer. • If the terminal of the battery is dirty, remove the dirt and dust from the terminal. -
Page 34: Troubleshooting
Materials Troubleshooting First, try out the following procedures (34 to 35). If the problem is not resolved, it may be improved by selecting [Reset] on the [Setup] ([Setting]) menu. • Please also refer to the “Operating Instructions <Complete Guide>”, which describes more detailed information. - Page 35 Materials Striping or flicker may appear under lighting such as fluorescent or LED lighting. • This is characteristic of MOS sensors which serve as the camera’s pickup sensors. This is not a malfunction. • When using the electronic shutter, lowering the shutter speed may reduce the effect of the horizontal stripes.
-
Page 36: Specifications
Materials Specifications • Please also refer to the “Operating Instructions <Complete Guide>”, which lists more items. The specifications are subject to change for performance enhancement. Digital camera body (DC-GH5M2): Information for your safety Power source: 9.0 V Power consumption: 4.5 W (when recording with the monitor), 3.8 W (when playing back with the monitor) [When using the interchangeable lens (H-ES12060)] 4.4 W (when recording with the monitor),... - Page 37 Materials Recording format for still images File format for still JPEG (DCF compliant, Exif 2.31 compliant) / RAW images Picture size When the aspect ratio setting is [4:3] (pixels) [L]: 5184×3888 [M]: 3712×2784 [S]: 2624×1968 6K photo: 4992×3744 4K photo: 3328×2496 Recording format for video Video format MP4 (H.264/MPEG-4 AVC, H.265/HEVC)
- Page 38 Materials Monitor System Aspect ratio 3:2, 3.0 inches, approx. 1,840,000 dots monitor, capacitive touch screen Field of view ratio Approx. 100 % Focus AF type TTL type based on image detection (Contrast AF) Exposure control Light metering 1728-zone metering, multi-metering / center-weighted system, metering / spot metering / highlight-weighted metering Light metering mode...
- Page 39 Materials Zoom Extended Tele Conversion Max. 2.0x (when a picture size of [S] is selected.) (Picture) Interface USB Type-C™, SuperSpeed USB3.1 GEN1, Supports USB Power Delivery (9.0 V/3.0 A) • Data from the PC cannot be written to the camera using the USB connection cable.
- Page 40 Materials Wi-Fi Compliance IEEE 802.11a/b/g/n/ac (standard wireless LAN protocol) standard Frequency range 2412 MHz to 2472 MHz (1 to 13ch) used (central 5180 MHz to 5320 MHz (36/40/44/48/52/56/60/64ch) frequency) 5500 MHz to 5700 MHz (100/104/108/112/116/120/124/ 128/132/136/140ch) Encryption method Wi-Fi compliant WPA™ / WPA2™ Access method Infrastructure mode Bluetooth...
- Page 41 0 °C to 40 °C (32 °F to 104 °F) For more information about the energy efficiency of the product, please visit our website, www.panasonic.com, and enter the model number in the search box. Battery pack (lithium-ion) (Panasonic DMW-BLK22): Information for your safety Voltage/capacity: 7.2 V / 2200 mAh...
- Page 42 Materials Interchangeable Lens H-ES12060 H-FS12060 “LEICA DG VARIO- “LUMIX G VARIO ELMARIT 12–60mm/ 12–60mm/F3.5–5.6 F2.8–4.0 ASPH./POWER ASPH./POWER O.I.S.” O.I.S.” Mount Micro Four Thirds Mount Micro Four Thirds Mount Focal length f=12 mm to 60 mm f=12 mm to 60 mm (35 mm film camera (35 mm film camera equivalent: 24 mm to...
- Page 43 Materials Dust and splash resistant Recommended -10 °C to 40 °C (14 °F to 0 °C to 40 °C (32 °F to operating temperature 104 °F) 104 °F) Permissible relative 10 %RH to 80 %RH 10 %RH to 80 %RH humidity •...
-
Page 44: Trademarks And Licenses
• QuickTime and the QuickTime logo are trademarks or registered trademarks of Apple Inc., used under license therefrom. • HDAVI Control™ is a trademark of Panasonic Corporation. • Adobe is a trademark or registered trademark of Adobe Systems Incorporated in the United States and/or other countries. - Page 45 ® word mark and logos are registered trademarks owned by Bluetooth SIG, Inc. and any use of such marks by Panasonic Corporation is under license. Other trademarks and trade names are those of their respective owners. • The Wi-Fi CERTIFIED™ Logo is a registered trademark of Wi-Fi Alliance ®...
- Page 46 [Setup] → [Others] → [Firmware Version] → [Software info]. At least three (3) years from delivery of this product, Panasonic will give to any third party who contacts us at the contact information provided below, for a charge no more than our cost of physically performing source code distribution, a complete machine- readable copy of the corresponding source code covered under GPL V2.0 or LGPL...
- Page 47 Sehr geehrter Kunde, Wir möchten diese Gelegenheit nutzen, Ihnen für den Kauf dieser Digital-Kamera von Panasonic zu danken. Lesen Sie dieses Dokument sorgfältig durch und bewahren Sie es zu späteren Referenzzwecken auf. Beachten Sie, dass die tatsächlichen Bedienelemente, Komponenten, Menüoptionen usw. Ihrer Digital-Kamera möglicherweise von den Abbildungen in diesem Dokument abweichen.
-
Page 48: In Diesem Dokument Verwendete Symbole
Leitfaden> (HTML-Format / PDF-Format) Enthält detaillierte Erläuterungen aller Funktionen und Bedienungsverfahren. Dieses Dokument kann mit einem PC oder Smartphone betrachtet werden. https://panasonic.jp/support/dsc/oi/GH5M2/index.html URL und QR-Code können auch unter [Online-Handbuch] des [Setup]-Menüs überprüft werden. In diesem Dokument verwendete Symbole In diesem Dokument wird der Kamerabetrieb anhand der folgenden Symbole erklärt:... - Page 49 Inhalt Zur Bedienungsanleitung ................48 Informationen für Ihre Sicherheit ..............50 Vorsichtsmaßnahmen ..................53 Einführung Vor dem ersten Gebrauch ................56 Standardzubehör ....................58 Bezeichnungen der Teile .................. 60 Kamera......................60 Objektiv ......................65 Sucher-/Monitor-Anzeigen ................66 Erste Schritte / Grundlegende Bedienvorgänge Anbringen eines Schultergurts ...............
-
Page 50: Informationen Für Ihre Sicherheit
Informationen für Ihre Sicherheit WARNUNG: Um die Gefahr eines Brandes, eines Stromschlages oder einer Beschädigung des Produktes zu reduzieren, • Setzen Sie dieses Gerät weder Regen, noch Feuchtigkeit, Tropfen oder Spritzern aus. • Verwenden Sie das empfohlene Zubehör. • Entfernen Sie die Abdeckungen nicht. •... -
Page 51: Konformitätserklärung (Doc)
Informationen für Ihre Sicherheit Konformitätserklärung (DoC) Die “Panasonic Corporation” bestätigt hiermit, dass dieses Produkt den grundlegenden Anforderungen und sonstigen relevanten Vorgaben der Richtlinie 2014/53/EU entspricht. Kunden können eine Kopie der Original-DoC zu unseren RE-Produkten von unserem DoC-Server herunterladen: http://www.ptc.panasonic.eu Wenden Sie sich an einen zugelassenen Vertragshändler:... - Page 52 Informationen für Ihre Sicherheit ■ Hinweise zum Akku ACHTUNG • Explosionsgefahr bei falschem Anbringen der Batterie. Ersetzen Sie die Batterie nur durch den vom Hersteller empfohlenen Typ. • Wenden Sie sich zur Entsorgung der Batterien an die lokalen Behörden oder erfragen Sie die richtige Vorgehensweise zur Entsorgung.
-
Page 53: Vorsichtsmaßnahmen
Informationen für Ihre Sicherheit Vorsichtsmaßnahmen • Verwenden Sie ausschließlich das USB-Anschlusskabel im Lieferumfang der Kamera bzw. des Akku-Ladegeräts (DMW-BTC15: Sonderzubehör). • Es ist grundsätzlich ein Original-Panasonic-Fernauslöser (DMW-RS2: Sonderzubehör) zu verwenden. • Es ist grundsätzlich ein Original-Panasonic-Stativgriff (DMW-SHGR1: Sonderzubehör) zu verwenden. - Page 54 Informationen für Ihre Sicherheit • Entfernen Sie vor der Reinigung der Kamera den Akku bzw. den DC-Koppler (DMW-DCC17: Sonderzubehör) oder trennen Sie den Netzstecker vom Netz. • Üben Sie keinen zu starken Druck auf den Monitor aus. • Üben Sie keinen zu starken Druck auf das Objektiv aus. •...
- Page 55 Informationen für Ihre Sicherheit • Der Akku ist bei Auslieferung nicht geladen. Laden Sie den Akku vor dem ersten Einsatz auf. • Die Kamera arbeitet mit einem aufladbaren Lithium-Ionen-Akku. Bei zu hoher oder zu niedriger Temperatur verringert sich die Betriebszeit des Akkus. •...
-
Page 56: Einführung
– Anderenfalls kommt es möglicherweise zu fehlerhaftem Touch-Betrieb. Bei niedrigen Umgebungstemperaturen (–10 °C bis 0 °C) – Bringen Sie vor der Verwendung ein Objektiv von Panasonic mit empfohlener Mindest-Betriebstemperatur von –10 °C an. Fassen Sie nicht mit der Hand in den Kameraanschluss. - Page 57 Einführung Spritzwassergeschützt Die Bezeichnung “Spritzwasserschutz” bezieht sich auf ein zusätzliches Schutzniveau dieser Kamera gegen Eindringen minimaler Mengen Feuchtigkeit/Wasser und Staub. Durch den Spritzwasserschutz besteht keine Garantie gegen Beschädigungen, wenn diese Kamera direktem Kontakt mit Wasser ausgesetzt wird. Um die Möglichkeit einer Beschädigung zu minimieren, beachten Sie folgende Vorsichtsmaßnahmen: –...
-
Page 58: Standardzubehör
Einführung Standardzubehör Gehäuse der Digital-Kamera USB-Anschlusskabel (Wird in diesem Dokument als Kamera bezeichnet.) K1HY24YY0026 Kabelhalter 1PP1A561Z Schultergurt Kontrollieren Sie vor dem Gebrauch der Kamera, dass alle Zubehörteile DVPW1029Z mitgeliefert wurden. Kameradeckel (Stand der Produktnummern: Mai 2021) Akkupack (Wird in diesem VKF4971 Dokument als Akkupack Augenmuschel ... - Page 59 6 Ist zum Kaufzeitpunkt am Objektiv angebracht. • Die Speicherkarte ist als Sonderzubehör erhältlich. • Wenden Sie sich an Ihren Händler oder an Panasonic, wenn Sie mitgeliefertes Zubehör verlieren und Ersatz benötigen. (Alle Teile des Zubehörs sind separat erhältlich.) •...
-
Page 60: Bezeichnungen Der Teile
Einführung Bezeichnungen der Teile Kamera Stereo-Mikrofon [WB] (Weißabgleich)-Taste • Verdecken Sie das Mikrofon [ISO] (ISO-Empfindlichkeit)-Taste nicht mit dem Finger. ] (Belichtungsausgleich)-Taste Anderenfalls kann es zu Videoaufnahmetaste Problemen bei der Tonaufnahme kommen. ] (Bildstil)-Taste Ladeleuchte/ Antriebsmoduswahlrad NETWORK-Verbindungslampe Zubehörschuh (Zubehörschuhabdeckung) ] (Aufnahmedistanz- •... - Page 61 Einführung [LVF]-Taste [DISP.]-Taste Öse für Schultergurt ] (AF-Modus)-Taste ] (Wiedergabe)-Taste [Q] (Quick Menü)-Taste Joystick/ Cursor-Tasten/ Fn-Tasten Fn-Tasten Mitte: Fn8, : Fn9, : Fn10, : Fn13, : Fn14, : Fn15, : Fn11, : Fn12 : Fn16 Monitor/ [MENU/SET]-Taste Touchscreen Steuerwahlrad [AF ON]-Taste ] (Abbrechen)-Taste/ Fokusmodushebel ] (Löschen)-Taste/...
- Page 62 Einführung Augenmuschel Kartenfach • Bewahren Sie die [REMOTE]-Buchse Augenmuschel außerhalb der Kartenzugriffsleuchte 1 Reichweite von Kindern auf, Kartensteckplatz 1 damit diese die Augenmuschel Kartensteckplatz 2 nicht verschlucken können. Kartenzugriffsleuchte 2 Sucher Kartenfach-Freigabehebel Augensensor Akku-Abdeckung Wahlrad zur Dioptrienkorrektur Lautsprecher DVQX2187 (GER)
- Page 63 Verschlucken zu verhindern. verwendet werden. Stativbefestigung • Verwenden Sie nur den Original- • Wenn Sie versuchen, ein Netzadapter von Panasonic Stativ mit Schrauben der (DMW-AC10E: Sonderzubehör). Länge 5,5 mm oder länger zu • Verwenden Sie in Verbindung befestigen, kann das Stativ mit dem Netzadapter möglicherweise nicht sicher...
- Page 64 Einführung Selbstauslöser-Licht/ Sensor AF-Hilfslicht [MIC]-Buchse Vorderes Wahlrad Kopfhörerbuchse Auslöser • Übermäßiger Schalldruck von In- Ear-Ohrhörern und Kopfhörern Markierung zur Objektivanbringung kann zu Hörschäden führen. Griff [HDMI]-Buchse Vorschautaste/ USB-Anschluss Fn-Taste (Fn2) Kabelhalteranschluss Kontaktpunkte • Bewahren Sie den Blitzlicht-Synchro-Anschluss Klemmbereich des Kabelhalters (Blitzlicht-Synchro-Anschlussdeckel) außerhalb der Reichweite •...
-
Page 65: Objektiv
Einführung Objektiv H-ES12060 H-FS12060 3 4 5 Linsenoberfläche [AF/MF]-Schalter • Wenn der [AF/MF] Schalter Tele des Objektives oder die Fokusring Kameraeinstellung auf [MF] Zoom-Ring eingestellt ist, ist der manuelle Weitwinkel Fokus (MF) aktiviert. O.I.S.-Schalter Kontaktpunkt Objektivfassungsgummi Markierung zur Objektivanbringung DVQX2187 (GER) -
Page 66: Sucher-/Monitor-Anzeigen
Einführung Sucher-/Monitor-Anzeigen Zum Kaufzeitpunkt werden im Sucher/Monitor die folgenden Symbole angezeigt. • Informationen zu den hier nicht beschriebenen Symbolen finden Sie in der “Bedienungsanleitung <Vollständiger Leitfaden>”. Sucher Monitor 60 60 60 60 Bildstil Verschlusszeit Künstlicher Horizont Blendenwert Bildqualität/ Wert des Belichtungsausgleichs/ Bildgröße Manuelle Belichtungshilfe AF-Bereich... -
Page 67: Erste Schritte / Grundlegende Bedienvorgänge
Erste Schritte / Grundlegende Bedienvorgänge • Achten Sie bei der Vorbereitung darauf, dass der Ein/Aus- Schalter der Kamera auf [OFF] gestellt ist. Anbringen eines Schultergurts Bringen Sie einen Schultergurt an der Kamera an, indem Sie die folgenden Schritte ausführen, um zu vermeiden, dass die Kamera herunterfällt. •... -
Page 68: Aufladen Des Akkus
Erste Schritte / Grundlegende Bedienvorgänge Aufladen des Akkus Der Akku kann sowohl über das mitgelieferte Ladegerät als auch im Kameragehäuse aufgeladen werden. Sie können auch das Akku-Ladegerät (DMW-BTC15: Sonderzubehör) verwenden. • Der folgende Akku kann mit dieser Kamera verwendet werden: DMW-BLK22 / DMW-BLF19E. - Page 69 Erste Schritte / Grundlegende Bedienvorgänge Verbinden Sie das Ladegerät und den Netzadapter mithilfe des USB-Anschlusskabels. • Prüfen Sie die Richtung der Anschlüsse und führen Sie den Stecker gerade ein/ ziehen Sie den Stecker gerade heraus, wobei Sie das Steckergehäuse festhalten. (Erfolgt das Einschieben nicht gerade, sondern aus einem Winkel, so kommt es möglicherweise zu Verformungen oder Fehlfunktionen.) Schließen Sie den Netzadapter an eine Netzsteckdose an.
-
Page 70: Einsetzen Des Akkus
Erste Schritte / Grundlegende Bedienvorgänge Einsetzen des Akkus • Verwenden Sie stets Originalakkus von Panasonic (DMW-BLK22 / DMW-BLF19E). – Das Modell DMW-BLF19E (Sonderzubehör) verfügt über eine geringere Akkukapazität als das Modell DMW-BLK22. • Falls andere Akkus verwendet werden, übernehmen wir keine Garantie für die Qualität dieses Produkts. - Page 71 Erste Schritte / Grundlegende Bedienvorgänge Schalten Sie den Ein/Aus-Schalter der Kamera auf [OFF]. Setzen Sie den Akku in die Kamera ein. Verbinden Sie den USB-Anschluss der Kamera und den Netzadapter mithilfe des USB-Anschlusskabels. • Prüfen Sie die Richtung der Anschlüsse und führen Sie den Stecker gerade ein/ziehen Sie den Stecker gerade heraus, wobei Sie das Steckergehäuse festhalten.
-
Page 72: Stromversorgung
Erste Schritte / Grundlegende Bedienvorgänge Stromversorgung Wenn der Akku zum Aufladen in die Kamera eingesetzt ist und die Kamera mit Strom versorgt wird, können Sie die Kamera einschalten und aufnehmen. • Auf dem Bildschirm wird [ ] angezeigt, während Strom zugeführt wird. •... - Page 73 • Verwenden Sie zum Aufnehmen von Videos mit 400 MBit/s Karten, die mit Video- Geschwindigkeitsklasse 60 oder höher kompatibel sind. • Neueste Informationen zu Speicherkarten, für die ein einwandfreier Betrieb bestätigt wurde, finden Sie auf der folgenden Support-Website: https://panasonic.jp/support/global/cs/dsc/ (Nur Englisch) Kartensteckplatz 1 Kartensteckplatz 2 •...
-
Page 74: Anbringen Eines Objektivs
Sie können auch das Wechselobjektiv Leica M-Mount verwenden, indem Sie den M-Mount-Adapter (DMW-MA2M: Sonderzubehör) anbringen. • Aktuelle Informationen zu unterstützten Objektiven finden Sie in den Katalogen und auf den Websites. https://panasonic.jp/support/global/cs/dsc/ (Nur Englisch) Objektiv-Befestigungsmarkierungen Entfernen eines Objektivs • Halten Sie die Objektiv-Entriegelungstaste gedrückt, drehen Sie das Objektiv so weit wie... -
Page 75: Einstellen Von Monitorausrichtung Und -Winkel
Erste Schritte / Grundlegende Bedienvorgänge Anbringen einer Gegenlichtblende Beim Anbringen der Gegenlichtblende (Blumenform), die mit dem austauschbaren Objektiv (H-ES12060/H-FS12060) mitgeliefert wurde Richten Sie die Markierung A ( ) an der Gegenlichtblende mit der Markierung am Rand des Objektivs aus. Drehen Sie die Gegenlichtblende in Pfeilrichtung, bis sie einrastet, und richten Sie die Markierung B ( ) an der Gegenlichtblende mit der Markierung am Rand... -
Page 76: Einstellen Der Uhr (Beim Erstmaligen Einschalten)
Erste Schritte / Grundlegende Bedienvorgänge Einstellen der Uhr (beim erstmaligen Einschalten) Wenn Sie die Kamera erstmalig einschalten, wird ein Bildschirm zum Einstellen von Zeitzone und Uhr geöffnet. Folgen Sie den Anweisungen, um die Einstellungen vorzunehmen. • Wenn ein Sprachauswahlbildschirm angezeigt wird, drücken , um die Sprache auszuwählen. -
Page 77: Menübedienungsmethoden
Erste Schritte / Grundlegende Bedienvorgänge Menübedienungsmethoden Menüebenen Hauptregister Wechseln zwischen Menüebenen Unterregister Auswählen Menüpunkte Einstellen Einstellungselemente • Wenn Sie [DISP.] drücken, während ein Menü- oder Einstellungselement ausgewählt ist, wird eine entsprechende Beschreibung auf dem Bildschirm angezeigt. • Menüelemente, die nicht eingestellt werden können, werden ausgegraut angezeigt. Wenn Sie oder drücken, während ein ausgegrautes Element ausgewählt... -
Page 78: Materialien
[Dieser Akku kann nicht ver- wendet werden.] • Verwenden Sie einen Original-Akku von Panasonic. Wird diese Meldung auch bei Verwendung eines Original-Akkus von Panasonic angezeigt, wenden Sie sich an Ihren Händler. • Wenn die Akkuanschlüsse verschmutzt sind, reinigen Sie die Anschlüsse von Staub und Schmutz. -
Page 79: Fehlerbehebung
Materialien Fehlerbehebung Versuchen Sie zunächst folgendes Vorgehen (79 bis 80). Kann das Problem nicht behoben werden, so lässt sich unter Umständen durch Auswahl von [Reset] im Menü [Setup] ([Einstellung]) Abhilfe schaffen. • In “Bedienungsanleitung <Vollständiger Leitfaden>” finden Sie nähere Informationen. Der Akku entlädt sich zu schnell. - Page 80 Materialien Unter Beleuchtungen wie beispielsweise Leuchtstoff- oder LED-Lampen können Streifen oder Flackern auftreten. • Dies ist ein typisches Merkmal der MOS-Bildsensoren, die als Aufnahme-Sensoren der Kamera dienen. Dabei handelt es sich nicht um eine Fehlfunktion. • Bei Verwenden des elektronischen Verschlusses kann der Effekt der horizontalen Streifen möglicherweise durch Verlängern der Verschlusszeit reduziert werden.
-
Page 81: Technische Daten
Materialien Technische Daten • In der “Bedienungsanleitung <Vollständiger Leitfaden>” finden Sie weitere Informationen. Die Spezifikationen können zur Leistungsverbesserung ohne Ankündigung geändert werden. Gehäuse der Digital-Kamera (DC-GH5M2): Sicherheitshinweise Stromquelle: 9,0 V Stromverbrauch: 4,5 W (bei Aufnahme mit dem Monitor), 3,8 W (bei Wiedergabe auf dem Monitor) [Wenn das austauschbare Objektiv verwendet wird (H-ES12060)] 4,4 W (bei Aufnahme mit dem Monitor),... - Page 82 Materialien Aufnahmeformat für Fotos Dateiformat für JPEG (entspricht DCF und Exif 2.31) / RAW Fotos Bildgröße Beim Bildseitenverhältnis [4:3] (Pixel) [L]: 5184×3888 [M]: 3712×2784 [S]: 2624×1968 6K Foto: 4992×3744 4K Foto: 3328×2496 Aufnahmeformat für Video Videoformat MP4 (H.264/MPEG-4 AVC, H.265/HEVC) MOV (H.264/MPEG-4 AVC, H.265/HEVC) Audioformat AAC (2ch)
- Page 83 Materialien Monitor System Bildverhältnis 3:2, 3,0 Zoll, Monitor mit ca. 1.840.000 Punkten und kapazitivem Touchscreen Bildfeldabdeckung Ca. 100 % Fokus AF-Typ TTL-Typ auf Basis von Bilderkennung (Kontrast-AF) Belichtungssteuerung Belichtungsmesssystem, 1728-Zonen-Messung, Mehrfeld-Messung / Belichtungsmessungsmodus Mittenbetonte Messung / Spot-Messung / Spitzlichtbetonte Messung Messbereich EV 0 bis EV 18 (F2.0-Objektiv, ISO100-Konvertierung)
- Page 84 Materialien Zoom Erweitertes Teleobjektiv Max. 2,0x (wenn eine Bildgröße von [S] ausgewählt ist.) (Bilder) Schnittstellen USB Type-C™, SuperSpeed USB3.1 GEN1, Unterstützt USB Power Delivery (9,0 V/3,0 A) • Daten vom PC können nicht über USB- Anschlusskabel auf die Kamera geschrieben werden. [HDMI] HDMI Typ A [REMOTE]...
- Page 85 Materialien Wi-Fi Konformitätsstandard IEEE 802.11a/b/g/n/ac (WLAN-Standardprotokoll) Genutzter 2412 MHz bis 2472 MHz (1 bis 13ch) Frequenzbereich 5180 MHz bis 5320 MHz (36/40/44/48/52/56/60/64ch) (zentrale Frequenz) 5500 MHz bis 5700 MHz (100/104/108/112/116/120/ 124/128/132/136/140ch) Verschlüsselungsmethode Wi-Fi-kompatibles WPA™ / WPA2™ Zugriffsmethode Infrastruktur-Modus Bluetooth Konformitätsstandard Bluetooth v4.2, Bluetooth Low Energy (BLE) Genutzter Frequenzbereich 2402 MHz bis 2480 MHz...
- Page 86 Ausgang: 5,0 V 1,8 A Betriebstemperatur: 0 °C bis 40 °C Weitere Informationen zur Energieeffizienz des Produktes entnehmen Sie bitte unserer Webseite, www.panasonic.com, indem Sie die Modellnummer in der Suchmaske eingeben. Akkupack (Lithium-Ionen) (Panasonic DMW-BLK22): Sicherheitshinweise Spannung/Kapazität: 7,2 V/2200 mAh Die Symbole auf diesem Produkt (einschließlich Zubehör) haben die folgenden...
- Page 87 Materialien Austauschbares H-ES12060 H-FS12060 Objektiv “LEICA DG VARIO- “LUMIX G VARIO ELMARIT 12–60mm/ 12–60mm/F3.5–5.6 F2.8–4.0 ASPH./POWER ASPH./POWER O.I.S.” O.I.S.” Fassung Micro Four Thirds Mount Micro Four Thirds Mount Brennweite f=12 mm bis 60 mm f=12 mm bis 60 mm (Kleinbild-Äquivalent: (Kleinbild-Äquivalent: 24 mm bis 120 mm) 24 mm bis 120 mm)
- Page 88 Materialien Betriebstemperatur -10 °C bis 40 °C 0 °C bis 40 °C Zulässige relative 10 %RH bis 80 %RH 10 %RH bis 80 %RH Luftfeuchtigkeit • LEICA ist eine eingetragene Handelsmarke von Leica Microsystems IR GmbH. ELMARIT ist ein eingetragenes Markenzeichen von Leica Camera AG. Die LEICA DG Objektive wurden mit Messgeräten und Qualitätssicherungssystemen hergestellt, die von der Leica Camera AG auf Grundlage der Qualitätsstandards der Firma zertifiziert wurden.
-
Page 89: Markenzeichen Und Lizenzen
• QuickTime und das QuickTime Logo sind Handelszeichen oder registrierte Handelszeichen der Apple Inc., welche unter Lizenz verwendet werden. • HDAVI Control™ ist ein Markenzeichen von Panasonic Corporation. • Adobe ist ein Warenzeichen oder ein eingetragenes Warenzeichen von Adobe Systems Incorporated in den USA und/oder anderen Ländern. - Page 90 • Die Bluetooth ® -Wortmarke und -Logos sind eingetragene Markenzeichen von Bluetooth SIG, Inc. und jede Verwendung dieser Marken durch Panasonic Corporation erfolgt unter Lizenz. Andere Warenzeichen und Handelsnamen sind Eigentum der jeweiligen Inhaber. • Das Wi-Fi CERTIFIED™-Logo ist eine eingetragene Marke der Wi-Fi Alliance ®...
- Page 91 Einzelheiten dazu finden Sie in den ausführlichen Nutzungsbedingungen unter [MENU/SET] → [Setup] → [Sonstige] → [Firmware-Anz.] → [Software info]. Mindestens drei (3) Jahre nach der Lieferung dieses Produkts stellt Panasonic eine vollständig maschinenlesbare Kopie des entsprechenden Quellcodes, der unter GPL V2.0 oder LGPL V2.1 abgedeckt ist, sowie einen entsprechenden Copyright-Hinweis.
-
Page 92: Appareil Photo Numérique
À notre clientèle, Nous vous remercions d’avoir fait l’acquisition de cet appareil photo numérique Panasonic. Veuillez lire attentivement ce document et conservez-le à portée de main pour vous y référer ultérieurement. Veuillez noter que les commandes et les composants, les éléments de menu, etc. réels de votre appareil photo numérique peuvent sembler quelque peu différents de ceux montrés dans les illustrations... -
Page 93: Symboles Utilisés Dans Ce Document
Explique en détail toutes les fonctions et méthodes de fonctionnement. Vous pouvez le consulter avec un ordinateur ou un téléphone intelligent. https://panasonic.jp/support/dsc/oi/GH5M2/index.html L’URL et le code QR peuvent également être consultés dans le [Manuel en ligne] du menu [Config.]. ... - Page 94 Table des matières À propos de ce manuel d’utilisation ............... 93 Précautions à prendre ..................95 Précautions à prendre ..................98 Introduction Avant utilisation ....................101 Accessoires standard ..................103 Noms des éléments ..................105 Appareil photo ....................105 Objectif ......................110 Affichages viseur/écran .................
-
Page 95: Précautions À Prendre
Précautions à prendre AVERTISSEMENT : Pour réduire les risques d’incendie, d’électrocution ou d’endommagement du produit, • N’exposez pas cet appareil à la pluie, l’humidité, aux écoulements ou aux éclaboussures. • Utilisez les accessoires recommandés. • Ne retirez pas les caches. •... -
Page 96: Déclaration De Conformité (Doc)
Précautions à prendre Déclaration de Conformité (DoC) Par la présente, “Panasonic Corporation” déclare que ce produit est en conformité avec les exigences essentielles et les autres clauses justificatives de la Directive 2014/53/EU. Les clients peuvent télécharger une copie de la DoC originale de nos produits RE sur notre serveur de DoC: http://www.ptc.panasonic.eu... -
Page 97: A Propos De La Batterie
Précautions à prendre ■ A propos de la batterie MISE EN GARDE • Il y a un danger d’explosion si la batterie n’est pas correctement remplacée. Remplacez-la uniquement par le type recommandé par le fabricant. • Pour vous débarrasser des batteries, veuillez contacter les autorités locales ou votre revendeur afin de connaître la procédure d’élimination à... -
Page 98: Précautions À Prendre
• N’utilisez aucun autre câble de raccordement USB que le câble fourni avec l’appareil photo ou le chargeur de batterie (DMW-BTC15 : en option). • Assurez-vous de toujours utiliser un véritable déclencheur à distance de Panasonic (DMW-RS2 : en option). - Page 99 Précautions à prendre • Avant de nettoyer l’appareil photo, retirez la batterie ou le coupleur c.c. (DMW-DCC17 : en option), ou débranchez la prise électrique. • N’appuyez pas avec force sur l’écran. • N’appuyez pas avec force sur l’objectif. • Ne répandez pas d’insecticides ou de substances chimiques volatiles sur l’appareil.
- Page 100 Précautions à prendre • La batterie n’est pas chargée lors de l’achat de l’appareil photo. Chargez la batterie avant de l’utiliser. • La batterie est une batterie de type lithium-ion rechargeable. Si la température est trop élevée ou trop basse, la durée de fonctionnement de la batterie sera plus courte.
-
Page 101: Introduction
– Le commandes tactiles pourraient être mal reconnues. Quand il est utilisé lorsque la température est froide (–10 °C à 0 °C (14 °F à 32 °F)) – Avant usage, installez un objectif Panasonic pouvant fonctionner sous une température minimale de –10 °C (14 °F). -
Page 102: Résistance Aux Éclaboussures
Introduction Résistance aux éclaboussures La résistance aux éclaboussures est une expression utilisée pour décrire le niveau supplémentaire de protection qu’offre cet appareil photo contre l’exposition à une quantité minimale d’humidité, d’eau ou de poussière. Être résistant aux éclaboussures n’est pas une garantie que des dommages ne surviendront pas si cet appareil photo est soumis au contact direct de l’eau. -
Page 103: Accessoires Standard
Introduction Accessoires standard Boîtier de l’appareil photo numérique Câble de (Ceci est appelé appareil photo dans ce raccordement USB document.) K1HY24YY0026 Support de câble 1PP1A561Z Bandoulière Vérifiez que tous les accessoires sont fournis avant d’utiliser DVPW1029Z l’appareil photo. Capuchon de boîtier (Les numéros de produit sont corrects à... - Page 104 6 Celui-ci est attaché à l’objectif au moment de l’achat. • La carte mémoire est en option. • Consultez le revendeur ou Panasonic si vous perdez les accessoires fournis. (Vous pouvez acheter les accessoires séparément.) • Veuillez respecter la réglementation locale pour la mise au rebut de toutes les pièces d’emballage.
-
Page 105: Noms Des Éléments
Introduction Noms des éléments Appareil photo Microphone stéréo Touche [ ] (Compensation de • Ne bouchez pas le microphone l’exposition) avec le doigt. Le son serait Touche d’enregistrement vidéo difficile à enregistrer. Touche [ ] (Style photo) Molette du mode d’entraînement Témoin de charge/ Griffe porte-accessoires Voyant de connexion NETWORK... - Page 106 Introduction Touche du viseur [LVF] Touche d’affichage [DISP.] Œillet de la bandoulière Touche [ ] (mode MPA) Touche de menu rapide [Q] Touche [ ] (Lecture) Manette/ Touches du curseur/ Touches Fn Touches Fn Centre : Fn8, : Fn9, : Fn10, : Fn13, : Fn14, : Fn15,...
- Page 107 Introduction Œilleton du viseur Prise du déclencheur à distance • Conservez l’œilleton hors de [REMOTE] portée des enfants pour éviter Témoin d’accès à la carte 1 qu’ils puissent l’avaler. Logement pour carte 1 Viseur Logement pour carte 2 Détecteur du viseur Témoin d’accès à...
- Page 108 Connecteur de la prise • En utilisant un adaptateur d’alimentation (couvercle secteur, assurez-vous que le pour connecteur de la prise coupleur C.C. de Panasonic d’alimentation) (DMW-DCC17 : en option) et • Conservez le couvercle l’adaptateur secteur pour connecteur de la prise (DMW-AC10E : en option) sont d’alimentation hors de portée...
- Page 109 Introduction Témoin du retardateur/ Capteur Témoin d’assistance MPA Prise [MIC] Molette avant Prise casque Déclencheur • Une pression sonore excessive provenant des écouteurs ou du Repère d’insertion de l’objectif casque peut causer une perte Poignée de prise en main de l’audition. Touche de prévisualisation/ Prise [HDMI] Touche Fn (Fn2)
-
Page 110: Objectif
Introduction Objectif H-ES12060 H-FS12060 3 4 5 Commutateur de mise au point Surface de l’objectif automatique/mise au point Téléobjectif manuelle [AF/MF] (MPA/MPM) Bague de mise au point • Si le commutateur [AF/MF] de Bague de zoom l’objectif ou le paramètre de l’appareil Grand-angle photo est réglé... -
Page 111: Affichages Viseur/Écran
Introduction Affichages viseur/écran Au moment de l’achat, le viseur/écran affiche les icônes suivantes. • Pour des informations sur les icônes autres que celles décrites ici, reportez-vous à “Manuel d’utilisation <Guide complet>”. Viseur Écran 60 60 60 60 Style photo Valeur d’ouverture Jauge de niveau Valeur de la compensation de l’exposition/... -
Page 112: Mise En Route / Commandes De Base
Mise en route / Commandes de base • Lors des préparatifs, assurez-vous que l’interrupteur marche/ arrêt de l’appareil photo est sur [OFF]. Fixation d’une bandoulière Procédez comme suit pour fixer une bandoulière à l’appareil photo pour éviter qu’il tombe. • Tirez sur la bandoulière et vérifiez qu’elle tient bien. •... -
Page 113: Charge De La Batterie
Mise en route / Commandes de base Charge de la batterie Vous pouvez charger la batterie en vous servant du chargeur fourni ou du boîtier de l’appareil photo. Vous pouvez également utiliser le chargeur de batterie (DMW-BTC15 : en option). •... - Page 114 Mise en route / Commandes de base Raccordez le chargeur et l’adaptateur secteur à l’aide d’un câble de connexion USB. • Vérifiez le sens de la prise et branchez/débranchez en tenant la fiche droite. (Insérer celles-ci de biais pourrait causer une déformation ou un dysfonctionnement) Branchez l’adaptateur secteur à...
-
Page 115: Mise En Place De La Batterie
Mise en route / Commandes de base Mise en place de la batterie • Assurez-vous d’utiliser une batterie de marque Panasonic (DMW-BLK22 / DMW-BLF19E). – La DMW-BLF19E (en option) a une capacité de batterie inférieure à celle de la DMW-BLK22. -
Page 116: Indications Du Témoin De Charge
Mise en route / Commandes de base Placez l’interrupteur marche/arrêt de l’appareil photo sur [OFF]. Insérez la batterie dans l’appareil photo. Branchez le port USB de l’appareil photo et l’adaptateur secteur à l’aide du câble de raccordement USB. • Vérifiez le sens de la prise et branchez/débranchez en tenant la fiche droite. (Insérer celles-ci de biais pourrait causer une déformation ou un dysfonctionnement) Branchez l’adaptateur secteur à... -
Page 117: Fourniture D'électricité
Mise en route / Commandes de base Fourniture d’électricité Lorsque la batterie est introduite dans l’appareil photo pour la charger et que l’appareil photo est mis en marche, vous pouvez enregistrer pendant que l’appareil photo est fourni en électricité. •... - Page 118 60 ou supérieure. • Pour obtenir les toutes dernières informations sur les cartes mémoire dont le fonctionnement est confirmé, consultez le site d’assistance suivant : https://panasonic.jp/support/global/cs/dsc/ (En anglais uniquement) Logement pour carte 1 Logement pour carte 2 •...
-
Page 119: Mise En Place D'un Objectif
à monture M Leica en fixant l’adaptateur pour monture M (DMW-MA2M : en option). • Référez-vous aux catalogues/sites Web pour la plupart des informations actuelles concernant les objectifs pris en charge. https://panasonic.jp/support/global/cs/dsc/ (En anglais uniquement) Repères d’insertion de l’objectif Retrait d’un objectif •... -
Page 120: Mise En Place D'un Parasoleil
Mise en route / Commandes de base Mise en place d’un parasoleil Pour installer le parasoleil (forme tulipe) fourni avec l’objectif interchangeable (H-ES12060/H-FS12060) Alignez le repère A ( ) présent sur le parasoleil avec le repère situé à l’extrémité de l’objectif. Faites tourner le parasoleil dans le sens de la flèche jusqu’à... -
Page 121: Réglage De L'horloge (Lors De La Première Mise En Route)
Mise en route / Commandes de base Réglage de l’horloge (Lors de la première mise en route) Lorsque vous mettez l’appareil photo sous tension pour la première fois, un écran pour régler le fuseau horaire et l’horloge apparaît. Suivez les instructions du message pour effectuer les réglages. -
Page 122: Méthodes D'actionnement Du Menu
Mise en route / Commandes de base Méthodes d’actionnement du menu Niveaux du menu Onglets principaux Pour se déplacer entre les niveaux du menu Sous-onglets Pour sélectionner Éléments du menu Défini Éléments de configuration • Si vous appuyez sur [DISP.] tandis qu’un élément ou un paramètre du menu est sélectionné, une description de celui-ci s’affiche à... -
Page 123: Matériel
[Cette batterie ne peut pas être utilisée] • Utilisez une batterie Panasonic originale. Si ce message s’affiche même lorsqu’une batterie Panasonic originale est utilisée, contactez le revendeur. • Si les bornes de la batterie sont sales, retirez la saleté et la poussière de la borne. -
Page 124: En Cas De Problème
Matériel En cas de problème D’abord, essayez les procédures suivantes (124 à 125). Si le problème n’est pas résolu, il peut être amélioré en sélectionnant [Restaurer] dans le menu [Config.] ([Réglages]). • Veuillez vous référer également au “Manuel d’utilisation <Guide complet>”, lequel décrit plus d’informations détaillées. - Page 125 Matériel Une strie ou un scintillement peut apparaître sous un éclairage tels qu’un éclairage fluorescent ou à DEL. • Cela est propre aux capteurs MOS que l’appareil utilise comme capteurs d’image. Ce n’est pas un mauvais fonctionnement. • En utilisant l’obturateur électronique, baisser la vitesse d’obturation peut réduire l’effet des stries horizontales.
-
Page 126: Spécifications
Matériel Spécifications • Veuillez consulter également le “Manuel d’utilisation <Guide complet>”, lequel liste plus d’éléments. Les caractéristiques peuvent être soumises à des changements en vue d’une amélioration des performances. Boîtier de l’appareil photo numérique (DC-GH5M2) : Précautions à prendre Source d’alimentation : 9,0 V Consommation d’énergie : 4,5 W (lors d’un enregistrement avec l’écran), 3,8 W (lors de la lecture avec l’écran) [Lorsque vous utilisez l’objectif interchangeable... - Page 127 Matériel Format d’enregistrement pour photo Format de fichier JPEG (conforme DCF, conforme Exif 2.31) / RAW pour photo Taille des images Lorsque le format est [4:3] (pixels) [L] : 5184×3888 [M] : 3712×2784 [S] : 2624×1968 Photo 6K : 4992×3744 Photo 4K : 3328×2496 Format d’enregistrement des vidéos Format vidéo...
-
Page 128: Vitesse De Synchronisation Du Flash
Matériel Écran Système Format 3:2, 3,0 pouces, Écran d’environ 1 840 000 de points, écran tactile capacitif Taux du champ de Environ 100 % vision Mise au point Type MPA Type TTL basé sur la détection de l’image (Contraste MPA) Contrôle de l’exposition Système de Mesure 1728-zones, mesure multiple / mesure centrale... - Page 129 Matériel Zoom Convertisseur télé Max. 2,0x (lorsque une taille d’image [S] est étendu sélectionnée.) (Photo) Interface USB Type-C™, SuperSpeed USB3.1 GEN1, Prise en charge de l’alimentation USB (9,0 V/3,0 A) • Les données venant d’un PC ne peuvent pas être écrites sur l’appareil photo en utilisant le câble de raccordement USB.
-
Page 130: Plage De Fréquence Utilisée (Fréquence Centrale)
Matériel Wi-Fi Norme de conformité IEEE 802.11a/b/g/n/ac (protocole pour réseau local (LAN) sans fil standard) Plage de fréquence 2412 MHz à 2472 MHz (canaux 1 à 13) utilisée (fréquence 5180 MHz à 5320 MHz centrale) (canaux 36/40/44/48/52/56/60/64) 5500 MHz à 5700 MHz (canaux 100/104/108/112/116/ 120/124/128/132/136/140) Méthode de cryptage Wi-Fi conforme WPA™... -
Page 131: Chargeur De Batterie (Panasonic Dvlc1005Z) : Précautions À Prendre
0 °C à 40 °C (32 °F à 104 °F) Pour plus d’informations sur l’efficacité énergétique du produit, veuillez vous rendre sur notre site Web, www.panasonic.com, et entrer le numéro du modèle dans la zone de recherche. Bloc-batterie (lithium-ion) (Panasonic DMW-BLK22) : Précautions à... -
Page 132: Objectif Interchangeable
Matériel Objectif H-ES12060 H-FS12060 interchangeable “LEICA DG VARIO- “LUMIX G VARIO ELMARIT 12–60mm/ 12–60 mm/F3.5–5.6 F2.8–4.0 ASPH./S.O.I. ASPH./S.O.I. PUISSANT” PUISSANT” Monture Micro Quatre Tiers (Micro Micro Quatre Tiers (Micro Four Thirds) Four Thirds) Longueur focale f=12 mm à 60 mm f=12 mm à... - Page 133 Matériel Longueur totale Environ 86 mm (3,4 po) Environ 71 mm (2,8 po) (du bout de l’objectif à la (du bout de l’objectif à la base de la monture de base de la monture de l’objectif) l’objectif) Poids Environ 320 g / 0,70 lb Environ 210 g / 0,46 lb Résistance à...
-
Page 134: Marques De Commerce Et Licences
• QuickTime et le logo QuickTime sont des marques de commerce ou des marques déposées de Apple Inc. et sont utilisées sous licence. • HDAVI Control™ est une marque de commerce de Panasonic Corporation. • Adobe est une marque de commerce ou une marque déposée de Adobe Systems Incorporated aux États-Unis et/ou dans d’autres pays. - Page 135 • La marque et les logos Bluetooth ® sont des marques déposées appartenant à Bluetooth SIG, Inc. et toute utilisation de telles marques par Panasonic Corporation est sous licence. Les autres marques de commerce et dénominations commerciales appartiennent à leurs propriétaires respectifs.
- Page 136 [MENU/SET] → [Config.] → [Autres] → [Aff. version] → [Info logiciel]. Pendant au moins trois (3) ans à compter de la livraison de ce produit, Panasonic donnera à toute personne qui nous contacte à l’adresse ci-dessous, pour des frais n’excédant pas le coût de la distribution physique du code source, une copie...
-
Page 137: Fotocamera Digitale
Egregio cliente, Grazie per aver acquistato questa fotocamera digitale Panasonic. Leggere attentamente questo documento e tenerlo a portata di mano per potervi fare riferimento in futuro. Si noti che l’aspetto effettivo di comandi, componenti, voci di menu, ecc. - Page 138 Illustra tutte le funzioni e i metodi di funzionamento in modo dettagliato. È possibile visualizzare questo documento con un PC o uno smartphone. https://panasonic.jp/support/dsc/oi/GH5M2/index.html È anche possibile accedere all’URL e al codice QR dalla voce [Manuale online] del menu [Setup]. ...
- Page 139 Sommario Nota relativa alle istruzioni per l’uso ............138 Informazioni per la sua sicurezza ..............140 Precauzioni per l’uso ..................143 Introduzione Prima dell’uso ....................146 Accessori standard ..................148 Nome dei componenti ..................150 Fotocamera ....................150 Obiettivo ....................... 155 Visualizzazioni su mirino/monitor ..............
-
Page 140: Informazioni Per La Sua Sicurezza
Informazioni per la sua sicurezza ATTENZIONE: Per ridurre il rischio di incendi, folgorazioni o danni al prodotto, • Non esporre questa unità a pioggia, umidità, gocce o spruzzi d’acqua. • Utilizzare gli accessori consigliati. • Non rimuovere le coperture. • Non riparare l’unità autonomamente. Per la manutenzione rivolgersi a personale qualificato. -
Page 141: Dichiarazione Di Conformità (Doc)
Informazioni per la sua sicurezza Dichiarazione di Conformità (DoC) Con la presente, “Panasonic Corporation” dichiara che questo prodotto è conforme ai requisiti essenziali e alle altre disposizioni rilevanti della Direttiva 2014/53/UE. I clienti possono scaricare una copia del DoC originale per i nostri prodotti RE dal nostro server DoC: http://www.ptc.panasonic.eu... - Page 142 Informazioni per la sua sicurezza ■ Pacco batterie PRECAUZIONE • Se la batteria viene sostituita in modo non corretto esiste il pericolo di esplosione. Sostituire solo con il tipo raccomandato dal produttore. • Quando si smaltiscono le batterie, contattare le autorità locali o il rivenditore e chiedere informazioni sul metodo corretto di smaltimento.
-
Page 143: Precauzioni Per L'uso
• Non utilizzare cavi di collegamento USB di alcun genere diversi da quello fornito in dotazione con la fotocamera o il caricabatterie (DMW-BTC15: opzionale). • Utilizzare sempre un telecomando dell’otturatore Panasonic originale (DMW-RS2: opzionale). • Utilizzare sempre un’Impugnatura treppiede Panasonic originale (DMW-SHGR1: opzionale). - Page 144 Informazioni per la sua sicurezza • Prima di pulire la fotocamera rimuovere la batteria o l’accoppiatore CC (DMW-DCC17: opzionale), oppure scollegare l’alimentazione dalla rete. • Non premere con troppa forza il monitor. • Non premere con troppa forza l’obiettivo. • Non spruzzare insetticidi o sostanze chimiche volatili sulla fotocamera. •...
- Page 145 Informazioni per la sua sicurezza • Quando si acquista la fotocamera, la batteria non è carica. Caricare la batteria prima dell’uso. • La batteria è una batteria ricaricabile a ioni di litio. Se la temperatura è troppo alta o troppo bassa, il tempo di funzionamento della batteria si riduce. •...
-
Page 146: Introduzione
– Le operazioni touch potrebbero non venire riconosciute correttamente. Quando si utilizza la fotocamera a basse temperature (–10 °C a 0 °C) – Prima dell’uso, installare un obiettivo intercambiabile Panasonic con una temperatura operativa minima consigliata di –10 °C. Non posizionare la mano all’interno dell’innesto della fotocamera. - Page 147 Introduzione Resistenza agli schizzi “Resistenza agli schizzi” è un termine utilizzato per descrivere un ulteriore livello di protezione offerto da questa fotocamera, contro l’esposizione a minime quantità di umidità, acqua o polvere. La resistenza agli schizzi non garantisce che la fotocamera non subisca danni qualora venga a diretto contatto con l’acqua.
-
Page 148: Accessori Standard
Introduzione Accessori standard Corpo della fotocamera digitale Cavo di collegamento (In questo documento viene chiamato fotocamera.) K1HY24YY0026 Supporto cavo 1PP1A561Z Tracolla Controllare che tutti gli accessori siano forniti prima di utilizzare la DVPW1029Z fotocamera. Coperchio sul corpo (I codici dei prodotti sono validi a maggio della fotocamera ... - Page 149 6 È installato sull’obiettivo al momento dell’acquisto. • La scheda di memoria è opzionale. • Se si sono smarriti gli accessori in dotazione, consultare il rivenditore o Panasonic. (È possibile acquistare gli accessori separatamente.) • Disfarsi di ogni imballo in modo appropriato.
-
Page 150: Nome Dei Componenti
Introduzione Nome dei componenti Fotocamera Microfono stereo Pulsante [ ] (Compensazione • Non coprire il microfono con esposizione) un dito. Sarà difficile registrare Pulsante registrazione video l’audio. Pulsante [ ] (Stile foto) Selettore della modalità di scatto Spia di carica/ Attacco a slitta (coperchio Indicatore luminoso di connessione dell’adattatore a slitta) - Page 151 Introduzione Pulsante [LVF] Pulsante [DISP.] Occhiello tracolla Pulsante [ ] (modalità AF) Pulsante [ ] (Riproduzione) Pulsante [Q] (Menu rapido) Joystick/ Pulsanti cursore/ Pulsanti Fn Pulsanti Fn Centro: Fn8, : Fn9, : Fn10, : Fn13, : Fn14, : Fn15, : Fn11, : Fn12 : Fn16 Monitor/...
- Page 152 Introduzione Protezione del mirino Sportello scheda • Tenere il coperchio dell’oculare Presa [REMOTE] al di fuori della portata dei Spia accesso scheda 1 bambini per evitare rischi di Slot scheda 1 ingerimento. Slot scheda 2 Mirino Spia accesso scheda 2 Sensore occhio Leva rilascio sportello batteria Selettore di regolazione diottrica...
- Page 153 Panasonic. Attacco treppiede • Utilizzare sempre un Adattatore • Se si tenta di installare un CA Panasonic originale treppiede con una vite lunga (DMW-AC10E: opzionale). 5,5 mm o più, potrebbe non • Quando si utilizza un Adattatore...
- Page 154 Introduzione Spia autoscatto/ Sensore Luce ausilio AF Presa [MIC] Selettore anteriore Presa per cuffie Pulsante di scatto dell’otturatore • Un’eccessiva pressione acustica dagli auricolari o dalle cuffie può Segno per l’installazione causare la perdita dell’udito. dell’obiettivo Presa [HDMI] Impugnatura Porta USB Pulsante anteprima/ Pulsante Fn (Fn2) Fissaggio supporto cavo...
-
Page 155: Obiettivo
Introduzione Obiettivo H-ES12060 H-FS12060 3 4 5 Superficie dell’obiettivo Selettore [AF/MF] • Quando il selettore [AF/MF] Teleobiettivo sull’obiettivo è posizionato su [MF] Ghiera di messa a fuoco o quando è selezionata la modalità Ghiera dello zoom [MF] sulla fotocamera, la messa a Grandangolo fuoco manuale (MF) è... -
Page 156: Visualizzazioni Su Mirino/Monitor
Introduzione Visualizzazioni su mirino/monitor Al momento dell’acquisto, il mirino/monitor visualizza le seguenti icone. • Per informazioni sulle icone non descritte qui, vedere “Istruzioni d’uso <Guida completa>”. Mirino Monitor 60 60 60 60 Stile Foto Velocità otturatore Livella Valore apertura Qualità dell’immagine/ Valore compensazione Dimensioni immagine esposizione/... -
Page 157: Per Iniziare / Funzionamento Di Base
Per iniziare / Funzionamento di base • Durante la preparazione, accertarsi che l’interruttore on/off della fotocamera sia posizionato su [OFF]. Installazione di una tracolla Installare la tracolla sulla fotocamera con la seguente procedura per evitare che cada. • Tirare la tracolla e controllare che non esca. •... -
Page 158: Carica Della Batteria
Per iniziare / Funzionamento di base Carica della batteria È possibile caricare la batteria usando il caricatore in dotazione oppure all’interno del corpo della fotocamera. È anche possibile utilizzare il caricabatterie (DMW-BTC15: opzionale). • La batteria utilizzabile con la fotocamera è DMW-BLK22 / DMW-BLF19E. (Informazioni aggiornate a maggio 2021) –... - Page 159 Per iniziare / Funzionamento di base Collegare il caricatore all’adattatore CA con il cavo di collegamento USB. • Controllare la direzione dei terminali ed inserirli/estrarli dalla presa in linea retta. (L’inserimento in linea non retta può causare deformazione o malfunzionamento) Collegare l’adattatore CA a una presa elettrica.
-
Page 160: Inserimento Della Batteria
Per iniziare / Funzionamento di base Inserimento della batteria • Utilizzare sempre batterie Panasonic originali (DMW-BLK22 / DMW-BLF19E). – Il modello DMW-BLF19E (opzionale) ha una capacità della batteria inferiore a quella del modello DMW-BLK22. • Se si utilizzano altre batterie, non possiamo garantire la qualità di questo prodotto. - Page 161 Per iniziare / Funzionamento di base Posizionare l’interruttore di accensione/spegnimento della fotocamera su [OFF]. Inserire la batteria nella fotocamera. Collegare l’adattatore CA alla porta USB della fotocamera usando il cavo di collegamento USB. • Controllare la direzione dei terminali ed inserirli/estrarli dalla presa in linea retta.
-
Page 162: Alimentazione Elettrica
Per iniziare / Funzionamento di base Alimentazione elettrica Quando la batteria è inserita nella fotocamera per la carica e la fotocamera è accesa, è possibile registrare mentre alla fotocamera viene fornita alimentazione elettrica. • Mentre l’alimentazione è attiva, sullo schermo viene visualizzato [ •... - Page 163 Video Speed Class 60 o superiore. • Per le informazioni più aggiornate sulle schede di memoria di cui sia stato verificato il funzionamento, consultare il seguente sito del supporto: https://panasonic.jp/support/global/cs/dsc/ (solo in inglese) Slot scheda 1 Slot scheda 2 •...
-
Page 164: Installazione Di Un Obiettivo
È anche possibile utilizzare l’obiettivo intercambiabile Leica M-Mount montando l’anello adattatore per M-Mount (DMW-MA2M: opzionale). • Per informazioni aggiornate sugli obiettivi supportati, consultare cataloghi/siti Web. https://panasonic.jp/support/global/cs/dsc/ (solo in inglese) Segni per l’installazione dell’obiettivo Rimozione di un obiettivo • Tenendo premuto il pulsante di sblocco dell’obiettivo... -
Page 165: Regolazione Della Direzione E Dell'angolo Del Monitor
Per iniziare / Funzionamento di base Installazione di un paraluce Quando si installa il paraluce (a forma di fiore) in dotazione con l’obiettivo intercambiabile (H-ES12060/H-FS12060) Allineare il segno A ( ) sul paraluce con il segno sull’estremità dell’obiettivo. Ruotare il paraluce nella direzione della freccia sino a che si arresta con un clic e quindi allineare il segno B ( ) sul paraluce con il segno sull’estremità... -
Page 166: Impostazione Dell'orologio (In Caso Di Prima Accensione)
Per iniziare / Funzionamento di base Impostazione dell’orologio (in caso di prima accensione) Quando si accende la fotocamera per la prima volta, appare una schermata per impostare il fuso orario e l’orologio. Seguire il messaggio per effettuare le impostazioni. • Premere per selezionare la lingua se viene visualizzata una schermata di selezione della lingua. -
Page 167: Metodi Di Utilizzo Dei Menu
Per iniziare / Funzionamento di base Metodi di utilizzo dei menu Livelli menu Schede principali Si sposta tra livelli menu Schede secondarie Selezionare Voci del menu Impostare Voci di impostazione • Se si preme [DISP.] mentre è selezionata una voce di menu o di impostazione, verrà... -
Page 168: Materiali
Riaccendere la fotocamera. Se il messaggio continua ad essere visualizzato, contattare il rivenditore. [Batteria non utilizzabile] • Utilizzare una batteria originale Panasonic. Se questo messaggio viene visualizzato anche quando si utilizza una batteria Panasonic originale, contattare il rivenditore. • Se il terminale della batteria è sporco, rimuovere lo sporco e la polvere dal terminale. -
Page 169: Ricerca Guasti
Materiali Ricerca guasti Prima di tutto provare le seguenti procedure (169 - 170). Se il problema non si risolve, è possibile migliorare la situazione selezionando [Azzera] sul menu [Setup] ([Impostazione]). • Vedere anche “Istruzioni d’uso <Guida completa>”, che fornisce informazioni più dettagliate. - Page 170 Materiali Sotto luci fluorescenti o a LED è possibile che sull’immagine compaiano striature o sfarfallii. • Si tratta di una caratteristica dei sensori MOS che fungono da sensori di cattura della fotocamera. Non si tratta di un malfunzionamento. • Quando si utilizza l’otturatore elettronico, abbassando la velocità dell’otturatore è possibile ridurre l’effetto delle strisce orizzontali.
-
Page 171: Specifiche
Materiali Specifiche • Vedere anche “Istruzioni d’uso <Guida completa>”, che riporta ulteriori voci. Le specifiche sono soggette a modifica per migliorare le prestazioni. Corpo della fotocamera digitale (DC-GH5M2): Informazioni per la sua sicurezza Alimentazione: 9,0 V Consumo di corrente: 4,5 W (quando si registra con il monitor), 3,8 W (quando si riproduce con il monitor) [Quando si utilizza l’obiettivo intercambiabile (H-ES12060)]... - Page 172 Materiali Formato di registrazione per foto Formato file per foto JPEG (conforme a DCF, conforme a Exif 2.31) / RAW Dimensioni Quando il formato è impostato su [4:3] immagine [L]: 5184×3888 (pixel) [M]: 3712×2784 [S]: 2624×1968 Foto 6K: 4992×3744 Foto 4K: 3328×2496 Formato di registrazione per i video Formato video MP4 (H.264/MPEG-4 AVC, H.265/HEVC)
- Page 173 Materiali Monitor Sistema Formato 3:2, 3,0 pollici, monitor con circa 1.840.000 punti, touch screen capacitivo Rapporto campo di Circa 100 % visualizzazione Messa a fuoco Tipo AF Tipo TTL basato su rilevazione immagine (Contrast AF) Controllo dell’esposizione Sistema di misurazione della Misurazione su 1728 zone, Modalità...
- Page 174 Materiali Zoom Convertitore di Massimo 2,0x (quando è selezionata una dimensione focale Tele dell’immagine [S].) (Foto) Interfaccia USB Type-C™, SuperSpeed USB3.1 GEN1, Supporta USB Power Delivery (9,0 V/3,0 A) • Non è possibile scrivere sulla fotocamera dati provenienti da un PC utilizzando il cavo di collegamento.
- Page 175 Materiali Wi-Fi Conforme allo IEEE 802.11a/b/g/n/ac (protocollo LAN wireless standard standard) Gamma di frequenza Da 2412 MHz a 2472 MHz (da 1 a 13canali) utilizzata (frequenza Da 5180 MHz a 5320 MHz centrale) (36/40/44/48/52/56/60/64canali) Da 5500 MHz a 5700 MHz (100/104/108/112/116/120/124/128/132/136/140canali) Metodo di Wi-Fi conforme a WPA™...
- Page 176 Temperatura operativa: Da 0 °C a 40 °C Potete trovare maggiori informazioni sull’efficienza energetica del prodotto sul nostro sito web, www.panasonic.com, inserendo il numero di modello nella maschera di ricerca. Batteria (agli ioni di litio) (Panasonic DMW-BLK22): Informazioni per la sua sicurezza Tensione/capacità:...
- Page 177 Materiali Obiettivo H-ES12060 H-FS12060 intercambiabile “LEICA DG VARIO- “LUMIX G VARIO ELMARIT 12–60mm/ 12–60mm/F3.5–5.6 F2.8–4.0 ASPH./POWER ASPH./POWER O.I.S.” O.I.S.” Supporto Micro Four Thirds Mount Micro Four Thirds Mount Distanza focale f= da 12 mm a 60 mm f= da 12 mm a 60 mm (equivalente per (equivalente per fotocamera con pellicola...
- Page 178 Materiali Lunghezza Circa 86 mm Circa 71 mm complessiva (dall’estremità dell’obiettivo (dall’estremità dell’obiettivo al lato di base del supporto al lato di base del supporto dell’obiettivo) dell’obiettivo) Massa Circa 320 g Circa 210 g Resistente alla polvere Sì Sì ed agli schizzi Temperatura operativa Da -10 °C a 40 °C Da 0 °C a 40 °C...
-
Page 179: Marchi E Licenze
• QuickTime e il logo QuickTime sono marchi depositati o marchi registrati di Apple Inc., utilizzati con licenza. • HDAVI Control™ è un marchio di fabbrica della Panasonic Corporation. • Adobe è un marchio o marchio registrato di Adobe Systems Incorporated negli Stati Uniti e/o in altri paesi. - Page 180 ® e i loghi sono marchi registrati di proprietà di Bluetooth SIG, Inc. e qualsiasi utilizzo di tali marchi da parte di Panasonic Corporation è concesso in licenza. Altri marchi e nomi di marchi sono di proprietà dei rispettivi proprietari.
- Page 181 Questo prodotto comprende il seguente software: (1) Il software sviluppato in modo indipendente da o per Panasonic Corporation, (2) Il software di proprietà di soggetti terzi e fornito in licenza a Panasonic Corporation, (3) il software concesso in licenza in base a GNU General Public License, Version 2.0 (GPL V2.0),...
- Page 182 Estimado cliente, Nos gustaría aprovechar la oportunidad para agradecerle la compra de esta cámara digital Panasonic. Lea este documento detenidamente y téngalo a mano para futuras consultas. Tenga en cuenta que los controles y componentes, elementos del menú, etc. reales de su cámara digital puede que sean algo diferentes de los mostrados en las ilustraciones de este documento.
-
Page 183: Símbolos Utilizados En Este Documento
Explica todas las funciones y los métodos de operación de manera detallada. Puede verse en un PC o en un teléfono inteligente. https://panasonic.jp/support/dsc/oi/GH5M2/index.html La URL y el código QR también se pueden consultar en [Manual en línea] del menú [Conf.]. - Page 184 Contenidos Acerca de las Instrucciones de funcionamiento ......... 183 Información para su seguridad ..............185 Precauciones de uso..................188 Introducción Antes del uso ....................191 Accesorios de serie ..................193 Nombres de las piezas ................... 195 Cámara ......................195 Objetivo ......................200 Visualizaciones en el Buscador/Monitor ............
-
Page 185: Información Para Su Seguridad
Información para su seguridad ADVERTENCIA: Para reducir el riesgo de incendios, de descargas eléctricas o de daños en el producto, • No exponga esta unidad a la lluvia, humedad, goteo o salpicaduras. • Utilice los accesorios recomendados. • No retire las cubiertas. •... - Page 186 Información para su seguridad Declaración de conformidad (DoC) Por la presente, “Panasonic Corporation” declara que este producto se encuentra en conformidad con los requerimientos esenciales y otras disposiciones relevantes de la Directiva 2014/53/EU. Los clientes pueden descargar una copia de la DoC original para nuestros equipos de RE desde nuestro servidor de DoC: http://www.ptc.panasonic.eu...
- Page 187 Información para su seguridad ■ Acerca del paquete de la batería ATENCIÓN • Existe un riesgo de explosión si la batería se reemplaza incorrectamente. Reemplace solamente con el tipo recomendado por el fabricante. • Al desechar las baterías, comuníquese con sus autoridades locales o con el distribuidor y pregunte sobre el método correcto de eliminación.
-
Page 188: Precauciones De Uso
• No utilice ningún otro cable de conexión USB excepto el suministrado con la cámara o el cargador de batería (DMW-BTC15: opcional). • Utilice siempre un control de mando del obturador remoto original de Panasonic (DMW-RS2: opcional). • Utilice siempre una Empuñadura-Trípode original de Panasonic (DMW-SHGR1: opcional). - Page 189 Información para su seguridad • Antes de limpiar la cámara, quite la batería o el acoplador de CC (DMW- DCC17: opcional), o desconecte la clavija de alimentación del tomacorriente. • No ejerce demasiada presión en el monitor. • No ejerza demasiada presión en el objetivo. •...
- Page 190 Información para su seguridad • Cuando se envía la cámara, la batería está descargada. Cárguela antes de usarla. • La batería es una batería de litio recargable. Si la temperatura es demasiado alta o demasiado baja, la duración de funcionamiento de la batería se acortará.
-
Page 191: Introducción
– Es posible que las operaciones táctiles no se reconozcan correctamente. Cuando se use a temperaturas bajas (–10 °C hasta 0 °C (14 °F a 32 °F)) – Antes del uso, coloque una lente Panasonic con una temperatura mínima de funcionamiento recomendada de –10 °C (14 °F). - Page 192 Introducción Resistencia a las salpicaduras Resistencia a las salpicaduras es un término que se utiliza para describir un nivel adicional de protección que esta cámara ofrece frente a la exposición a una cantidad mínima de humedad, agua y polvo. La Resistencia a las salpicaduras no garantiza que no se averíe en caso de esta cámara entre en contacto directo con el agua.
-
Page 193: Accesorios De Serie
Introducción Accesorios de serie Cuerpo de la Cámara Digital Cable de conexión (Esto se denomina cámara en este documento.) K1HY24YY0026 Soporte del cable 1PP1A561Z Correa de transporte Antes de usar la cámara, compruebe que estén DVPW1029Z suministrados todos los accesorios. Tapa del cuerpo ... - Page 194 6 Esto se adjunta a la lente al momento de la compra. • La tarjeta de memoria es un accesorio opcional. • Llame al concesionario o a Panasonic si pierde los accesorios suministrados. (Puede comprar los accesorios por separado.) • Deshágase apropiadamente de todo el material de empaquetado.
-
Page 195: Nombres De Las Piezas
Introducción Nombres de las piezas Cámara Micrófono estéreo Botón [ ] (Compensación de la • No bloquee el micrófono con exposición) el dedo. Será difícil grabar el Botón de vídeo audio. Botón [ ] (Fotoestilo) Disco del modo de dispositivo Luz de carga/ Zapata caliente (cubierta de la Luz de conexión NETWORK... - Page 196 Introducción Botón [LVF] Botón [DISP.] Sujeción de la correa de transporte Botón [ ] (modo AF) Botón [Q] (Menú rápido) Botón [ ] (Reproducción) Joystick/ Botones de cursor/ Botones Fn Botones Fn Centro: Fn8, : Fn9, : Fn10, : Fn13, : Fn14, : Fn15, : Fn11,...
- Page 197 Introducción Protector del ocular Toma [REMOTE] • Mantenga el ocular fuera del Luz de acceso a la tarjeta 1 alcance de los niños para evitar Ranura para tarjeta 1 que se la traguen. Ranura para tarjeta 2 Visor Luz de acceso a la tarjeta 2 Sensor ocular Palanca de liberación de la tapa de Disco de ajuste dióptrico...
- Page 198 • Cuando usa un adaptador batería (cubierta del conector de la de CA, asegúrese de usar el empuñadura con batería) adaptador DC de Panasonic • Mantenga la cubierta del (DMW-DCC17: opcional) y el conector de la empuñadura con adaptador de CA (DMW-AC10E: batería fuera del alcance de...
- Page 199 Introducción Luz del autodisparador/ Sensor Lámpara de ayuda AF Toma [MIC] Disco frontal Entrada del auricular Botón del obturador • La presión excesiva del sonido de audífonos o auriculares Marca de ajuste de la lente puede causar pérdida auditiva. Empuñadura Toma [HDMI] Botón de vista previa/ Puerto USB...
-
Page 200: Objetivo
Introducción Objetivo H-ES12060 H-FS12060 3 4 5 Superficie de la lente Interruptor [AF/MF] • Cuando el interruptor [AF/MF] Teleobjetivo del objetivo o de la configuración Anillo de enfoque de la cámara se establece a Anillo de zoom [MF], se habilita el enfoque Gran angular manual (MF). -
Page 201: Visualizaciones En El Buscador/Monitor
Introducción Visualizaciones en el Buscador/Monitor Al momento de la compra, el visor/monitor muestra los siguientes iconos. • Para ver información sobre otros iconos distintos de los que se describen aquí, consulte “Instrucciones de funcionamiento <Guía completa>”. Visor Monitor 60 60 60 60 Fotoestilo Velocidad del obturador... -
Page 202: Primeros Pasos / Operaciones Básicas
Primeros pasos / Operaciones básicas • Durante la preparación, asegúrese de que el interruptor on/ off de la cámara esté en [OFF]. Colocación de la correa de transporte Coloque una correa de transporte en la cámara siguiendo el siguiente procedimiento para evitar que se caiga. •... -
Page 203: Cargar La Batería
Primeros pasos / Operaciones básicas Cargar la batería Puede cargar la batería utilizando el cargador suministrado o en el cuerpo de la cámara. También puede usar el cargador de batería (DMW-BTC15: opcional). • La batería que se puede usar con la cámara es la DMW-BLK22 / DMW-BLF19E. (A fecha de mayo de 2021) –... - Page 204 Primeros pasos / Operaciones básicas Conecte el cargador y el adaptador de CA con el cable de conexión USB. • Compruebe la dirección de los terminales y enchufe/desenchufe sujetando el enchufe en posición recta. (Insertarlos en ángulo puede provocar deformación o mal funcionamiento) Conecte el adaptador de CA a la toma de corriente.
-
Page 205: Inserción De La Batería
Primeros pasos / Operaciones básicas Inserción de la batería • Utilice siempre baterías de Panasonic (DMW-BLK22 / DMW-BLF19E). – La DMW-BLF19E (opcional) tiene una capacidad de batería menor que la DMW-BLK22. • Si utiliza otras b aterías, no podemos garantizar la calidad de este producto. - Page 206 Primeros pasos / Operaciones básicas Establezca el interruptor on/off de la cámara en [OFF]. Inserte la batería en la cámara. Conecte el puerto USB de la cámara y el adaptador de CA usando el cable de conexión USB. • Compruebe la dirección de los terminales y enchufe/desenchufe sujetando el enchufe en posición recta.
-
Page 207: Suministro De Energía
Primeros pasos / Operaciones básicas Suministro de energía Cuando la batería está insertada en la cámara para cargarla y la cámara está encendida, se puede grabar mientras se suministra energía a la cámara. • [ ] se muestra en la pantalla mientras se está suministrando energía. •... - Page 208 60 o superior. • Para obtener la información más reciente sobre las tarjetas de memoria cuyo funcionamiento se ha confirmado, consulte el siguiente sitio de soporte: https://panasonic.jp/support/global/cs/dsc/ (Solo en inglés) Ranura para tarjeta 1 Ranura para tarjeta 2 •...
-
Page 209: Cómo Montar Una Lente
Leica M si monta el adaptador de montaje M (DMW-MA2M: opcional). • Consulte los catálogos/sitios web para conocer la información más actual sobre las lentes compatibles: https://panasonic.jp/support/global/cs/dsc/ (Solo en inglés) Marcas de ajuste de la lente ... -
Page 210: Cómo Montar Un Parasol
Primeros pasos / Operaciones básicas Cómo montar un parasol Cuando coloque el parasol (en forma de flor) suministrado con la lente intercambiable (H-ES12060/H-FS12060) Alinee la marca A ( ) en la visera de la lente con la marca en el extremo de la lente. -
Page 211: Ajuste Del Reloj (Cuando Se Enciende Por Primera Vez)
Primeros pasos / Operaciones básicas Ajuste del reloj (Cuando se enciende por primera vez) Cuando enciende la cámara por primera vez, aparece una pantalla para ajustar la zona horaria y el reloj. Siga el mensaje para realizar los ajustes. • Pulse para seleccionar el idioma si se muestra una pantalla de selección de idioma. -
Page 212: Métodos De Operación Del Menú
Primeros pasos / Operaciones básicas Métodos de operación del menú Niveles del menú Pestañas principales Muévase entre los niveles del menú Subpestañas Seleccione Elementos del menú Fije Elementos de ajuste • Si pulsa [DISP.] mientras un elemento del menú o elemento de ajuste está seleccionado, aparecerá... -
Page 213: Materiales
[Esta batería no puede ser usada] • Utilice una batería Panasonic original. Si este mensaje aparece aun cuando utiliza una batería original de Panasonic, llame al concesionario. • Si el terminal de la batería está sucio, elimine la suciedad y el polvo del terminal. -
Page 214: Búsqueda De Averías
Materiales Búsqueda de averías Primero pruebe los siguientes procedimientos (214 a 215). En el caso de que no se solucione el problema, el mismo puede mejorarse seleccionando [Reiniciar] en el menú [Conf.] ([Configuración]). • También consulte el “Instrucciones de funcionamiento <Guía completa>”, donde se describe información más detallada. - Page 215 Materiales El parpadeo o las rayas pueden aparecer bajo la iluminación de la luz fluorescente o luz LED. • Esto es típico de los sensores MOS que sirven como sensores lectores de la cámara. Esto no es un funcionamiento defectuoso. •...
-
Page 216: Especificaciones
Materiales Especificaciones • Consulte también las “Instrucciones de funcionamiento <Guía completa>”, donde se listan más elementos. Las especificaciones están sujetas a cambios para la mejora del rendimiento. Cuerpo de la Cámara Digital (DC-GH5M2): Información para su seguridad Fuente de alimentación: 9,0 V Potencia absorbida: 4,5 W (cuando se graba con el monitor), 3,8 W (cuando se reproduce con el monitor) - Page 217 Materiales Formato de grabación para imágenes fijas Formato de archivo Foto JPEG (conforme con DCF, conforme con Exif para imágenes fijas 2.31) / RAW Tamaño de la Cuando el ajuste de la relación de aspecto es [4:3] imagen [L]: 5184×3888 (píxeles) [M]: 3712×2784 [S]: 2624×1968...
- Page 218 Materiales Monitor Sistema Aspecto 3:2; 3,0 pulgadas, monitor de aprox. 1.840.000 de puntos, pantalla táctil capacitiva Campo de relación Aprox. 100 % visual Enfoque Tipo AF Tipo TTL basado en la detección de imágenes (Contraste AF) Control de la exposición Sistema de medición de la luz, Medición de 1728 zonas, multimedición / medición...
- Page 219 Materiales Zoom Conversión de teleobjetivo Máx. 2,0x (cuando se selecciona un tamaño de imagen adicional de [S].) (Imágenes) Interfaz USB Type-C™, SuperSpeed USB3.1 GEN1, Compatible con USB Power Delivery (9,0 V/3,0 A) • Los datos del ordenador no se pueden escribir en la cámara usando el cable de conexión USB.
- Page 220 Materiales Wi-Fi Cumplimiento de la IEEE 802.11a/b/g/n/ac (protocolo LAN inalámbrico norma estándar) Frecuencia de rango 2412 MHz a 2472 MHz (1 a 13c) usada (frecuencia 5180 MHz a 5320 MHz (36/40/44/48/52/56/60/64c) central) 5500 MHz a 5700 MHz (100/104/108/112/116/120/124/ 128/132/136/140c) Método de cifrado Wi-Fi en cumplimiento con WPA™...
- Page 221 0 °C a 40 °C (32 °F a 104 °F) Para más información sobre la eficiencia energética del producto, visite nuestra página web, www.panasonic.com, e introduzca el número de modelo en la máscara de búsqueda. Batería (iones de litio) (Panasonic DMW-BLK22): Información para su seguridad...
- Page 222 Materiales Lente intercambiable H-ES12060 H-FS12060 “LEICA DG VARIO- “LUMIX G VARIO ELMARIT 12–60mm/ 12–60mm/F3.5–5.6 F2.8–4.0 ASPH./POWER ASPH./POWER O.I.S.” O.I.S.” Montura Micro Four Thirds Mount Micro Four Thirds Mount Longitud focal f=12 mm a 60 mm f=12 mm a 60 mm (equivalente a una cámara (equivalente a una cámara de película de 35 mm:...
- Page 223 Materiales Longitud total Aprox. 86 mm (3,4″) Aprox. 71 mm (2,8″) (desde la punta de la lente (desde la punta de la lente en hasta el lado base del en hasta el lado base del montaje de la lente) montaje de la lente) Masa Aprox.
- Page 224 DVQX2187 (SPA)
-
Page 225: Marcas Comerciales Y Licencias
• QuickTime y el logo QuickTime son marcas o marcas registradas de Apple Inc., usadas con licencia. • HDAVI Control™ es una marca de fábrica de Panasonic Corporation. • Adobe es una marca de fábrica o una marca registrada de Adobe Systems Incorporated en Estados Unidos y/u otros países. - Page 226 Bluetooth SIG, Inc. y cualquier uso de dichas marcas por parte de Panasonic Corporation se realiza bajo licencia. Otros nombres de marcas y marcas comerciales son propiedad de sus respectivos propietarios. • El logotipo Wi-Fi CERTIFIED™ es una marca comercial registrada de Wi-Fi Alliance ®...
- Page 227 [MENU/SET] → [Conf.] → [Otros] → [Vis. versión] → [Software info]. Durante al menos tres (3) años a partir del suministro de este producto, Panasonic otorgará a cualquier tercero que se ponga en contacto a través de la información proporcionada a continuación, por un precio que no supere el costo de realizar...
- Page 228 Manufactured by: Panasonic Corporation Kadoma, Osaka, Japan Representative in Europe: Panasonic Marketing Europe GmbH Panasonic Testing Centre Winsbergring 15, 22525 Hamburg, Germany Panasonic Corporation Web Site: http://www.panasonic.com © Panasonic Corporation 2021...