Table des Matières
Publicité
Les langues disponibles
Les langues disponibles
Liens rapides
IT
RAFFRESCATORE EVAPORATIVO
POLIFEMO DEDALO
ISTRUZIONI PER L'USO
Leggere attentamente le istruzioni prima di far funzionare l'apparecchio oppure fare manutenzione.
Osservare tutte le istruzioni di sicurezza; la mancata osservanza delle istruzioni può portare a incidenti
e/o danni. Conservare queste istruzioni per futuro riferimento.
V 12/20
1
Publicité
Table des Matières

Manuels Connexes pour Argo POLIFEMO DEDALO


Sommaire des Matières pour Argo POLIFEMO DEDALO
- Page 1 RAFFRESCATORE EVAPORATIVO POLIFEMO DEDALO ISTRUZIONI PER L’USO Leggere attentamente le istruzioni prima di far funzionare l’apparecchio oppure fare manutenzione. Osservare tutte le istruzioni di sicurezza; la mancata osservanza delle istruzioni può portare a incidenti e/o danni. Conservare queste istruzioni per futuro riferimento.
-
Page 2: Informazioni Generali Di Sicurezza
INFORMAZIONI GENERALI DI SICUREZZA Utilizzare quest’apparecchio solo come descritto nel presente manuale. Qualsiasi altro uso non consigliato dal costruttore può causare incendi, scosse elettriche o incidenti a persone. Assicuratevi che il tipo di alimentazione elettrica sia conforme alle richieste elettriche dell’apparecchio (220-240V~/50Hz). - Page 3 Non utilizzare l'apparecchio in presenza di fili o spine Non piegare o appoggiare oggetti pesanti sul cavo danneggiati. Non tentare di cambiare il cavo di di alimentazione. alimentazione da sé. Se il cavo di alimentazione è danneggiato dovrà essere sostituito dal produttore, dal suo rivenditore o da una persona similmente qualificata onde evitare rischi.
-
Page 4: Descrizione Delle Parti
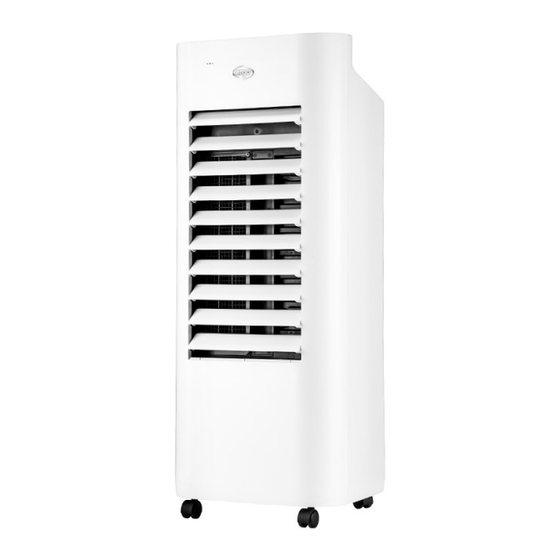
DESCRIZIONE DELLE PARTI 1. Pannello di controllo 2. Tasti sul pannello 3. Uscita d’aria 4. Filtro anti-polvere e pannello evaporativo 5. Tanica dell’acqua 6. Ruote pluridirezionali COME UTILIZZARE L’APPARECCHIO L’apparecchio non richiede installazione. Collocare l’unità su una superficie piana e stabile e collegare il cavo di alimentazione ad una presa di corrente appropriata (220-240V~ 50Hz): l’apparecchio può... -
Page 5: Pannello Di Controllo
TELECOMANDO Le funzioni del telecomando sono le stesse presenti sul pannello di controllo. PANNELLO DI CONTROLLO PULSANTE ON/OFF Premere questo pulsante sul pannello di controllo per accendere o spegnere l’unità. La modalità di funzionamento impostata di default è ventilazione bassa (velocità 1) e ventilazione General. PULSANTE SPEED Quando l’apparecchio è... - Page 6 l’unità si spegnerà automaticamente. Tenendo premuto il tasto Timer/Preset è possibile velocizzare l’impostazione del Timer di spegnimento. Funzione Preset (Timer di accensione): In modalità stand-by premere il pulsante Timer/Preset per selezionare l’impostazione del Timer di accensione dell’apparecchio, ad ogni pressione del pulsante è possibile impostare l’intervallo di accensione da 1 fino a 15 ore, i LED sul pannello di controllo si accenderanno in base alla selezione effettuata.
-
Page 7: Funzionamento Con Il Telecomando
FUNZIONAMENTO CON IL TELECOMANDO FUNZIONAMENTO CON IL TELECOMANDO Scorrere per aprire la cover seguendo la direzione indicata dalla freccia. Inserire le batterie (AAA, LR03, 1,5V - non fornite) nel telecomando, rispettando le polarità indicate. Rimettere la cover. Puntare il telecomando verso il ricevitore sul climatizzatore. -
Page 8: Riempimento Del Serbatoio Dell'acqua
RIEMPIMENTO DEL SERBATOIO DELL’ACQUA E’ NECESSARIO RIEMPIRE IL SERBATOIO CON ACQUA DEMINERALIZZATA PER FAR FUNZIONARE L’APPARECCHIO IN RAFFRESCAMENTO/ UMIDIFICAZIONE. L’acqua va inserita direttamente nel serbatoio posteriore. Verificare prima di introdurre l’acqua che all’interno della pompa dell’acqua non ci siano residui d’acqua, per prevenirne la fuoriuscita. Riempire il serbatoio fino al livello massimo segnato sull’indicatore dell’acqua, senza superare il limite del livello d’acqua, questo potrebbe causarne la fuoriuscita. -
Page 9: Manutenzione E Stoccaggio
MANUTENZIONE E STOCCAGGIO ATTENZIONE: ESTRARRE SEMPRE LA SPINA PRIMA DI PULIRE L’APPARECCHIO O FARE MANUTENZIONE. IMPORTANTE: NON IMMERGERE IL PRODOTTO IN ACQUA Pulizia della superficie esterna dell'apparecchio Usare un panno morbido per rimuovere la polvere dal prodotto. Se questo non basta, usare un panno morbido inumidito con acqua e detergente neutro a temperatura inferiore a 50°C. - Page 10 Pulizia del serbatoio e del canale dell’acqua Per pulire il serbatoio dell’acqua, estrarlo dalla sua sede e pulirlo accuratamente con un panno asciutto. Rimuovere il filtro posizionato all’interno del serbatoio, pulirlo e lasciarlo asciugare prima di riposizionarlo. Dopo aver estratto il serbatoio, pulire accuratamente con un panno il canale dell’acqua da eventuali residui di acqua che si possono essere formati.
- Page 11 POSSIBILI PROBLEMI DI FUNZIONAMENTO E SOLUZIONE Se l’apparecchio presenta qualche anomalia di funzionamento, consultare la tabella sottostante per risolvere eventuali anomalie. Se persistono contattare un centro assistenza autorizzato per la riparazione dell’apparecchio. PROBLEMA POSSIBILE CAUSA SOLUZIONE Il cavo di alimentazione non è collegato o Collegarlo correttamente non è...
- Page 12 INFORMAZIONE PER IL CORRETTO SMALTIMENTO DELPRODOTTO ai sensi dell’art. 26 D.Lgs 14/03/14, no. 49 “ATTUAZIONE DELLA DIRETTIVA EUROPEA 2012/19/UE SUI RIFIUTI DA APPRECCHIATURE ELETTRICHE ED ELETTRONICHE” Alla fine della sua vita utile questo apparecchio non deve essere smaltito insieme ai rifiuti domestici. Richiamiamo l’importante ruolo del consumatore nel contribuire al riutilizzo, al riciclaggio e ad altre forme di recupero di tali rifiuti.
- Page 13 EVAPORATIVE AIR COOLER POLIFEMO DEDALO OPERATING INSTRUCTIONS Read the instructions carefully before operating the appliance or carrying out maintenance operations. Observe all the safety instructions; failure to observe the instructions may lead to accidents and/or damage. Keep these instructions in a safe place for future reference.
-
Page 14: General Safety Information
GENERAL SAFETY INFORMATION Only use this appliance as described in this manual. Any other use not recommended by the manufacturer may cause fire, electric shock or injury to people. Make sure that the type of mains power complies with the electrical requirements of the appliance (220-240V~/50 Hz). - Page 15 Do not use the appliance if the cord or plug is Do not bend or stand heavy objects on the power damaged. Do not attempt to change the power cord cord. yourself. If the power cord is damaged, it must be replaced by the manufacturer, dealer or a similarly qualified person so as to avoid any safety risks.
-
Page 16: Description Of Parts
DESCRIPTION OF PARTS 1. Control panel 2. Buttons on control panel 5. Water tank 3. Air outlet 6. Multidirectional wheels 4. Dust filter and evaporative panel HOW TO USE THE APPLIANCE The appliance does not need to be installed. Position the unit on a flat, stable surface and connect the power cord to a suitable power socket (220-240 V~): the appliance can be switched on using the ON/OFF button and you will hear a sound. -
Page 17: Remote Control
REMOTE CONTROL The functions of the remote control are the same as those on the control panel. DISPLAY AND CONTROL PANEL ON/OFF BUTTON Press this button on the control panel to turn the unit on or off. The default operating mode is low ventilation (speed 1) and General ventilation SPEED BUTTON When the appliance is on, press the SPEED button to choose the fan speeds which are: high (speed 4), medium (speed 3), low (speed 2), very low (speed 1). - Page 18 TIMER/PRESET BUTTON Timer off function: With the unit on, press this button to select the time of appliance turning off, each press of the button allows you to set the shutdown interval from 1 to 15 hours, the LEDs on the control panel will light up based on your selection.
-
Page 19: Remote Control Operation
REMOTE CONTROL OPERATION Slide the cover open in the direction indicated by the arrow. Insert the batteries (AAA, LR03, 1,5 V - not provided) into the remote control and make sure the poles match. Put the cover back on. Point the remote control towards the receiver on the air conditioner. -
Page 20: Maintenance And Storage
If you wish to keep the water in the tank below room temperature in order to maximize cooling in warmer months, leave the two synthetic ice packs supplied in the freezer until solid, then add them to the water in the tank. The ice will absorb heat from the water. - Page 21 Opening clasp Opening Filter Dust clasp Honeycomb assembly filter filter Bottom Fig.1 Cleaning the tank and the water channel To clean the water tank, remove it from its seat and clean it thoroughly with a dry cloth. Remove the filter positioned inside the tank, clean it and let it dry before repositioning it.
- Page 22 STORAGE If the appliance is not used for prolonged periods, disconnect the power cord and store the appliance with this manual in its original packaging, in a cool and dry place. Before packaging, the honeycomb filter and dust-proof filter should be dry, and there is no water in the tank. POSSIBLE OPERATING PROBLEMS AND SOLUTION If the appliance has any operating anomalies, consult the table below to resolve any anomalies.
- Page 23 INFORMATION FOR THE CORRECT DISPOSAL OF THE PRODUCT IN ACCORDANCE WITH EUROPEAN DIRECTIVE 2012/19/EU This appliance may not be scrapped with domestic waste at the end of its life cycle. We call your attention to the crucial role played by the consumer in the re-use, recycling and other forms of recovery of such waste. The appliance must be scrapped by a sorted waste disposal centre or by returning it to the retailer (no charge is levied for this service), when you purchase a new equivalent appliance.
-
Page 24: Rafraîchisseur D'air Par Évaporation
RAFRAÎCHISSEUR D'AIR PAR ÉVAPORATION POLIFEMO DEDALO INSTRUCTIONS D’UTILISATION Lire attentivement ces instructions avant de faire fonctionner l’appareil ou avant toute opération d’entretien. Se conformer aux consignes de sécurité. Le non-respect de ces consignes peut causer des accidents et/ou des dommages. Conserver ces instructions pour toute consultation ultérieure. -
Page 25: Informations Générales Sur La Sécurité
INFORMATIONS GÉNÉRALES SUR LA SÉCURITÉ Utiliser cet appareil comme décrit dans cette notice d’utilisation. Tout usage autre que celui conseillé par le fabricant peut être la cause d’incendies, de chocs électriques ou d’accidents à des personnes. S’assurer que le type d’alimentation électrique est conforme aux spécifications électriques de l'appareil (220-240V~/50Hz). - Page 26 Ne pas plier ou poser d'objets lourds sur le cordon Ne pas utiliser l’appareil si les fils ou les fiches sont d'alimentation. endommagés. Ne pas essayer de changer soi-même le cordon d'alimentation. Si le cordon d'alimentation est endommagé, le faire remplacer par le fabricant, le revendeur ou une personne également qualifiée afin d'éviter tout danger.
-
Page 27: Description Des Pièces
DESCRIPTION DES PIÈCES 1. Panneau de contrôle 2. Bouton sur le panneau 3. Sortie d’air 4. Filtre anti-poussière et panneau d’évaporation 5. Réservoir d'eau 6. Roues multidirectionnelles COMMENT UTILISER L'APPAREIL Pour cet appareil, aucun type d’installation n’est nécessaire . Placer l'unité sur une surface plane et stable et brancher le cordon d’alimentation dans une prise de courant appropriée (220-240V~): l'appareil peut être mis en marche en appuyant sur la touche ON/OFF, l'appareil émet un son. -
Page 28: Télécommande
TÉLÉCOMMANDE Les fonctions de la télécommande sont les mêmes que celles du panneau de contrôle. PANNEAU DE CONTRÔLE TOUCHE ON/OFF Appuyez sur ce bouton sur le panneau de commande pour allumer ou éteindre l'appareil. Le mode de fonctionnement par défaut est la ventilation basse (vitesse 1) et la ventilation générale. TOUCHE SPEED Lorsque l'appareil est en marche, appuyez sur le bouton SPEED pour choisir les vitesses du ventilateur qui sont: haute (vitesse 4), moyenne (vitesse 3), basse (vitesse 2), très basse (vitesse 1). -
Page 29: Utilisation Avec La Télécommande
automatiquement. En maintenant le bouton Timer / Preset enfoncé, il est possible d'accélérer le réglage de la minuterie d'arrêt. Fonction préréglée (minuterie de marche): en mode Sleep, appuyez sur le bouton Timer / Preset pour sélectionner le réglage de la minuterie de marche de l'appareil, chaque fois que vous appuyez sur le bouton, vous pouvez régler l'intervalle de mise en marche de 1 à... -
Page 30: Remplissage Du Réservoir D'eau
sous des dispositifs de chauffage ou d'autres sources de chaleur. Retirer les piles de la télécommande lorsqu'elle n'est pas utilisée pendant une période prolongée. 10. Si aucun signal sonore ne retentit et que le symbole d'émission ne clignote pas sur l'écran d'affichage, cela signifie que les piles doivent être remplacées. -
Page 31: Entretien Et Stockage
Pour maintenir plus longtemps la température de l'eau du réservoir au-dessous de la température ambiante, de manière à favoriser le rafraîchissement pendant la saison la plus chaude, ajouter à l'eau du réservoir les deux tablettes de glace fournies et préalablement placée dans le congélateur pour le temps nécessaire à leur congélation (environ 4 heures). La glace absorbe la chaleur de l’eau. - Page 32 Crochet Support du d'ouverture filtre à Filtre en nid Filtre à poussière Assemblage d'abeille poussière du filtre Crochet Bottom Base Crochets Guide Fig.1 Nettoyage du réservoir et du canal d'eau Pour nettoyer le réservoir d'eau, retirez-le de son siège et nettoyez-le soigneusement avec un chiffon sec. Retirez le filtre placé...
-
Page 33: Problèmes De Fonctionnement Possibles Et Solution
STOCKAGE Pendant les périodes de non-utilisation, débrancher le cordon d'alimentation et ranger l'appareil dans sa boîte d'origine, avec la présente notice, dans un endroit frais et ventilé. Avant l'emballage, le Réservoir d’eau, le panneau en nid d'abeille et le filtre anti-poussière doivent être complètement sec et il ne doit pas être présente de l'eau dans le réservoir. - Page 34 INFORMATION POUR L'ÉLIMINATION CORRECTE DU PRODUIT CONFORMÉMENT À LA DIRECTIVE EUROPÉENNE 2012/19/UE À la fin de sa vie utile, cet appareil ne doit pas être jeté avec les déchets ménagers. Nous rappelons le rôle important du consommateur dans la contribution à la réutilisation, au recyclage et aux autres formes de récupération de ce type de déchets.
- Page 35 VERDUNSTUNGSKÜHLER POLIFEMO DEDALO GEBRAUCHSANLEITUNG Lesen Sie die vorliegende Gebrauchsanleitung aufmerksam durch, bevor Sie das Gerät in Betrieb nehmen oder warten. Halten Sie alle Sicherheitshinweise sorgfältig ein: Eine Nichtbeachtung kann zu Unfällen und/oder Schäden führen. Bewahren Sie diese Anleitung für zukünftiges Nachschlagen gut auf.
-
Page 36: Allgemeine Informationen Zur Sicherheit
ALLGEMEINE INFORMATIONEN ZUR SICHERHEIT Verwenden Sie dieses Gerät nur gemäß den in diesem Handbuch beschriebenen Anweisungen. Jeder nicht vom Hersteller empfohlene Einsatz kann Brände, Stromstöße oder Personenschäden verursachen. Stellen Sie sicher, dass die Stromversorgung den elektrischen Anforderungen des Geräts entspricht (220-240V~/50 Hz). ... - Page 37 Führen Sie keine Gegenstände in das Gitter des Geräts Versprühen Sie in der Nähe des Produkts keine ein. entflammbaren Substanzen oder Pestizide. Dadurch Dies könnte zu Lecks, Kurzschlüssen und Schäden am könnte das Produkt beschädigt werden. Produkt führen. Achtung!!! Nicht berühren. Stromschlaggefahr! Knicken Sie das Stromkabel nicht und stellen Sie Schalten Sie das Gerät nicht ein, wenn Kabel oder...
-
Page 38: Beschreibung Der Teile
Setzen Sie das Gerät nicht zu hohen oder zu niedrigen Verhindern Sie, dass der Bereich um den Kühler Temperaturen aus. Stellen Sie im Sommer sicher, feucht oder nass wird. Bei Feuchtigkeit den Auslass dass Sie häufig frisches Wasser hinzufügen, da die des Luftkühlers absenken. -
Page 39: Funktionsweise Des Geräts
FUNKTIONSWEISE DES GERÄTS Das Gerät erfordert keine Installation. Stellen Sie die Einheit auf einer flachen und stabilen Oberfläche auf und schließen Sie das Stromkabel an eine geeignete Steckdose an (220-240 V~ 50Hz): Das Gerät kann durch Drücken der ON / OFF-Taste in Betrieb genommen werden, das Gerät gibt einen Ton aus Verwenden Sie den Griff auf der Rückseite zum Verstellen des Gerätes. - Page 40 TASTE ON/OFF Drücken Sie diese Taste auf dem Bedienfeld, um das Gerät ein- oder auszuschalten. Die Standardbetriebsart ist niedrige Belüftung (Geschwindigkeit 1) und allgemeine Belüftung. TASTE SPEED Wenn das Gerät eingeschaltet ist, drücken Sie die Taste SPEED, um folgende Lüftergeschwindigkeiten auszuwählen: hoch (Geschwindigkeit 4), mittel (Geschwindigkeit 3), niedrig (Geschwindigkeit 2), sehr niedrig (Geschwindigkeit 1).
-
Page 41: Betrieb Mit Der Fernbedienung
BETRIEB MIT DER FERNBEDIENUNG Die Batterieabdeckung in Pfeilrichtung aufschieben. Legen Sie die Alkaline-Batterien (AAA, LR03/1,5V - (nicht vorgesehen) konform mit der Batterierichtlinie 2006/66 / EU und Änderungen der Richtlinie 56/2013 / EU in die Fernbedienung ein und achten Sie dabei auf die Polarität. Setzen Sie die Abdeckung wieder auf. -
Page 42: Wartung Und Lagerung
Wasser hinzufügen Maximaler Wasserstand Mindestwasserstand Wenn Sie die Wassertemperatur im Tank längere Zeit unter der Umgebungstemperatur halten möchten, um die Kühlung in der heißesten Jahreszeit zu begünstigen, fügen Sie die beiden synthetischen Eistabletten hinzu, die dem Wasser im Tank zugeführt werden, nachdem Sie es an Ort und Stelle belassen haben. Gefrierschrank für die für ihre vollständige Konsolidierung erforderliche Zeit (ca. - Page 43 Reinigung des Staubschutzfilters, des Wabenfilters. Befolgen Sie zum Reinigen der Teile die folgenden Anweisungen. Entfernen Sie die Filterbaugruppe, indem Sie sie durch Drücken auf den Öffnungshaken vom Gerät lösen. Entfernen Sie nach dem Entfernen vorsichtig den Wabenfilter, indem Sie ihn unter die Haken schieben. Entfernen Sie den Staubfilter und schieben Sie ihn immer von den Haken.
- Page 44 Filter Filter Wasserkanal LAGER Ziehen Sie bei Nichtgebrauch das Netzkabel ab und bewahren Sie das Gerät zusammen mit diesem Handbuch in der Originalverpackung an einem kühlen und belüfteten Ort auf. Vor dem Verpacken müssen der Wassertank, die Wabenplatte und der Staubschutzfilter vollkommen trocken sein und es darf sich kein Wasser im Tank befinden.
- Page 45 MÖGLICHE BETRIEBSPROBLEME UND LÖSUNG Wenn die Appliance Betriebsstörungen aufweist, lesen Sie die folgende Tabelle, um etwaige Anomalien zu beheben. Wenn sie weiterhin bestehen, wenden Sie sich an ein autorisiertes Servicecenter, um das Gerät zu reparieren. PROBLEM MÖGLICHE URSACHE LÖSUNG Das Netzkabel ist nicht oder nicht richtig Schließen Sie es richtig an angeschlossen Das Gerät funktioniert nicht...
- Page 46 INFORMATIONEN BEZÜGLICH DER KORREKTEN ENTSORGUNG DES PRODUKTES GEMÄSS DER EU- RICHTLINIE 2012/19/EU Am Ende seiner Lebensdauer darf dieses Gerät nicht im Haushaltsmüll entsorgt werden. Jeder Verbraucher kann einen wichtigen Beitrag zur erneuten Nutzung, zum Recycling und zu anderen Formen der Wiederverwendung dieser Altgeräte leisten.
- Page 47 REFRIGERADOR EVAPORADOR POLIFEMO DEDALO INSTRUCCIONES DE USO Leer las instrucciones detenidamente antes de encender el aparato o de hacer algún mantenimiento. Observar todas las instrucciones de seguridad; la inobservancia de las instrucciones puede ser fuente de accidentes y/o daños. Conservar estas instrucciones para futuras consultas.
-
Page 48: Información General Sobre La Seguridad
INFORMACIÓN GENERAL SOBRE LA SEGURIDAD Atenerse exclusivamente a las indicaciones de uso de este manual. Cualquier otro uso no recomendado por el fabricante puede provocar incendios, descargas eléctricas o accidentes personales. Cerciorarse de que el tipo de suministro eléctrico coincida con la tensión indicada en la etiqueta de datos del ventilador (220- 240V~/50Hz). - Page 49 No utilizar el aparato con el cable o la clavija No apoyar objetos pesados sobre el cable de dañados. intentar cambiar cable alimentación y no doblarlo. alimentación por cuenta propia. Si el cable de alimentación presenta daños, deberá ser sustituido por el fabricante, el revendedor u otra persona cualificada para evitar todo tipo de riesgo.
-
Page 50: Descripción De Las Partes
DESCRIPCIÓN DE LAS PARTES 1. Panel de control 2. Teclas en el panel 3. Salida de aire 4. Filtro de aire y panel de evaporación 5. Depósito de agua 6. Ruedas multidireccionales CÓMO UTILIZAR EL APARATO El dispositivo no requiere instalación. Coloque la unidad sobre una superficie plana y estable y conecte el cable de alimentación a una toma de corriente adecuada (220-240V ~ 50Hz): el aparato se puede encender presionando el botón ON / OFF, la unidad emitirá... -
Page 51: Mando A Distancia
MANDO A DISTANCIA Las funciones del mando a distancia son las mismas que las del panel de control. PANEL DE CONTROL TECLA ON/OFF Presione este botón en el panel de control para encender o apagar la unidad. El modo de funcionamiento predeterminado es ventilación baja (velocidad 1) y ventilación General. TECLA SPEED Cuando el aparato esté... - Page 52 TECLA TIMER / PRESET Función de temporizador de apagado: con la unidad encendida, presione este botón para seleccionar el temporizador de apagado del aparato, cada presión del botón le permite configurar el intervalo de apagado de 1 a 15 horas, los LED en el panel de control se iluminarán basado en su selección.
-
Page 53: Funcionamiento Con El Mando A Distancia
FUNCIONAMIENTO CON EL MANDO A DISTANCIA Desplazar para abrir la tapa siguiendo la dirección de la flecha. Introducir las baterías (AAA, LR03, 1,5V – no presentes) en el mando a distancia respetando las polaridades indicadas. Poner la tapa. Apuntar el mando a distancia al receptor del climatizador. El mando a distancia debería estar dentro de un radio de 6 metros desde el receptor. - Page 54 LLENADO DEL DEPÓSITO DEL AGUA ES NECESARIO LLENAR EL DEPÓSITO CON AGUA DESMINERALIZADA PARA HACER FUNCIONAR EL APARATO EN MODO REFRIGERACIÓN/HUMIDIFICACIÓN. El agua se inserta directamente en el tanque trasero. Antes de introducir el agua, verifique que no haya residuos de agua dentro de la bomba de agua, para evitar su fuga.
-
Page 55: Mantenimiento Y Almacenaje
MANTENIMIENTO Y ALMACENAJE ATENCIÓN: DESCONECTAR SIEMPRE LA CLAVIJA ANTES DE LIMPIAR EL APARATO O DE HACER MANTENIMIENTO. IMPORTANTE: NO SUMERGIR EL APARATO EN AGUA. Limpieza de la superficie exterior del aparato Utilizar un paño suave para quitar el polvo del aparato. Si esto no es suficiente, utilizar un paño suave humedecido con agua y detergente neutro a una temperatura inferior a 50°C. - Page 56 Limpieza del tanque y el canal de agua Para limpiar el depósito de agua, retírelo de su asiento y límpielo a fondo con un paño seco. Retire el filtro colocado dentro del tanque, límpielo y déjelo secar antes de reposicionarlo. Después de retirar el tanque, limpie cuidadosamente el canal de agua con un paño para eliminar el agua residual que pueda haberse formado.
- Page 57 POSIBLES PROBLEMAS DE FUNCIONAMIENTO Y SOLUCIÓN Si el aparato tiene alguna anomalía de funcionamiento, consulte la tabla a continuación para resolver cualquier anomalía. Si persisten, comuníquese con un centro de servicio autorizado para reparar el aparato. PROBLEMA CAUSA POSIBLE SOLUCIÓN El cable de alimentación no está...
- Page 58 INFORMACIÓN PARA LA CORRECTA ELIMINACIÓN DEL PRODUCTO EN VIRTUD DE LA DIRECTIVA EUROPEA 2012/19/UE Al final de su vida útil, este aparato no debe eliminarse junto a los desechos domésticos. Destacamos el importante papel de la contribución del consumidor a la reutilización, el reciclado y demás formas de recuperación de estos desechos.