
Manuels Connexes pour Klarfit Cycloony Mini Bike


Sommaire des Matières pour Klarfit Cycloony Mini Bike
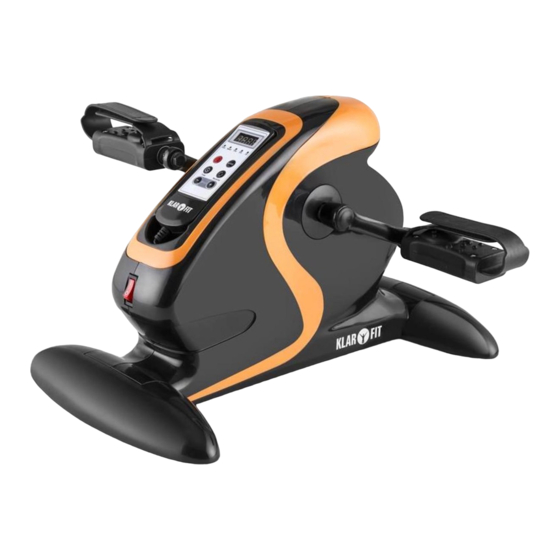
- Page 1 10026399 10026400 Cycloony Mini Bike Pedaltrainer Pedal Trainer Entraîneur à pédales Mini Bicicleta Estática Mini Cyclette...
-
Page 3: Table Des Matières
Sehr geehrter Kunde, wir gratulieren Ihnen zum Erwerb Ihres Gerätes. Lesen Sie die folgenden Hinweise sorgfältig durch und befolgen Sie diese, um möglichen Schäden vorzubeugen. Für Schäden, die durch Missachtung der Hinweise und unsachgemäßen Gebrauch entstehen, übernehmen wir keine Haftung. Scannen Sie den folgenden QR-Code, um Zugriff auf die aktuellste Bedienungsanleitung und weitere Informationen rund um das Produkt zu erhalten. -
Page 4: Sicherheitshinweise
SICHERHEITSHINWEISE • Lesen Sie sich diese Bedienungsanleitung vor dem Aufbauen und Benutzen des Gerätes aufmerksam durch. Ein sicherer und effektiver Gebrauch des Gerätes kann nur erzielt werden, wenn das Gerät ordnungsgemäß aufgebaut, gepflegt und benutzt wird. Stellen Sie sicher, dass sämtliche Personen, die dieses Gerät nutzen, über die Warnungen und Sicherheitshinweise informiert sind. -
Page 5: Geräteübersicht Und Zusammenbau
GERÄTEÜBERSICHT UND ZUSAMMENBAU Übersicht... - Page 6 Zusammenbau 1. Befestigen Sie den hinteren Stabilisator (B) mit Unterlegscheiben (E) und Schrauben (D) am Hauptrahmen (A), wie in Schritt 1 beschrieen. 2. Befestigen Sie den vorderen Stabilisator (B) mit Unterlegscheiben (E) und Schrauben (D) am Hauptrahmen (A), wie in Schritt 2 beschrieen. 3.
-
Page 7: Bedienfeld Und Bedienung
BEDIENFELD UND BEDIENUNG Bedienfeld und Tastenfunktionen Scan Geschwind. Zeit Distanz Kalorien Start / Stop Modus Zeit Richtungsänderung Geschwindigkeit Geschwindigkeit senken erhöhen Power Start und Stop. Time Auswahltaste Zeit (1-15 min). Mode Auswahltaste für die Anzeige der Werte für Geschwindigkeit, Zeit, Distanz und Kalorien. Reverse Taste zur Richtungsänderung der Pedalbewegung. - Page 8 Bedienung Power Drücken Sie auf die POWER-Taste, um mit Geschwindigkeitsstufe 1 und einer voreingestellten Zeit von 10 Minuten zu starten. Das Display zeigt abwechselnd die Werte für Geschwindigkeit, Zeit, Distanz und Kalorien an. Time Drücken Sie auf die TIME-Taste, um die Zeit der Trainingseinheit von 1 bis 15 Minuten einzustellen.
-
Page 9: Training Und Übungen
TRAINING UND ÜBUNGEN • Wenn Sie noch untrainiert sind, empfehlen wir Ihnen kurze Trainingseinheiten zwischen 3 bis 6 Minuten auf einer niedrigen Geschwindigkeitsstufe. Trainieren Sie zweimal täglich. Die voreingestellte Dauer beträgt 5 Minuten. • Erhöhen Sie die Dauer jeder Trainingseinheit Stück für Stück, bis Sie zweimal täglich 15 Minuten erreichen. - Page 10 Übung 2: Liegend 1. Wenn Sie sich hinlegen, vergewissern Sie sich, dass der untere Teil Ihres Rückens (Lendenbereich) aufliegt, während sie den Pedaltrainer verwenden. Wir empfehlen, sich ein kleines Kissen unter den Lendenbereich und den Kopf zu legen. 2. Legen Sie sich mit beiden Füßen in den Pedalen hin (es ist empfehlenswert, die Pedalschlaufen zu verwenden).
-
Page 11: Pflege Und Wartung
3. Nehmen Sie die Fernbedienung aus der Halterung und drücken Sie die POWER-Taste. Die Pedale beginnen, sich zu drehen. 4. Bleiben Sie nach Beenden der Trainingseinheit noch einen Moment in dieser Position sitzen und stehen Sie dann langsam auf. PFLEGE UND WARTUNG Hinweis: Wie bei allen Trainingsgeräten mit mechanischen, beweglichen Komponenten kann es auch bei diesem Produkt vorkommen, dass sich Schrauben durch häufigen Gebrauch lockern. -
Page 12: Spezielle Entsorgungshinweise Für Verbraucher In Deutschland
SPEZIELLE ENTSORGUNGSHINWEISE FÜR VERBRAUCHER IN DEUTSCHLAND Entsorgen Sie Ihre Altgeräte fachgerecht. Dadurch wird gewährleistet, dass die Altgeräte umweltgerecht verwertet und negative Auswirkungen auf die Umwelt und menschliche Gesundheit vermieden werden. Bei der Entsorgung sind folgende Regeln zu beachten: • Jeder Verbraucher ist gesetzlich verpflichtet, Elektro- und Elektronikaltgeräte (Altgeräte) sowie Batterien und Akkus getrennt vom Hausmüll zu entsorgen. - Page 13 • Bei einem Vertrieb unter Verwendung von Fernkommunikationsmitteln ist die unentgeltliche Abholung am Ort der Abgabe auf Elektro- und Elektronikgeräte der Kategorien 1, 2 und 4 gemäß § 2 Abs. 1 ElektroG, nämlich „Wärmeüberträger“, „Bildschirmgeräte“ (Oberfläche von mehr als 100 cm²) oder „Großgeräte“ (letztere mit mindestens einer äußeren Abmessung über 50 Zentimeter) beschränkt.
-
Page 14: Hinweise Zur Entsorgung
HINWEISE ZUR ENTSORGUNG Wenn es in Ihrem Land eine gesetzliche Regelung zur Entsorgung von elektrischen und elektronischen Geräten gibt, weist dieses Symbol auf dem Produkt oder auf der Verpackung darauf hin, dass dieses Produkt nicht im Hausmüll entsorgt werden darf. Stattdessen muss es zu einer Sammelstelle für das Recycling von elektrischen und elektronischen Geräten gebracht werden. -
Page 15: Technical Data
Dear Customer, Congratulations on purchasing this equipment. Please read this manual carefully and take care of the following hints to avoid damages. Any failure caused by ignoring the items and cautions mentioned in the instruction manual is not covered by our warranty and any liability. Scan the QR code to get access to the latest user manual and other information about the product. -
Page 16: Safety Instructions
SAFETY INSTRUCTIONS • Please read these operating instructions carefully before setting up and using the device. Safe and effective use of the unit can only be achieved if it is properly assembled, maintained and used. Make sure that all persons who use this device are informed of the warnings and safety instructions. -
Page 17: Overview And Assembly
OVERVIEW AND ASSEMBLY Overview... - Page 18 Assembly 1. Attach the rear stabilizer (B) to the main frame (A) using washers (E) and screws (D) as described in step 1. 2. Attach the front stabilizer (B) to the main frame (A) using washers (E) and screws (D) as described in step 2. 3.
-
Page 19: Control Panel And Operation
CONTROL PANEL AND OPERATION Control Panel and Key Functions Scan Speed Time Distance Calories Start / Stop Mode Time Change of direction Decrease Speed Increase Speed Power Start and Stop. Time Selection key Time (1-15 min). Mode Selection key for displaying the values for speed, time, distance and calories. - Page 20 Operation Power Press the POWER button to start at speed 1 and a preset time of 10 minutes. The display alternates between speed, time, distance and calories. Time Press the TIME button to set the workout time from 1 to 15 minutes.
-
Page 21: Training And Exercises
TRAINING AND EXERCISES • If you are still untrained, we recommend short training sessions between 3 and 6 minutes at a low speed. Exercise twice a day. The preset duration is 5 minutes. • Increase the duration of each session piece by piece until you reach 15 minutes twice daily. - Page 22 Exercise 2: Lying down 1. When lying down, make sure that the lower part of your back (lumbar re- gion) is lying down while using the pedal trainer. We recommend that you place a small cushion under your lumbar region and head. 2.
-
Page 23: Care And Maintenance
3. Remove the remote control from the cradle and press the power button. The pedals will begin to rotate. 4. Sit in this position for a moment after finishing the workout, then slowly stand up. CARE AND MAINTENANCE Note: As with all training machines with mechanical, moving components, screws may loosen due to frequent use. -
Page 24: Disposal Considerations
DISPOSAL CONSIDERATIONS If there is a legal regulation for the disposal of electrical and electronic devices in your country, this symbol on the product or on the packaging indicates that this product must not be disposed of with household waste. Instead, it must be taken to a collection point for the recycling of electrical and electronic equipment. -
Page 25: Fiche Technique
Chère cliente, cher client, Toutes nos félicitations pour l’acquisition de ce nouvel appareil. Veuillez lire attentivement et respecter les instructions de ce mode d’emploi afin d’éviter d’éventuels dommages. Nous ne saurions être tenus pour responsables des dommages dus au non-respect des consignes et à... -
Page 26: Consignes De Sécurité
CONSIGNES DE SÉCURITÉ • N‘assemblez pas l‘appareil avant d‘avoir lu entièrement le mode d‘emploi. La sécurité et l‘efficacité de l‘appareil ne peuvent être garanties que si l‘appareil a été correctement monté, entretenu et utilisé. Il est de votre responsabilité de vous assurer que tous les utilisateurs de l‘appareil sont informés des avertissements et des précautions. -
Page 27: Aperçu De L'appareil Et Assemblage
APERÇU DE L‘APPAREIL ET ASSEMBLAGE Aperçu... -
Page 28: Assemblage
Assemblage 1. Fixez le stabilisateur arrière (B) avec les rondelles (E) et les vis (D) au cadre principal (A) comme décrit à l‘étape 1. 2. Fixez le stabilisateur avant (B) avec les rondelles (E) et les vis (D) au cadre principal (A) comme décrit à... -
Page 29: Panneau Commande Et Utilisation
PANNEAU COMMANDE ET UTILISATION Panneau de commande et fonctions des touches Scan Vitesse Durée Distance Calories Start / Stop Mode Durée Inversion du sens Pour réduire la vitesse Pour augmenter la vitesse Power Start et Stop. Time Touche de sélection de la durée (1-15 min). Mode Touche de sélection pour l'affichage des valeurs de vitesse, de temps, de distance et de calories. -
Page 30: Utilisation
Utilisation Power Appuyez sur la touche POWER pour démarrer à la vitesse 1 et avec une durée prédéfinie de 10 minutes. L'écran affiche alternativement les valeurs de vitesse, de durée, de distance et de calories. Time Appuyez sur la touche TIME pour régler la durée d’entraînement de 1 à... -
Page 31: Entraînement Et Exercices
ENTRAÎNEMENT ET EXERCICES • Si vous n‘êtes pas encore entraîné, nous vous recommandons de commencer par 3 à 6 minutes à faible vitesse. Faites de l‘exercice deux fois par jour. La durée par défaut est de 5 minutes. • Augmentez la durée de chaque session, pas à pas, jusqu‘à atteindre 15 minutes deux fois par jour. - Page 32 Exercice 2: couché 1. Lorsque vous vous allongez, assurez-vous que la partie inférieure de votre dos (région lombaire) repose pendant que vous utilisez l’entraîneur à pédales. Nous vous recommandons de placer un petit oreiller sous la région lombaire et la tête. 2.
-
Page 33: Entretien Et Maintenance
3. Retirez la télécommande du support et appuyez sur la touche POWER. Les pédales commencent à tourner. 4. Après avoir terminé la séance d’entraînement, restez dans cette position pendant un moment, puis relevez-vous lentement. ENTRETIEN ET MAINTENANCE Remarque : Comme pour tous les appareils d’exercice avec des pièces mécaniques mobiles, il peut arriver que les vis de ce produit se desserrent en raison d‘une utilisation fréquente. -
Page 34: Conseils Pour Le Recyclage
CONSEILS POUR LE RECYCLAGE S‘il existe une réglementation pour l‘élimination ou le recyclage des appareils électriques et électroniques dans votre pays, ce symbole sur le produit ou sur l‘emballage indique que cet appareil ne doit pas être jeté avec les ordures ménagères. Vous devez le déposer dans un point de collecte pour le recyclage des équipements électriques et électroniques. -
Page 35: Datos Técnicos
Estimado cliente, Le felicitamos por la adquisición de este producto. Lea atentamente el siguiente manual y siga cuidadosamente las instrucciones de uso con el fin de evitar daños posibles. La empresa no se responsabiliza de los daños ocasionados por un uso indebido del producto o por haber desatendido las indicaciones de seguridad. -
Page 36: Instrucciones De Seguridad
INSTRUCCIONES DE SEGURIDAD • Lea atentamente el manual de instrucciones antes del primer uso y guárdelo para futuras consultas. El fabricante se reserva el derecho de mejorar su producto sin previo aviso. En consecuencia, las fotos pueden variar con el producto y sirven como guía. Conserve este manual en un lugar seguro de tal forma que pueda consultarlo posteriormente. -
Page 37: Descripción Del Aparato Y Montaje
DESCRIPCIÓN DEL APARATO Y MONTAJE Visión general... - Page 38 Montaje 1. Coloque el estabilizador trasero (B) con arandelas (E) y tornillos (D) al cuadro principal (A), como se muestra en el paso número 1. 2. Coloque el estabilizador trasero (B) con arandelas (E) y tornillos (D) al cuadro principal (A), como se muestra en el paso número 2. 3.
-
Page 39: Panel De Control Y Funcionamiento
PANEL DE CONTROL Y FUNCIONAMIENTO Panel de control y funciones de las teclas Escanear Velocidad Tiempo Distancia Calorías Start / Stop Modo Tiempo Cambio de dirección Disminuir velocidad Aumentar velocidad Power Empezar y parar Tiempo Configuración del tiempo (1-15 min). Modo Tecla para mostrar valores de velocidad, tiempo, distancia y calorías... - Page 40 Funcionamiento Power Pulse la tecla POWER para comenzar a velocidad 1 con un tiempo por defecto de 10 min. La pantalla muestra alternativamente los parámetros de velocidad, tiempo, distancia y calorías. Time Pulse la tecla TIME para configurar el tiempo entre 1 y 15 min. Para una configuración más rápida mantenga pulsado el botón hasta que se muestre el tiempo deseado.
-
Page 41: Entrenamiento Y Ejercicios
ENTRENAMIENTO Y EJERCICIOS • Si está desenfrenado le recomendamos sesiones cortas de entrenamiento entre 3 y 6 minutos a baja velocidad. Entrene dos veces al día. La duración por defecto es de 5 minutos. • Aumente la duración de cada sesión poco a poco hasta que alcance los 15 minutos dos veces al día. - Page 42 Ejercicio 2: tumbado 1. Cuando se tumbe asegúrese de que la parte baja de su espalda (región lumbar) está apoyada mientras usa el aparato Le recomendamos colocar una pequeña almohada en el área lumbar. 2. Túmbese con los pies en los pedales (le recomendamos utilizar las correas de los pedales) 3.
-
Page 43: Limpieza Y Mantenimiento
3. Retire el mando del soporte y pulse el botón POWER. Los pedales empiezan a girar. 4. Tras terminar el entrenamiento permanezca un momento sentado y levántese despacio. LIMPIEZA Y MANTENIMIENTO Nota : Como ocurre con todos los aparatos de entrenamiento que tienen piezas móviles, los tornillos de estas piezas pueden aflojarse debido al uso frecuente. -
Page 44: Indicaciones Sobre La Retirada Del Aparato
INDICACIONES SOBRE LA RETIRADA DEL APARATO Si en su país existe una disposición legal relativa a la eliminación de aparatos eléctricos y electrónicos, este símbolo estampado en el producto o en el embalaje advierte que no debe eliminarse como residuo doméstico. -
Page 45: Dati Tecnici
Gentile cliente, La ringraziamo per aver acquistato il nostro prodotto. La preghiamo di leggere attentamente le seguenti istruzioni e di seguirle per evitare eventuali danni. Si declina ogni responsabilità per danni derivati da una mancata osservazione delle istruzioni e da un uso improprio del dispositivo. -
Page 46: Avvertenze Di Sicurezza
AVVERTENZE DI SICUREZZA • Leggere attentamente il manuale di istruzioni prima di montare e utilizzare il dispositivo. Un utilizzo sicuro ed efficace può essere raggiunto solo se il dispositivo viene montato, curato e usato correttamente. Assicurarsi che tutte le persone che usano questo dispositivo siano informate sulle avvertenze e istruzioni di sicurezza. -
Page 47: Descrizione Del Prodotto E Montaggio
DESCRIZIONE DEL PRODOTTO E MONTAGGIO Panoramica... - Page 48 Montaggio 1. Applicare lo stabilizzatore posteriore (B) al telaio principale (A) con le rondelle (E) e le viti (D) come descritto nella figura 1. 2. Applicare lo stabilizzatore anteriore (B) al telaio principale (A) con le rondelle (E) e le viti (D) come descritto nella figura 2. 3.
-
Page 49: Pannello Di Controllo E Comando
PANNELLO DI CONTROLLO E COMANDO Pannello di controllo e funzioni dei tasti Scan Velocità Tempo Distanza Calorie Start / Stop Modalità Tempo Cambio direzione Diminuire la velocità Aumentare la velocità Power Start e stop. Time Tasto di selezione tempo (1-15 min). Mode Tasto di selezione per l’indicazione dei valori per velocità, tempo, distanza e calorie. - Page 50 Comando Power Premere il tasto POWER per iniziare dal livello 1 con un tempo predefinito di 10 minuti. Sul display vengono visualizzati alternativamente i valori per la velocità, il tempo, la distanza e le calorie. Time Premere il tasto TIME per impostare la durata dell’allenamento da 1 a 15 minuti.
-
Page 51: Allenamento Ed Esercizi
ALLENAMENTO ED ESERCIZI • Consigliamo a chi è fuori allenamento di iniziare con brevi sessioni da 3 a 6 minuti a un livello basso. Allenarsi due volte al giorno. La durata predefinita è di 5 minuti. • Aumentare la durata di ogni sessione un po’ alla volta fino a raggiungere 15 minuti due volte al giorno. - Page 52 Esercizio 2: da sdraiati 1. Quando ci si sdraia assicurarsi che la parte inferiore della schiena (zona lombare) sia appoggiata durante l’utilizzo della pedaliera. Consigliamo di sistemare un piccolo cuscino sotto la zona lombare e la testa. 2. Sdraiarsi inserendo entrambi i piedi nei pedali (è consigliabile usare i cinturini).
-
Page 53: Pulizia E Manutenzione
3. Togliere il telecomando dall’attacco e premere il tasto POWER. I pedali iniziano a girare. 4. Dopo la sessione restare per un momento seduti in questa posizione e poi alzarsi lentamente. PULIZIA E MANUTENZIONE Nota: come per tutti gli attrezzi ginnici dotati di componenti meccaniche mobili, può... -
Page 54: Avviso Di Smaltimento
AVVISO DI SMALTIMENTO Se nel proprio paese si applicano le regolamentazioni inerenti lo smaltimento di dispositivi elettrici ed elettronici, questo simbolo sul prodotto o sulla confezione segnala che questi prodotti non possono essere smaltiti con i rifiuti normali e devono essere portati a un punto di raccolta di dispositivi elettrici ed elettronici.