
Manuels Connexes pour Yamaha YAS-108


Sommaire des Matières pour Yamaha YAS-108
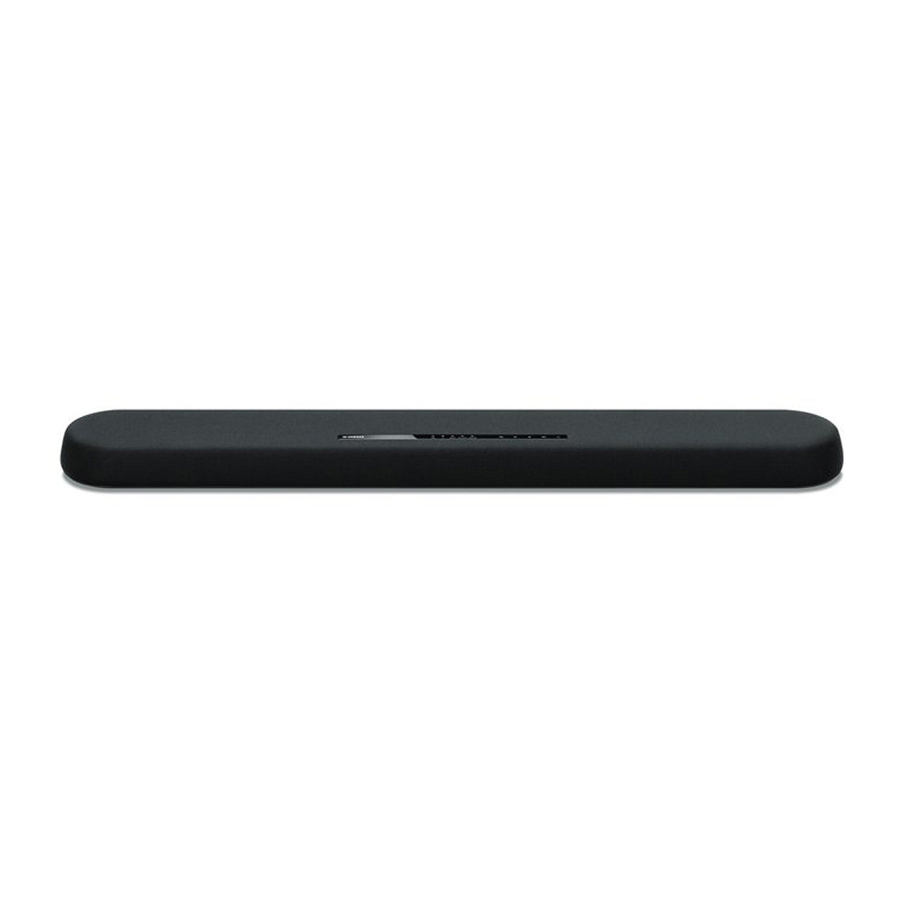
- Page 1 English Français Front Surround System Système Surround Frontal Owner’s Manual Mode d’emploi...
-
Page 2: Table Des Matières
CONTENTS PRECAUTIONS 5 Connecting the power cord........26 Connecting the power cord....................26 NOTICE AND INFORMATION PLAYBACK Basic operations............27 BEFORE USING THE UNIT Basic procedure for playback....................27 Enjoying your favorite sound........29 Features................. 14 Playback with 3D surround sound..................29 Accessories.............. - Page 3 CONFIGURATIONS Configuring various functions........37 Changing the brightness of the indicators (DIMMER)..........37 Configuring the HDMI control function................37 Configuring HDMI audio output..................38 Setting the auto power standby function..............38 Enabling/disabling touch panel control (child lock function)......... 39 Configuring the Bluetooth standby function..............39 Initializing the unit........................
-
Page 4: Explanation Of Graphical Symbols
Explanation of Graphical Symbols The lightning flash with arrowhead symbol within CAUTION an equilateral triangle is intended to alert the user to the presence of uninsulated “dangerous RISK OF ELECTRIC SHOCK voltage” within the product’s enclosure that may be DO NOT OPEN of sufficient magnitude to constitute a risk of electric shock to persons. - Page 5 FCC/IC NOTICE (U.S.A. and Canada) • This equipment compiles with FCC/IC radiation exposure limits set forth for an uncontrolled environment and meets the FCC radio frequency (RF) Exposure Guidelines and RSS-102 of the IC radio frequency (RF) Exposure rules. This equipment has very low levels of RF energy that it deemed to comply without maximum permissive exposure evaluation (MPE).
-
Page 6: Precautions
Yamaha service personnel. – Foreign material or water gets into the interior of the unit. • Yamaha cannot be held responsible for injury to you – There is a loss of sound during use. or damage of the products caused by improper use –... - Page 7 Be sure to use the supplied power cord. Also, do not use the supplied Water warning power cord for other units. Failure to observe the above may cause a fire, burns, or malfunctions. Do not expose the unit to rain, use it near water or in damp or wet Check the electric plug periodically and remove any dirt or dust which may conditions, or place on it any containers (such as vases, bottles or have accumulated on it.
- Page 8 Do not disassemble a battery. When disconnecting the power plug, always hold the plug itself and not If the contents of the battery get on your hands or in your eyes, it can the cord. cause blindness or chemical burns. Pulling by the cord can damage it and cause electric shocks or a fire.
-
Page 9: Battery Use
Keep batteries away from children. Hearing loss A child could accidentally swallow a battery. Failure to observe this may also cause inflammation due to battery fluid leaks. Do not use the unit for a long period of time at a high or uncomfortable Do not put in a pocket or bag, carry, or store batteries together with pieces volume level, since this can cause permanent hearing loss. -
Page 10: Notice And Information
NOTICE AND INFORMATION Notice Indicates points that you must observe in order to prevent product Connections failure, damage or malfunction and data loss. • If connecting external units, be sure to thoroughly read the Power supply manual for each unit and connect them in accordance with the instructions. -
Page 11: Maintenance And Care
Maintenance and care • When cleaning the unit, use a dry, soft cloth. Using chemicals such as benzine or thinner, cleaning agents, or chemical scrubbing cloths can cause discoloration or deformation. Speakers • Do not touch the speaker units. Failure to observe this may damage the speaker units. - Page 12 ® The Bluetooth word mark and logos are registered trademarks owned by Bluetooth SIG, Inc. and any use of such marks by Yamaha Corporation is Manufactured under license from Dolby Laboratories. Dolby, Dolby Audio, under license. Pro Logic, and the double-D symbol are trademarks of Dolby Laboratories.
- Page 13 About content in this manual • This manual is for the following readers: – the users of the unit – the constructor, builder and dealer that mount the unit on the wall • This manual uses the following signal words for the important information: –...
-
Page 14: Before Using The Unit
BEFORE USING THE UNIT Features Introduction This front surround system with its built-in subwoofers allows for the enjoyment of dynamic sound with video played on a TV. • Play audio from a TV or BD/DVD player in surround sound. • Play audio from a Bluetooth device with excellent quality. - Page 15 Compressed Music Enhancer technology improves sound quality 3D surround playback and characteristics, and can be used to enjoy realistic and impressive sound. For details, see the following: Surround sound can be heard not only from horizontal directions, • “Connecting the unit to two Bluetooth devices simultaneously but also from varying heights when DTS Virtual:X is used.
-
Page 16: Accessories
Accessories Using the remote control Checking the accessories Preparing the remote control Make sure you have received all of the following accessories. Remove the battery’s insulating strip before attempting to use the remote control. The unit Remote control Power cord Optical digital audio Battery’s insulating strip * A CR2025 Lithium... -
Page 17: Operating Range Of The Remote Control
Operating range of the remote control Replacing the battery in the remote control Operate the remote control within the range shown in the following figure. Press and hold the release tab firmly in the direction indicated by [A], and slowly slide the battery holder out in the direction indicated by [B]. -
Page 18: Part Names And Functions
Part names and functions Part names and functions of the front/top panel The part names and functions of the front and top panels are as follows. The indicators on the top panel flash or glow, Adjust the volume (p.27). to show the operation and setting status. In this manual, indicators status, such as off, Turn on or off the unit. - Page 19 Receive infrared signals from the remote control of the unit (p.17).
- Page 20 Part names and functions of the rear panel The part names and functions of the rear panel are as follows. The illustrations in this manual include labels next to the jacks on the bottom of the unit for easy identification. Inside the cover Connect the power cord of this unit (p.26).
- Page 21 Part names and functions of the remote control The part names and functions of the supplied remote control are as follows. Turn on/off the unit. Indicate audio signal information of the input source being played or bass extension setting (p.35). Hold down the key for more than 3 seconds to enable/disable the Bluetooth standby The indicator for the last input source selected...
-
Page 22: Preparation
PREPARATION Installation Installing the unit on a TV stand, etc. Position the unit with the touch panel facing up on a TV stand, etc. Remote control Touch panel sensor... -
Page 23: Connecting A Tv
Connecting a TV Connecting a TV that supports Audio Return Channel (ARC) Connect the TV, which supports Audio Return Channel (ARC), to the unit with an HDMI cable (sold separately). HDMI OUT jack HDMI input jack HDMI (ARC) HDMI HDMI HDMI HDMI The unit (rear) -
Page 24: Connecting A Tv That Does Not Support Audio Return Channel (Arc)
Connecting a TV that does not support Audio Return Channel (ARC) Connect the TV to the unit with an HDMI cable (sold separately) and an optical digital audio cable (supplied). HDMI OUT jack HDMI input jack HDMI HDMI HDMI HDMI HDMI OPTICAL The unit... -
Page 25: Connecting Playback Devices
Connecting playback devices HDMI connection with a playback device Analog connection with a playback device Connect a playback device such as a BD/DVD player to the unit with an HDMI cable (sold separately). Use the HDMI cable to best Connect a playback device, such as a game console or a TV that connect a playback device equipped with the HDMI output jack. -
Page 26: Connecting An External Subwoofer
Connecting an external Connecting the power cord subwoofer Connecting the power cord Connecting an external subwoofer After all connections are complete, connect the supplied power cord to the AC IN jack on the unit and plug the power cord into an The unit has dual built-in subwoofers;... -
Page 27: Playback
PLAYBACK Basic operations Basic procedure for playback Basic procedure for playing back music is as follows. HDMI: Sound from a device connected to the HDMI IN jack TV: TV audio ANALOG: Sound from a device connected to the Input buttons ANALOG input jack BLUETOOTH: Sound from a Bluetooth device The indicator for the selected input source glows. - Page 28 Volume down (-) Volume up (+) When audio is output from both TV speaker and the unit, mute the TV sound. Flash (on mute) Volume down (-) Volume up (+)
-
Page 29: Enjoying Your Favorite Sound
Enjoying your favorite sound Playback with 3D surround sound Playback with surround sound Press 3D SURROUND to switch to 3D surround playback according Press SURROUND to switch to surround playback according to the to the input source or your individual preference. input source or your individual preference. -
Page 30: Playback Of Human Voices Clearly (Clear Voice)
Playback of human voices clearly (clear Enjoying enhanced bass sound (bass voice) extension) Press CLEAR VOICE to turn on the clear voice function. Human Press BASS EXTENSION to turn on the bass extension function. You voices such as lines in movies and TV shows, or news and sport can enjoy enhanced bass sound and more powerful sound. -
Page 31: Use Of A Bluetooth® Device
Use of a Bluetooth® device Listening to music stored on a Bluetooth® device The BLUETOOTH indicator on the unit flashes. Music files stored on a Bluetooth device, such as a smartphone, smart speaker, or digital music player, can be played back on the unit over a wireless connection. - Page 32 If a passkey (PIN) is required, enter the number “0000”. device. PIN 0 0 0 0 YAS-108 Yamaha When the connection between the Bluetooth device and the unit is established, a completion message is displayed on the Bluetooth device, and the BLUETOOTH indicator on the unit glows.
-
Page 33: Connecting The Unit To Two Bluetooth Devices Simultaneously (Multipoint Connection)
Connecting the unit to two Bluetooth devices simultaneously (multipoint connection) The unit can be connected to two Bluetooth devices at the same time. Follow these instructions to switch between the Bluetooth devices for playback. The unit will begin playing audio from the other Bluetooth device. -
Page 34: Useful Features For Playback
Useful features for playback Using a TV’s remote control to operate Both the TV and the unit turn on/off at the same time. the unit (HDMI control) The HDMI control function coordinates TV and unit operation so that The unit's input source switches accordingly when the TV’s input source is switched. -
Page 35: Showing Audio Information With Playback
Showing audio information with HDMI glows (white): Dolby Digital playback HDMI glows (red): DTS TV glows (white): AAC The type of audio signal being played, whether Dolby Pro Logic II is HDMI and TV off: PCM/analog input/no input enabled or disabled, and bass extension and clear voice settings can be confirmed by the status of indicators. -
Page 36: Operating The Unit With The Home Theater Controller App
In addition to basic unit operation, various functions, including surround mode selection and tone adjustment, can be more precisely configured using the app than is possible using the remote control. For details on the HOME THEATER CONTROLLER app, see the product information on the Yamaha website. -
Page 37: Configurations
CONFIGURATIONS Configuring various functions Changing the brightness of the indicators (DIMMER) The HDMI control function is enabled or disabled, and the unit turns on. The indicator shows HDMI control Change the brightness of the indicators on the unit. function status for several seconds immediately after the Each time DIMMER is pressed, the brightness of the indicators unit is turned on. -
Page 38: Configuring Hdmi Audio Output
Configuring HDMI audio output Setting the auto power standby function Select the device from which audio input via the unit’s HDMI IN jack Enabling the auto power standby function prevents the unit from will be played when the HDMI control function is disabled. HDMI remaining on when not in use. -
Page 39: Enabling/Disabling Touch Panel Control (Child Lock Function)
Enabling/disabling touch panel control Configuring the Bluetooth standby (child lock function) function Disable touch panel control to prevent children from accidentally If the Bluetooth standby function is enabled, the unit will be turned operating the unit. When touch panel control is disabled, operations on and will be ready to play sound from the Bluetooth device when can be performed only via the remote control or dedicated free Bluetooth connection is made on a Bluetooth device. -
Page 40: Initializing The Unit
Initializing the unit Reset the settings of the unit to the factory presets. Flash (initialized) -
Page 41: Appendix
If the power still turns off frequently, unplug the contact the nearest authorized Yamaha dealer or service center. power cord from the AC wall outlet and contact the nearest... - Page 42 Unplug the power cord from the AC wall outlet and plug it the power cord from the AC wall outlet and contact the nearest again. authorized Yamaha dealer or service center. The unit turns on by itself No operations can be performed from the unit’s touch panel...
- Page 43 When the unit is turned off, video and/or The unit cannot be operated using the audio from a playback device are not TV’s remote control output to the TV Confirm the settings are properly configured as follows. – The HDMI control function of the unit is enabled. Enable the HDMI control function.
- Page 44 When any problem appears (Audio) When connecting a TV that supports ARC (Audio Return Channel) to the unit using an HDMI cable only, enable the HDMI control function. No sound To output audio signals from the unit with the HDMI control function disabled, connect the TV’s audio output jack to the unit’s TV input jack (optical digital) via the optical digital audio Select an appropriate input source.
- Page 45 The volume decreases when the unit is Noise is heard turned on Move those devices away from the unit. To prevent excessive loudness, the unit automatically controls its volume within a certain level when the unit is turned on. Turn up the volume as required.
-
Page 46: When Any Problem Appears (General)
When any problem appears (Bluetooth®) Terminate the current Bluetooth connection, and then connect to the new device. The unit cannot be connected to a Bluetooth® device Terminate one of the Bluetooth connections, and then connect to the new device. Select Bluetooth as the input source. For details, see the following: No sound can be heard, or the sound cuts –... - Page 47 Do not use the unit near devices that emit electromagnetic waves. Stop playback on the Bluetooth device from which audio is currently being played, and start playback on the other Bluetooth device.
-
Page 48: Specifications
Specifications Specifications Supported audio signal PCM (up to 5.1ch) The specifications of the unit are as follows. Dolby Digital (up to 5.1ch) DTS Digital Surround (up to 5.1ch) Maximum Rated Output Power • Front L/R 30 W × 2ch HDMI 1 (HDMI IN) •... -
Page 49: Supported Hdmi Audio And Video Formats
Bluetooth class Bluetooth Class2 Dimensions (W x H x D) 890 × 53 × 131 mm • Installing the unit in front of a TV, etc. Range (line-of-sight) Approx. 10 m (33 ft) (35" × 2-1/8" × 5-1/8") 890 × 131 × 62 mm •... -
Page 50: Supported Digital Audio Formats
• High Dynamic Range (HDR) video Supported digital audio formats – HDR10 – HLG The following digital audio formats can be used by the unit. The unit is compatible with the following resolutions. • VGA • 480i/60 Hz 2ch, 32 kHz to 96 kHz, CD, DVD-Video, DVD 2ch Linear PCM •... -
Page 51: Information For Qualified Contractors Or Dealers
Information for qualified contractors or dealers Mounting the unit on a wall Mount the unit on a wall so that the touch panel faces forward. Remote control Touch panel Mounting template (supplied) sensor Screw holes Tapes or thumbtacks... - Page 52 457 mm (18") Mounting holes on the bottom of the unit 4 to 5 mm 7 to 9 mm (#8 to #10) (1/4" to 3/8") 20 mm (3/4") or more Touch panel 13 to 15 mm (1/2" to 5/8") Spacers...
- Page 53 TABLE DES MATIÈRES 4 Raccordement d’un caisson de graves externe PRÉCAUTIONS D'USAGE .................. 27 Raccordement d’un caisson de graves externe............27 AVIS ET INFORMATIONS 5 Branchement du cordon d’alimentation....27 Branchement du cordon d’alimentation................ 27 AVANT D'UTILISER L'UNITÉ LECTURE Caractéristiques............15 Fonctionnement de base..........
- Page 54 CONFIGURATIONS Configuration des diverses fonctions......38 Modification de la luminosité des témoins (DIMMER)..........38 Configuration de la fonction de contrôle HDMI............38 Configuration de la sortie audio HDMI audio..............39 Réglage de la fonction de veille automatique.............. 39 Activation/désactivation de la commande de l’écran tactile (fonction de verrouillage enfant)........................
-
Page 55: Explication Des Symboles Graphiques
Explication des symboles graphiques L'éclair avec une flèche à l'intérieur d'un triangle équilatéral est destiné à attirer l'attention de l'utilisateur sur la présence d'une « tension dangereuse » non isolée à l'intérieur de l'appareil, ATTENTION: POUR RÉDUIRE LES RISQUES D’INCENDIE ET DE pouvant être suffisamment élevée pour constituer DÉCHARGE ELECTRIQUE, NE PAS RETIRER LE COUVERCLE (OU LE PANNEAU ARRIÈRE). - Page 56 AVIS FCC / IC (États-Unis et Canada) • Cet équipement est conforme aux limites d'exposition aux rayonnements énoncées pour un environnement non contrôlé et respecte les règles les radioélectriques (RF) de la FCC lignes directrices d'exposition et d'exposition aux fréquences radioélectriques (RF) CNR-102 de l'IC.
-
Page 57: Précautions D'usage
– Un corps étranger ou de l’eau a pénétré à l’intérieur de l’appareil. • Yamaha ne peut être tenu responsable des – Une brusque perte de son est survenue durant l’utilisation de l’appareil. dommages corporels ou matériels causés par une –... - Page 58 Assurez-vous d’utiliser l’appareil avec la tension d’alimentation qui y est Démontage interdit imprimée. L'absence de raccordement à une prise secteur appropriée pourrait Ne tentez pas de démonter ou de modifier l’appareil. provoquer un incendie, des chocs électriques ou des dysfonctionnements. Le non-respect de cette procédure risque d'entraîner un incendie, des Veillez à...
-
Page 59: Utilisation Des Piles
Utilisation des piles ATTENTION N’AVALEZ PAS LES PILES SOUS PEINE DE BRÛLURE CHIMIQUE. La télécommande fournie avec ce produit contient une pile bouton. Si la pile bouton est avalée, elle peut provoquer de graves brûlures internes en Ce contenu indique « un risque de blessures ». seulement 2 heures et entraîner la mort. -
Page 60: Perte De Capacités Auditives
N’installez pas l’appareil d’une autre façon que celle indiquée. Entretien et soins Le non-respect de cette consigne risque d'entraîner des dysfonctionnements ou la chute de l'appareil, ce qui provoquerait des Retirez la fiche d’alimentation de la prise secteur avant de procéder au blessures. - Page 61 Ne conservez pas les piles dans une poche ou un sac contenant des pièces en métal et évitez de transporter ou de stocker des piles avec des éléments métalliques. Cela pourrait court-circuiter les piles, les faire exploser ou déverser leur liquide et provoquer un incendie ou des blessures.
-
Page 62: Avis Et Informations
AVIS ET INFORMATIONS Avis Indique des points à observer afin d’empêcher la panne, le Connexions dommage ou le dysfonctionnement du produit et la perte des données. • En cas de connexion d'unités externes, assurez-vous de lire attentivement le mode d'emploi de l'appareil concerné et reliez-le Alimentation conformément aux instructions fournies. -
Page 63: Entretien Et Soins
Entretien et soins • Utilisez un chiffon doux et sec pour le nettoyage de l'appareil. L'utilisation de produits chimiques tels que de la benzène ou du diluant, de produits d'entretien ou de chiffons de lavage chimique peut causer la décoloration ou la déformation de l'appareil. Enceintes •... -
Page 64: À Propos De La Plaque Signalétique De L'appareil
L’expression et les logos Bluetooth sont des marques déposées de Marques commerciales Bluetooth SIG, Inc. et l’utilisation de ces marques par Yamaha Corporation est sous licence. Fabriqué sous licence de Dolby Laboratories. Dolby, Dolby Audio, Pro Logic « Blu-ray Disc™ », « Blu-ray™ » et les logos sont des marques de la Blue- et le symbole double-D sont des marques déposées de Dolby Laboratories. -
Page 65: À Propos Du Contenu De Ce Manuel
À propos du contenu de ce manuel • Ce manuel est destiné aux lecteurs suivants : – les utilisateurs de l’appareil – le constructeur, le fabricant et le revendeur qui installent l’appareil au mur • Ce manuel emploie les termes d’avertissement suivants pour les informations importantes : –... -
Page 66: Avant D'utiliser L'unité
AVANT D'UTILISER L'UNITÉ Caractéristiques Introduction Ce système surround frontal avec ses caissons de graves intégrés procure un son dynamique avec les vidéos lues sur un téléviseur. • Lisez le son depuis un téléviseur ou un lecteur BD/DVD en son surround. •... - Page 67 deux dispositifs Bluetooth. Notre technologie exclusive Lecture surround 3D Compressed Music Enhancer améliore la qualité et les caractéristiques sonores, et permet de délivrer un son réaliste et Le son surround peut être entendu non seulement dans le sens impressionnant. Pour plus d’informations, reportez-vous à : horizontal, mais également depuis différentes hauteurs lorsque DTS •...
-
Page 68: Accessoires
Accessoires Utilisation de la télécommande Vérification des accessoires Préparation de la télécommande Vérifiez que vous disposez de tous les accessoires suivants. Retirez la languette isolante de la pile avant d’essayer d’utiliser la télécommande. L’unité Télécommande Cordon Câble audio Languette isolante de la pile * Une pile au lithium d’alimentation numérique optique... -
Page 69: Rayon D'action De La Télécommande
Rayon d’action de la télécommande Remplacement de la pile dans la télécommande Utilisez la télécommande dans le rayon indiqué sur la figure suivante. Maintenez enfoncée la patte de dégagement dans le sens indiqué par [A] et sortez le porte-pile en le faisant glisser dans le sens indiqué... -
Page 70: Noms De Pièces Et Fonctions
Noms de pièces et fonctions Noms des pièces et fonctions de la face avant/supérieure Les noms des pièces et fonctions de la face avant/supérieure sont les suivants. Les témoins sur la face supérieure clignotent Pour régler le volume (p.28). ou s’allument pour indiquer le fonctionnement et le statut du réglage. - Page 71 Pour recevoir les signaux infrarouges émis par la télécommande de l’unité (p.18).
-
Page 72: Noms Des Pièces Et Fonctions De La Face Arrière
Noms des pièces et fonctions de la face arrière Les noms des pièces et fonctions de la face arrière sont les suivants. Les illustrations dans ce mode d’emploi comprennent des étiquettes à côté des prises au bas de l’unité pour une identification facile. À... -
Page 73: Noms Des Pièces Et Fonctions De La Télécommande
Noms des pièces et fonctions de la télécommande Les noms des pièces et fonctions de la télécommande fournie sont les suivants. Pour allumer ou éteindre l’unité. Maintenez enfoncée la touche pendant plus de 3 secondes pour activer ou désactiver la fonction de veille Bluetooth (p.40). -
Page 74: Préparation
PRÉPARATION Installation Installation de l’unité sur un meuble de télévision, etc. Placez l’unité avec l’écran tactile tourné vers le haut sur un meuble de télévision, etc. Capteur de la Écran tactile télécommande... -
Page 75: Raccordement D'un Téléviseur
Raccordement d’un téléviseur Connexion d’un téléviseur prenant en charge Audio Return Channel (ARC) Raccordez un téléviseur prenant en charge Audio Return Channel (ARC) à l’unité avec un câble HDMI (vendu séparément). Prises HDMI OUT Prise d’entrée HDMI HDMI (ARC) HDMI HDMI HDMI HDMI... -
Page 76: Connexion D'un Téléviseur Ne Prenant Pas En Charge Audio Return Channel (Arc)
Connexion d’un téléviseur ne prenant pas en charge Audio Return Channel (ARC) Raccordez le téléviseur à l’unité avec un câble HDMI (vendu séparément) et un câble audio numérique optique (fourni). Prises HDMI OUT Prise d’entrée HDMI HDMI HDMI HDMI HDMI HDMI L’unité... -
Page 77: Raccordement D'appareils De Lecture
Raccordement d’appareils de lecture Connexion HDMI avec un appareil de Connexion analogique avec un appareil lecture de lecture Raccordez un appareil de lecture comme un lecteur BD/DVD à Raccordez un appareil de lecture, comme une console de jeux ou l’unité avec un câble HDMI (vendu séparément). Utilisez le câble un téléviseur n’ayant pas de sortie audio numérique optique, à... -
Page 78: Raccordement D'un Caisson De Graves Externe
Raccordement d’un caisson de Branchement du cordon graves externe d’alimentation Raccordement d’un caisson de graves Branchement du cordon d’alimentation externe Une fois que tous les raccordements sont terminés, branchez le cordon d’alimentation fourni sur la prise AC IN de l’unité et L’unité... -
Page 79: Lecture
LECTURE Fonctionnement de base Procédure de base pour la lecture La procédure de base pour lire de la musique est la suivante. HDMI : Son d’un dispositif raccordé à la prise HDMI IN TV : Son du téléviseur ANALOG : Son d’un dispositif raccordé à la prise d’entrée ANALOG Touches d’entrée BLUETOOTH : Son d’un dispositif Bluetooth... - Page 80 Volume bas (-) Volume élevé (+) Lorsque le son est émis à la fois par les enceintes du téléviseur et par l’unité, coupez le son du téléviseur. Clignote (en sourdine) Volume bas (-) Volume élevé (+)
-
Page 81: Écoute De Votre Son Préféré
Écoute de votre son préféré Lecture avec un son Surround 3D Lecture avec un son surround Appuyez sur 3D SURROUND pour basculer sur la lecture surround Appuyez sur SURROUND pour basculer sur la lecture surround 3D selon la source d’entrée ou votre préférence individuelle. selon la source d’entrée ou votre préférence individuelle. -
Page 82: Lecture Claire Des Voix Humaines (Clear Voice)
Lecture claire des voix humaines (Clear Profiter de sons graves de meilleure Voice) qualité (accentuation des graves) Appuyez sur CLEAR VOICE pour activer la fonction Clear Voice. Appuyez sur BASS EXTENSION pour activer la fonction Les voix humaines, comme les dialogues de film ou de série télé, d’accentuation des graves. -
Page 83: Utilisation D'un Dispositif Bluetooth
Utilisation d’un dispositif Bluetooth® Écoute de musique stockée sur un dispositif Bluetooth® Le témoin BLUETOOTH sur l’unité clignote. Les fichiers de musique stockés sur un dispositif Bluetooth, comme un smartphone, une enceinte intelligente ou un baladeur numérique peuvent être lus sur l’unité via une connexion sans fil. L’unité... - Page 84 Si un code (PIN) est nécessaire, tapez le numéro Bluetooth. « 0000 ». PIN 0 0 0 0 YAS-108 Yamaha Lorsque la connexion entre le dispositif Bluetooth et l’unité est établie, un message de fin de connexion s’affiche sur le dispositif Bluetooth, et le témoin BLUETOOTH s’allume sur l’appareil.
-
Page 85: Connexion Simultanée De L'unité À Deux Dispositifs Bluetooth (Connexion Multipoint)
Connexion simultanée de l’unité à deux dispositifs Bluetooth (connexion multipoint) L’unité peut être connectée à deux dispositifs Bluetooth en même temps. Suivez ces instructions pour permuter entre les dispositifs Bluetooth utilisés pour la lecture. L’unité se met à lire le son depuis l’autre dispositif Bluetooth. -
Page 86: Fonctionnalités Pratiques Pour La Lecture
Fonctionnalités pratiques pour la lecture Utilisation d’une télécommande de Le téléviseur et l’unité sont mis sous/hors tension simultanément. téléviseur pour commander l’unité (Contrôle HDMI) La source d’entrée de l’unité bascule en fonction de la source d’entrée du téléviseur. La fonction de contrôle HDMI coordonne le fonctionnement d’un Par exemple, lorsqu’un programme télévisé... -
Page 87: Affichage Des Informations Audio Avec La Lecture
Affichage des informations audio avec la HDMI allumé (blanc) : Dolby Digital lecture HDMI allumé (rouge) : DTS TV allumé (blanc) : AAC Le type de signal audio lu, que Dolby Pro Logic II soit activé ou HDMI et TV éteints : PCM/entrée analogique/pas d’entrée désactivé, et les réglages d’accentuation des graves ou Clear Voice peuvent être confirmés par le statut des témoins. -
Page 88: Commande De L'appareil Avec L'application Home Theater Controller
être configurées plus précisément au moyen de l’application qu’avec la télécommande. Pour en savoir plus sur l’application HOME THEATER CONTROLLER, consultez les informations sur le produit sur le site Yamaha. -
Page 89: Configurations
CONFIGURATIONS Configuration des diverses fonctions Modification de la luminosité des témoins (DIMMER) La fonction de contrôle HDMI est activée ou désactivée, Changez la luminosité des témoins sur l’unité. et l’unité s’allume. Le témoin indique le statut de la Chaque fois que vous appuyez sur DIMMER, la luminosité des fonction de contrôle HDMI pendant plusieurs secondes témoins change comme suit. -
Page 90: Configuration De La Sortie Audio Hdmi Audio
Configuration de la sortie audio HDMI Réglage de la fonction de veille audio automatique Sélectionnez l’unité à partir duquel l’entrée audio via la prise HDMI En activant la fonction de veille automatique, vous empêchez l’unité IN de l’unité sera lue lorsque la fonction de contrôle HDMI est de rester allumée lorsqu’elle n’est pas utilisée. -
Page 91: Activation/Désactivation De La Commande De L'écran Tactile (Fonction De Verrouillage Enfant)
Activation/désactivation de la commande Configuration de la fonction de veille de l’écran tactile (fonction de Bluetooth verrouillage enfant) Si la fonction de veille Bluetooth est activée, l’unité s’allumera et sera prête à lire le son depuis le dispositif Bluetooth une fois qu’une Désactivez la commande de l’écran tactile pour empêcher les connexion Bluetooth a été... -
Page 92: Réinitialisation De L'unité
Réinitialisation de l’unité Les réglages de l’unité sont ramenés aux préréglages en usine. Clignote (réinitialisé) -
Page 93: Annexe
Yamaha le plus proche. débranchez le cordon d’alimentation et contactez le revendeur ou le service après-vente agréé Yamaha le plus proche. -
Page 94: L'unité Ne Fonctionne Pas Correctement
Débranchez le cordon d’alimentation de la prise secteur et contactez le revendeur ou le service après-vente L’unité s’allume toute seule agréé Yamaha le plus proche. Aucune opération ne peut être effectuée Mettez fin à la connexion Bluetooth avec l’unité. Pour plus depuis l’écran tactile de l’unité. -
Page 95: L'unité Ne Peut Pas Être Commandée Avec La Télécommande
Lorsque l’unité est mise hors tension, la L’unité ne peut pas être commandée avec vidéo et/ou l’audio de l’appareil de la télécommande du téléviseur lecture ne sont pas émis sur le téléviseur Confirmez que les réglages sont correctement configurés comme suit. Activez la fonction de contrôle HDMI. -
Page 96: En Cas De Problème (Audio)
En cas de problème (Audio) Configurez l’unité de sorte que les signaux de l’entrée audio HDMI soient émis depuis l’unité. Pour plus d’informations, Absence de son reportez-vous à : – « Configuration de la sortie audio HDMI audio » (p.39) Sélectionnez une source d’entrée appropriée. -
Page 97: Pas D'effet Surround
Le volume diminue lorsque l’unité est On entend du bruit mise sous tension Éloignez ces dispositifs de l’appareil. Pour éviter un bruit trop fort, l’unité contrôle automatiquement son volume à un certain niveau lorsqu’elle est mise sous tension. Augmentez le niveau de volume à votre guise. Pour plus d’informations, reportez-vous à... -
Page 98: En Cas De Problème (Bluetooth®)
En cas de problème (Bluetooth®) Mettez fin à l’une des connexions Bluetooth, puis connectez- L’unité ne peut pas être connectée à un vous au nouveau dispositif. dispositif Bluetooth® Aucun son n’est restitué ou le son est saccadé depuis un dispositif Bluetooth® Sélectionnez Bluetooth comme source d’entrée. -
Page 99: Caractéristiques Techniques
Caractéristiques techniques Caractéristiques techniques Signal audio pris en charge PCM (jusqu’à 5.1 canaux) Les caractéristiques techniques de l’unité sont les suivantes. Dolby Digital (jusqu’à 5.1 canaux) DTS Digital Surround (jusqu’à 5.1 canaux) Puissance de sortie nominale maximale • Avant G/D 30 W ×... -
Page 100: Formats Audio Et Vidéo Hdmi Pris En Charge
Portée (ligne de mire) Environ 10 m Poids 3,2 kg Méthode de protection du contenu prise en charge SCMS-T [Modèles pour le Royaume-Uni et l’Europe] • Fréquence radio (fréquence opérationnelle) 2402 MHz à 2480 MHz • Puissance de sortie maximale (EIRP) 20 dBm (100 mW) Formats audio et vidéo HDMI pris en charge... -
Page 101: Formats Audio Numériques Pris En Charge
• 480p/60 Hz Formats audio numériques pris en charge • 576i/50 Hz • 576p/50 Hz Les formats audio numériques suivants peuvent être utilisés par l’unité. • 720p/60 Hz, 50 Hz • 1080i/60 Hz, 50 Hz • 1080p/60 Hz, 50 Hz, 30 Hz, 25 Hz, 24 Hz •... -
Page 102: Informations Pour Les Entrepreneurs Qualifiés Ou Les Revendeurs
Informations pour les entrepreneurs qualifiés ou les revendeurs Fixation de l’unité à un mur Fixez l’unité à un mur de sorte que l’écran tactile soit tourné vers l’avant. Capteur de la Écran tactile télécommande Gabarits de fixation (fournis) Orifices de Rubans adhésifs ou punaises... - Page 103 457 mm Orifices de montage au bas de l’unité 7 à 9 mm 4 à 5 mm 20 mm ou plus 13 à 15 mm Écran tactile Entretoises...
- Page 104 Yamaha Global Site http://www.yamaha.com/ Yamaha Downloads http://download.yamaha.com/ Manual Development Group © 2018 Yamaha Corporation Published 04/2017 ODNV-A0 Printed in China AV17-0066 10-1 Nakazawa-cho, Naka-ku, Hamamatsu, 430-8650 Japan...