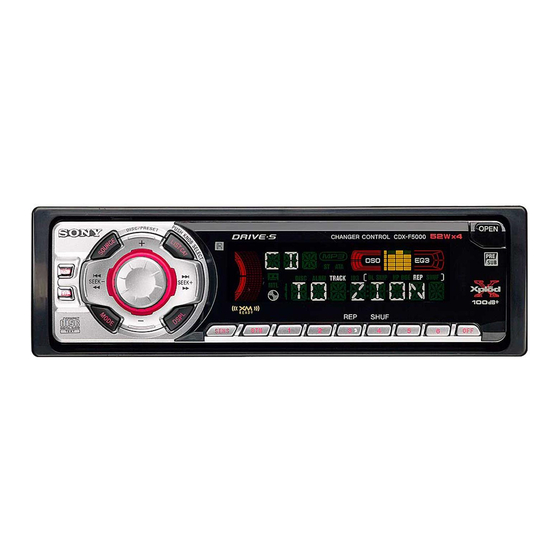
Sony CDX-F5000 Mode D'emploi
Table des Matières
Les langues disponibles
Les langues disponibles
Liens rapides
FM/AM
Compact Disc
Player
Operating Instructions
Mode d'emploi
Owner's Record
The model and serial numbers are located on the bottom of the unit.
Record these numbers in the space provided below.
Refer to these numbers whenever you call upon your Sony dealer regarding this product.
Model No. CDX-F5000 Serial No.
For installation and connections, see the supplied installation/connections manual.
En ce qui concerne l'installation et les connexions, consulter le manuel
d'installation/raccordement fourni.
CDX-F5000
© 2004 Sony Corporation
3-261-847-11 (1)
US
FR
Chapitres
Table des Matières
Dépannage

Manuels Connexes pour Sony CDX-F5000


Sommaire des Matières pour Sony CDX-F5000
- Page 26 Félicitations ! Nous vous remercions d’avoir fait l’acquisition de ce lecteur de disques compacts Sony. Vous pouvez profiter encore davantage des multiples fonctions de cet appareil grâce aux fonctions et accessoires cités ci-dessous : • Fonctionnement avec des lecteurs CD ou MD en option (changeurs et lecteurs)* •...
- Page 27 Table des matières Radio Emplacement des commandes ... 4 Précautions ......6 Mémorisation automatique des stations Remarques sur les disques.
-
Page 28: Emplacement Des Commandes
Pour obtenir des informations plus détaillées, reportez-vous aux numéros de pages indiqués. OPEN SEEK SEEK SHUF SENS CDX-F5000 a Touche DSO 21 l Touche SENS 15 b Touche SOURCE (Mise sous tension/ m Touche RESET (située à l’avant de Radio/CD/MD) l’appareil, derrière la façade) 8... -
Page 29: Touche Source
Mini-télécommande RM-X115 DSPL MODE SEEK SEEK PRESET SOURCE SENS – SEEK SEEK PRESET – – (DISC/PRESET) (+) : pour déplacer la sélection vers le haut (SEEK) (SEEK) (–) : pour (+) : pour déplacer la déplacer la Les touches de la mini-télécommande sélection sélection permettent de commander les mêmes... -
Page 30: Précautions
2 dans ce mode d’emploi, contactez votre secondes qui suivent et revendeur Sony. maintenez-la enfoncée. Condensation passer d’un album + ou – [maintenez la touche à... -
Page 31: Remarques Sur Les Disques
• Avant la lecture, nettoyez les disques avec un Remarques sur les disques chiffon de nettoyage disponible dans le commerce. Essuyez chaque disque en partant du centre vers l’extérieur. N’utilisez pas de • Pour qu’un disque reste propre, ne touchez pas solvants, tels que de l’essence du diluant, des sa surface. -
Page 32: Préparation
Retrait de la façade Préparation Vous pouvez retirer la façade de cet appareil pour éviter qu’il ne soit volé. Réinitialisation de l’appareil Alarme d’avertissement Si vous mettez la clé de contact en position OFF Avant la première mise en service de l’appareil, sans ôter la façade, l’alarme d’avertissement après avoir remplacé... -
Page 33: Réglage De L'horloge
Installation de la façade Réglage de l’horloge Enfilez l’orifice A de la façade sur la tige B de l’appareil, puis poussez doucement sur le côté gauche pour l’engager en position. L’horloge numérique fonctionne suivant un cycle Appuyez sur (SOURCE) sur l’appareil (ou de 12 heures. -
Page 34: Lecteur Cd Lecteur Cd Ou Md (En Option)
Pour Appuyez sur Lecteur CD (OFF) interrompre la lecture Lecteur CD ou MD (en (OPEN), puis sur Z éjecter le disque option) (SEEK) (–/+) passer d’une plage à l’autre (./>) – Accès [une fois par plage] Cet appareil vous permet, en plus de la lecture de automatique CD, de piloter des lecteurs externes MD ou CD aux plages... -
Page 35: Rubriques D'affichage
Précautions à prendre lors du raccordement d’appareils MGS-X1 ou MD Rubriques d’affichage Cet appareil reconnaît le MGS-X1 comme étant un appareil MD. • Pour lancer la lecture sur un lecteur MGS-X1, Lorsque le disque, l’album ou la plage change, appuyez sur (SOURCE) pour sélectionner « MS » ou tout titre préenregistré* du nouveau disque, du «... -
Page 36: Lecture De Plages En Boucle
Lecture de plages en boucle Lecture des plages dans un ordre aléatoire — Lecture répétée Vous pouvez sélectionner : — Lecture aléatoire • REP-TRACK — pour répéter la plage en cours Vous pouvez sélectionner : de lecture. • SHUF-ALBM* — pour écouter les plages de •... -
Page 37: Identification D'un Cd
Conseils Identification d’un CD • Pour corriger ou effacer un caractère, procédez simplement par réécriture ou saisissez « ». • Vous pouvez identifier les CD avec un appareil ne — Fonction de mémo de disque (lors du disposant pas de la fonction CUSTOM FILE si cet raccordement d’un lecteur CD disposant de la appareil est raccordé... -
Page 38: Recherche D'un Disque Par Son Nom
Recherche d’un disque par Radio son nom L’appareil peut mémoriser jusqu’à 6 stations par — Affichage automatique des titres (lors du bande de fréquences (FM1, FM2, FM3, AM1 et raccordement d’un lecteur CD disposant de la AM2). fonction CD TEXT ou CUSTOM FILE ou pour un lecteur MD) Attention Pour sélectionner des stations pendant que vous... -
Page 39: Réception Des Stations Mémorisées
Si la réception stéréo FM est mauvaise Réception des stations — Mode mono mémorisées En cours de réception radio, appuyez plusieurs fois sur (SENS) jusqu’à ce que l’indication « MONO-ON » Appuyez plusieurs fois sur (SOURCE) s’affiche. pour sélectionner la radio. Appuyez plusieurs fois sur (MODE) pour sélectionner la bande. -
Page 40: Syntonisation D'une Station À Partir D'une Liste
Syntonisation d’une station à Autres fonctions partir d’une liste Vous pouvez également commander l’appareil — Affichage automatique de la liste (et les appareils CD ou MD en option) avec un satellite de commande (en option). En cours de réception radio, appuyez sur (LIST/CAT). -
Page 41: Commande
Fonctionnement par pression et Appuyez sur Pour rotation de la commande (SOURCE) changer de source (Radio/CD/MD* )/mettre l’appareil sous tension (MODE) changer de mode de fonctionnement (Bande radio/lecteur CD* lecteur MD* Commande PRESET/DISC (ATT) atténuer le son (OFF)* arrêter la lecture d’un disque ou la réception radio/mettre l’appareil hors tension Exercez une pression sur la commande... - Page 42 Modification du sens de Pendant la lecture d’un fichier MP3, vous pouvez sélectionner un album avec le satellite de fonctionnement commande. Le sens de fonctionnement des commandes est réglé par défaut comme indiqué dans (Avec un appareil en option) l’illustration ci-dessous. Pour Procédez ainsi Pour augmenter...
-
Page 43: Réglages Des Caractéristiques Sonores
Réglages des Modification des réglages du caractéristiques sonores son et de l’affichage Vous pouvez régler la balance, l’atténuateur, le Les réglages suivants sont disponibles : filtre passe-bas et le volume du caisson de • REAR/SUB* — pour commuter la sortie graves. -
Page 44: Réglage De L'égaliseur (Eq3)
Commutation REAR/SUB* Réglage de l’égaliseur (EQ3) Appuyez sur la touche de sélection, puis tournez la molette de réglage du Vous pouvez sélectionner l’une des 7 courbes de volume. réglages de l’égaliseur, dont chacune correspond à un type de musique (XPLOD, VOCAL, CLUB, Après 3 secondes, l’affichage revient en mode de JAZZ, NEW AGE, ROCK, CUSTOM et OFF lecture normal. -
Page 45: Réglage Du Répartiteur Dynamique Du Son Émis (Dso)
Réglage de la courbe de l’égaliseur Réglage du répartiteur Vous pouvez mémoriser et régler différentes plages de tonalité pour l’égaliseur. dynamique du son émis Appuyez sur (SOURCE) pour (DSO) sélectionner une source (Radio, CD ou MD). Si vos haut-parleurs sont installés dans la partie Appuyez plusieurs fois sur (EQ3) pour inférieure des portières, le son est émis à... -
Page 46: Informations Complémentaires
Si le fusible fond, vérifiez le branchement de l’alimentation et remplacez le fusible. Si le nouveau fusible fond également, il est possible que l’appareil soit défectueux. Dans ce cas, contactez votre revendeur Sony le plus proche. Fusible (10 A) pôle + vers le haut Avertissement Ne jamais utiliser de fusible dont la capacité... -
Page 47: Démontage De L'appareil
3 Faites glisser l’appareil en dehors Démontage de l’appareil de son support. Retirez le cadre de sûreté. 1 Retirez la façade (page 8). 2 Insérez les clés de déblocage simultanément dans le cadre de sûreté. Orientez correctement la clé de déblocage. 3 Tirez sur les clés de déblocage pour retirer le cadre de sûreté. -
Page 48: Caractéristiques Techniques
Cet appareil ne doit pas être branché à un (commutation arrière/ préamplificateur numérique ni à un égaliseur caisson de graves) compatible avec le système Sony BUS. Borne de commande de relais d’antenne électrique La conception et les caractéristiques techniques sont Borne de commande sujettes à... -
Page 49: Dépannage
La lecture ne commence pas. t Lecture avec un lecteur CD compatible • Disque MD défectueux ou disque CD MP3 de Sony, tel que le CDX-757MX. souillé. • CD-R ou CD-RW non finalisé. Le contenu de la mémoire a été effacé. -
Page 50: Affichage Des Erreurs Et Messages
Réception radio Affichage des erreurs et Impossible de capter une présélection. messages • Enregistrez la fréquence correcte dans la mémoire. • Le signal capté est trop faible. Affichage des erreurs Impossible de capter des stations. (pour cet appareil et les changeurs CD ou Le son est parasité. - Page 51 (page 15). « » ou « » Vous avez atteint le début ou la fin du disque et vous ne pouvez pas aller plus loin. Si ces solutions ne permettent pas d’améliorer la situation, contactez votre revendeur Sony le plus proche.