
Manuels Connexes pour Hilti PMP 32


Sommaire des Matières pour Hilti PMP 32
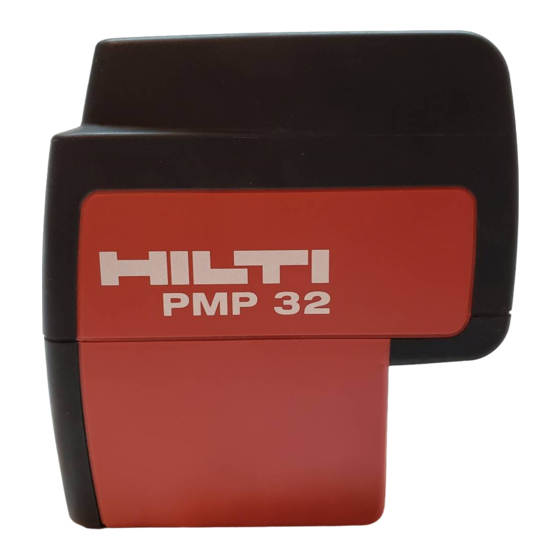
- Page 1 Operating instructions Mode d’emploi Manual de instrucciones Printed: 07.07.2013 | Doc-Nr: PUB / 5070095 / 000 / 00...
- Page 2 2 1 2 Printed: 07.07.2013 | Doc-Nr: PUB / 5070095 / 000 / 00 PMP 32...
- Page 3 Printed: 07.07.2013 | Doc-Nr: PUB / 5070095 / 000 / 00...
- Page 4 Printed: 07.07.2013 | Doc-Nr: PUB / 5070095 / 000 / 00...
-
Page 5: Table Des Matières
It is essential that the operating instructions are read before the tool is operated for the first time. Always keep these operating instructions together with the tool. Ensure that the operating instructions are with the tool when it is given to other persons. Component parts Laser exit windows Magnets... -
Page 6: Safety Notices And Their Meaning
Keep these pages open while studying the operating instructions. In these operating instructions, the PMP 32 plumb laser is referred to as « the tool ». Location of identification data on the tool The type designation and serial number can be found on the type plate on the tool. -
Page 7: Accessories
The PMP 32 is a self-leveling plumb laser which can be used by one per- son working alone to plumb, very quickly and with great accuracy. The tool incorporates 2 vertical laser beams. Features: Upward beam accuracy (± 3 mm at 10 m on a leveled surface). -
Page 8: Technical Data
Range up beam 30 m down beam 1 m (recommended) Accuracy at 25 °C Plumb beam up ● ± 3 mm at 10 m ( in at 30 ft) Plumb beam down (reference) ± 2 mm at 1 m ( in at 3 ft) ●... -
Page 9: Basic Information Concerning Safety
Keep laser tools out of reach of children. ● Have the tool repaired only at a Hilti service center. Failure to follow the ● correct procedures when opening the tool may cause emission of laser radiation in excess of class 2. -
Page 10: Electromagnetic Compatibility
(see Section 5.2). 5.4.1 Electromagnetic compatibility Although the tool complies with the strict requirements of the relevant directives, Hilti cannot entirely rule out the following possibilities: The tool may cause interference to other equipment (e.g. aircraft navi- ●... -
Page 11: Safety Precautions
Although the tool is protected to prevent entry of dampness, it should ● be wiped dry each time before being put away in its Hilti toolbox. 5.5.1 Electrical hazards The batteries must be insulated or removed from the tool before it is ●... -
Page 12: Operation & Applications
6.1 Inserting new batteries -NOTE- Do not use damaged batteries. Do not mix old and new batteries. Do not mix batteries of different makes or types. 1. If the tool is on, turn it off. 2. Pull the battery compartment release button 3. -
Page 13: Examples Of Applications
-NOTE- The tool switches itself off automatically after approx. 15 minutes. 7.1.3 Deactivating the automatic cut-out 1. Press and hold the selector button (approx. 4 seconds) until the LED on the tool blinks three times in confirmation. -NOTE- The tool will be switched off when the selector button is pressed or when the batteries are exhausted. -
Page 14: Checks
The batteries are almost The laser beam blinks twice every ● exhausted. 10 seconds. The tool cannot level itself The laser beam blinks rapidly. ● automatically. 8. Checks 8.1 Checking the vertical (plumb) beam 1. Make a mark on the floor (a cross) in a high room (e.g. in a stairwell or hall- way with a height of 5–10 m). -
Page 15: Care And Maintenance
Remove the batteries if the tool is not used over a long period. Leaking batteries may damage the tool. 9.3 Transportation Use the Hilti shipping carton, Hilti toolbox or packaging of equivalent qual- Printed: 07.07.2013 | Doc-Nr: PUB / 5070095 / 000 / 00... -
Page 16: Troubleshooting
(incorrect polarity). Battery compartment is Close the battery not closed. compartment. Tool or selector button is Bring the tool to a Hilti defective. repair center. Individual The laser source or laser Bring the tool to a Hilti laser beams control is defective. - Page 17 This may result in serious personal injury, injury to third par- ties and pollution of the environment. Most of the materials from which Hilti tools or appliances are manufactured can be recycled. The materials must be correctly separated before they can be recycled.
- Page 18 Hilti warrants that the tool supplied is free of defects in material and work- manship. This warranty is valid so long as the tool is operated and handled correctly, cleaned and serviced properly and in accordance with the Hilti Oper- ating Instructions, and the technical system is maintained.
- Page 19 – Connect the equipment to an outlet on a circuit different from that to which the receiver is connected. – Consult your dealer or an experienced TV/radio technician for assistance. Changes or modifications not expressly approved by Hilti could limit the user’s right to operate the equipment. Labels...
- Page 20 Printed: 07.07.2013 | Doc-Nr: PUB / 5070095 / 000 / 00...
- Page 21 Avant de mettre l'appareil en marche, lire impérativement son mode d'emploi et bien respecter les consignes. Le présent mode d'emploi doit toujours accompagner l'appareil. Ne pas prêter ou céder l'appareil à un autre utilisateur sans lui fournir le mode d'emploi. Principaux éléments Fenêtres de sortie du faisceau laser Aimants...
-
Page 22: Termes Signalant Un Danger Et Leur Signification
Pour lire le mode d'emploi, rabattre ces pages de manière à voir les illustrations. Dans le texte du présent mode d'emploi, « l'appareil » désigne toujours le laser d’aplomb PMP 32. Identification de l'appareil La désignation et le numéro de série du modèle se trouvent sur la plaque signalétique de l'appareil. -
Page 23: Articles Livrés Avec Le Laser Point (Version Boîte En Carton)
Le PMP 32 est un appareil laser à mise à niveau automatique qui permet à un seul homme de déterminer des aplombs de manière très rapide et précise. L'appareil émet deux faisceaux laser visibles, un vers le haut et un vers le bas. -
Page 24: Caractéristiques Techniques
Portée faisceau haut 30 m faisceau bas 1 m (recommandée) Précision à 25 °C Faisceau haut ● ± 3 mm à 10 m ( in à 30 ft) Faisceau bas (référence) ± 2 mm à 1 m ( in à 3 ft) ●... -
Page 25: Consignes De Sécurité
Tenir l'appareil laser hors de portée des enfants. ● Ne faire réparer l'appareil que par le S.A.V. Hilti. En cas de montage incor- ● Printed: 07.07.2013 | Doc-Nr: PUB / 5070095 / 000 / 00... -
Page 26: Compatibilité Électromagnétique
Utiliser uniquement l'appareil conformément à l'usage prévu (voir 5.2). ● 5.4.1 Compatibilité électromagnétique Bien que l'appareil satisfasse aux exigences des directives applicables, Hilti n'exclut pas la possibilité que l'appareil perturbe le fonctionnement d'autres appareils (par ex. des ● dispositifs de navigation d'avion, des appareils médicaux) ou que le fonctionnement de l'appareil soit perturbé... -
Page 27: Dangers Électriques
5.5 Consignes de sécurité générales Avant utilisation, vérifier que l'appareil est ni encrassé, ni endommagé. ● Si tel est le cas, le faire réparer par le S.A.V. Hilti. Après une chute ou tout autre incident mécanique, il est nécessaire de ●... -
Page 28: Mise En Place De Piles Neuves
6.1 Mise en place de piles neuves -REMARQUE- Ne pas utiliser de piles endommagées. Ne pas utiliser de piles neuves avec des piles usagées. Ne pas utiliser de piles de différentes marques ou de types différents. 1. Si l'appareil est en marche, prendre soin de l'éteindre. 2. -
Page 29: Exemples D'utilisation
-REMARQUE- Au bout de 15 minutes environ, l'appareil s'arrête automatiquement. 7.1.3 Désactivation du dispositif d'arrêt automatique 1. Tenir la touche marche/arrêt appuyée (environ 4 sec.) jusqu'à ce que le témoin lumineux vert clignote pour confirmation. -REMARQUE- L'appareil s'arrête lorsque le commutateur de sélection est enfoncé ou lorsque les piles sont vides. -
Page 30: Contrôle
Les piles sont presque vides. Le faisceau laser clignote deux fois ● toutes les 10 secondes. L'appareil ne peut pas effectuer Le faisceau laser clignote à une ● la mise à niveau automatique. fréquence élevée. 8. Contrôle 8.1 Contrôle du faisceau d'aplomb haut 1. -
Page 31: Nettoyage Et Entretien
8.2 Calcul de la précision de visée (g) à une distance de mesure autre que 5 m : g = (3 mm x distance de mesure (m)) / 5 m. Dans ce cas, la distance horizontale entre d1 et d2 doit être au maximum la valeur (g) pour une distance de mesure définie (m). -
Page 32: Guide De Dépannage
Fermer le compartiment piles n'est pas fermé. des piles. L'appareil ou le commu- Apporter l'appareil dans un tateur de sélection est atelier de réparation Hilti. défectueux. Des faisceaux La source laser ou la Apporter l'appareil dans un laser indivi- commande laser est atelier de réparation Hilti. - Page 33 à des tierces personnes et de polluer l'environnement. Les appareils Hilti sont fabriqués pour une grande partie en matériaux recy- clables. dont la réutilisation exige un tri correct. Dans de nombreux pays, Hilti est déjà équipé pour reprendre votre ancien appareil afin d'en recycler les composants.
- Page 34 à une incapacité à utiliser l'appa- reil dans quelque but que ce soit. Hilti exclut en particulier les garan- ties implicites concernant l'utilisation et l'aptitude dans un but bien pré- cis.
- Page 35 – Demander l'aide d'un revendeur ou d'un technicien spécialisé en radio / TV. Toute modification ou tout changement subi par l'appareil et non expres- sément approuvé par Hilti peut limiter le droit de l'utilisateur à se servir de l'équipement. Identification de l'appareil :...
- Page 36 Printed: 07.07.2013 | Doc-Nr: PUB / 5070095 / 000 / 00...
- Page 37 Lea detenidamente el manual de empleo antes de la puesta en servicio de la herramienta. Conserve siempre este manual de empleo cerca de la herramienta. No entregue nunca la herramienta a otras personas sin el manual de empleo. Componentes de la herramienta Ventanas de salida del láser Imanes Conmutador selector...
-
Page 38: Señales De Peligro Y Significado
En el texto de este manual de empleo, la expresión « la herramienta » siem- pre hace referencia al láser de plomada PMP 32. Ubicación de los datos identificativos de la herramienta. -
Page 39: Herramientas Y Accesorios
El PMP 32 es un láser de plomada autonivelante de fácil aplicación que puede utilizarse de forma individual para aplomar con gran precisión. La herramienta incorpora 2 rayos láser verticales. Características: Precisión del rayo hacia arriba (± 3 mm a 10 m sobre una superficie nive- ●... -
Page 40: Datos Técnicos
Rayo de alineación hacia arriba 30 m hacia abajo 1 m (recomendado) Precisión a 25 °C Rayo de plomada hacia arriba ● ± 3 mm en 10 m ( in en 30 ft) Rayo de plomada hacia abajo ● (de referencia) ±... -
Page 41: Observaciones Básicas De Seguridad
No abra la herramienta. ● Para evitar lesiones, utilice exclusivamente accesorios y complementos ● originales Hilti. No está permitido efectuar manipulaciones o modificaciones en la herramienta. ● Observe las indicaciones sobre el funcionamiento, cuidado y manteni- ●... -
Page 42: Organización Segura Del Lugar De Trabajo
(véase 5.2). 5.4.1 Compatibilidad electromagnética Aunque la herramienta cumple con las estrictas exigencias de las directi- vas pertinentes, Hilti no puede excluir la posibilidad de que la herramienta: se vea afectada por otros aparatos (p. ej., dispositivos de navegación de ●... -
Page 43: Medidas De Seguridad Generales
ópticas (binoculares, gafas, cáma- ras fotográficas). A pesar de que la herramienta está protegida contra la humedad, es con- ● veniente secarla antes de introducirla en el maletín Hilti. 5.5.1 Peligro eléctrico Printed: 07.07.2013 | Doc-Nr: PUB / 5070095 / 000 / 00... -
Page 44: Puesta En Servicio
6.1 Colocación de pilas nuevas -INDICACIÓN- No emplee pilas que estén dañadas. No utilice al mismo tiempo pilas nuevas y viejas. No utilice pilas de varios fabricantes o con denominaciones de modelo diferentes. 1. Si la herramienta está conectada, desconéctela. 2. -
Page 45: Ejemplos De Aplicación
-INDICACIÓN- Tras 15 minutos se apaga la herramienta automáticamente. 7.1.3 Desactivación de la desconexión automática 1. Mantenga pulsado el conmutador (durante 4 segundos aprox.) hasta que el LED de la herramienta parpadee tres veces a modo de confirmación. -INDICACIÓN- La herramienta se desconecta si se pulsa el conmutador selector o cuando las pilas están agotadas. -
Page 46: Comprobación
Las pilas están casi agotadas. El rayo láser parpadea dos veces ● cada 10 segundos. La herramienta no se nivela auto- El rayo láser parpadea con una ● máticamente. frecuencia mayor. 8. Comprobación 8.1 Comprobación del rayo de plomada vertical 1. -
Page 47: Cuidado Y Mantenimiento
Si las pilas tienen fugas pueden dañar la herramienta. 9.3 Transporte Para el transporte o envío del equipo, utilice el cartón de embalaje de Hilti, el Printed: 07.07.2013 | Doc-Nr: PUB / 5070095 / 000 / 00... -
Page 48: Localización De Averías
Compartimento para pilas Cerrar el compartimento abierto. para pilas. Herramienta o conmutador Enviar la herramienta al selector defectuoso. centro de reparación de Hilti. Alguno de los Fuente láser o direcciona- Enviar la herramienta al rayos láser no miento láser defectuoso. centro de reparación de funciona. - Page 49 En muchos países, Hilti ya está organizada para reco- ger su vieja herramienta y proceder a su recuperación. Póngase en con- tacto con el servicio de atención al cliente de Hilti o con su asesor de ven- tas.
- Page 50 Para toda reparación o recambio, les rogamos que envíen la herramienta o las piezas en cuestión a la dirección de su organización de venta Hilti más cercana inmediatamente después de la constatación del defecto.
- Page 51 – Solicite consejo a su proveedor o a un técnico de radio y televisión. Todas aquellas modificaciones realizadas que no hayan sido permitidas de forma expresa por Hilti, pueden limitar el derecho del usuario a poner la herramienta en funcionamiento.
- Page 52 Printed: 07.07.2013 | Doc-Nr: PUB / 5070095 / 000 / 00...
- Page 53 Printed: 07.07.2013 | Doc-Nr: PUB / 5070095 / 000 / 00...
- Page 54 Printed: 07.07.2013 | Doc-Nr: PUB / 5070095 / 000 / 00...
- Page 55 Printed: 07.07.2013 | Doc-Nr: PUB / 5070095 / 000 / 00...
- Page 56 Printed: 07.07.2013 | Doc-Nr: PUB / 5070095 / 000 / 00...
- Page 57 Printed: 07.07.2013 | Doc-Nr: PUB / 5070095 / 000 / 00...
- Page 58 Printed: 07.07.2013 | Doc-Nr: PUB / 5070095 / 000 / 00...
- Page 59 Printed: 07.07.2013 | Doc-Nr: PUB / 5070095 / 000 / 00...
- Page 60 Printed: 07.07.2013 | Doc-Nr: PUB / 5070095 / 000 / 00...
- Page 61 Printed: 07.07.2013 | Doc-Nr: PUB / 5070095 / 000 / 00...
- Page 62 Printed: 07.07.2013 | Doc-Nr: PUB / 5070095 / 000 / 00...
- Page 63 Printed: 07.07.2013 | Doc-Nr: PUB / 5070095 / 000 / 00...
- Page 64 Printed: 07.07.2013 | Doc-Nr: PUB / 5070095 / 000 / 00...
- Page 65 Printed: 07.07.2013 | Doc-Nr: PUB / 5070095 / 000 / 00...
- Page 66 Printed: 07.07.2013 | Doc-Nr: PUB / 5070095 / 000 / 00...
- Page 67 Printed: 07.07.2013 | Doc-Nr: PUB / 5070095 / 000 / 00...
- Page 68 Printed: 07.07.2013 | Doc-Nr: PUB / 5070095 / 000 / 00...
- Page 69 Hilti Corporation LI-9494 Schaan Tel.: +423 / 234 21 11 Fax: +423 / 234 29 65 www.hilti.com Printed: 07.07.2013 | Doc-Nr: PUB / 5070095 / 000 / 00...