Publicité

Les langues disponibles
  • FR

Les langues disponibles

  • FRANÇAIS, page 14

Liens rapides

Publicité

Table des Matières
loading

Sommaire des Matières pour Thrustmaster Ferrari F430 Force Feedback

  • Page 2: Technical Specifications

    For PC User Manual TECHNICAL SPECIFICATIONS 1 Multidirectional D-Pad Manettino controller featuring: - One 5-position rotary switch 2 Force (F) button - One pushbutton indicator 3 10 digital action buttons Mode selection slider: 4 2 sequential gear shift levers (Up & Down) - Manual Manettino (MM) - Automatic Manettino (AM) 1/12...
  • Page 3 Power adapter 11 Attachment system USB cable and connector 12 Metal fastening screw 10 Pedal set cable and connector SETTING UP YOUR RACING WHEEL Place the racing wheel on a table or a desktop 1. Place the racing wheel on a table or any other horizontal, flat and stable surface. 2.
  • Page 4 ATTACHMENT / REMOVAL DIRECTION To tighten: Screw counter-clockwise To release: Unscrew clockwise Attaching the racing wheel to a cockpit 1. Place the racing wheel on the cockpit shelf. 2. Place two M6 screws (not included with the racing wheel) through the cockpit shelf and insert them in the two small threaded holes located beneath the racing wheel.
  • Page 5 PC INSTALLATION System requirements: PC (Windows® XP or Vista) featuring a USB port. The CD-ROM included with this product allows users to install the Force Feedback drivers. 1. Insert the installation CD-ROM in your CD-ROM drive. Follow the instructions provided onscreen to install the Force Feedback drivers.
  • Page 6 CONFIGURING THE PEDAL SET By default, your racing wheel's accelerator and brake controls operate in "Separate" mode; this setting means that the pedals operate on independent axes. This mode considerably improves precision when racing. If your game is not compatible with the "Separate" mode, the pedal set connected to your racing wheel will not operate correctly.
  • Page 7 SETTING THE AUTOMATIC CENTERING FEATURE By default, the racing wheel's automatic centering feature is deactivated. Most recent games feature their own automatic centering mode. It is therefore strongly recommended (in most cases) to deactivate the racing wheel's automatic centering feature and let your game manage this feature. The Force Feedback quality will be improved.
  • Page 8 USING THE 5-POSITION MANETTINO CONTROLLER The 5-position Manettino controller enables you to adjust your car's settings during a race. The 5 positions match action buttons 13, 14, 15, 16 & 17 on your racing wheel. The Manettino system comprises the following: - A rotary switch that you can move from one position to another - A pushbutton located beneath the switch 2 operating modes are available:...
  • Page 9 MANETTINO IN MANUAL MODE (This mode is recommended and compatible with most simulation games) 1) Move the slider (7) to MM (Manual Manettino) This mode allows you to allocate any required features to the Manettino controller's 5 icons. In this mode, the required feature is performed when you press the pushbutton (and not when you turn the switch) after placing the switch on the relevant icon.
  • Page 10 Many other configurations can be defined according to the features available in your game's options or controller management interface (e.g. braking force distribution, tire pressure, selecting cockpit view or other more basic features). MANETTINO IN AUTOMATIC MODE (This setting is recommended for games preconfigured for your racing wheel's Manettino controller) Move the slider (7) to AM (Automatic Manettino) This mode is mainly intended for game developers, who can define preset features for each of the...
  • Page 11 If this fails to solve the problem, download the manual calibration software Thrustmaster Calibration Tool 1.03, available here: http://ts.thrustmaster.com. - The racing wheel moves on its own during gameplay: This is normal; it is caused by the automatic centering feature that is available in some games. To stop these movements, simply place your hands on the racing wheel or reduce the Force Feedback feature's intensity.
  • Page 12: Technical Support

    TECHNICAL SUPPORT If you encounter a problem with your product, please go to http://ts.thrustmaster.com and click Technical Support. From there you will be able to access various utilities (Frequently Asked Questions (FAQ), the latest versions of drivers and software) that may help to resolve your problem. If the problem persists, you can contact the Thrustmaster products technical support service (“Technical Support”):...
  • Page 13: Warranty Information

    Where authorized by applicable law, the full liability of Guillemot and its subsidiaries (including for indirect damages) is limited to the repair or replacement of the Thrustmaster product. The consumer’s legal rights with respect to legislation applicable to the sale of consumer goods are not affected by this warranty.
  • Page 14: Caractéristiques Techniques

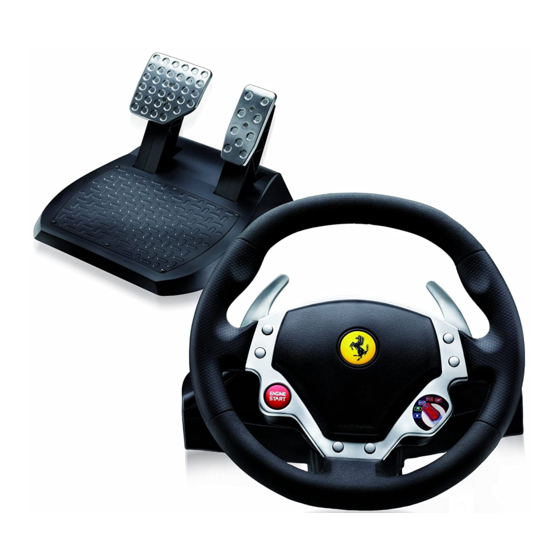
    Pour : PC Manuel de l’utilisateur CARACTÉRISTIQUES TECHNIQUES 1 Croix multidirectionnelle numérique Manettino avec : - Switch rotatif 5 positions 2 Bouton Force (F) - et Bouton Poussoir Voyant 3 10 Boutons d’actions numériques Slider pour choix : 4 2 leviers séquentiels de changement de vitesse - Manettino Manuel (MM) (Up et Down) - Manettino Automatique (AM)
  • Page 15: Installation Du Volant

    Adaptateur Secteur 11 Système de fixation Câble et Connecteur USB 12 Vis de Serrage métallique 10 Câble et Connecteur du pédalier INSTALLATION DU VOLANT Fixer le volant sur une table ou un bureau 1. Placez le volant sur une table ou autre surface plane. 2.
  • Page 16: Montage / Demontage

    MONTAGE / DEMONTAGE SENS Pour serrer : Vissez dans le sens inverse des aiguilles d’une montre Pour desserrer : Dévissez dans le sens des aiguilles d’une montre Fixer le volant sur un cockpit 1. Placez le volant sur la tablette du cockpit 2.
  • Page 17: Installation Sur Pc

    INSTALLATION SUR PC Configuration requise : PC (Windows® XP ou Vista) équipé d'un port USB. Le CD-ROM fourni avec ce produit permet d'installer les pilotes Force Feedback. 1. Insérez le CD-ROM d'installation dans votre lecteur de CD-ROM. Suivez les instructions affichées à l'écran pour installer les pilotes Force Feedback.
  • Page 18: Configuration Du Pedalier

    CONFIGURATION DU PEDALIER Par défaut, les commandes d’accélérateur et de frein de votre volant fonctionnent en mode « Séparés », ce qui signifie que les pédales fonctionnent sur des axes indépendants. Ce mode permet d’améliorer considérablement la précision de votre pilotage. Si votre jeu ne supporte pas le mode «...
  • Page 19: Reglage De La Fonction Auto-Centrage

    REGLAGE DE LA FONCTION AUTO-CENTRAGE Par défaut, l’autocentrage du volant est désactivé. La plupart des jeux récents proposent leur propre mode d’auto-centrage. Il est donc fortement conseillé (dans la majorité des cas) de désactiver l’auto-centrage du volant, pour laisser le jeu le gérer. Le Force Feedback sera alors de meilleure qualité. Le mode auto-centrage activé...
  • Page 20: Utilisation Du Manettino 5 Positions

    UTILISATION DU MANETTINO 5 POSITIONS Le Manettino 5 positions vous permettra d’effectuer les réglages de votre voiture directement en course. Les 5 positions correspondent aux boutons d’actions 13, 14, 15, 16 & 17 du volant. Le système se compose : - d’un Switch rotatif que vous pouvez tourner d’une position à...
  • Page 21 MANETTINO « MODE MANUEL » (Mode conseillé et compatible dans la plupart des jeux de simulation) 1) Positionner le Slider (7) sur MM (= Manual Manettino) Ce mode vous permet de programmer les fonctions de votre choix sur les 5 icônes du Manettino. Ici la fonction désirée se déclenche dès vous pressez le Bouton Poussoir (et non lorsque vous tournez le Switch) avec le Switch positionné...
  • Page 22 De nombreuses autres configurations sont possibles et dépendront des fonctions disponibles dans les « Options / Contrôleur » de votre jeu (telles que la répartition du freinage, le réglage des pneus, le réglage du siège en vue cockpit ou autres fonctions plus basiques). MANETTINO «...
  • Page 23: Depannage

    Eteignez votre ordinateur, déconnectez entièrement votre volant, reconnectez tous les câbles (avec l’adaptateur secteur et le pédalier), redémarrez et relancez votre jeu. Si le problème de calibration persiste, téléchargez le logiciel de calibration manuelle « Thrustmaster Calibration Tool v 1.03 » disponible à cette adresse : http://ts.thrustmaster.com - Mon volant bouge tout seul dans le jeu : Ceci est normal, il s'agit de la fonction d’auto-centrage disponible dans certains jeux.
  • Page 24: Support Technique

    SUPPORT TECHNIQUE Si vous rencontrez un problème avec votre produit, rendez-vous sur le site http://ts.thrustmaster.com et cliquez sur Support Technique. Vous aurez alors accès à différents services (Foire Aux Questions (FAQ), dernières versions des pilotes et logiciels) susceptibles de résoudre votre problème. Si le problème persiste, vous pouvez contacter le support technique des produits Thrustmaster («...
  • Page 25: Informations Relatives À La Garantie

    Dans le monde entier, Guillemot Corporation S.A. (« Guillemot ») garantit au consommateur que le présent produit Thrustmaster est exempt de défauts matériels et de vices de fabrication, et ce, pour une période de deux (2) ans à compter de la date d’achat d’origine. Si, au cours de la période de garantie, le produit semble défectueux, contactez immédiatement le Support Technique qui vous indiquera la procédure à...
  • Page 26: Technische Spezifikationen

    Für PC Benutzerhandbuch TECHNISCHE SPEZIFIKATIONEN 1 Multidirektionales D-Pad Manettino Controller mit - Einem 5-Positions-Rotationsschalter 2 Force (F) Button - Einem Druckknopf Indikator 3 10 digitale Actionbuttons Modi-Auswahlschieberegler: 4 2 sequentielle Gangschalthebel (Hoch & - Manuell Manettino (MM) Runter) oder - Automatik Manettino (AM) 1/12...
  • Page 27 Netzteil 11 Befestigungssystem USB Kabel und Anschluß 12 Metall-Befestigungsschraube 10 Pedalset Kabel und Anschluß EINRICHTEN DES RENNLENKERS Plazieren des Rennlenkers auf einem Tisch oder Schreibtisch 1. Plazieren Sie den Rennlenker auf einem Tisch oder jedwede horizontale, flache und stabile Oberfläche. 2.
  • Page 28 BEFESTIGEN / ENTFERNEN RICHTUNG Anschrauben: Schrauben entgegen dem Uhrzeigersinn Lösen: Abschrauben im Uhrzeigersinn Anbau des Rennlenkers an ein Cockpit 1. Plazieren Sie den Rennlenker auf dem Cockpitbord. 2. Plazieren Sie (die nicht mitgelieferten) zwei M6 Schrauben durch das Cockpitbord und schrauben diese in die kleinen Gewinde unten am Rennlenker.
  • Page 29 PC INSTALLATION Systemanforderungen: PC (Windows® XP oder Vista) mit einem USB Port. Die diesem Produkt beigelegte CD-ROM ermöglicht dem Nutzer die Installation der Force Feedback Treiber. 1. Legen Sie die Installations-CD-ROM in Ihr CD-ROM Laufwerk. Folgen Sie den Bildschirm-Anweisungen, um die Force Feedback Treiber zu installieren. Ist die Installation beendet, klicken Sie auf Beenden und starten Ihren Computer neu.
  • Page 30: Konfiguration Des Pedalsets

    AUTOMATISCHE KALIBRIERUNG RENNLENKERS PEDALSETS Die Kalibrierung des Rennlenkers wird automatisch ausgeführt wenn Sie das Netzteil einstecken und diesen via USB anschließen (der Rennlenker bewegt sich) Auch die Kalibrierung des Pedalsets erfolgt automatisch. Drücken Sie dazu einfach ein paar Mal die Pedale nieder. KONFIGURATION DES PEDALSETS Voreingestellt sind Bremse und Gas des Rennlenkers im "Separaten"...
  • Page 31 EINSTELLEN DES AUTOMATISCHEN ZENTRIERUNGSFEATURES Voreingestellt ist das automatische Zentrierungsfeature deaktiviert. Die meisten, aktuellen Spiele verfügen über ihren eigenen Zentrierungsmodus. Demnach empfehlen wir dringlichst (in den meisten Fällen), daß Sie dieses Feature deaktivieren und die Zentrierung durch Ihr Spiel vornehmen lassen. Die Force Feedback Qualität wird dadurch verbessert.
  • Page 32: Benutzen Des 5-Positions Manettino Controllers

    BENUTZEN DES 5-POSITIONS MANETTINO CONTROLLERS Der 5-Positions Manettino Controller ermöglicht Ihnen die Einstellungen Ihres Autos während eines Rennens zu justieren. Die 5 Positionen entsprechen den Actionbuttons 13, 14, 15, 16 & 17 an Ihrem Rennlenker. Das Manettino System beinhaltet folgendes: - Ein Rotationsschalter mit dem Sie von einer Position zur nächsten gehen können - Ein Druckknopf neben dem Schalter 2 Betriebsmodi sind verfügbar:...
  • Page 33 MANETTINO IM MANUELLEN MODUS (Dieser Modus ist empfohlen und kompatibel mit den meisten Simulationsspielen) 1) Setzen Sie den Schieberegler (7) auf MM (Manuell Manettino) Dieser Modus gestattet Ihnen die Zuordnung der erforderlichen Features zu den 5 Icons des Manettino Controllers. Das erforderliche Feature wird in diesem Modus ausgeführt wenn Sie den Druckknopf drücken (und nicht wenn Sie den Schalter drehen) nachdem Sie den Schalter auf das relevante Icon gedreht haben.
  • Page 34 Es können je nach verfügbaren Features in Ihren Spieloptionen oder der Steuerkonsole des Controllers viele andere Konfigurationen definiert werden (z. B. Bremskraftaufteilung, Reifendruck, Auswahl Cockpitsicht, u. v. a. m.). MANETTINO IM AUTOMATISCHEN MODUS (Diese Einstellung ist für Spiele erforderlich, die für den Manettino Controller vorkonfiguriert sind) Setzten Sie den Schieberegler (7) auf AM (Automatisch Manettino) Dieser Modus ist hauptsächlich für Spielentwickler gedacht, die damit Voreinstellungsfeatures für jede der 5 Positionen des Controllers definieren können.
  • Page 35 Schalten Sie Ihren Computer aus, entfernen Sie alle Kabel Ihres Rennlenkers und stecken diese dann wieder ein (auch Netzteil und Pedalset), starten Sie Ihren Computer und rufen das Spiel erneut auf. Falls dies Ihr Problem nicht behebt, laden Sie die manuelle Kalibrierungssoftware Thrustmaster Calibration Tool v 1.03 von der Seite: http://ts.thrustmaster.com...
  • Page 36 TECHNISCHER SUPPORT Sollten Sie mit Ihrem Produkt ein Problem haben, besuchen Sie bitte die Seite http://ts.thrustmaster.com und klicken Sie auf Technischer Support. Von dort aus können Sie auf verschiedene Hilfen zugreifen (Fragen und Antworten (FAQ), die neuesten Versionen von Treibern und Software), die Ihnen bei der Lösung Ihres Problems helfen könnten.
  • Page 37 COPYRIGHT © 2008 Guillemot Corporation S.A. Alle Rechte vorbehalten. Thrustmaster® ist ein eingetragenes Warenzeichen der Guillemot Corporation S.A. Microsoft® Windows® 98, 2000, Me und XP sind eingetragene Warenzeichen der Microsoft Corporation in den Vereinigten Staaten von Amerika und/oder anderen Ländern. Alle anderen Warenzeichen und Markennamen werden hiermit anerkannt und sind Eigentum ihrer jeweiligen Eigentümer.
  • Page 38: Technische Specificaties

    VOOR DE PC Handleiding TECHNISCHE SPECIFICATIES 1 Multidirectionele D-pad Manettino-controller met: - Een draaiknop met 5 standen 2 Force (F)-knop - Een drukknop -indicator 3 10 digitale actieknoppen Schuifregelaar voor het selecteren van de 4 2 sequentiële schakelflippers (omhoog en modus: omlaag) - MM (Manettino handmatig)
  • Page 39 Voedingsadapter 11 Bevestigingssysteem USB-kabel met connector 12 Metalen bevestigingsschroef 10 Pedaalsetkabel met connector HET RACESTUUR INSTALLEREN Het racestuur op een tafel of werkblad plaatsen 1. Plaats het racestuur op een tafel of een ander horizontaal, vlak en stabiel oppervlak. 2. Plaats de bevestigingsschroef (12) in het bevestigingssysteem (11), en draai de schroef aan (tegen de klok in) zodat deze vast komt te zitten in het schroefgat onder het racestuur en het apparaat volledig stabiel is.
  • Page 40 BEVESTIGEN / VERWIJDEREN RICHTING Vastdraaien: Schroef tegen de klok in draaien Losmaken: Schroef met de klok mee draaien Het racestuur aan een cockpit bevestigen 1. Plaats het racestuur op het cockpitpaneel. 2. Plaats twee M6-schroeven (niet bij het racestuur geleverd) door het cockpitpaneel en in de twee schroefgaten onder het racestuur.
  • Page 41 INSTALLATIE OP DE PC Systeemvereisten: Pc (Windows® XP of Vista) met een USB-poort. Op de meegeleverde cd-rom staan de drivers die moeten worden geïnstalleerd voor Force Feedback. 1. Plaats de installatie-cd in het cd-rom-station. Volg de instructies op het scherm om de Force Feedback-drivers te installeren.
  • Page 42 DE PEDAALSET CONFIGUREREN Standaard werkt de bediening voor gas geven en remmen van het racestuur in de modus "Separate" (onafhankelijk van elkaar). Bij deze instelling functioneren de pedalen op verschillende assen. In deze modus is de precisie bij het racen veel hoger. Als de game niet geschikt is voor de modus "Separate", werkt de pedaalset die op het racestuur is aangesloten, niet goed.
  • Page 43 AUTOMATISCH CENTREERSYSTEEM INSTELLEN Standaard is het automatische centreersysteem van het racestuur uitgeschakeld. De meeste recente games hebben een eigen automatische centreermodus. Het wordt (in de meeste gevallen) dan ook sterk aanbevolen om de automatische centreerfunctie van het racestuur uit te schakelen en het automatisch centreren in te stellen via de game. Dit levert een betere kwaliteit Force Feedback op.
  • Page 44 DE MANETTINO-CONTROLLER MET 5 STANDEN GEBRUIKEN Met de Manettino-controller met 5 standen kunt u de instellingen van de auto aanpassen tijdens een race. De 5 standen komen overeen met actieknoppen 13, 14, 15, 16 en 17 op het racestuur. Het Manettino-systeem bestaat uit de volgende onderdelen: - Een draaiknop die in verschillende s anden kan worden gezet - Een drukknop onder de schakelaar Er zijn 2 modi beschikbaar:...
  • Page 45 MANETTINO IN DE HANDMATIGE MODUS (Deze modus wordt aanbevolen en is geschikt voor de meeste simulatiegames) 1) Stel de schuifregelaar (7) in op MM (Manettino handmatig) In deze modus kunt u de gewenste functies toewijzen aan de 5 symbolen van de Manettino-controller. In deze modus wordt de gewenste functie uitgevoerd als u op de drukknop drukt (en niet wanneer u de schakelaar omzet) nadat de schakelaar op het symbool van de gewenste functie is ingesteld.
  • Page 46 Er kan een groot aantal andere configuraties worden gedefinieerd op basis van de functies die beschikbaar zijn in de opties of het configuratiescherm van de game (bijvoorbeeld remkrachtverdeling, bandendruk, gewenste cockpitweergave en andere basisfuncties). MANETTINO IN DE AUTOMATISCHE MODUS (Deze instelling wordt aanbevolen voor games die speciaal zijn geconfigureerd voor de Manettino- controller van het racestuur) 1) Stel de schuifregelaar (7) in op AM (Manettino automatisch) Deze modus is voornamelijk bedoeld voor gamedevelopers, die functies kunnen toewijzen aan de 5...
  • Page 47: Verhelpen Van Storingen

    Is het probleem hiermee niet opgelost, download dan de software voor handmatig kalibreren Thrustmaster Calibration Tool v 1.03 op de website http://ts.thrustmaster.com. - Het racestuur beweegt uit zichzelf tijdens de game: Dit is normaal en komt door de automatische centreerfunctie die in sommige games beschikbaar is. Wilt u deze bewegingen stoppen, leg dan de handen op het stuur of kies een zwakkere ForceFeedback- instelling.
  • Page 48: Technische Ondersteuning

    Technical Support. U hebt daar toegang tot verschillende onderwerpen die u helpen bij het vinden van oplossingen, zoals de FAQ (veelgestelde vragen) en de meest recente drivers en software. Als het probleem op die manier niet kan worden verholpen, kunt u contact opnemen met de Thrustmaster product technical support service (Technical Support).
  • Page 49 COPYRIGHT © Guillemot Corporation S.A. 2006. Alle rechten voorbehouden. Thrustmaster® is een geregistreerd handelsmerk van Guillemot Corporation. Microsoft® Windows® is een geregistreerd handelsmerk van Microsoft Corporation in de Verenigde Staten en/of andere landen. Alle overige handelsmerken en merknamen worden hierbij erkend en zijn het eigendom van de respectieve eigenaren. Afbeeldingen zijn niet bindend.
  • Page 50: Caratteristiche Tecniche

    Per PC Manuale d’uso CARATTERISTICHE TECNICHE 1 D-Pad multidirezionale Manettino dotato di: - Uno switch rotante a 5 posizioni 2 Pulsante Force (F) - Un pulsante Indicatore 3 10 pulsanti azione digitali Slider per la selezione della modalità: 4 2 leve del cambio sequenziali (Su e Giù) - Manettino Manuale (MM) oppure - Manettino Automatico (AM)
  • Page 51 Alimentatore 11 Sistema di aggancio Cavo USB e connettore 12 Vite di fissaggio in metallo 10 Cavo pedaliera e connettore PREPARARE IL TUO VOLANTE Colloca il volante su un tavolo o su una scrivania 1. Colloca il volante su un tavolo o qualsiasi altra superficie orizzontale liscia e stabile. 2.
  • Page 52 AGGANCIO / RIMOZIONE DIREZIONE Per fissare: Avvita in senso antiorario Per sganciare: Avvita in senso orario Fissaggio del volante ad un cockpit 1. Posiziona il volante sullo chassis del cockpit. 2. Fai passare due viti M6 (non accluse al volante) attraverso lo chassis del cockpit, facendole passare nei due appositi fori posti nella parte inferiore del volante.
  • Page 53 INSTALLAZIONE PC Requisiti di sistema: PC (Windows® XP o Vista) dotato di porta USB. Il CD-ROM accluso a questo prodotto consente di installare i driver Force Feedback. 1. Inserisci il CD-ROM di installazione nel tuo lettore CD-ROM. Installa i driver Force Feedback seguendo le istruzioni che appaiono sullo schermo.
  • Page 54 CONFIGURAZIONE DELLA PEDALIERA Per default, l’acceleratore ed il freno del tuo volante operano in modalità "Separata"; ciò significa che i pedali operano su assi indipendenti. Questa modalità aumenta notevolmente la precisione durante la guida. Qualora il tuo gioco non fosse compatibile con la modalità "Separata", la pedaliera collegata al tuo volante non funzionerà...
  • Page 55 IIMPOSTAZIONE DELLA FUNZIONE DI RICENTRAGGIO AUTOMATICO Per default, la funzione di ricentraggio automatico del volante è disattivata. I giochi più recenti sono dotati di una propria modalità di ricentraggio. Pertanto, nella maggior parte dei casi, ti consigliamo vivamente di disattivare la funzione di ricentraggio automatico del volante e lasciare che sia il tuo gioco a gestirla.
  • Page 56 USO DEL MANETTINO A 5 POSIZIONI Tramite il Manettino a 5 posizioni potrai regolare le impostazioni della tua auto durante la corsa. Le 5 posizioni corrispondono ai pulsanti azione 13, 14, 15, 16 e 17 del tuo volante. Il sistema Manettino comprende: - Uno switch rotante che puoi muovere da una posizione all’altra - Un pulsante posto al di sotto dello switch Le modalità...
  • Page 57 MANETTINO IN MODALITÀ MANUALE (Questa modalità è compatibile e consigliata per la maggior parte dei giochi di simulazione) 1) Sposta lo slider (7) su MM (Manettino Manuale) Questa modalità ti permette di associare una qualsiasi funzione ad ognuna delle 5 icone del Manettino. In questo modo, dopo aver collocato lo switch sulla relativa icona, la funzione desiderata verrà...
  • Page 58 A seconda delle opzioni presenti nel tuo gioco o nell’interfaccia per la gestione del controller, potrebbero essere disponibili anche molti altri parametri di configurazione (ad esempio, ripartizione della frenata, pressione delle gomme, tipo di visuale dall’abitacolo o altre funzioni di base). MANETTINO IN MODALITÀ...
  • Page 59: Risoluzione Dei Problemi

    Se il problema dovesse persistere, scarica il software per la calibrazione manuale Thrustmaster Calibration Tool v 1.03, disponibile qui: http://ts.thrustmaster.com. - Il volante si muove da solo durante il gioco: Questo è normale: ciò è causato dalla funzione di ricentraggio automatico presente in alcuni giochi. Per arrestare questi movimenti, non devi far altro che impugnare il volante o ridurre l’intensità...
  • Page 60: Assistenza Tecnica

    Nel mondo, Guillemot Corporation S.A. (“Guillemot”) garantisce al consumatore che questo prodotto Thrustmaster è privo di difetti nei materiali e nell’assemblaggio per un periodo di due (2) anni dalla prima data di acquisto. Qualora il prodotto presentasse dei difetti durante tale periodo, contatta immediatamente il servizio di Assistenza Tecnica, che ti indicherà...
  • Page 61 COPYRIGHT © 2008 Guillemot Corporation S.A. Tutti i diritti riservati. Thrustmaster® è un marchio registrato di proprietà di Guillemot Corporation. Microsoft® Windows® è un marchio registrato di proprietà di Microsoft Corporation, negli Stati Uniti e/o altri Paesi. Tutti gli altri marchi registrati o nomi di prodotti vengono qui citati previa autorizzazione ed appartengono ai legittimi proprietari.
  • Page 62: Especificaciones Técnicas

    Para PC Manual del usuario ESPECIFICACIONES TÉCNICAS 1 D-Pad multidireccional Mando Manettino que incorpora: - Un interruptor giratorio de 5 posiciones 2 Botón Force (F) - Un botón pulsador Indicador 3 10 botones digitales de acción Deslizador de selección de modo: 4 2 palancas secuenciales de cambio de marchas - Manettino Manual (MM) (Arriba y Abajo)
  • Page 63 Adaptador de corriente 11 Sistema de fijación Conector y cable USB 12 Tornillo de sujeción metálico 10 Conector y cable de los pedales CONFIGURACIÓN DEL VOLANTE DE CARRERAS Colocar el volante de carreras en una mesa o un escritorio 1. Coloca el volante de carreras en una mesa o en otra superficie horizontal, plana y estable. 2.
  • Page 64 COLOCACIÓN / RETIRADA INDICACIÓN Para apretar: Atornillar en sentido antihorario Para soltar: Desatornillar en sentido horario Fijar el volante de carreras a una cabina 1. Coloca el volante de carreras en el estante de la cabina. 2. Coloca dos tornillos M6 (no incluidos con el volante de carreras) a través del estante de la cabina e insértalos en los dos agujeros roscados pequeños que hay debajo del volante de carreras.
  • Page 65 INSTALACIÓN EN PC Requisitos del sistema: PC (Windows® XP o Vista) que cuente con un puerto USB. El CD-ROM incluido con este producto permite a los usuarios instalar los controladores Force Feedback. 1. Inserta el CD-ROM de instalación en tu lector de CD-ROM. Sigue las instrucciones ofrecidas en pantalla para instalar los controladores de Force Feedback.
  • Page 66 CONFIGURACIÓN DE LOS PEDALES De forma predeterminada, los controles de acelerador y freno del volante de carreras funcionan en modo “Separado”, lo que significa que los pedales funcionan en ejes independientes. Este modo mejora considerablemente la precisión al correr. Si tu juego no es compatible con el modo "Separado", los pedales conectados al volante de carreras no funcionarán correctamente.
  • Page 67 CONFIGURACIÓN DE LA FUNCIÓN DE CENTRADO AUTOMÁTICO De forma predeterminada, la función de centrado automático del volante está desactivada. La mayoría de los juegos recientes incorporan su propio modo de centrado automático. Por lo tanto, se recomienda (en la mayoría de los casos) desactivar la función de centrado automático del volante y dejar que el juego la gestione.
  • Page 68 UTILIZACIÓN DEL MANDO MANETTINO DE 5 POSICIONES El mando Manettino de 5 posiciones te permite ajustar la configuración del coche durante una carrera. Las 5 posiciones coinciden con los botones de acción 13, 14, 15, 16 y 17 del volante de carreras. El sistema Manettino consta de lo siguiente: - Un interruptor giratorio que se puede mover de una posición a otra - Un botón pulsador situado debajo del interruptor...
  • Page 69 MANETTINO EN MODO MANUAL (Este modo es el recomendado y el compatible con la mayoría de los juegos de simulación) 1) Mueve el deslizador (7) a MM (Manettino Manual) Este modo te permite asignar las funciones necesarias a los 5 iconos del mando Manettino. En este modo, la función requerida se realiza cuando pulsas el botón pulsador (y no cuando giras el interruptor) después de colocar el interruptor en el icono pertinente.
  • Page 70 Se pueden definir otras muchas configuraciones según las funciones disponibles en las opciones del juego o la interfaz de gestión del mando (p.e. distribución de fuerzas de frenado, presión de neumáticos, selección de vista de cabina u otras funciones más básicas). MANETTINO EN MODO AUTOMÁTICO (Esta configuración es la recomendada para los juegos preconfigurados para el mando Manettino del volante de carreras)
  • Page 71: Resolución De Problemas

    Si el problema no se resuelve, descarga el software de calibración manual Thrustmaster Calibration Tool 1.03, disponible aquí: http://ts.thrustmaster.com. - El volante de carreras se mueve solo durante el juego: Esto es normal, se debe a la función de centrado automático que está disponible en algunos juegos. Para detener esos movimientos, basta con que coloques tus manos en el volante de carreras o reduzcas la intensidad de la función Force Feedback.
  • Page 72: Soporte Técnico

    En todo el mundo, Guillemot Corporation S.A. (“Guillemot”) garantiza al consumidor que este producto de Thrustmaster estará libre de defectos materiales y fallos de fabricación por un periodo de dos (2) años a partir de la fecha de compra original. Si el producto pareciera estar defectuoso durante el periodo de garantía, contacte inmediatamente con el Soporte Técnico, que le indicará...
  • Page 73: Recomendación De Protección Ambiental

    COPYRIGHT © 2008 Guillemot Corporation S.A. Todos los derechos reservados. Thrustmaster® es una marca registrada de Guillemot Corporation S.A. Windows® y Windows® XP son marcas comerciales registradas de Microsoft Corporation en Estados Unidos y/o en otros países. Pentium® es una marca comercial registrada de Intel Corporation.
  • Page 74: Руководство Пользователя

    ГОНОЧНЫЙ РУЛЬ Для ПК Руководство пользователя ТЕХНИЧЕСКИЕ ХАРАКТЕРИСТИКИ 1 Манипулятор D-Pad Особенности переключателя "Manettino" (Небольшой переключатель): 2 Кнопка усилия (F) - один поворотный выключатель с пятью позициями; 3 + 10 цифровые командные кнопки - одна кнопка; индикатор 4 2 последовательных рычага переключения передач...
  • Page 75 Адаптер питания 11 Система крепления USB-кабель и разъем 12 Металлический крепежный винт 10 Набора кабелей для педалей и разъем УСТАНОВКА ГОНОЧНОГО РУЛЯ Установка руля на столе или приборной доске 1. Установите гоночный руль на столе или любой другой горизонтальной плоской и устойчивой поверхности.
  • Page 76 КРЕПЛЕНИЕ / УДАЛЕНИЕ НАПРАВЛЕНИЕ Для того закрепить, поворачивайте винт против часовой стрелки Для того чтобы снять руль, раскрутите винт, вращая его по часовой стрелке Установка гоночного руля в кабине 1. Положите гоночный руль на доску кабины. 2. Проденьте через маленькие отверстия, расположенные под основанием гоночного руля, и закрепите...
  • Page 77 УСТАНОВКА ПК Требования к системе: ОС (Windows® XP или Vista) и USB-порт. CD-диск, поставляемый с изделием, позволяет установить драйверы Force Feedback. 1. Вставьте установочный CD-диск в привод CD дисков. Для установки драйверов Force Feedback следуйте инструкциям, которые будут появляться на экране. После завершения установки нажмите...
  • Page 78 НАСТРОЙКА ПАРАМЕТРОВ НАБОРА ПЕДАЛЕЙ Параметры педалей акселератора и тормоза гоночного руля по умолчанию заданы в режиме «Separate» (Автономный). Параметры этой настройки обозначают, что оси педалей не синхронизированы. Такой режим значительно улучшает управляемость автомобиля во время гонок. Если игра несовместима с режимом «Separate» (Автономный), набор педалей, подсоединенный к рулю...
  • Page 79 НАСТРОЙКА ФУНКЦИИ АВТОМАТИЧЕСКОЙ ЦЕНТРОВКИ По умолчанию функция автоматической центровки не активирована. Многие новые игры имеют свой режим автоматической центровки. Поэтому, настоятельно рекомендуется (в большинстве случаев) отключить функцию автоматической центровки руля и позволить игре самостоятельно настроить ее. Качество Force Feedback (Обратной связи по усилию) будет значительно улучшено. Режим...
  • Page 80 Использование контроллера MANETTINO с пятью позициями Контроллер Manettino с пятью позициями переключения скорости позволит отрегулировать настройки автомобиля во время гонки. 5 позицией переключения скорости соответствует кнопок 13, 14, 15, 16 и 17, номера которых отмечены на руле. Система Manettino имеет такие элементы: - переключатель...
  • Page 81 MANETTINO В РУЧНОМ РЕЖИМЕ (Рекомендуется использовать этот режим. Совместим практически со всеми игровыми симуляторами) 1) Установите указатель слайдера (7) на MM (Manual Manettino "Ручной режим Manettino") Этот режим позволяет выбрать необходимую функцию, изображенную на пяти рисунках контроллера Manettino. В данном режиме можно выбрать нужную функцию с помощью кнопки, а не переключателя, расположив указатель...
  • Page 82 Также можно выполнить настройки многих других функций, которые доступны в параметрах игры или в интерфейсе управления контроллером (например, распределения тормозных усилий, уровень давления в шинах, выбор внешнего вид кабины водителя и т. д.). MANETTINO В АВТОМАТИЧЕСКОМ РЕЖИМЕ (Эта настройка рекомендуется для игр, параметры которых были предварительно отрегулированы...
  • Page 83: Устранение Неисправностей

    Выключите компьютер, полностью отсоедините руль, в том числе все кабели (сетевой адаптер и комплект педалей), затем повторно включите компьютер и запустите игру. Если проблема не устранена, загрузите ПО для калибровки вручную Thrustmaster Calibration Tool v 1.03, ПО можно скачать здесь: http://ts.thrustmaster.com. http://ts.thrustmaster.com.”...
  • Page 84: Техническая Поддержка

    Во всех странах, корпорация Guillemot Corporation S.A. (“Guillemot”) дает гарантию на изделия Thrustmaster в том, что эти изделия не имеют дефектов материалов или производства на (2) года от даты покупки. При обнаружении дефекта в течении гарантийного срока немедленно свяжитесь со...
  • Page 85: Авторское Право

    АВТОРСКОЕ ПРАВО © 2008 Guillemot Corporation S.A. Все права защищены. Thrustmaster® является зарегистрированной торговой маркой Guillemot Corporation. Microsoft® Windows® является зарегистрированной торговой маркой Microsoft Corporation в Соединенных Штатах Америки и/или других странах. Все прочие торговые марки и фирменные названия приведенные в данном...
  • Page 86 Produced under license of ferrari sPa. ferrari, the PrancinG horse device, all associated loGos and distinctive desiGns are trademarks of ferrari sPa. the body desiGns of the ferrari cars are Protected as ferrari ProPerty under desiGn, trademark and trade dress reGulations. Produit fabriqué...

Table des Matières