Table des Matières
Publicité
Les langues disponibles
Les langues disponibles
Liens rapides
In USA - BEST Hartford, Wisconsin
In CANADA - BEST Drummondville, QC, Canada
REGISTER YOUR PRODUCT ONLINE AT : www.BestRangeHoods.com/register
For additional Information visit www.BestRangeHoods.com
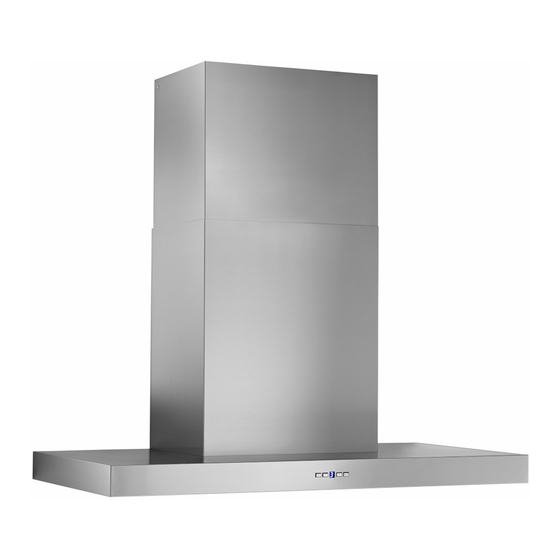
Model WPB9
ENGLISH........................................3
FRANÇAIS...................................18
ESPAÑOL.....................................35
Publicité
Table des Matières

Manuels Connexes pour Best WPB9 Serie


Sommaire des Matières pour Best WPB9 Serie
- Page 17 - 17 -...
- Page 18 WPB9 Modèle ENGLISH........3 FRANÇAIS........18 ESPAÑOL........35 Aux États-Unis - BEST Hartford, Wisconsin Au CANADA - BEST Drummondville, QC, Canada ENREGISTREZ VOTRE PRODUIT EN LIGNE À : www.BestRangeHoods.com/register Pour de plus amples informations, visitez www.BestRangeHoods.com - 18 -...
- Page 19 - 19 -...
-
Page 20: Lire Ces Directives Et Les Conserver
LIRE CES DIRECTIVES ET LES CONSERVER CONÇUE POUR LES CUISINES PRIVÉES UNIQUEMENT AVERTISSEMENTS POUR RÉDUIRE LES RISQUES D’INCENDIE, D’ÉLECTROCUTION OU DE BLESSURES PHYSIQUES, RESPECTEZ LES INSTRUCTIONS CI-DESSOU: 1. Utilisez cet appareil uniquement de la manière prévue par le fabricant. Si vous avez des ques- tions, contactez le fabricant à... - Page 21 AVERTISSEMENTS POUR RÉDUIRE LE RISQUE DE BLESSURES PHYSIQUES EN CAS DE FEU DE FRITURE SUR LA TABLE DE CUISSON, VEUILLEZ PROCÉDER COMME SUIT :* 1. ÉTOUFFEZ LES FLAMMES avec un couvercle hermétique, une plaque à biscuits ou un plateau en métal, puis éteignez le brûleur. SOYEZ PRUDENT(E) AFIN D’ÉVITER LES BRÛLURES.
-
Page 22: Nettoyage Et Entretien
NETTOYAGE ET ENTRETIEN Pour assurer les performances de l'appareil, entretenez-le de manière appropriée. Moteur Le moteur est lubrifié en permanence et aucun graissage n'est nécessaire. Si les roulements du moteur font un bruit excessif ou inhabituel, remplacez le moteur par une pièce de rechange identique. -
Page 23: Fonctionnement
FONCTIONNEMENT COMMANDES (Fig.1) FIG. 1 Bouton A = tourne les lumières / basse / haute / arrêt. Bouton B = active / désactive la fonction retard-off. Appuyez une fois (lorsque la soufflerie est activée) pour activer la fonction retard-off. Le niveau de vitesse sélectionnée qui est affichée dans l’affichage “C”... -
Page 24: Préparation De La Hotte
PRÉPARATION DE LA HOTTE Déballez la hotte et vérifiez le contenu de l’emballage. Il doit comprendre : 1 - Hotte 1 - Carneau décoratif 1 - Sac de pièces (080811032) contenant: 1 - Collier d’évacuation 6 - Vis de montage (à tête cylindrique de 3,9 x 9,5 mm) 2 - Vis de montage (à... -
Page 25: Installer Les Conduits
INSTALLER LES CONDUITS CAPUCHON DU TOIT REMARQUE: pour réduire les risques d’incendie, utilisez uniquement des CONDUIT ROND DE 8” conduits métalliques. 1. Décidez où le tuyau doit être installé, entre votre hotte et l’extérieur. 2. Un conduit droit et court permettra à votre CARNEAU hotte de fonctionner d’une façon plus efficace. - Page 26 FIXEZ LA PLAQUE D’ASSEMBLAGE ELECTRICAL 3,9x9,5mm Fixer la plaque elctrical avec 4 vis (3.9x9.5mm) à la hotte, les vis se trouvent à l’intérieur du sachet accessoires (Fig. 5). FIG.5 INSTALLEZ LA HOTTE STRUCTURE DERRIÈRE LE SUPPORT EN BOIS CROISÉ Remarque : avant l'installation finale, retirez la pellicule en plastique de toutes les surfaces extérieures, des carneaux décoratifs et des filtres.
- Page 27 VIS D’ASSEMBLAGE (6x60mm) PLANCHE DE BOIS POUR L'ADAPTATION VIS D’ASSEMBLAGE (6x60mm) FIG. 7 FIG. 8 - 27 -...
-
Page 28: Fixez Le Collier
FIXEZ LE COLLIER VIS DE MONTAGE 3.9x9.5mm Fixez le collier d’évacuation au refoulement de la soufflante avec 2 vis (3.9x9.5mm), les vis se trouvent à l’intérieur du sachet accessoires (Fig. 9). FIG. 9 INSTALLATION ELECTRIQUE Remarque: Ce modèle de hotte doit être relié... -
Page 29: Installation Du Support De Montage Du Carneau
INSTALLATION DU SUPPORT VIS D’ASSEMBLAGE (6x60mm) DE MONTAGE DU CARNEAU 1. Centrez avec soin le support de montage directement au-dessus de l'emplacement de la hotte de cuisine. 2. Fixez le support au mur à l'aide de 2 vis de montage de 6 x 60 mm (Fig.11). Veillez à ce que le support soit poussé... -
Page 30: Installation Des Filtres
INSTALLATION DES FILTRES REMARQUE: Avant toute utilisation, enlever la pellicule de protection du cadre du filtre. 1. Pour retirer le filtre à GRAISSE, (Fig.15) pousser le filtre vers l’avant pour qu’il efface le canal du filtre, puis tirez sur la poignée pour dégager le filtre de la hotte. -
Page 31: Calibrage Du Ventilateur Iq
CALIBRAGE DU VENTILATEUR IQ VENTILATEUR INTERNE AVEC CONDUITS SEULEMENT Une fois la hotte installée et connectée, enclenchez le processus de calibrage (notre Technologie de performance garantie s’assure que le débit d’air optimal sera émis). Avant le calibrage, assurez-vous que les filtres, les ampoules d’éclairage et les conduits sont installés. CALIBRAGE Maintenez le bouton de calibrage pendant 3 secondes;... -
Page 32: Garantie
GARANTIE LIMITéE DE UN AN DE BEST Broan-NuTone LLC (Broan-NuTone) garantit à l'acheteur original que les produits BEST vendus en vertu de la présente sont libres de tout vice de matériau ou de fabrication pour une période de un an à compter de la date d'achat originale. CETTE GARANTIE NE COMPORTE AUCUNE AUTRE GARANTIE, EXPRESSE OU TACITE, Y COMPRIS, MAIS SANS S'Y LIMITER, LES GARANTIES TACITES DE VALEUR MARCHANDE OU D'ADAPTATION À... -
Page 33: Pièces De Rechange
PIÈCES DE RECHANGE MODÈLE WPB9 PART N. DESCRIPTION B08087951 Filtres à graisse B02300804 Capteur de température B06102611 Ensemble de Fils B03292499 Fils de passage BE3350233 Boîte de alimentation BE3334252 Couvercle Boîte de alimentation BE3353371 Support de montage du carneau B03292290 Serre-fil B03295035 Boîte Fusible... - Page 34 - 34 -...
- Page 36 - 36 -...
- Page 51 - 51 -...
- Page 52 04308685...