ION SLIDES 2 PC Guide D'utilisation

ION SLIDES 2 PC Guide D'utilisation

Masquer les pouces Voir aussi pour SLIDES 2 PC:

Publicité

Les langues disponibles
  • FR

Les langues disponibles

  • FRANÇAIS, page 15

Liens rapides

USER GUIDE
ENGLISH ( 3 – 8 )
GUÍA DEL USUARIO
ESPAÑOL ( 9 – 14 )
GUIDE D'UTILISATION
FRANÇAIS ( 15 – 20 )
GUIDA UTENTE
ITALIANO ( 21 – 26 )
BEDIENUNGSANLEITUNG
DEUTSCH ( 27 – 32 )
GEBRUIKERSHANDLEIDING
NEDERLANDS ( 33 – 38 )

Publicité

Table des Matières
loading

Sommaire des Matières pour ION SLIDES 2 PC

  • Page 1 USER GUIDE ENGLISH ( 3 – 8 ) GUÍA DEL USUARIO ESPAÑOL ( 9 – 14 ) GUIDE D’UTILISATION FRANÇAIS ( 15 – 20 ) GUIDA UTENTE ITALIANO ( 21 – 26 ) BEDIENUNGSANLEITUNG DEUTSCH ( 27 – 32 ) GEBRUIKERSHANDLEIDING NEDERLANDS ( 33 –...
  • Page 3: Fcc Notice

    Improper use creates the risk of serious accident. Do not try to open the case of SLIDES 2 PC or attempt to modify SLIDES 2 PC in any way. High- voltage internal components create the risk of electric shock when exposed. Maintenance and repairs should be performed only by authorized service providers.
  • Page 4: Software Installation (Mac)

    SOFTWARE INSTALLATION To use the SLIDES 2 PC you must install ImageScanTool in advance. SOFTWARE INSTALLATION (WINDOWS) Note: Please remove any prior version of ImageScanTool before installing this version.
  • Page 5 Push the lever towards the left, then pull the lever back to the right again to load a slide from the feeder into SLIDES 2 PC. Repeat this step for subsequent slides (which will push the used slides out the...
  • Page 6 USING THE SLIDES 2 PC Plug the USB cable of the SLIDES 2 PC into your computer’s USB port. Once connected, the power LED light will be blue. Note for Windows users: The first time you connect SLIDES 2 PC to your computer, wait a few seconds until you see a dialog box that says "Found New Hardware"...
  • Page 7 EDITING YOUR PICTURES Snapshot – To capture your previewed image, click "Snapshot." Delete – Deletes a file selected from the list. Mirror – Click this button to mirror the image. Rotate – Rotates the image right 90º. Brightness/Exposure – Click and drag the slider to adjust the image's brightness. Color Balance –...
  • Page 8 There is a black border The slide or film might not Remove the holder from SLIDES 2 PC and around the edge of the be properly inserted in the make sure the slide or film is placed correctly image.
  • Page 9: Requisitos De Sistema

    únicamente proveedores de servicio autorizados. Mantenga el SLIDES 2 PC lejos del agua y de otros líquidos. No use el SLIDES 2 PC con las manos mojadas. Nunca use SLIDES 2 PC en la lluvia o la nieve. La humedad crea el peligro de incendio y electrocución.
  • Page 10: Contenido De La Caja

    El polvo o la suciedad de los negativos y las bandejas pueden afectar a la calidad de las imágenes escaneadas. INSTALACIÓN DEL SOFTWARE Para usar el SLIDES 2 PC, debe instalar previamente el programa ImageScanTool. INSTALACIÓN DEL SOFTWARE (WINDOWS) Nota: "BORRE" cualquier versión anterior de ImageScanTool antes de instalar esta versión.
  • Page 11 Empuje la palanca hacia la izquierda y luego de regreso a la derecha para cargar una diapositiva del alimentador en el SLIDES 2 PC. Repita este paso para las diapositivas siguientes (que empujarán a las usadas hacia afuera del otro lado).
  • Page 12 CÓMO USAR EL SLIDES 2 PC Enchufe el cable USB del SLIDES 2 PC en el puerto USB de su computadora. Una vez conectado, el LED de encendido se ilumina con luz azul. Nota para usuarios de Windows: La primera vez que conecte SLIDES 2 PC a la computadora, espere algunos segundos hasta ver un cuadro de diálogo que diga "Found New Hardware"...
  • Page 13 CÓMO EDITAR LAS FOTOGRAFÍAS Snapshot – Para capturar la imagen de la vista preliminar, haga clic "Snapshot" (instantánea). Eliminar – Permite eliminar un archivo seleccionado en la lista. Espejo – Haga clic en este botón para crear un espejo de la imagen. Giro a izquierda o derecha –...
  • Page 14: Solución De Problemas

    Reinserte el soporte éste no esté totalmente en el SLIDES 2 PC (debe hacer un clic en su sitio insertado en el SLIDES 2 cuando queda insertado correctamente). Este símbolo en el producto o en las instrucciones significa que su equipo eléctrico y electrónico debe ser desechado al final de su vida útil separadamente de sus residuos domésticos.
  • Page 15: Configuration Nécessaire

    MISES EN GARDE Avant d'utiliser le SLIDES 2 PC, veuillez vous assurer de lire et comprendre les mises en garde relatives à la sécurité décrites ci-dessous. Il est important de s'assurer que le SLIDES 2 PC est utilisé de façon adéquate.
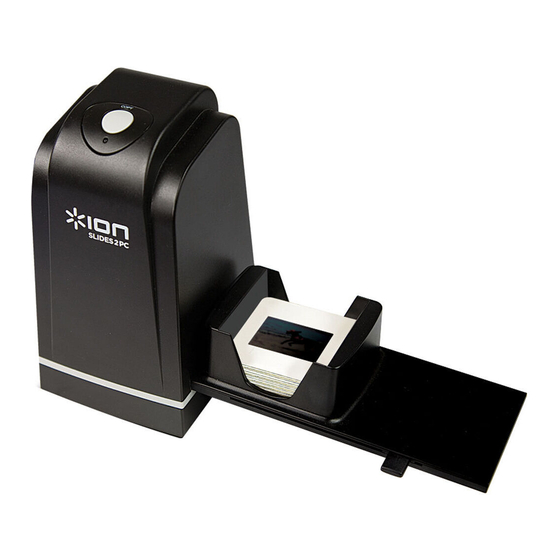
  • Page 16: Contenu De La Boîte

    La poussière ou la saleté provenant des négatifs et des paniers influencera la qualité des images numérisées. INSTALLATION DU LECTEUR ET DU LOGICIEL Pour utiliser le SLIDES 2 PC, vous devez installer ImageScanTool au préalable. INSTALLATION DU LOGICIEL (WINDOWS) Remarque : veuillez « SUPPRIME » toute version antérieure de ImageScanTool avant d'installer cette version.
  • Page 17: Utilisation Des Supports Inclus

    Poussez le levier vers la gauche, puis de nouveau vers la droite afin de charger la prochaine diapositive du support dans le SLIDES 2 PC. Répétez ces étapes pour toutes les autres diapositives (les diapositives visionnées ressortiront de l’autre côté de l'appareil).
  • Page 18: Utilisation Du Slides 2 Pc

    UTILISATION DU SLIDES 2 PC Brancher le câble USB du SLIDES 2 PC dans le port USB de l’ordinateur. Une fois branché, le témoin d’alimentation DEL s’allume en bleu. Remarque pour les utilisateurs de Windows : La première fois que vous branchez le SLIDES 2 PC à votre ordinateur, attendez quelques minutes, jusqu’à...
  • Page 19: Modification Des Images

    MODIFICATION DES IMAGES Snapshot – Pour saisir votre image en aperçu, cliquez sur « Snapshot » (instantané). Supprimer – Ce bouton permet de supprimer le fichier sélectionné. Miroir – Cliquez ce bouton afin de présenter l’autre face. Rotation – Ce bouton permet de pivoter l’image vers la droite de 90º. Ajustement de la luminosité...
  • Page 20: Guide De Dépannage

    « nettoyer » votre photo numérique. Il y a une bordure noire autour La diapositive ou le film peut Retirez le porte-film du SLIDES 2 PC et assurez- de l’image. être mal inséré dans le vous que la diapositive ou le film est correctement porte-film, ou le porte-film inséré...
  • Page 21: Dichiarazione Fcc

    BENVENUTI! Grazie per aver acquistato uno scanner SLIDES 2 PC per pellicole e diapositive. Dedichi un po’ di tempo alla lettura completa di questo manuale per ottenere il massimo dal Suo SLIDES 2 PC. PRECAUZIONI Prima di utilizzare SLIDES 2 PC, assicurarsi di aver letto e compreso a fondo le precauzioni d’uso descritte di seguito.
  • Page 22: Contenuti Della Confezione

    Polvere o sporcizia sui negativi e sui vassoi influirà sulla qualità delle immagini scannerizzate. INSTALLAZIONE SOFTWARE Per utilizzare lo SLIDES 2 PC bisogna innanzitutto installare ImageScanTool. INSTALLAZIONE DEL SOFTWARE (WINDOWS) Nota: prima di installare ImageScanTool, "RIMUOVERE" qualsiasi versione precedente di questo software.
  • Page 23 Collocare l’alimentatore rapido diapositive nello SLOT PER PORTA PELLICOLE. Spingere la leva verso sinistra, quindi tirarla nuovamente verso destra per caricare una diapositiva dall’alimentatore al SLIDES 2 PC. Ripetere questo passaggio per le diapositive successive (che spingeranno le diapositive usate facendole uscire dal lato opposto).
  • Page 24 UTILIZZO DELLO SLIDES 2 PC Collegare il cavo USB allo SLIDES 2 PC alla porta USB del computer. Una volta collegato, il LED di alimentazione sarà blu. Nota per gli utenti Windows: La prima volta che si connette SLIDES 2 PC al proprio computer, aspettare qualche secondo fino a quando non si vede una finestra di dialogo che dice "Trovato nuovo hardware"...
  • Page 25 MODIFICA DELLE IMMAGINI Snapshot – Per acquisire l'immagine visualizzata in anteprima, fare clic su "Snapshot" (istantanea). Delete (cancella) – Cancella un file selezionato dall'elenco. Mirror (specchio) – Cliccare su questo pulsante per girare l'immagine. Rotate (ruota) – Ruota l'immagine a destra di 90º. Brightness/Exposure –...
  • Page 26: Risoluzione Di Problemi

    Lo SLIDES 2 PC non è Il computer deve essere dotato di una porta USB SLIDES 2 PC. collegato ad una porta USB 2.0 per comunicare con lo SLIDES 2 PC. ad alta velocità. Verificare che sul computer sia installata una Ricevo un messaggio Windows porta USB 2.0.
  • Page 27: Systemanforderungen

    Geräte Beschränkungen unterliegt. Verwendung am falschen Ort birgt ein ernsthaftes Unfallrisiko. Versuchen Sie nicht, das Gehäuse des SLIDES 2 PC zu öffnen oder den SLIDES 2 PC auf andere Weise umzubauen. Hochspannungskomponenten im Inneren können zu einem elektrischen Schlag führen. Wartungs- und Reparaturarbeiten sollten nur von hierzu befugtem Kundendienstpersonal vorgenommen werden.
  • Page 28: Inhalt Der Verpackung

    Abdeckungen beeinträchtigt die Qualität der eingescannten Bilder. INSTALLATION VON TREIBER UND SOFTWARE Um mit Ihrem SLIDES 2 PC arbeiten zu können, müssen Sie zuerst den ImageScanTool installieren. INSTALLATION DER SOFTWARE (WINDOWS) Hinweis: ENTFERNEN Sie eventuell vorhandene ältere Versionen von ImageScanTool, bevor Sie mit der Installation von diese Software beginnen.
  • Page 29 Schieben Sie den Hebel ganz nach links und ziehen Sie ihn anschließend zurück nach rechts, um ein Dia vom Zuführgerät in den SLIDES 2 PC zu laden. Wiederholen Sie diesen Schritt für alle weiteren Dias (was die verwendeten Dias auf der anderen Seite herausschiebt).
  • Page 30 BEDIENUNG DES SLIDES 2 PC Schließen Sie das USB-Kabel des SLIDES 2 PC an den USB-Port Ihres Computers an. Wenn das Gerät angeschlossen ist, leuchtet die Leuchtdiode blau auf. Hinweis für Windows-Benutzer: Wenn SLIDES 2 PC zum ersten Mal an...
  • Page 31 BEARBEITEN VON BILDERN Snapshot – Um Ihr Bild in der Voransicht zu digitalisieren, klicken Sie auf die Taste "Snapshot" (Schnappschuss). Löschen – Löscht eine Datei, die aus der Liste. Horizontal spiegeln – Klicken Sie auf diese Schaltfläche um das Bild horizontal spiegeln. Drehen links/rechts –...
  • Page 32 PROBLEM MÖGLICHE URSACHE LÖSUNG Mein Computer erkennt SLIDES 2 PC ist nicht an Um mit Ihrem SLIDES 2 PC kommunizieren zu SLIDES 2 PC nicht. einen können, braucht Ihr Computer USB 2.0. Überprüfen Hochgeschwindigkeits- Sie, ob USB 2.0 auf Ihrem Computer installiert ist.
  • Page 33 Gebruik de SLIDES 2 PC niet in de buurt van water en andere vloeistoffen. Gebruik de SLIDES 2 PC niet wanneer uw handen nat zijn. Gebruik de SLIDES 2 PC nooit in regen of sneeuw. Vocht geeft een gevaar op brand en elektrische schok.
  • Page 34: Inhoud Verpakking

    INSTALLATIE VAN DRIVER EN SOFTWARE Om de SLIDES 2 PC te gebruiken dienen ImageScanTool vooraf geïnstalleerd te worden. SOFTWARE-INSTALLATIE (WINDOWS) N.B.: Zorg ervoor dat de vorige versie van Media Impression is verwijderd voordat deze versie van de software is geïnstalleerd.
  • Page 35 Duw de hendel naar links en trek daarna de hendel terug naar rechts, om een dia uit de lader in de SLIDES 2 PC te laden. Herhaal deze stap voor de volgende dia's (die de gebruikte dia's de andere kant op zullen duwen).
  • Page 36 GEBRUIK VAN DE SLIDES 2 PC Sluit de USB-kabel van de SLIDES 2 PC aan op een USB 2.0-poort van de PC. Na aansluiting zal de stroomLED blauw oplichten. N.B.: De eerste keer dat de SLIDES 2 PC wordt aangesloten op uw computer moet ene paar seconden gewacht worden tot een dialoogvenster verschijnt met "Nieuwe hardware gevonden"...
  • Page 37 BEWERKEN VAN AFBEELDINGEN Snapshot – Voor het vastleggen van uw beeld bekeken, klik op de knop "Snapshot." Verwijderen –Verwijdert het bestand, geselecteerd uit de lijst. Spiegelen – Klik op deze knop om het beeld horizontaal te draaien. Draai rechts – Draait het beeld 90º naar rechts. Brightness/Exposure –...
  • Page 38: Probleemoplossing

    Er staat een zwarte rand De dia of film kan onjuist in Verwijder de houder uit de SLIDES 2 PC en rond de kant van de de houder geplaatst zijn, of waarborg dat de dia of film juist in de houder afbeelding.
  • Page 39 APPENDIX SPECIFICATIONS Image Sensor 5 mega CMOS sensor, 5.17 megapixels Lens Specification Precision Glass Element Fixed Focus Color Balance Automatic + software Exposure Control Automatic + software Supported film size auto-converting Slide; color negative film; black/white negative film Focus Range Fixed focus PC interface USB 2.0...
  • Page 41 www.ionaudio.com MANUAL VERSION 1.6...

Table des Matières