Publicité

Les langues disponibles
  • FR

Les langues disponibles

Liens rapides

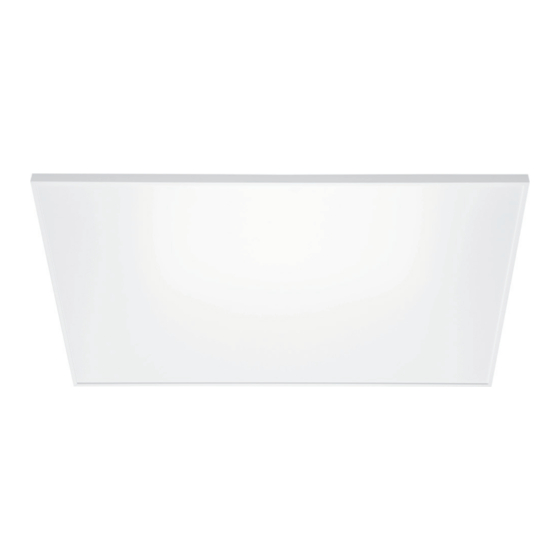
WONDERSKY
Decken-Infrarotheizung
Ceiling Infrared Heater
Radiateur infrarouge de plafond
Calefacción por infrarrojos de techo
Radiatore da soffitto a infrarossi
10038378 10038379 10038380 10038381
www.klarstein.com
Hinweis: Dieses Produkt ist nur für gut isolierte Räume
oder für den gelegentlichen Gebrauch geeignet.
Note: This product is only suitable for well insulated
spaces or occasional use.
Advertencia: Este producto está indicado únicamente en
lugares abrigados o para una utilización punctual.
Remarque : Ce produit ne peut être utilisé que dans
des locaux bien isolés ou de manière occasionnelle.
Nota: Questo prodotto è adatto solo per spazi
ben isolati o uso occasionale.

Publicité

Table des Matières
loading

Sommaire des Matières pour Klarstein WONDERSKY

  • Page 1 WONDERSKY Decken-Infrarotheizung Ceiling Infrared Heater Radiateur infrarouge de plafond Calefacción por infrarrojos de techo Radiatore da soffitto a infrarossi 10038378 10038379 10038380 10038381 www.klarstein.com Hinweis: Dieses Produkt ist nur für gut isolierte Räume oder für den gelegentlichen Gebrauch geeignet. Note: This product is only suitable for well insulated spaces or occasional use.
  • Page 3: Table Des Matières

    Sehr geehrter Kunde, wir gratulieren Ihnen zum Erwerb Ihres Gerätes. Lesen Sie die folgenden Hinweise sorgfältig durch und befolgen Sie diese, um möglichen Schäden vorzubeugen. Für Schäden, die durch Missachtung der Hinweise und unsachgemäßen Gebrauch entstehen, übernehmen wir keine Haftung. Scannen Sie den folgenden QR-Code, um Zugriff auf die aktuellste Bedienungsanleitung und weitere Informationen rund um das Produkt zu erhalten.
  • Page 4: Produktdatenblatt

    PRODUKTDATENBLATT Modellkennung(en) 10038378, 10038379 Angabe Symbol Wert Einheit Angabe Einheit Wärmeleistung Nur bei elektrischen Speicher- Einzelraumheizgeräten: Art der Regelung der Wärmezufuhr Nennwärmeleistung 0,35 Manuelle Regelung der Wärmezufuhr mit nein integriertem Thermostat Mindestwärmeleistung Manuelle Regelung der Wärmezufuhr nein (Richtwert) mit Rückmeldung der Raum- und/oder Außentemperatur Maximale kontinuierliche 0,35...
  • Page 5 Modellkennung(en) 10038380, 10038381 Angabe Symbol Wert Einheit Angabe Einheit Wärmeleistung Nur bei elektrischen Speicher- Einzelraumheizgeräten: Art der Regelung der Wärmezufuhr Nennwärmeleistung Manuelle Regelung der Wärmezufuhr mit nein integriertem Thermostat Mindestwärmeleistung Manuelle Regelung der Wärmezufuhr nein (Richtwert) mit Rückmeldung der Raum- und/oder Außentemperatur Maximale kontinuierliche Elektronische Regelung der Wärmezufuhr...
  • Page 6: Sicherheitshinweise

    SICHERHEITSHINWEISE Gerätespezifi sche Sicherheitshinweise • Die Infrarotheizung läuft, wenn Sie an der Decke montiert wurde, mit einer Oberfl ächentemperatur von 110–120 °C. Berühren Sie die Heizung nicht, wenn sie eingeschaltet ist. • Längeres Berühren des eingeschalteten Heizgeräts kann zu Verletzungen oder Verbrennungen führen.
  • Page 7 • Wenn das Netzkabel beschädigt ist, muss es durch den Hersteller, den Kundendienst oder eine ähnlich qualifi zierte Person ersetzt werden, um eine Gefährdung zu vermeiden. • Die Oberfl äche des Heizgerätes kann eine Oberfl ächentemperatur von bis zu 110-120 °C erreichen. Halten Sie es außerhalb der Reichweite von Kindern und schutzbedürftigen Personen.
  • Page 8: Installation

    INSTALLATION Installationshinweise • Der im Lieferumfang enthaltene Bausatz darf ausschließlich an stabilen Decken installiert werden. Wenn Sie das Gerät an anderen Deckenarten installieren möchten, werden entsprechende Befestigungen benötigt (nicht im Lieferumfang enthalten). Stellen Sie sicher, dass die Wand für die Installation geeignet ist.
  • Page 9 Decke Schritt 3: Stecken Sie die Dübel in die Löcher. Decke Schritt 4: Drehen Sie die Schrauben durch die Löcher in der H-förmigen Halterung in die Dübel hinein.
  • Page 10: Heizgerät

    Decke Schritt 5: Bringen Sie das Heizpaneel an der Halterung an. Stellen Sie sicher, dass es ausreichend gesichert ist. HEIZGERÄT...
  • Page 11: Thermostat

    THERMOSTAT Allgemeine Hinweise zum Steuerungssystem Dieses Heizgerät verfügt über einen eingebauten Thermostatempfänger, der mit dem Thermostat drahtlos über ein Funkfrequenzsignal verbunden wird. Das Thermostat kann alle Heizgeräte im Radius von 10 Metern (ohne Hindernisse) steuern. Über das Thermostat können Sie sowohl die Heizfunktion als auch die Beleuchtung einstellen.
  • Page 12 Bildschirmanzeigen des Thermostats Wochentag Heizanzeige Uhrzeit Offene-Fernster-Erkennung Modus Kindersicherung Beleuchtung...
  • Page 13: Bedienung

    BEDIENUNG Verbindung zwischen Thermostat und Heizgerät herstellen • Schritt 1: Schalten Sie das Heizgerät ein. Drücken Sie zwei Mal die Taste P am Schaltkasten auf der Rückseite des Heizgeräts. Die Paarungs-Signalleuchte (grünes Licht) beginnt zu blinken. • Schritt 2: Schalten Sie das Thermostat ein. Halten Sie die Lichttaste 5 Sekunden lang gedrückt.
  • Page 14 Modi Das Thermostat verfügt über 2 verschiedene Betriebsmodi. Drücken Sie die Taste M um zwischen Modus 1 und Modus 2 auszuwählen. Modus 1 ist der manuelle Modus und Modus 2 ist der Heizprogramm-Modus. Sie können die Einstellung des Heizprogramm-Modus für jeden Tag separat vornehmen.
  • Page 15: Reinigung Und Pflege

    REINIGUNG UND PFLEGE Reinigung • Ziehen Sie vor der Reinigung immer den Netzstecker aus der Steckdose und lassen Sie das Gerät vollständig abkühlen. • Tauchen Sie das Gerät niemals unter Wasser und achten Sie darauf, dass das Gerät nicht mit Spritzwasser in Berührung kommt. •...
  • Page 16: Spezielle Entsorgungshinweise Für Verbraucher In Deutschland

    SPEZIELLE ENTSORGUNGSHINWEISE FÜR VERBRAUCHER IN DEUTSCHLAND Entsorgen Sie Ihre Altgeräte fachgerecht. Dadurch wird gewährleistet, dass die Altgeräte umweltgerecht verwertet und negative Auswirkungen auf die Umwelt und menschliche Gesundheit vermieden werden. Bei der Entsorgung sind folgende Regeln zu beachten: • Jeder Verbraucher ist gesetzlich verpflichtet, Elektro- und Elek- tronikaltgeräte (Altgeräte) sowie Batterien und Akkus getrennt vom Hausmüll zu entsorgen.
  • Page 17 • Bei einem Vertrieb unter Verwendung von Fernkommunikationsmitteln ist die unentgeltliche Abholung am Ort der Abgabe auf Elektro- und Elektronikgeräte der Kategorien 1, 2 und 4 gemäß § 2 Abs. 1 ElektroG, nämlich „Wärmeüberträger“, „Bildschirmgeräte“ (Oberfläche von mehr als 100 cm²) oder „Großgeräte“...
  • Page 18: Hinweise Zur Entsorgung

    Importeur für Großbritannien: Berlin Brands Group UK Ltd PO Box 1145 Oxford, OX1 9UW United Kingdom Hiermit erklärt Chal-Tec GmbH, dass der Funkanlagentyp Wondersky der Richtlinie 2014/53/EU entspricht. Der vollständige Text der EU-Konformitätserklärung ist unter der folgenden Internetadresse verfügbar: use.berlin/10038378...
  • Page 19 Dear customer, Congratulations on purchasing this device. Please read the following instructions carefully and follow them to prevent possible damages. We assume no liability for damage caused by disregard of the instructions and improper use. Scan the QR code to get access to the latest user manual and more product information.
  • Page 20: Product Data Sheet

    PRODUCT DATA SHEET Model identifier(s): 10038378, 10038379 Item Symbol Value Unit Item Unit Heat output Type of heat input, for electric storage local space heaters only Nominal heat output 0.35 manual heat charge control, with integrated thermostat Minimum heat output manual heat charge control with room and/ (indicative) or outdoor temperature feedback...
  • Page 21 Model identifier(s): 10038380, 10038381 Item Symbol Value Unit Item Unit Heat output Type of heat input, for electric storage local space heaters only Nominal heat output manual heat charge control, with integrated thermostat Minimum heat output manual heat charge control with room and/ (indicative) or outdoor temperature feedback Maximum continuous heat...
  • Page 22: Safety Instructions

    SAFETY INSTRUCTIONS Device-specifi c safety instructions • The infrared heater runs at a surface temperature of 110-120 °C when mounted on the ceiling. Do not touch the heater when it is switched on. • Prolonged touching of the switched-on heater can cause injury or burns. •...
  • Page 23 • If the power cord is damaged, it must be replaced by the manufacturer, customer service or a similarly qualifi ed person in order to avoid a hazard. • The surface of the heater can reach a surface temperature of up to 110-120 °C. Keep it out of the reach of children and vulnerable persons.
  • Page 24: Installation

    INSTALLATION Installation instructions • The kit included in the delivery may only be installed on stable ceilings. If you want to install the unit on other types of ceilings, appropriate fixings are required (not included). Make sure that the wall is suitable for the installation. •...
  • Page 25 Ceiling Step 3: Insert the dowels into the holes. Ceiling Step 4: Screw the screws through the holes in the H- shaped bracket into the dowels.
  • Page 26: Heater

    Ceiling Step 5: Attach the heating panel to the bracket. Make sure it is adequately secured. HEATER...
  • Page 27: Thermostat

    THERMOSTAT General notes on the control system This heater has a built-in thermostat receiver that connects to the thermostat wirelessly via a radio frequency signal. The thermostat can control all heaters within a radius of 10 metres (without obstacles). You can set both the heating function and the lighting via the thermostat.
  • Page 28 Thermostat screen displays Weekday Heating display Time Open window detection Mode Child safety lock Lighting...
  • Page 29: Operation

    OPERATION Establish connection between thermostat and heater • Step 1: Switch on the heater. Press the P button on the control box on the back of the heater twice. The pairing signal light (green light) will start flashing. • Step 2: Switch on the thermostat.
  • Page 30 Modes The thermostat has 2 different operating modes. Press the M button to select between mode 1 and mode 2. Mode 1 is the manual mode and mode 2 is the heating programme mode. You can set the heating programme mode separately for each day. If you want to change the setting, press and hold the M button for 5 seconds until “W1”...
  • Page 31: Cleaning And Care

    CLEANING AND CARE Cleaning • Before cleaning, always unplug the appliance from the wall outlet and allow it to cool completely. • Never immerse the unit in water and ensure that the unit does not come into contact with splashing water. •...
  • Page 32: Disposal Considerations

    For Great Britain: Hereby, Chal-Tec GmbH declares that the radio equipment type Wondersky is in compliance with the relevant statutory requirements. The full text of the declaration of conformity is available at the following internet address:...
  • Page 33: Fiche Technique

    Cher client, chère cliente, Toutes nos félicitations pour l’acquisition de ce nouvel appareil. Lisez attentivement les indications suivantes et suivez-les pour éviter d'éventuels dommages. Nous ne saurions être tenus pour responsables des dommages dus au non-respect des consignes et à la mauvaise utilisation de l’appareil.
  • Page 34: Fiche De Données Produit

    FICHE DE DONNÉES PRODUIT Référence(s) du modèle 10038378, 10038379 Donnée Symbole Valeur Unité Donnée Unité Puissance thermique Uniquement pour les radiateurs électriques à accumulation : type de contrôle de l'apport de chaleur Puissance thermique 0,35 Contrôle manuel de l'apport de chaleur nominale avec un thermostat intégré...
  • Page 35 Référence(s) du modèle 10038380, 10038381 Donnée Symbole Valeur Unité Donnée Unité Puissance thermique Uniquement pour les radiateurs électriques à accumulation : type de contrôle de l'apport de chaleur Puissance thermique Contrôle manuel de l'apport de chaleur nominale avec un thermostat intégré Puissance thermique Contrôle manuel de l'apport de chaleur minimale (valeur...
  • Page 36: Consignes De Sécurité

    CONSIGNES DE SÉCURITÉ Consignes de sécurité spécifi ques de l'appareil • Le chauff age infrarouge fonctionne à une température de surface de 110 - 120 °C lorsqu'il est monté au plafond. Ne touchez pas le radiateur lorsqu'il est allumé. • Un contact prolongé...
  • Page 37 • Si le cordon d'alimentation est endommagé, il doit être remplacé par le fabricant, le service après-vente ou une personne de qualifi cation similaire afi n d'éviter tout danger. • Le radiateur peut atteindre une température de surface allant jusqu'à 110 - 120 °C.
  • Page 38: Installation

    INSTALLATION Consignes d'installation • Le kit fourni doit être installé uniquement sur des plafonds stables. Si vous souhaitez installer l'appareil sur d'autres types de plafond, des fixations appropriées sont nécessaires (non fournies). Assurez-vous que le mur est adapté à l'installation. •...
  • Page 39 Plafond Étape 3 : Insérez les chevilles dans les trous. Plafond Étape 4 : Vissez les vis dans les trous du support en forme de H pour les insérer dans les chevilles.
  • Page 40: Radiateur

    Plafond Étape 5 : Fixez le panneau chauffant sur le support. Assurez- vous qu'il est suffisamment sécurisé. RADIATEUR...
  • Page 41: Thermostat

    THERMOSTAT Remarques générales sur le système de contrôle Ce radiateur dispose d'un récepteur de thermostat intégré qui est relié sans fil au thermostat par un signal de fréquence radio. Le thermostat peut contrôler tous les appareils de chauffage dans un rayon de 10 mètres (sans obstacles). Le thermostat permet de régler à...
  • Page 42 Voyants du thermostat Jour de semaine Indicateur de chauffage Horloge Détection de fenêtre ouverte Mode Verrouillage parental Éclairage...
  • Page 43: Utilisation

    UTILISATION Établissement d'une connexion entre le thermostat et le radiateur • Étape 1 : Allumez le radiateur. Appuyez deux fois sur la touche P du boîtier de commande à l'arrière du radiateur. Le voyant d'appairage (lumière verte) se met à clignoter. •...
  • Page 44 Modes Le thermostat dispose de 2 modes de fonctionnement différents. Appuyez sur la touche M pour choisir entre le mode 1 et le mode 2. Le mode 1 est le mode manuel et le mode 2 est le mode programme de chauffage. Vous pouvez régler le mode de programme de chauffage séparément pour chaque jour.
  • Page 45: Nettoyage Et Entretien

    NETTOYAGE ET ENTRETIEN Nettoyage • Avant le nettoyage, débranchez toujours la fiche de la prise et laissez l'appareil refroidir complètement. • Ne plongez jamais l'appareil dans l'eau et veillez à ce qu'il ne soit pas atteint par des éclaboussures. • Essuyez l'appareil avec un chiffon doux et humide.
  • Page 46: Conseils Pour Le Recyclage

    PO Box 1145 Oxford, OX1 9UW United Kingdom Le soussigné, Chal-Tec GmbH, déclare que l’équipement radioélectrique du type Wondersky est conforme à la directive 2014/53/UE. Le texte complet de la déclaration UE de conformité est disponible à l’adresse internet suivante : use.berlin/10038378...
  • Page 47 Estimado cliente: Le felicitamos por la adquisición de este producto. Lea atentamente el siguiente manual y siga cuidadosamente las instrucciones de uso con el fin de evitar posibles daños. La empresa no se responsabiliza de los daños ocasionados por un uso indebido del producto o por haber desatendido las indicaciones de seguridad.
  • Page 48: Ficha Técnica Del Producto

    FICHA TÉCNICA DEL PRODUCTO Denominación del modelo 10038378, 10038379 Datos Símbolo Valor Unidad Datos Unidad Potencia calorífica Solo en calefactores eléctricos para habitaciones individuales: tipo de regulación del suministro de calor Potencia calorífica nominal 0,35 Regulación manual del suministro calorífico con termostato integrado Potencia calorífica mínima Regulación manual del suministro calorífico...
  • Page 49 Denominación del modelo 10038380, 10038381 Datos Símbolo Valor Unidad Datos Unidad Potencia calorífica Solo en calefactores eléctricos para habitaciones individuales: tipo de regulación del suministro de calor Potencia calorífica Regulación manual del suministro calorífico nominal con termostato integrado Potencia calorífica mínima Regulación manual del suministro calorífico mín.
  • Page 50: Indicaciones De Seguridad

    INDICACIONES DE SEGURIDAD Indicaciones de seguridad específi cas del aparato • El calefactor por infrarrojos funciona a una temperatura superfi cial de 110-120 °C cuando está montado en el techo. No toque el calefactor por infrarrojos cuando esté encendido. • El contacto prolongado con el calefactor por infrarrojos encendido puede causar lesiones o quemaduras.
  • Page 51 • Si el cable de alimentación está dañado, debe ser sustituido por el fabricante, el servicio técnico o una persona con cualifi cación similar para evitar peligros. • La superfi cie del calefactor puede alcanzar una temperatura superfi cial de hasta 110-120 °C.
  • Page 52: Instalación

    INSTALACIÓN Indicaciones de instalación • El juego de montaje incluido en la entrega únicamente debe instalarse en techos estables. Si desea instalar el aparato en otro tipo de techos, se requerirán fijaciones adecuadas (no incluidas). Asegúrese de que la pared es adecuada para la instalación.
  • Page 53 Techo Paso 3 Introduzca tacos en los orificios. Techo Paso 4 Atornille el soporte en for- ma de H con los tornillos.
  • Page 54: Calefactor

    Techo Paso 5 Fije el panel calefactor al soporte. Compruebe que esté bien asegurado. CALEFACTOR...
  • Page 55: Termostato

    TERMOSTATO Indicaciones generales sobre el sistema de control Este calefactor dispone de un receptor de termostato que se conecta al termostato de forma inalámbrica a través de una señal de radiofrecuencia. El termostato puede controlar todos los calefactores en un radio de 10 metros (sin obstáculos). Con la ayuda del termostato, puede ajustar tanto la función de calefacción como la de iluminación.
  • Page 56 Pantalla del termostato Día de la semana Indicador de calefacción Hora Detección de ventanas abiertas Modo Mecanismo de bloqueo de botones Iluminación...
  • Page 57: Funcionamiento

    FUNCIONAMIENTO Conectar el termostato y el calefactor • Paso 1: Encienda el calefactor. Pulse dos veces el botón P situado en la parte posterior del calefactor. La luz de emparejamiento (luz verde) empieza a parpadear. • Paso 2: Encienda el termostato. Mantenga el botón de luz pulsado durante 5 segundos.
  • Page 58 Modos El termostato cuenta con 2 modos de funcionamiento diferentes. Pulse el botón M para seleccionar entre el modo 1 y el modo 2. El modo 1 es el modo manual y el modo 2 es el modo de programa de calefacción. Puede ajustar el modo de programa de calefacción por separado para cada día de la semana.
  • Page 59: Limpieza Y Cuidado

    LIMPIEZA Y CUIDADO Limpieza • Desenchufe siempre el aparato y deje que se enfríe totalmente antes de limpiarlo. • No sumerja nunca el aparato en el agua y asegúrese de que no entre en contacto con salpicaduras de agua. • Limpie el aparato con un paño suave y húmedo.
  • Page 60: Retirada Del Aparato

    Oxford, OX1 9UW United Kingdom Por la presente, Chal-Tec GmbH declara que el tipo de equipo radioeléctrico Wondersky es conforme con la Directiva 2014/53/UE. El texto completo de la declaración UE de conformidad está disponible en la dirección Internet siguiente: use.berlin/10038378...
  • Page 61 Gentile cliente, La ringraziamo per l'acquisto del dispositivo. La preghiamo di leggere attentamente le seguenti istruzioni d'uso e di seguirle per prevenire eventuali guasti. Non ci assumiamo alcuna responsabilità per danni scaturiti da una mancata osservanza delle avvertenze di sicurezza e da un uso improprio del dispositivo.
  • Page 62: Scheda Informativa Del Prodotto

    SCHEDA INFORMATIVA DEL PRODOTTO Contrassegno/i del 10038378, 10038379 modello Indicazione Simbolo Valore Unità Indicazione Unità Potenza termica Solo per dispositivi elettrici di accumulo di calore per locali singoli: tipo di regolazione dell'afflusso di calore Potenza termica nominale 0,35 Controllo manuale dell'apporto termico con termostato integrato Potenza termica minima Controllo manuale dell'apporto termico con...
  • Page 63 Contrassegno/i del 10038380, 10038381 modello Indicazione Simbolo Valore Unità Indicazione Unità Potenza termica Solo per dispositivi elettrici di accumulo di calore per locali singoli: tipo di regolazione dell'afflusso di calore Potenza termica nominale Controllo manuale dell'apporto termico con termostato integrato Potenza termica minima Controllo manuale dell'apporto termico con (valore indicativo)
  • Page 64: Avvertenze Di Sicurezza

    AVVERTENZE DI SICUREZZA Istruzioni di sicurezza specifi che del dispositivo • Il radiatore a infrarossi funziona a una temperatura superfi ciale di 110-120 °C quando è montato sul soffi tto. Non toccare il radiatore quando è acceso. • Toccare a lungo il radiatore quando è acceso può causare lesioni o ustioni. •...
  • Page 65 • Se il cavo di alimentazione è danneggiato, deve essere sostituito dal produttore, dal servizio di assistenza ai clienti o da una persona con qualifi ca equivalente, in modo da evitare pericoli. • La superfi cie del radiatore può raggiungere una temperatura che va da 110 a 120 °C.
  • Page 66: Installazione

    INSTALLAZIONE Avvertenze per l'installazione • Il kit contenuto nella consegna può essere installato solo su soffitti stabili. Se si desidera installare il dispositivo su altri tipi di soffitto, sono necessari i fissaggi appropriati (non inclusi). Assicurarsi che la parete sia adatta all'installazione.
  • Page 67 Soffitto Passaggio 3: Inserire i tasselli nei fori. Soffitto Passaggio 4: Avvitare le viti attraverso i fori della staffa ad H nei tasselli.
  • Page 68: Radiatore

    Soffitto Passaggio 5: Fissare il pannello di riscaldamento alla staffa. Assicurarsi che sia adeguatamente fissato. RADIATORE...
  • Page 69: Termostato

    TERMOSTATO Note generali sul sistema di controllo Questo radiatore dispone di un ricevitore termostatico incorporato che si collega al termostato senza fili tramite un segnale di radiofrequenza. Il termostato può controllare tutti i radiatori in un raggio di 10 metri (senza ostacoli). È possibile impostare sia la funzione di riscaldamento che l'illuminazione tramite il termostato.
  • Page 70 Display del termostato Giorno settimanale Visualizzazione del riscaldamento Rilevamento finestra aperta Modalità Blocco di sicurezza per bambini Illuminazione...
  • Page 71: Utilizzo

    UTILIZZO Stabilire il collegamento tra termostato e radiatore • Passaggio 1: Accendere il radiatore. Premere due volte il pulsante P sulla scatola di comando posta sul retro del radiatore. La luce del segnale di accoppiamento (luce verde) inizia a lampeggiare. •...
  • Page 72 Modalità Il termostato dispone di 2 modalità operative diverse. Premere il pulsante M per selezionare la modalità 1 o 2. La modalità 1 corrisponde alla modalità manuale e la modalità 2 è la modalità del programma di riscaldamento. È possibile impostare la modalità del programma di riscaldamento separatamente per ogni giorno.
  • Page 73: Pulizia E Manutenzione

    PULIZIA E MANUTENZIONE Pulizia • Prima della pulizia, staccare la spina e lasciar raffreddare completamente il dispositivo. • Non immergere assolutamente il dispositivo in acqua e assicurarsi che non venga spruzzato. • Pulire il dispositivo con un panno morbido e umido. •...
  • Page 74: Smaltimento

    PO Box 1145 Oxford, OX1 9UW United Kingdom Il fabbricante, Chal-Tec GmbH, dichiara che il tipo di apparecchiatura radio Wondersky è conforme alla direttiva 2014/53/UE. Il testo completo della dichiarazione di conformità UE è disponibile al seguente indirizzo Internet: use.berlin/10038378...

Ce manuel est également adapté pour:

10038378100383791003838010038381

Table des Matières