Télécharger Imprimer la page
Interlogix TruVision Serie Guide De Démarrage Rapide

Interlogix TruVision Serie Guide De Démarrage Rapide

Masquer les pouces Voir aussi pour TruVision Serie:

Publicité

Les langues disponibles
  • FR

Les langues disponibles

  • FRANÇAIS, page 35

Liens rapides

All manuals and user guides at all-guides.com
TruVision IP Dome
Open-Standards Quick
Start Guide
EN
TruVision IP Dome Open-Standards Quick Start Guide
DE
TruVision IP Dome Open-Standards-Kurzanleitung
ES
Guía de inicio rápido de domo open-standard IP TruVision
FR
Guide de démarrage rapide du dôme IP TruVision
IT
Guida di avvio rapido dei modelli a standard aperti di telecamera
dome IP TruVision
NL
TruVision IP Dome open standaard Beknopte handleiding
PL
TruVision IP Dome Open-Standards — instrukcja szybkiego
uruchamiania
PT
Guia rápido de normas abertas de dome IP TruVision
RU
Краткое руководство по началу работы с купольной IP-
камерой открытого стандарта TruVision
TR
TruVision IP Dome Açık Standartlar Hızlı Başlangıç Kılavuzu
P/N 1076512C-Multilingual • REV 1.0 • ISS 04DEC12

Publicité

loading

Sommaire des Matières pour Interlogix TruVision Serie

  • Page 1 All manuals and user guides at all-guides.com TruVision IP Dome Open-Standards Quick Start Guide TruVision IP Dome Open-Standards Quick Start Guide TruVision IP Dome Open-Standards-Kurzanleitung Guía de inicio rápido de domo open-standard IP TruVision Guide de démarrage rapide du dôme IP TruVision Guida di avvio rapido dei modelli a standard aperti di telecamera dome IP TruVision TruVision IP Dome open standaard Beknopte handleiding...
  • Page 2 All manuals and user guides at all-guides.com © 2012 UTC Fire & Security Americas Copyright Corporation, Inc. Interlogix is part of UTC Climate Controls & Security, a unit of United Technologies Corporation. All rights reserved. The TruVision name and logo are trademarks of Trademarks and United Technologies.
  • Page 3 All manuals and user guides at all-guides.com Introduction This pocket guide provides basic information on installing the TruVision IP dome and wedge dome open-standard cameras. For detailed information on installing and using the cameras, please refer to the user manual. Package contents The camera is shipped with the following items: ...
  • Page 4 All manuals and user guides at all-guides.com Camera dimensions  Dome and IR dome cameras  Wedge dome cameras Setting up the camera Note: If the light source where the camera is installed experiences rapid, wide variations in lighting, the camera may not operate as intended.
  • Page 5 All manuals and user guides at all-guides.com To quickly put the camera into operation: 1. Prepare the mounting surface. 2. Connect the required cables to the camera. 3. Mount the camera to the ceiling using the appropriate fasteners. 4. Set up the camera’s network and streaming parameters so that the camera can be controlled over the network.
  • Page 6 All manuals and user guides at all-guides.com 1. Ground. Connect to ground. 2. Ethernet RJ45 PoE port. Connect to network devices. 3. Audio output. Connect to an audio output. Line level, 600 Ω. 4. Initial set. Press to hard reboot camera. 5.
  • Page 7 All manuals and user guides at all-guides.com 1. Power input connector. Connect +12 VDC power supply. Optional. 2. Ethernet RJ45 PoE connector. Connect to the network devices. 3. Lens. 4. Power LED. 5. Lens positioning screws. 6. Network status LEDs. 7.
  • Page 8 All manuals and user guides at all-guides.com Overview of the camera Web browser  Camera Web browser interface Item Name Description PTZ controls For future use. Live view Click to view live video. Playback Click to play back video. Click to search for event logs. There are four main information types: All, Alarm, Notification and Operation Configuration...
  • Page 9 All manuals and user guides at all-guides.com Item Name Description Capture Click to take a snapshot of the video. The snapshot will be saved to the default folder in jpeg format. Start/stop Click to record live video. recording Video image Click to adjust video image settings settings such as brightness, contrast,...
  • Page 10 All manuals and user guides at all-guides.com Refer to the User Manual for detailed information on configuring the cameras. See Table 1 on page 10 for an overview of the configuration parameters. Note: The On-screen display (OSD) menus are in English only. Table 1: Overview of the configuration parameters Configuration folders Description...
  • Page 11 All manuals and user guides at all-guides.com Specifications Dome and IR dome cameras: Electrical Power consumption 4.5 W max. TVD-N210V-2-N(-P), TVD-M2210V-2-N(-P), TVD-M2215V-2-N(-P), TVD-M3210V-2-N(-P), TVD-M3215V-2-N(-P) 5 W max. TVD-M5225V-4-N(-P) 5.5 W max. TVD-N245V-2-N(-P) 7.5 W max. TVD-M1210V-2-N(-P), TVD-M1225V-2-N(-P), Miscellaneous Dimensions (Ø × H) 140 ×...
  • Page 12 All manuals and user guides at all-guides.com All cameras: Electrical Voltage input 12 VDC, PoE (IEEE 802.3af) I/O connection DC jack flying lead, RJ45 flying lead Network Protocols TCP/IP, HTTP, DHCP, DNS, DDNS, RTP/RTCP, PPPoE, SMTP, NTP Ethernet/IP CoS 802.1 p/Q, QoS, IPv4 PoE IEEE 802.3af Miscellaneous...
  • Page 13 All manuals and user guides at all-guides.com Einführung Diese Kurzanleitung bietet die grundlegenden Informationen zur Installation der Open-Standard-IP-Dome-Kameras und -Keilform- Dome-Kameras aus der TruVision-Reihe. Detaillierte Informationen zu Installation und Verwendung der Kameras entnehmen Sie bitte dem Benutzerhandbuch. Packungsinhalt Im Lieferumfang der Kamera sind folgende Elemente enthalten: ...
  • Page 14 All manuals and user guides at all-guides.com Abmessungen der Kamera  Dome- und IR-Dome-Kameras) und Abbildung  Keilform-Dome-Kameras Einrichten der Kamera Hinweis: Wenn die Lichtverhältnisse, unter denen die Kamera installiert wird, schnellen, starken Schwankungen unterworfen sind, funktioniert die Kamera möglicherweise nicht wie vorgesehen. Detaillierte Anweisungen finden Sie im Benutzerhandbuch.
  • Page 15 All manuals and user guides at all-guides.com So nehmen Sie die Kamera schnell in Betrieb: 1. Bereiten Sie die Montageoberfläche vor. 2. Schließen Sie die benötigten Kabel an die Kamera an. 3. Befestigen Sie die Kamera mit den geeigneten Befestigungslementen an der Decke. 4.
  • Page 16 All manuals and user guides at all-guides.com 1. Masse. Anschluss für Erdung. 2. Ethernet-RJ45-PoE-Anschluss. Anschluss für Netzwerkgeräte. 3. Audioausgang. Anschluss an einen Audioausgang. Line-Level, 600 Ω. 4. Ersteinstellung. Drücken, um harten Neustart der Kamera zu bewirken. 5. Audioeingang. Anschluss an einen Audioeingang. 2,0 bis 2,4 Vp-p, 1 kΩ.
  • Page 17 All manuals and user guides at all-guides.com Keilform-Dome-Kameras:  Anschlüsse an Keilform-Dome-Kameras 1. Stromversorgungsanschluss. Anschluss eines 12-V-Gleichstrom- Netzteils. Optional. 2. Ethernet-RJ45-PoE-Anschluss. Anschluss für Netzwerkgeräte. 3. Objektiv. 4. Netz-LED. 5. Schrauben zur Positionierung des Objektivs. 6. Netzwerkstatus-LEDs 7. Reset-Schalter. Durch Drücken werden alle Parameter auf die Werkseinstellungen zurückgesetzt.
  • Page 18 All manuals and user guides at all-guides.com Zugriff auf die Kamera über das Internet Mit dem Kamera-Webbrowser können Sie über das Internet auf die Kamera zugreifen und sie konfigurieren. Über jedes Webbrowser- Fenster kann immer nur auf eine Kamera zugegriffen werden. So erfolgt der Online-Zugriff auf die Kamera: 1.
  • Page 19 All manuals and user guides at all-guides.com Element Name Beschreibung PTZ controls (PTZ- Zur künftigen Verwendung. Steueroptionen) Live view (Live- Hier klicken, um das Live-Video Ansicht) anzuzeigen. Playback Hier klicken, um das Video (Wiedergabe) wiederzugeben. Log (Protokoll) Hier klicken, um nach Ereignisprotokollen zu suchen.
  • Page 20 All manuals and user guides at all-guides.com Element Name Beschreibung Video image Hier klicken, um Videobild- settings (Videobild- Einstellungen wie Helligkeit, Einstellungen) Kontrast, Sättigung, Farbton oder Belichtung zu ändern. e-PTZ Hier klicken, um e-PTZ zu aktivieren bzw. zu deaktivieren. Wenn die Funktion aktiviert ist, können Sie die Bildschirmdarstellung mit dem Mausrad vergrößern und...
  • Page 21 All manuals and user guides at all-guides.com  Bildschirm Konfiguration Einzelheiten zum Konfigurieren der Kameras finden Sie im Benutzerhandbuch. Eine Übersicht der Konfigurationsparameter finden Sie unter Table 1 auf Seite 10. Hinweis: Die Bildschirmmenüs sind nur in englischer Sprache verfügbar. Tabelle 2: Übersicht der Konfigurationsparameter Konfigurationsordner Beschreibung...
  • Page 22 All manuals and user guides at all-guides.com Konfigurationsordner Beschreibung Alarm parameters Legt fest, wie die Kamera sich bei Alarmen (Alarmparameter) verhält, z. B. Eingabetyp, Benachrichtigung von Alarmen sowie Reaktionszeitpläne und - dauer. Deployment time Legt die Zeitpläne fest, in denen Ereignisse (Einsatzzeit) registriert werden.
  • Page 23 All manuals and user guides at all-guides.com Keilform-Dome-Kameras: Elektrik Leistungsaufnahme 4 W max. TVD-M1210W-2-N(-P) TVD-M1210W-2W-N(-P) TVD-N210W-4-N(-P) TVD-M2210W-4-N(-P) Verschiedenes Abmessungen 100 × 98 × 47 mm (L × B × H) Gewicht 0.25 kg (0.55 lbs.) TVD-M1210W-2-N(-P) TVD-M1210W-2W-N(-P) 0.5 kg (1.1 lbs.) TVD-N210W-4-N(-P) TVD-M2210W-4-N(-P) Gehäuseschutzart...
  • Page 24 All manuals and user guides at all-guides.com Introducción Esta guía de bolsillo proporciona información básica sobre la instalación de las cámaras domo open-standard IP y domo wedge de TruVision. Para obtener información completa sobre cómo instalar y utilizar esta cámara, consulte el manual del usuario. Contenido del paquete La cámara se suministra con los siguientes elementos: ...
  • Page 25 All manuals and user guides at all-guides.com Dimensiones de la cámara  Cámaras domo y domo IR  Cámaras domo wedge Configuración de la cámara Nota: si la fuente de luz que ilumina la zona de instalación de la cámara está sometida a variaciones amplias y rápidas de iluminación, el funcionamiento normal podría verse afectado.
  • Page 26 All manuals and user guides at all-guides.com Para poner la cámara en funcionamiento rápidamente: 1. Prepare la superficie de montaje 2. Conecte los cables necesarios a la cámara. 3. Monte la cámara en el techo utilizando las sujeciones adecuadas. 4. Configure los parámetros de red y de transmisión de la cámara para que se pueda controlar a través de la red.
  • Page 27 All manuals and user guides at all-guides.com 3. Salida de audio Conectar a una salida de audio. Nivel de línea, 600 Ω. 4. Configuración inicial. Pulse para reiniciar la cámara. 5. Entrada de audio Conectar a un dispositivo de audio. 2,0 a 2,4 Vp-p, 1 kΩ.
  • Page 28 All manuals and user guides at all-guides.com 1. Conector de entrada de alimentación. Conectar a una fuente de alimentación de +12 VCC. Opcional. 2. Conector Ethernet RJ45 PoE. Conectar a los dispositivos de red. 3. Lentes. 4. Indicador LED de alimentación. 5.
  • Page 29 All manuals and user guides at all-guides.com Descripción del explorador web de la cámara  Interfaz del explorador web de la cámara Ítem Nombre Descripción Controles PTZ Para uso futuro. Visualización en vivo Haga clic para ver vídeo en directo. Controles de Haga clic para reproducir vídeo.
  • Page 30 All manuals and user guides at all-guides.com Ítem Nombre Descripción Visor Haga clic para ver vídeo en directo o para reproducir vídeo. Usuario actual Muestra al usuario que está conectado actualmente. Exit (Salir) Haga clic para salir del sistema. Pantalla completa Haga clic para ver como pantalla (Full screen) completa.
  • Page 31 All manuals and user guides at all-guides.com Configuración de red y transmisión En la pantalla del explorador web de la cámara, haga clic en el botón Configuración (Configuration) de la barra de herramientas para ver la pantalla de configuración. Consulte la figura F. ...
  • Page 32 All manuals and user guides at all-guides.com Carpetas de Descripción configuración Channel parameters Define las propiedades OSD de la (Parámetros de los información de la cámara, de los esquemas canales) y parámetros de grabación, de los parámetros de detección de movimiento, de la calidad de imagen, de las respuestas de alarma y del texto superpuesto.
  • Page 33 All manuals and user guides at all-guides.com Especificaciones Cámaras domo y domo IR: Electricidad: Consumo de energía 4,5 W máx. TVD-N210V-2-N(-P), TVD-M2210V-2-N(-P), TVD-M2215V-2-N(-P), TVD-M3210V-2-N(-P), TVD-M3215V-2-N(-P) 5 W máx. TVD-M5225V-4-N(-P) 5,5 W máx. TVD-N245V-2-N(-P) 7,5 W máx. TVD-M1210V-2-N(-P), TVD-M1225V-2-N(-P), Varios Dimensiones (Al x Pro): 140 ×...
  • Page 34 All manuals and user guides at all-guides.com Todas las cámaras: Electricidad Voltaje de entrada 12 VCC, PoE (IEEE 802.3af) Conexión E/S Clavija intercambiable CD jack, clavija intercambiable RJ45 Protocolos TCP/IP, HTTP, DHCP, DNS, DDNS, RTP/RTCP, PPPoE, SMTP, NTP Ethernet/IP CoS 802.1 p/Q, QoS, IPv4 PoE IEEE 802.3af Varios...
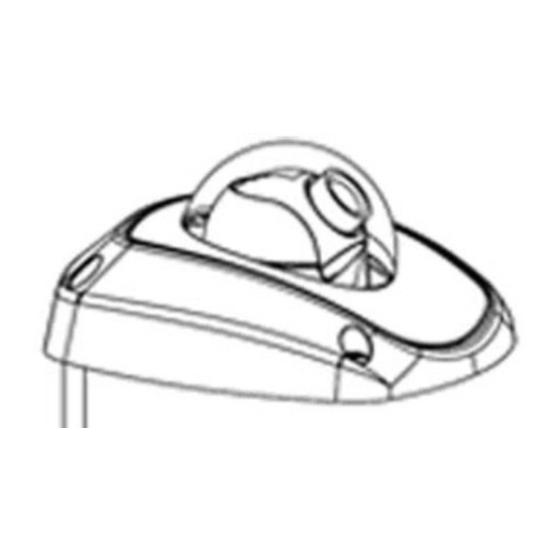
  • Page 35 All manuals and user guides at all-guides.com Introduction Ce guide de poche fournit des informations fondamentales sur l’installation des caméras à norme ouverte dôme de coin et dôme IP TruVision. Pour obtenir des informations détaillées sur l’installation et l’utilisation de ces caméras, reportez-vous au manuel d’installation. Contenu du coffret La caméra est fournie avec les éléments suivants : ...
  • Page 36 All manuals and user guides at all-guides.com Dimensions de la caméra  Caméras dôme et dôme IR   Caméras dôme de coin Mise en marche de la caméra Remarque : si la source d’éclairage du lieu d’installation de la caméra est sujette à...
  • Page 37 All manuals and user guides at all-guides.com Pour mettre rapidement la caméra en marche : 1. Préparez la surface de montage. 2. Branchez les câbles indispensables sur la caméra. 3. Montez la caméra sur le plafond à l’aide des attaches appropriées. 4.
  • Page 38 All manuals and user guides at all-guides.com 1. Masse. Connexion à la masse. 2. Port PoE Ethernet RJ45. Connexion des dispositifs en réseau. 3. Sortie audio. Connexion d’une sortie audio. Niveau de ligne, 600 Ω. 4. Initialisation initiale. Appuyez sur ce bouton pour redémarrer à froid la caméra.
  • Page 39 All manuals and user guides at all-guides.com Caméras dôme de coin :  Connexions des caméras dôme de coin 1. Connecteur d’entrée d’alimentation. Connexion à une alimentation de 12 V c.c. Facultatif. 2. Connecteur PoE Ethernet RJ45. Connexion des périphériques réseau.
  • Page 40 All manuals and user guides at all-guides.com Remarque : les caméras dôme de coin ne comportent pas d’emplacement pour carte SDHC. Accès à la caméra par l’Internet Le navigateur Web de la caméra vous permet d’accéder à la caméra par l’Internet et de la configurer. Une caméra seulement est accessible à...
  • Page 41 All manuals and user guides at all-guides.com Présentation du navigateur Web de la caméra  Interface du navigateur Web de la caméra N° Description (Description) PTZ controls Réservé à un usage ultérieur. (commandes PTZ) Live view Permet de regarder des images vidéo (Affichage en en direct.
  • Page 42 All manuals and user guides at all-guides.com N° Description (Description) Viewer Permet de regarder des images vidéo (Visualiseur) en direct ou de les lire. Current user Affiche l’utilisateur connecté à cet (Utilisateur actuel) instant. Exit (Quitter) Permet de se déconnecter du système.
  • Page 43 All manuals and user guides at all-guides.com Configuration réseau et des flux Dans l’écran du navigateur Web de la caméra, cliquez sur le bouton Configuration dans la barre d’outils pour accéder à l’écran de configuration. Voir Figure F.  Ecran de configuration Reportez-vous au manuel d’utilisation pour obtenir des informations détaillées sur la configuration des caméras.
  • Page 44 All manuals and user guides at all-guides.com Dossiers de Description (Description) configuration Channel parameters Définit les propriétés OSD des informations (Paramètres du canal) sur la caméra, les paramètres et les horaires d’enregistrement, les paramètres de détection de mouvement, la qualité d’image, les réactions à...
  • Page 45 All manuals and user guides at all-guides.com Spécifications Caméras dôme et dôme IR : Facteurs électriques Consommation 4,5 W max. TVD-N210V-2-N(-P), TVD-M2210V-2-N(-P), TVD-M2215V-2-N(-P), TVD-M3210V-2-N(-P), TVD-M3215V-2-N(-P) 5 W max. TVD-M5225V-4-N(-P) 5,5 W max. TVD-N245V-2-N(-P) 7,5 W max. TVD-M1210V-2-N(-P), TVD-M1225V-2-N(-P), Divers Dimensions (P × H) 140 ×...
  • Page 46 All manuals and user guides at all-guides.com Toutes les caméras : Facteurs électriques Tension d’entrée 12 V c.c., PoE (IEEE 802.3af) Raccordement E/S Cordon prise CC, cordon RJ45 Réseau Protocoles TCP/IP, HTTP, DHCP, DNS, DDNS, RTP/RTCP, PPPoE, SMTP, NTP Ethernet/IP CoS 802.1 p/Q, QoS, IPv4 PoE IEEE 802.3af...
  • Page 47 All manuals and user guides at all-guides.com Introduzione Questa guida rapida fornisce informazioni di base sull’installazione delle telecamere a standard aperti dome IP TruVision e wedge dome. Per informazioni dettagliate sull’installazione e l’uso delle telecamere, consultare il manuale dell’utente. Contenuto della confezione La telecamera è...
  • Page 48 All manuals and user guides at all-guides.com Dimensioni della telecamera  Telecamere Dome e IR dome  Telecamere Wedge dome Impostazione della telecamera Nota: se la sorgente luminosa che caratterizza l’ambiente in cui è installata la telecamera è soggetta a rapide e notevoli variazioni di illuminazione, la telecamera potrebbe non funzionare come previsto.
  • Page 49 All manuals and user guides at all-guides.com Per mettere rapidamente in funzione la telecamera: 1. Preparare la superficie di montaggio. 2. Collegare i cavi richiesti alla telecamera. 3. Montare la telecamera al soffitto utilizzando i dispositivi di fissaggio appropriati. 4. Configurare i parametri di streaming e rete della telecamera in modo da poterla controllare tramite rete.
  • Page 50 All manuals and user guides at all-guides.com 1. Terra. Collegamento alla terra 2. Porta Ethernet RJ45 PoE. Collegare a dispositivi in rete. 3. Uscita audio. Collegare a un’uscita audio. Livello linea, 600 Ω. 4. Impostazione iniziale. Premere per riavviare la telecamera. 5.
  • Page 51 All manuals and user guides at all-guides.com 1. Connettore ingresso alimentazione. Collegare l’alimentazione +12 V CC. Opzionale. 2. Connettore porta Ethernet RJ45 PoE. Collegare ai dispositivi di rete. 3. Obiettivo. 4. LED di alimentazione. 5. Viti di posizionamento obiettivo. 6. LED di stato di rete. 7.
  • Page 52 All manuals and user guides at all-guides.com Panoramica sul web browser della telecamera  La finestra del web browser Elemento Nome Descrizione Comandi PTZ Per uso futuro. Visualizzazione live Fare clic per vedere il video live. Riproduzione Fare clic per riprodurre il video.
  • Page 53 All manuals and user guides at all-guides.com Modulo Visualizzatore Fare clic per visualizzare il video live o riprodurlo. Utente corrente Visualizza l’utente corrente collegato. Exit [Esci] Fare clic per scollegarsi dal sistema. Schermo intero Fare clic per visualizzare a schermo intero. Avvio/stop Fare clic per visualizzazione live...
  • Page 54 All manuals and user guides at all-guides.com Configurazione di streaming e rete Nella schermata del browser Web della telecamera fare clic sul pulsante Configuration [Configurazione] nella barra strumenti per visualizzare la schermata di configurazione. Vedere la figura F.  Schermata di configurazione Per informazioni sulla configurazione delle telecamere, fare riferimento al manuale utente.
  • Page 55 All manuals and user guides at all-guides.com Cartelle di Descrizione configurazione Network parameters Definisce i parametri di rete richiesti per [Parametri di rete] accedere alla telecamera su Internet. Serial settings Definisce le impostazioni di comunicazione [Impostazioni seriali] RS-485 e RS-232. Alarm parameters Definisce la modalità...
  • Page 56 All manuals and user guides at all-guides.com Varie Dimensioni (L x A): 140 × 120 mm Peso 1,3 kg Classificazione Protezione antivandalica per interni ambientale Telecamere Wedge dome: Caratteristiche elettriche Consumo 4 W (max) TVD-M1210W-2-N(-P) TVD-M1210W-2W-N(-P) TVD-N210W-4-N(-P) TVD-M2210W-4-N(-P) Varie Dimensioni (L × P × A): 100 ×...
  • Page 57 All manuals and user guides at all-guides.com Varie Temperatura di Da -10 a +60°C funzionamento Temperatura di Da -20 a +70 °C stoccaggio Requisiti PC PC basato su Intel 1 GHz o superiore Memoria: 1 GB di RAM Sistema operativo Windows®...
  • Page 58 All manuals and user guides at all-guides.com Inleiding In deze beknopte handleiding wordt algemene informatie gegeven over de installatie van de TruVision IP-domecamera en de wigvormige domecamera’s. Raadpleeg de gebruikershandleiding voor de volledige informatie over de installatie van deze camera’s. Inhoud van de verpakking De camera wordt geleverd met de volgende items: ...
  • Page 59 All manuals and user guides at all-guides.com Afmetingen camera  Dome- en IR-domecamera’s  Wigvormige domecamera’s De camera instellen Opmerking: Als de lichtbron op de locatie waar de camera is gemonteerd snelle, grote variaties in licht waarneemt, is het mogelijk dat de camera niet functioneert zoals de bedoeling is. Zie de gebruikershandleiding voor gedetailleerde instructies.
  • Page 60 All manuals and user guides at all-guides.com Ga als volgt te werk om de camera snel in werking te nemen: 1. Bereid het montageoppervlak voor. 2. Sluit de vereiste kabels aan op de camera. 3. Bevestig de camera aan het plafond met het juiste bevestigingsmateriaal.
  • Page 61 All manuals and user guides at all-guides.com 1. Aarde. Op aarde aansluiten. 2. Ethernet RJ45 PoE-poort. Netwerkapparaten aansluiten. 3. Audio-uitgang. Een audio-uitgang aansluiten. Lijnniveau, 600 Ω. 4. Eerste ingebruikname. Hierop drukken om de camera opnieuw op te starten. 5. Audio-ingang. Een audio-ingang aansluiten. 2,0 tot 2,4 Vp-p, 1 kΩ 6.
  • Page 62 All manuals and user guides at all-guides.com 1. Voedingsingangconnector. +12V gelijkstroom aansluiten. Optioneel. 2. Ethernet RJ45 PoE-connector. Sluit de netwerkapparaten aan. 3. Lens. 4. Aan/uit-indicatielampje. 5. Schroeven voor plaatsing lens 6. Netwerkstatuslampjes 7. Reset-schakelaar. Hierop klikken om alle parameters terug in te stellen op de fabrieksinstellingen.
  • Page 63 All manuals and user guides at all-guides.com Overzicht van de camerawebbrowser  Webbrowserinterface camera Item Naam Beschrijving PTZ controls (PTZ- Voor toekomstig gebruik. besturing) Live view (Live- Aanklikken om live-video te bekijken. weergave) Playback Aanklikken om de video af te spelen. (Afspelen) Log (Logboek) Aanklikken om naar...
  • Page 64 All manuals and user guides at all-guides.com Current user Hiermee wordt de huidige gebruiker (Huidige gebruiker) die is aangemeld, weergegeven. Exit (Afsluiten) Aanklikken om u bij het systeem af te melden. Full screen Aanklikken om een volledig scherm (Volledig scherm) weer te geven.
  • Page 65 All manuals and user guides at all-guides.com  Configuratiescherm Raadpleeg de gebruikershandleiding voor gedetailleerde informatie over het configureren van de camera’s. Zie Table 1 op pagina 10 voor een overzicht van de configuratieparameters. Opmerking: De menu’s (OSD) die op het scherm worden weergegeven worden alleen in het Engels weergegeven.
  • Page 66 All manuals and user guides at all-guides.com Configuratiemappen Beschrijving Alarm Parameters Hier definieert u hoe de camera alarmen (Alarmparameters) moet verwerken, zoals ingangstype, alarmmeldingen en schema’s en duur van de reactie. Deployment time Hiermee worden de schema’s gedefinieerd (Implementatietijd) waarmee gebeurtenissen worden geregistreerd.
  • Page 67 All manuals and user guides at all-guides.com Overige Afmetingen (D × H) 140 × 120 mm Gewicht 1,3 kg Milieuklassificatie Vandalismebestendig in binnenruimten Wigvormige domecamera’s: Elektriciteit Stroomverbruik 4 W max. TVD-M1210W-2-N(-P) TVD-M1210W-2W-N(-P) TVD-N210W-4-N(-P) TVD-M2210W-4-N(-P) Overige Afmetingen (L x B x H) 100 ×...
  • Page 68 All manuals and user guides at all-guides.com PC-vereisten Intel PC 1 GHz of sneller Geheugen 1 GB RAM Besturingssysteem Windows® XP, Vista of Windows 7 Direct X 9.0 of hoger Browser Microsoft Internet Explorer 6.0 of hoger NL 68 Beknopte handleiding...
  • Page 69 All manuals and user guides at all-guides.com Wstęp Ten kieszonkowy przewodnik zawiera podstawowe informacje dotyczące instalowania kamer kopułowych TruVision IP typu open- standard (w tym również przeznaczonych do montażu klinowego). Aby uzyskać szczegółowe informacje dotyczące instalowania i użytkowania kamer, należy zapoznać się z instrukcją użytkownika. Zawartość...
  • Page 70 All manuals and user guides at all-guides.com Wymiary kamery  Kamery kopułowe i kamery kopułowe IR  Kamery kopułowe do montażu klinowego Konfigurowanie kamery Uwaga: Jeżeli źródło światła w miejscu zainstalowania kamery wykazuje znaczące nagłe zmiany natężenia oświetlenia, kamera może nie działać...
  • Page 71 All manuals and user guides at all-guides.com Aby szybko uruchomić kamerę: 1. Przygotuj powierzchnię montażową. 2. Podłącz wymagane kable do kamery. 3. Przymocuj kamerę do sufitu, używając odpowiednich śrub. 4. Skonfiguruj parametry sieciowe oraz parametry przesyłania strumieniowego kamery, aby można ją było obsługiwać za pośrednictwem sieci.
  • Page 72 All manuals and user guides at all-guides.com 1. Uziemienie. Podłącz do uziemienia. 2. Port Ethernet RJ45 PoE. Podłącz do urządzeń sieciowych. 3. Wyjście audio. Podłącz do wyjścia audio. Poziom linowy, 600 Ω. 4. Ustawienia fabryczne. Naciśnij, aby spowodować twardy restart kamery.
  • Page 73 All manuals and user guides at all-guides.com 2. Port Ethernet RJ45 PoE. Podłącz do urządzeń sieciowych. 3. Obiektyw. 4. Dioda LED zasilania. 5. Śruby zmiany ustawienia obiektywu. 6. Diody LED stanu sieci. 7. Przełącznik resetowania. Kliknij, aby przywrócić fabryczne wartości parametrów.
  • Page 74 All manuals and user guides at all-guides.com Przegląd okna przeglądarki internetowej kamery  Interfejs kamery w przeglądarce internetowej Element Nazwa Opis PTZ controls (Menu Zarezerwowane do użytku w sterowania PTZ) przyszłości. Live view (Podgląd na Kliknij, aby wyświetlić obraz żywo) wideo na żywo.
  • Page 75 All manuals and user guides at all-guides.com Viewer (Przeglądarka) Kliknij, aby wyświetlić obraz na żywo lub odtworzyć nagrania wideo. Current user (Bieżący Wyświetla zalogowanego w użytkownik) danym momencie użytkownika. Exit (Wyjście) Kliknij, aby wylogować się z systemu. Full screen (Pełny Kliknij, aby wyświetlić...
  • Page 76 All manuals and user guides at all-guides.com Konfiguracja sieci i transmisji strumieniowej W oknie kamery przeglądarki internetowej kliknij przycisk Configuration (Konfiguracja) na pasku narzędzi, aby wyświetlić okno konfiguracji. Patrz rysunek F).  Okno konfiguracji Szczegółowe informacje na temat konfigurowania kamer można znaleźć...
  • Page 77 All manuals and user guides at all-guides.com Foldery konfiguracji Opis Channel parameters Umożliwia określenie właściwości tekstu (Parametry kanału) ekranowego z informacjami o kamerze, parametrów i harmonogramu nagrywania, parametrów wykrywania ruchu, odpowiedzi na alarm i tekstu wyświetlanego na obrazie. Network parameters Umożliwia określenie parametrów sieci (Parametry sieci) wymaganych w celu uzyskania dostępu do...
  • Page 78 All manuals and user guides at all-guides.com Dane techniczne Kamery kopułowe i kamery kopułowe IR: Parametry elektryczne Zużycie energii Maks. 4,5 W TVD-N210V-2-N(-P), TVD-M2210V-2-N(-P), TVD-M2215V-2-N(-P), TVD-M3210V-2-N(-P), TVD-M3215V-2-N(-P) Maks. 5 W TVD-M5225V-4-N(-P) Maks. 5,5 W TVD-N245V-2-N(-P) Maks. 7,5 W TVD-M1210V-2-N(-P), TVD-M1225V-2-N(-P), Pozostałe ustawienia Wymiary (G ×...
  • Page 79 All manuals and user guides at all-guides.com Wszystkie kamery: Parametry elektryczne Napięcie wejściowe 12 V, prąd stały, PoE (IEEE 802.3af) Podłączenie I/O Przewód połączeniowy zasilania DC z wtykiem jack, przewód połączeniowy RJ45 Sieć Protokoły TCP/IP, HTTP, DHCP, DNS, DDNS, RTP/RTCP, PPPoE, SMTP, NTP Ethernet/IP CoS 802.1 p/Q, QoS, IPv4 PoE IEEE...
  • Page 80 All manuals and user guides at all-guides.com Introdução Este guia rápido fornece informações básica sobre como instalar as câmaras de dome e dome em cunha IP TruVision de norma aberta. Para informações detalhadas sobre como instalar e utilizar as câmaras, consulte o manual de utilizador. Conteúdo da embalagem A câmara é...
  • Page 81 All manuals and user guides at all-guides.com Dimensões da câmara  Câmaras de dome e de dome IR de infravermelhos  Câmaras de dome em cunha Configuração da câmara Nota: Se a fonte de luz onde a câmara está instalada sofrer grandes variações rápidas de luz, a câmara poderá...
  • Page 82 All manuals and user guides at all-guides.com Para colocar rapidamente a câmara em funcionamento: 1. Prepare a superfície de montagem. 2. Ligue os cabos necessários à câmara. 3. Fixe a câmara ao tecto com os parafusos de fixação adequados. 4. Configure a rede e parâmetros de streaming da câmara, de modo que a câmara possa ser controlada através da rede.
  • Page 83 All manuals and user guides at all-guides.com 2. Porta PoE RJ45 Ethernet. Ligar a dispositivos de rede. 3. Saída de áudio. Permite ligação à saída de áudio. Nível de linha, 600 Ω. 4. Reinicialização. Prima para reinicializar a câmara por hardware. 5.
  • Page 84 All manuals and user guides at all-guides.com 1. Conector de entrada de alimentação. Liga a fonte de alimentação de +12 VCC. Opcional. 2. Conector PoE RJ45 Ethernet. Ligue aos dispositivos de rede. 3. Lente. 4. LED de alimentação. 5. Parafusos de posicionamento da lente. 6.
  • Page 85 All manuals and user guides at all-guides.com Descrição geral do browser Web da câmara  Interface do browser Web da câmara Item Nome Descrição PTZ controls Para utilização futura. (Controlos PTZ) Live view (Vista ao Clique para visualizar o vídeo em vivo) directo.
  • Page 86 All manuals and user guides at all-guides.com Item Nome Descrição Viewer Clique para visualizar o vídeo em (Visualizador) directo ou para reproduzi-lo. Current user Apresenta o utilizador actual com (Utilizador actual) sessão iniciada. Exit (Sair) Clique para terminar a sessão do sistema.
  • Page 87 All manuals and user guides at all-guides.com Configuração da rede e de streaming No ecrã do browser Web da câmara, clique no botão Configuração na barra de ferramentas para apresentar o ecrã de configuração.  Consulte a figura (ecrã de configuração). ...
  • Page 88 All manuals and user guides at all-guides.com Pastas de Descrição configuração Channel parameters Define as propriedades OSD da informação (Parâmetros do canal) da câmara, parâmetros e agendamentos de gravação, parâmetros de detecção de movimento, qualidade de imagem, respostas de alarme e texto de sobreposição.
  • Page 89 All manuals and user guides at all-guides.com 5 W máx. TVD-M5225V-4-N(-P) 5,5 W máx. TVD-N245V-2-N(-P) 7,5 W máx. TVD-M1210V-2-N(-P), TVD-M1225V-2-N(-P), Diversos Dimensões (D × A) 140 × 120 mm (5,5 x 4,7 poleg.) Peso 1,3 kg (2,8 lbs) Taxa ambiental Resistente a vandalismo interior Câmara de dome em cunhas: Eléctricas...
  • Page 90 All manuals and user guides at all-guides.com Diversos Temperatura de -10 a +60 °C (14 a 140°F) funcionamento Temperatura de -20 a +70°C (-4 a +158 F) armazenamento Requisitos do PC PC baseado em Intel 1 GHz ou mais rápido Memória 1 GB de RAM Sistema operativo...
  • Page 91 All manuals and user guides at all-guides.com Введение В данном карманном руководстве содержатся основные сведения по установке купольной IP-камеры TruVision и купольных клиновидных камер открытого стандарта. Более подробная информация по установке и эксплуатации камер содержится в руководстве пользователя. Комплектация Камера поставляется со следующими компонентами: ...
  • Page 92 All manuals and user guides at all-guides.com Габариты камеры  купольные камеры и купольные ИК-камеры  140 мм (5,5 дюйма)  купольные клиновидные камеры  140 мм (5,5 дюйма) 98 мм (3,8 дюйма) 84 мм (3,3 дюйма) R 25 мм (1,0 дюйма) Настройка камеры ...
  • Page 93 All manuals and user guides at all-guides.com Чтобы быстро ввести камеру в эксплуатацию, выполните следующие действия: 1. Подготовьте несущую поверхность. 2. Подключите к камере необходимые кабели. 3. Выполните монтаж камеры на потолок с помощью соответствующих крепежных устройств. 4. Настройте параметры сети и потоковой передачи, чтобы можно...
  • Page 94 All manuals and user guides at all-guides.com 1. Земля. Заземление. 2. Порт Ethernet RJ45 PoE. Подключение к сетевым устройствам. 3. Аудиовыход. Подключение к аудиовыходу. Линейный уровень, 600 Ω. 4. Заводские настройки. Нажать для «жесткой» перезагрузки камеры. 5. Аудиовход. Подключение к аудиовходу. от 2,0 до 2,4 Vp-p, 1 кΩ.
  • Page 95 All manuals and user guides at all-guides.com 1. Разъем источника энергии. Подключение источника постоянного тока на +12 В. Дополнительно. 2. Порт Ethernet RJ45 PoE. Подключение к сетевым устройствам. 3. Объектив. 4. Индикатор питания. 5. Винты для регулировки положения объектива. 6. Индикаторы состояния сети. 7.
  • Page 96 All manuals and user guides at all-guides.com Общие сведения о веб-браузере камеры  веб-интерфейс управления камерой Позиция Название Описание Элементы управления Для последующего PTZ (PTZ controls) использования. Просмотр живого Щелкните для просмотра видео видео (Live view) в реальном времени. воспроизведение Щелкните...
  • Page 97 All manuals and user guides at all-guides.com Позиция Название Описание средство просмотра Щелкните для просмотра картинки в реальном времени либо воспроизведения видео. Текущий Вывод информации о текущем пользователь (Current активном пользователе. user) выход Щелкните для выхода из системы. полноэкранный Щелкните для просмотра видео на...
  • Page 98 All manuals and user guides at all-guides.com Настройки сети и потоковой передачи На экране браузера камеры нажмите кнопку Configuration (Конфигурация) в панели инструментов меню, чтобы открыть  экран настройки. См. рисунок (Экран конфигурации).  Экран конфигурации Более подробная информация о настройке камер содержится в руководстве...
  • Page 99 All manuals and user guides at all-guides.com Папки конфигурации Описание Network parameters Определяет сетевые параметры, (Сетевые параметры) необходимые для доступа к камере через Интернет. Serial settings Установка настроек соединения через (Настройки RS-485 и RS-232. последовательного порта) Alarm parameters Определяет способ обработки камерой (Параметры...
  • Page 100 All manuals and user guides at all-guides.com 5 Вт (макс.) TVD-M5225V-4-N(-P) 5,5 Вт (макс.) TVD-N245V-2-N(-P) 7,5 Вт (макс.) TVD-M1210V-2-N(-P), TVD-M1225V-2-N(-P), Прочие характеристики Габариты (В × Г) 140 × 120 мм Вес 1,3 кг Степень защиты Вандалозащищенный, для использования внутри помещений Купольные...
  • Page 101 All manuals and user guides at all-guides.com Прочие характеристики Рабочая температура -10 °С до+60 °С Температура хранения от -20 до +70 °С Требования к ПК ПК на базе INTEL 1 ГГц или быстрее Память ОЗУ 1 ГБ Операционная Windows® XP, Vista или Windows 7 система...
  • Page 102 All manuals and user guides at all-guides.com Giriş Cep kılavuzunda açık standartlı TruVision IP dome ve wedge dome kameraların kurulumu ile ilgili temel bilgiler verilmektedir. Kameraların kurulumuna ve kullanımına ilişkin daha fazla bilgi için, lütfen kullanım kılavuzuna başvurun. Paket içindekiler Kamera aşağidaki öğelerle birlikte gönderilir: ...
  • Page 103 All manuals and user guides at all-guides.com Kamera boyutları  Dome ve IR dome kameralar  Wedge dome kameralar Kameranın kurulması Not: Kameraların kurulduğu yerdeki ışık kaynağı, aydınlatmada hızlı, büyük değişiklikler gösteriyorsa, kamera istendiği gibi çalışmayabilir. Ayrıntılı talimatlar için, lütfen kullanım kılavuzuna başvurun. Hızlı...
  • Page 104 All manuals and user guides at all-guides.com Kamerayı hızlı biçimde çalıştırmak için: 1. Montaj yüzeyini hazırlayın. 2. Gerekli kabloları kameraya bağlayın. 3. Kamerayı uygun bağlantı parçalarıyla tavana monte edin. 4. Kameranın ağ ve aktarım parametrelerini kamera ağ üzerinden kontrol edilebilecek biçimde ayarlayın. 5.
  • Page 105 All manuals and user guides at all-guides.com 2. Ethernet RJ45 PoE portu. Ağ cihazlarına bağlayın. 3. Ses çıkışı. Bir ses çıkışına bağlayın. Hat seviyesi, 600 Ω. 4. Başlangıç ayarı. Kamerayı yeniden başlatmak için sert basın. 5. Ses girişi. Bir ses girişine bağlayın. 2,0 ila 2,4 Vp-p, 1 kΩ. 6.
  • Page 106 All manuals and user guides at all-guides.com 1. Güç girişi konektörü. +12 VDC güç kaynağı bağlayın. İsteğe Bağlı. 2. Ethernet RJ45 PoE konektörü. Ağ cihazlarına bağlayın. 3. Lens. 4. Güç LED’i. 5. Lens yerleştirme vidaları. 6. Ağ durumu LED’leri. 7. Resetleme düğmesi. Tüm parametreleri fabrika varsayılanına resetlemek için tıklayın.
  • Page 107 All manuals and user guides at all-guides.com Kamera Web tarayıcısına genel bakış  kamera Web tarayıcısı arayüzü Öğe Açıklama PTZ controls (PTZ Gelecekte kullanılmak üzere. kontrolleri) Live view (Canlı Canlı video izlemek için tıklayın. görüntüleme) Playback (İzleme) Video izlemek için tıklayın. Log (Olay Kaydı) Olay kayıtlarını...
  • Page 108 All manuals and user guides at all-guides.com Öğe Açıklama Current user Oturum açmış geçerli kullanıcıyı (Geçerli kullanıcı) görüntüler. Exit (Çıkış) Sistemde oturum kapatmak için tıklayın. Full screen Tam Tam ekran olarak izlemek için tıklayın. Ekran (Full screen) Canlı görünümü Canlı görünümü başlatmak/durdurmak başlatma/durdurma için tıklayın.
  • Page 109 All manuals and user guides at all-guides.com  Konfigürasyon ekranı ameraları yapılandırma hakkında detaylı bilgi için Kullanım Kılavuzuna başvurun. Konfigürasyon parametrelerinin genel bir özeti için, bkz. Table 1, sayfa 10. Not: Ekran görüntüsü (OSD) menüleri yalnızca İngilizcedir. Tablo 10: Yapılandırma parametrelerine genel bakış Yapılandırma Açıklama klasörleri...
  • Page 110 All manuals and user guides at all-guides.com Yapılandırma Açıklama klasörleri Alarm parameters Kameranın alarmları nasıl ele alacağını (Alarm parametreleri) tanımlar (örneğin; giriş tipi, alarm bildirimi ve yanıt programları ve süresi). Deployment time Olayların kaydedildiği sıradaki programları (Konuşlandırma süresi) tanımlar. User management Kamerayı...
  • Page 111 All manuals and user guides at all-guides.com Wedge dome kamera: Elektriksel Güç tüketimi 4 W maks. TVD-M1210W-2-N(-P) TVD-M1210W-2W-N(-P) TVD-N210W-4-N(-P) TVD-M2210W-4-N(-P) Diğer Özellikler Boyutlar (U x G × Y) 100 × 98 × 47 mm Ağırlık 0.25 kg (0.55 lbs.) TVD-M1210W-2-N(-P) TVD-M1210W-2W-N(-P) 0.5 kg (1.1 lbs.) TVD-N210W-4-N(-P)
  • Page 112 All manuals and user guides at all-guides.com...