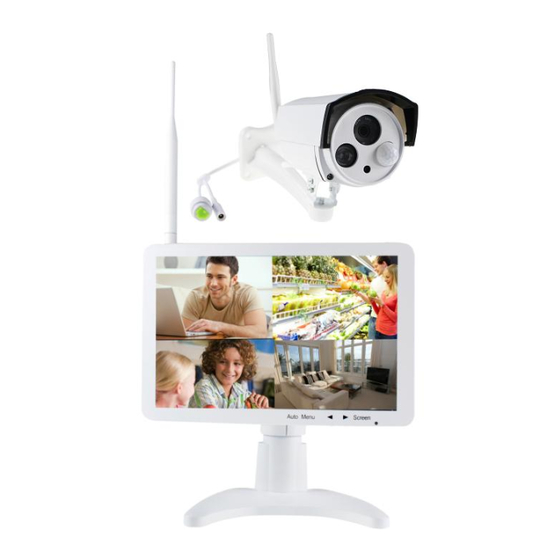
Technaxx TX-29 Manuel D'utilisation

Security premium caméra ensemble
Masquer les pouces Voir aussi pour TX-29:
Table des Matières

Publicité

Les langues disponibles

Les langues disponibles

Liens rapides

Security Premium Kamera-Set 10.1 TX-29
Security Premium Kamera-Set 18.5 TX-30
Wichtiger Hinweis in Bezug auf die Gebrauchsanleitungen:
Alle Sprachen der Gebrauchsanleitung befinden sich auf der
Inhaltsverzeichnis
1. Besonderheiten ................................................................................................................ 2
2. Packungsinhalt ................................................................................................................ 3
3. Produktüberblick .............................................................................................................. 3
4. Installation ........................................................................................................................ 6
4.1 Installation von TX-29 und TX-30 ................................................................................... 7
4.2 Antenneninstallation ....................................................................................................... 7
4.3 Festplatteninstallation .................................................................................................... 8
4.4 Kamera zu TX-29/TX-30 hinzufügen .............................................................................. 9
5. Software-Funktionen ...................................................................................................... 10
5.1 Geteilter Bildschirm ...................................................................................................... 10
5.2 Kamera verw ................................................................................................................ 10
5.4 Wiedergabe ................................................................................................................. 20
5.5 Videobackup ................................................................................................................ 21
5.6 Farbeinstellung ............................................................................................................ 22
5.7 PTZ (Nicht für gelieferte Kameras) .............................................................................. 23
5.8 Manu. Aufnahme .......................................................................................................... 23
5.9 Lautstärke .................................................................................................................... 23
5.10 Assistent .................................................................................................................... 23
5.11 Netzwerk .................................................................................................................... 23
5.12 Kamera hinzufügen .................................................................................................... 24
5.13 System verl. ............................................................................................................... 24
6. Gerätezugriff .................................................................................................................. 24
6.1 Zugriff über LAN (lokale WEB-Benutzeroberfläche) ..................................................... 24
6.2 Zugriff über WAN (globale WEB-Benutzeroberfläche) ................................................. 25
6.3 Mobile Anwendung (Security Premium) ....................................................................... 26
7. Security Premium PC-Client .......................................................................................... 32
8. Erweiterte Kameraeinstellungen .................................................................................... 36
9. Fehlerbehebung ............................................................................................................. 36
10. Technische Daten ........................................................................................................ 37
aufgelistet. Andere HDD-Modelle können kompatibel sein, wurden von uns aber nicht
getestet. ............................................................................................................................. 38
®
Technaxx
beiliegenden CD.
* Gebrauchsanleitung
Garantie 2 Jahre
1

Publicité

Table des Matières
loading

Sommaire des Matières pour Technaxx TX-29

  • Page 1: Table Des Matières

    8. Erweiterte Kameraeinstellungen ..................36 9. Fehlerbehebung ......................36 10. Technische Daten ......................37 11. Anhang: Einige getestete und empfohlene HDDs für TX-29 und TX-30 sind hier aufgelistet. Andere HDD-Modelle können kompatibel sein, wurden von uns aber nicht getestet..........................38...
  • Page 2: Besonderheiten

    Eingebautes Kameramikrofon für Audioaufnahmen  PIR-Sensor mit ~8m Reichweite bei Tag & Nacht  Push-Nachricht über APP bei Bewegungserkennung  Kabellose Kameraverbindung mit bis zu 4 Kameras (TX-29) & bis zu 8 Kameras (TX-30) Fenster-Teilungsfunktion mit Echtzeit-/Routine-/Ereignisüberwachung  Festplatten- speicherfunktion & USB-Backup-Funktion  Netzwerkbetrieb per LAN-Kabelanschluss Mobile Beobachtung via kostenfreie iOS &...
  • Page 3: Packungsinhalt

    (2m), CD, Gebrauchsanleitung, [*HDD nicht enthalten] 3. Produktüberblick Das Haupteinsatzgebiet des Gerätes ist lokal über das Display. TX-29 und TX-30 sind Rekorder, Empfänger und Display in einem Gerät. Sie können beispielsweise als Überwachungsgerät verwendet werden. TX-29 unterstützt bis zu 4 Kameras, TX-30 unterstützt bis zu 8 Kameras.
  • Page 4 TX-29 TX-30 Name Funktion AUTO-Taste: Passt die Bildschirmanzeige automatisch an. Aktiviert und beendet die OSD-Menüeinstellungen der Anzeige MENÜ-Taste: (Monitor) Bewegt das OSD-Menü oder verkleinert den Wert des  Taste ausgewählten Elements oder verringert die Lautstärke des Displays (Monitor). Bewegt das OSD-Menü oder vergrößert den Wert des ...
  • Page 5 IP-Kamera: Nr. Name Funktion IR-LEDs Die Kamera nutzt sie unter schlechten Lichtverhältnissen, um (Infrarot) ein Schwarzweißbild, selbst bei völliger Dunkelheit, zu generieren. Objektiv Stellen Sie für ein verlässliches und klares Bild sicher, dass das Objektiv sauber ist und nicht blockiert wird. Verwenden Sie zur Reinigung eine spezielle Linsenreinigungslösung und ein Tuch, beides ist in allen gute Fotografie-Fachgeschäften erhältlich.
  • Page 6: Installation

    • Das Gerät nicht verwenden, wenn Kabel und Anschlüsse frei liegen. • Keine Behälter mit Flüssigkeit in der Nähe des TX-29 und TX-30 (z. B. Vase) aufstellen. • NVR muss an einem gut belüfteten Ort montiert werden. Belüftungsöffnung dürfen nicht blockiert werden.
  • Page 7: Installation Von Tx-29 Und Tx-30

    Schließen Sie den mitgelieferten 12V-Netzadapter an die Netzbuchse der Kamera an. ⑤ Stecken Sie den Netzadapter in die Netzsteckdose. Warten Sie einige Minuten bis TX-29/TX-30 und die IP-Kamera die Inbetriebnahme abgeschlossen haben. Das lokale Überwachungssystem ist bereit. ⑥ Falls Sie dieses System mit einem Smartphone oder Computer aus der Ferne steuern möchten,...
  • Page 8: Festplatteninstallation

    Aufnahme manuell formatiert werden. Eine Festplatte (HDD) ist für die Aufnahme (Zeit, Bewegung, Sensor), Wiedergabe von Aufnahmen, Speichern der Log-Dateien und Versenden von Push-Benachrichtigungen erforderlich. TX-29 (HDD 2,5 Zoll, max. 4TB) Entfernen Verbinden 3. Verbinden Sie Daten- und...
  • Page 9: Kamera Zu Tx-29/Tx-30 Hinzufügen

    (Matchcode) und bestätigen Sie mit "Yes (Ja)". Hinweis: Matchcode “ ” Match code funktioniert nur mit Kameras des TX-29- oder TX-30-Systems (Zusatzkamera). ③ Nach ca. 30 Sekunden erscheint die neue Kamera in der Liste "Added device (hinzugefügte Geräte)" und der Status wird als "Connect success (Erfolgreich verbunden)"...
  • Page 10: Software-Funktionen

    (WLAN: die aber bereits an den NVR angepasst wurden), nachdem Sie Aktualisieren gedrückt haben. IP-Kameras, die über WLAN an den NVR angepasst wurden, können nur mit einem NVR (TX-29 oder TX-30) verbunden werden. IP-Kameras, die über das Ethernet-Kabel mit dem Netzwerk verbunden sind, können an mehr als einen NVR...
  • Page 11 Hiermit werden neue IP-Kameras zum NVR, hinzugefügt. Der Matchcode NVR und die IP-Kamera müssen über den Passwortschlüssel Prozess zusammengeführt werden. Danach können Sie das kabellose NVR-Gerät anschließen. Alle Kameras, die in der Liste angezeigt werden, werden Automatisch automatisch hinzugefügt, wenn die Netzwerkverbindung der hinzufügen Kameras gut ist.
  • Page 12 Beide Kameras müssen zuerst mit dem NVR (siehe Kapitel 4.4) verbunden werden und müssen sich in der Nähe des NVRs und nahe beieinander befinden. Drücken Sie auf die Schaltfläche und gehen Sie zum nächsten Schritt. Wenn Sie auf klicken, öffnet sich ein Drop-Down-Menü. Wählen Sie die Kanalnummer (Kamera), die Sie mit dem Repeater verbinden möchten.
  • Page 13 5.3 Menü Allgemein: Die Hauptfunktionen des Geräts, wie Auto Logout, Summer; Allgemein Sprache, Key-Typ und Remote-ID können in diesem Menü eingestellt werden. Einrichtungsassistent, Zeige Geräte-ID in der Vorschau, Zeit Vorschau anzeigen Autom. Bildschirmabschaltung können ebenfalls Aktiviert/Deaktiviert werden. Zeiteinstellung Zeitzone: Wählen Sie zur korrekten Zeitanzeige Ihre Zeitzone.
  • Page 14 Datumsformat: Legen Sie das korrekte Datumsformat für Ihre Region fest. Systemdatum: Wird automatisch vom Rekorder eingestellt. Systemzeit: Wird automatisch Rekorder eingestellt. Sync Zeit: Die Systemzeit kann über den Link unter "Erweitert" synchronisiert werden (das Gerät muss mit dem Internet verbunden sein). Zeitformat: Wählen Sie zwischen dem 12- und 24-Stunden-Format.
  • Page 15 Alarmsystem hinzugefügt werden. Netzwerk: DHCP ist als Standard festgelegt. Das ist die einfachste Möglichkeit das TX-29/TX-30 mit Ihrem Netzwerk zu verbinden und eine IP-Adresse zu erhalten. Die IP-Adresse kann aber auch manuell festgelegt werden. Die IP-Adresse und der Port (Standard 81) des Geräts werden auf dieser Seite angezeigt.
  • Page 16 Klicken Sie auf Übernehmen. Um die Konfiguration zu aktivieren, müssen Sie einen Neustart durchführen. Nach dem Neustart verbindet sich TX-29/TX-30 automatisch mit dem Internet. Die IP-Adresse im PPPoE ist der dynamische Wert. Geben Sie die IP-Adresse des Geräts in den Browser ein, um Einstellungen vorzunehmen.
  • Page 17 Kennwort: Geben Sie das Passwort Ihrer obigen E-Mail-Adresse ein. Verschlüsselungstyp: Verwenden Sie zur Verschlüsselung SSL. Absender: Geben Sie Ihre E-Mail-Adresse erneut ein. Empfänger1: Geben Sie die Empfänger-E-Mail-Adresse ein (Anregung: Verwenden Sie wieder Ihre eigene). Empfänger2: Geben Sie die Empfänger-E-Mail-Adresse ein (Anregung: Verwenden Sie die E-Mail-Adresse einer anderen Person).
  • Page 18 Das rote Dreieck-Symbol in der linken unteren Ecke dient der Alarm-Erinnerung. Klicken Sie darauf, um die Alarminformationen anzuzeigen. Nach der Aktivierung der Summer-Funktion gibt TX-29/TX-30 einen akustischen Alarmton ab, wenn ein Alarm erkannt wird (Lautstärke mit Pfeil-Tasten im Display einstellen).
  • Page 19 Falls Sie den Alarm für Bewegung markiert haben, wird ein gelber gehender Mann in der rechten oberen Ecke des Kanals angezeigt, wenn ein Alarm eintritt. Falls Sie "Zeitplan" und nicht "Bewegung" aktiviert haben, wird in der rechten oberen Ecke des Kanals eine Uhr angezeigt.
  • Page 20: Wiedergabe

    Für das System-Upgrade müssen Sie die Firmware auf eine leeren USB-Speicherstick kopieren. Setzen Sie diese in einen USB-Port des TX-29/TX-30 ein. Wählen Sie aus dem Menü USB-Speicher und die Option (meist System), die Sie aktualisieren möchten. Wählen Sie aus der Liste unten die Firmware und klicken Sie auf Start.
  • Page 21: Videobackup

    5.5 Videobackup Klicken Sie mit der rechten Maustaste auf der Haupt-Benutzeroberfläche auf  Videobackup  Kanalnummer  Aufnahmemodus  und geben Sie die Suchzeit mit der Anfangszeit und Endzeit ein  klicken Sie auf Suche. Die Aufnahmen werden angezeigt  wählen Sie die Videos, die Sie sichern möchten ...
  • Page 22: Farbeinstellung

    5.6 Farbeinstellung Bevor Sie die Farbe anpassen können, müssen Sie über die Split-Screen-Funktion auf den Kanal umschalten, den Sie anpassen möchten. Klicken Sie dann mit der rechten Maustaste auf der Haupt-Benutzeroberfläche auf  Farbeinstellung. Unten rechts erscheint ein Fenster, indem Sie folgende Eigenschaften anpassen können: Farbton, Helligkeit, Sättigung und Kontrast.
  • Page 23: Ptz (Nicht Für Gelieferte Kameras)

    Sie den Boot-Assistent erneut starten. Damit wird die Einstellung der Grundoptionen des TX-29/TX-30 erleichtert. 5.11 Netzwerk Hier wird die Geräte-ID als QR-Code angezeigt. Sie können die Netzwerk-Optionen des TX-29/TX-30 mit zwei Optionen einrichten. Wenn Sie Auto. Konfig wählen, stellt der NVR...
  • Page 24: Kamera Hinzufügen

    alles automatisch ein oder Sie wählen Manuelle Konfig, dann müssen Sie die IP, Gateway und die Sub-Maske selbst einstellen. Unter Manuelle Konfig. können Sie auch auswählen, ob Sie die PPPoE-Funktion benötigen. Klicken Sie auf Anwenden oder OK, um die Einstellungen zu speichern. Wenn Sie auf die Schaltfläche Prüfen klicken, scannt der NVR seine Netzwerkverbindung und zeigt seine Status in der Zeile Netzwerk-Status an.
  • Page 25: Zugriff Über Wan (Globale Web-Benutzeroberfläche)

    6.2 Zugriff über WAN (globale WEB-Benutzeroberfläche) Die globale WEB-Benutzeroberfläche wird nur für die Live-Ansicht eingesetzt, um die Alarmanlage von anderen Standpunkten aus mit einem Computer zu überprüfen. Schritt 1: Klicken Sie mit der rechten Maustaste auf der Haupt-Benutzeroberfläche auf-> Systemeinstellung ->Netzwerk Videorekorder-Geräte-ID überprüfen. Schritt 2: Geben Sie für den Zugriff per Computer im WAN www.technaxxp2p.de in den IE-Browser (NUR IE möglich) ein.
  • Page 26: Mobile Anwendung (Security Premium)

    6.3 Mobile Anwendung (Security Premium) Das TX-29/TX-30 funktioniert mit iPhone- und Android-Geräten. Installieren Sie die mobile APP und verwenden Sie Ihr Mobilgerät für die Remote-Anzeige/-Wiedergabe Ihres NVR. Die mobile APP steht Ihnen kostenlos zum Herunterladen im entsprechenden APP Store von Apple und dem Google Play Store zur Verfügung.
  • Page 27 “ ” Schritt 4: Wählen Sie Gerät über ID hinzufügen Schritt 5: Geben Sie jetzt die Geräte-ID ein. Scannen Sie den QR-Code des TX-29/TX-30 oder geben Sie die Geräte-ID ein. Wechseln Sie zu Ihrem TX-29/TX-30, klicken Sie “ ” rechts und öffnen Sie Netzwerk .
  • Page 28 Schritt 7: Drücken Sie auf "Speichern", um die Einstellung zu beenden und zu speichern (evtl. zeigt das Gerät die Meldung "Fehler - das Gerät ist bereits vorhanden – Bestätigen"), dann wurde Ihr Gerät erfolgreich hinzugefügt. Schritt 8: Tippen Sie in der Geräteliste auf das Gerät, welches Sie anzeigen möchten. Schritt 9: Der linke Kreis zeigt den Einzelbildschirm;...
  • Page 29 Benutzergruppe hinzufügen Schritt 1: Tippen Sie auf Gruppe. Tippen Sie auf das "+"-Symbol, um Kanäle zu einer Gruppe hinzuzufügen. Schritt 2: Geben Sie den Gruppennamen ein. Schritt 3: Wählen Sie verschiedene Kanäle für die Gruppe aus. Schritt 4: Tippen Sie zum Speichern der Gruppe oben rechts auf Speichern. Funktionen unter Mein Gerät für Wiedergabe muss eine HDD in den NVR eingelegt werden) 1.
  • Page 30 auszuwählen. Hinweis: Falls Aufnahmen (Ereignisse) vorhanden sind, ist die Zeitachse gefärbt. Funktionen unter Mein Konto 1. Screenshot/Video: Zeigt Fotos und Videos an, die Sie manuell aufgenommen haben. 2. Alarmmeldungen: Zeigt Benachrichtigungen zeitlich sortiert. 3. Alarmeinstellung: Aktiviert oder deaktiviert die Alarmeinstellung. 4.
  • Page 32: Security Premium Pc-Client

    7. Security Premium PC-Client Vorschau: Nachdem der Client gestartet wurde, wird die Live-Ansicht der Vorschau angeschlossenen Kameras angezeigt (abhängig vom ausgewählten Bildschirm-Aufteilungsmodus 1, 4, 6, 8, 9, 16, 25, 36 oder 49 Kanäle). Hierzu die Schaltfläche „Alle öffnen“ anklicken. Wenn Sie die rechte Maustaste halten und über die Live-Ansicht eines Kanals bewegen, sehen Sie ein grünes Rechteck, mit dem Sie den Kanal digital zoomen können.
  • Page 33 Aktualisiert die Kameravorschau. Automatischer Abruf Durch Anklicken dieser Schaltfläche wird die Größe/das Format der Fenstervollbild gegenwärtigen Videovorschau geändert. Vollbild Durch Anklicken dieser Schaltfläche wechselt der ausgewählte Bildschirm-Aufteilungsmodus in den Vollbild-Modus. Um den Vollbild-Modus zu schließen, klicken Sie mit der rechten Maus und “...
  • Page 34 Sicherung: Bereich Zeigt die Geräte an, die gesichert werden. Zeitachse Die Zeitachse aller Kanäle mit den aufgenommenen Videos. Um einen Kanal zu sichern, markieren Sie das Kontrollkästchen auf der linken Seite des Fensters. Lokal bedeutet, dass die Aufnahme auf der PC-Festplatte manuell Lokal oder Fernzugriff aufgenommen wird und Fernzugriff bedeutet, dass die Aufnahme auf der Gerätefestplatte nach Zeitplan, Bewegung oder PIR...
  • Page 35 Bildschirm fest. Netzwerk DHCP ein/aus festlegen, Port festlegen, P2P ID anzeigen und PPPoE ein/aus festlegen. Kodierung Legen Haupt- Sub-Stream-Einstellungen, Codier-Modus, Codier-Format, Qualität, Bit- und Bildrate fest. Aufnahme Legen Sie den Aufnahmezeitplan für jeden Kanal fest, wählen Sie Zeitpunkt, Bewegung oder/und Sensor (siehe Kapitel 5.3 Aufnahmeeinstellung ...
  • Page 36: Erweiterte Kameraeinstellungen

    Kamera über Netzwerkkabel mit Ihrem Router. Gehen Sie dann zum Display des TX-29/TX-30, öffnen Sie die Video-Verwaltungseinstellungen, wählen Sie das N1-Protokoll aus und klicken Sie auf der rechten Seite auf die Schaltfläche "Aktualisieren". Jetzt wird die IP-Adresse angezeigt (Beispiel: 192.168.1.168), die Sie in den Browser einfügen müssen. Klicken Sie auf "Enter", dann wird der Anmelde-Bildschirm angezeigt.
  • Page 37: Technische Daten

    10. Technische Daten Kabellose-NVR-Spezifikation ” ” Bildschirm 10,1 (TX-29) 18,5 (TX-30) Horizontal 170° Horizontal 90° Bildwinkel Vertikal 170° Vertikal 65° Reaktionszeit 25ms Anzeigegerät Leuchtdichte-Kontrastverhältnis 800:1 Zentrale Leuchtdichte 350cd/m² Max. 4 Kanäle Max. 8 Kanäle Netzwerk-Video IP-Kameras IP-Kameras AV Eingang Netzwerk-Videoeingang...
  • Page 38: Anhang: Einige Getestete Und Empfohlene Hdds Für Tx-29 Und Tx-30 Sind Hier

    (L) 15,5 x (B) 9,7 x (H) 8,7cm Gewicht 550g Schutzklasse IP66 11. Anhang: Einige getestete und empfohlene HDDs für TX-29 und TX-30 sind hier aufgelistet. Andere HDD-Modelle können kompatibel sein, wurden von uns aber nicht getestet. Seagate 2,5" 500GB Pipeline HD ST500VT000 SAMSUNG 2,5"...
  • Page 39 GPL v2 without charge except for the cost of media, shipping, and handling, upon written request to Technaxx GmbH & Co. KG, Kruppstraße 105, 60388 Frankfurt am Main, Germany.
  • Page 40 To protect your rights, we need to make restrictions that forbid anyone to deny you these rights or to ask you to surrender the rights. These restrictions translate to certain responsibilities for you if you distribute copies of the software, or if you modify it. For example, if you distribute copies of such a program, whether gratis or for a fee, you must give the recipients all the rights that you have.
  • Page 41 2. You may modify your copy or copies of the Program or any portion of it, thus forming a work based on the Program, and copy and distribute such modifications or work under the terms of Section 1 above, provided that you also meet all of these conditions: a) You must cause the modified files to carry prominent notices stating that you changed the files and the date of any change.
  • Page 42 received the program in object code or executable form with such an offer, in accord with Subsection b above.) The source code for a work means the preferred form of the work for making modifications to it. For an executable work, complete source code means all the source code for all modules it contains, plus any associated interface definition files, plus the scripts used to control compilation and installation of the executable.
  • Page 43 circumstance, the balance of the section is intended to apply and the section as a whole is intended to apply in other circumstances. It is not the purpose of this section to induce you to infringe any patents or other property right claims or to contest validity of any such claims;...
  • Page 44 not limited to loss of data or data being rendered inaccurate or losses sustained by you or third parties or a failure of the program to operate with any other programs), even if such holder or other party has been advised of the possibility of such damages. END OF TERMS AND CONDITIONS...
  • Page 45 HOW TO APPLY THESE TERMS TO YOUR NEW PROGRAMS (1) If you develop a new program, and you want it to be of the greatest possible use to the public, the best way to achieve this is to make it free software which everyone can redistribute and change under these terms.
  • Page 46 Security Premium Überwachungskamera-Set TX-29 10,1 Zoll Monitor mit Aufnahmefunktion & HD Aussenkamera 10.1" HD LCD Monitor with loudspeaker/ HD Camera 720P with CMOS Sensor / Wireless Transmission with 2.4GHz / Wireless Camera Connection max. 4 Cameras / 10.1" HD LCD Monitor mit Lautsprecher HD Kamera 720P mit CMOS Sensor Funkübertragung mit 2.4GHz...
  • Page 47 2. Package content ......................3 3. Product Overview......................3 4. Installation ........................6 4.1 How to install TX-29 & TX-30 ..................7 4.2 Antenna installation ......................7 4.3 Hard disk installation ...................... 8 4.4 Add camera to TX-29/TX-30 ..................9 5.
  • Page 48: Features

     Push message via APP when motion is detected  Wireless camera connection with up to 4 cameras (TX-29) & up to 8 cameras (TX-30)  Windows split-screen function with real-time/routine/event surveillance  Hard disk storage function & USB backup function Network operation via LAN cable connection ...
  • Page 49: Package Content

    Manual, [*HDD not included] 3. Product Overview The main use of the device is local on the display. The TX-29 & TX-30 are recorder, receiver and display in one device. They can be used for example as surveillance device. TX-29 supports up to 4 cameras, TX-30 supports up to 8 cameras. Both need a HDD (not included) for recording and push notifications.
  • Page 50 TX-29 TX-30 No. Name Function AUTO key Adjusts the screen display automatically. MENU key Activates and exits the OSD menu settings of the display (monitor) Moves the OSD menu or decreases the selected item value or ← key decrease volume of the display (monitor).
  • Page 51 IP Camera: No. Name Function IR (Infrared) LEDs The camera will use these in low-light conditions to generate a black and white image, even in total darkness. Lens The business end of the camera. For a reliable and clear image, ensure that the lens stays clean and unobstructed. To clean, use a dedicated lens cleaning solution and cloth, available from all good photography stores.
  • Page 52: Installation

    4. Installation Figure 4-1 DC12V/1A Computer AC Wall Socket Internet DC12V/2A/3A Smartphone USB Mouse Router RJ45 Cable Safety cautions • Make sure product is fixed correctly and stable if fastened in place. • Do not operate if wires and terminals are exposed. •...
  • Page 53: How To Install Tx-29 & Tx-30

    Camera. ⑤ Plug the power adapter into the wall socket. Wait for a few minutes till the TX-29/TX-30 and the IP camera finished startup. So far, the local surveillance system was done. ⑥ If you want to remote access this system with a Smartphone or computer, you should connect the TX-29/TX-30 to your home wireless router with a RJ45 network cable and make sure the router has been linked to internet.
  • Page 54: Hard Disk Installation

    HDD is needed for recording (Time, Motion, Sensor), playback of recordings, saving log files and sending out Push Notifications. TX-29 (HDD has to be 2.5 inch, max. 4TB) 1. Remove the screws of 3. Connect the data and the device back cover.
  • Page 55: Add Camera To Tx-29/Tx-30

    “N1” and press “refresh”->select the camera in the search list and press “Match code” and answer with yes. Note: Match code only works with cameras of the TX-29 or TX-30 system (additional cameras). ③ After about 30 seconds the new camera will be occurred in the “added device” list, and status displays ”Connect success”.
  • Page 56: Software Functions

    Standard: Shows mostly all IP cameras that are connected to the network after pressing refresh. N1: Shows the IP cameras of the TX-29 & TX-30 system that are not connected to NVR (WiFi: But have already matched to NVR) after pressing refresh.
  • Page 57 Multiply Network Segment Multiply Network Segment means that Advanced (not supported) access a segment to add the device. Allow Repeated Add When enabled you can add the same camera more than one time Intelligent Add Intelligent smart functionality. It is mainly used for the wired camera.
  • Page 58 Both cameras must be first connected to the NVR (see chapter 4.4) and should be nearby to the NVR and each other. Now press the button and see next step. By pressing button a dropdown menu opens. Select the channel number (camera) that you want to connect to the repeater.
  • Page 59 General setup: General The main functions of the device like Auto Logout, Key buzzer; Language, setup Keypad Type and Remote ID can be set under this menu. Boot Wizard, Show Device ID when Preview, Show time when Preview and Auto Turn Off Screen can also be Enabled/Disable.
  • Page 60 Record setup: Record Plan  Set four time periods for every channel for everyday of the week. First select the channel and weekday. After that set the time periods you want to get alarmed. You can set Alarm, Motion, Sensor or all by checking all three boxes. (By checking motion the display shows a yellow walking man in the top right corner of the channel that the alarm occurred.
  • Page 61 Network setup: DHCP will be set as default it is the easiest way that the TX-29/TX-30 connects with your network and get an IP. But it is also possible to set the IP address manually. The IP address and the port (default 81) of your device are shown on this page. The page displays the network status where you can see if the device is connected to a network and the internet.
  • Page 62 If you want to receive alarm emails when motion (motion or sensor E-Mail enabled) is detected, you must enable the function and fill in the settings. When you are finished with the settings first press Apply and then Test to check if your settings are right.
  • Page 63 Handle: The different notifications you can get are set here.. The red triangle symbol in the left bottom corner is for Alarm reminding. Click on it to see alarm information. After activating Buzzer function the TX-29/TX-30 will make an acoustic sound when an alarm is detected (set volume with arrow keys of the display).
  • Page 64 By checking Alarm for motion the display shows a yellow walking man in the top right channel corner when alarm occurs. If you have activated time and not motion you will see a clock on the top right corner of the channel. For PIR sensor a yellow triangle with exclamation mark is shown in the top right corner of the channel.
  • Page 65: Video Playback

    System upgrade For the system upgrade you need to copy the firmware to an empty USB disk. Insert it to the free USB port of the TX-29/TX-30. Select from the menu USB storage and the option you want to update (mostly system).
  • Page 66: Video Backup

    5.5 Video backup Click the mouse right button on the main interface  Video backup  choose channel No.  Choose record mode  enter Search time, input the beginning time and end time  click search. The recording will come up  choose the videos which needed to backup  click on Backup.
  • Page 67: Color Adjust

    5.6 Color adjust Before you can adjust the color you have to switch via the split screen function to the channel you want to adjust. Then click the mouse right button on the main interface  Color Adjust. Now on the right bottom appears a window where you can set the Hue, Brightness, Saturation and Contrast.
  • Page 68: Manual Record

    Here you can see the Device ID as QR code. You can setup the network options of the TX-29/TX-30 with two options. Choose Auto Config to let the NVR set everything on his one or choose Manual Config to set IP, Gateway and subnet mask by yourself. Under Manual Config you can also decide to choose the PPPoE function if necessary for you.
  • Page 69: Device Access

    6. Device Access 6.1 Access via LAN (local WEB Interface) Local WEB Interface is only for live view and playback. Do settings directly on NVR. Step 1: Click the mouse right button on the main interface-> System setup ->Network setup Check NVR IP address.
  • Page 70: Access Via Wan ( Global Web Interface)

    6.2 Access via WAN ( global WEB Interface) Global WEB Interface is only for live view to check from other locations on a computer. Step 1: Click the mouse right button on the main interface-> System setup->Network setup Check video recorder Device ID. Step 2: Access by computer in WAN, input www.technaxxp2p.de in IE browser (recommended).
  • Page 71: Mobile Application (Security Premium)

    6.3 Mobile application (Security Premium) The TX-29/TX-30 can work with iPhone and Android devices. Install the mobile APP and use your mobile for remote viewing/playback your NVR. The mobile APP is free to download for you, and is available from the respective Apple APP Store and Google Play Store.
  • Page 72 Step 5: Now you entered the device edit page. Scan the QR-code of the TX-29/TX-30 or enter the Device ID (= Cloud ID). Switch to your TX-29/TX-30 press right click and open “Fast network”. There you find device IP and QR-code. See chapter 5.3 system setup ...
  • Page 73 Functions under My Device (For Playback inserted HDD in the NVR is needed) 1. Click on Playback to see the recorded videos 2. Click on Capture to manually take a snapshot of the chosen channel 3. Click on Record to manually take a recording of the chosen channel 4.
  • Page 74 Functions under Me 1. Local Records: Take a look at your manually taken photo & Video. 2. Notifications list: Look up different notifications. 3. Alarm setting: Enable or disable the Alarm setting 4. Change password: You can change the password 5.
  • Page 75: Security Premium Pc Client

    7. Security Premium PC Client Preview: Preview After starting the client you see the live view of the connected cameras (depending on the selected screen divide mode 1, 4, 6, 8, 9, 16, 25, 36 or 49 channels). By holding the left mouse button and moving over the live view of a channel.
  • Page 76 Playback (max. 4 channel playback at the same time): Shows the devices with its available channels. By clicking on “plus” / Area “minus” it will open / close the channel list. Double click on a device to open/close all channels of the device. Double click on channel of the device to just open/close the selected channel.
  • Page 77 Settings  Device manage: By checking the box in front of one or more devices from the device list and then pressing Add the selected devices will be add to a Area. Quick setup All devices in the device list will be added Add area Add areas for organizing the cameras.
  • Page 78: Advanced Camera Settings

    After that go to your TX-29/TX-30 Display, open the video manage setup, select the N1 protocol and press on the refresh button on the right. Now you will see the IP address (example: 192.168.1.168) which you have to insert into the browser.
  • Page 79 10. Technical specifications Wireless NVR Specification 10.1” (TX-29) 18.5” (TX-30) Screen Horizontal 170° Horizontal 90° Viewing angle Vertical 170° Vertical 65° Response time 25ms Display device Luminance contrast ratio 800:1 Central luminance 350cd/m² Max. 4CH Max. 8CH Network video IP cameras...
  • Page 80: Specifications

    Weight 550g Protection class IP66 11. Attachment: Some tested and recommended HDD for TX-29 and TX-30 are listed here. But other HDD models can be compatible but not tested from our side. Seagate 2.5" 500GB Pipeline HD ST500VT000 SAMSUNG 2.5" 500GB ST500LM012-W SAMSUNG 2.5"...
  • Page 81 GPL v2 without charge except for the cost of media, shipping, and handling, upon written request to Technaxx GmbH & Co. KG, Kruppstraße 105, 60388 Frankfurt am Main, Germany.
  • Page 82 Also, for each author's protection and ours, we want to make certain that everyone understands that there is no warranty for this free software. If the software is modified by someone else and passed on, we want its recipients to know that what they have is not the original, so that any problems introduced by others will not reflect on the original authors' reputations.
  • Page 83 c) If the modified program normally reads commands interactively when run, you must cause it, when started running for such interactive use in the most ordinary way, to print or display an announcement including an appropriate copyright notice and a notice that there is no warranty (or else, saying that you provide a warranty) and that users may redistribute the program under these conditions, and telling the user how to view a copy of this License.
  • Page 84 If distribution of executable or object code is made by offering access to copy from a designated place, then offering equivalent access to copy the source code from the same place counts as distribution of the source code, even though third parties are not compelled to copy the source along with the object code.
  • Page 85 8. If the distribution and/or use of the Program is restricted in certain countries either by patents or by copyrighted interfaces, the original copyright holder who places the Program under this License may add an explicit geographical distribution limitation excluding those countries, so that distribution is permitted only in or among countries not thus excluded.
  • Page 86 HOW TO APPLY THESE TERMS TO YOUR NEW PROGRAMS (1) If you develop a new program, and you want it to be of the greatest possible use to the public, the best way to achieve this is to make it free software which everyone can redistribute and change under these terms.
  • Page 87 2. Contenu du produit ......................3 3. Présentation du produit ....................3 4. Installation ........................6 4.1 Comment installer le TX-29 et le TX-30 ................. 7 4.2 Installation de l'antenne ....................7 4.3 Installation du disque dur ....................8 4.4 Ajout d’une caméra au TX-29/TX-30 ................9 5.
  • Page 88: Fonctionnalités

    ~8m de distance le jour & la nuit  Notification push via APP quand un mouvement est détecté  Connexion caméras sans fil avec 4 caméras maximum (TX-29) & 8 caméras maximum (TX-30)  Fonction écran de fenêtres divise pour la surveillance en temps réel/de routine/événement ...
  • Page 89: Contenu Du Produit

    Ils peuvent servir par exemple de dispositif de surveillance. Le TX-29 prend en charge au max. 4 cameras et le TX-30 prend en charge au max. 8 caméras. Les deux produits nécessitent un disque dur (non inclus) pour l’enregistrement et les notifications push.
  • Page 90 TX-29 TX-30 N° Fonction Pour régler automatiquement l'affichage de l’écran. Touche AUTO Pour activer et quitter les paramètres du menu OSD de Touche MENU l’affichage (moniteur). Pour se déplacer dans le menu OSD, diminuer la valeur de touche ← l'élément sélectionné ou baisser le volume de l'affichage (moniteur).
  • Page 91 Caméra IP : N° Fonction La caméra l’utilisera dans des conditions de luminosité faible LED IR (Infrarouges) pour générer une image en noir et blanc, même dans l’obscurité totale. Objectif Le rôle final de la caméra. Pour une image fiable et claire, vérifiez que l’objectif reste propre et non obstrué.
  • Page 92: Installation

    4. Installation Figure 4-1 DC12V (CC12V)/1A Ordinateur Prise secteur Internet DC12V (CC12V)/2A/3A Smartphone Souris USB Routeur Câble RJ45 Précautions de sécurité • Vérifiez que l’appareil est correctement et stablement fixé. • N’utilisez pas l'appareil si des fils et des bornes sont exposés. •...
  • Page 93: Comment Installer Le Tx-29 Et Le Tx-30

    ⑥ Si vous voulez accéder à ce système à distance avec un smartphone ou un ordinateur, vous devez brancher un câble RJ45 au TX-29/TX-30 et à votre routeur sans fil et vous assurer que le routeur est connecté à internet. L’installation sur un smartphone est décrite au chapitre 6.3 Application mobile (Security Premium).
  • Page 94: Installation Du Disque Dur

    (heure, mouvement et capteur), la lecture des enregistrements, la sauvegarde de fichiers de journal et l’envoi de notifications push. TX-29 (Le disque dur doit mesurer 2,5 pouce et avoir au max. 4To) 1. Ôtez les vis du couvercle 2.
  • Page 95 « Refresh » (Rafraîchir)-> sélectionnez la caméra dans la liste de recherche, appuyez sur « Match code » (Correspondance de code) et répondez par Yes (Oui). Remarque : La correspondance de code fonctionne uniquement avec des caméras du système TX-29 ou TX-30 (caméras supplémentaires).
  • Page 96: Fonctions Logicielles

    Standard : Affiche essentiellement toutes les caméras IP qui sont connectées au réseau après un appui sur Refresh (rafraîchir). N1 : Affiche les caméras IP du système TX-29 et TX-30 qui ne sont pas connectées au NVR (WiFi : Mais déjà associées au NVR) après un appui sur Refresh (Rafraîchir).
  • Page 97 Sélectionnez une caméra dans la liste de recherche. Vous pouvez Modify (Modifier) modifier l'adresse IP de la caméra sélectionnée, Username (Nom d’utilisateur) et Password (Mot de passe). Multiply Network Segment Multiplier le segment réseau signifie Advanced (Multiplier segment accéder à un segment pour ajouter (Avancé) réseau) (non...
  • Page 98 Les deux caméras doivent être d’abord connectées au NVR (voir chapitre 4.4) et doivent être à proximité du NVR et l’une de l’autre. Appuyez ensuite sur le bouton et allez à l'étape suivante. , un menu déroulant s’ouvre. Sélectionnez le numéro Quand vous appuyez sur le bouton de canal (caméra) à...
  • Page 99 General setup (Configuration système) : General setup Les fonctions principales de l'appareil telles que Auto Logout (Configuration (Déconnexion automatique), Key buzzer (Avertisseur de clavier), système) Language (Langue), Keypad Type (Type de clavier) et Remote ID (ID distant) peuvent être réglées dans ce menu. Boot Wizard (Assistant d'amorçage), Show Device ID when Preview (Afficher l’ID de l'appareil lors de la prévisualisation), Show time when Preview (Afficher l’heure lors de la prévisualisation) et Auto Turn...
  • Page 100 VGA resolution (Résolution VGA) : Vous pouvez régler la résolution d'affichage ici. Auto Switch (Basculement auto) : Pour basculer entre l'affichage de 1 canal et de 4 canaux (2 à 10 secondes) Vous pouvez formater le disque dur et régler la valeur de période Setup après laquelle le fichier le plus ancien doit être supprimé.
  • Page 101 être ajoutés ici pour un système d’alarme. Network setup (Configuration réseau) : DHCP sera défini par défaut, ainsi le TX-29/TX-30 peut se connecter à votre réseau et obtenir une IP facilement. Mais il est également possible de régler manuellement l'adresse IP.
  • Page 102 Internet). Cliquez sur Apply (appliquer), le système a besoin de redémarrer pour activer votre configuration. Après un réamorçage, le TX-29/TX-30 se connectera automatiquement à Internet. L'IP dans le PPPoE est la valeur dynamique. Vous pouvez accéder à cet IP pour visiter l'unité.
  • Page 103 Encryption (Type de chiffrement) : Pour utiliser un chiffrement SSL. Sender (Expéditeur) : Saisissez votre adresse courriel une nouvelle fois. Receiver1 (Destinataire 1) : Saisissez l'adresse courriel destinataire (il est suggéré d’utiliser la vôtre à nouveau). Receiver2 (Destinataire 2) : Saisissez une adresse courriel destinataire (il est suggéré...
  • Page 104 à gauche est pour le rappel Alarm / (d'alarme). Cliquez dessus pour consulter les informations d’alarme. Après avoir activé la fonction Buzzer (avertisseur sonore), le TX-29/TX-30 émettra un son quand une alarme est détectée. (réglez le volume grâce aux touches fléchées de...
  • Page 105 Activez E-Mail Notice (notification par courriel) pour être informé par Email (Courriel) quand une alarme se produit. Remarque : Vous devez régler la configuration de courriel dans Network setup (Configuration de réseau)  Email (Courriel). Si vous cochez APP Alarm (Alarme sur l’appli), vous recevrez des notifications push sur votre smartphone si vous avez installé...
  • Page 106 USB. Insérez-la dans le port USB libre du système) TX-29/TX-30. Sélectionnez dans le stockage USB du menu et l’option à mettre à niveau (essentiellement système). Choisissez le micrologiciel dans la liste ci-dessous et appuyez sur démarrer.
  • Page 107: Video Playback (Lecture D'une Vidéo)

    5.4 Video playback (Lecture d’une vidéo) Pour voir le dernier enregistrement (5, 10 ou 30min), cliquez sur le bouton droit de la souris sur l’interface d'accueil  Video playback (Lecture d’une vidéo)  choisissez la durée de recherche passée  choisissez le n° de canal. La lecture commence. Pour des enregistrements qui datent de plus de 30 minutes (recherche manuelle), faites un clic droit sur l’interface d'accueil ...
  • Page 108 5.5 Video backup (Sauvegarde de vidéo) Faites un clic droit sur l’interface d’accueil  Video backup (Sauvegarde de vidéo)  choisissez un n° de canal  Choisissez un mode d’enregistrement  saisissez l’heure de recherche, l’heure de début et l’heure de fin  cliquez sur Search (rechercher). L’enregistrement s'affichera ...
  • Page 109: Color Adjust (Réglage De Couleur)

    5.6 Color adjust (Réglage de couleur) Avant de pouvoir régler la couleur, il faut basculer sur le canal à régler via la fonction d'écran divisé. Ensuite, faites un clic droit sur l’interface d'accueil  Color Adjust (Réglage de couleur). En bas à droite apparaît une fenêtre où vous pouvez régler Hue (teinte), Brightness (luminosité), Saturation (saturation) et Contrast (contraste).
  • Page 110: Manual Record (Enregistrement Manuel)

    Ici vous verrez l’ID de l'appareil comme code QR. Vous pouvez configurer les options de réseau du TX-29/TX-30 avec deux options. Choisissez Auto Config (Config auto) pour laisser le NVR tout régler ou choisissez Manual Config (Config manuelle) pour régler vous-même l’IP, Gateway (passerelle) et le masque de sous-réseau.
  • Page 111: Accès À L'appareil

    6. Accès à l'appareil 6.1 Accès par LAN (interface web locale) L’interface web locale pour le visionnage en direct et la lecture. Effectuez les réglages directement sur le NVR. Étape 1 : Faites un clic droit de souris sur l’interface d'accueil -> System setup (Configuration système) ->Network setup (Configuration réseau) Vérifiez l'adresse IP du NVR.
  • Page 112: Accès Par Wan (Interface Web Mondiale)

    6.2 Accès par WAN (interface web mondiale) L’interface web mondiale sert uniquement à visualiser en direct depuis un autre endroit sur un ordinateur. Étape 1 : Faites un clic droit de souris sur l’interface d'accueil -> System setup (Configuration système) ->Network setup (Configuration réseau) Vérifiez l'ID de l'appareil enregistreur vidéo.
  • Page 113: Application Pour Mobile (Security Premium)

    6.3 Application pour mobile (Security Premium) Le TX-29/TX-30 peut fonctionner avec les appareils iPhone et Android. Installez l'appli pour mobile et utilisez votre mobile pour visionner/lire à distance votre NVR. Le téléchargement de l'appli pour mobile est gratuite et disponible sur App Store d’Apple et Play Store de Google.
  • Page 114 Dans l’appli, sous Description (Description), saisissez votre nom personnalisé pour l'appareil. Saisissez les informations d’identification de l'enregistreur vidéo (nom d'utilisateur et mot de passe). Étape 6.1/6.2 : Veillez à sélectionner le bon numéro de canal (TX-29 = 4 ; TX-30 = 8).
  • Page 115 Étape 7 : Appuyez sur Submit (soumettre) pour terminer et sauvegarder les paramètres (l'appareil affichera peut-être le message « Error - The device has been existed – Confirm » (Erreur - L'appareil existe déjà – Confirmer)), alors votre appareil a bien été ajouté. Étape 8 : Cliquez sur l'appareil dans la liste des appareils pour obtenir la vidéo en direct Étape 9 : Le cercle de gauche vous montre l'écran simple ;...
  • Page 116 Ajouter un groupe Étape 1 : Cliquez sur Group (groupe). Ensuite, cliquez sur l'icône « + » pour ajouter des canaux à un groupe. Étape 2 : Saisissez le nom du groupe. Étape 3 : Sélectionnez de canaux différents pour le groupe. Étape 4 : Cliquez sur Submit (soumettre) pour sauvegarder.
  • Page 117 Fonctions sous Me (moi) 1. Local Records (Enregistrements locaux) : Regardez vos photos et vidéos enregistrées manuellement. 2. Liste Notifications (Notifications) : Regardez les différentes notifications. 3. Alarm setting (Réglage d'alarme) : Activer désactiver le réglage d’alarme 4. Change password (Modifier le mot de passe) : Vous pouvez modifier le mot de passe 5.
  • Page 118: Client Pc Security Premium

    7. Client PC Security Premium Preview (Prévisualisation) : Preview Après avoir démarré le client, vous verrez la visualisation en direct (Prévisualisation) des caméras connectées (selon le mode d'écran divisé sélectionné à 1, 4, 6, 8, 9, 16, 25, 36 ou 49 canaux). En maintenant enfoncé le bouton gauche de la souris et en survolant la visualisation en direct d'un canal, vous verrez un rectangle vert que vous pouvez utiliser pour faire un zoom numérique sur le canal.
  • Page 119 Remarque : En ouvrant des appareils (avec un double clic) et en réglant un espace de stockage sur le disque dur local, vous démarrez automatiquement un enregistrement manuellement. Le point rouge en haut à droite l’indique. En cliquant faisant un clic droit sur le point rouge, vous pouvez arrêter l’enregistrement.
  • Page 120 Playback (Lecture) (lecture de 4 canaux en même temps au max.) : Affiche les appareils avec leurs canaux disponibles. Si vous cliquez Area (Zone) sur « plus »/« moins », la liste des canaux s’ouvrira/se fermera. Double-cliquez sur un appareil pour ouvrir/fermer tous les canaux de l’appareil.
  • Page 121 Backup (Sauvegarde) : Area (Zone) Affiche les appareils pour la sauvegarde. Timeline (Chronologie) La chronologie de tous les canaux avec ses vidéos enregistrés. Pour sauvegarder un canal, cochez la case à gauche de la fenêtre. Local or remote (Local Local signifie enregistré manuellement sur le disque dur du PC et ou distant) Remote (distant) signifie enregistré...
  • Page 122 Settings (Paramètres)  Device settings (Paramètres de l'appareil) : Device information Si vous cliquez sur un appareil dans la liste des appareils, (Informations sur l'appareil) vous obtiendrez des informations sur l'appareil. Remarque : Les informations de l'appareil sont disponibles uniquement pour des appareils ajoutés.
  • Page 123: Paramètres Avancés De La Caméra

    à votre routeur grâce au câble réseau. Ensuite, allez dans l'affichage de votre TX-29/TX-30, ouvrez la configuration de gestion de vidéos, sélectionnez le protocole N1 t appuyez sur la touche Refresh (Rafraîchir) à droite.
  • Page 124: Dépannage

    De plus, avec le mode d’identification, nous fournissons aux utilisateurs un avertissement d'état d'équipement, une alarme, des flux d'actualités et d'autres fonctions auxiliaires. 10. Caractéristiques Caractéristiques du NVR sans fil 10,1 pouces 18,5 pouces Écran (TX-29) (TX-30) Horizontal 170° Horizontal 90° Angle de vue Vertical 170° Vertical 65° Écran Temps de réponse...
  • Page 125 Manuel / temporisation / mouvement / Mode vidéo/capture Contrôle vidéo Mode lecture Temps réel, routine, événement Sauvegarde Sauvegarde USB 1x interface SATA (jusqu’à SATA III) Type Disque dur allant Disque dur Disque dur allant jusqu’à 4To Capacité max. jusqu’à 4To (3,5 po) (2,5 po) 1x RJ45 adaptable 10Mbit/s /100Mbit/s Interface réseau...
  • Page 126 550g Indice de protection IP66 11. Accessoires : Certains disques durs testés et recommandés pour le TX-29 et le TX-30 sont répertoriés ici. Mais d'autres modèles de disques durs que nous n'avons pas testés peuvent être compatibles. Seagate 2,5" 500Go Pipeline HD ST500VT000 SAMSUNG 2,5"...
  • Page 127 GPL v2 without charge except for the cost of media, shipping, and handling, upon written request to Technaxx GmbH & Co. KG, Kruppstraße 105, 60388 Frankfurt am Main, Germany.
  • Page 128 Also, for each author's protection and ours, we want to make certain that everyone understands that there is no warranty for this free software. If the software is modified by someone else and passed on, we want its recipients to know that what they have is not the original, so that any problems introduced by others will not reflect on the original authors' reputations.
  • Page 129 c) If the modified program normally reads commands interactively when run, you must cause it, when started running for such interactive use in the most ordinary way, to print or display an announcement including an appropriate copyright notice and a notice that there is no warranty (or else, saying that you provide a warranty) and that users may redistribute the program under these conditions, and telling the user how to view a copy of this License.
  • Page 130 If distribution of executable or object code is made by offering access to copy from a designated place, then offering equivalent access to copy the source code from the same place counts as distribution of the source code, even though third parties are not compelled to copy the source along with the object code.
  • Page 131 8. If the distribution and/or use of the Program is restricted in certain countries either by patents or by copyrighted interfaces, the original copyright holder who places the Program under this License may add an explicit geographical distribution limitation excluding those countries, so that distribution is permitted only in or among countries not thus excluded.
  • Page 132 HOW TO APPLY THESE TERMS TO YOUR NEW PROGRAMS (1) If you develop a new program, and you want it to be of the greatest possible use to the public, the best way to achieve this is to make it free software which everyone can redistribute and change under these terms.

Ce manuel est également adapté pour:

Tx-30

Table des Matières