EMS AIR-FLOW S2 Instructions D'utilisation
Masquer les pouces
Voir aussi pour AIR-FLOW S2:
- Mode d'emploi (108 pages) ,
- Notice d'utilisation (94 pages) ,
- Mode d'emploi (96 pages)
Table des Matières
Publicité
Liens rapides
OPERATION INSTRUCTIONS
INSTRUCCIONES DE EMPLEO
AIR-FLOW
®
S2
Fold out the cover pages to view technical drawings
Despliegue las tapas de este manual para ver los dibujos
TECHNICAL MODIFICATIONS
EMS reserves the right to modify the technique,
accessories, operating instructions or contents
of the set due to technical or scientifi c improve-
ments.
MODIFICACIONES TÉCNICAS
EMS se reserva el derecho de realizar modi-
fi caciones en la técnica, los accesorios, las
instrucciones de empleo, así como en el con-
tenido del embalaje original, siempre y cuando
estas modifi caciones representen un desarrollo
técnico o científi co.
Publicité
Table des Matières

Manuels Connexes pour EMS AIR-FLOW S2


Sommaire des Matières pour EMS AIR-FLOW S2
- Page 1 Fold out the cover pages to view technical drawings Despliegue las tapas de este manual para ver los dibujos TECHNICAL MODIFICATIONS EMS reserves the right to modify the technique, accessories, operating instructions or contents of the set due to technical or scientifi c improve- ments.
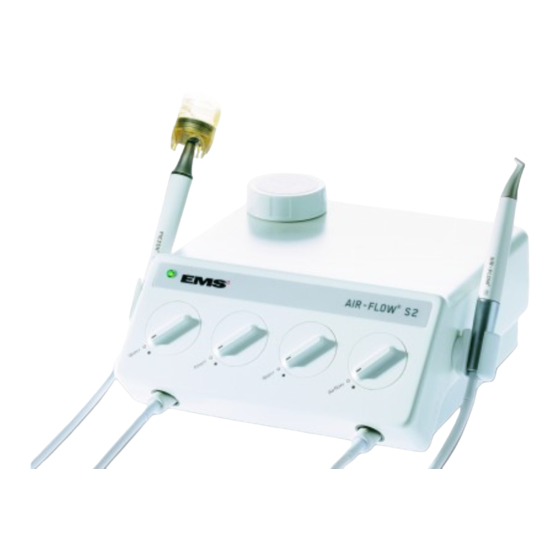
- Page 2 Power cable Power switch Condensation water collector Water fi lter Water fi lter cartridge Water hose connector Footpedal connection Air hose connector Power socket EMS supplies units with various accessories. The "Packing list" shows exactly what your unit includes. 17 18...
- Page 4 Tel. +49 89 42 71 610, Fax +49 89 42 71 61 60 e-mail: info@ems-dent.de FRANCE EMS France, 23, Av. Louis Bréguet, Immeuble Santos Dumont, Bâtiment D, F-78140 Vélizy Villacoublay Tél. +33 1 34 58 03 80, Fax +33 1 34 58 03 90 e-mail: info@ems-france.fr SPAIN EMS España, Bernardino Obregón 14 bis, E-28012 Madrid...
- Page 5 Enchufe de red eléctrica Presa cavo rete Nätkontakt Per questo apparecchio la EMS mette a disposizione una vasta EMS tillhandahåller apparater med olika tillbehör. Bifogad "Packing EMS ofrece este aparato con diferentes variantes de equipamiento. gamma di accessori. Nel "Packing list" troverete il dettaglio degli list"...
- Page 6 à ultrasons. einem Pulverstrahl und einem Ultraschallgerät. This unit is for use in dentistry with EMS Air- Cet appareil est utilisé en dentisterie avec les Dieses Gerät ist für den zahnmedizinischen Ein- Flow ®...
- Page 7 Les felicitamos por la adquisición de su nuevo Ci congratuliamo con voi per l’acquisto di questo Tack för att ni valde denna nya EMS produkt. Den producto EMS. El cual satisface las exigencias nuovo prodotto EMS. Esso soddisfa le più alte uppfyller högsta kvalitets- och säkerhetskrav.
- Page 8 This unit is for use in dentistry with EMS Piezon ® Cet appareil est utilisé en dentisterie avec les Dieses Gerät ist für den zahnmedizinischen ® systems. systèmes Piezon EMS. Einsatz mit EMS Piezon ® Systemen. EMS supplies ultrasonic instruments for the EMS propose des instruments à...
- Page 9 ® Piezon EMS. system. EMS ofrece instrumentos ultrasónicos para las siguientes indicaciones: La EMS offre strumenti ultrasonici per i seguenti EMS har ultraljudsspetsar för följande ända- campi d’impiego: mål: • Remoción de cálculos supragingivales • Remoción de cálculos subgingivales • Rimozione delle concrezioni sopragengivali •...
- Page 10 PLEASE READ THIS BEFORE A LIRE ATTENTIVEMENT AVANT ERST LESEN, DANN STARTEN! BEGINNING WORK! DE COMMENCER! This operating instructions are to ensure the Ce mode d’emploi est destiné à l’installation et Diese Bedienungsanleitung soll Ihnen helfen, correct installation and use of this product. à...
- Page 11 ¡LEA ATENTAMENTE ANTES DE LEGGERE QUESTE ISTRUZIONI LÄS DETTA INNAN NI BÖRJAR EMPEZAR! PRIMA DI COMINCIARE! ANVÄNDNINGEN! Esta instrucción de empleo se destina a la correc- Queste istruzioni per l’uso sono destinate al- Denna bruksanvisning avser korrekt installation ta instalación y utilización de este producto. l’installazione e all’utilizzo corretto di questo och användning av denna produkt.
- Page 12 éventuelles suggestions. Natu- sehr dankbar. Bei Problemen bieten wir Ihnen Please call directly your approved EMS repair rellement, nous vous proposons un soutien tech- selbstverständlich technische Unterstützung an. center or your dealer.
- Page 13 Var god och kontakta naturalmente nuestro apoyo técnico. Por favor vi offriamo, naturalmente, il nostro supporto. vår EMS godkänt serviceställe eller med din llame directamente a nuestro centro de repara- Chiamate direttamente il vostro centro assistenza fördelare.
-
Page 14: Table Des Matières
CONTENTS SOMMAIRE INHALT Installation and setting up ......... 2 Installation et branchement ......2 Installieren und Anschliessen ......2 Connecting the footpedal ......2 Connexion de la pédale ....... 2 Anschliessen des Fusspedals ...... 2 Connecting the unit to the water supply ..4 Connexion de l'appareil à... - Page 15 INDICE INDICE INNEHÅLL Instalación y conexión ........3 Installazione e collegamenti ......3 Installation och anslutning ........ 3 Conexión del pedal de control ...... 3 Collegamento del pedale di comando ..3 Anslutning av fotpedal........3 Conexión del equipo a la alimentación de Collegamento dell’apparecchio Anslutning av apparaten till vatten ....
- Page 16 Garantie ............60 Garantie ............60 Accessories ............ 60 Accessoires ............ 60 Zubehör ............60 EMS-Service ..........62 Service EMS ........... 62 EMS-Service ..........62 Symbols ............64 Symboles ............64 Symbole ............64 Technical data ..........68 Caractéristiques techniques ......68 Technische Daten ...........
- Page 17 Kassering av produkt, tillbehör och dell’imballaggio ..........61 emballage ............61 Accesorios ............61 Garanzia ............61 Garanti ............61 Servicio técnico EMS ........63 Accessori ............61 Tillbehör ............61 Símbolos ............65 Assistenza EMS ..........63 EMS Service ........... 63 Especifi...
-
Page 18: Installation And Setting Up
INSTALLATION AND SETTING INSTALLATION ET INSTALLIEREN UND BRANCHEMENT ANSCHLIESSEN Connecting the footpedal Connexion de la pédale Anschliessen des Fusspedals... -
Page 19: Instalación Y Conexión
INSTALACIÓN Y CONEXIÓN INSTALLAZIONE E INSTALLATION OCH COLLEGAMENTI ANSLUTNING Conexión del pedal de control Collegamento del pedale di comando Anslutning av fotpedal... -
Page 20: Connecting The Unit To The Water Supply
Connect the unit to a water supply with an Branchez l'appareil à l'alimentation d'eau Schliessen des Gerätes ausschliesslich original EMS water hose only. avec le tuyau d'eau EMS d’origine unique- mit dem original EMS Wasserschlauch an die ment. Festwasserversorgung an. -
Page 21: Conexión Del Equipo A La Alimentación De Agua
Conecte su equipo a una toma de agua Anslut apparaten till vatten endast med Collegate l'apparecchio all’alimentazione fi ja sólo con la manguera de alimentación de en original EMS-slang. d’acqua esclusivamente mediante il tubo d’acqua agua original EMS. EMS originale. -
Page 22: Connecting The Unit To Compressed Air Supply
Connecting the unit to compressed air Connexion de l’appareil au réseau Anschliessen des Gerätes an die supply d'air comprimé Druckluftversorgung 4.5 - 7 bar Use only dry, pure, and fi ltered compressed Utilisez uniquement de l’air comprimé sec, pur, Benutzen Sie nur trockene und gefi lterte Druck- air. -
Page 23: Conexión Del Equipo A La Red De Aire Comprimido
Conexión del equipo a la red de aire Collegamento dell'apparecchio alla Anslutning av apparaten till tryckluft comprimido rete d’aria compressa Utilice solamente aire comprimido seco, puro, Utilizzate esclusivamente aria compressa secca, Använd endast torr, ren och fi ltrerad tryckluft. y fi ltrado. pura e fi... -
Page 24: Connecting The Unit To The Network Electrical Supply
Connecting the unit to the network Connexion de l’appareil au réseau Anschliessen des Gerätes an die electrical supply électrique Stromversorgung 100 -110 VAC / 50-60 Hz 120 - 130 VAC / 50-60 Hz 220 VAC / 50-60 Hz 230 - 240 VAC / 50-60 Hz To prevent damage to the unit, check that Pour éviter d'endommager l'appareil, vé- Die Nennspannung des Gerätes muss... -
Page 25: Conexión Del Equipo A La Red Eléctrica
Conexión del equipo a la red eléctrica Collegamento dell'apparecchio alla Anslutning av apparaten till en ström- rete elettrica källa Compruebe que la tensión nominal del La tensione nominale dell’apparecchio Undvik skador på apparaten genom att aparato coincide con la tensión de la red de su deve essere corrispondente alla tensione di kontrollera att angiven märkspänning stämmer consulta, puesto que de lo contrario el equipo... -
Page 26: Connecting The Cords
Connecting the cords Branchement des cordons Anschliessen der Schläuche Check that the Piezon ® cord is quite dry Vérifi ez que le cordon Piezon ® est bien Prüfen Sie, dass die Piezon ® -Schläuche vor before its connection with the unit. sec avant de le connecter à... -
Page 27: Conexión De Los Mangos
Conexión de los mangos Collegare i cordoni Anslutning av slangar Compruebe que el mango Piezon ® está Verifi care che il cordone Piezon ® sia asciut- Kontrollera att Piezon ® -slangen är ordent- seco antes de conectarlo en la unidad. to prima del collegamento con l’apparechio. -
Page 28: Filling The Powder Chamber
à poudre au-dessus de la meiden, die rote Linie "Max" der Pulverkammer ligne rouge "Max". nicht überfüllen. Use only powder provided by EMS. Utilisez uniquement de la poudre fournie Nur original EMS Pulver verwenden. Close correctly your bottle. The conditions par EMS. -
Page 29: Llenado De La Cámara De Polvo
"Max". "Max". della linea rossa "Max". Använd endast pulver levererat av EMS. Utilice únicamente producto en polvo pro- Utilizzate soltanto polvere fornita da Stäng fl askan ordentligt. I kapitlen "Förva- porcionado por EMS. - Page 30 Clean the threads of the powder chamber before Nettoyez le pas de vis de la chambre à poudre Schrauben Sie den Verschluss erst dann auf screwing on the cap. et du bouchon avant de le visser. das Gerät, nachdem Sie das Gewinde der Pul- verkammer gesäubert haben.
- Page 31 Limpié la rosca de la cámara de polvo antes de Pulire la fi lettatura del vano per la polvere prima Rengör pulverbehållarens gängor innan locket colocar la tapa. di avvitare il tappo. skruvas på. Compruebe que la tapa no está dañada. Accertatevi che il tappo non sia danneggia- Säkerställ att locket inte är skadat.
-
Page 32: Preparing For Treatment
PREPARING FOR TREATMENT PRÉPARATION POUR LE VORBEREITEN FÜR DIE TRAITEMENT BEHANDLUNG Connecting the Air-Flow ® handpiece Mise en place de la pièce à main Air- Aufstecken des Handstückes Air- Flow ® Flow ® For further details concerning the use Pour plus de détails concernant l’utilisation Für weitere Informationen über die ver- of the handpiece please refer to the operating de la pièce à... -
Page 33: Preparación Para El Tratamiento
PREPARACIÓN PARA EL PREPARATIVI PER IL FÖRBEREDELSE FÖR TRATAMIENTO TRATTAMENTO BEHANDLING Montaje del mango Air-Flow ® Montare il manipolo Air-Flow ® Anslutning av handstycke Air-Flow ® CLICK Hallará información más detallada referen- Per ulteriori informazioni sull’uso del ma- Ytterligare information om handhavande te a la utilización del mango en las instrucciones nipolo, fare riferimento alle istruzioni dei sistemi av handstycke fi... -
Page 34: Connecting The Piezon Handpiece
Connecting the Piezon ® handpiece Mise en place de la pièce à main Aufstecken des Handstückes Piezon ® Piezon ® To evacuate any residue of liquid, shake the Pour évacuer tout résidu de liquide, se- Schütteln Sie das Handstück und den handpiece and the connector of the handpiece couez la pièce à... -
Page 35: Montaje Del Mango Piezon
Montaje del mango Piezon ® Montare il manipolo Piezon ® Anslutning av handstycke Piezon ® Agite el mango y los conectores de la man- Scuotere entrambe le parti dell’attacco Se till att ingen vätska ansamlas i kopp- guera para eliminar todos los líquidos residuales e il manipolo per eliminare il liquido. -
Page 36: Operating The Unit
OPERATING THE UNIT UTILISATION DE L’APPAREIL BEDIENEN DES GERÄTES Switching On / Off Mise sous tension Ein- / Ausschalten When the unit is powered up, the control Lors de la mise sous tension de l'appareil, Wenn das Gerät eingeschaltet ist leuchtet lamp lights up and the powder chamber is under le voyant lumineux s'allume et la chambre à... -
Page 37: Uso Del Aparato
USO DEL APARATO USO DELL’APPARECCHIO ANVÄNDNING AV APPARATEN Encendido / Apagado Accendere / spegnere Slå av och på Cuando se conecta la unidad, el indicador Quando l'apparechio è alimentato, le spie När apparaten är påslagen tänds indi- luminoso se enciende y la cámara de polvo se di funzionamento si accendono ed il vano per la katorlampan och pulverbehållaren ställs under encuentra bajo presión. -
Page 38: Handpieces Functions
Handpieces functions Fonction des pièces à mains Funktion der Handstücke... -
Page 39: Funcionamiento De Los Mangos
Funcionamiento de los mangos Funzione dei manipoli Handstyckets funktioner... -
Page 40: Air-Flow ® Function
® ® ® AIR-FLOW function Fonction AIR-FLOW Funktion AIR-FLOW Footpedal Pédale de commande Fusspedal Liquid Irrigation Flüssigkeit Air/Powder with liquid Air/Poudre avec irrigation Pulver-Luftgemisch mit Flüssigkeit... -
Page 41: Funcionamiento Air-Flow
® ® ® Funcionamiento AIR-FLOW Funzione AIR-FLOW AIR-FLOW funktioner Pedal de control Pedale di comando Fotpedal Irrigación Irrigazione Vätska Aire/Polvo con irrigación Aria/polvere con irrigazione Luft/pulver med vätska... -
Page 42: Setting The Water Fl Ow Rate
® AIR-FLOW Setting the water fl ow rate Réglage du débit d'eau Einstellen der Wassermenge Set the water fl ow rate from your unit to Réglez le débit d’eau depuis votre appareil Stellen Sie die Wassermenge an Ihrem obtain a uniform spray. afi... -
Page 43: Regulación Del Caudal De Agua
® AIR-FLOW Regulación del caudal de agua Regolazione della velocità del fl usso Reglering av vattenfl öde dell'acqua Ajuste el caudal de agua desde su equipo Regolare la portata dell’acqua del vostro Reglera vattenfl ödet från apparaten så att con el fi n de obtener un chorro de agua unifor- apparecchio per ottenere un getto d’acqua uni- strålen blir jämn. -
Page 44: Setting The Air Fl Ow Rate
® AIR-FLOW Setting the air fl ow rate Réglage du débit d'air Einstellen der Luft menge You will fi nd information precise on the Vous trouverez les informations précises Weitere Informationen über verschiedene handling and setting water / air, in the operating sur le maniement et réglage eau/air dans les Anwendungen, die Handhabung und Einstellung ®... -
Page 45: Regulado Del Caudal De Aire
® AIR-FLOW Regulado del caudal de aire Regolazione della velocità del fl usso Reglering av luftfl öde dell'aria Encontrará información precisa sobre la Informazioni dettagliate relative alla rego- Närmare information om handhavande manipulación de agua / aire porfavor en los ins- lazione aria / acqua disponibili sul manuale di och inställning av luft och vatten fi... -
Page 46: Powder Change
® AIR-FLOW Powder change Changement de poudre Pulveraustausch Purge the unit for 20 s to avoid various Purgez l'appareil durant 20 secondes pour Reinigen Sie das Gerät für 20 s aus, um reactions caused by the mixture of the powder. éviter différentes réactions dues au mélange de die verschiedenen Reaktionen zu vermeiden, poudre. -
Page 47: Cambio De Polvo
® AIR-FLOW Cambio de polvo Cambio polvere Byte av pulver 20 S Purgue el equipo durante 20 s para evitar Spurgare l’apparecchio per 20 secondi al Töm apparaten i 20 sek för att undvika varias reacciones provocadas por la mezcla del fi... -
Page 48: Piezon ® Functions
® ® ® PIEZON functions Fonction PIEZON Funktion PIEZON Footpedal Pédale de commande Fusspedal Liquid Irrigation Flüssigkeit Ultrasonics with liquid Ultrasons avec irrigation Ultraschall mit Flüssigkeit... -
Page 49: Funcionamiento Piezon
® ® ® Funcionamiento PIEZON Funzione PIEZON PIEZON funktioner Pedal de control Pedale di comando Fotpedal Irrigación Irrigazione Vätska Ultrasonidos con irrigación Ultrasuoni con irrigazione Ultraljud med vätska... -
Page 50: Setting The Water Fl Ow Rate
Beachten Sie für die Einstellung der Was- ® operating instructions for Piezon systems which sur le réglage optimal du débit d'eau pour cha- sermenge die Bedienungsanleitung zu den EMS includes precise details on the correct settings que instrument dans les modes d’emploi des Piezon ®... -
Page 51: Regulado Del Caudal De Agua
® PIEZON Regulado del caudal de agua Regolazione della velocità del fl usso Reglering av vattenfl öde dell'acqua Hallará información más detallada refe- Per la quantità dell'acqua erogata, veda le Vattenfl ödet anges i bruksanvisningen till ® ® rente a la regulación óptima del aporte de agua istruzioni per l’uso allegate ai sistemi Piezon . -
Page 52: Setting The Ultrasonic Power
Bedienungsanleitung zu ® which include precise details on the correct set- sons pour chaque instrument dans les modes den EMS Piezon -Systemen. Sie fi nden dort tings for every instrument. d’emploi des systèmes Piezon ®... -
Page 53: Regulación De La Potencia Ultrasónica
® PIEZON Regulación de la potencia ultrasónica Regolare l’intensità ultrasonica Reglering av ultraljudseffekt Hallará información más detallada referen- Nelle istruzioni per l’uso allegate ai sistemi Inställningen av ultraljudeffekten fi nns ® ® te a la regulación óptima de la potencia ultrasó- Piezon , troverà... -
Page 54: Disinfecting, Cleaning And Sterilizing
DISINFECTING, CLEANING AND DÉSINFECTION, NETTOYAGE ET DESINFIZIEREN, REINIGEN UND STERILIZING STÉRILISATION STERILISIEREN Unit Appareil Gerätes Clean the unit only with an alcohol-based, Nettoyez l'appareil uniquement avec un Reinigen Sie Ihr Gerät mit einem han- commercially available (ethanol, isopropanol), co- désinfectant sans colorant à base d'alcool, vendu delsüblichen, farblosen Desinfektionsmittel auf lourless disinfectant. -
Page 55: Desinfección, Limpieza Y Esterilización
DESINFECCIÓN, LIMPIEZA Y DISINFEZIONE, PULIZIA E DESINFICERING, RENGÖRING ESTERILIZACIÓN STERILIZZAZIONE OCH STERILISERING Equipo Apparecchio Apparaten Limpié el equipo sólo con un desinfec- Pulire l’apparecchio unicamente con un Rengör endast apparaten med ett ofärgat, tante sin colorantes a base de alcohol común disinfettante senza colorante a base di alcool, alkoholbaserat desinfektionsmedel som fi... -
Page 56: Handpieces Cords
Handpieces cords Cordons des pièces à mains Handstückschlauches Clean the hanpieces cords only with an Nettoyez les cordons uniquement avec Reinigen Sie die Handstückschläuche mit einem handelsüblichen, farblosen Desinfektions- alcohol-based, commercially available (ethanol, un désinfectant sans colorant à base d'alcool, mittel auf Alkoholbasis (Ethanol, Isopropanol). -
Page 57: Mangueras Del Mango
Mangueras del mango Cordoni del manipolo Handstyckenas slangar 135°C 135°C Limpié las mangueras del mango única- Pulire i cordoni del manipolo unicamente Rengör endast handstyckenas slangar mente con un desinfectante sin colorantes, a con un disinfettante senza colorante a base di med ett ofärgat, alkoholbaserat desinfektions- base de alcohol común (etanol, isopropanol). -
Page 58: Handpieces
Handpieces Pièces à mains Handstücke For disinfecting, cleaning and sterilizing Pour la désinfection, nettoyage et stérili- Für die Desinfektion, Reinigung und Ste- the handpieces, please refer to the operating sation des pièces à mains, veuillez vous référer rilisierung der Handstücke möchten wir Sie auf instructions of Piezon ®... -
Page 59: Mangos
Mangos Manipolo Handstycken Para desinfectar, limpiar y esterilizar los Per la disinfezione, la pulizia e la sterilizza- I bruksanvisningarna till Piezon ® - och Air- ® mangos, por favor consulte las instrucciones zione del manipolo, fare riferimento al manuale Flow -systemen fi... -
Page 60: Cap
Bouchon Schraubverschluss Clean and disinfect regularly the cap. First Nettoyez et désinfectez régulièrement le Reinigen und desinfizieren Sie den Schraubverschluss regelmässig. Spülen Sie rinse it with water, and then disinfect it with al- bouchon. Rincez-le d’abord à l’eau, puis désin- ihn mit Wasser aus, bevor Sie ihn mit Alkohol cohol (ethanol, isopropanol). -
Page 61: Tapa
Tapa Tappo Lock 135°C 135°C Limpié y desinfecte regularmente la tapa. Pulire e disinfettare regolarmente il tappo. Rengör och desinfi cera locket regelbundet. Aclárela con agua y a continuación desinféctela Prima sciacquarlo con acqua, quindi disinfettarlo Skölj det först med vatten och desinfi cera det on alcohol (etanol, isopropanol). -
Page 62: Regular Cleaning And Maintenance
REGULAR CLEANING AND ENTRETIEN PÉRIODIQUE ET REGELMÄSSIGE REINIGUNGS- MAINTENANCE MAINTENANCE UND WARTUNGSARBEITEN O-ring O-ring O-Ringe If an O-ring is damaged or worn out, it Si un joint O-ring est endommagé ou usé, Sollte ein O-Ring beschädigt oder ver- must be replaced immediately. il doit être remplacé... -
Page 63: Trabajos Periódicos Y Mantenimiento
TRABAJOS PERIÓDICOS Y CURA E MANUTENZIONE REGELBUNDEN RENGÖRING MANTENIMIENTO PERIODICA OCH UNDERHÅLL O-ring O-ring O-ring Si la junta O-ring está dañada o usada, Se un O-ring è danneggiato o consumato, Om en O-ring är skadad eller utsliten debe ser substituida inmediatamente. deve essere sostituito immediatamente. -
Page 64: Powder Chamber
Powder Chamber Chambre à poudre Pulverkammer Clean regularly the powder chamber. Nettoyez régulièrement la chambre à pou- Reinigen Sie die Pulverkammer regelmäs- sig. dre. The cap and its seal must be replaced at Der Schraubverschluss und die Dichtung least once a year. Le bouchon et son joint doivent être rem- müssen mindestens einmal im Jahr ausgetauscht placés au moins une fois par an. -
Page 65: Cámara De Polvo
Cámara de polvo Vano per la polvere Pulverbehållaren Limpié regularmente la cámara de pol- Pulire regolarmente il vano per la polve- Rengör pulverbehållaren regelbundet. Lock och packning ska bytas minst en La tapa y su junta se deben sustituir al Il tappo e la sua guarnizione devono es- gång om året. -
Page 66: Water Fi Lter
Water fi lter Filtre à eau Wasserfi lters Check and clean regularly the fi lter. Contrôlez et nettoyez régulièrement le fi ltre. Kontrollieren Sie und reinigen regelmässig den Filter. -
Page 67: Filtro De Agua
Filtro de agua Filtro di acqua Vattenfi lter Compruebe y limpie el fi ltro con regularidad. Controllare e pulire regolarmente il fi ltro. Kontrollera och rengör regelbundet fi ltret. -
Page 68: Air Fi Lter
Air fi lter Filtres à air Luftfi lters Control the air fi lters once per month. Contrôlez une fois par mois les fi ltres à air. überprüfen Sie die Luftfi lter einmal pro Monat. -
Page 69: Filtro De Aire
Filtro de aire Filtro dell’aria Luftfi lter Compruebe los fi ltros de aire una vez por mes. Controllare i fi ltri dell’aria una volta al mese. Kontrollera luftfi ltren en gång per månad. -
Page 70: Safety Precautions
REMARQUES CONCERNANT LA SÉCURITÉ EMS and the distributor of this product accept EMS et le distributeur de ce produit ne peuvent EMS und der Vertreiber dieses Produktes haften no liability for direct or consequential injury or être tenus responsables d’éventuels préjudices nicht für direkte Schäden und Folgeschäden, die... -
Page 71: Consejos De Seguridad
CONSEJOS DE SEGURIDAD OSSERVAZIONI SULLA SÄKERHETSFÖRESKRIFTER SICUREZZA EMS y los distribuidores de este producto no EMS e il distributore di questo prodotto declinano EMS och distributören av denna produkten tar se hacen responsables de los daños directos ogni responsabilità per danni diretti o indiretti che inte på... - Page 72 CSA (Canadian Standard Association) hat die d’incendie. CSA (Canadian Standard Association) physiologischen Wirkungen nicht untersucht. The powders provided by EMS are espe- n’a pas étudié les effets physiologiques. cially designed for use with the unit. Do not use Die EMS-Pulver wurden speziell für den powders from other manufacturers as this could Les poudres fournies par EMS sont spécia-...
- Page 73 CSA (Canadian Standard Association) non ha De pulver som tillhandahålls av EMS är sär- Este producto ha sido sometido a un es- studiato gli effetti fi siologici. skilt utvecklade för att användas med apparaten.
-
Page 74: Storing The Product When Out Of Use For Extended Periods
STORING THE PRODUCT WHEN RANGEMENT DE VOTRE LAGERUNG IHRES OUT OF USE FOR EXTENDED PRODUIT EN CAS DE NON- PRODUKTES BEI LÄNGERER PERIODS UTILISATION PROLONGÉE NICHTNUTZUNG Keep the original packaging until the prod- Nous vous conseillons de conserver l’em- Bewahren Sie die Originalverpackung bis uct is to be disposed of permanently. -
Page 75: Conservación De Su Producto En Caso De Inactividad Prolongada
CONSERVACIÓN DE SU CONSERVAZIONE DEL VOSTRO FÖRVARING AV PRODUCTO EN CASO DE PRODOTTO PER PERIODI DI PRODUKTEN VID LÄNGRE INACTIVIDAD PROLONGADA INATTIVITÀ PROLUNGATI ANVÄNDARUPPEHÅLL Le aconsejamos conserve el embalaje Si consiglia di conservare l’imballo origi- Behåll originalförpackningen tills produkten original hasta el momento de deshacerse de nale fi... -
Page 76: Disposing Of The Product, Accessories And Packaging
(Etikett: "Warranty void if removed") ACCESSORIES ACCESSOIRES ZUBEHÖR Accessories are available from EMS or any au- Vous trouverez les accessoires auprès d'EMS Zubehör erhalten Sie bei EMS oder einem au- thorized dealers. Please contact your customer ou de l'un des distributeurs autorisés. Veuillez torisierten Händler. -
Page 77: Garantía
ACCESORIOS ACCESSORI TILLBEHÖR Encontrarán los accesorios para EMS o de los Troverete gli accessori presso la EMS o i rivendi- Tillbehör kan erhållas från EMS eller auktoriserad unos de los distribuidores autorizados. Contacte tori autorizzati. Vogliate contattare direttamente återförsäljare. Kontakta kundservice. -
Page 78: Ems-Service
Des réparations sans autorisation ou le non-res- Reparaturen ohne Erlaubnis sowie Schäden bei tions, EMS accepts no liability whatsoever. This pect du mode d’emploi dégagent EMS de toute Nichtbeachtung der Bedienungsanleitung ent- will also void the warranty. responsabilité et annulent la garantie. -
Page 79: Servicio Técnico Ems
Antes de enviar su producto junto con zare il prodotto e gli accessori inclusi secondo Om Ni skickar produkten direkt till ett av EMS todos sus accesorios, desinfecte, limpié y es- queste istruzioni per l’uso prima del trasporto. godkänt serviceställe, ber vi er ange återförsälja- terilice todo el material según se indica en las... -
Page 80: Symbols
SYMBOLS SYMBOLES SYMBOLE Manufacturer’s logo Logo du fabriquant Hersteller-Logo Knob for regulating the water fl ow rate Bouton de réglage du débit d'eau Water Drehregler der Wassermenge Knob for regulating the power Power Bouton de réglage de la puissance des ultrasons Drehregler des Ultraschall-Intensität Knob for regulating the air fl... -
Page 81: Símbolos
SÍMBOLOS SIMBOLI SYMBOLER Logotipo del fabricante Logo del produttore Tillverkarens logotype Regulador del caudal de agua Manopola per regolare la velocità del fl usso dell'acqua Water Knopp för reglering av vattenfl ödet Regulador de la potencia ultrasónica Power Manopola per regolare l'intensità ultrasonica Knopp för reglering av ultraljudseffekt Regulador del caudal de aire Airfl... - Page 82 SYMBOLS SYMBOLES SYMBOLE Power switch "ON" Interrupteur général "ON" Hauptschalter "ON" Power switch "OFF" Interrupteur général "OFF" Hauptschalter "OFF" Output Sortie Ausgang Fuse Fusible Sicherung Applied part, type B Partie appliquée du type B Anwendungsteil Typ B Degree of protection against water permeability Degré...
- Page 83 SÍMBOLOS SIMBOLI SYMBOLER Interruptor principal "ON" Interruttore principale "ON" Huvudströmbrytare "PÅ" Interruptor principal "OFF" Interruttore principale "OFF" Huvudströmbrytare "AV" Salida Uscita Utsläpp Fusible Fusibile Säkring Pieza de aplicación tipo B Parte applicata del tipo B Tillämpad del, typ B Grado de protección contra la penetración de agua Grado di protezione contro la permeabilità...
-
Page 84: Technical Data
TECHNICAL DATA CARACTÉRISTIQUES TECHNIQUES DESCRIPTION DESCRIPTION Manufacturer EMS SA, CH-1260 Nyon, Switzerland Fabriquant EMS SA, CH-1260 Nyon, Suisse ® ® Model AIR-FLOW Modèle AIR-FLOW Classifi cation EN 60601-1 - Class I Classifi cation EN 60601-1 - Classe I - Applied part, Type B - Partie appliquée du Type B... -
Page 85: Technische Daten
TECHNISCHE DATEN ESPECIFICACIONES TÉCNICAS BEZEICHNUNG DENOMINACIÓN Hersteller EMS SA, CH-1260 Nyon, Schweiz Fabricante EMS SA, CH-1260 Nyon, Suiza ® ® Model AIR-FLOW Modelo AIR-FLOW Klassifi kation EN 60601-1 - Klasse I Clasifi cación EN 60601-1 - Clase I - Typ B - Parte de aplicación tipo B... -
Page 86: Dati Tecnici
DATI TECNICI TEKNISKA DATA DENOMINAZIONE BESKRIVNING Costruttore EMS SA, CH-1260 Nyon, Svizzera Tillverkare EMS SA, CH-1260 Nyon, Schweiz ® ® Modello AIR-FLOW Modell AIR-FLOW Classifi cazione EN 60601-1 - Classe I Klassifi cering EN 60601-1 - Klass I - Tipo B - Tillämpad del, Typ B... -
Page 88: Electromagnetic Compatibility
The use of accessories and cables other tion. muss die Funktion des Gerätes in dieser Konfi - than those specifi ed or sold by EMS as replace- guration vor Benutzung geprüft werden. ment parts, may result in increased emissions L’utilisation d’accessoires ou de câbles or decreased immunity of this product. -
Page 89: Compatibilidad Electromagnética
Användning av tillbehör och kablar andra confi guración. L’utilizzo di accessori o cavi diversi da quelli än dem som specifi ceras eller säljs av EMS som El uso de accesorios y cables distintos specifi cati o venduti da EMS come parti di ricam- reservdelar, kan resultera i ökad emission eller... -
Page 90: Troubleshooting
• Check the presence of water at the connector cord output without handpiece ---> If water, the handpiece is blocked and send it to an approved EMS repair center • Check the presence of water at the unit connector cord without the cord •... - Page 91 Water leakage between handpiece • Check the O-ring on the handpiece cord cord and handpiece • Send the handpiece cord to an approved EMS repair center Leakage on the unit water supply • Check the water supply connection • Change the water supply hose with connector...
-
Page 92: Mesures À Prendre En Cas D'incident
• Contrôlez la présence de l'eau à la sortie du cordon sans pièce à main ---> si il y a de l'eau, la pièce à main est bouchée, Envoyez là à un centre de réparation agréé EMS • Contrôlez la présence d'eau à la sortie du connecteur de l'appareil sans cordon •... - Page 93 • Contrôlez l'état du joint de la pièce à main pièce à main et la pièce à main • Envoyez le cordon de pièce à main à un service après-vente EMS Fuite à l'alimentation d'eau • Contrôlez la connexion d'eau de l'appareil •...
-
Page 94: Fehlerbehebung
• Entfernen Sie mit Hilfe der Putznadeln das restliche Pulver aus den Leitungen • Kontrollieren Sie die Pulvermenge in Ihrem Gerät • Schicken Sie Ihr Handstück, Ihren Handstückschlauch oder das Gerät an ein von EMS genehmigtes Reparatur- zentrum Aus dem Handstück tritt kein Was- •... - Page 95 Luft tritt aus dem Handstück aus, • Schicken Sie das Gerät an ein von EMS genehmigtes Reparaturzentrum ohne das Fusspedal zu betätigen Keine Ultraschallschwingung beim • Gerät am Geräthauptschalter einschalten Betätigen des Fusspedals • Überprüfen Sie, ob die Luftstrom handpiece Schnur in seinem Halter ist •...
-
Page 96: Medidas A Adoptar En Caso De Incidentes
• Elimine cualquier polvo residual en el canal del mango utilizando aguja de limpieza • Compruebe la cantidad de polvo que queda en el equipo • Envie el mango, la manguera o el equipo a un centro de reparación autorizado EMS No sale ningún chorro de agua del •... - Page 97 Fuga de aire en el mango sin pulsar • Envíe el equipo a un centro de reparación autorizado EMS el pedal de control No se generan vibraciones ultrasóni- • Encienda el equipo mediante el interruptor principal cas al accionar el pedal de control •...
-
Page 98: Misure Da Adottare In Caso D'incidente
• Eliminare polveri residue dal canale per le polveri del manipolo uitilizzando un ago per la pulizia • Controllare la quantità di polvere nell’unità • Spedire il manipolo, il cordone o l'apparecchio ad un centro assistenza autorizzato EMS Azionando il pedale, non esce alcun •... - Page 99 Fuoriuscita di acqua fra il cordone del • Controllare l’O-ring del cordone del manipolo manipolo e il manipolo • Spedire il cordone del manipolo ad un centro assistenza autorizzato EMS Perdita nell’unità dell’alimentazione • Controllare la connessione dell’alimentazione d’acqua d’acqua •...
-
Page 100: Felsökning
• Kontrollera om vatten kommer ut ur slanganslutningen om handstycket tas bort ---> Om vatten kommer ut är handstycket tilltäppt och skickas till av EMS godkänt serviceställe • Kontrollera om vatten kommer ut ur apparatens slanganslutning om slangen tas bort •... - Page 101 Luftfl öde från handstycket utan att • Sticka apparaten till ett av EMS godkänt serviceställe fotpedalen trycks ner Inga ultraljudsvibrationer när fotpeda- • Slå på apparaten med strömbrytaren len aktiveras • Kontrollera att AirFlow-handstyckets slang sitter i sin hållare • Kontrollera apparatens tryckluftsanslutning •...