Publicité

Les langues disponibles

Les langues disponibles

Liens rapides

Quick Start Guide
Guide de démarrage rapide

Publicité

Chapitres

Table des Matières
loading

Sommaire des Matières pour Canon CanoScan 8800F

  • Page 1 Quick Start Guide Guide de démarrage rapide...
  • Page 3: Table Des Matières

    Quick Start Guide Quick Start Guide Please read this guide before operating this scanner. After you finish reading this guide, store it in a safe place for future reference. Table of Contents Package Contents .......... 1 Scanning with MP Navigator EX..... 7 Installing the Software ........
  • Page 4: Installing The Software

    • Quit all running applications before installation, including anti-virus software. ® • To upgrade from Windows XP to Windows Vista, first uninstall software bundled with the Canon scanner. • Log in as an administrator to install the software. Place the Setup CD-ROM in the drive. ®...
  • Page 5 Installing the Software Click [Install] to start installation. Carefully read the License Agreement, and then click [Yes] to proceed. Follow the on-screen instructions to perform the installation. When the installation is complete, click [Restart] to restart your computer. After restarting the computer, "Solution Menu" will appear. See the last part of the "Try Scanning"...
  • Page 6: Preparing The Scanner

    Preparing the Scanner Preparing the Scanner Unlocking the Scanner Peel the shipping tapes off the scanner. Open the document cover and slide the lock switch toward the unlock mark ( Unlock Mark • Handle the scanner with both hands. Be careful not to drop the scanner. •...
  • Page 7: Try Scanning

    Try Scanning Try Scanning This section explains the basic scanning procedures using the image editing program, ArcSoft PhotoStudio, and the scanner driver, ScanGear. Place a document on the document glass and close the document cover. Start ArcSoft PhotoStudio. Alignment Bottom For Windows: Select [Start] - [(All) Programs] - Mark [ArcSoft PhotoStudio 5.5], then click [PhotoStudio 5.5].
  • Page 8: Using The Scanner Buttons

    Using the Scanner Buttons Using the Scanner Buttons Scanner buttons allow you to copy, scan, e-mail, and save scanned images in PDF format with a press of a button. Simply place your document on the scanner, and then press the scanner button for the required function.
  • Page 9: Scanning With Mp Navigator Ex

    Operating Procedures Start MP Navigator EX. For Windows: Select [Start] – [(All) Programs] – [Canon Utilities] – [MP Navigator EX 1.0], and click [MP Navigator EX 1.0]. For Macintosh: Open [Applications] – [Canon Utilities] folders, then double-click the [MP Navigator EX 1.0] icon.
  • Page 10: Scanning Film

    Scanning Film Scanning Film This scanner can scan 35 mm film (film strip or slide) and 120 format film. Follow the procedure below when scanning film. Remove the protective sheet from the document cover. Press and hold the lever at the top of the protective sheet while you pull the sheet outward and detach it.
  • Page 11 Scanning Film 35mm Slides Align the Film Guide’s tab with the FILM symbol on the document glass of the scanner. Place a slide or slides face down (correctly viewed from below) in the Film Guide as shown in the diagram to the right.
  • Page 12 Scanning Film Start ArcSoft PhotoStudio, then start ScanGear. Follow the steps 2 to 4 in "Try Scanning" on page 5. Select [Negative Film (Color)] or [Positive Film (Color)] in [Select Source] to match the type of film you are scanning, then click [Preview]. Place a check mark beside the number(s) of the frame(s) you want to scan.
  • Page 13: Specifications

    The fastest speed in USB 2.0 Hi-Speed mode on Windows PC. Transfer time is not included. Scan- ning speed varies according to the document types, scan settings, or specifications of the computer. Canon AC Adapter: K30286 Do not use it for other products. • Specifications are subject to change without notice. Model Number: K10301 (CanoScan 8800F)
  • Page 14 (EEA: Norway, Iceland and Liechtenstein) For Customers in Europe, Middle-East, Africa and Russia only For Canon Customer Support contacts, please see the back cover of the European Warranty System (EWS) Booklet or visit www.canon-europe.com. The socket-outlet shall be installed near the equipment and shall be easily accessible.
  • Page 15: Safety Precautions

    If any of these objects or liquids enters the scanner, immediately unplug the AC adapter and the power cord. Then contact your retailer or Canon Customer Support Help Desk. CAUTION • Do not place the scanner in areas with high humidity, areas subject to direct sunlight, areas with high temperatures and areas near flame sources.
  • Page 16 • If you hear unusual noises, see smoke, feel excessive heat or smell anything unusual, immediately unplug the AC adapter and the power cord. Then contact your retailer or Canon Customer Support Help Desk. Continued use of the scanner may result in fires or electrical shock.
  • Page 17 Guide de démarrage rapide Guide de démarrage rapide Lisez ce guide avant d'utiliser ce scanner. Quand vous avez terminé la lecture de ce guide, rangez-le en lieu sûr afin de pouvoir le consulter ultérieurement. Table des matières Contenu de l'emballage........1 Numérisation avec MP Navigator EX .....
  • Page 18: Installation Des Logiciels

    • Pour effectuer une mise à niveau de Windows XP à Windows Vista, désinstallez d'abord les logiciels fournis avec le scanner Canon. • Ouvrez une session en tant qu'administrateur pour installer les logiciels. Insérez le CD-ROM d'installation dans le lecteur.
  • Page 19 Installation des logiciels Cliquez sur [Installer] pour lancer l'installation. Lisez attentivement le contrat de licence, puis cliquez sur [Oui] pour continuer. Suivez les instructions qui s'affichent afin de procéder à l'installation. Une fois l'installation terminée, cliquez sur [Redémarrer] pour relancer votre ordinateur. Après le redémarrage de l'ordinateur, le «...
  • Page 20: Préparation Du Scanner

    Préparation du scanner Préparation du scanner Déverrouillage du scanner Retirez les bandes de protection du scanner. Ouvrez le couvercle du scanner et faites glisser le bouton de verrouillage vers le repère de déverrouillage ( Repère de déverrouillage • Manipulez le scanner des deux mains. Veillez à ne pas le laisser tomber. •...
  • Page 21: Essai De Numérisation

    Essai de numérisation Essai de numérisation Cette section explique les procédures de numérisation de base à l'aide du programme de retouche d'image, ArcSoft PhotoStudio, et du pilote du scanner, ScanGear. Posez un document sur la vitre du scanner et fermez le couvercle du scanner.
  • Page 22: Utilisation Des Boutons Du Scanner

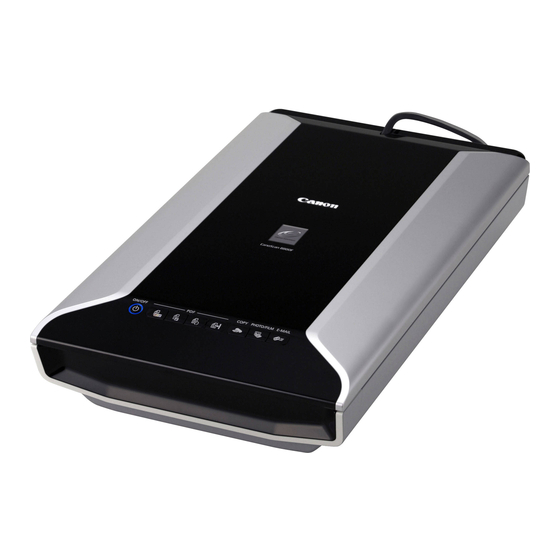
    Utilisation des boutons du scanner Utilisation des boutons du scanner Les boutons du scanner permettent, d'une simple pression, de copier, de numériser, d'envoyer par courrier électronique et d'enregistrer des images numérisées au format PDF. Il vous suffit de poser le document sur le scanner, puis d'appuyer sur la bouton correspondant à...
  • Page 23: Numérisation Avec Mp Navigator Ex

    Pour Windows : Sélectionnez [Démarrer] – [(Tous les) programmes] – [Canon Utilities] – [MP Navigator EX 1.0], puis cliquez sur [MP Navigator EX 1.0]. Pour le Macintosh : Ouvrez les dossiers [Applications] - [Canon Utilities], puis cliquez deux fois sur l'icône [MP Navigator EX 1.0].
  • Page 24: Numérisation D'un Film

    Numérisation d'un film Numérisation d'un film Ce scanner permet de numériser un film 35 mm (pellicule ou diapositive) et un film au format 120. Lors de la numérisation d'un film, procédez comme suit. Retirez la feuille de protection du couvercle du scanner.
  • Page 25 Numérisation d'un film Diapositives 35 mm Alignez la languette du guide de film sur le symbole FILM de la vitre du scanner. Placez une ou plusieurs diapositives face vers le bas (afin qu'elles soient correctement visibles du bas) dans le guide de film comme décrit dans le schéma sur la droite.
  • Page 26 Numérisation d'un film Démarrez ArcSoft PhotoStudio, puis ScanGear. Suivez les étapes 2 à 4 dans "Essai de numérisation » à la page 5. Sélectionnez [Film négatif (couleur)] ou [Film positif (couleur)] dans l'option [Sélectionner une source] en fonction du film que vous numérisez, puis cliquez sur [Aperçu].
  • Page 27: Fiche Technique

    La vitesse de numérisation varie selon les types de documents, les paramètres de numérisation ou les caractéristiques techniques de l'ordinateur. Adaptateur secteur Canon : K30286 Ne l'utilisez pas pour d'autres produits. • Fiche technique susceptible d'être modifiée sans avis préalable. Numéro de modèle : K10301 (CanoScan 8800F)
  • Page 28 Pour les clients en Europe, au Moyen-Orient, en Afrique et en Russie uniquement Pour connaître les contacts du support clientèle Canon, reportez-vous à la dernière page de couverture de la brochure sur le système de garantie européenne (EWS) ou visitez le site www.canon-europe.com.
  • Page 29: Précautions De Sécurité

    Si l'un de ces objets ou liquides pénètre à l'intérieur du scanner, déconnectez immédiatement l'adaptateur secteur et le cordon d'alimentation. Contactez votre revendeur ou le centre de service clientèle Canon. ATTENTION •...
  • Page 30 • Si vous entendez des bruits inhabituels, apercevez de la fumée, sentez une chaleur excessive ou une odeur étrange, débranchez immédiatement l'adaptateur secteur et le cordon d'alimentation. Contactez votre revendeur ou le centre de service clientèle Canon. L'utilisation du scanner dans ces conditions pourrait créer des risques d'incendie ou d'électrocution.
  • Page 31 Do not make any changes or modifications to the equipment unless otherwise specified in the manual. If such changes or modifications should be made, you could be required to stop operation of the equipment. Canon U.S.A., Inc. One Canon Plaza...
  • Page 32 QT5-1301-V01 XXXXXXXX ©CANON INC. 2007 PRINTED IN THAILAND IMPRIME EN THAILANDE...

Table des Matières