Table des Matières
Publicité
Les langues disponibles
Les langues disponibles
Liens rapides
IT
GENERALITA' - AVVERTENZE - INSTALLAZIONE - MANUTENZIONE
EN
GENERAL INFORMATION - WARNINGS - INSTALLATION - MAINTENANCE
DE
ALLGEMEINE ANGABEN – HINWEISE – INSTALLATION – WARTUNG
FR
GÉNÉRALITÉS - AVERTISSEMENTS - INSTALLATION - ENTRETIEN
ES
GENERALIDADES - ADVERTENCIAS - INSTALACIÓN - MANTENIMIENTO
STUFE A PELLET AD ARIA
PELLETOFEN AIR- POÊLES À GRANULÉS AIR -
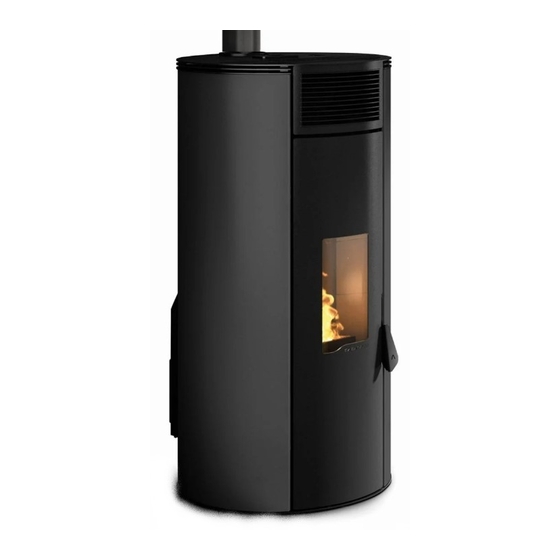
LEONARDO 8ET - 9ET
Il presente manuale è parte integrante del prodotto.
Si raccomanda di leggere attentamente le istruzioni prima
dell'installazione, manutenzione o utilizzo del prodotto. Le
immagini del prodotto sono puramente indicative.
This manual is an integral part of the product.
Read the instructions carefully before installing, servicing or
operating the product. The images of the product are purely
indicative.
Die vorliegende Anleitung ist fester Bestandteil des Produkts.
Vor der Installation, Wartung und Verwendung die Anleitungen
stets aufmerksam durchlesen. Die Bilder des Produktes sind
rein bezeichnend.
AIR PELLET STOVES
-
PELLET ESTUFA DE AIRE
Le présent manuel fait partie intégrante du produit.
Il est conseillé de lire attentivement les consignes avant
l'installation, l'entretien ou l'utilisation du produit. Les images du
produit sont simplement indicatives.
Este manual es parte integrante del producto.
Se recomienda leer detenidamente las instrucciones antes
de la instalación, el mantenimiento y el uso del producto. Las
imágenes del producto son puramente indicativas
.
Publicité
Chapitres
Table des Matières

Manuels Connexes pour CASATELLI LEONARDO 8ET


Sommaire des Matières pour CASATELLI LEONARDO 8ET
- Page 1 AIR PELLET STOVES PELLETOFEN AIR- POÊLES À GRANULÉS AIR - PELLET ESTUFA DE AIRE LEONARDO 8ET - 9ET Il presente manuale è parte integrante del prodotto. Si raccomanda di leggere attentamente le istruzioni prima dell’installazione, manutenzione o utilizzo del prodotto. Le immagini del prodotto sono puramente indicative.
- Page 2 Gentile cliente, desideriamo innanzitutto ringraziarLa per la preferenza che ha voluto accordarci acquistando il nostro prodotto e ci congratuliamo con Lei per la scelta. Per consentirLe di utilizzare al meglio la Sua nuova stufa, la invitiamo a seguire attentamente quanto descritto nel presente manuale. Dear Customer, We’d like to thank you for having purchased one of our products and congratulate you on your choice.
-
Page 3: Table Des Matières
INDICE PANNELLO COMANDI PREMESSA GENERALE DESCRIZIONE SIMBOLOGIA USO DEL PANNELLO COMANDI DESTINAZIONE D’USO PARAMETRI DI FUNZIONAMENTO SCOPO E CONTENUTO DEL MANUALE CONSERVAZIONE DEL MANUALE AGGIORNAMENTO DEL MANUALE OPERAZIONI PRELIMINARI GENERALITÀ 10.1 CARICAMENTO PELLET PRINCIPALI NORME RISPETTATE E DA 10.2 ALIMENTAZIONE ELETTRICA RISPETTARE 10.3 IMPOSTAZIONI INIZIALI GARANZIA LEGALE... -
Page 4: Premessa Generale
PREMESSA GENERALE SCOPO E CONTENUTO DEL MANUALE Lo scopo del manuale è quello di fornire le Il prodotto, oggetto del presente manuale, è costruito regole fondamentali e di base per una corretta e collaudato seguendo le prescrizioni di sicurezza installazione, manutenzione e uso del prodotto. indicate nelle direttive europee di riferimento. -
Page 5: Principali Norme Rispettate Eda Rispettare
1.7 PRINCIPALI NORME RISPETTATE E • installazione da parte di personale non DA RISPETTARE qualificato e non addestrato; • uso non conforme alle direttive di sicurezza; A) Direttiva 2014/35/UE: “Materiale elettrico destinato ad essere adoperato entro taluni limiti • modifiche e riparazioni non autorizzate dal di tensione “. -
Page 6: Avvertenze Per La Sicurezza
AVVERTENZE PER LA 2.3 AVVERTENZE PER L’UTILIZZATORE • Non toccare e non avvicinarsi al vetro della SICUREZZA porta, potrebbe causare ustioni; non guardare la fiamma per lungo tempo; 2.1 AVVERTENZE PER L’INSTALLATORE • non toccare lo scarico dei fumi; • non eseguire pulizie di qualunque tipo; Osservare le prescrizioni indicate nel presente •... -
Page 7: Caratteristiche Del Combustibile
e contattare i vigili del fuoco. • In caso di malfunzionamento della stufa dovuto ad un tiraggio non ottimale della canna fumaria effettuarne la pulizia seguendo la procedura descritta. • La pulizia della canna fumaria deve essere effettuata secondo quanto descritto nel paragrafo •... -
Page 8: Installazione
INSTALLAZIONE incendiarsi se esposte a eccessivo calore. Pavimenti costituiti da materiale infiammabile come ad esempio: legno, parquet, linoleum, laminato o 5.1 CONSIDERAZIONI GENERALI coperti da tappeti, devono essere protetti da una Nei paragrafi successivi sono riportate alcune base ignifuga sotto la stufa, di dimensioni sufficienti. indicazioni da rispettare per ottenere il massimo Questa base può... -
Page 9: Aria Comburente
5.4 ARIA COMBURENTE La stufa, durante il suo funzionamento, preleva una quantità di aria dall’ambiente in cui è collocata (ad eccezione dei prodotti della serie ermetica che possono prelevarla direttamente dall’esterno); quest’aria dovrà essere reintegrata attraverso una presa d’aria esterna al locale stesso (Fig. 5.3 - PA = Presa d’Aria). -
Page 10: Scarico Fumi
Installazione “Ermetica” In questo caso è possibile in alternativa: canalizzare l’aria comburente sfruttando un tubo di scarico coassiale per l’espulsione dei fumi ed il prelevamento dell’aria; pertanto non è necessario fare una classica presa d’aria nel locale (Fig. 5.5 A,B=Ingresso aria C,D=Uscita fumi);... - Page 11 5.5.1 Scarico a tetto mediante camino tradizionale Il camino per lo scarico dei fumi deve essere realizzato in osservanza alle norme UNI 10683- EN 1856-1-2- EN 1857- EN 1443- EN 13384-1-3- EN 12391-1 sia per quanto riguarda le dimensioni che per i materiali utilizzati nella sua costruzione. Camini FATISCENTI, realizzati con materiale non idoneo (fibrocemento, acciaio zincato, ecc...
-
Page 12: Livellamento Della Stufa
5.6 LIVELLAMENTO DELLA STUFA La stufa deve essere livellata, con l’ausilio di un’asta a bolla, agendo sui piedini di regolazione (ove previsti) (Fig. 5.10). A B = Asta a Bolla 5.7 ALLACCIAMENTO AGLI IMPIANTI 5.7.1 Collegamento elettrico È sufficiente collegare la stufa all’impianto elettrico attraverso la spina in dotazione. - Page 13 6.1.1 Manutenzione del sistema fumario Da effettuarsi almeno una volta all’anno, oppure ogni 40 quintali di pellet bruciato. Se esistono dei tratti orizzontali, é necessario verificare e asportare l’eventuale deposito di cenere e fuliggine prima che le stesse otturino il passaggio dei fumi.
-
Page 14: Demolizione E Smaltimento
PROGRAMMA DI CONTROLLO E MANUTENZIONE OGNI OGNI ACCENSIONE SETTIMANA MESE MESI ANNO Braciere Cassetto/Vano cenere Vetro Caldaia Canotto porta resistenza Collettore fumi Guarnizioni portina e braciere* Condotto di evacuazione fumi* Ventilatori* A cura di un centro di assistenza tecnico abilitato. Almeno una volta all‘anno oppure ogni 40 quintali di pellet bruciati. -
Page 15: Configurazione Iniziale
CONFIGURAZIONE INIZIALE DISPLAY In funzione della tipologia di installazione è necessario impostare la stufa secondo la configurazione più corretta per il suo funzionamento. Prima di procedere è necessario dare tensione alla stufa attraverso l’interruttore di sicurezza posto sul retro: d) Agendo sui tasti freccia portarsi sul menu setup e premere il tasto e) Selezionare la password “7”... -
Page 16: Pannello Comandi
PANNELLO COMANDI Prima di procedere con la lettura del manuale, prendere visione della descrizione della stufa contenuta nel relativo manuale allegato. 9.1 DESCRIZIONE Il pannello comandi è composto da: A) una parte superiore con i led di stato e le icone retroilluminate che identificano ciascuna funzione;... -
Page 17: Uso Del Pannello Comandi
9.1.2 Descrizione dei menu ICONA FUNZIONE DESCRIZIONE VALORI Potenza Impostazione della potenza di funzionamento 1..5 Ventilazione Impostazione della velocità del ventilatore dell’aria ambiente. OFF*,1..5; Auto; Hi *(ove previsto) Visualizza la temperatura letta in ambiente e permette di impostare la Temperatura 6°C .. -
Page 18: Parametri Di Funzionamento
9.3 PARAMETRI DI FUNZIONAMENTO Il funzionamento della stufa è determinato dai parametri di Potenza, Ventilazione e Temperatura impostati dall’utente. 9.3.1 Modifica della potenza La potenza definisce la quantità di calore prodotta dalla stufa e quindi incide direttamente anche sui consumi. Per modificare la potenza: a) Portarsi con i tasti sul menu potenza... -
Page 19: Operazioni Preliminari
OPERAZIONI PRELIMINARI 10.1 CARICAMENTO PELLET La prima operazione da eseguire prima di accendere il prodotto è quella di riempire il serbatoio di combustibile (pellet) utilizzando preferibilmente una apposita paletta. Non svuotare il sacco direttamente nel serbatoio per evitare di caricare della segatura o altri elementi estranei che potrebbero compromettere il buon funzionamento della stufa e per evitare di disperdere il pellet al di fuori del serbatoio. - Page 20 10.3.2 Impostazione luminosità display E’ possibile impostare il grado di attenuazione della luminosità del display quando è nella modalità standby. a) Agendo sui tasti freccia portarsi sul menu setup e premere il tasto b) Selezionare la password “7” con il tasto e confermare con il tasto [11] c) Scorrere con il tasto...
-
Page 21: Utilizzo Della Stufa
UTILIZZO DELLA STUFA 11.1 ACCENSIONE Prima di ogni accensione, accertarsi che il braciere sia completamente vuoto e correttamente posizionato nella sua sede. Per accendere la stufa tenere premuto il tasto per qualche secondo. L’icona a forma di fiamma inizierà a lampeggiare, durante la fase di accensione fino a restare fissa a stufa accesa. Accensione automatica: la stufa è... -
Page 22: Funzioni Disponibili
FUNZIONI DISPONIBILI 12.1 TIMER E’ possibile impostare, abilitare ed assegnare ai vari giorni della settimana, i programmi personalizzati per l’accensione e/o lo spegnimento automatico della stufa. E’ possibile configurare fino a sei programmi personalizzati. Per ciascun programma si può impostare: ora di accensione, ora di spegnimento e temperatura desiderata. A ciascun giorno della settimana è... -
Page 23: Funzione Risparmio "Eco Mode
12.2 FUNZIONE RISPARMIO “ECO MODE” Abilitando questa funzione si fa in modo che la stufa, al raggiungimento della temperatura desiderata in ambiente, si spenga. Se tale funzione non è abilitata, la stufa modula il proprio funzionamento per mantenere la temperatura desiderata consumando il meno possibile. La funzione “Eco Mode”... - Page 24 12.7 ATTIVAZIONE MANUALE DEL SISTEMA DI CARICAMENTO In caso di primo utilizzo (serbatoio pellet inizialmente vuoto), o per testare il funzionamento del gruppo di carica, è possibile azionare manualmente la carica. Sul pannello comandi della stufa: a) Agendo sui tasti freccia portarsi sul menu setup e premere il tasto b) Selezionare la password “7”...
-
Page 25: Gestione Degli Allarmi
GESTIONE DEGLI ALLARMI Nel caso si verifichi un’anomalia nel funzionamento, viene attivata la seguente procedura: 1) allarme acustico (beep); 2) si illumina uno dei seguenti led di sistema: 3) se l’anomalia riguarda un errore, la stufa si spegnerà. La pressione prolungata del tasto “annulla” consente la visualizzazione sul display del codice di errore: CODICE DESCRIZIONE... - Page 27 INDEX CONTROL PANEL GENERAL INTRODUCTION DESCRIPTION SYMBOLS USING THE CONTROL PANEL DESTINATION OF USE OPERATING PARAMETERS PURPOSE AND CONTENTS OF THE MANUAL PRESERVATION OF THE MANUAL PRELIMINARY OPERATIONS UPDATE OF THIS MANUAL 10.1 LOADING PELLETS GENERAL INFORMATION 10.2 ELECTRIC POWER SUPPLY MAIN STANDARDS OBSERVED AND TO 10.3 INITIAL SETTINGS BE OBSERVED...
-
Page 28: General Introduction
PURPOSE AND CONTENTS OF THE GENERAL INTRODUCTION MANUAL The product, subject of this manual, was The purpose of the manual is to provide the basic manufactured and tested according to the safety rules and the basis for correct product installation, requirements stated in the reference European maintenance and use. -
Page 29: Main Standards Observed And To Be Observed
1.7 MAIN STANDARDS OBSERVED AND • modifications and repairs not authorised by the TO BE OBSERVED manufacturer on the stove; • the use of spare parts that are not original or A) Directive 2014/35/EU: “Electrical equipment which are not specific to the stove model; designed for use within certain voltage limits”. -
Page 30: Safety Warning
SAFETY WARNING 2.3 WARNING FOR THE USER • Do not touch or approach the door glass, it could 2.1 WARNING FOR THE INSTALLER cause burns; do not look at the flame for a long time; Observe the prescriptions contained in this manual. •... -
Page 31: Fuel Characteristics
• In the event of a fire in the chimney, turn the stove off with the switch-off procedure indicated and call the fire brigade. • In the event of stove malfunction due to non- optimal flue draft, clean it following the procedure described. -
Page 32: Installation
INSTALLATION Floors consisting of flammable material such as for example: wood, parquet, linoleum, laminate or covered with carpets, must be protected by a flame 5.1 GENERAL CONSIDERATIONS retardant base under the stove, of a sufficient size. In the following paragraphs there are some This base can be, for example, in steel, pressed guidelines to follow in order to obtain the maximum slate, glass or stone and must cover the floor in the... -
Page 33: Combustion Air
5.4 COMBUSTION AIR The stove, during its operation, draws a quantity of air from the environment in which it is placed (with the exception of the products of the hermetic series that can take it directly from the outside); this air must be reintegrated through an air intake outside the room itself (Fig. -
Page 34: Fume Exhaust
“Hermetic” series installation In this case the following is possible as an alternative: channel the combustion air using a coaxial exhaust pipe for the expulsion of the fumes and withdrawal of the air; therefore, it is not necessary to create a classic air intake in the room (Fig. - Page 35 5.5.1 Roof exhaust with traditional fireplace The flue for flue gas discharge must be carried out in compliance with the UNI 10683 - EN 1856-1-2 - EN 1857 - EN 1443 - EN 13384-1-3 - EN 12391-1 standards both regarding the dimensions and the materials used in its construction.
-
Page 36: Levelling The Stove
5.6 LEVELLING THE STOVE The stove must be levelled using a spirit level and by adjusting the feet (where included) (Fig. 5.10). A B = Spirit Level 5.7 CONNECTION TO SYSTEMS 5.7.1 Electrical connection Just connect the stove to the electrical system using the plug provided. - Page 37 6.1.1 Maintenance of the smoke system To be performed at least once a year, or every 40 tons of burned pellets. If there are horizontal sections, it is necessary to check and remove any ash and soot deposits before they block the passage of the fumes. In the event of failure or inadequate cleaning, the stove may have functional problems such as: bad combustion...
-
Page 38: Demolition And Disposal
INSPECTION AND MAINTENANCE SCHEDULE EACH EACH IGNITION WEEK MONTH MESI YEAR Burn pot Ash drawer/compartment Glass Boiler Resistance sleeve Fumes manifold Door seals and burn pot* Smoke exhaust duct* Fans* To be performed by a qualified technical support centre. At least once a year or every 4 tonnes of burnt pellets. DEMOLITION AND DISPOSAL The responsibility for the demolition and disposal of the stove is the exclusive responsibility of the owner who must act in compliance with the laws on safety, respect and protection of the environment, in force in the country... -
Page 39: Home Page Configuration
HOME PAGE CONFIGURATION Depending on the type of installation, the stove must be set according to the most correct configuration for its operation. Before starting, the stove must be powered on by pressing the safety switch on the back: a) Use the arrow keys to go to the set-up menu and press the key;... -
Page 40: Control Panel
CONTROL PANEL Before reading the manual, look at the description of the stove in the relevant manual enclosed. 9.1 DESCRIPTION The control panel consists of: A) an upper part with status LEDs and backlit icons that identify each function; B) LED display; C) power on button D) “Cancel”... -
Page 41: Using The Control Panel
9.1.2 Menu description ICON FUNCTION DESCRIPTION VALUES Power Setting the operating power 1..5 Ventilation Fan speed setting of the ambient air. OFF*,1..5; Auto; Hi *(where included) Displays the room temperature reading and allows you to set the desired Temperature 6°C .. 51°C temperature. -
Page 42: Operating Parameters
9.3 OPERATING PARAMETERS Functioning of the stove is determined by the Power, Ventilation and Temperature parameters set by the user. 9.3.1 Changing the power The power defines the quantity of heat produced by the stove and therefore also directly affects consumption. To change the power: a) Use the keys on the power menu... -
Page 43: Preliminary Operations
PRELIMINARY OPERATIONS 10.1 LOADING PELLETS The first operation to perform before switching the stove on is to fill the fuel (pellet) tank using the relevant scoop. Do not empty the bag directly into the tank to avoid introducing sawdust or other foreign elements that could prevent the stove from working properly and avoid scattering pellets outside the tank. - Page 44 10.3.2 Display brightness setting It is possible to set the dimming of the display brightness when in standby mode. a) Use the arrow keys to go to the set-up menu and press the key; b) Select the password "7" with the key and confirm with the key;...
-
Page 45: Using The Stove
USING THE STOVE 11.1 POWER ON Before each ignition, make sure that the burn pot is completely empty and correctly positioned in its seat. To turn on the stove keep the key pressed for a few seconds. The flame icon will start to flash, during the ignition phase until it remains fixed when the stove is on. Automatic ignition: the stove is equipped with an automatic device that allows pellet ignition without the use of other traditional ignitors. -
Page 46: Available Functions
AVAILABLE FUNCTIONS 12.1 TIMER It is possible to set, enable and assign to the various days of the week the customised programs for the automatic switching on and/or off of the stove. Up to six customised programs can be configured. For each program it is possible to set: start time, switch off time and desired temperature. -
Page 47: Eco Mode" Saving Function
12.2 “ECO MODE” SAVING FUNCTION By enabling this function, the stove is turned off when the desired room temperature is reached. If this function is not enabled, the stove modulates its operation to maintain the desired temperature while consuming as little as possible. -
Page 48: Manual Activation Of The Loading System
12.7 MANUAL ACTIVATION OF THE LOADING SYSTEM If it is the first use (pellet tank initially empty) or to test the loading unit operation, the load can be started manually. On the stove control panel: a) Use the arrow keys to go to the set-up menu and press the key;... -
Page 49: Alarm Management
ALARM MANAGEMENT If an anomaly occurs in the operation, the following procedure is activated: 1) acoustic alarm (beep); 2) one of the following system LEDs lights up: 3) if the anomaly concerns an error, the stove will switch off. Press and hold the “cancel”... - Page 51 VERZEICHNIS BEDIENTAFEL ALLGEMEINES BESCHREIBUNG SYMBOLE VERWENDUNG DER BEDIENTAFEL BESTIMMUNGSGEMÄSSE VERWENDUNG BETRIEBSPARAMETER ZWECK UND INHALT DES HANDBUCHS AUFBEWAHRUNG DES HANDBUCHS AKTUALISIERUNG DES HANDBUCHS VORBEREITENDE MASSNAHMEN ALLGEMEINES 10.1 LADEN DER PELLETS GRUNDLEGENDE EINGEHALTENE UND 10.2 ELEKTRISCHE VERSORGUNG EINZUHALTENDE NORMEN 10.3 ANFÄNGLICHE EINSTELLUNGEN GEWÄHRLEISTUNG HAFTBARKEIT DES HERSTELLERS VERWENDUNG DES OFENS...
- Page 52 ZWECK UND INHALT DES ALLGEMEINES HANDBUCHS Das Produkt, Gegenstand dieses Handbuchs, wurde Der Zweck des Handbuchs besteht darin, gemäß den in den europäischen Referenzrichtlinien die grundlegenden Regeln für die korrekte angegebenen Sicherheitsvorschriften gebaut und getestet. Installation, Wartung und Verwendung des Produkts bereitzustellen.
- Page 53 1.7 GRUNDLEGENDE EINGEHALTENE • Installation von Seiten nicht qualifizierten und UND EINZUHALTENDE NORMEN nicht geschulten Personals; • nicht mit den Sicherheitsrichtlinien konformer A) Richtlinie 2014/35/EU: “Bereitstellung Gebrauch; elektrischer Betriebsmittel zur Verwendung innerhalb bestimmter Spannungsgrenzen”. • Nicht vom Hersteller genehmigte Änderungen und Reparaturen am Heizofen;...
- Page 54 SICHERHEITSHINWEISE WARNHINWEISE FÜR DEN BENUTZER • Berühren oder nähern Sie sich nicht der Glasscheibe der Tür, da dies zu Verbrennungen führen kann. 2.1 WARNHINWEISE FÜR DEN Nicht für längere Zeit in die Flamme schauen; INSTALLATEUR • den Rauchabzug nicht anfassen; Die im vorliegenden Handbuch enthaltenen •...
- Page 55 • Im Falle einer Fehlfunktion des Ofens aufgrund eines nicht optimalen Abzuges, diesen gemäß der beschriebenen Vorgehensweise reinigen. • Der Kamin muss wie im Abschnitt 6beschrieben gereinigt werden. • Während des Betriebs nicht die lackierten Teile berühren, um Schäden am Lack zu vermeiden. EIGENSCHAFTEN DES BRENNSTOFFS 3.1 EIGENSCHAFTEN DES...
- Page 56 INSTALLATION Böden aus brennbaren Materialien wie Holz, Parkett, Linoleum, Laminat oder Teppichböden müssen durch eine feuerfeste Unterlage mit 5.1 ALLGEMEINE BETRACHTUNGEN ausreichenden Abmessungen geschützt werden. In den folgenden Absätzen werden einige Dieser Sockel kann beispielsweise aus Stahl, zu befolgende Anweisungen aufgeführt, um Pressschiefer, Glas oder Stein bestehen und den maximalen Wirkungsgrad des erworbenen muss den Boden im Bereich unterhalb des Ofens,...
- Page 57 5.4 VERBRENNUNGSLUFT Während des Betriebs entnimmt der Ofen eine gewisse Menge Raumluft (mit Ausnahme der Produkte der raumluftunabhängigen Serie, die die Luft direkt von außen entnehmen können); diese Luftmenge muss dem Raum über einen Außenluftzuführung wieder zugeführt werden (Abb. 5.3 - PA = Luftzuführung). Sorgen Sie für die Luftzuführung.
- Page 58 “Luftdichte” Installation In diesem Fall ist es alternativ möglich: die Verbrennungsluft mit einem koaxialen Abgasrohr zum Ausstoßen der Dämpfe und zum Abziehen der Luft kanalisieren; folglich ist es nicht erforderlich, für eine herkömmliche Luftzuführung im Raum zu sorgen (Abb. 5.5 A, B = Lufteinlass C, D = Rauchauslass);...
- Page 59 5.5.1 Rauchableitung mit traditionellem Schornstein Der Rauchabzug für die Ableitung der Rauchgase muss unter Beachtung der Normen UNI 10683 - EN 1856-1-2 - EN 1857 - EN 1443 - EN 13384-1- -3 und EN 12391-1 angelegt werden, sowohl was seine Größe betrifft als auch das für seinen Bau verwendete Material.
- Page 60 5.6 NIVELLIEREN DES OFENS Der Ofen muss mit Hilfe einer Wasserwaage durch Regulierung der Stellfüßen (sofern vorgesehen) nivelliert werden (Abb. 5.10). A B = Wasserwaage 5.7 ANSCHLUSS AN DIE ANLAGEN 5.7.1 Elektrischer Anschluss Der Ofen muss lediglich mit Hilfe des mitgelieferten Steckers ans Stromnetz angeschlossen werden.
- Page 61 6.1.1 Wartung des Rauchabzugsystems Mindestens einmal pro Jahr oder alle 40 Tonnen verbrannter Pellets. Wenn horizontale Abschnitte vorhanden sind, müssen Asche- und Rußablagerungen überprüft und entfernt werden, bevor sie den Durchgang des Rauchs blockieren. Wird die Reinigung nicht oder nur unzureichend durchgeführt, dann können Funktionsstörungen auftreten: Schlechte Verbrennung...
- Page 62 KONTROLL- UND WARTUNGSPLAN BEI JEDER BEI JEDER ZÜNDUNG WOCHE MESE MESI JAHR Kohlebecken Aschenlade/-Fach Glas Kessel Halterung der Widerstände Rauchsammler Dichtung der Tür und des Kohlebeckens* Rauchabzugskanal Ventilatoren* von einem qualifizierten technischen Kundendienst Mindestens einmal pro Jahr oder alle 4000 kg verbranntes Pellets. VERSCHROTTUNG UND ENTSORGUNG Die Verschrottung und Entsorgung des Heizofenss sind ausschließlich zu Lasten des Eigentümers und liegen in dessen alleiniger Verantwortung;...
- Page 63 ANFÄNGLICHE KONFIGURATION DES DISPLAYS Je nach Art der Installation muss der Heizofen auf die für seinen Betrieb am besten geeignete Konfiguration eingestellt werden. Bevor Sie fortfahren, müssen Sie den Ofen über den Sicherheitsschalter auf der Rückseite mit Strom versorgen: a) Mithilfe der Pfeiltasten zum Einstellungsmenü...
- Page 64 BEDIENTAFEL Vor dem Lesen des Handbuchs die Beschreibung Ofens entsprechenden beigefügten Handbuch lesen. 9.1 BESCHREIBUNG Die Bedientafel besteht aus: A) einen oberen Teil mit Status-LEDs und beleuchteten Symbolen, die jede Funktion identifizieren; B) LED-Display; C) Einschalttaste D) Taste “Abbrechen” und Anzeige von “Fehlern” E) Zwei Pfeiltasten, um sich zwischen den verschiedenen Funktionen zu bewegen;...
- Page 65 9.1.2 Beschreibung der Menüs IKONE FUNKTION BESCHREIBUNG WERTE Leistung Einstellung der Betriebsleistung 1..5 Belüftung Einstellung der Geschwindigkeit des Raumluftventilators. OFF*,1..5; Auto; Hi *(wo vorgesehen) Zeigt die in der Umgebung gemessene Temperatur an und ermöglicht die Temperatur 6°C .. 51°C Einstellung der gewünschten Temperatur. Brennstoff Funktion nicht verwendet Aktivierung oder Deaktivierung der Zeitschaltuhr.
- Page 66 9.3 BETRIEBSPARAMETER Die Funktion des Heizofens wird durch die vom Benutzer eingestellten Leistungs-, Ventilations- und Temperatur- parameter bestimmt. 9.3.1 Änderung der Leistung Die Leistung bestimmt die vom Ofen erzeugte Wärmemenge und wirkt sich somit auch direkt auf den Verbrauch aus. Um die Leistung zu ändern: a) Mithilfe der Tasten auf das Menü...
- Page 67 VORBEREITENDE MASSNAHMEN 10.1 LADEN DER PELLETS Der erste Vorgang, der vor dem Einschalten des Produkts ausgeführt werden muss, besteht darin, den Tank vorzugsweise mit einer speziellen Schaufel mit Kraftstoff (Pellets) zu füllen. Den Beutel nicht direkt in den Tank leeren, vermeiden, dass Sägemehl...
- Page 68 10.3.2 Einstellung der Helligkeit des Displays Im Standby-Modus kann der Dämpfungsgrad der Displayhelligkeit eingestellt werden. a) Mithilfe der Pfeiltasten zum Einstellungsmenü gehen und die Taste drücken; b) Das Passwort “7” mit der Taste wählen und mit der Taste bestätigen; [11] c) Mithilfe der Taste scrollen und das Untermenü...
- Page 69 VERWENDUNG DES OFENS 11.1 ANFEUERN Vor jeder Zündung sicherstellen, dass das Kohlebecken vollständig entleert und richtig in seinem Sitz positioniert ist. Zum Einschalten des Ofens die Taste einige Sekunden gedrückt halten. Das Flammensymbol beginnt während der Zündphase zu blinken, bis es bei eingeschaltetem Ofen dauerhaft leuchtet.
- Page 70 VERFÜGBARE FUNKTIONEN 12.1 ZEITSCHALTUHR Es ist möglich, die benutzerdefinierten Programme für das automatische Ein- und / oder Ausschalten des Ofens einzustellen, zu aktivieren und den verschiedenen Wochentagen zuzuweisen. Es können bis zu sechs benutzerdefinierte Programme konfiguriert werden. Für jedes Programm können eingestellt werden: Zündzeitpunkt, Ausschaltzeitpunkt und gewünschte Temperatur. Jedem Wochentag können bis zu drei Programme zugeordnet werden.
- Page 71 12.2 SPARFUNKTION “ÖKO-MODUS” Durch Aktivieren dieser Funktion wird der Heizofen ausgeschaltet, wenn die gewünschte Raumtemperatur erreicht ist. Wenn diese Funktion nicht aktiviert ist, moduliert der Ofen seinen Betrieb, um die gewünschte Temperatur aufrechtzuerhalten und dabei so wenig wie möglich zu verbrauchen. Die Funktion “Öko-Modus”...
- Page 72 12.6 FROSTSCHUTZFUNKTION (Nur in Konfiguration 1) Es ist möglich, eine Mindesttemperatur einzustellen, unter der sich der Ofen einschaltet (außerhalb der eingestellten Zeitbänder und nur, wenn die Zeitschaltuhr aktiv ist). Zur Änderung des Wertes der Frostschutztemperatur: a) Mithilfe der Pfeiltasten zum Einstellungsmenü gehen und die Taste drücken;...
- Page 73 VERWALTUNG DER ALARME Sollte es zu einer Betriebsstörung kommen, wird folgende Prozedur aktiviert: 1) Akustischer Alarm (Beep); 2) Es schaltet sich eine der folgenden System-LEDs ein: 3) Betrifft die Störung einen Fehler, schaltet sich der Heizofen ab. Durch längeres Drücken der Taste “Abbrechen” kann der Fehlercode am Display angezeigt werden: CODE BESCHREIBUNG...
- Page 75 INDEX PANNEAU DE COMMANDES AVANT-PROPOS GÉNÉRAL DESCRIPTION SYMBOLES UTILISATION DU PANNEAU DE COMMANDES DESTINATION D’USAGE PARAMÈTRES DE FONCTIONNEMENT OBJET ET CONTENU DU MANUEL CONSERVATION DU MANUEL MISE À JOUR DU MANUEL OPÉRATIONS PRÉLIMINAIRES GÉNÉRALITÉS 10.1 CHARGEMENT DES GRANULÉS PRINCIPALES NORMES RESPECTÉES ET À 10.2 ALIMENTATION ÉLECTRIQUE RESPECTER 10.3 RÉGLAGES INITIAUX...
-
Page 76: Avant-Propos Général
OBJET ET CONTENU DU MANUEL AVANT-PROPOS GÉNÉRAL Le but de ce manuel est de fournir les règles Le produit faisant l’objet du présent manuel est fondamentales et de base pour une installation, une maintenance et une utilisation correctes du fabriqué et testé conformément aux exigences de produit. -
Page 77: Principales Normes Respectées Et Àrespecter
1.7 PRINCIPALES NORMES • installation de la part de personnel non qualifié RESPECTÉES ET À RESPECTER et non formé ; • utilisation non conforme aux directives de A) Directive 2014/35/UE : « Matériel électrique sécurité ; destiné à être employé dans certaines limites de tension ». -
Page 78: Avertissement De Sécurité
AVERTISSEMENT DE SÉCURITÉ AVERTISSEMENTS POUR L’UTILISATEUR • Ne pas toucher ni s’approcher de la vitre de la 2.1 AVERTISSEMENTS POUR porte, cela pourrait provoquer des brûlures ; ne pas regarder la flamme pendant longtemps ; L’INSTALLATEUR • ne pas toucher l’évacuation des fumées ; Respecter les prescriptions indiquées dans le •... -
Page 79: Caractéristiques Du Combustible
• En cas de dysfonctionnement du poêle dû à un tirage non optimal du conduit des fumées, nettoyer le conduit en suivant la procédure décrite. • Le nettoyage de la cheminée doit être effectué comme décrit dans le paragraphe 6. •... -
Page 80: Installation
INSTALLATION Les planchers composés de matériaux inflammables comme le bois, le parquet, le linoléum, le stratifié ou recouverts de tapis, doivent être protégés par une CONSIDÉRATIONS D’ORDRE GÉNÉRAL base ignifuge sous le poêle, avec des dimensions Les paragraphes suivants fournissent des appropriées. -
Page 81: Air De Combustion
5.4 AIR DE COMBUSTION Pendant son fonctionnement, le poêle aspire une quantité d’air de l’environnement dans lequel il est placé (à l’exception des produits de la série hermétique qui peuvent le prélever directement de l’extérieur) ; cet air doit être renouvelé par une entrée d’air extérieure à... -
Page 82: Évacuation Fumées
Installation « Hermétique » Dans ce cas, il est possible en alternative : canaliser l’air comburant à l’aide d’un tuyau d’évacuation coaxial pour l’expulsion des fumées et le prélèvement de l’air ; il n’est donc pas nécessaire de réaliser une prise d’air classique dans la pièce (Fig. - Page 83 5.5.1 Évacuation sur le toit à travers un conduit de cheminée traditionnel La cheminée d’évacuation des fumées doit être réalisée conformément aux normes UNI 10683- EN 1856-1-2 - EN 1857 - EN 1443 - EN 13384- 1-3-EN 12391-1 en termes de dimensions et de matériaux utilisés dans sa construction.
-
Page 84: Mise À Niveau Du Poêle
5.6 MISE À NIVEAU DU POÊLE Le poêle doit être mis à niveau à l’aide d’une tige à bulles agissant sur les pieds de réglage (le cas échéant) (Fig. 5.10). A B = Niveau à bulles 5.7 RACCORDEMENT AUX INSTALLATIONS 5.7.1 Branchement électrique Simplement brancher le poêle au système électrique à... - Page 85 6.1.1 Entretien du système d’évacuation des fumées L’entretien doit être effectué au moins une fois par an ou tous les 40 quintaux de granulés brûlés. S’il existe des parties de conduites horizontales, il est nécessaire de vérifier et d’enlever les éventuels dépôts de cendres et de suie avant qu’ils ne puissent obstruer sérieusement le passage des fumées.
-
Page 86: Démolition Et Élimination
PROGRAMME DE CONTROLE ET D’ENTRETIEN À CHAQUE CHAQUE ALLUMAGE SEMAINE MOIS MOIS Brasier Tiroir/compartiment cendre Vitre Chaudière Manchon porte-résistance Collecteur fumées Joints portes et brasier* Conduit d’évacuation de la fumée* Ventilateurs* Par un centre d’assistance technique agréé. Au moins une fois par an ou tous les 40 quintaux de granulés brûlés. DÉMOLITION ET ÉLIMINATION La démolition et la mise au rebut du poêle sont exclusivement à... -
Page 87: Configuration Initiale Display
CONFIGURATION INITIALE DISPLAY En fonction du type d’installation, il est nécessaire de programmer le poêle selon la configuration la plus correcte pour son fonctionnement. Avant de continuer, il est nécessaire de mettre le poêle sous tension via l’interrupteur de sécurité à l’arrière : a) En agissant sur les touches fléchées se positionner sur le menu setup puis frapper la touche... -
Page 88: Panneau De Commandes
PANNEAU DE COMMANDES Avant de procéder à la lecture du manuel, lire la description du poêle contenue dans le manuel ci- joint. 9.1 DESCRIPTION Le panneau de commande est composé de : A) une partie supérieure avec les LED d’état et les icônes rétroéclairées qui identifient chaque fonction ;... -
Page 89: Utilisation Du Panneau De Commandes
9.1.2 Description des menus ICÔNE FONCTION DESCRIPTION VALEURS Puissance Configuration de la puissance de fonctionnement 1..5 Ventilation Configuration de la vitesse du ventilateur de l'air ambiant. OFF*,1..5; Auto; Hi *(le cas échéant) Affiche la température lue dans la pièce et permet de régler la température Température 6°C .. -
Page 90: Paramètres De Fonctionnement
9.3 PARAMÈTRES DE FONCTIONNEMENT Le fonctionnement du poêle est déterminé par les paramètres de Puissance, Ventilation et Température définis par l’utilisateur. 9.3.1 Modification de la puissance La puissance définit la quantité de chaleur produite par le poêle et influe donc directement sur la consommation. Pour modifier la puissance : a) Se déplacer à... -
Page 91: Opérations Préliminaires
OPÉRATIONS PRÉLIMINAIRES 10.1 CHARGEMENT DES GRANULÉS La première chose à faire avant d’allumer le produit est de remplir le réservoir de combustible (granulés de bois) en utilisant de préférence une palette spéciale. Ne pas vider le sac directement dans le réservoir pour éviter de charger de la sciure de bois ou d’autres éléments... - Page 92 10.3.2 Programmation luminosité affichage Il est possible de régler le degré de variation de la luminosité de l’écran lorsqu’il est en mode veille. a) En agissant sur les touches fléchées se positionner sur le menu setup puis frapper la touche b) Sélectionner le mot de passe «...
-
Page 93: Utilisation Du Poêle
UTILISATION DU POÊLE 11.1 ALLUMAGE Avant chaque allumage, s’assurer que le brasier est complètement vide et correctement positionné dans son emplacement. Pour allumer le poêle, maintenir le bouton enfoncé pendant quelques secondes. L’icône en forme de flamme se met à clignoter, pendant la phase d’allumage et devient fixe quand le poêle est allumé. -
Page 94: Fonctions Disponibles
FONCTIONS DISPONIBLES 12.1 MINUTERIE Il est possible de régler, activer et affecter des programmes personnalisés aux différents jours de la semaine pour l’allumage et/ou l’arrêt automatique du poêle. Jusqu’à six programmes personnalisés peuvent être configurés. Pour chaque programme, on peut programmer l’heure d’allumage, l’heure d’arrêt et la température désirée. Il est possible d’attribuer à... -
Page 95: Fonction Économie « Eco Mode
12.2 FONCTION ÉCONOMIE « ECO MODE » En validant cette fonction, le poêle s’éteint lorsque la température ambiante désirée est atteinte. Si cette fonction n’est pas validée, le poêle module son fonctionnement pour maintenir la température désirée, en consommant le moins possible. La fonction «... -
Page 96: Activation Manuelle Du Système De Chargement
12.7 ACTIVATION MANUELLE DU SYSTÈME DE CHARGEMENT En cas de première utilisation (réservoir à granulés initialement vide), ou pour tester le fonctionnement de l’unité de chargement, on peut actionner le chargement manuellement. Sur le panneau de commande du poêle : a) En agissant sur les touches fléchées se positionner sur le menu setup puis frapper la touche... -
Page 97: Gestion Des Alarmes
GESTION DES ALARMES Si une anomalie se vérifie dans le fonctionnement, la procédure suivante est activée : 1) alarme sonore (bip) ; 2) l’une des LED suivantes s’allume : 3) si l’anomalie concerne une erreur, le poêle s’éteint. La pression prolongée de la touche « annuler » permet la visualisation sur le display du code d'erreur : CODE DESCRIPTION... - Page 99 ÍNDICE PANEL DE MANDOS PREMISA GENERAL DESCRIPCIÓN SIMBOLOGÍA USO DEL PANEL DE MANDOS DESTINO DE USO PARÁMETROS DE FUNCIONAMIENTO FINALIDAD Y CONTENIDO DEL MANUAL CONSERVACIÓN DEL MANUAL ACTUALIZACIÓN DEL MANUAL OPERACIONES PRELIMINARES VISIÓN GENERAL 10.1 CARGA DE PELLET NORMAS PRINCIPALES RESPETADAS Y 10.2 ALIMENTACIÓN ELÉCTRICA PARA RESPETAR 10.3 CONFIGURACIONES INICIALES...
-
Page 100: Premisa General
PREMISA GENERAL FINALIDAD Y CONTENIDO DEL MANUAL El producto, objeto de este manual, está fabricado y El objetivo del manual es suministrar las reglas probado siguiendo las prescripciones de seguridad fundamentales y de base para una instalación indicada en las directivas europeas de referencia. correcta, mantenimiento y uso del producto. -
Page 101: Normas Principales Respetadas Ypara Respetar
1.7 NORMAS PRINCIPALES • instalación por parte de personal no cualificado RESPETADAS Y PARA RESPETAR y/o no formado; • uso no conforme con las directivas de A) Directiva 2014/35/UE: “Material eléctrico seguridad; destinado para ser utilizado dentro dichos límites de tensión”. •... -
Page 102: Advertencias Para La Seguridad
ADVERTENCIAS PARA LA 2.3 ADVERTENCIAS PARA EL USUARIO • No tocar y no acercarse al vidrio de la puerta, SEGURIDAD podría causar quemaduras; no mirar la llama por mucho tiempo; ADVERTENCIAS PARA EL INSTALADOR • no tocar la salida de humos; •... -
Page 103: Características Del Combustible
• En caso de incendio de la chimenea apagar la estufa con el procedimiento de apagado indicado y contactar a los bomberos. • En caso de mal funcionamiento de la estufa debido a un tiro no ideal del humero, realizar la limpieza siguiendo el procedimiento descrito. -
Page 104: Instalación
INSTALACIÓN Pavimentos constituidos por material inflamable como por ejemplo: madera, parqué, linóleo, laminado o cubiertos por alfombras, deben estar 5.1 CONSIDERACIONES GENERALES protegidos por una base ignífuga bajo la estufa, de En los siguientes párrafos se describen algunas dimensiones adecuadas. Esta base puede ser, por indicaciones que se deben respetar para obtener ejemplo, de acero, pizarra prensada, vidrio o piedra el rendimiento máximo del producto adquirido. -
Page 105: Aire Comburente
5.4 AIRE COMBURENTE La estufa, durante su funcionamiento, extrae una cantidad de aire del ambiente en la cual se coloca (a excepción de los productos de la serie hermética que pueden extraerla directamente del exterior); el aire deberá ser reintegrado a través de una toma de aire externa al local mismo (Fig. -
Page 106: Descarga De Humos
Instalación “Hermética” En este caso es posible como alternativa: canalizar el aire comburente aprovechando un tubo de descarga coaxial para la expulsión de los humos y la extracción del aire; por lo tanto, no es necesario hacer una toma de aire clásica en el local (Fig. - Page 107 5.5.1 Descarga de techo por medio de chimenea tradicional La chimenea para la descarga de los humos debe ser fabricada en cumplimiento de las normas UNI 10683 - EN 1856-1-2 - EN 1857 - EN 1443 - EN 13384-1-3 - EN 12391-1 tanto en relación a las dimensiones como para los materiales utilizados en la construcción.
-
Page 108: Nivelación De La Estufa
5.6 NIVELACIÓN DE LA ESTUFA La estufa debe ser nivelada, con la ayuda de un nivel de burbuja, actuando en los pies de regulación (donde sea previsto) (Fig. 5.10). A B = Nivel de burbuja 5.7 CONEXIÓN A LAS INSTALACIONES 5.7.1 Conexión eléctrica Es suficiente conectar la estufa a la instalación eléctrica a través del enchufe proporcionado. - Page 109 6.1.1 Mantenimiento del sistema de chimeneas Debe realizarse por lo menos una vez al año, o cada 40 quintales de pellet quemados. Si existen tramos horizontales, es necesario comprobar y quitar el dispositivo eventual de cenizas y hollín antes de que estos obturen el pasaje de los humos.
-
Page 110: Demolición Y Eliminación
PROGRAMA DE CONTROL Y MANTENIMIENTO CADA CADA ENCENDIDO SEMANA MESES AÑO Brasero Cajón/Compartimiento cenizas Vidrio Caldera Manguito puerta resistencia Colector de humo Guarniciones puerta y brasero* Conducto de evacuación humos* Ventiladores* A cargo de un centro de asistencia técnico habilitado. Por lo menos una vez al año, o cada 40 quintales de pellet quemados. -
Page 111: Configuración Inicial Del Display
CONFIGURACIÓN INICIAL DEL DISPLAY En función del tipo de instalación es necesario configurar la estufa según la configuración más correcta para su funcionamiento. Antes de proceder es necesario dar tensión a la estufa a través del interruptor de seguridad colocado en la parte de atrás: a) Actuando en las teclas de flecha ir al menú... -
Page 112: Panel De Mandos
PANEL DE MANDOS Antes de proceder con la lectura del manual, examinar la descripción de la estufa contenida en el manual anexo. 9.1 DESCRIPCIÓN El panel de mandos está compuesto por: A) una parte superior con los ledes de estado y los iconos retroiluminados que identifican cada función;... -
Page 113: Uso Del Panel De Mandos
9.1.2 Descripción de los menús ICONO FUNCIÓN DESCRIPCIÓN VALORES Potencia Configuración de la potencia de funcionamiento 1..5 Ventilación Configuración de la velocidad del ventilador del aire ambiente. OFF*,1..5; Auto; Hi *(donde esté previsto) Muestra la temperatura leída en el ambiente y permite configurar la temperatura Temperatura 6°C .. -
Page 114: Parámetros De Funcionamiento
9.3 PARÁMETROS DE FUNCIONAMIENTO El funcionamiento de la estufa está determinado por los parámetros de Potencia, Ventilación y Temperatura configurados por el usuario. 9.3.1 Modificación de la potencia La potencia define la cantidad de calor producida por la estufa y, por lo tanto, incide también directamente en los consumos. -
Page 115: Operaciones Preliminares
OPERACIONES PRELIMINARES 10.1 CARGA DE PELLET La primera operación para realizar antes de encender el producto es el llenado del depósito de combustible (pellet) utilizando preferiblemente una paleta adecuada. No vaciar la bolsa directamente en el depósito para evitar cargar aserrín u otros elementos extraños que podrían comprometer el buen funcionamiento de la estufa y para evitar la dispersión de pellet fuera del depósito. - Page 116 10.3.2 Configuración de la luminosidad del display Es posible configurar el grado de atenuación de la luminosidad del display cuando está en la modalidad standby. a) Actuando en las teclas de flecha ir al menú setup y presionar la tecla b) Seleccionar la contraseña “7”...
-
Page 117: Uso De La Estufa
USO DE LA ESTUFA 11.1 ENCENDIDO Antes de cada encendido, asegurarse que el brasero esté completamente vacío y correctamente posicionado en su sede. Para encender la estufa mantener presionada la tecla por algunos segundos. El icono con forma de llama comenzará a parpadear, durante la fase de encendido hasta permanecer fijo con la estufa encendida. -
Page 118: Funciones Disponibles
FUNCIONES DISPONIBLES 12.1 TIMER Es posible configurar, habilitar y asignar los distintos días de la semana, los programas personalizados para el encendido y/o el apagado automático de la estufa. Es posible configurar hasta seis programas personalizados. Para cada programa se puede configurar: hora de encendido, hora de apagado y temperatura deseada. A cada día de la semana es posible asignarle hasta tres programas. -
Page 119: Función Ahorro "Eco Mode
12.2 FUNCIÓN AHORRO “ECO MODE” Habilitando esta función se hace que la estufa, al alcanzar la temperatura deseada en el ambiente, se apague. Si esta función no está habilitada, la estufa modula el propio funcionamiento para mantener la temperatura deseada consumiendo lo menos posible. La función “Eco Mode”... -
Page 120: Activación Manual Del Sistema De Carga
12.7 ACTIVACIÓN MANUAL DEL SISTEMA DE CARGA En caso de primer uso (depósito de pellet inicialmente vacío), o para probar el funcionamiento del grupo de carga, es posible accionar manualmente la carga. En el panel de mandos de la estufa: a) Actuando en las teclas de flecha ir al menú... -
Page 121: Gestión De Las Alarmas
GESTIÓN DE LAS ALARMAS En el caso en que se compruebe una anomalía en el funcionamiento, se activa el siguiente procedimiento: 1) alarma acústica (bip); 2) se ilumina uno de los siguientes ledes de sistema: 3) si la anomalía está relacionada a un error, la estufa se apagará. La presión prolongada de la tecla “anular”... -
Page 122: Características Técnicas Del Producto (Pag. 122)
CARATTERISTICHE TECNICHE DEL PRODOTTO - TECHNICAL SPECIFICATIONS OF THE PRODUCT - TECHNISCHE MERKMALE DES PRODUKTES - CARACTÉRISTIQUES TECHNIQUES DU PRODUIT - CARACTERÍSTICAS TÉCNICAS DEL PRODUCTO LEGENDA TARGHETTA MATRICOLA – LEGEND PRODUCT LABEL BESCHREIBUNG TYPENSCHILD - LEGEND ETIQUETTE PRODUIT LEYENDA PLACA DE CARACTERISTÍCAS - FORKLARING TIL SKILT ITALIANO ENGLISH DEUTSCH... - Page 123 RIMOZIONE DALLA PALETTA - SCOOP REMOVAL - SCHAUFEL ENTFERNEN PELLET DEPLACEMENT - REMOCION PALETA DISTANZA MINIMA DAI MATERIALI COMBUSTIBILI - MINIMUM DISTANCE FROM COMBUSTIBLE MATERIALS MINDESTABSTAND ZU BRENNBAREN MATERIALIEN - DISTANCE MINIMALE À PARTIR DE MATÉRIAUX COMBUSTIBLES DISTANCIA MÍNIMA DE MATERIALES COMBUSTIBLES [cm] 004778330 - 16/07/2020...
- Page 124 DESCRIZIONE - DESCRIPTION - DESCRIPTION - BESCHREIBUNG - DESCRIPCION LEONARDO 8ET - 9ET ITALIANO ENGLISH FRANCAIS DEUTSCH ESPAÑOL A Coperchio serbatoio Pellet lid Couvercle du reservoir Behaelterabdeckung Tapa del tanque B Portina focolare Firebox door Porte foyer Feuertuer Puerta del hogar...
- Page 125 SCHEMA ELETTRICO - WIRING DIAGRAMS - ELEKTRISCHER SCHALTPLAN SCHÉMA DE CÂBLAGE - DIAGRAMA DE CABLEADO 1. IGNITER t° t° UI / comb 2. COMBUSTION FAN 3. ROOM FAN 4. PELLET AUGER F01/02 +VIO 5. STB SAFETY 6. UNDER PRESSURE SAFETY 7.
- Page 126 PULIZIA CLEANING REINIGUNG DEUTSCH ITALIANO ENGLISH The cleaning operations can be Die Reinigungsarbeiten können vom Le operazioni di pulizia possono performed by the user as long as all Benutzer durchgeführt werden, sofern essere effettuate dall’utente a patto the instructions given in this manual alle in diesem Handbuch angeführten che si siano lette e ben comprese have been read and understood.
- Page 127 Fig. 1 Fig. 2 Fig. 3 Fig. 4 Fig. 5 Fig. 6 004778330 - 16/07/2020...
- Page 128 NETTOYAGE LIMPIEZA FRANÇAIS ESPAÑOL Les opérations de nettoyage peuvent Las operaciones de limpieza pueden être effectuées par l’utilisateur à ser realizadas por el usuario siempre condition que toutes les instructions que haya leído y comprendido bien indiquées dans le présent manuel todas las instrucciones descritas en soient lues et bien comprises.
- Page 129 Fig. 1 Fig. 2 Fig. 3 Fig. 4 Fig. 5 Fig. 6 004778330 - 16/07/2020...
- Page 130 CARATTERISTICHE TECNICHE / TECHNICAL FEATURES / CARACTÉRISTIQUES TECHNIQUES / TECHNISCHE EIGENSCHAFTEN / CARACTERÍSTICAS TÉCNICAS / TEKNISKE SPECIFIKATIONER LEONARDO 8ET *Potenza termica globale (resa) 2149,61 kcal/h 6190,89 kcal/h *Total Thermal power (yield) / *Puissance thermique globale (rendement) - *Gesamtwärmeleistung (resa) / *Potencia...
- Page 131 CARATTERISTICHE TECNICHE / TECHNICAL FEATURES / CARACTÉRISTIQUES TECHNIQUES / TECHNISCHE EIGENSCHAFTEN / CARACTERÍSTICAS TÉCNICAS / TEKNISKE SPECIFIKATIONER LEONARDO 9ET *Potenza termica globale (resa) 2149,61 kcal/h 7050,73 kcal/h *Total Thermal power (yield) / *Puissance thermique globale (rendement) - *Gesamtwärmeleistung (resa) / *Potencia 2,5 kW 8,2 kW calorífica total (cedida) / *Global varmeeffekt (ydelse)
- Page 132 DIMENSIONI - DIMENSIONS - ABMESSUNGEN - DIMENSIONS - DIMENSIONES - LEONARDO 8ET - 9ET 245,5 Dimensioni (mm)- Dimensions (mm) - Abmessungen (mm) Dimensions (mm) - Dimensiones (mm) 004778330 - 16/07/2020...
- Page 136 Gruppo Palazzetti Via Roveredo, 103 - 33080 Porcia/PN - ITALY Internet: www.royal1915.it La Ditta Palazzetti non si assume alcuna responsabilità per eventuali errori del presente opuscolo e si ritiene libera di variare senza preavviso le caratteristiche dei propri prodotti. Palazzetti accepts no liability for any mistakes in this handbook and is free to modify the features of its products without prior notice.