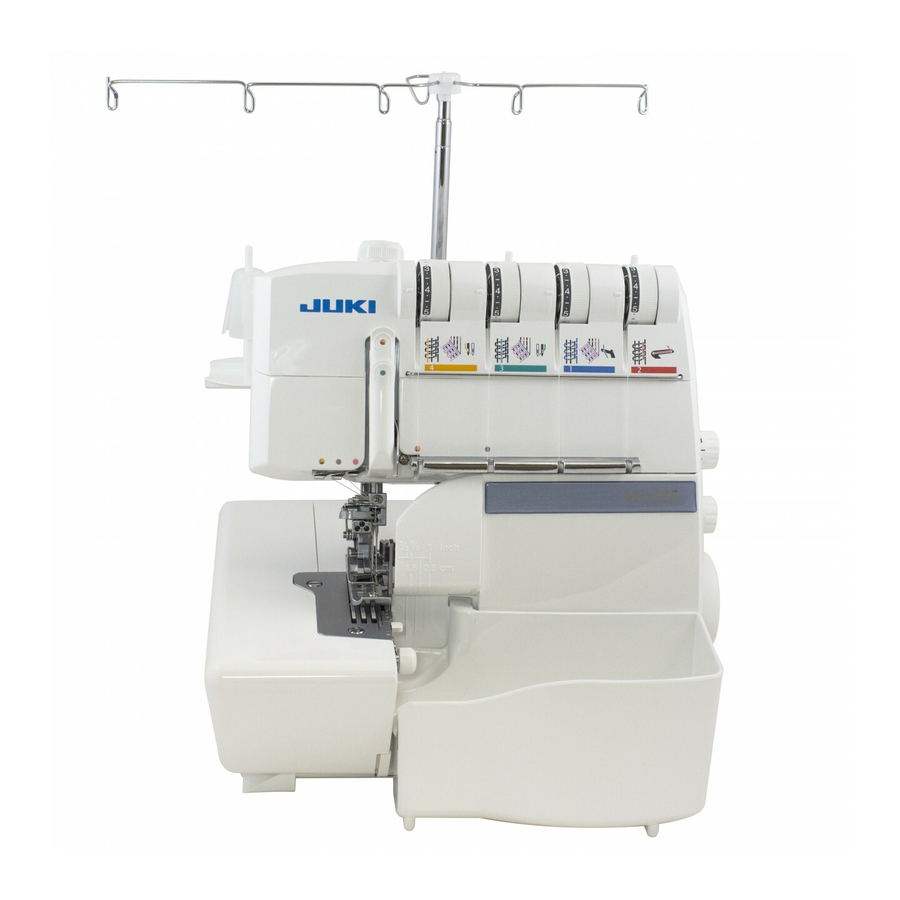
JUKI MO-735 Manuel D'instructions
Surjeteuse-raseuse 2 aiguilles, 2/3/4/5 fils+point enveloppant
Masquer les pouces
Voir aussi pour MO-735:
- Manuel d'instructions (72 pages) ,
- Manuel d'instructions (70 pages)
Table des Matières
Liens rapides
2-Needle, 2/3/4/5-Thread Overlock+Cover Stitch Sewing Machine
2-igłowa, 2/3/4/5-owerlokowa maszyna do szycia + krycie ściegów
Überwendlich-Nähmaschine Mit 2 Nadeln, 2/3/4/5 Fäden+Cover Stich
Surjeteuse-Raseuse 2 Aiguilles, 2/3/4/5 Fils+Point Enveloppant
MO-735
Instruction Manual
Instrukcja obsługi
Bedienungsanleitung
Manuel d'instructions
IMPORTANT:
Read all safety regulations carefully and under-
stand them before using your sewing machine.
Retain this instruction manual for future reference.
WAŻNE:
Uważnie, ze zrozumieniem przeczytaj wszystkie
zasady bezpieczeństwa przed użyciem maszyny.
Zachowaj tę instrukcję dla przyszłego użytku.
WICHTIG:
Alle sicherheitsvorschriften vor gebrauch der
nähmaschine sorgfältig durchlesen.
Bewahren Sie diese bedienungsanleitung für
weitere bezüge auf.
IMPORTANT:
Avant de mettre la machine en marche, lire
attentivement et assimiler les regles de securite
de ce manuel.
Conserver le manuel afin de pouvoir le consulter
ul terieurement.
®
Table des Matières

Manuels Connexes pour JUKI MO-735


Sommaire des Matières pour JUKI MO-735
- Page 1 ® 2-Needle, 2/3/4/5-Thread Overlock+Cover Stitch Sewing Machine 2-igłowa, 2/3/4/5-owerlokowa maszyna do szycia + krycie ściegów Überwendlich-Nähmaschine Mit 2 Nadeln, 2/3/4/5 Fäden+Cover Stich Surjeteuse-Raseuse 2 Aiguilles, 2/3/4/5 Fils+Point Enveloppant MO-735 Instruction Manual Instrukcja obsługi Bedienungsanleitung Manuel d’instructions IMPORTANT: Read all safety regulations carefully and under- stand them before using your sewing machine.
-
Page 2: Safety Regulations
1. The appliance should never be left unattended when plugged in. 2. Always unplug this appliance from the electric outlet immediately after using and before cleaning. 3. Always unplug before re-lamping. Replace bulb with same type rated max.15W (120V), max.10W (220-240V) for model MO-735. “WARNING _____To reduce the risk of burns, fire, electric shock, or injury to persons:”... - Page 3 1. Nigdy nie należy pozostawiać podłączonego urządzenia bez nadzoru. 2. Zawsze odłączaj urządzenie od źródła zasilania natychmiast po użyciu i przed czyszczeniem. 3. Zawsze odłączaj przed wymianą lamp. Zastąp żarówkę tym samym typem: maks. 15W (120V), maks. 10W(220-240V) dla modelu MO-735. “OSTRZEŻENIE! ________ W celu zmniejszenia ryzyka poparzeń, pożaru, porażenia prądem lub obrażeń.”...
-
Page 4: Sicherheitsvorschriften
1. Die Overlockmaschine nie unbeaufsichtigt stehen lassen, solange sie am Stromnetz angeschlossen ist. 2. Nach Gebrauch und vor einer Reinigung die Maschine immer vom Stromnetz trennen. 3. Vor einem Glühlampenwechsel immer Netzstecker herausziehen. MO-735: max. 15W (120V), max.10W (220 -240V), Glühlampen verwenden. “ACHTUNG _____Zum Schutz vor Verbrennungen, Brand, elektrischem Schlag und Verletzungen von Personen:”... -
Page 5: Consignes De Sécurité
1. Ne pas laisser la surjeteuse sans surveillance tant qu’elle est raccordée au réseau. 2. Après usage et avant un nettoyage, séparer toujours la machine du réseau. 3. Retirer la fiche du réseau pour changer une ampoule. Employer des ampoules pour modèle MO-735: max. 15W (120V), max. 10W (220 - 240V). -
Page 6: Table Des Matières
Contents / Inhoud Safety regulations ........1 Setting/Practical sewing Practical sewing-Cover stitch Contents ..........5 • Thread breakage ......23 • Securing the seam end ..... 55 Details of the machine ......7,8 • Unpicking seams ......23 • Unpicking seams ......55 •... -
Page 7: Inhalt
Inhalt / Table des matières Sicherheitsvorschriften ......3 • Obergreiferabdeckung ...... 21 3 Faden Cover Stitch einfädeln (Breit) .. 50 Inhalt ............6 • Rollsäumen ........21 3 Faden Cover Stitch einfädeln Details der Maschine ......7,8 • Nähfussdruck ........22 (Schmal) ........... -
Page 8: Details Of The Machine
Details of the machine / Details van de machine Details der Maschine / Détails de la machine Details der Maschine Details of the machine 1. Looper cover with built in knife guard 1. Greiferdeckel mit integrierter 2. Looper cover opening indent Messerabdeckung 3. -
Page 9: Accessories
Details of the machine /Elementy maszyny Details der Maschine / Détails de la machine A n s i c h t b e i g e ö f f n e t e m View with looper cover open Greiferdeckel 1. -
Page 10: Preparing The Machine
If the plug does not fit fully in the polarized main socket, reverse the plug. If it still does not fit, contact a qualified electrician to install the proper polarized main socket. Do not modify the plug in any way.(for USA, Canada only) *For MO-735 use only the foot control model YC-482(USA,CANADA), YC-483N(220-240V) Dołączanie pedału kontrolnego Podłącz pedał... -
Page 11: Thread Stand
Preparing the machine / Using the machine Przygotowanie i używanie maszyny Maschine bereitstellen / Inbetriebnahme Préparation de la machine / mise en service Thread stand Push the support rod firmly into the socket on the back of the machine. Raise the support rod (C) fully, turning slightly until the position catches engage. Position the thread guide (D) on the thread stand so that the arrow is to the front. -
Page 12: Thread, Cones, Spools
Preparing the machine / Using the machine Przygotowanie i używanie maszyny Maschine bereitstellen / Inbetriebnahme Préparation de la machine / mise en service Thread / cones / spools The anti-vibration cone should be used with the wider edge at the bottom on the spool holder pin when sewing with cones. -
Page 13: Using The Machine
Using the machine /Używanie maszyny Inbetriebnahme / Mise en service Power/light switch Haupt- und Lichtschalter The power/light switch is conveniently placed Der Haupt- und Lichtschalter ist übersichtlich on the handwheel side of the machine in front auf der Handradseite vor der of the socket. -
Page 14: Two Step Presser Foot Lifter With Integrated Front Foot Lift
Using the machine /Używanie maszyny Inbetriebnahme / Mise en service Two step presser foot lifter with Zweistufen Nähfusslifterhebel mit integriertem Nähfussspitzen - Anheber. integrated front foot lift Um den Nähfuss hochzustellen, den To raise the presser foot, lift the presser foot Nähfusslifterhebel nach oben bewegen, bis lever on the rear of the machine, until it engages er ansteht (A). -
Page 15: Looper Cover
Using the machine /Używanie maszyny Inbetriebnahme / Mise en service Looper cover To open, press to the right with your thumb in the indent provided and tilt the cover towards you. To close push it up and press lightly to the right. The cover engages automatically. -
Page 16: Inserting Needles / Needles / Threads
Using the machine Używanie maszyny Inbetriebnahme / Einfädeln Mise en service / enfilage Inserting the needles Needles can be inserted quickly and easily with the practical needle inserter (A). Switch the machine off ( Power switch to “O”) Disconnect machine from electricity supply. Turn handwheel towards you until needles are fully raised. -
Page 17: Igły I Nici
Needle and thread /Igła i nić Nadel und Faden / Aiguille et fil Needles Needles must be in perfect condition. Problems can occur if needles: A are bent. B are damaged or blunt. C have hooked points. Igły Igły muszą być w idealnym stanie. Mogą wystąpić problemy, jeśli igły: A. - Page 18 Needle and thread /Igły i nici Nadel und Faden / Aiguille et fil Thread/decorative threads Faden, Dekorfaden Sewing and special overlock threads are manufactured in a wide vari- Näh- und Overlockfäden sind in einer Vielfalt von Stärken und Qualitäten ety of types, weights and combination of fibres. It is worth investing in erhältlich.
-
Page 19: Stitch Length
Adjustments and settings /Dostosowania i ustawienia Einstellen und Bedienen / Réglage et utilisation Stitch length Stichlänge It can be adjusted while sewing. Die Stichlänge kann stufenlos und The stitch length is infinitely variable from während des Nähens eingestellt werden. 1-4mm. Most overlock work is done with Die Stichlänge ist stufenlos einstellbar im a basic setting of 2.5mm. -
Page 20: Differential Feed
Adjustments and settings /Dostosowania i ustawienia Einstellen und Bedienen / Réglage et utilisation Differential feed There are two feed dogs one front (C) and one rear (D). The two feed dogs move indepen- dently and the distance each feed dog travels during one complete movement can be ad- justed. -
Page 21: Gathering
Adjustments and settings /Dostosowania i ustawienia Funktionen und allgemeine Bedienungshinweise Fonctions et indications générales sur mode d’emploi Adjusting the differential feed Simply turn the dial in the direction desired for fully variable adjustment while sewing. Test sew. Effect Fabric Wave-free seams (G) Thick wool knits, hand knitted articles, very stretchy fabrics Wave-free seams (H) Cotton, silk, synthetic jersey, sweatshirt fabrics and fine knits... -
Page 22: Upper Looper Converter
Adjustments and settings /Dostosowania i ustawienia Einstellen und Bedienen / Réglage et utilisation Upper looper converter Obergreiferabdeckung Use the upper looper converter to sew stitches Die Obergreiferabdeckung ermöglicht das Nähen with one looper thread, such as 2-thread roll hem, von Stichen mit einem Greiferfaden, wie zum 2-thread flatlock and overlock. -
Page 23: Presser Foot Pressure
Settings, practical sewing /Ustawienia, szycie w praktyce Bedienen, Praktisches Nähen / Couture pratique Nähfussdruck: Presser foot pressure Der Nähfussdruck garantiert einen optimalen The presser foot pressure is factory adjusted Stofftransport. Der Druck wurde vom to a medium setting. Hersteller auf einen Mittelwert eingestellt. Should you wish to adjust it, simply turn the Einstellung Nähfussdruck: Den Knopf in die knob in the direction desired:... -
Page 24: Thread Breakage
Settings, practical sewing /Ustawienia szycia w praktyce Bedienen, Praktisches Nähen / Couture pratique Thread breakage during sewing Sew off immediately at an angle and remove the work. Re-thread. If the lower looper thread has broken, cut off both needle threads at the needles and remove surplus thread from below. -
Page 25: Preparation/Tips
Threding preparations / tips Przygotowanie do nawlekania/wskazówki Einfädeln vorbereiten / Tips Préparer l’enfilage / conseils • Switch the machine off (power switch”O") • Maschine ausschalten, Hauptschalter auf „O“ stellen. • Support rod with thread guide must be fully raised. •... -
Page 26: Stitch Chart
Stitch chart Stitch Stitch width Thread tension Basic settings 4-Thread overlock with 7-9 mm, Left needle (yellow) 3-5 Stitch length: 2.5 integrated safety seam right and left needles Right needle (green) 3-5 Cutting width: 3 Differential: N-2 (knits) Upper looper (blue) 3-5 0.7-N (wovens) Lower looper (red) 3-5 3-Thread super stretch... - Page 27 Stitch Stitch width Thread tension Basic settings 2-Thread chain stitch 7-9 mm, Right needle (brown) 3-5 Stitch length: 2.5 right needles Chain looper M Differential: N-2 (knits) 3-Thread overlock (left needle) 7-9 mm, Left needle (brown) 3-5 Stitch length: 2.5 + chain stitch right and left needles Right needle (green) 3-5...
-
Page 28: Tabela Ściegów
Wykaz ściegów Ścieg Szerokość ściegu Naprężenie nici Podstawowe ustawienia 4-niciowy owerlokowy ze 7-9 mm, Lewa igła (żółty) 3-5 Długość ściegu: 2,5 zintegrow. szwem bezpieczeństwa prawa i lewa igła Prawa igła (zielony) 3-5 Szerokość cięcia: 3 Górna sczepiarka (niebieski) 3-5 Zróżnicowanie: Dolna sczepiarka (czerwony) 3-5 N-2 (dzianiny) 0,7 (tkane) - Page 29 Steek Steekbreedte Draadspanning Basisinstellingen 2-niciowy łańcuszkowy 7-9 mm, Prawa igła (brązowy) 3-5 Długość ściegu: 2,5 prawa igła Sczepiarka łańcuchowa (M) Zróżnicowanie: N-2 (breisels) 3-niciowy owerlokowy (lewa igła) 7-9 mm, Lewa igła (brązowy) 3-5 Długość ściegu: 2,5 + łańcuszkowy prawa i lewa igła Prawa igła (zielony) 3-5 Szerokość...
-
Page 30: Stichübersicht
Stichübersicht Stich Stichbreite Fadenspannung Grundeinstellung 4-Faden Overlock mit 7-9 mm Linke Nadel (gelb) 3-5 Stichlänge: 2.5 integrierter Sicherheitsnaht recht und linke Nadel Rechte Nadel (grün) 3-5 Messerposition: 3 Differential: Obergreifer (blau) 3-5 N-2 (Maschenware) Untergreifer (rot) 3-5 0.7-N (Webstoff) 3-Faden Super-Stretch 7-9 mm Linke Nadel (gelb) 5-7 Stichlänge: 2.5... - Page 31 Stich Stichbreite Fadenspannung Grundeinstellung 2-Faden Kettenstich 7-9 mm Rechte Nadel (braun) 3-5 Stichlänge: 2.5 rechte Nadel Differential: Kettengreifer M N-2 (Maschenware) 3-Faden Overlock (Linke Nadel) 7-9 mm Linke Nadel (braun) 3-5 Stichlänge: 2.5 + Kettenstich recht und linke Nadel Rechte Nadel (grün) 3-5 Messerposition: 3 Differential: N-2 Obergreifer (blau) 3-5...
-
Page 32: Récapitulation Des Points
Récapitulation des points Point Largeur de point Tension de fil Réglage de base Surjet à 4 fils avec point de 7-9 mm Aiguille de gauche (jaune) 3-5 Longueur de point: 2.5 sécurité intégré Aiguille de droite et de Aiguille de droite (vert) 3-5 Position du couteau: 3 gauche Différentiel:... - Page 33 Point Largeur de point Tension de fil Réglage de base Point double chaînette à 2 fils 7-9 mm Aiguille de droite (brun) 3-5 Longueur de point: 2.5 Aiguille de droite Différentiel: Boucleur point chaînette M N-2 (tissus à mailles) Surjet à 3 fils (aiguille gauche) 7-9 mm Aiguille de gauche (brun) 3-5 Longueur de point: 2.5...
-
Page 34: Upper Looper Thread, Blue Markings
Threading 4/3 Thread OL /Nawlekanie 4/3-niciowego owerloka Einfädeln 4/3 Faden OL / Enfilage du point de surjet à 4/3 fils 1. Upper looper thread, blue markings Place the spool on the spool holder pin as illustrated. (1) Bring the thread up from the spool and lay it from the back to the front into the guide. -
Page 35: Lower Looper Thread, Red Markings
Threading 4/3 Thread OL /Nawlekanie 4/3- niciowego owerloka Einfädeln 4/3 Faden OL / Enfilage du point de surjet à 4/3 fils 2. Lower looper thread, red markings Place the spool on the spool holder pin as illustrated. (1) Bring the thread up from spool and lay it from the back to the front into the guide. -
Page 36: Right-Hand Needle, Green Markings
Threading 4/3 Thread OL /Nawlekanie 4/3-niciowego owerloka Einfädeln 4/3 Faden OL / Enfilage du point de surjet à 4/3 fils 3. Right-hand needle, green markings Place the spool on the spool holder pin as illustrated. (1) Bring the thread up from the spool and lay it from the back to the front into the guide. -
Page 37: Left-Hand Needle, Yellow Markings
Threading 4/3 Thread OL /Nawlekanie 4/3-niciowego owerloka Einfädeln 4/3 Faden OL / Enfilage du point de surjet à 4/3 fils 4. Left-hand needle, yellow markings Place the spool on the spool holder pin as illustrated. (1) Bring the thread up from the spool and lay it from the back to the front into the guide. -
Page 38: Threading Chain Looper
Threading, Chainstitch and OL /Nawlekanie, ścieg łańcuszkowy i owerlok Einfädeln, Kettenstich und OL / Enfilage, point de chaînette et surjet 1.Threading chainstitch looper (purple) Place the spool on the spool holder pin as illustrated. (1,2) Bring the thread up from the spool and lay it from the front to the back into the guide. -
Page 39: Enfiler L'aiguille Pour Le Point De Chaînette, Repères Brun (Tension Jaune)
Threading, Chainstitch and OL /Nawlekanie, ścieg łańcuszkowy i owerlok Einfädeln, Kettenstich und OL / Enfilage, point de chaînette et surjet 2. Chain-needle, brown markings (use yellow tension) Place the spool on the spool holder pin as illustrated. (1) Bring the thread up from the spool and lay it from the back to the front into the guide. -
Page 40: Threading Chainstitch And Ol
Threading Chainstitch and OL /Nawlekanie, ścieg łańcuszkowy i owerlok Kettenstich einfädeln und OL / Enfilage, point de chaînette et surjet Threading, Chainstitch Kettenstich einfädeln 1. Threading chain looper (purple): see page 37 1. Kettenstich Greifer einfädeln (violett), voir page 37 2. -
Page 41: Trial Sewing, Thread Tension
Trial sewing, thread tension / Próbne szycie, naprężenie nici Nähprobe, Fadenspannung / Essai de couture, tension de fil Sewing test After threading make a trial run. Always use a double layer of fabric to check the stitch formation and thread tension properly. •... - Page 42 Thread tension /Naprężenie nici Fadenspannung / Tension de fil Check your trial run Nähprobe prüfen Chainstitch and OL Kettenstich und OL 1. Upper looper thread (blue). 1. Oberer Greiferfaden (blau). 2. Lower looper thread (red). 2. Unterer Greiferfaden (rot). 3. Right/left-hand OL needle thread (green) 3.
-
Page 43: Adjusting The Thread Tension
Thread tension /Naprężenie nici Fadenspannung / Tension de fil Adjusting the thread tension Turn the tension dials by only quarter or half number, then test sew again and check the result. • The loops are formed on the underside. Tighten the upper looper thread tension, (blue) or loosen the lower looper thread tension, red (A). -
Page 44: Cover/Chain Stitch Functions
Cover/chain stitch functions /Funkcje ściegu krytego i łańcuszkowego Cover Stich Funktionen / Fonctions du point enveloppant Cover stitch The 5 mm wide cover stitch is formed with two or three needle threads and one looper thread. The needle threads appear as two or three parallel lines on the right side. -
Page 45: General Operating Instructions
Cover/chain stitch functions and general operating instructions Funkcje i ogólne instrukcje do pracy ze ściegiem krytym i łańcuszkowym. Cover Stich / Kettenstich Funktionen und allgemeine Bedienungshinweise Fonctions du point enveloppant/de chaînette et indications générales sur son utilisation Upper looper release Feststellhebel für den Obergreifer If the cover stitch and chainstitch without overlock Wenn der Cover-Stich, der Kettenstich ohne... -
Page 46: Knife Guard / Cover And Chain Stitch Extension Plate
Cover/chain stitch functions and general operating instructions Funkcje i ogólne instrukcje do pracy ze ściegiem krytym i łańcuszkowym. Cover Stich / Kettenstich Funktionen und allgemeine Bedienungshinweise Fonctions du point enveloppant/de chaînette et indications générales sur son utilisation Knife guard / cover and chain stitch extension plate When the machine is converted to cover/chain stitch, the knife guard in the looper cover is replaced by cover stitch extension plate. -
Page 47: Threading Cover Stitch Looper
Threading 4 thread cover stitch /Nawlekanie 4-niciowego ściegu krytego 4 Faden Cover Stich einfädeln / Préparation de l’enfilage du point enveloppant à 4 fils 1.Threading cover stitch looper (purple) Place the spool on the spool holder pin as illustrated. (1,2) Bring the thread up from the spool and lay it from the back to the front into the guide. (3,4) Thread the guides. -
Page 48: Cover Stitch R Needle
Threading 4 thread cover stitch /Nawlekanie 4-niciowego ściegu krytego 4 Faden Cover Stich einfädeln / Préparation de l’enfilage du point enveloppant à 4 fils 2. Cover stitch R needle (pink) markings Place the spool on the spool holder pin as illustrated. (1) Bring the thread up from the spool and lay it from the back to the front into the guide. -
Page 49: Cover Stitch C Needle
Threading 4 thread cover stitch /Nawlekanie 4-niciowego ściegu krytego 4 Faden Cover Stich einfädeln / Préparation de l’enfilage du point enveloppant à 4 fils 3. Cover stitch C needle (pink) markings Place the spool on the spool holder pin as illustrated. (1) Bring the thread up from the spool and lay it from the back to the front into the guide. -
Page 50: Cover Stitch L Needle
Threading 4 thread cover stitch / Inrijgen van de 4-draads coverstitch 4 Faden Cover Stich einfädeln / Préparation de l’enfilage du point enveloppant à 4 fils 4. Cover stitch L needle (pink) markings Place the spool on the spool holder pin as illustrated. (1) Bring the thread up from the spool and lay it from the back to the front into the guide. -
Page 51: Enfilage Pour Le Point Enveloppant À 3 Fils (Large)
Threading 3 thread cover stitch (wide) Nawlekanie 3-niciowego ściegu krytego (szerokiego) 3 Faden Cover Stich einfädeln (Breit) Enfilage pour le point enveloppant à 3 fils (large) Preparation 3 thread cover stitch (wide) Cover stitch needle R (pink) Cover stitch needle L (pink) Przygotowywanie 3-niciowego ściegu krytego (szerokiego) Igła R (prawa) do ściegu krytego (różowy) Igła L (lewa) do ściegu krytego (różowy) -
Page 52: Threading 3 Thread Cover Stitch (Wide) . 50 Threading 3 Thread Cover Stitch (Narrow)
Threading 3 thread cover stitch (narrow) Nawlekanie 3-niciowego ściegu krytego (wąskiego) 3 Faden Cover Stich Einfädeln (schmal) Enfilage pour le point enveloppant à 3 fils (étroit) Preparation 3 thread cover stitch (narrow) Cover stitch needle C (pink) Cover stitch needle L or R (pink) Przygotowywanie 3-niciowego ściegu krytego (wąskiego) Igła C (środkowa) do ściegu krytego (różowy). -
Page 53: Threading Chain Stitch
Threading chain stitch Nawlekanie ściegu łańcuszkowego 2 Faden Kettenstich einfädeln Enfilage du point de chaînette à 2 fils Preparation chain stitch Chain stitch needle R (brown) Przygotowywanie ściegu łańcuszkowego Igła R (prawa) do ściegu łańcuszkowego (brązowy). Vorbereitung 2 Faden Kettenstich Kettenstich R Nadel (braun) Préparation de l’enfilage du point de chaînette à... -
Page 54: Cover Stitch Sewing Test
Sewing test and tension adjustment /Szycie próbne i dostosowywanie naprężenia Nähprobe und Sticheinstellung / Test de couture et réglages Sewing Test Cover Stich Nähprobe und Sticheinstellung After threading make a sewing test on a double layer of fabric Nach dem Einfädeln eine Nähprobe auf doppeltem Stoff nähen, to check the stitch formation and the thread tension. -
Page 55: Tension Adjustments
Tension adjustments /Dostosowywanie naprężenia Fadenspannung anpassen / Adapter la tension Tension adjustments Cover stitch Dostosowywanie naprężenia The right needle thread forms loops on the w ściegu krytym. underside: Nić prawej igły formuje pętelki po Tighten the right needle (upper looper) ten- spodniej stronie: sion (pink, R) Zwiększ naprężenie nici prawej... -
Page 56: Securing The Seam End
Practical Sewing-Cover stitch /Szycie ściegiem krytym w praktyce Cover Stich praktisches Nähen / Couture pratique avec le point enveloppant Securing the seam end, cover stitch After removing your work turn it over to the wrong side. Secure the seam by pulling the loop (1) towards the left. If the looper thread is subsequently pulled to the upper side, the needle thread loops (2) are visible in the stitch formation and can also be pulled through to the wrong side and knotted. -
Page 57: Simple Hem
Practical Sewing Cover stitch /Szycie ściegiem krytym w praktyce Cover Stich praktisches Nähen / Couture pratique avec le point enveloppant Simple hem Einfacher Saum Stitch length: 3-4 Stichlänge: 3-4 Differential: N-2 (depending on fabric) Differential: N-2 (je nach Material) - Mark hem depth and fold or press. - Saumtiefe markieren und einbiegen oder - Place fabric under the foot and guide the vorbügeln. -
Page 58: Edge With Elastic
Practical Sewing Cover stitch /Szycie ściegiem krytym w praktyce Cover Stich praktisches Nähen / Couture pratique avec le point enveloppant Edges with elastic Saum mit eingenähtem Elast Stitch length: 3-4 Stichlänge: 3-4 Differential: 0.7-N Differential: 0.7-N - Sew on elastic with 4-thread overlock. - Elast mit 4-Faden Overlock einnähen. -
Page 59: Top Stitching Seams/Ribbing/Yokes
Practical Sewing Cover stitch /Szycie ściegiem krytym w praktyce Cover Stich praktisches Nähen / Couture pratique avec le point enveloppant Top stitching seams /ribbing/yokes Stitch length :3-4 Differential: 0.7-N - Fold or press seam to one side. - Edge stitch (or at distance desired) from the right. - Guide the edge of the fabric along the side sections of the foot. -
Page 60: Gathering
Practical Sewing-Chain stitch /Szycie ściegiem łańcuszkowym w praktyce Kettenstich Praktisches Nähen / Couture pratique avec le point de chaînette Gathering with chain stitch Single layer of fabric can be gathered with chain stitch and differential feed: Differential feed: 2 Stitch length: 4 Basic tension. -
Page 61: Changing The Upper Knife
Das Obermesser (bewegliches Messer) ist aus Hartmetall und muss nicht ersetzt werden. Ein Auswechseln ist nur erforderlich, wenn die Spitze der Klinge beschädigt wurde. Wenden Sie sich dazu bitte an Ihren JUKI-Händler. Untermesser auswechseln Maschine ausschalten, Hauptschalter auf „O“ stellen. Maschine durch... -
Page 62: Replacing The Bulb
Maintenance /Utrzymanie Wartung / Maintenance Replacing the bulb Main switch off “O”. Disconnect machine from electricity supply. Let the bulb cool down, then unscrew the bulb and replace it with a new one. The bulbs are max.15 Watt for 120V machines and max. 10 Watt for 220-240V machines. -
Page 63: Trouble Shooting Guide
Trouble shooting guide Problem Page The machine does not • Looper or cloth plate cover is open. • Close the looper or the cloth plate cover. sew: • The main switch is not on. • Switch machine on. (Main switch to “I”) •... -
Page 64: Przewodnik Po Problemach
Przewodnik po problemach problem Przyczyna Rozwiązanie Strona Maszyna nie szyje • Pokrywa sczepiarki lub płytki materiałowej jest otwarta. • Zamknij pokrywę sczepiarki lub płytki materiałowej • Wyłacznik jest ustawiony na "O" • ZWłącz maszynę (pozycja wyłącznika "I") • Maszyna nie jest podłączona Włóż... -
Page 65: Hilfe Bei Störungen
Hilfe bei Störungen Problem: ö Seite Die Maschine näht nicht: • Der Greiferdeckel oder der Stoffauflagedeckel ist • Greiferdeckel oder Stoffauflagedeckel geöffnet. schliessen. • Der Hauptschalter ist nicht eingeschaltet. • Maschine einschalten, Hauptschalter auf „l“. • Die Maschine ist nicht angeschlossen. •... -
Page 66: Comment Éliminer Soi-Même Les Pannes
Comment éliminer soi-même les pannes Défaut: è Page La machine ne coud pas: • Le couvercle du boucleur ou celui du plateau de • Refermer le couvercle du boucleur ou celui du travail est ouvert. plateau de travail. • Le commutateur principal n’est pas enclenché. •... -
Page 67: Technical Data
Technical data /Dane techniczne Technical data 3 needles, 1 looper: 5 mm Stitch choice Cover stitch 2 needles, 1 looper: 5 mm 2 needles, 1 looper: 2.5 mm Chain stitch 1 needle, 1 looper:2 thread chainstitch 2 needles, 3 loopers: chain stitch + 3 thread overlock Over lock 2 needles, 2 loopers: 4 thread overlock with integrated safety seam 1 needle, 2 loopers: 3 thread overlock, flatlock roll hem... -
Page 68: Technische Daten
Technische Daten / Spécifications techniques (voir additif) Technische Daten Stichmöglichkeiten: Cover Stich 3 Nadeln 1 Greifer: 5mm 2 Nadeln 1 Greifer: 5mm 2 Nadeln 1 Greifer: 2,5mm Kettenstich 1 Nadel 1 Greifer: 2 Faden Kettenstich 2 Nadeln 3 Greifer: 2 Faden Kettenstich + 3 Faden Overlock Overlock 2 Nadeln 2 Greifer: 4-Faden Overlock mit integr. -
Page 69: Optional Accessories
Optional Accessories /Dodatkowe akcesoria Sonderzubehör / Accessoires spéciaux · Blind stitch presser foot · Gathering presser foot • Stopka do ściegu krytego • Stopka zbierająca · Blindstichhfuß · Pied presseur à points · Kräuseldrückerfuß perdus · Pied presseur à froncer A9810 634 0A0A A9860 655 0A0B ·... - Page 70 ® JUKI CORPORATION 8-2-1, KOKURYO-CHO, CHOFU-SHI, TOKYO 182-8655, JAPAN PHONE : (81)3-3480-5034 FAX : (81)3-3480-5037 Copyright © 2003 JUKI CORPORATION. All rights reserved throughout the world. 2003.10 Printed in Japan (T) A915073500A...