Table des Matières
Publicité
Liens rapides
2-Needle, 2/3/4-Thread Overlock Sewing Machine
Maquina de coser Sobreorilladora de 2 Agujas, 2/3/4 Hilos
Surjeteuse-Raseuse 2 Aiguilles, 2/3/4 Fils
Macchina per cucire surfilatrice 2 aghi, 2/3/4 fili
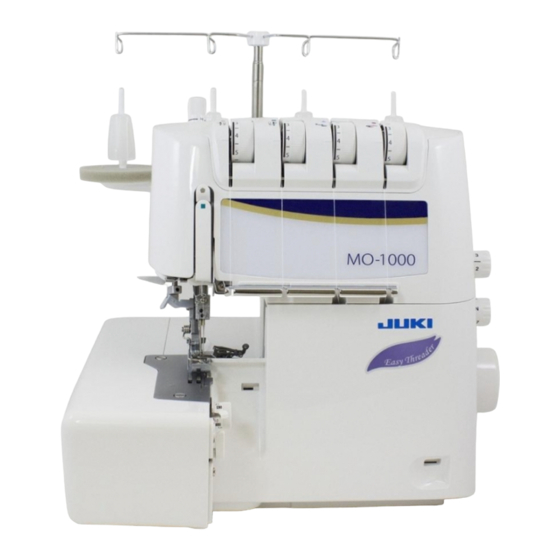
MO-1000
Instruction Manual
Manual de instrucciones
Manuel d'instructions
Manuale d'istruzioni
IMPORTANT:
Read all safety regulations carefully and
understand them before using your sew-
ing machine.
Retain this instruction manual for future
reference.
IMPORTANTE:
Lea cuidadosamente todas las recomen-
daciones con respecto a la seguridad y
comprendalas perfectamente antes de
usar su maquina.
Guarde este libro de instrucciones para
referencias futuras.
IMPORTANT:
Avant de mettre la machine en marche,
lire attentivement et assimiler les regles
de securite de ce manuel.
Conserver le manuel afin de pouvoir le
consulter ul terieurement.
IMPORTANTE:
Prima della messa in servizio, leggere e
seguire con attenzione tutte le regole per
la sicurezza.
Conservare e consultare questo manua-
le per ogni riferimento futuro.
Publicité
Table des Matières

Manuels Connexes pour JUKI MO-1000


Sommaire des Matières pour JUKI MO-1000
- Page 1 2-Needle, 2/3/4-Thread Overlock Sewing Machine Maquina de coser Sobreorilladora de 2 Agujas, 2/3/4 Hilos Surjeteuse-Raseuse 2 Aiguilles, 2/3/4 Fils Macchina per cucire surfilatrice 2 aghi, 2/3/4 fili MO-1000 Instruction Manual Manual de instrucciones Manuel d’instructions Manuale d’istruzioni IMPORTANT: Read all safety regulations carefully and understand them before using your sew- ing machine.
- Page 2 “IMPORTANT SAFETY INSTRUCTIONS” When using an electrical appliance, basic safety precautions should always be followed, including the following: Read all in- structions before using this sewing machine. “DANGER ____ To reduce the risk of electric shock:” 1. The appliance should never be left unattended when plugged in. 2.
- Page 3 Congratulations on your purchase of a JUKI sewing machine. Please be sure to read safety precautions in “To use the sewing machine safely” in the Instruction Manual before use to fully understand the functions and operating procedures of the sewing machine so as to use the sewing machine for a long time.
-
Page 4: Other Precautions
WARNING For the combination of the material and the thread and needle, in particular, refer to the explanation table in “Replacement of the needle”. If the needle or thread does not match the material used such as in the case that an extra heavy-weight material (e.g., denim) is sewn with a thin needle (#11 or higher), the needle can break resulting in an unexpected personal injury. -
Page 5: Reglas De Seguridad
“NORMAS DE SEGURIDAD IMPORTANTES” Cuando se usa un aparato eléctrico deben respetarse las siguientes normas de seguridad: “PELIGRO ____ para reducir el riesgo de electrochoque:” 1. No dejar nunca la máquina de punto cadeneta y cobertura sin vigilancia si ella está enchufada. 2. -
Page 6: Uso Seguro De La Máquina De Coser
Felicitaciones por haber adquirido una máquina de coser JUKI. Asegúrese de leer las precauciones de seguridad indicadas en el apartado “Uso seguro de la máquina de coser” del Manual de instrucciones antes del uso para comprender plenamente las funciones y procedimientos de operación de la máquina de coser de modo que pueda utilizarla durante mucho tiempo. -
Page 7: Otras Precauciones
ADVERTENCIA Para la combinación del material y el hilo de aguja, en particular, consulte la tabla de explicación en “Sustitución de la aguja”. Si la aguja o el hilo no coinciden con el material utilizado, como por ejemplo en el caso de coser un material muy pesado (p. ej., tela vaquera) con una aguja fina (#11 o más), la aguja podría romperse y causar lesiones personales inesperadas. - Page 8 “PRESCRIPTIONS DE SECURITE IMPORTANTES” L’emploi d’un appareil électrique exige d’observer les mesures de sécurité suivantes: “DANGER ____ Pour la protection contre tout choc électrique:” 1. Ne pas laisser la machine à points de chaînette et enveloppant sans surveillance tant qu’elle est raccordée au réseau. 2.
-
Page 9: Pour Utiliser La Machine À Coudre En Toute Sécurité
Consignes de sécurité Merci d’avoir fait l’achat d’une machine à coudre JUKI. Avant l’utilisation, veuillez lire les consignes de sécurité sous la section « Pour utiliser la machine à coudre en toute sécurité » du Manuel d’instructions, afin de comprendre parfaitement les fonctions et procédures d’utilisation de la ma- chine à... -
Page 10: Autres Précautions À Prendre
AVERTISSEMENT Pour combiner l’aiguille en fonction de la matière et du fil, reporter vous à la section «remplacement de l’aiguille» Si l’aiguille ou le fil n’est bien adapté au tissu, comme dans le cas d’un tissu très lourd (p. ex. du jean) cousu avec une aiguille mince (n°... - Page 11 “ISTRUZIONI IMPORTANTI RIGUARDO LA SICUREZZA” Usando un oggetto elettrico bisogna osservare le seguenti prescrizioni di sicurezza: “PERICOLO ____ Per ridurre il rischio di scosse elettriche:” 1. Non lasciare mai la macchina per punto di copertura e punto catenella incostudita, finché è allacciata alla corrente. 2.
- Page 12 Congraturazioni per l’acquisto di una macchina per cucire JUKI. Assicuratevi di aver letto le precauzioni per la sicurezza nella sezione “ Come usare la macchina per cucire in sicurezza “ nel manuale di istruzioni, prima di utilizzarla, per capire nella loro completezza le funzioni e le procedure d’uso della macchina per cucire, così...
-
Page 13: Altre Precauzioni
ATTENZIONE Per la combinazione di materiali con filo ed ago, nel particolare, fate riferimento alla tabella esplicativa nella sezione “Sostituzione dell’ago”. Se l’ago o il filo non sono adatti al tessuto adatto, come nel caso in cui un tessuto extra-pesante (come il denim) sia cucito con un ago sottile (#11 o più... -
Page 14: Table Des Matières
Contents / Indice Setting/ Practical sewing Safety regulations ··············································· 1-3 Contents ···························································· 13 • Preparation/Tips ··············································· 36 Details of the machine ······································· 15-17 Stitch chart ························································· 37 • Accessories ·····················································17 Threading 4/3 Thread OL • Thread stand ··················································· 17 • Lower looper ···················································· 41 Preparing the machine / Using the machine ················... - Page 15 Table des matières / Indice Couture pratique Consignes de sécurité ·········································· 7-9 Table des matières ·············································· 14 • Préparer l’enfilage / conseils ································ 36 Détails de la machine ········································ 15-17 Récapitulation des points ······································· 39 • Accessoires ···················································· 17 Enfilage du point de surjet à 4/3 fils •...
-
Page 16: Details Of The Machine
Details of the machine / Detalles de la máquina Détails de la machine / Dettagli della macchina Details of the machine 1. Looper cover with built in knife guard 2. Looper cover opening indent 3. Cloth plate 4. Top cover 5. -
Page 17: Dettagli Della Macchina
Details of the machine / Detalles de la máquina Détails de la machine / Dettagli della macchina Details of the machine Détails de la machine 1. Thread cutter 1. Coupe-fil 2. Automatic needle threader 2. L’enfileur automatique 3. Presser foot lifter 3. -
Page 18: Accessories
Details of the machine / Detalles de la máquina Détails de la machine / Dettagli della macchina Accessories Accessoires 1. Needle set 130/705H 1. Jeu d’aiguilles 130/705H (SCHMETZ) (SCHMETZ) 2. Screwdriver 2. Tournevis 3. Tweezers 3. Pincette 4. Brush/needle inserter 4. -
Page 19: Preparing The Machine / Using The Machine
Preparing the machine / Using the machine Preparación de la máquina / puesta en servicio Préparation de la machine / mise en service Preparazione della macchina / messa in servizio Attaching the foot control Plug foot control into the machine socket (A) and then into main socket (B). -
Page 20: Thread, Cones, Spools
Preparing the machine / Using the machine Preparación de la máquina / puesta en servicio Préparation de la machine / mise en service Preparazione della macchina / messa in servizio Thread / cones / spools Mise en place des bobines de fil The anti-vibration cone should be used Lors de l’emploi de cônes de fil normaux, with the wider edge at the bottom on... -
Page 21: Main Power/ Light Switch
Using the machine / Puesta en servicio Mise en service / Uso della macchina Main Power/light switch Commutateur principal et inter- The main power/light switch is conve- rupteur de lumière niently placed on the handwheel side of Le commutateur principal / interrupteur the machine in front of the socket. -
Page 22: Handwheel
Using the machine / Puesta en servicio Mise en service / Uso della macchina Handwheel The handwheel turns forward, i.e. in the same direction as on a household sewing machine. Volante El volante se gira en sentido contrario de las agujas del reloj, igual como en una máquina de coser. -
Page 23: Changing The Presser Foot
Using the machine / Puesta en servicio Mise en service / Uso della macchina Changing the presser foot • Switch the machine off (power switch”0”) and deactivate the upper knife. • Raise the presser foot. • Turn handwheel towards you until needles are fully raised. Match the match- ing up marks on handwheel and side cover. -
Page 24: Upper Knife Is Deactivated
Using the machine / Puesta en servicio Mise en service / Uso della macchina To carry out sewing without cutting the material (the upper knife is deactivated) Turn off the power switch before deactivating the upper knife. 1. Lower the upper knife changeover knob in the direction of the arrow. 2. -
Page 25: How To Use The Presser Foot
Using the machine / Puesta en servicio Mise en service / Uso della macchina How to use the presser foot Use the marker on the presser foot as a guide when placing the material under the presser foot. (F) Left needle position (G) Right needle position (H) Knife position (when the lower knife adjusting knob is set at scale mark “1.5”) The knife position represents the position at which the material is cut. -
Page 26: Inserting The Needles
Using the machine Puesta en servicio / enhebrado Mise en service / enfilage Uso della macchina / infilatura Inserting the needles Needles can be inserted quickly and easily with the practical needle inserter (A). Switch the machine off (Power switch to “0”) Disconnect machine from electricity supply. -
Page 27: Aiguille Et Fil
Needle and thread / Aguja e hilo Aiguille et fil / Ago e filo Needles Aiguille Needles must be in perfect condition. Les aiguilles doivent être en bon état. Problems can occur if needles: Des difficultés apparaîtront dans les A are bent. cas suivants: A Aiguille tordue. -
Page 28: Fils, Fils Décoratifs
Needle and thread / Aguja e hilo Aiguille et fil / Ago e filo Thread/decorative threads Sewing and special overlock threads are manufactured in a wide variety of types, weights and combination of fibres. It is worth investing in good quality threads for perfect sewing results. Decorative threads specially made for overlockers (available on cones) are also becoming widely available. - Page 29 Needle and thread / Aguja e hilo Aiguille et fil / Ago e filo Thread, needle, application table Thread Needles Where Application Needles and looper All purpose overlock thread 120/2 (polyester) 70-90 For all overlock. threads Polyester-continuous filaments Loopers only Neatening edges Woolly nylon Loopers only...
-
Page 30: Stitch Length
Adjustments and settings / Regulación y manejo Réglage et utilisation / Regolazione ed uso Stitch length It can be adjusted while sewing. The stitch length is infinitely variable from 1-4mm. Most overlock work is done with a basic setting of 2.5mm. For roll hemming or narrow overlocking, it is best to set the dial at “1 to 1.5”. -
Page 31: Cutting Width
Adjustments and settings / Regulación y manejo Réglage et utilisation / Regolazione ed uso Cutting width Position du couteau 注意 Switch the machine off (Power Couper le circuit de la machine en switch to “0”) mettant le commutateur principal sur Disconnect machine from electricity „O“. -
Page 32: Entraînement Différentiel
Adjustments and settings / Regulación y manejo Réglage et utilisation / Regolazione ed uso Differential feed There are two feed dogs one front (C) and one rear (D). The two feed dogs move in- dependently and the distance each feed dog travels during one complete movement can be adjusted. -
Page 33: Adjusting The Differential Feed
Adjustments and settings / Funciones e instrucciones generales Fonctions et indications générales sur mode d’emploi Funzioni ed indicazioni generali per l’uso Adjusting the differential feed Simply turn the dial in the direction desired for fully variable adjustment while sewing. Test sew. Effect Fabric Wave-free seams (G) Thick wool knits, hand knitted articles, very stretchy fabrics... -
Page 34: Adjustment
Adjustments and settings / Funciones e instrucciones generales Fonctions et indications générales sur mode d’emploi Funzioni ed indicazioni generali per l’uso Gathering Fronçage Using the differential feed, a single layer of L’entraînement différentiel permet de fron- fabric can be gathered before sewing it to cer une fine couche de tissu, par exemple the garment. -
Page 35: Roll Hemming
Adjustments and settings / Regulación y manejo Réglage et utilisation / Regolazione ed uso Roll hemming Ourlets roulés • Turn the handwheel towards you • Tourner le volant et amener les until the needles are fully raised. aiguilles à leur position la plus éle- •... -
Page 36: Presser Foot Pressure
Adjustments and settings / Regulación y manejo Réglage et utilisation / Regolazione ed uso Presser foot pressure Pression du pied-de-biche: The presser foot pressure is factory La pression du pied-de-biche garantit adjusted to a medium setting. un entraînement optimal du tissu. Align the marker line on the presser Elle est réglée en usine sur une va- foot pressure regulating knob with the... -
Page 37: Preparation/Tips
Threading preparations / Tips Preparación del enhebrado / consejos Préparer l’enfilage / conseils Preparazione infilatura / consigli 1. Extend the retractable support rod fitted with open 1. Déployer complètement la tige de support escamotable thread guide as far as it goes. équipé... -
Page 38: Stitch Chart
Stitch chart * The scale marks of the tension regulating dial listed below are just a guide. The correct adjustment differs according to the type of thread and material to be used. Stitch Stitch width Thread tension Basic settings 4-Thread overlock with Left needle (beige) 3-5 Stitch length: 2.5 integrated safety seam... -
Page 39: Tabla De Puntos
Tabla de puntos * Las marcas de la escala del dial regulador de tensión enumeradas a continuación son sólo una guía. El ajuste co- rrecto difiere según el tipo de hilo y el material a ser utilizado. Punto Ancho del punto Tensión del hilo Regulación de base Overlock de 4 hilos... -
Page 40: Récapitulation Des Points
Récapitulation des points * Les graduations du bouton de régulation de tension énumérés ci-dessous sont seulement une indication. Le réglage correct peut varier selon le type de fil et la matière utilisée. Point Largeur de point Tension de fil Réglage de base Surjet à... -
Page 41: Regolazioni Base
Tabella punti * La tabella dei simboli della regolazione della tensione, riportata in seguito è indicativa. Le regolazioni ottimali differi- scono in base al tipo di filo e di tessuto usati. Punto Ampiezza punti Tensione filo Regolazioni base Overlok a 4 fili con cu- ago sinistra (beige) 3-5 Lunghezza punto: 2,5 5-9 mm... -
Page 42: Threading 4/3 Thread Ol
Threading 4/3 Thread OL / Enhebrado de overlock de 4/3 hilos Enfilage du point de surjet à 4/3 fils / Infilatura punto overlock a 4 /3 fili Lower looper thread, red markings Place the spool on the spool holder pin as illustrated. (1) Raise the threading changeover lever in the direction of the arrow. -
Page 43: Upper Looper
Threading 4/3 Thread OL / Enhebrado de overlock de 4/3 hilos Enfilage du point de surjet à 4/3 fils / Infilatura punto overlock a 4 /3 fili Upper looper thread, purple markings Place the spool on the spool holder pin as illustrated. (1) Raise the threading changeover lever in the direction of the arrow. -
Page 44: Right-Hand Needle, Green Markings
Threading 4/3 Thread OL / Enhebrado de overlock de 4/3 hilos Enfilage du point de surjet à 4/3 fils / Infilatura punto overlock a 4 /3 fili Right-hand needle, green markings • Switch the machine off (power switch”0”) Place the spool on the spool holder pin as illustrated. (1) Thread the thread guide which is located just above the spool from back to front. -
Page 45: Aiguille De Gauche, Repères Beige
Threading 4/3 Thread OL / Enhebrado de overlock de 4/3 hilos Enfilage du point de surjet à 4/3 fils / Infilatura punto overlock a 4 /3 fili Left-hand needle, beige markings • Switch the machine off (power switch”0”) Place the spool on the spool holder pin as illustrated. (1) Thread the thread guide which is located just above the spool from back to front. -
Page 46: Come Usare L'infila Crochet
Threading 4/3 Thread OL / Enhebrado de overlock de 4/3 hilos Enfilage du point de surjet à 4/3 fils / Infilatura punto overlock a 4 /3 fili How to use the looper threader To thread woolly thread or any thread that cannot pass smoothly through the threading holes, it is recommended either to use the “looper threader”... -
Page 47: Trial Sewing
Trial sewing / Costura de prueba Essai de couture / Prova di cucitura Sewing test Use two plies of material to check that the quality of the finished seam and thread tensions are correct. 1. Close the looper cover. Turn the power on. 2. -
Page 48: Thread Tension
Thread tension / Tensión del hilo Tension de fil / Tensione del filo Check your trial run Vérification de l’essai de couture 4/3 Thread OL Surjet à 4/3 fils 1. Upper looper thread (purple). 1. Fil de boucleur supérieur (violet). 2. -
Page 49: Adjusting The Thread Tension
注意 注意 Thread tension / Tensión del hilo Tension de fil / Tensione del filo 注意 Adjusting the thread tension Turn the tension dials by quater or half number, then test sew again and check the result. 注意 • The loops are formed on the underside. Tighten the upper looper thread tension, (purple) or loosen the lower looper thread tension, red (A). -
Page 50: Practical Sewing-Overlock
Practical Sewing - Overlock / Costura práctica: overlock Couture practique avec surjet / Cucitura pratica: overlock Sewing in tape Pose de ruban T h e s t a n d a r d p r e s s e r f o o t i s Le pied standard pour le point surjet equipped with a tape guide. -
Page 51: Carrying Out Hemming And Narrow Overlocking
Practical Sewing - Overlock / Costura práctica: overlock Couture practique avec surjet / Cucitura pratica: overlock Carrying out hemming and narrow overlocking The sewing machine incorporates the hemming device to enable roll hemming and narrow overlocking. The sewing machine is able to overlock the material edges such as bottoms and sleeve cuffs beautifully while automatically folding them inwardly. -
Page 52: Wrapped Overlocking With Three Threads
Practical Sewing - Overlock / Costura práctica: overlock Couture practique avec surjet / Cucitura pratica: overlock Wrapped overlocking with three threads Surjet enveloppé à 3 fils, Pour effectuer un surjet avec l’aiguille For wrapped overlocking with the right needle (3 to 7 mm in width) droite (3 à... -
Page 53: Cover Stitch With Three Threads (Flatlock)
Practical Sewing - Overlock / Costura práctica: overlock Couture practique avec surjet / Cucitura pratica: overlock Cover stitch with three threads (flatlock) 1. Deactivate the upper knife. 2. Use a decorative thread as the upper looper thread. (Filament thread is best-suited as the needle thread and the lower looper thread. -
Page 54: Thread Breakage During Sewing
Practical Sewing - Overlock / Costura práctica: overlock Couture practique avec surjet / Cucitura pratica: overlock Thread breakage during sewing Sew off immediately at an angle and remove the work. Re-thread. If the upper or lower looper thread breaks during sewing, re-thread- ing is necessary. -
Page 55: Securing Thread Ends At The Beginning And End Of Sewing
Practical Sewing - Overlock / Costura práctica: overlock Couture practique avec surjet / Cucitura pratica: overlock Securing thread ends at the beginning and end of sewing Overlock stitches can unravel if the threads are not secured at the beginning and end of sewing. - Page 56 Practical Sewing - Overlock / Costura práctica: overlock Couture practique avec surjet / Cucitura pratica: overlock 2) Securing thread ends at the end of sewing 1. Stop the needle at the end of material. 2. Lift the needle. 3. Raise the presser foot. 4.
- Page 57 Practical Sewing - Overlock / Costura práctica: overlock Couture practique avec surjet / Cucitura pratica: overlock In the case of securing thread ends with a wool needle: (A) Leave a 2 to 3 cm long chain-off thread at the beginning and end of sewing. Put the chain-off threads in the finished seam by means of a wool needle.
-
Page 58: Cleaning And Lubricating
Maintenance / Mantenimiento Maintenance / Manutenzione Cleaning and lubricating Turn off the power switch and disconnect the power plug from the wall outlet before starting cleaning or lubricating the machine. As you use the sewing machine, lint is likely to accumulate in the sewing machine. -
Page 59: Replacing The Knife
Maintenance / Mantenimiento Maintenance / Manutenzione To carry out cleaning with the cloth plate opened Be sure to turn off the power switch before opening the cloth plate. • How to open the cloth plate Push this side of the cloth plate to the left to open it. •... -
Page 60: Trouble Shooting Guide
Trouble shooting guide Problem Cause Solution Page The machine does • Looper or cloth plate cover is open. • Close the looper or the cloth plate cover. not sew: • The main switch is not on. • Switch machine on. (Main switch to “I”) •... -
Page 61: Ayuda En Caso De Averías
Ayuda en caso de averías Problema: Causa: Solución: Página La máquina no • La tapa de la lanzadera o la tapa de la mesa • Cerrar la tapa de la lanzadera o la tapa de la cose: de trabajo está abierta. mesa de trabajo. -
Page 62: Comment Éliminer Soi-Même Les Pannes
Comment éliminer soi-même les pannes Défaut: Cause: Remède: Page La machine ne • Le couvercle du boucleur ou celui du plateau de • Refermer le couvercle du boucleur ou celui du coud pas: travail est ouvert. plateau de travail. • Le commutateur principal n’est pas enclenché. •... -
Page 63: Eliminazione Dei Difetti
Eliminazione dei difetti Problema: Motivo: Soluzione: Pag. La macchina • Il coperchio del crochet o il piano appoggia stoffa • Chiudere il coperchio del crochet o il piano appog- non cuce: è aperto. gia stoffa. • L’interruttore principale è su “O”. •... -
Page 64: Especificónes
Technical data / Datos téchnicos Technical data Stitch choice Over lock 2 needles, 2 loopers: 4 thread overlock with integrated safety seam 1 needle, 2 loopers: 3 thread overlock, flatlock roll hem 1 needle, 1 looper: 2 thread overlock, flatlock roll hem 2 needles, 1 looper: 3 thread super stretch Needle system SCHMETZ 130/705 H or JLx2... -
Page 65: Spécifications Techniques (Voir Additif) / Dati Tenici
Velocità di cucitura Max. 1500 sti/min Peso 9 kg Dimensioni 330 (L) x 280 (B) x 310 (H) Reostato Modello Nr. YC-483N (220-240V) La JUKI si riserva il diritto di apportare delle modifiche tecniche nell’interesse di mogliorarne le qualità. -
Page 66: Optional Accessories
Optional Accessories / Accesorios opcionales Accessoires spéciaux / Accessori opzionali · Blind stitch presser foot · Piping presser foot · Pie prensatelas de · Pie prensatelas de ribetes puntada ciega · Pied presseur à ganser · Pied presseur à points ·... - Page 68 2-11-1, TSURUMAKI, TAMA-SHI, TOKYO, 206-8551, JAPAN PHONE : (81)42-357-2341 FAX : (81)42-357-2379 Copyright C 2013 JUKI CORPORATION All rights reserved throughout the world. 000813 40141813...