Table des Matières
Publicité
Les langues disponibles
Les langues disponibles
Liens rapides
Xpelair Simply Silent
Xpelair Simply Silent
Installation and Maintenance Instructions
Installation and Maintenance Instructions
Installation and Maintenance Instructions
Istruzioni per installazione e manutenzione
Instrucciones de instalación y mantenimiento
DX100R (93005AW)
DX100S (93025AW)
DX100HPTR (93009AW)
DX100HPTS (93029AW)
Installatie - en Onderhoudsinstructies
Installatie - en Onderhoudsinstructies
Installatie - en Onderhoudsinstructies
Instructions d'installation et d'entretien
Instructions d'installation et d'entretien
Instructions d'installation et d'entretien
DX100TR (93006AW)
DX100TS (93026AW)
DX100
DX100
تعليمات التركيب والصيانة
DX100PR (93007AW)
DX100PS (93027AW)
DX100PIRR (93010AW)
DX100PIRS (93030AW)
DX100HTR (93008AW)
DX100HTS (93028AW)
™
™
Publicité
Table des Matières

Manuels Connexes pour Xpelair Simply Silent DX100 Serie


Sommaire des Matières pour Xpelair Simply Silent DX100 Serie
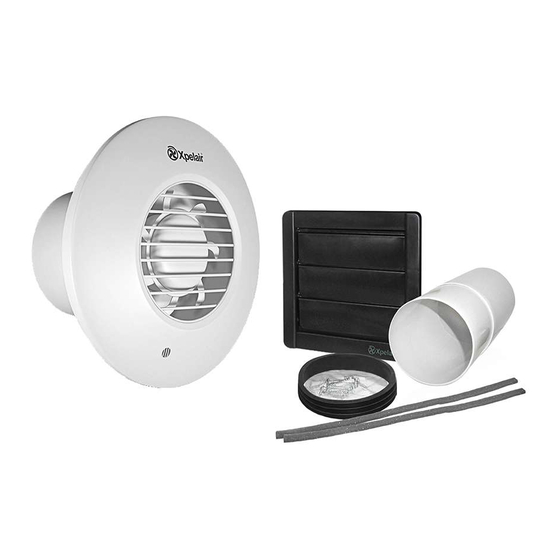
- Page 1 Xpelair Simply Silent Xpelair Simply Silent ™ ™ DX100 DX100 Installation and Maintenance Instructions Installation and Maintenance Instructions Installation and Maintenance Instructions Installatie - en Onderhoudsinstructies Installatie - en Onderhoudsinstructies Installatie - en Onderhoudsinstructies Instructions d’installation et d’entretien Instructions d’installation et d’entretien Instructions d’installation et d’entretien...
- Page 3 Installation and Maintenance Instructions Standard Timer Pull Cord Humidistat, Timer DX100R (93005AW) DX100TR (93006AW) DX100PR (93007AW) DX100HTR (93008AW) DX100S (93025AW) DX100TS (93026AW) DX100PS (93027AW) DX100HTS (93028AW) Humidistat, Pull Cord, Timer Integral Body Movement Sensor DX100HPTR (93009AW) DX100PIRR (93010AW) DX100HPTS (93029AW) DX100PIRS (93030AW) • Do read the entire instruction leaflet before commencing installation. • Do install each fan with a means for disconnection in all poles in the fixed wiring. • Do make sure the mains supply is switched off before attempting to make electrical connections or carry out any maintenance or cleaning.
- Page 4 All Xpelair Simply Silent™ DX100 AC • If installing in a room containing a fuel burning fans have the following features: device which has a non-balanced flue, it is the • Two speed extraction installer’s responsibility to ensure that there...
-
Page 5: Overall Dimensions (Mm)
Overall Dimensions (mm) Back plate fixing positions 90˚ 90˚ 6.0 (m) 6.0 (m) Horizontal detection area 60˚ 60˚ 6.0 (m) 6.0 (m) Vertical detection area Front Cover Removal DEPRESS COVER LATCH WITH TOOL & REMOVE COVER COMPLETE... - Page 6 IMPORTANT – PLEASE READ Adjusting the humidity setting Fan switches on Fan does not at lower level of switch on until condensation higher level of (anti-clockwise) condensation (clockwise) MORE SENTITIVE (RH = 50%) LESS SENTITIVE (RH = 95%) Factory settings: Timer 15 minutes, RH 75% Adjusting the run on timer setting Fan runs on for a Fan runs on for a shorter time when longer time when the external switch the external switch is turned off is turned off Minimum 30 seconds Maximum 30 minutes Wiring and setting up SEE DETAIL A DETAIL A...
- Page 7 Wiring and setting up SEE DETAIL D DETAIL D SCALE 2.000 SEE DETAIL E OVER-RUN TIMER HUMIDISTAT CUSTOMER CONNECTION DETAIL E TERMINAL SCALE 2.000 LOW SPEED SET JUMPER TO REQUIRED POSITION HIGH LEVEL LINE FOR SPEED SETTING SPEED DX100HTR / DX100HTS SEE DETAIL F OVER-RUN SEE DETAIL G TIMER DETAIL F SCALE 2.000 HUMIDISTAT CUSTOMER LOW...
- Page 8 • A 100mm diameter prepared hole for the / DX100PR / DX100PS / DX100PIRR / external grille, ideally positioned to allow DX100PIRS Connection to the supply can be condensation to run away from the first bend made by a flexible 2-core cable complete with in the duct towards the external grille. 3 pin plug for insertion into an approved 10A • Appropriate ancillaries for termination. These GPO or directly wired through an approved 10A items are available from Xpelair: wall mounted surface switch with at least 3mm 1. 3m flexible ducting Ref: 89663AA. If the clearance between contacts. duct passes through a cold space use insulated duct ref: 89847AA. For Australia Only –DX100TR / DX100TS 2. Soffit Grille Ref: 89742AW / DX100HTR / DX100HTS / DX100HPTR / DX100HPTS These models are permanently...
- Page 9 10. Insert the fan tube into the wall duct/ceiling wall duct. as before. 17. Drill screw holes in marked positions and fit 11. Fasten the back-plate to the wall/ceiling the remaining wall plugs. using appropriate fasteners supplied. See 18. Holding open the top and bottom vanes, figure A. refit the back draft shutter and fasten 12. If using screws, do not over tighten. it to the wall using the screws. Do not overtighten screws. 19. Make sure that the vanes open and shut fully. Mount the back draft shutter 13. Peel the backing from the foam strip Wire the electrical connections. supplied and attach it around the outside lip 20. Make sure the mains supply is isolated. on the backdraft shutter. Switch off the mains electrical supply and 14. Go outside. Holding open the top and bottom remove fuses. vanes insert the lip into the wall duct. 21. Feed the cable to the terminal block. Wire 15. Making sure that the back draft shutter is the fan as shown in Figure H using the level, mark the positions of the two fixing diagram appropriate to the fan model. holes in the top right hand and bottom left 22. Connect the cable from the isolating switch hand corners. to the electrical supply wiring. 16. Remove the back draft shutters from the DX100R/DX100S DX100PR/DX100PS...
-
Page 10: Fan Settings
Fan Settings drops the fan continues to operate for the adjustable time delay. • External operation - Use the external on/off SPEED SETTING switch. When the fan is switched off, the fan The fans are factory set to low speed, but have continues to operate for the adjustable time two speed settings for different applications. delay then goes into automatic mode. Select either high or low speed by connecting the jumper between the centre and high or low DX100HPTR / DX100HPTS Only. speed pin on the jumper (see Figure G). • Automatic mode - The fan automatically adjusts to slow changes in natural humidity DX100TR / DX100TS / DX100PIRR / levels without operating the fan. If the humidity DX100PIRS only. levels increase at a rate slower than 5% RH • To adjust the over-run period turn the control in 5 minutes, up to the pre-set humidity level, (T) clockwise to increase and anti-clockwise the fan will not be triggered by humidity. This to decrease – see Figure F. - Page 11 Cleaning Technical advice and service (recommended once a month) 1. Before cleaning, isolate the fan completely Customers outside UK - from the mains supply. see international below. 2. Remove the front cover by depressing the latch on the underside of the cover and United Kingdom pulling off the front cover from the bottom. Xpelair have a comprehensive range of services 3. To clean the front cover, either wipe it with including: a damp, lint free cloth or wash it with warm • Free technical advice help-desk from soapy water. Thoroughly dry the front cover Engineers on all aspects of ventilation. and refit. • Free design service, quotations and site 4. Do not immerse the fan in water or other surveys. liquids to clean any other parts of the fan. • Service and maintenance contracts to suit all 5. Do not use strong detergents, solvents or requirements. chemical cleaners 6. Allow fan to dry thoroughly before use.
- Page 12 Installatie- en onderhoudsinstructies Standaard Timer Trekkoord Hygrostaat, timer DX100R (93005AW) DX100TR (93006AW) DX100PR (93007AW) DX100HTR (93008AW) DX100S (93025AW) DX100TS (93026AW) DX100PS (93027AW) DX100HTS (93028AW) Hygrostaat, trekkoord, timer Integrale lichaamsbewegingssensor DX100HPTR (93009AW) DX100PIRR (93010AW) DX100HPTS (93029AW) DX100PIRS (93030AW) • Lees het hele instructieboekje voordat u met de installatie begint. •...
- Page 13 * Fabrieksinstellingen: Timer 15 minuten, RV 75% het apparaat mogen niet door kinderen worden gedaan. Waar moet de ventilator geplaatst worden. Alle Xpelair Simply Silent™ Contour • Plaats hem zo hoog mogelijk. AC ventilatoren hebben de volgende • Ten minste 110 mm vanaf de kenmerken: hoeken van het installatieoppervlak •Twee snelheden van afzuiging...
- Page 14 Totale afmetingen (mm) Bevestigingsposities achterplaat 90˚ 90˚ 6.0 (m) 6.0 (m) Horizontaal waarnemingsgebied 60˚ 60˚ 6.0 (m) 6.0 (m) Verticaal waarnemingsgebied Verwijderen van het frontpaneel DRUK OP DE HENDEL VAN HET PANEEL MET GEREEDSCHAP EN VERWIJDER HET DEKSEL EN SCHERM VOLLEDIG...
- Page 15 BELANGRIJK - DOORLEZEN A.U.B. AANpassen van de vochtigheidsinstelling De ventilator wordt De ventilator wordt ingeschakeld bij een niet ingeschakeld lager niveau van tot een hoger niveau condensatie (tegen van condensatie de klok in) (met de klok mee) GEVOELIGER MINDER GEVOELIG (RV = 50%) (RV = 95%) Fabrieksinstellingen:...
- Page 16 Bedrading en opzetten ZIE DETAIL D DETAIL D SCHAAL 2.000 ZIE DETAIL E OVERSCHRIJ- HYGROSTAAT DINGSTIMER KLANT AANSLUITKLEM DETAIL E SCHAAL 2.000 LAGE SNELHEID STEL DE JUMPER IN OP DE VEREISTE HOGE STELLIJN POSITIE VOOR HET SNELHEID INSTELLEN VAN DE SNELHEID DX100HTR / DX100HTS ZIE DETAIL F...
-
Page 17: Installatie
• Geschikte hulpmiddelen om af te sluiten. Voorbereiden van de ventilator voor installatie. Deze items zijn verkrijgbaar bij Xpelair: 1. Verwijder het frontpaneel door op de hendel 1. Flexibele buis van 3 m met ref: 89663AA. Als... - Page 18 Markeer de positie van de achterplaat Monteer de achterplaat. 2. Houd de achterplaat zo dat de stellijn die erop 7. Duw de geribbelde pakking op het gemarkeerd is, horizontaal georiënteerd is. buisgedeelte van de achterplaat (zie 3. Schuif de ventilatorbuis voorzichtig in het afbeelding D).
- Page 19 Bevestig de ontluchtingsafsluiter regelknop H. 13. Haal de plakstrip van de meegeleverde • De timer voor langer draaien is in de fabriek schuimstrip en bevestig deze rond de rand ingesteld op 15 minuten, maar kan worden van de ontluchtingsafsluiter. aangepast van 30 seconden tot 30 minuten 14.
- Page 20 Als er na deze tijd geen beweging wordt • Garantie: Neem contact op met uw lokale waargenomen, gaat de ventilator in de stand- distributeur of direct met Xpelair voor details. by modus. • Technisch advies en service: Neem contact op met uw lokale Xpelair distributeur.
- Page 21 Instructions d’installation et d’entretien Minuteur standard Câble à traction Humidistat, Minuteur DX100R (93005AW) DX100TR (93006AW) DX100PR (93007AW) DX100HTR (93008AW) DX100S (93025AW) DX100TS (93026AW) DX100PS (93027AW) DX100HTS (93028AW) Humidistat, Câble à traction, Minuteur Capteur de mouvement corporel intégré DX100HPTR (93009AW) DX100PIRR (93010AW) DX100HPTS (93029AW) DX100PIRS (93030AW) •...
- Page 22 * Réglages d'usine : Minuteur 15 minutes, HR 75 % effectuées par des enfants. Emplacement du ventilateur. • Placez-le le plus haut possible. Tous les ventilateurs Xpelair Simply • À une distance minimale de 110 mm Silent™ DX100 AC présentent les entre les extrémités de la surface de caractéristiques suivantes :...
-
Page 23: Dimensions Générales (Mm)
Dimensions générales (mm) Positions de fixation de la plaque arrière 90˚ 90˚ 6.0 (m) 6.0 (m) Zone de détection horizontale 60˚ 60˚ 6.0 (m) 6.0 (m) Zone de détection verticale Retrait du couvercle avant RABATTEZ LE LOQUET AVEC UN OUTIL ET ENLEVEZ L'ENSEMBLE DE LA GRILLE... -
Page 24: Câblage Et Installation
IMPORTANT – BIEN VOULOIR LIRE Réglage des paramètres d'humidité Le ventilateur se Le ventilateur ne se met en marche à met pas en marche un faible niveau de tant qu'un niveau de condensation (dans condensation plus le sens inverse élevé n'est pas atteint des aiguilles d'une (dans le sens des montre) - Page 25 Câblage et installation VOIR SCHÉMA D SCHÉMA D ÉCHELLE 2 000 VOIR FONCTIONNEMENT SCHÉMA E DU MINUTEUR HUMIDISTAT BORNE DE RACCORDEMENT SCHÉMA E DU CLIENT ÉCHELLE 2 000 VITESSE RÉDUITE RÉGLEZ LE COMMUTATEUR GRANDE LIGNE DE RÉFÉRENCE SUR LA POSITION VITESSE INDIQUÉE POUR LE RÉGLAGE DE...
- Page 26 Pièces humides : L'interrupteur • Des accessoires de finition appropriés. Ces Marche/Arrêt doit être placé de éléments sont disponibles chez Xpelair : telle manière qu'il ne puisse être 1. Gaine flexible de 3 m Réf : 89663AA. Si touché par les utilisateurs de la la gaine passe à...
- Page 27 Si le travail s'effectue au-dessus du Si l'installation se fait sur un plafond, niveau du sol, des mesures de des accessoires de finition sécurité doivent être prises. appropriés sont nécessaires. Suivez les instructions fournies. Marquez la position de la plaque arrière 2.
-
Page 28: Réglages Du Ventilateur
11. Fixez la plaque arrière au mur/plafond à l'aide aiguilles d'une montre afin de l'augmenter de fixations appropriées. Voir schéma A et dans le sens inverse des aiguilles d'une 12. En cas d’utilisation de vis, ne les serrez pas trop. montre pour la réduire –... -
Page 29: Nettoyage
• Garantie : Contactez directement votre quel autre mouvement détecté relance la distributeur local ou Xpelair pour toute autre séquence. Ce mécanisme assure la ventilation information. de la pièce seulement pendant et directement •... - Page 30 Istruzioni per installazione e manutenzione Standard Timer Tirante Umidistato, Timer DX100R (93005AW) DX100TR (93006AW) DX100PR (93007AW) DX100HTR (93008AW) DX100S (93025AW) DX100TS (93026AW) DX100PS (93027AW) DX100HTS (93028AW) Uimidistato, Tirante, Timer Sensore di movimento del corpo integrale DX100HPTR (93009AW) DX100PIRR (93010AW) DX100HPTS (93029AW) DX100PIRS (93030AW) •...
- Page 31 (per es. essere effettuate dai bambini. di fronte alla porta interna). • Vicino a fonte di vapore o odori. Tutti i ventilatori Xpelair Simply Silent™ DX100 AC sono dotati delle • Non in luoghi in cui vi sia la seguenti caratteristiche: possibilità...
- Page 32 Dimensioni complessive (mm) Posizioni di fissaggio della piastra posteriore 90˚ 90˚ 6.0 (m) 6.0 (m) Area di rilevamento orizzontale 60˚ 60˚ 6.0 (m) 6.0 (m) Area di rilevamento verticale Rimozione della copertura anteriore PREMERE LA CHIUSURA DELLA COPERTURA CON UNO STRUMENTO, RIMUOVERE DEL TUTTO LA COPERTURA...
- Page 33 IMPORTANTE – LEGGERE Regolare l'impostazione dell'umidità Il ventilatore si Il ventilatore non si accende al livello accende fino a un più basso di livello superiore di condensa (senso condensa (senso antiorario) orario) MAGGIORE MINORE SENSIBILITÀ SENSIBILITÀ (UR = 50%) (UR = 95%) Impostazioni di fabbrica: Timer 15 minuti, UR 75% Regolazione del funzionamento mediante impostazione...
- Page 34 Cablaggio e configurazione VEDERE DETTAGLIO D DETTAGLIO D SCALA 2.000 VEDERE DETTAGLIO E TIMER DI SUPERAMENTO UMIDISTATO MORSETTO DI CONNESSIONE DETTAGLIO E PERSONALIZZATO SCALA 2.000 BASSA VELOCITÀ IMPOSTARE IL JUMPER NELLA ALTA LINEA DI LIVELLO POSIZIONE VELOCITÀ NECESSARIA PER L'IMPOSTAZIONE DI DX100HTR / DX100HTS VELOCITÀ...
- Page 35 Camere umide: L'interruttore di • Accessori appropriati per il completamento. accensione/spegnimento deve Questi articoli sono disponibili presso Xpelair: essere posizionato in modo che 1. Condotto flessibile da 3 m Rif.: 89663AA. non possa essere toccato da Se il condotto passa attraverso un spazio persone che usano bagni o docce.
- Page 36 5. Rimuovere la piastra posteriore dal condotto. ai morsetti. 6. Trapanare i fori in queste posizioni, se 10. Inserire il tubo del ventilatore nel condotto a necessario, e montare spine e viti a parete, parete/soffitto, come prima. secondo necessità. 11. Fissare la piastra posteriore a parete/soffitto utilizzando fissaggi appropriati.
-
Page 37: Utilizzo Del Ventilatore
Utilizzo del 16. Rimuovere le serrante antiritorno dal condotto della parete. ventilatore 17. Eseguire i fori nelle posizioni segnate e installare i restanti tappi della parete. 18. Tenendo aperte le pale superiori e inferiori, Solo DX100R / DX100S reinstallare la serranda antiritorno e serrarla •... -
Page 38: Smaltimento
• Il sensore rileva il movimento nella stanza • Garanzia: Per dettagli, contattare il e attiva il ventilatore. Una volta rilevato il distributore locale o Xpelair direttamente. movimento, il ventilatore funzionerà per un • Consulenza e assistenza tecnica: Contattare periodo superiore predefinito e qualsiasi altro il distributore locale Xpelair. - Page 39 Instrucciones de instalación y mantenimiento Estándar Temporizador Interruptor de cuerda Higrostato, temporizador DX100R (93005AW) DX100TR (93006AW) DX100PR (93007AW) DX100HTR (93008AW) DX100S (93025AW) DX100TS (93026AW) DX100PS (93027AW) DX100HTS (93028AW) Higrostato, interruptor de cuerda, temporizador Sensor de movimiento del cuerpo integral DX100HPTR (93009AW) DX100PIRR (93010AW) DX100HPTS (93029AW) DX100PIRS (93030AW)
- Page 40 • Tan lejos como sea posible de la principal Todos los extractores Xpelair Simply fuente de reemplazo de aire y frente a la Silent™ DX100 AC tienen las misma para asegurar el flujo de aire por la siguientes características:...
- Page 41 Dimensiones generales (mm) Posiciones de fijación de placas posteriores 90˚ 90˚ 6.0 (m) 6.0 (m) Zona de detección horizontal 60˚ 60˚ 6.0 (m) 6.0 (m) Zona de detección vertical Extracción de la cubierta frontal PRESIONE EL PESTILLO DE LA CUBIERTA CON LA HERRAMIENTA Y RETIRE LA TAPA TOTALMENTE...
- Page 42 IMPORTANTE (POR FAVOR, LÉALO) Ajuste la configuración de humedad El extractor se El extractor no enciende a un se enciende nivel más bajo hasta alcanzar de condensación un nivel más alto (sentido contrario de de condensación las agujas del reloj) (sentido de las agujas del reloj) MÁS SENSIBLE...
- Page 43 Cableado y configuración VER DETALLE D DETALLE D ESCALA 2.000 VER DETALLE E TEMPORIZADOR DE TIEMPO DE HIGROSTATO REBASAMIENTO TERMINAL DE CONEXIÓN DETALLE E DEL CLIENTE ESCALA 2.000 VELOCIDAD BAJA AJUSTE EL PUENTE A LA POSICIÓN VELOCIDAD LÍNEA DE NIVEL NECESARIA PARA ALTA AJUSTAR LA...
- Page 44 • Elementos auxiliares apropiados para encendido/apagado (si es necesario). la terminación. Estos artículos están disponibles de Xpelair: Salas húmedas: El interruptor de 1. Conducto flexible de 3 m ref.: 89663AA. Si encendido/apagado debe el conducto pasa a través de un espacio...
- Page 45 3. Introduzca con cuidado el tubo del extractor 8. Empuje la pieza de más diámetro del en el conducto de la pared. tubo telescópico de pared hacia la junta 4. Marque en la pared las posiciones de los estriada. Primero, corte el cable al tamaño orificios de fijación en la placa posterior.
-
Page 46: Uso Del Extractor
exterior de la ventanilla. humedad relativa mediante el control H. 14. Vaya fuera. Manteniendo abiertas las aspas • El temporizador de rebasamiento está superior e inferior, introduzca el borde dentro preestablecido de fábrica en 15 minutos, pero del conducto de pared. se puede ajustar desde 30 segundos a 30 15. - Page 47 Internacional. en modo de reposo. • Garantía: Contacte con su distribuidor local o con Xpelair para conocer más detalles. Todos los extractores • Asesoramiento y servicio técnico: Contacte Vuelva a colocar la cubierta frontal/deflector con su distribuidor local de Xpelair.
- Page 48 تعليمات التركيب والصيانة جهاز ضبط الرطوبة، الميقاتي كابل السحب المبقاتي المواصفة DX100HTR (93008AW) DX100PR (93007AW) DX100TR (93006AW) DX100R (93005AW) DX100HTS (93028AW) DX100PS (93027AW) DX100TS (93026AW) DX100S (93025AW) مستشعر حركة الجسم المدمج جهاز ضبط الرطوبة، كابل السحب، الميقاتي DX100PIRR (93010AW) DX100HPTR (93009AW) DX100PIRS (93030AW) DX100HPTS (93029AW) .•...
- Page 49 .الزاوية األولى في الشفاط باتجاه الشبك الخارجي .السحب المدمج :Xpelair • فروع مناسبة لإلنهاء. هذه البنود متاحة لك من في الوضع األوتوماتيكي: المبقاتي المدمج يقوم أوتوماتيك ي ًا بشغيل المروحة 36698. إذا كان الموصل بمرAA :1. ناقل مرن مقاس 3 متر...
- Page 50 (األبعاد العامة )ملم مواضع تثبيت اللوج الخلفي 90˚ 90˚ 6.0 (m) 6.0 (m) منطقة الكشف األفقية 60˚ 60˚ 6.0 (m) 6.0 (m) منطقة الكشف الرأسية خلع الغطاء األمامي اضغط على لسان الغطاء باستخدام األداة المناسبة لخلع الغطاء والعارضة بالكامل...
- Page 51 هام - يرجى القراءة ضبط إعدادات الرطوبة مفاتيح المروحة مشغلة المروحة ال تعمل حتى على مستوى تكثف مستوى أعلى من التكثف منخفض (عكس اتجاه (في اتجاه عقارب )عقارب الساعة )الساعة أكثر حساسية أقل حساسية )50% = (رطوبة الهواء )95% = (رطوبة الهواء :إعدادات...
- Page 52 األسالك واإلعدادات D انظر تفاصيل D تفاصيل 2.000 الحجم E انظر تفاصيل ميقاتي فرط التشغيل جهاز ضبط الرطوبة طرف اتصال العميل E تفاصيل 2.000 الحجم سرعة منخفضة اضبط النطاط على الوضع سرعة عالية المرغوب للسرعة المضبوطة خط المستوى DX100HTR / DX100HTS F انظر...
- Page 53 تركيب مفتاح العزل عند التركيب في السقف فمن الضروري أن يتم استخدام .والكابالت فروع أطراف مناسبة. احرص على اتباع التعليمات •احرص على تركيب شبكة بالشكل الذي يتيح إمكانية الفصل .المقدمة في كل أقطاب األسالك المثبتة بما يتوافق مع تعليمات تركيب .ركب...
- Page 54 فقطDX100TR / DX100TS DX100HTR / DX100HTS / DX100HPTR / .)• شغل المروحة باستخدام مفتاح التشغيل/اإلطفاء (غير مورد .G وF فقط – انظر الشكلينDX100HPTS ملحوظة - يمكن أن تستغرق المروحة فترة تصل إلى 01 ثوان • وضع التشغيل على الرطوبة سابق الضبط تم ضبطه في المصنع لتعمل...
- Page 55 عالمي المروحة لن يتم تفعيلها بفعل الرطوبة. وهذا لغرض منع اإلخالل مباشرةXpelair • الضمان: اتصل بالموزع المحلي أو بشركة بعملية تفعيل المروحة. إذا ما ارتفعت مستويات الرطوبة عند معدل أسرع من %5 في خالل 5 دقائق، فسوف تعمل المروحة. عند...
- Page 56 मानक टाइमर खीं च ने वाली रस् स ी ह् य ू म िडिस् ट े ट , टाइमर DX100R (93005AW) DX100TR (93006AW) DX100PR (93007AW) DX100HTR (93008AW) DX100S (93025AW) DX100TS (93026AW) DX100PS (93027AW) DX100HTS (93028AW) ह् य ू म िडिस् ट े ट , खीं च ने वाली रस् स ी, टाइमर एकीकृ...
- Page 57 • य दि किसी रसोईघर मे ं लगाया जाए तो पं ख े • यदि किसी ऐसे कमरे मे ं लगा रहे हों जहां असं त ु ल ित सभी Xpelair Simply Silent™ DX100 AC पं ख ों मे ं निम् न ां क ित विशे ष ताएं है ं : • द...
- Page 58 90˚ 90˚ 6.0 (m) 6.0 (m) क् ष ै त िज सं स ू च न क् ष े त ् र 60˚ 60˚ 6.0 (m) 6.0 (m) ऊर् ध ् व ाधर सं स ू च न क् ष े त ् र औजार से...
- Page 59 सं घ नन के निम् न तर जब तक सं घ नन उच् च स् त र पर पं ख ा स् व िच स् त र पर नहीं पहु ं च ऑन हो जाता है (घड़ ी जाता, पं ख ा स् व िच ऑन के विपरीत दिशा मे ं ) नहीं होता है (घड़ ी की दिशा मे...
- Page 60 विवरण D दे ख े ं 2.000 विवरण E दे ख े ं ओवर-रन टाइमर ह् य ू म िडिस् ट े ट ग् र ाहक कने क ् श न टर् म िनल 2.000 कम गति गति से ट िं ग के लिए जं प र को वां छ ित स् थ िति पर से ट करे ं अधिक...
- Page 61 • तारों के टर् म िनल तै य ार करने के लिए उपयु क ् त सहायक सामग् र ी। ये वस् त ु ए ं Xpelair के पास उपलब् ध है ं : 1. 3 मी लचीली डक् ट िं ग सं द र् भ : 89663AA यदि डक् ट...
- Page 62 18. ऊपरी और निचले फलकों (वे न ) को खु ल ी स् थ िति मे ं पकड़ े रखते हु ए , बै क ड् र ाफ़ ् ट शटर को वापस फिट करे ं और उसे पे च ों का उपयोग करते हु ए दीवार से कस दे ं । पे...
- Page 63 DX100HTR / DX100HTS / DX100HPTR / का स् त र, 5 मिनट मे ं 5% से धीमी दर पर, पहले से से ट DX100HPTS - आर् द ् र ता स् त र तक, बढ़ता है , तो पं ख ा आर् द ् र ता द् व ारा • पहले से से ट आर् द ् र ता प् र चालन को फ़ ै क ् ट ् र ी से लगभग ट्...
- Page 64 स् थ ानीय प् र ाधिकरण से कहे ं । • गारं ट ी: विवरण के लिए अपने स् थ ानीय वितरक या Xpelair Direct से सं प र् क करे ं । • तकनीकी सलाह एवं से व ा: अपने स् थ ानीय Xpelair वितरक से सं प र् क करे ं । www.xpelair.co.uk/international...
- Page 68 Head Office, UK Sales Office and Spares Redring Xpelair Group Ltd, Newcombe House, Newcombe Way, Orton Southgate, Peterborough, PE2 6SE England Telephone: +44 (0) 844 372 7761 www.xpelair.co.uk www.xpelair.co.uk/international FM02118 ISO 9001: 2000 Part No: 26098AA (Revision A)