Télécharger Imprimer la page
Masquer les pouces Voir aussi pour CAMERA Serie:

Publicité

Les langues disponibles
  • FR

Les langues disponibles

Liens rapides

Quick
guide
H.265 IP
CAMERA SERIES
IT
EN
FR
ES
DE
|
|
|
|
www.urmet.com
IF YOU LOVE YOUR BUILDING

Publicité

loading

Sommaire des Matières pour Urmet CAMERA Serie

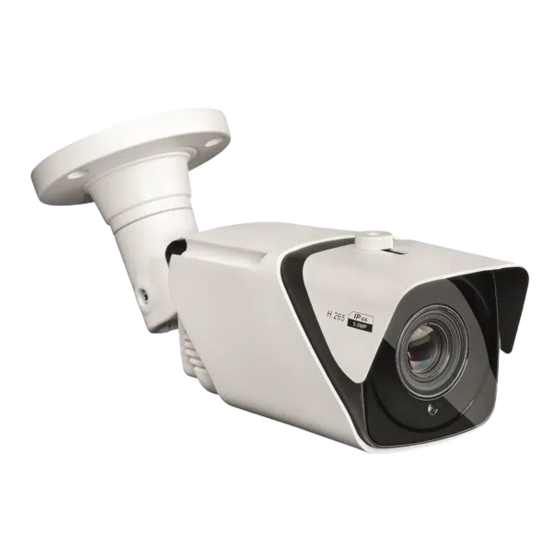
  • Page 1 Quick guide H.265 IP CAMERA SERIES www.urmet.com IF YOU LOVE YOUR BUILDING...
  • Page 2: Table Des Matières

    Quick guide H.265 IP CAMERA SERIES Indice INFORMAZIONI GENERALI Avvertenze INSTALLAZIONE Installazione Bullet Camera Installazione Vandal-Proof Dome Camera Installazione Mini Dome Camera CONFIGURAZIONI IP DELL’UNITÀ DI RIPRESA Connessione su rete IP con servizio DHCP Controllo PTZ SOFTWARE PER DISPOSITIVI MOBILI ADDENDUM DS1099-002B...
  • Page 3: Informazioni Generali

    *NOTA BENE Per maggiori approfondimenti, fare riferimento al manuale istruzioni presente sul sito Urmet. Per scaricare il Manuale dal Sito vedere il QR code sul foglio di Addendum. AVVERTENZE Alimentazione Prima di collegare l’...
  • Page 4 Registrazione immagini Questa apparecchiatura non è progettata come antifurto ma principalmente per trasmettere ed eventualmente per registrare immagini. Perciò, qualora l’utilizzatore subisca un furto, la società URMET S.p.A. non può essere considerata responsabile di alcuna perdita o danno conseguente. DS1099-002B...
  • Page 5 NON potrà essere ritenuto responsabile per un utilizzo di questo prodotto che non sia in conformità con le norme in vigore. Aggiornamento firmware Contattare il Customer Service di URMET S.p.A. al fine di verificare la disponibilità di eventuali aggiornamenti firmware. Configurazione di rete La telecamera è...
  • Page 6: Installazione

    Installazione INSTALLAZIONE BULLET CAMERA Fissaggio a soffitto Inserire tre tasselli nel soffitto e fissare l’ a pparecchiatura con tre viti di bloccaggio. Tassello Vite di bloccaggio Chiave a brugola Installazione completata Montaggio a parete Inserire tre tasselli nella parete e fissare l’ a pparecchiatura con tre viti di bloccaggio. Tassello Vite di bloccaggio...
  • Page 7 Installazione SD Card Slot SD card...
  • Page 8: Installazione Vandal-Proof Dome Camera

    INSTALLAZIONE VANDAL-PROOF DOME CAMERA Fissaggio a soffitto 1. Applicare l’ a desivo nella posizione corretta. 2. Rimuovere il componente anteriore, allentando le tre viti di bloccaggio con l’ a usilio di un cacciavite. 3. Fissare il piedestallo praticando fori di bloccaggio intorno all’ a desivo, inserirvi quattro tasselli e fissare il tutto mediante quattro viti di bloccaggio.
  • Page 9: Installazione Mini Dome Camera

    Installazione SD Card Slot SD card INSTALLAZIONE MINI DOME CAMERA Fissaggio a soffitto 1. Applicare l’ a desivo nella posizione corretta. 2. Rimuovere lo schermo della telecamera, ruotando il collare in senso anti-orario verso il basso. 3. Fissare la base praticando fori di bloccaggio intorno all’ a desivo, inserire tre tasselli e fissare il tutto mediante tre viti di bloccaggio.
  • Page 10 Tassello Vite di bloccaggio Installazione completata DS1099-002B...
  • Page 11: Configurazioni Ip Dell'unità Di Ripresa

    Configurazioni IP dell’unità di ripresa Dopo aver alimentato la telecamera è necessario configurarla sulla propria rete di casa o ufficio. In caso vi siano più telecamere da installare sulla stessa rete, si consiglia di installare e configurare una telecamera alla volta. CONNESSIONE SU RETE IP CON SERVIZIO DHCP Per l’installazione rapida della telecamera su rete con servizio di indirizzamento automatico (DHCP), sarà...
  • Page 12 Se l’indirizzo IP cercato e l’indirizzo IP del PC non sono nella stessa rete, l’utente può modificare l’indirizzo IP, la subnet mask e altri parametri della telecamera IP utilizzando il software “Device Config. Tool”. Selezionare inizialmente il dispositivo per modificare l’indirizzo IP e successivamente inserire il nuovo indirizzo IP, la subnet mask, il gateway e username/password.
  • Page 13 • Attendere lo scaricamento del Plug-in, dopodiché confermare l’installazione dell’ActiveX. • Selezionare “Install” ed attendere che l’installazione sia terminata.
  • Page 14 4. Al termine dell’installazione dell’Active X chiudere la pagina Web di Internet Explorer e lanciarla nuovamente inserendo l’indirizzo IP della telecamera IP, verrà visualizzata la schermata di accesso dove è possibile selezionare il nome utente (di default: admin), la password (di default: admin) e la Lingua. 5.
  • Page 15 6. Cliccare sui pulsanti in alto a sinistra (Main Stream, Sub Stream o Mobile Stream) per selezionare il flusso video.
  • Page 16: Controllo Ptz

    CONTROLLO PTZ (Controllo PTZ) selezionando l’icona compare la seguente finestra: Sui modelli di Telecamere Autofocus con un’ o ttica AF l’interfaccia PTZ sarà la seguente: DS1099-002B...
  • Page 17 È possibile selezionare 8 differenti angoli sul controllo circolare: • PTZ Speed: 0 – 10 indica velocità differenti PTZ. • ZOOM aumenta o diminuisce lo ZOOM. • FOCUS aumenta o diminuisce il FOCUS. • Restore inserisce nuovamente i valori di fabbrica. Sui modelli di Telecamere Auto Focus con un’...
  • Page 18 Opzione Valore Spiegazione Regola manualmente lo zoom (+ aumenta / - diminu- Zoom Step/-/+ isce) Step: definisce la velocità di esecuzione dello zoom Regola manualmente il fuoco (+ aumenta / - diminu- Focus Step/-/+ isce) Step: definisce la velocità di esecuzione del fuoco Questa funzione consente di personalizzare la modalità...
  • Page 19 Opzione Valore Spiegazione Consente di stabilire la regolazione dello Zoom ad ogni riaccensione della telecamera: SAVE SAVE POSI: mantiene la posizione di zoom impostato POWER POSI + prima dello spegnimento della telecamera. MODE OFF + OFF: non salva le impostazioni memorizzate prima dello WIDE spegnimento.
  • Page 20: Software Per Dispositivi Mobili

    Qualora non fosse provvista di indirizzamento automatico (DHCP) l’indirizzo IP statico di default sarà 192.168.1.168. URMET iUVS plus è un’ a pplicazione TVCC per iOS e Android, smartphone, pad e tablet, compatibile con tutti i dispositivi URMET sia di tipo IPCam (Codec H265), sia DVR/NVR/ HVR (tutti i codec).
  • Page 21 Funzionalità principali:  • Audio/ video Live Stream Multicanale • Playback remoto Multicanale • Double stream playback • Supporto Telecamere Fisheye, in Live e Playback • Notifiche allarmi • Personalizzazione configurazione singolo flusso video • Gestione formato segnale video 4:3 – 16:9, •...
  • Page 22 Quick guide H.265 IP CAMERA SERIES Index GENERAL INFORMATION Warnings INSTALLATION Installation of Bullet Cameras Installation of Vandal-Proof Dome Cameras Installation of Mini Dome Cameras IP CAMERA CONFIGURATIONS Connection to IP network with DHCP service PTZ control MOBILE SOFTWARE ADDENDUM DS1099-002B...
  • Page 23: General Information

    Keep this guide at hand so that you can refer to it when needed. *NOTE For more detailed information about the devices, refer to the complete user manual available on the Urmet website (see QR code printed on the Addendum sheet). WARNINGS Electricity Before connecting to electrical outlet, verify the electrical specifications of the device are suitable for the available power source.
  • Page 24 Video recording This device is not designed as a burglar system but mainly to transmit and record video images. URMET S.p.A. is not in any way responsible for loss or damages of the user consequent to theft. Before using the device, record a demo video to verify the correct functionality of this feature.
  • Page 25 (DHCP), the device will automatically switch to factory IP 192.168.1.168. Use Urmet “Device Config. Tool” software provided with IP Camera CD in order to modify the IP address and other network settings to prevent any conflict with other devices on the network.
  • Page 26: Installation

    Installation INSTALLATION OF BULLET CAMERAS Ceiling Mounting Insert three expansion bolts in place into the ceiling and fix the equipment with three locking screws. Expansion Bolt Locking Screw Allen wrench Completion of Installation Wall Mounting Insert three expansion bolts in place into the wall and fix the equipment with three locking screws.
  • Page 27 SD Card Installation SD card slot...
  • Page 28: Installation Of Vandal-Proof Dome Cameras

    INSTALLATION OF VANDAL-PROOF DOME CAMERAS Ceiling Mounting 1. Paste the sticker in place at the proper position as selected. 2. Remove the front component by loosening the three locking screws with a screwdriver. 3. Fix the pedestal by drilling locking holes around the sticker and inserting four expansion bolts into the holes and fastening it with four locking screws.
  • Page 29: Installation Of Mini Dome Cameras

    SD Card Installation SD card slot INSTALLATION OF MINI DOME CAMERAS Ceiling Mounting 1. Paste the sticker in place at the proper position as selected. 2. Remove the collar off the camera by rotating it down. 3. Fix the pedestal by drilling locking holes around the sticker and inserting three expansion bolts into the holes and fastening it with three locking screws.
  • Page 30 Expansion Bolt Locking Screw Completion of Installation DS1099-002B...
  • Page 31: Ip Camera Configurations

    IP Camera Configurations The camera must be configured for the home or office network after it has been powered. It is advisable to install and configure one camera at a time if you are installing multiple cameras on the same network. CONNECTION TO IP NETWORK WITH DHCP SERVICE For Quick installation about IP camera with dynamic host configuration (DHCP) on the network will be assigned an IP address automatically.
  • Page 32 If the searched IP address and PC IP address are not in the same network segment, user may modify IP address, subnet mask, and other parameters of IP camera by using “Device Config. Tool” software. First select the device to modify IP address and then input new IP address, subnet mask, gateway and username/password.
  • Page 33 • Wait for plug-in download, after that confirm the ActiveX Installation. • Select “Install” and wait for the installation is completed. 4. After completed the Active X installation, close the Internet Explorer Web Page and launch it again, put the IP Camera Address and the Login screen will be displayed. Select Username (default: admin), a Password (default: admin) and Language.
  • Page 34 5. Select “Login” in order to enter in LIVE screen. DS1099-002B...
  • Page 35 6. Click the buttons on the top left corner in the Web Page to select the stream to display (Main Stream, Sub Stream or Mobile Stream).
  • Page 36: Ptz Control

    PTZ CONTROL (PTZ control) select the icon to open the following window: On Autofocus cameras with AF optics, the PTZ interface will be as follows: DS1099-002B...
  • Page 37 Eight different angles can be selected on the circular control: • PTZ Speed: 0 – 10 indicates different PTZ speeds. • ZOOM zooms in and out. • FOCUS increases or decreases FOCUS. • Restore resets default settings. On Auto Focus cameras with DF optics, the PTZ interface will be as follows:...
  • Page 38 Option Value Explanation Manually adjusts zoom (+ zoom in / - zoom out) Zoom Step/-/+ Step: defines zooming speed Manually adjusts focus (+ increase / - decrease) Focus Step/-/+ Step: defines focusing speed This function is used to customise the camera focusing mode.
  • Page 39 Option Value Explanation AutoFocus Adjusts focus automatically Restore Resets PTZ interface default settings (including focus) Updates the PTZ interface with changes to parameters Refresh (including focus)
  • Page 40: Mobile Software

    Smartphone, Tablet). The following is a description of the Mobile Client Software. SMARTPHONE DEVICE Urmet iUVS plus Mobile Software Urmet iUVS plus is a TVCC application for iOS and Android on smartphones, pads and tablets that is compatible with all URMET devices, both IPCam (Codec H265) and DVR/ NVR/HVR (all codecs).
  • Page 41 • • Image and Video capture  • Multi-device support IMPORTANT NOTE For more details about how to use the App and the features description please refer to the IP Camera user manual or online support available in Urmet iUVS Plus.
  • Page 42 Quick guide H.265 IP CAMERA SERIES Index GENERALITES Avertissements INSTALLATION Installation Bullet Camera Installation Vandal-Proof Dome Camera Installation Mini Dome Camera CONFIGURATIONS IP DE L’UNITE DE FILMAGE Connexion sur reseau IP avec service DHCP Commande PTZ APPLICATION POUR SMARTPHONE ADDENDUM DS1099-002B...
  • Page 43: Generalites

    à portée de main pour toute consultation ultérieure. *IMPORTANT Pour toute information détaillée sur l’ a ppareil, il est recommandé de consulter le manuel d’usage que vous pouvez repérer sur le site Urmet (voir QR code reporté sur la feuille complémentaire). AVERTISSEMENTS Alimentation Avant de brancher l’...
  • Page 44 l’humidité. Pour de tels environnements, utiliser les protections prévues à cet effet. Éviter d’ o rienter directement l’ o bjectif vers le soleil ou vers des sources de lumière interne y compris quand la caméra est éteinte; la personne/objet à filmer ne doit pas être en contre-jour.
  • Page 45 Dans le cas où l’utilisateur serait victime d’une perte ou de tout autre préjudice causé par un mauvais réglage, par une mauvaise utilisation, un fonctionnement impropre de l’ a ppareil, la société URMET S.p.A. ne saurait être tenue pour responsable de la perte de données mémorisées.
  • Page 46: Installation

    Installation INSTALLATION BULLET CAMERA Fixation au plafond Poser trois chevilles au plafond et fixer l’équipement à l’ a ide de trois vis de fixation. Cheville Vis de fixation Clé hexagonale Installation terminée Montage mural Poser trois chevilles sur le mur et fixer l’équipement à l’ a ide de trois vis de fixation. Cheville Vis de fixation...
  • Page 47 Installation de la carte SD Slot pour carte SD...
  • Page 48: Installation Vandal-Proof Dome Camera

    INSTALLATION VANDAL-PROOF DOME CAMERA Fixation au plafond 1. Appliquer l’ a dhésif dans la position correcte. 2. Retirer l’élément avant, en desserrant les trois vis de fixation à l’ a ide d’un tournevis. 3. Fixer la base en perçant des trous de blocage autour de l’ a dhésif; y insérer quatre chevilles et fixer le tout à...
  • Page 49: Installation Mini Dome Camera

    Installation de la carte SD Slot pour carte SD INSTALLATION MINI DOME CAMERA Fixation au plafond 1. Appliquer l’ a dhésif dans la position correcte. 2. Retirer l’écran de la caméra, en tournant le collier vers le bas. 3. Fixer la base en perçant des trous de blocage autour de l’ a dhésif; y insérer trois chevilles et fixer le tout à...
  • Page 50 Cheville Vis de fixation Installation terminée DS1099-002B...
  • Page 51: Configurations Ip De L'unite De Filmage

    Configurations IP de l’unite de filmage Après avoir mis la caméra sous tension, il est nécessaire de la configurer sur le réseau de la maison ou du bureau. En présence de plusieurs caméras sur un même réseau, il est conseillé de les installer et de les configurer une à...
  • Page 52 Si l’ a dresse IP recherchée et l‘adresse du PC ne se trouvent pas sur le même réseau, l’utilisateur peut modifier l’ a dresse IP, le masque de sous-réseau et d’ a utres paramètres de la caméra IP, en utilisant le logiciel “Device Config. Tool”. Sélectionner d’...
  • Page 53 • Attendre le déchargement du plugin. Donner ensuite confirmation à l’installation de ActiveX. • Sélectionner “Install” et attendre que l’ a pplication soit installée. 4. Après avoir terminé l’installation Active X, fermer la page Web et relancer l’ a pplication. Insérer l’...
  • Page 54 5. A ce stade, sélectionner “Login” pour accéder à l’écran LIVE. DS1099-002B...
  • Page 55 Appuyer sur les boutons en haut à gauche pour sélectionner le flux vidéo (Main Stream, Sub Stream ou Mobile Stream).
  • Page 56: Commande Ptz

    COMMANDE PTZ (Commande PTZ) la sélection de l’icône affiche la fenêtre suivante :Les modèles de caméras autofocus avec optique AF comportent l’interface PTZ suivante : DS1099-002B...
  • Page 57 Sur la commande circulaire, il est possible de sélectionner 8 différents angles: • PTZ Speed: 0 - 10 indique les différentes vitesses PTZ. • ZOOM augmente ou diminue le ZOOM. • FOCUS augmente ou diminue la MISE AU POINT. • Restore saisi de nouveau les valeurs d’usine.
  • Page 58 Option Valeur Explication Règle manuellement le zoom (+ augmente / - diminue) Zoom Step/-/+ Step: définit la vitesse d’exécution du zoom Règle manuellement la mise au point (+ augmente Focus Step/-/+ / - diminue) Step: définit la vitesse d’exécution de la mise au point Cette fonction permet de personnaliser le mode de mise au point de la caméra.
  • Page 59 Option Valeur Explication Permet d’établir le réglage du Zoom lors de chaque remise sous tension de la caméra: SAVE SAVE POSI: maintient la position de zoom définie avant POWER POSI + la mise hors tension de la caméra. MODE OFF + OFF: n’enregistre pas les réglages mémorisés avant la WIDE mise hors tension.
  • Page 60: Application Pour Smartphone

    Application Urmet IUVS plus URMET iUVS plus est une application de vidéo surveillance développée pour iPhone et iPad. Elle est compatible avec les séries DVR/HVR/NVR URMET, intégrant les deux CODEC vidéo H264 et H265. L’ a pplication iUVS Plus est téléchargeable du Play Store avec le lien suivant:...
  • Page 61 PTZ (Pan Tilt Zoom) • Capture manuelle image et vidéo  • Connexion simultanée vers plusieurs dispositifs URMET REMARQUE Pour plus de renseignements se référer à la notice technique disponible dans l’application ou à la documentation du dispositif disponible sur le site URMET.
  • Page 62 Quick guide H.265 IP CAMERA SERIES Index INFORMACIÓN GENERAL Seguridad INSTALACIÓN Instalación de la cámara bullet Instalación de la cámara vandal-proof dome Instalación de cámara minidomo CONFIGURACIONES IP DE LA UNIDAD DE FILMACIÓN Conexión en red IP con servicio DHCP Control PTZ MOBILE SOFTWARE ADDENDUM...
  • Page 63: Addendum

    Estimado cliente, Le agradecemos que haya comprado este producto. En este documento se describe cómo instalar y utilizar H.265 IP Camera series de Urmet. Lea con atención esta guía rápida, ya que contiene información sobre el uso correcto y seguro de los dispositivos.
  • Page 64 Grabación en vídeo Este dispositivo no ha sido diseñado como sistema antiintrusión, sino principalmente para transmitir y grabar imágenes en vídeo. URMET S.p.A. no asume ninguna responsabilidad por pérdidas o daños causados al usuario como consecuencia de un robo. Antes de usar el dispositivo, grabe un vídeo de demostración para comprobar que esta función se ejecuta correctamente.
  • Page 65 (DHCP), el dispositivo cambiará automáticamente a la IP de fábrica 192.168.1.168. Utilice el software Urmet “Device Config. Tool” incluido en el CD de la cámara IP para modificar la dirección IP y otra configuración de red y evitar que entren en conflicto con otros dispositivos de la red.
  • Page 66: Instalación

    Instalación INSTALACIÓN DE LA CÁMARA BULLET Montaje en techo Colocar tres tacos en el techo y fijar el equipo con tres tornillos de bloqueo. Taco Tornillo de bloqueo Llave Allen Instalación completada Montaje en pared Colocar tres tacos en la pared y fijar el equipo con tres tornillos de bloqueo. Taco Tornillo de bloqueo...
  • Page 67 Instalación de tarjeta SD Slot tarjeta SD...
  • Page 68: Instalación De La Cámara Vandal-Proof Dome

    INSTALACIÓN DE LA CÁMARA VANDAL-PROOF DOME Montaje en techo 1. Colocar el adhesivo en la posición correcta. 2. Retirar el elemento delantero, aflojando los tres tornillos de bloqueo con la ayuda de un destornillador. 3. Fijar el pedestal realizando orificios de bloqueo alrededor del adhesivo, colocar cuatro tacos y fijar el conjunto mediante cuatro tornillos de bloqueo.
  • Page 69: Instalación De Cámara Minidomo

    Instalación de tarjeta SD Slot tarjeta SD INSTALACIÓN DE CÁMARA MINIDOMO Montaje en techo 1. Coloque la pegatina en el lugar que desee instalar la cámara. 2. Quite la arandela haciéndola girar en sentido anti-horario. 3. Fije la base utilizando los tacos y tornillos suministrados. 4.
  • Page 70 Taco Tornillos de fijación Instalación completa DS1099-002B...
  • Page 71: Configuraciones Ip De La Unidad De Filmación

    Configuraciones IP de la unidad de filmación Después de alimentar la cámara es necesario configurarla en la propia red de casa o de la oficina. Si se deben instalar varias cámaras en la misma red, se recomienda instalar y configurar una cámara a la vez. CONEXIÓN EN RED IP CON SERVICIO DHCP Para la instalación rápida de la cámara en red con servicio de enrutamiento automático (DHCP), se asignará...
  • Page 72 Si la dirección IP que se busca y la dirección IP del ordenador no están en la misma red, el usuario puede modificar la dirección IP, la máscara de subred y otros parámetros de la cámara IP utilizando el software “Device Config. Tool”. Seleccionar en primer lugar el dispositivo para modificar la dirección IP, y a continuación introducir la nueva dirección IP, la máscara de subred, la puerta de enlace y nombre de usuario/contraseña.
  • Page 73 • Espere la descarga del plug-in y confirme la instalación del ActiveX. • Seleccione “Install” (Instalar) y espere a que se complete la instalación. 4. Después de completada la instalación del Active X, cierre Internet Explorer y ábralo de nuevo. Acceda a la dirección IP de la cámara y se mostrará una pantalla de Login.
  • Page 74 5. Ahora, seleccionar “Login” para entrar en la pantalla LIVE. DS1099-002B...
  • Page 75 6. Pulsar los botones de arriba, a la izquierda, para seleccionar la secuencia vídeo (Main Stream, Sub Stream o Mobile Stream).
  • Page 76: Control Ptz

    CONTROL PTZ (Control PTZ) seleccionando el icono aparece la siguiente ventana: En los modelos de Cámaras Auto Focus con una óptica AF, la interfaz PTZ será la siguiente: DS1099-002B...
  • Page 77 Es posible seleccionar 8 ángulos distintos en el control circular: • PTZ Speed: 0 – 10 indica distintas velocidades PTZ. • ZOOM aumenta o disminuye ZOOM. • FOCUS aumenta o disminuye el ENFOQUE. • Restore coloca nuevamente los valores de fábrica. En los modelos de Cámaras Auto Focus con una óptica DF, la interfaz PTZ será...
  • Page 78 Opción Valor Explicación Regula manualmente el zoom (+ aumenta / - Zoom Step/-/+ disminuye) Step: define la velocidad de ejecución del zoom Regula manualmente el enfoque (+ aumenta / - Focus Step/-/+ disminuye) Step: define la velocidad de ejecución del enfoque Esta opción permite personalizar el modo de enfoque de la cámara.
  • Page 79 Opción Valor Explicación AutoFocus Ejecuta de forma automática la regulación del enfoque Restablece los valores de fábrica de la interfaz PTZ Restore (incluyendo el enfoque) Actualiza los parámetros de la interfaz PTZ con Refresh las modificaciones de los parámetros realizadas (incluyendo el enfoque)
  • Page 80: Mobile Software

    DISPOSITIVOS SMARTPHONE Urmet IUVS plus Software Mobile URMET iUVS plus es una aplicación de CCTV para iOS y Android, teléfono inteligente, teclado y tableta, compatible con todos los dispositivos URMET tanto IPCam (Codec H265) como DVR / NVR / HVR (todos los codecs).
  • Page 81 • Múltiples dispositivos admitidos NOTA IMPORTANTE Para mayores detalles sobre el uso de la aplicación y la descripción de las características, consulte el manual de uso de la Cámara IP o la asistencia en línea disponible en Urmet iUVS Plus...
  • Page 82 Quick guide H.265 IP CAMERA SERIES Index INHALTSVERZEICHNIS Wichtige Hinweise INSTALLATION Installation Bullet Kamera Installation Vandalensichere Dome Kamera Installation der Mini-Dome-Kameras IP-KONFIGURATION DER AUFNAHMEEINHEIT Verbindung im IP-Netzwerk mit DHCP-Service PTZ-Steuerung SOFTWARE FÜR MOBILE GERÄTE ADDENDUM DS1099-002B...
  • Page 83: Allgemeine Informationen

    Allgemeine Informationen Sehr geehrter Kunde, vielen Dank für den Kauf dieses Produktes. Dieses Dokument beschreibt die Installation und die ersten Bedienschritte der URMET IP Kamera Serie. Lesen dieses Dokument vor Verwendung des Gerätes sorgfältig. Es enthält Informationen über die korrekte und sichere Verwendung.
  • Page 84 Feuchtigkeit ausgesetzt ist. Verwenden Sie in diesen Fällen die dafür vorgesehenen Wetterschutzvorrichtungen. Vermeiden Sie es, das Objektiv direkt gegen die Sonne oder intensive Lichteinstrahlung zu richten, auch bei ausgeschalteter Kamera. Der aufzunehmende Gegenstand darf sich nicht im Gegenlicht befinden. Vermeiden Sie es, die Kamera auf lichtreflektierende Objekte zu richten. Einige Lichtarten (z.B.
  • Page 85 Verluste oder Schäden durch Diebstahl. Führen Sie vor Inbetriebnahme des Geräts eine Probeaufnahme durch, um sicherzustellen, dass die Aufnahme fehlerfrei erfolgt. Beachten Sie bitte, dass URMET S.p.A. keine Haftung für Datenverluste oder Schäden übernimmt, die auf falsche Videoüberwachungseinstellungen, Missbrauch und unsachgemäßen Betrieb des Geräts oder technische Ausfälle zurückzuführen sind.
  • Page 86: Installation

    Installation INSTALLATION BULLET KAMERA Deckenmontage Die drei Dübel in die Decke einsetzen und das Gerät mit den drei Befestigungsschrauben anbringen. Dübel Befesti- gungs- schraube Inbussschlüssel Installation abgeschlossen Wandmontage Die drei Dübel in die Wand einsetzen und das Gerät mit den drei Befestigungsschrauben anbringen.
  • Page 87 SD-Karten Installation SD-Karteneinschub...
  • Page 88: Installation Vandalensichere Dome Kamera

    INSTALLATION VANDALENSICHERE DOME KAMERA Deckenmontage 1. Den Aufkleber in der korrekten Position anbringen. 2. Das vordere Bauteile entfernen, indem die drei Befestigungsschrauben mit Hilfe eines Schraubendrehers gelöst werden. 3. Den Sockel anbringen, indem Öffnungen zum Anbringen rund um den Aufkleber angebracht, die vier Dübel dort eingesetzt werden und alles mit den vier Befestigungsschrauben befestigt wird.
  • Page 89: Installation Der Mini-Dome-Kameras

    SD-Karten Installation SD-Karteneinschub INSTALLATION DER MINI-DOME-KAMERAS Deckenmontage 1. Befestigen Sie die Bohrschablone an dem Ort, an welchen die Kamera montiert werden soll. 2. Den Befestigungsrings durch Drehen im Uhrzeigersinn entfernen. 3. Die Befestigungslöcher anhand der Bohrschablone bohren und das Kameragehäuses mittels Dübeln und Schrauben an der Decke montieren.
  • Page 90 Dübel Befestigungs- schraube Komplettierung der Installation. DS1099-002B...
  • Page 91: Ip-Konfiguration Der Aufnahmeeinheit

    IP-Konfiguration der Aufnahmeeinheit Nach dem Einschalten der Stromversorgung der Kamera muss diese in ihrem eigenen Haus- oder Büronetzwerk konfiguriert werden. Sollten mehrere Kameras in demselben Netzwerk zu installieren sein, wird empfohlen, jeweils eine Kamera zu installieren und zu konfigurieren. VERBINDUNG IM IP-NETZWERK MIT DHCP-SERVICE Für die schnelle Installation der Kamera im Netzwerk mit automatischer Zuordnung (DHCP) wird der IP-Kamera automatisch eine IP-Adresse zugeordnet.
  • Page 92 Befinden sich die gesuchte IP-Adresse und die IP-Adresse des PC nicht in demselben Netzwerk, kann der Benutzer die IP-Adresse, die Subnet mask und andere Parameter der IP-Kamera unter Verwendung der Software “Device Config. Tool” ändern. Anfangs das Gerät auswählen, um die IP-Adresse zu ändern und anschließend die neue IP-Adresse, die Subnet mask, das Gateway und Username/Password eingeben.
  • Page 93 • Warten auf den Download des Web Plugins, nach Download die Installation bestätigen. • Auswahl “Install” und warten bis die Installation abgeschlossen ist. 4. Nach abgeschlossener Installation den Internet Explorer schließen und den Internet Explorer erneut öffnen. Die IP-Adresse der Kamera in die Adressleiste des Internet Explorers eingeben, es erscheint nun wie unten abgebildet die Anmeldemaske der IP-Kamera.
  • Page 94 5. Nun “Login” auswählen, um in die LIVE-Ansicht zu gelangen. 6. Die Tasten oben links betätigen, um den Videofluss auszuwählen (Mainstream, Substream oder Mobile Stream). DS1099-002B...
  • Page 95: Ptz-Steuerung

    PTZ-STEUERUNG (PTZ-Steuerung) durch Auswahl des Symbols erscheint das folgende Fenster:Auf den Autofocus-Kameramodellen mit AF-Optik liegt die folgende PTZ-Schnittstelle vor:...
  • Page 96 Es können 8 unterschiedliche Winkel auf der Kreissteuerung ausgewählt werden: • PTZ Speed: 0 – 10 gibt die unterschiedlichen PTZ- Geschwindigkeiten an. • ZOOM verringert oder erhöht den ZOOM. FOCUS verringert oder erhöht den FOCUS. • • Restore gibt erneut die werkseitigen Werte ein. Auf den Autofocus-Kameramodellen mit DF-Optik liegt die folgende PTZ-Schnittstelle vor: DS1099-002B...
  • Page 97 Option Wert Erklärung Stellt den Zoom manuell ein (+ erhöht / - verringert) Zoom Step/-/+ Step: definiert die Ausführungsgeschwindigkeit des Zoom Stellt die Scharfeinstellung manuell ein (+ erhöht / - verringert) Focus Step/-/+ Step: definiert die Ausführungsgeschwindigkeit der Scharfeinstellung Diese Funktion gestattet die persönliche Auslegung des Scharfeinstellungsmodus der Kamera.
  • Page 98 Option Wert Erklärung Gestattet es, die Zoomeinstellung bei jedem erneuten Einschalten der Kamera festzulegen. SAVE SAVE POSI: Erhält die vor dem Ausschalten der Kamera POWER POSI + eingegebene Zoom-Position. MODE OFF + OFF: Speichert die vor dem Ausschalten gespeicherten WIDE Einstellungen nicht.
  • Page 99: Software Für Mobile Geräte

    Tablet) Plattformen verwendet. Der Beschreibung der Mobile Client Software folgen. SMARTPHONE-GERÄTE Mobile Software Urmet IUVS plus URMET iUVS plus ist eine CCTV-Applikation für iOS und Android, Smartphone, Pad und Tablet, die mit allen URMET-Geräten, d.h. sowohl des Typs IPCam (Codec H265) als auch DVR/NVR/HVR (alle Codecs) kompatibel ist.
  • Page 100 Bild und Videoaufnahme  • Unterstützung Multi-Gerät WICHTIGER HINWEIS Für mehr Details zur Nutzung der App und Beschreibung der Merkmale, informieren Sie sich in der der Bedienungsanleitung der IP-Kamera oder nutzen Sie den Online Support in der Urmet iUVS plus. DS1099-002B...
  • Page 101: Addendum

    Addendum Guida rapida e manuale completo del dispositivo sono scaricabili puntando il seguente QR code. Guida rapida e manuale completo sono altresì disponibili per il DOWNLOAD dal sito URMET nella sezione LIBRETTI DI ISTRUZIONE. 1099/200 1099/201 1099/202 1099/301 1099/203 1099/300...
  • Page 102 QR code. La guía rápida y el manual de usuario completo del producto también están disponibles para DOWNLOAD en la página web de URMET bajo la sección USER MANUALS (La página web está en inglés). Die Schnellanleitung, sowie die komplette Bedienungsanleitung stehen unter dem folgenden QR code zur Verfügung.
  • Page 103 1099/200 1099/202 1099/201 1099/301 1099/203 1099/300 1099/302 1099/303 1099/304...
  • Page 105 Per informazioni sull’ a cquisto o sulla disponibilità dei prodotti, è possibile puntare il proprio smartphone sul seguente QR code o visitare www.urmet.com >> Contatti >> Rete Commerciale Italia Sales Network For assistance and information about Urmet products and systems you can scan this QR code with your smartphone or visit www.urmet.com >>...
  • Page 107 Urmet S.pA. si riserva il diritto di apportare modifiche alle proprie apparecchiature in qualsiasi momento, senza darne alcun preavviso. Realizzata nel mese di aprile 2018. www.urmet.com | info@urmet.com Prodotto in Cina su specifica Urmet. Tutti i prodotti Urmet sono marcati Urmet S.pA.
  • Page 108 Customer Care Italia: 011 23 39 810 Export Dept.: +39 011 24 00 250/256 URMET S.p.A. Via Bologna, 188/C | 10154 Torino (ITALY) www.urmet.com | info@urmet.com IF YOU LOVE YOUR BUILDING...

Ce manuel est également adapté pour:

1099/2011099/3011099/300