Table des Matières
Publicité
Liens rapides
Publicité
Table des Matières
Dépannage

Manuels Connexes pour Janome CoverPro 2000CPX


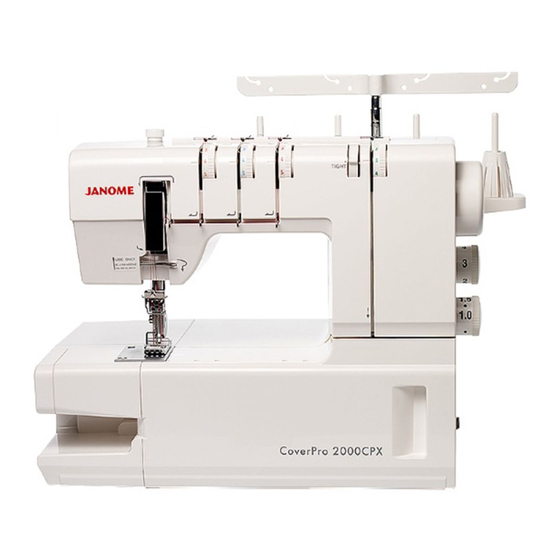
Sommaire des Matières pour Janome CoverPro 2000CPX
- Page 1 Instruction Book Manual de instrucciones Manuel d’instructions...
-
Page 2: Important Safety Instructions
IMPORTANT SAFETY INSTRUCTIONS When using an electrical appliance, basic safety precautions should always be followed, including the following: This sewing machine is designed and manufactured for household use only. Read all instructions before using this sewing machine. DANGER — To reduce the risk of electric shock: 1. -
Page 3: Instrucciones Importantes De Seguridad
INSTRUCCIONES IMPORTANTES DE SEGURIDAD Siempre que utilice esta máquina, tome ciertas precauciones mínimas de seguridad: La máquina de coser fue diseñada y fabricada únicamente para uso doméstico. Lea todas las instrucciones antes de utilizar esta máquina. PELIGRO: Para reducir el riesgo de descarga eléctrica: 1. -
Page 4: Consignes Importantes De Securite
CONSIGNES IMPORTANTES DE SECURITE Pour utiliser un appareil électrique, il faut toujours respecter les consignes de sécurité fondamentales, notamment les consignes suivantes: Cette machine à coudre a été conçue et fabriquée pour l'usage domestique uniquement. Avant d’utiliser cet appareil, lisez toutes ces instructions. DANGER: Pour éviter tout risque de décharge électrique: 1. -
Page 5: Table Des Matières
TABLE OF CONTENTS KNOW YOUR MACHINE Names of Parts ............. 2 Standard Accessories ........... 4 GETTING READY TO SEW Connecting the Machine to the Power Supply ..... 6 Controlling Sewing Speed ..........6 How to Turn the Handwheel ......... 8 Opening and Closing the Looper Cover ....... - Page 6 ÍNDICE DESCRIPCIÓN DE LA MÁQUINA Nombre de las partes ............ 3 Accesorios estándar ............5 PREPARATIVOS ANTES DE COSER Conexión de la máquina a la fuente de alimentación ..7 Control de la velocidad de costura ....... 7 Cómo girar el volante ........... 9 Apertura y cierre de la tapa del gancho .......
- Page 7 TABLE DES MATIÈRES FAMILIARISATION AVEC LA MACHINE Dénomination des composants ........3 Accessoires standard ............ 5 PRÉPARATION DU TRAVAIL DE COUTURE Raccordement de la machine au secteur ...... 7 Contrôle de la vitesse de couture ........7 Manipulation du volant ..........9 Ouverture et fermeture du couvercle du boucleur ..
-
Page 8: Know Your Machine Names Of Parts
KNOW YOUR MACHINE Names of Parts q Differential feed dial w Stitch length dial e Handwheel r Spool stand t Spool holder y Spool pin u Thread guide bar i Thread guide post o Looper thread tension dial !0 Looper thread tension switching lever !1 Thread guide plate !2 Carrying handle !3 Right needle thread tension dial... -
Page 9: Descripción De La Máquina Nombre De Las Partes
DESCRIPCIÓN DE LA MÁQUINA FAMILIARISATION AVEC LA MACHINE Nombre de las partes Dénomination des composants q Regulador de la alimentación con diferencial q Cadran d’entraînement différentiel w Regulador de longitud de la puntada w Sélecteur de longueur de point e Volante e Volant r Portacarretes r Support de bobines... -
Page 10: Standard Accessories
Standard Accessories q Set of needles: 2 X #80/12, 3 X #90/14 (Schmetz EL X 705) w Screwdriver (Large) e Screwdriver (Small) r Tweezers t Nets y Spool holder caps u Lint brush i Needle threader o Attachment screws (for fixing optional accessories) (Refer to the instruction sheet of the optional accessory) !0 Accessory box... -
Page 11: Accesorios Estándar
Accesorios estándar Accessoires standard q Juego de agujas: 2 x n.º 80/12, 3 x n.º90/14 q Ensemble d’aiguilles : 2 X #80/12, 3 X #90/14 (Schmetz EL X 705) (Schmetz EL X 705) w Destornillador (grande) w Tournevis (grand) e Destornillador (pequeño) e Tournevis (petit) r Pinzas r Pinces... -
Page 12: Getting Ready To Sew Connecting The Machine To The Power Supply
GETTING READY TO SEW Connecting the Machine to the Power Supply z Turn off the power switch, and connect the machine plug to the machine socket. x Connect the power supply plug to your power supply. c Turn on the power switch. q Power switch w Machine plug e Machine socket... -
Page 13: Preparativos Antes De Coser
PREPARATIVOS ANTES DE COSER PRÉPARATION DU TRAVAIL DE COUTURE Conexión de la máquina a la fuente de alimentación Raccordement de la machine au secteur z Apague el interruptor de encendido e introduzca la toma del z Coupez l’alimentation de la machine et insérez la fiche de la cable en la toma correspondiente de la máquina. -
Page 14: How To Turn The Handwheel
How to Turn the Handwheel Always turn the handwheel toward you (counterclockwise). q Handwheel Opening and Closing the Looper Cover To open: (A) While pushing with the thumb to the right as far as it will go, pull the looper cover toward you. To close: (B) Lift the looper cover and push it against the machine. -
Page 15: Cómo Girar El Volante
Cómo girar el volante Manipulation du volant Gire siempre el volante hacia usted (a la izquierda, mirándolo Tournez toujours le volant vers vous (dans le sens inverse des de frente). aiguilles d’une montre). q Volante q Volant Apertura y cierre de la tapa del gancho Ouverture et fermeture du couvercle du boucleur Apertura: (A) Ouverture: (A) -
Page 16: Raising Or Lowering The Presser Foot
Raising or Lowering the Presser Foot By raising or lowering the presser foot lifter, the presser foot goes up or down. * While in operation, keep the presser foot lowered except when threading the machine or test running without threads. NOTE: Thread tension will be released when the presser foot lifter is raised. -
Page 17: Subida O Bajada Del Prénsatelas
Subida o bajada del prénsatelas Relevage et abaissement du pied presseur Manœuvrez le relève-presseur vers le haut ou vers le bas pour El prénsatelas se eleva y se baja moviendo el alzador. relever ou abaisser le pied presseur. * Mientras la máquina esté en funcionamiento, mantenga * Pendant le fonctionnement de la machine, veillez à... -
Page 18: Adjustment Of Stitch Length
Adjustment of Stitch Length To adjust the stitch length, turn the dial. The larger the number, the longer the stitch. For regular sewing, set the stitch length at 3 – 3.5. q Stitch length dial w Setting mark e To lengthen r To shorten Adjustment of Differential Feed Ratio The differential feed ratio can be altered by turning the... -
Page 19: Ajuste De La Longitud De Las Puntadas
Ajuste de la longitud de las puntadas Réglage de la longueur de point Para ajustar la longitud de la puntada, gire el regulador. Utilisez le sélecteur de longueur de point. Cuanto más alto sea el número, más larga será la puntada. Plus le chiffre est élevé, plus le point est long. -
Page 20: Changing Needle
Changing Needle WARNING: Turn the power switch off and unplug the machine before changing needles. Turn the handwheel toward you to raise the needle to its highest position. q Handwheel Then loosen the needle clamp screw for the needle you are going to remove. -
Page 21: Cambio De La Aguja
Cambio de la aguja Changement de l’aiguille ATENCIÓN: AVERTISSEMENT : Apague y desenchufe la máquina antes de cambiar la Coupez l'alimentation et débranchez la machine avant de aguja. changer les aiguilles. Gire el volante hacia usted una vuelta para elevar la aguja Tournez le volant vers vous pour relever l’aiguille à... -
Page 22: Setting The Thread Guide Bar
Setting the Thread Guide Bar Pull the thread guide bar up as far as it will go. Turn the thread guide bar so that the thread guides are right above the spool pins. q Thread guide bar w Thread guide e Spool pin r Stoppers t Thread guide post... -
Page 23: Colocación De La Barra Del Guiahilos
Colocación de la barra del guiahilos Installation de la barre de guidage du fil Baje la barra del guiahilos tanto como sea posible. Relevez à fond la barre de guidage du fil. Gire la barra del guiahilos de forma que éste quede justo sobre Tournez la barre de façon à... -
Page 24: Threading The Machine
Threading the Machine WARNING: Turn the power switch off and unplug the machine before threading the machine. z Left needle thread x Center needle thread c Right needle thread v Looper thread Raise the presser foot lifter. q Presser foot lifter NOTE: When threading the machine always raise the presser foot. -
Page 25: Enhebrado De La Máquina
Enhebrado de la máquina Enfilage de la machine ATENCIÓN: AVERTISSEMENT: Coupez l'alimentation et débranchez la machine avant de Apague y desenchufe la máquina antes de enhebrar la procéder à l'enfilage. máquina. z Hilo de la aguja izquierda z Fil d'aiguille gauche x Hilo de la aguja central x Fil d'aiguille centrale c Hilo de la aguja derecha... -
Page 26: Threading The Needles
Threading the needles Thread each needle in the following steps: z Draw the thread through the left side thread guide bar from back to front as shown (A). NOTE: If the thread is coming out from the thread guide notch, pass the thread through the thread guide hole again as shown (B) q Thread guide bar... -
Page 27: Enhebrado De Las Agujas
Enhebrado de las agujas Enfilage des aiguilles Siga estos pasos para enhebrar cada aguja: Enfilez chaque aiguille en procédant comme suit: z Pase el hilo por el guiahilos de la izquierda, de detrás hacia z Faites passer le fil par le côté gauche de la barre de guidage adelante (A). -
Page 28: How To Use The Threader
c Hold the thread at both ends and tug gently to ensure the thread is correctly inserted between the tension disks. ( If the presser foot lifter is raised, the thread easily inserts between the tension discs.) e Tension dial r Tension disks v Pass the thread through the thread guide (A) from the right. -
Page 29: Utilización Del Enhebrador
c Sujete el hilo por ambos extremos y tire suavemente, para c Maintenez le fil par les deux bouts et tirez légèrement asegurarse de que está bien introducido entre los discos de dessus pour vérifier que le fil est correctement inséré entre tensión. -
Page 30: Threading The Looper
Threading the looper Thread the looper in the following steps: z Draw the thread through the right side thread guide bar from back to front as shown (A). NOTE: If the thread is coming out from the thread guide notch, pass the thread through the thread guide hole again as shown (B). -
Page 31: Enhebrado Del Gancho
Enhebrado del gancho Enfilage du boucleur Enhebre el gancho como se indica a continuación: Enfilez le boucleur en procédant comme suit: z Pase el hilo por el guiahilos de la derecha, de detrás hacia z Faites passer le fil par le côté droit de la barre de guidage du adelante (A). - Page 32 c Hold the thread at both ends and tug gently to ensure the thread is correctly inserted between the tension disks. (If the presser foot lifter is raised, the thread easily inserts between the tension disks.) e Tension dial r Tension disks v Draw the thread down into the looper thread guide (A).
- Page 33 c Mantenga el hilo por los dos extremos e introdúzcalo c Maintenez le fil par les deux bouts et tirez légèrement suavemente para asegurarse de que el hilo esté dessus pour s'assurer qu'il soit correctement inséré entre inserto correctamente entre los discos de tensión. (Si el les disques de tension.
-
Page 34: Stitch Types Triple Cover Stitch
STITCH TYPES Triple Cover Stitch The triple cover stitch is sewn with all three needles. This stitch forms three parallel rows of the straight stitch on the right side, ideal for hemming, attaching elastics, decorative stitches etc. q Left needle w Center needle e Right needle Type of Fabric... -
Page 35: Tipos De Puntada
TIPOS DE PUNTADA TYPES DE POINTS Puntada de recubrir triple Triple point de recouvrement La puntada de recubrir triple se cose con las tres agujas. Le triple point de recouvrement s'effectue avec les trois aiguilles. Esta puntada forma tres filas paralelas de la puntada recta en el Ce point, qui forme trois rangées parallèles de points droits sur lado derecho, ideal para coser dobladillos, fijar elásticos, hacer l’endroit du tissu, est idéal pour réaliser des ourlets, fixer des... -
Page 36: Cover Stitch
Cover Stitch This stitch is sewn with two needles and forms two parallel rows of the straight stitch on the right side, widely used on cuffs and stretch welts of T-shirts etc. There are three types of cover stitch: • Narrow-left (3 mm wide) •... -
Page 37: Puntada De Recubrir
Puntada de recubrir Point de recouvrement Esta puntada se cose con dos agujas y forma dos filas paralelas Ce point s'effectue avec deux aiguilles et forme deux rangées de puntada recta, a la derecha. Se utiliza mucho en los puños y parallèles de points droits sur l’endroit du tissu. -
Page 38: Balancing The Thread Tension
Balancing the thread tension z Set the tension dials as follows: For narrow-left (3 mm wide): q Left needle thread tension dial: w Center needle thread tension dial: e Looper thread tension dial: For narrow-right (3 mm wide): q Center needle thread tension dial: w Right needle thread tension dial: e Looper thread tension dial: For Wide (6 mm wide):... -
Page 39: Equilibrado De La Tensión Del Hilo
Equilibrado de la tensión del hilo Équilibrage de la tension de fil z Ajuste los reguladores de tensión como se indica a z Réglez les cadrans de tension comme suit : continuación: Para la puntada estrecha - izquierda (3 mm de ancho) Point étroit gauche (largeur de 3 mm): q Regulador de la tensión del hilo de la aguja izquierda: q Cadran de tension de fil, aiguille gauche :... -
Page 40: Chain Stitch
Chain Stitch This stitch is sewn with a single needle and forms a chain of looper thread on the wrong side of the fabric. This is a durable and flexible stitch used for seaming knit fabrics, attaching elastics, attaching bias tapes etc. Thread one of the three needles and looper. -
Page 41: Puntada De Cadeneta
Puntada de cadeneta Point de chaînette La puntada se realiza con una sola aguja y forma una cadena Ce point est réalisé avec une seule aiguille et forme une chaîne con el hilo del enhebrador en el reverso de la tela. avec le fil du boucleur sur l’envers du tissu. -
Page 42: Curling Problem
Curling Problem SOFT To avoid the curling problem of the fabric being sewn, switch the looper thread tension switching lever to “SOFT”, and adjust the stitch length to “3.0” or higher. If the skipped stitch occurs, adjust the stitch length to a higher TIGHT length, or switch the thread tension switching lever to “TIGHT”, and adjust the thread tension. -
Page 43: Problema De Encrespado
Problema de encrespado Problème de gondolement Para evitar el problema en el que se encrespa la tela utilizada, Pour éviter le problème de gondolement lorsque vous cousez le cambiar la palanca de tensión del hilo del gancho a “SOFT” tissu, basculez le levier de la tension du fil du boucleur à “SOFT” (“suave”), y ajustar la longitud de puntada en “3.0”... -
Page 44: Finishing The Seam
Finishing the Seam To achieve the best results, use a piece of scrap fabric at the beginning and end of the seam. Beginning of the seam z Raise the presser foot and insert a piece of scrap fabric under the foot. Lower the foot and turn the handwheel several times toward you. -
Page 45: Acabado De La Costura
Acabado de la costura Finition de la couture Para lograr unos resultados óptimos, utilice un retazo de tela al Pour obtenir les meilleurs résultats, utilisez une chute de tissu principio y al final de la costura. au début et à la fin de la couture. Principio de la costura Début de la couture z Levante el pie prénsatelas e introduzca una pieza de retazo... -
Page 46: Removing The Fabric In The Middle Of The Stitching
Removing the Fabric in the Middle of the Stitching z Raise the needles to their highest position by turning the handwheel toward you. q Handwheel x Raise the presser foot with the presser foot lifter. w Presser foot lifter c Pull the needle threads before the needle eyes. This prevents the threads from being caught when removing the fabric. -
Page 47: Extracción De La Tela En Medio De La Costura
Extracción de la tela en medio de la costura Retrait du tissu au milieu de la couture z Levante las agujas hasta su posición más alta, girando el z Faites tourner le volant vers vous pour relever les aiguilles au volante hacia usted. -
Page 48: Hemming With The Cover Stitch
Hemming with the Cover Stitch z Fold up the edge of the fabric to the wrong side and press. x Draw a line with a tailor’s chalk on the right side of the fabric to mark the fabric edge. c Place the fabric so the left needle drops just to the left side of the marked line. -
Page 49: Dobladillos Con La Puntada De Recubrir
Dobladillos con la puntada de recubrir Réalisation d’ourlets avec le point de recouvrement z Doble el borde de la tela hacia el reverso y apriete. z Repliez le bord du tissu sur l’envers et appuyez dessus. x Dibuje una línea con una tiza de sastre en el anverso de la tela para marcar el borde. -
Page 50: Triple Cover Stitch Applications
Triple Cover Stitch Applications Hemming on sleeves and waistlines q Sleeve w Waistline Attaching laces and tapes q Tape or lace w Right side of the fabric e Wrong side of the fabric Attaching elastics q Right side of the fabric w Wrong side of the fabric e Elastic Decorative stitch q Right side of the fabric... -
Page 51: Aplicaciones De La Puntada De Recubrir Triple
Aplicaciones de la puntada de recubrir triple Applications du triple point de recouvrement Dobladillos de mangas y cinturillas Ourlets de manches et tailles q Manga q Manche w Cintura w Taille Fijación de cintas y cordones Fixation de dentelles et de rubans q Cinta o cordón q Ruban ou dentelle w Anverso de la tela w Endroit du tissu... -
Page 52: Care Of Your Machine Cleaning The Feed Dogs And Looper Area
CARE OF YOUR MACHINE Cleaning the Feed Dogs and Looper Area WARNING: Turn the power switch off and unplug the machine before cleaning. NOTE: Do not dismantle the machine in any way other than what is explained in this section. z Remove the presser foot and needles. -
Page 53: El Mantenimiento De Su Máquina
EL MANTENIMIENTO DE SU MÁQUINA ENTRETIEN DE VOTRE MACHINE Limpieza de los dientes de arrastre y la zona del Nettoyage des griffes d’entraînement et du gancho boucleur ATENCIÓN: AVERTISSEMENT: Apague y desenchufe la máquina antes de limpiarla. Coupez l'alimentation et débranchez la machine avant de procéder à... -
Page 54: Troubleshooting
Troubleshooting Problem Cause Reference Needle thread 1. The machine is not threaded correctly. See pages 16 - 26. breaks. 2. The thread tension is too tight. See pages 28, 32, 34. 3. The needle is bent or blunt. See page 14. 4. -
Page 55: Detección Y Resolución De Problemas
Detección y resolución de problemas Problema Causa Referencia El hilo de la aguja 1. La máquina no está correctamente enhebrada. Consulte las páginas 17 a 27. se rompe. 2. El hilo está demasiado tenso. Consulte las páginas 29, 33 y 35. 3. -
Page 56: Dépistage Des Pannes
Dépistage des pannes Anomalie Cause Références Le fil d'aiguille 1. La machine n’est pas enfilée correctement. Voir en pages 17-27. casse 2. La tension de fil est trop élevée. Voir en pages 29, 33 et 35. 3. L’aiguille est déformée ou émoussée. Voir en page 15. - Page 60 796-800-659 q (ESF)