Philips YS534 Mode D'emploi
Masquer les pouces
Voir aussi pour YS534:
- Mode d'emploi (228 pages) ,
- Manuel d'utilisation (23 pages) ,
- Manuel d'utilisation (23 pages)
Table des Matières
Les langues disponibles
Les langues disponibles
Liens rapides
Table des Matières

Manuels Connexes pour Philips YS534


Sommaire des Matières pour Philips YS534
- Page 1 YS534 YS521 User manual...
- Page 5 EngliSh 6 FrançaiS (Canada) 26...
- Page 26 FrançaiS (Canada) introduction Félicitations pour votre achat et bienvenue dans l’univers Philips! Pour profiter pleinement du soutien de Philips, enregistrez votre produit sur le site : www.philips.com/welcome. Pour des fonctionnalités accrues, vous pouvez aussi acquérir des accessoires encastrables sur : www.philips.com/shop.
-
Page 27: Conformité Aux Normes
FrançaiS (Canada) - Attention avec l’eau chaude lorsque vous nettoyez l’appareil et les accessoires. Il est important de toujours vérifier que l’eau n’est pas trop chaude pour ne pas vous brûler les mains. avertissement - Chargez, utilisez et rangez l’appareil et les accessoires à... -
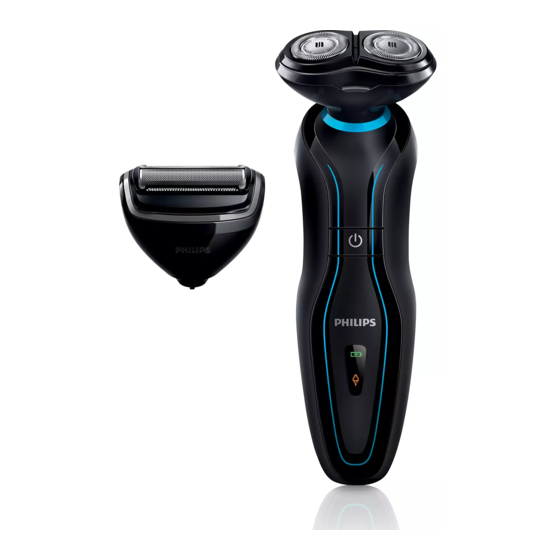
Page 28: Description Générale (Fig. 3)
Petite fiche Sélecteur de longueur de coupe (YS534 uniquement) 10 Accessoire pour la barbe (YS534 uniquement) 11 Peigne de coupe pour la barbe (YS534 uniquement) 12 Accessoire pour le corps 13 Grand peigne de coupe pour rasoir corporel (YS534 uniquement) -
Page 29: Témoin De Charge
FrançaiS (Canada) recharge La période de recharge complète est d’environ 60 minutes. Lorsque vous rechargez l’appareil pour la première fois ou après une longue période d’inutilisation, laissez-le se recharger pendant 90 minutes. Un appareil dont la charge est complète fournit jusqu’à 40 minutes d’autonomie. L’autonomie de l’appareil peut varier au fil du temps en fonction de vos habitudes d’utilisation, de la fréquence du nettoyage de l’appareil, de votre type... - Page 30 FrançaiS (Canada) Charge rapide Les symboles de batterie et de prise clignotent successivement en vert et en orange durant quelques minutes pour indiquer la charge rapide. Après environ 5 minutes, lorsque le symbole de prise cesse de clignoter, l’appareil dispose de suffisamment de charge pour une retouche rapide.
- Page 31 FrançaiS (Canada) rasage Période d’adaptation de la peau Vous n’obtiendrez peut-être pas les résultats escomptés dès le premier rasage et constaterez peut-être même une légère irritation de la peau. C’est normal. Votre peau et votre barbe ont besoin de temps pour s’adapter à n’importe quel nouveau système de rasage.
-
Page 32: Utilisation Du Rasoir
FrançaiS (Canada) Utilisation du rasoir Mettez l’appareil en marche en appuyant une fois sur le bouton marche/arrêt. Faites glisser l’unité de rasage sur votre peau. Pour obtenir de meilleurs résultats, faites glisser l’appareil sur votre peau en mouvements circulaires. Appuyez sur le bouton marche/arrêt pour éteindre l’appareil. - Page 33 FrançaiS (Canada) accessoire pour la barbe (YS534 uniquement) - Utilisez cet accessoire pour la barbe sur le visage uniquement. Cet accessoire ne convient ni au rasage du corps ni à la coupe des cheveux. Chaque accessoire de cet appareil est spécialement conçu pour un type de poils spécifique.
-
Page 34: Utilisation De L'accessoire Pour La Barbe Sans Le Peigne
FrançaiS (Canada) Appuyez sur le sélecteur de longueur de coupe (1) et poussez-le vers la gauche ou la droite (2) selon la longueur désirée. Mettez l’appareil en marche en appuyant une fois sur le bouton marche/arrêt. Vous pouvez maintenant commencer à donner forme à... -
Page 35: Fixation De L'accessoire Pour Le Corps
FrançaiS (Canada) Soins du corps - Utilisez cet accessoire pour le corps uniquement. Vous pouvez utiliser cet accessoire sur peau sèche ou peau humide sur les zones du corps situées en dessous du cou. Cet accessoire ne convient ni au rasage du visage ni à... - Page 36 FrançaiS (Canada) Peigne de coupe Longueur obtenue Petit 3 mm Moyen (YS534 uniquement) 5 mm Grand (YS534 uniquement) 7 mm Éteignez l’appareil. Encastrez le peigne sur l’accessoire pour le corps, en veillant à orienter les dents dans la bonne direction.
-
Page 37: Nettoyage Et Entretien
- Nettoyez régulièrement les têtes de rasoir avec le spray nettoyant spécifique de Philips (HQ110) pour garantir une performance de rasage optimale. Éteignez l’appareil. Appuyez sur les boutons de libération de l’accessoire de rasage (1) et retirez l’unité... - Page 38 FrançaiS (Canada) Soulevez la bague de fixation et dégagez-la du support de la tête de rasage. Retirez la lame et sa grille. Ne nettoyez pas plus d’une lame et d’un dresse-poils à la fois, car ils sont groupés par jeux. Si vous mélangez accidentellement les lames et les dresse-poils, il pourra vous falloir plusieurs semaines avant d’obtenir de nouveau un rasage optimal.
- Page 39 FrançaiS (Canada) Replacez la bague de fixation dans le support de la tête de rasoir (1). Pour verrouiller à nouveau la bague de fixation, faites-la pivoter dans le sens contraire indiqué par les flèches (2). Assurez-vous d’avoir placer correctement la bague de fixation.
- Page 40 éviter tout dommage et prévenir l’accumulation de poussière sur les têtes de rasage. Remarque YS534 : Rangez le rasoir et tous les accessoires dans la pochette. Placez un peigne sur l’accessoire pour le corps avant de le ranger ou de partir en voyage.
- Page 41 Et si vous constatez qu’elles sont endommagées, changez-les immédiatement. En remplacement d’une tête de rasoir, optez seulement pour une tête Philips RQ32. Voir aussi le chapitre «Commande d’accessoires». Suivez les étapes 1 à 4 décrites à la section «Nettoyage de l’accessoire de rasage»...
-
Page 42: Commande D'accessoires
Les accessoires suivants sont offerts : - Têtes de rasoir Philips RQ32 - Grille de tête de rasage pour le corps Philips BG2000 Accessoire pour la barbe Philips YS511 - Nettoyant en vaporisateur pour de tête de rasage Philips HQ110 Pour remplacer les peignes, visitez également le site... -
Page 43: Environnement
Déposez la batterie usagée à un endroit assigné à cet effet. Si vous n’arrivez pas à la retirer, vous pouvez apporter le rasoir dans un Centre de service agréé Philips, qui prendra toute l’opération en charge pour préserver l’environnement. Pour retirer la batterie rechargeable Retirez la pile rechargeable uniquement lorsque vous mettez l’appareil au rebut. -
Page 44: Assistance Et Garantie
FrançaiS (Canada) assistance et garantie Pour obtenir des renseignements supplémentaires, rendez-vous sur le site www.philips.com/ support ou lisez le dépliant de garantie internationale. restrictions de garantie Sujettes à l’usure, les têtes de rasoir (lames et dresse-poils) ne sont pas couvertes par la garantie internationale. - Page 45 FrançaiS (Canada) Problème Cause possible Solution Les têtes de rasage sont Nettoyez les lames et les sales. grilles avec la brosse de nettoyage fournie. Voir chapitre «Nettoyage et entretien». Les têtes du rasoir sont Nettoyez les lames et les bloquées par de longs grilles avec la brosse de poils.
- Page 46 Ma peau est Votre peau doit Des irritations cutanées irritée après le s’habituer au système de peuvent apparaître rasage. rasage Philips. durant les deux ou trois premières semaines d’utilisation. Cette sensation disparaît normalement par la suite. Les têtes du rasoir sont Remplacer les têtes...
- Page 47 FrançaiS (Canada) Problème Cause possible Solution L’appareil Si votre barbe est offre moins épaisse, l’appareil peut de 40 minutes se décharger avant d’autonomie 40 minutes de rasage après une sans fil. Le temps charge d’autonomie peut aussi complète. varier avec le temps, selon vos habitudes de rasage, la fréquence de nettoyage de l’appareil...
- Page 50 4222.002.5521.1...