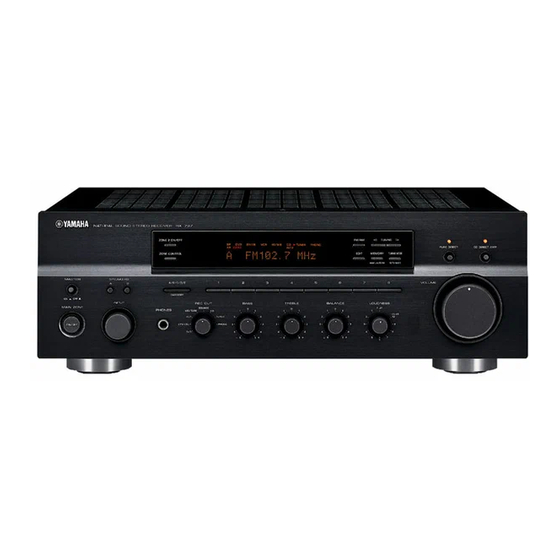
Yamaha RX-797 Mode D'emploi
Table des Matières
Les langues disponibles
Les langues disponibles
Chapitres
Table des Matières
Dépannage

Manuels Connexes pour Yamaha RX-797


Sommaire des Matières pour Yamaha RX-797
- Page 54 Alimenter l’appareil sous une tension plus élevée est dangereux et peut être responsable d’incendie, de dommage à l’appareil ou de blessure corporelle. YAMAHA ne saurait être tenue responsable des dommages résultant de l’alimentation de l’appareil sous une tension autre que celle prescrite.
- Page 55 TABLE DES MATIÉRES INTRODUCTION OPÉRATIONS DÉTAILLÉES PARTICULARITÉS ..........2 RÉGLAGES APPROFONDIS......39 ACCESSOIRES FOURNIS ........2 Modification des paramètres du menu COMMANDES ET FONCTIONS ......3 ADVANCED SETUP......... 39 Commutation du numéro d’identification de la Face avant ..............3 télécommande............40 Afficheur de la face avant..........
-
Page 56: Particularités
PARTICULARITÉS PARTICULARITÉS Amplificateur intégré à 2 voies Autres particularités ◆ Puissance de sortie minimum efficace ◆ Commutateur PURE DIRECT pour la reproduction la 100 W + 100 W (8 Ω), 0,019% DHT, 20 Hz à 20 kHz plus fidèle possible d’une source sonore ◆... -
Page 57: Commandes Et Fonctions
Commute la télécommande ID entre ID1 et ID2 en cas de manière à être en mesure de recevoir les signaux infrarouges d’utilisation de récepteurs ou amplificateurs YAMAHA multiples qui peuvent être émis par le boîtier de télécommande. (reportez-vous aux pages 9, 39, et 40). - Page 58 COMMANDES ET FONCTIONS 8 EDIT, SEARCH MODE F Sélecteur INPUT Echange l’assignation de deux stations présélectionnées Ce bouton assure la sélection de la source que vous lorsque TUNER est sélectionné comme source d’entrée désirez écouter ou regarder. (voir page 29). G A/B/C/D/E, CATEGORY Cette touche permet de sélectionner les modes de Sélectionne le groupe de stations présélectionnées (A à...
-
Page 59: Afficheur De La Face Avant
COMMANDES ET FONCTIONS Afficheur de la face avant DTV/CBL MD/TAPE TUNER PHONO ZONE2 ZONE3 MEMORY AUTO TUNED STEREO SLEEP MUTE HOLD 1 Témoins SP (SPEAKERS) A/B 7 Témoin SLEEP Ces témoins s’allument en fonction du jeu d’enceintes Ce témoin s’allume lorsque la minuterie de mise hors choisi. -
Page 60: Panneau Arrière
Cette prise sert à régler l’expansion. Pour de plus amples B Prises SPEAKERS détails concernant cette question, veuillez consulter le Connexion des haut-parleurs. revendeur ou le service après-vente YAMAHA. Voir page 12 pour ce qui concerne les raccordements. 5 Prise XM C Sélecteur IMPEDANCE SELECTOR (Modèle pour les États-Unis uniquement) -
Page 61: Boîtier De Télécommande
être utilisé avec cet appareil Choix du numéro de station présélectionnée (1 à 8) ou avec d’autres périphériques de YAMAHA ou d’autres lorsque TUNER est sélectionné comme source d’entrée. fabricants. Les fonctions des touches agissant sur d’autres Choix du numéro de canal présélectionné... - Page 62 COMMANDES ET FONCTIONS 9 SPEAKERS A/B Les enceintes reliées aux prises SPEAKERS A et/ou SPEAKERS B placées sur le panneau arrière sont mises en service ou hors service chaque fois que vous appuyez sur la touche correspondante. 0 CODE SET Utilisez cette touche pour enregistrer les codes de commande (voir page 45).
-
Page 63: Zone 2 Boîtier De Télécommande
TUNER est sélectionné comme source d’entrée. télécommande Zone 2 pour commander les fonctions de 4 A/B/C/D/E Satellite Radio XM et les lecteurs de CD YAMAHA. Sélectionne le groupe de stations présélectionnées (A à E) lorsque TUNER est sélectionné comme source d’entrée. - Page 64 XM est la source d’entrée. C Sélecteur CD/XM Commute les fonctions des touches de commande 5, B et D pour contrôler les lecteurs CD YAMAHA et les fonctions de XM Satellite Radio. D NUMBER Maintenez la pression d’un doigt avant d’appuyer sur les touches numériques/de sélection d’entrée pour saisir les...
-
Page 65: Mise En Place Des Piles Dans Le Boîtier De Télécommande
COMMANDES ET FONCTIONS Mise en place des piles dans le boîtier de télécommande ■ Remarques concernant les piles • Dès que la gamme de commande de la télécommande se rétrécit, changez toutes les piles. • Utilisez des piles AA, R6, UM-3 pour la télécommande, et des piles AAA, R03 ou UM-4 pour la télécommande Zone 2. •... -
Page 66: Raccordement Des Enceintes
RACCORDEMENTS RACCORDEMENTS Raccordement des enceintes Assurez-vous que la voie gauche (L), la voie droite (R) et les pôles “+” (rouge) et “–” (noir) sont convenablement reliés. Si le raccordement est défectueux, aucun son n’est émis par l’enceinte, et si la polarité de la connexion est incorrecte, les sons manquent de naturel et de composantes graves. -
Page 67: Connexion Des Périphériques Audio Et Vidéo
RACCORDEMENTS Connexion des périphériques audio et vidéo. AVERTISSEMENT • Ne reliez aucun appareil à l’alimentation secteur aussi longtemps que tous les raccordements ne sont pas terminés. • Toutes les connexions doivent être correctes: L (gauche) à L, R (droite) à R, “+” à “+” et “–” à “–”. Reportez-vous aussi au mode d’emploi de chaque appareil. -
Page 68: Raccordement Des Antennes Am Et Fm
Si vous constatez que la réception est de qualité médiocre, pensez à utiliser une antenne extérieure. Pour de plus amples détails concernant cette question, veuillez consulter le revendeur ou le service après-vente YAMAHA. • Si vous raccordez une antenne extérieure FM à cet appareil, ne raccordez pas l’antenne intérieure FM. -
Page 69: Raccordements De L'antenne Cadre Am
à la borne AM ANT et de le dérouler à l’extérieur par une fenêtre. Pour de plus amples détails concernant cette question, veuillez consulter le revendeur ou le service après- vente YAMAHA. Rentrez les fils électriques de l’antenne • L’antenne cadre AM doit être reliée à l’appareil, y compris dans cadre AM dans la prise AM ANT. -
Page 70: Raccordement Du Cordon D'alimentation
RACCORDEMENTS ■ AC OUTLET(S) (SWITCHED) Raccordement du cordon d’alimentation Modèle pour l’Australie.......1 prise secteur Autres modèles .......... 2 prises secteur Branchez le fil électrique dans AC IN au panneau arrière de Utilisez ces prises pour brancher la fiche du cordon l’appareil puis branchez la fiche du cordon d’alimentation à... -
Page 71: Mise Sous Tension Et Hors Tension De L'appareil
RACCORDEMENTS Mise sous tension et hors tension Appuyez MASTER ON/OFF du panneau avant de l’appareil vers la position ON pour mettre cet appareil sous tension. Tous les raccordements étant réalisés, mettez l’appareil MASTER sous tension. Main Zone de l’appareil s’allume. Vous pouvez régler Main Zone de cet appareil sur le ZONE 2 ON/OFF FM/AM... -
Page 72: Lecture Et Enregistrement
LECTURE ET ENREGISTREMENT LECTURE ET ENREGISTREMENT AVERTISSEMENT Il faut être très prudent lorsque vous écoutez des CD codés en DTS. Lorsque vous écoutez un CD codé en DTS sur un lecteur de CD incompatible avec DTS, vous entendez des parasites qui risquent d’abîmer les haut-parleurs. - Page 73 LECTURE ET ENREGISTREMENT Réglez la qualité du son avec les commandes BASS, TREBLE, BALANCE et LOUDNESS ou les commutateurs CD DIRECT AMP et PURE DIRECT sur la face avant. BASS TREBLE BALANCE LOUDNESS FLAT –30dB – – CD DIRECT AMP PURE DIRECT Appuyez une nouvelle fois sur MAIN ZONE ON/OFF sur la face avant (ou sur STANDBY...
-
Page 74: Réglage De La Qualité Du Son
LECTURE ET ENREGISTREMENT ■ Réglage de la commande LOUDNESS Réglage de la qualité du son Retient toute la gamme des sons à bas volume pour compenser la perte de sensibilité de l’oreille humaine au ■ Réglage de la commande BALANCE niveau des hautes et basses fréquences lorsque le volume Équilibre le son fourni par les enceintes gauche et droite est réduit. -
Page 75: Enregistrement D'une Source
LECTURE ET ENREGISTREMENT Enregistrement d’une source Tournez VOLUME sur la face avant (ou appuyez sur VOLUME +/– sur le boîtier de télécommande) pour régler le niveau sonore Remarques de la source que vous voulez enregistrer. • Les commandes VOLUME, BASS, TREBLE, BALANCE et LOUDNESS et les commutateur CD DIRECT AMP et PURE VOLUME DIRECT n’agissent pas sur la source en cours d’enregistrement. -
Page 76: Utilisation De La Minuterie De Mise Hors Service
LECTURE ET ENREGISTREMENT Utilisation de la minuterie de mise Appuyez à plusieurs reprises sur SLEEP de hors service façon que SLEEP OFF apparaisse sur l’afficheur de la face avant. Utilisez cette minuterie pour placer l’appareil en veille à l’expiration d’une certaine période. Cette minuterie est SLEEP commode si vous désirez vous coucher alors que l’appareil fournit un signal ou enregistre celui provenant... -
Page 77: Cette Touche Coupe Les Sons
LECTURE ET ENREGISTREMENT Cette touche coupe les sons. Appuyez sur MUTE du boîtier de télécommande pour couper le son. Le témoin MUTE clignote sur le panneau avant et MUTE ON s’affiche dans la fenêtre du panneau avant. MUTE MUTE Au bout de quelques secondes MUTE ON disparaît de la fenêtre du panneau avant. -
Page 78: Syntonisation Fm/Am
SYNTONISATION FM/AM SYNTONISATION FM/AM Il existe 2 méthodes de syntonisation; automatique et manuelle. Choisissez la méthode que vous préférez et et la puissance de réception de la station. Syntonisation automatique Appuyez une fois sur TUNING/CH l / h pour commander la syntonisation automatique. La syntonisation automatique est efficace lorsque les Appuyez sur h pour accorder une fréquence signaux captés sont puissants et qu’il n’existe aucun... -
Page 79: Syntonisation Manuelle
SYNTONISATION FM/AM Syntonisation manuelle Appuyez sur TUNING/CH l / h pour effectuer manuellement la syntonisation sur La syntonisation manuelle est efficace pour les stations la station désirée. dont le signal est trop faible. Maintenez la pression d’un doigt sur la touche pour poursuivre la recherche. -
Page 80: Mise En Mémoire Automatique Des Fréquences
SYNTONISATION FM/AM Mise en mémoire automatique des Appuyez sur FM/AM du panneau avant pour fréquences sélectionner la bande de réception FM. FM apparaît sur l’afficheur de la face avant. Vous pouvez employer la mise en mémoire automatique FM/AM pour enregistrer les stations FM. La mise en mémoire XM/ANT automatique des fréquences FM permet de détecter les stations puissantes et de mettre en mémoire jusqu’à... -
Page 81: Mise En Mémoire Automatique
SYNTONISATION FM/AM ■ Mise en mémoire automatique Appuyez sur TUNING/CH l / h du panneau personnalisée des fréquences Vous pouvez spécifier un groupe de présélection et un avant pour commencer la syntonisation numéro de station présélectionnée à partir duquel automatique des stations présélectionnées. l’appareil mettra en mémoire les stations FM Appuyez sur h pour accorder les fréquences automatiquement mises en mémoire. -
Page 82: Mise En Mémoire Manuelle
SYNTONISATION FM/AM Mise en mémoire manuelle Appuyez sur une des touches de numéro de station/canal présélectionné sur le panneau Vous pouvez faire une mise en mémoire manuelle des 40 avant pour attribuer un numéro de station stations (8 stations dans chacun des 5 groupes, A1 à E8). (1 à... -
Page 83: Choix D'une Présélection
SYNTONISATION FM/AM Choix d’une présélection Échange des fréquences Vous pouvez effectuer la syntonisation sur une station en Vous pouvez échanger le contenu de deux mémoires de choisissant simplement le numéro de la mémoire qui présélection. Le procédé suivant décrit un exemple contient la fréquence de cette station. -
Page 84: Syntoniseur Xm Satellite Radio
SYNTONISEUR XM SATELLITE RADIO SYNTONISEUR XM SATELLITE RADIO Que recouvre XM Satellite Radio? Raccordements XM Satellite Radio Reliez l’antenne pour signaux numériques XM Connect- Comme son nom l’indique, XM Satellite Radio est un and-Play (vendue séparément) à la prise XM placée sur le service radio qui intéresse des millions d’auditeurs aux panneau arrière de cet appareil. -
Page 85: Fonctions Xm Satellite Radio
SYNTONISEUR XM SATELLITE RADIO 5 Sélecteur INPUT Fonctions XM Satellite Radio Sélectionne XM comme source d’entrée. 6 CATEGORY Cette section traite du rôle des commandes utilisées pour la syntonisation de XM Satellite Radio. Recherche sur tous les canaux Commute entre les catégories du canal sans Remarque abandonner la recherche sur tous les canaux. - Page 86 Maintenez la pression d’un doigt pour boîtier de télécommande Zone 2 2, 7, 9, 0, A et B effectuer une recherche rapide. pour contrôler les lecteurs CD YAMAHA et les fonctions Recherche par catégorie de XM Satellite Radio. Cette touche commande une recherche de canal radio au sein de la catégorie sélectionnée.
-
Page 87: Activation De Xm Satellite Radio
SYNTONISEUR XM SATELLITE RADIO Activation de XM Satellite Radio Appuyez plusieurs fois de suite sur SEARCH MODE sur la face avant (ou sur SRCH MODE Pour bénéficier des services de XM Satellite Radio un de la télécommande) pour sélectionner la numéro d’identification XM Satellite Radio est requis. -
Page 88: Opérations De Base De Xm Satellite Radio
SYNTONISEUR XM SATELLITE RADIO Opérations de base de XM Appuyez plusieurs fois de suite sur DISP sur Satellite Radio la face avant (ou sur DISPLAY de la télécommande) pour afficher l’une des informations sur la station suivantes. TUN MODE/DISP DISPLAY AUTO/MAN'L ZONE 2 ON/OFF FM/AM... -
Page 89: Modes De Recherche Xm Satellite Radio
SYNTONISEUR XM SATELLITE RADIO Modes de recherche XM Satellite Appuyez plusieurs fois de suite sur Radio CATEGORY sur la face avant (ou sur A-E/ CAT. j / i de la télécommande) pour changer Vous pouvez rechercher également la station souhaitée à de catégorie du canal. -
Page 90: Recherche Par Catégorie
SYNTONISEUR XM SATELLITE RADIO ■ Recherche par catégorie ■ Recherche d’une présélection Avant de pouvoir effectuer une recherche de présélection, vous devez présélectionner les canaux XM Satellite Radio (voir page 37). Par défaut, les présélections (A1 à E8) rappellent “001 Preview”. ZONE 2 ON/OFF FM/AM l TUNING/CH h... -
Page 91: Accès Direct Par Le Numéro
SYNTONISEUR XM SATELLITE RADIO ■ Accès direct par le numéro Définition des présélections XM Satellite Radio Vous pouvez employer la méthode ci-dessous pour mettre en mémoire 40 canaux XM Satellite Radio ZONE 2 ON/OFF FM/AM l TUNING/CH h (8 présélections dans chacun des 5 groupes de canaux, PURE DIRECT CD DIRECT AMP XM/ANT... - Page 92 SYNTONISEUR XM SATELLITE RADIO Appuyez sur CATEGORY sur la face avant (ou sur A-E/CAT. j / i de la télécommande) pour sélectionner le groupe de canaux (A à E). La lettre désignant le groupe de canaux présélectionnés s’affiche. A/B/C/D/E ENTER CATEGORY A-E/CAT.
-
Page 93: Réglages Approfondis
RÉGLAGES APPROFONDIS RÉGLAGES APPROFONDIS ■ ADVANCED SETUP paramètres du menu Modification des paramètres du Modifiez le réglage initial (indiqué en caractères gras sous chaque paramètre) pour tenir compte des besoins de votre menu ADVANCED SETUP. environnement d’écoute. La menu ADVANCED SETUP apparaît sur l’afficheur de Réglages usine PRESET la face avant. -
Page 94: Commutation Du Numéro D'identification De La Télécommande
(voir page 39). Si vous utilisez plusieurs récepteurs ou amplificateurs YAMAHA qui ont le même code par défaut, il se peut que l’un de ces appareils se mettent tous en route en même temps. Dans ce cas, réglez l’appareil avec un code alternatif pour pouvoir le mettre en marche séparément. -
Page 95: Zone 2
• Un écran vidéo pour la seconde pièce. Certains modèles YAMAHA peuvent se connecter directement sur la prise REMOTE OUT à l’arrière de cette unité. Si vous possédez déjà ces appareils, vous n’avez pas besoin d’un émetteur d’infrarouges. Vous pouvez connecter jusqu’à six éléments YAMAHA comme indiqué... -
Page 96: Commandes Zone 2
ZONE 2 Commandes Zone 2 Utilisez la télécommande Zone 2 fournie pour commander la source d’entrée ou régler le volume de Zone 2 indépendamment des conditions d’écoute de la pièce principale. Appuyez sur POWER de la télécommande Zone 2 (ou ZONE 2 ON/OFF sur le panneau avant) pour mettre Zone 2 sous tension. -
Page 97: Particularités De La Télécommande
Les touches de la zone ombrée ci-dessous peuvent utilisées pour commander cette unité. être utilisées pour commander les éléments audio et vidéo de YAMAHA ou des autres fabricants. Chaque touche joue en rôle différent en fonction de l’appareil sélectionné. Sélectionnez l’appareil à régler en appuyant sur une des touches de sélection d’entrée. -
Page 98: Commande Des Autres Appareils
PARTICULARITÉS DE LA TÉLÉCOMMANDE Commande des autres appareils En plus de cet appareil, vous pouvez aussi commander MUTE INPUT d’autres éléments audio et vidéo de YAMAHA ou d’autre MUTE POWER POWER STANDBY POWER fabricants avec la télécommande fournie à cet effet. Pour commander les autres éléments, vous devez régler les... -
Page 99: Enregistrement Des Codes De Commande
Il se peut que vous ne soyez pas en mesure de commander les autres appareils YAMAHA bien que le code de télécommande YAMAHA initial figure dans la liste ci-dessus. Dans ce cas, essayez de régler avec un autre code de télécommande Remarques YAMAHA. -
Page 100: Guide De Dépannage
Reportez-vous au tableau suivant si l’appareil ne fonctionne pas comme il devrait. Si l’anomalie constatée n’est pas mentionnée, ou encore si les actions correctives suggérées sont sans effet, mettez l’appareil en veille, débranchez la fiche du cordon d’alimentation et prenez contact avec le revendeur ou le service après-vente de YAMAHA. ■ Généralités... -
Page 101: Syntoniseur
GUIDE DE DÉPANNAGE Cet appareil est hors tension ou bien en Mettez l’appareil sous tension. Le son est de moins veille. bonne qualité lorsque vous écoutez avec un casque raccordé au lecteur CD ou à la platine à cassette raccordé à cet appareil. - Page 102 GUIDE DE DÉPANNAGE ■ XM Satellite Radio Message d’erreur Causes possibles Actions correctives CHECK ANTENNA L’antenne pour signaux numériques XM Vérifiez le raccordement de l’antenne pour signaux Connect-and-Play n’est pas reliée, ou ne numériques XM Connect-and-Play. fonctionne pas convenablement. UPDATING Le code d’utilisateur XM est en cours de mise à...
-
Page 103: Caractéristiques Techniques
CARACTÉRISTIQUES TECHNIQUES CARACTÉRISTIQUES TECHNIQUES SECTION AUDIO SECTION VIDÉO • Puissance de sortie minimum efficace • Type du signal vidéo (8 Ω , 20 Hz à 20 kHz, 0,019% DHT) ....100 W + 100 W [Modèles pour les États-Unis, le Canada et modèle standard (6 Ω... - Page 104 YAMAHA ELECTRONICS (UK) LTD. YAMAHA HOUSE, 200 RICKMANSWORTH ROAD WATFORD, HERTS WD18 7GQ, ENGLAND YAMAHA SCANDINAVIA A.B. J A WETTERGRENS GATA 1, BOX 30053, 400 43 VÄSTRA FRÖLUNDA, SWEDEN YAMAHA MUSIC AUSTRALIA PTY, LTD. 17-33 MARKET ST., SOUTH MELBOURNE, 3205 VIC., AUSTRALIA...