Table des Matières

Publicité

Les langues disponibles
  • FR

Les langues disponibles

  • FRANÇAIS, page 75

Liens rapides

RELA
Standventilator mit Fernbedienung
DE
Pedestal Fan with Remote Control
EN
Ventilador de pie con control remoto
ES
Ventilateur sur pied avec télécommande
FR
Ventilatore a piantana con telecomando
IT
Staande ventilator met afstandsbediening
NL
V T X 2 0 0
NOW
DE
EN
ES
FR
IT
NL

Publicité

Table des Matières
loading

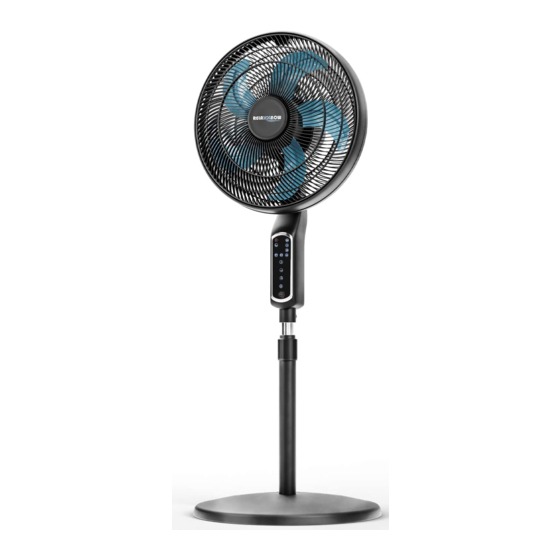
Sommaire des Matières pour RELAXXNOW VTX200

  • Page 1 RELA V T X 2 0 0 Standventilator mit Fernbedienung Pedestal Fan with Remote Control Ventilador de pie con control remoto Ventilateur sur pied avec télécommande Ventilatore a piantana con telecomando Staande ventilator met afstandsbediening...
  • Page 3 Sehr geehrter Kunde, wir freuen uns, dass Sie sich für ein Gerät aus der RELAXXNOW Produktpalette entschieden haben. RELAXXNOW Geräte bieten Ihnen höchste Qualität und neueste Technologie. Um die Leistungsfähigkeit des Gerätes voll ausnutzen zu können und viele Jahre Freude an Ihrem Gerät zu haben, lesen Sie bitte vor der Inbetriebnahme und dem Beginn des Trainings dieses Benutzerhandbuch sorgfältig durch und verwenden Sie das Gerät den Anweisungen entsprechend.
  • Page 4 Video Tutorials Unsere für Dich! In 3 einfachen Schritten zum schnellen und sicheren Start: Aufbau Benutzung Abbau 1. QR-Code scannen 2. Videos anschauen 3. schnell und sicher starten Link zu den Videos: https://service.innovamaxx.de/vtx200_video RELA...
  • Page 5: Table Des Matières

    INHALT 1. TECHNISCHE ANGABEN ....................6 2. LIEFERUMFANG ......................6 3. ALLGEMEINE HINWEISE ....................7 4. WICHTIGE SICHERHEITSHINWEISE ...................8 5. WARNHINWEISE ......................10 6. DIES KÖNNTE SIE AUCH INTERESSIEREN ................11 7. EXPLOSIONSZEICHNUNG / ERSATZTEILLISTE ..............12 8. GERÄTEÜBERSICHT ......................13 9. MONTAGE ........................14 10. INBETRIEBNAHME ......................16 11.
  • Page 6: Technische Angaben

    • App-Steuerung | W-Lan Funktion • flexible Anwendung für die Wohnung und den Arbeitsplatz WICHTIG Das Gerät ist zur Luftumwälzung ausschließlich von Innenräumen geeignet. 2. LIEFERUMFANG • 1x Standventilator VTX200 • 1x Fernbedienung (inklusive Batterien) • 1x Handbuch • 1x Adapter für Tischfunktion RELA...
  • Page 7: Allgemeine Hinweise

    3. ALLGEMEINE HINWEISE Bitte lesen Sie diese Bedienungsanleitung sorgfältig vor Gebrauch des Gerätes und bewahren Sie Sie an einem sicheren Ort auf. Benutzen Sie das Gerät nur wie beschrieben und machen Sie sich vor dem Benutzen des Produktes mit allen Bedien- und Sicherheitshinweisen vertraut. Entfernen Sie die Verpackung und prüfen Sie, ob das Produkt unbeschädigt ist.
  • Page 8: Wichtige Sicherheitshinweise

    4. WICHTIGE SICHERHEITSHINWEISE ACHTUNG Lesen Sie diese Sicherheitshinweise und Anweisungen vollständig durch. • Versäumnisse oder Verstöße gegen diese Sicherheitshinweise können unter Umständen zu elektrischen Stromschlägen, Bränden und / oder schweren Verletzungen führen. • Das Gerät darf von Kindern bis 14 Jahren nur unter Aufsicht benutzt werden. •...
  • Page 9: Verhalten Im Notfall

    • Stellen Sie das Gerät NIEMALS auf nassem Untergrund auf. • Legen Sie keine Gegenstände auf das Gerät (z. B. Kleidungsstücke). • Verwenden Sie das Gerät NICHT im Freien. • Eigenmächtige bauliche Veränderungen, An- und Umbauten sind verboten. • Ein anderer Betrieb als der in dieser Anleitung beschriebene ist verboten. •...
  • Page 10: Warnhinweise

    HINWEIS • Verwenden Sie zur Reinigung des Gerätes keine aggressiven Reinigungs-, Scheuer- oder Lösungsmittel. 5. WARNHINWEISE • Jede Wartung, die über die normale Pflege und den normalen Gebrauch hinaus geht, sollte von einem autorisierten Fachmann vorgenommen werden • Tauchen Sie das Gerät nicht in Wasser. •...
  • Page 11: Dies Könnte Sie Auch Interessieren

    6. DIES KÖNNTE SIE AUCH INTERESSIEREN SPORTSTECH – DFX100 MODERNER ARBEITSPLATZ Für das schnelle Workout im Büro oder zu Hause mit integrierter Smartphone Fitness App. GESUNDHEIT DURCH BEWEGUNG Ausdauer, Beweglichkeit, Mobilität, Rehabilitation und Konzentration. Steigern Sie langfristig Ihre Produktivität und nehmen Sie dabei Sie können dieses Produkt über folgenden QR-Code oder Link käuflich erwerben.
  • Page 12: Explosionszeichnung / Ersatzteilliste

    7. EXPLOSIONSZEICHNUNG / ERSATZTEILLISTE Unter folgendem Link finden Sie die Explosionszeichnung und die Ersatzteile-Liste: https://service.innovamaxx.de/vtx200_spareparts RELA...
  • Page 13: Geräteübersicht

    8. GERÄTEÜBERSICHT 1. Frontgitter 2. Drehscheibe 3. Lüfterflügel 4. Kunststoffmutter 5. Heckgitter mit Griff 6. Gitterverriegelung 7. Motorwelle 8. Motorgehäuse 9. obere Säule 10. Bedienfeld 11. oberer Säulenknopf 12. Netzkabel 13. mittlere Säule 14.Höhenverstellung Kontermutter 15. untere Säule 16. Adapter 17.
  • Page 14: Montage

    9. MONTAGE Öffnen Sie den Karton und entnehmen Sie das Gerät und alle darin enthaltenen Teile. WICHTIG 1. Entfernen Sie die Verpackung vollständig vom Gerät. 2. Wickeln Sie das Netzkabel vollständig ab. 3. Achten Sie darauf, dass Sie das Netzkabel nicht beschädigen bzw. dieses nicht beschädigt ist.
  • Page 15 ROTOR & GITTER Abbildung (3) A Entfernen und entsorgen Sie die Kunstverpackung auf der Motorwelle (#7). B Führen Sie das Heckgitter mit Griff (#5) entlang der Motorwelle (#7) gegen die Vorderseite des Motorgehäuses (#8). Stellen Sie sicher, dass der Griff an der Rückseite des Heckgitters (#5) nach oben zeigt und dass alle Führungszapfen am Motorgehäuse (#8) mit den Aussparungen am hinteren Gitter ausgerichtet sind.
  • Page 16: Inbetriebnahme

    Hinweis: Um das Frontgitter zu demontieren, ziehen Sie den Schnappverschlussstift leicht nach außen, während Sie das Frontgitter gegen den Uhrzeigersinn drehen. Ziehen Sie die Sicherungsschraube fest, um den Schnappverschlussstift zu sichern. Abbildung (4) 3. den Sicherungsstift ziehen 1. Einpassen und ausrichten 2.
  • Page 17: Das Bedienfeld

    11. DAS BEDIENFELD Dieser Ventilator ist mit 4 Geschwindigkeitsstärken, 2 Modi, einem Timer und einer Fernbedienung ausgestattet. Die Knöpfe auf der Schaltfläche haben dieselbe Funktion wie die auf der Fernbedienung. Alle Einstellungen des Gerätes können auch mit der mitgelieferten Fernbedienung vorgenommen werden. Die W-Lan Funktion ist von Anfang an eingeschaltet und lässt sich über die POWER und OSC -Tasten an- und ausschalten.
  • Page 18: Die Fernbedienung

    12. DIE FERNBEDIENUNG Hinweis: Entfernen Sie die Plastikisolierfolie unter der Batterie, bevor Sie die Fernbedienung ver- wenden. Der Betrieb unterliegt den folgenden beiden Bedingungen: 1. Dieses Gerät darf nicht zu Interferenzen führen. 2. Dieses Gerät muss alle Interferenzen akzeptieren, einschließlich Interferenzen, die möglicherweise zu unerwünschtem Betrieb des Gerätes führen können.
  • Page 19: Einstellmöglichkeiten Für Eine Verbesserte Luftzirkulation

    13. EINSTELLMÖGLICHKEITEN FÜR EINE VERBESSERTE LUFTZIRKULATION Der Ventilator hat drei Funktionen, die Ihnen ermöglichen, den Luftkomfort besser anzupassen und die Luftzirkulation im Raum zu verbessern. 1. Oszillation Um die Oszillation-Funktion für eine großflächige Windverteilung zu aktivieren, drücken Sie die Oszillation-Taste .
  • Page 20: App Funktion

    14. APP FUNKTION Hinweis: Diese App wird nur von 2.4Hz WiFi Netzwerk unterstützt. Bitte stellen Sie sicher, dass Ihr Mobiltelefon mit einem 2.4Hz WiFi Netzwerk verbunden ist. Schritt 1: Laden Sie die App herunter. Suchen und downloaden Sie die „Tuya Smart“ im Store. Schritt 2: Registrierung Öffnen Sie die App und registrieren Sie sich entsprechend der Anleitung.
  • Page 21 4. Drücken Sie für 5 Sekunden den OSC-Knopf , auf dem Bedienfeld des Ventilators. Der WiFi-Indikator auf dem Display beginnt schnell zu blinken. Drücken Sie „Confirm indicator rapidly blink“ auf dem Mobiltelefon, wie auf dem folgendem Bild dargestellt. Hinweis: Wenn die Verbindung fehlschlägt, drücken Sie „App Mode“ (rechts oben) und „Confirm indicator slowly blink“...
  • Page 22: Amazon Alexa

    AMAZON ALEXA 1. Wenn Sie Alexa nutzen wollen, drücken Sie „ME“ (rechts unten). 2. Wählen Sie „more services“ und dann „Alexa“. 3. Dort finden Sie, wie Sie Alexa nutzen. 4. Um den Ventilator AN / AUS zu schalten nutzen Sie den Sprachbefehl: „Alexa schalte den Ventilator AN / AUS.“...
  • Page 23: Transport Und Lagerung

    15. TRANSPORT UND LAGERUNG Bei unsachgemäßer Lagerung könnte das Gerät beschädigt werden. Bitte beachten Sie dringend die folgenden Hinweise. • Achten Sie darauf, den Ventilator vor der Lagerung zu zerlegen und zu reinigen. • Bewahren Sie die Originalverpackung für die Lagerung des Ventilators auf. •...
  • Page 24: Fehlerbehebung

    17. FEHLERBEHEBUNG Wenn der Ventilator nicht mehr funktionieren sollte, befolgen Sie bitte die folgenden Schritte, bevor Sie den Kundenservice kontaktieren: MÖGLICHE PROBLEM LÖSUNG URSACHE Der Ventilator Ventilator ist nicht an Schließen Sie Ihn an die entsprechen- geht nicht an. eine 220-240V AC, de Steckdose an und schalten Sie Ihn 50 / 60 Hz Steckdose erneut an.
  • Page 25: Technische Daten

    18. TECHNISCHE DATEN Größe: 16`` 450 mm x 430 mm x 1350 mm Abmessungen: Netzspannung: 220-240 V ~50 Hz Leistung: 55 W Geschwindigkeiten: 4 Stufen Lüftungsgeschwindigkeit: 3,8 m / s Geräuschpegel: 44 - 53 dB Netzkabellänge: 0,75 m Schwenkwinkel: 60° Gewicht: 4,3 kg RELA...
  • Page 26: Entsorgung

    19. ENTSORGUNG Recyclingkreislauf Verpackungsmaterialien können wieder dem Rohstoffkreislauf zugeführt werden. Entsorgen Sie die Verpackung gemäß den aktuellen Bestimmungen. Informationen erhalten Sie bei den Rückgabe- und Sammelsystemen Ihrer Gemeinde. B. Hinweise zur Entsorgung und Symbolik für ein Elektrogerät mit entnehmbarer Batterie: Hinweis zum Batteriegesetz (BattG) Batterien und Akkus dürfen nicht im Hausmüll entsorgt werden.
  • Page 27 Dear customer, We are pleased you chose a device from the RELAXXNOW product range. With equipment from RELAX- XNOW you get the highest quality and latest technology. In order to fully use the potential of your device and be able to enjoy it for many years, please read this manual carefully before starting up and beginning of training, and use the device according to the instruc- tions.
  • Page 28 video tutorials for you! 3 simple steps for a fast and safe start: construction reduction 1. scan the QR code 2. watch videos 3. start fast and safely https://service.innovamaxx.de/vtx200_video RELA...
  • Page 29 INDEX 1. TECHNICAL INFORMATION ....................30 2. SCOPE OF DELIVERY ......................30 3. GENERAL INFORMATION ....................31 4. IMPORTANT SAFETY INSTRUCTIONS ................32 5. WARNINGS ........................34 6. THIS MIGHT ALSO INTEREST YOU ..................35 7. EXPANDED ILLUSTRATION / SPARE PARTS LIST..............36 8. DEVICE OVERVIEW ......................37 9.
  • Page 30: Technical Information

    • flexible application for both the home and the workplace IMPORTANT The device is suitable for circulating air only indoors. 2. SCOPE OF DELIVERY • 1x pedestal fan VTX200 • 1x remote control (batteries included) • 1x manual pedestal fan VTX200 • 1x Adapter for table function RELA...
  • Page 31: General Information

    3. GENERAL INFORMATION Please read this manual carefully before using the device and keep it in a safe place. Only use the device as described and familiarize yourself with every aspect of the operating and safety instructions before using the product. Remove the packaging and check that the product is undamaged.
  • Page 32: Important Safety Instructions

    4. IMPORTANT SAFETY INSTRUCTIONS WARNING Read these safety instructions and instructions completely. • Failure to comply with this Safety Notice may result in electric shock, fire and / or serious injury. • The device may be used by children 8 years of age, but only under supervision. •...
  • Page 33 manual. • This device has a polarized plug. To reduce the risk of electric shock, this plug is only intended for a polarized socket. If the plug does not fit fully into the socket, turn the plug over. If it still does not fit afterwards, contact a qualified electrician. Do not try to bypass this security feature.
  • Page 34: Warnings

    5. WARNINGS • Any maintenance beyond normal care and use should be performed by an authorized professional. • Do not immerse the device in water. • Do not remove parts or remove the case to avoid the risk of fire or electric shock. •...
  • Page 35: This Might Also Interest You

    6. THIS MIGHT ALSO INTEREST YOU SPORTSTECH – DFX100 MODERN WORKPLACE: For a quick workout in the office or at home with an integrated smartphone fitness app. HEALTH THROUGH MOVEMENT: Endurance, flexibility, mobility, rehabilitation and concentration. Increase your long term productivity and lose weight.
  • Page 36: Expanded Illustration / Spare Parts List

    7. EXPANDED ILLUSTRATION / SPARE PARTS LIST AT THE FOLLOWING LINK AT THE FOLLOWING LINK YOU WILL FIND THE EXPLODED DRAWING YOU WILL FIND THE EXPLODED DRAWING AND THE SPARE PARTS LIST: AND THE SPARE PARTS LIST: https://service.innovamaxx.de/vtx200_spareparts RELA...
  • Page 37: Device Overview

    8. DEVICE OVERVIEW 1. Front grill 2. Turntable 3. Fan blades 4. Plastic nut 5. Rear gate with handle 6. Lattice lock 7. Motor shaft 8. Motor unit 9. Upper column 10. Control panel 11. Upper column button 12. Power cord 13.
  • Page 38: Assembly

    9. ASSEMBLY Open the box and remove the unit and all parts inside. IMPORTANT • Remove the packaging completely from the device. • Unwind the power cord completely. • Be careful not to damage the power cord. BASIS A Place the base (#17) on the floor. B Put the lower column (#15) into the base with the adapter (#16) and secure it by turning the...
  • Page 39 ROTOR & GRIDS (Fig. 3) A Remove and discard the plastic packaging of the motor shaft (#7). B Guide the rear grill with the handle (#5) along the motor shaft (#7) against the front of the motor unit (#8). Make sure that the handle on the back of the rear grill (#5) is facing up and that all the guide pins on the motor unit (#8) are aligned with the recesses on the rear grill.
  • Page 40: Commissioning

    Note: To disassemble the front grill, gently pull the snap lock pin outward while rotating the front grill counterclockwise. Tighten the locking screw to secure the snap lock pin. (Fig. 4) 3. Pull the locking pin 1. Fit and align 2.
  • Page 41: Control Panel

    11. CONTROL PANEL This fan is equipped with 4 speeds, 2 modes, a timer and a remote control. The buttons have the same function as those on the remote control. All settings of the device can also be accessed with the remote control supplied. The WiFi function is now switched on from the start and can be switched on and off using the POWER and OSC buttons.
  • Page 42: Remote Control

    12. REMOTE CONTROL Note: Remove the plastic insulation tab under the battery before using the remote con- trol. Operation is subject to the following two conditions: 1. This device does not encounter transmission interference, and 2. this device necessarily picks up any interference, including interference that may result in the compromised performance of the device.
  • Page 43: Setting Options For Improved Air Circulation

    13. SETTING OPTIONS FOR IMPROVED AIR CIRCULATION The fan has three functions which allow you to better adjust the air comfort and improve the air circulation in the room. 1. Oscillation To activate the oscillation function for wider wind distribution, press the oscillation button. To switch this function off, press the oscillation button again.
  • Page 44: App Function

    14. APP FUNCTION Note: This app is only supported by 2.4Hz WiFi network. Please make sure that your phone is connected to a 2.4Hz WiFi network Step 1: Download the app Search and download the „Tuya Smart“ from the store. Step 2: Registration Open the app and register according to the instructions.
  • Page 45 4. Press the OSC button on the fan control panel for 5 seconds. The WiFi indicator on the display starts flashing rapidly. Press „Confirm indicator rapidly blink“ on the mobile phone as on the is shown in the following picture. Note: If the connection fails, press „App Mode“...
  • Page 46: Amazon Alexa

    AMAZON ALEXA 1. If you want to use Alexa, press „ME“ (bottom right). 2. Select „more services“ and then „Alexa“. 3. There you will find how to use Alexa. 4. To switch the fan ON / OFF, use the voice command: 5.
  • Page 47: Transport And Storage

    15. TRANSPORT AND STORAGE Improper storage could damage the device. Please note the following important warnings. • Be sure to disassemble and clean the fan before storage. • Retain the original packaging for storing the fan. • Always keep the fan in a dry place. •...
  • Page 48: Troubleshooting

    17. TROUBLESHOOTING If the fan stops working, please follow these steps before contacting customer service: PROBLEM POSSIBLE CAUSE SOLUTION Fan is not connected Plug it into the appropriate outlet and The fan does not turn on. to a 220-240V AC, turn it on again.
  • Page 49: Technical Data

    18. TECHNICAL DATA Size: 16`` 450 mm x 430 mm x 1350 mm Dimensions: Power supply: 220-240 V ~50 Hz Power: 55 W Speeds: 4 Level Fan speed: 3,8 m / s Noise level: 44 - 53 dB Cable length: 0,75 m Rotation: 60°...
  • Page 50: Disposal

    19. DISPOSAL Recycling loop Packaging material can be conveyed back to the raw material cycle. Dispose of packaging material in accordance with legal provisions. Information can be retrieved from the return or collections systems of your community. B. Notes on Disposal of, and Symbols for, an Electrical Device with Removable Battery: Note on the Battery Act (BattG) Batteries and cells must not be disposed of with household waste.
  • Page 51 Estimado cliente, Nos complace que haya elegido un dispositivo de la línea de productos RELAXXNOW. Los dispositivos RELAXXNOW le ofrecen la más alta calidad y la última tecnología. Con el fin de usar todo el potencial de su dispositivo y para que pueda disfrutarlo durante muchos años, por favor lea este manual cuidadosamente antes de comenzar a ejercitarse, y use el dispositivo de acuer- do a las instrucciones.
  • Page 52 Nuestros tutoriales en video para usted! En 3 sencillos pasos para un arranque rápido y seguro: Construcción Utilizar Reducción 1. Escanear el código QR 2. Ver vídeos 3. Comienza rápido y seguro Enlace a los videos: https://service.innovamaxx.de/vtx200_video RELA...
  • Page 53 CONTENIDOS 1. DATOS TÉCNICOS ......................54 2. CONTENIDO ........................54 3. INFORMACIÓN GENERAL ....................55 4. CONSEJOS DE SEGURIDAD IMPORTANTES ...............56 5. ADVERTENCIAS DE SEGURIDAD ..................58 6. TAMBIÉN LE PUEDE INTERESAR ..................59 7. VISTA EXPLOSIONADA / LISTA DE RECAMBIOS ..............60 8. DESCRIPCIÓN DEL PRODUCTO ..................61 9.
  • Page 54: Datos Técnicos

    IMPORTANTE El dispositivo está diseñado para su uso en interiores. 2. CONTENIDO • 1 x Ventilador de pie VTX200 • 1 x Mando a distancia (pilas incluidas) • 1 x Manual de instrucciones VTX200 • 1x Adaptador para función de mesa...
  • Page 55: Información General

    3. INFORMACIÓN GENERAL Lea detenidamente estas instrucciones de funcionamiento antes de utilizar este aparato y guárdelas en un lugar seguro. Antes de utilizar el aparato, familiarícese con todas las instrucciones de uso y seguridad. Retire el embalaje y compruebe que el producto no esté dañado. Si hay alguna duda sobre la integridad del producto, no lo utilice y póngase en contacto con su proveedor.
  • Page 56: Consejos De Seguridad Importantes

    4. CONSEJOS DE SEGURIDAD IMPORTANTES ATENCIÓN: Lea estas instrucciones y consejos de seguridad al completo. • El incumplimiento de los consejos de seguridad puede provocar descargas eléctricas, incendios y/o lesiones graves. • Los niños mayores de 8 años deben utilizar el aparato bajo la supervisión de un adulto. •...
  • Page 57 • No altere ni amplíe el dispositivo. • Cualquier uso que no esté descrito en este manual está prohibido. • No seguir estas instrucciones anulará cualquier reclamación de responsabilidad y garantía. • Las personas que utilicen este equipo deben haber leído y comprendido todos los consejos de seguridad de este manual.
  • Page 58: Advertencias De Seguridad

    5. ADVERTENCIAS DE SEGURIDAD • Cualquier mantenimiento que vaya más allá del cuidado y uso normal debe ser realizado por un especialista autorizado. • No sumerja el aparato en agua. • Para evitar el riesgo de incendio o descarga eléctrica, no retire ninguna pieza de la estructura.
  • Page 59: También Le Puede Interesar

    6. TAMBIÉN LE PUEDE INTERESAR SPORTSTECH – DFX100 UN LUGAR DE TRABAJO MÁS MODERNO: Para hacer un entrenamiento rápido en la oficina o en casa con una app para smartphone integrada. DEPORTE ES SALUD: Resistencia, movilidad, agilidad, rehabilitación y concentración. Aumenta tu productividad a largo plazo.
  • Page 60: Vista Explosionada / Lista De Recambios

    7. VISTA EXPLOSIONADA / LISTA DE RECAMBIOS EN EL SIGUIENTE ENLACE EN EL SIGUIENTE ENLACE ENCONTRARÁS EL DIBUJO DE EXPLOSIÓN ENCONTRARÁS EL DIBUJO DE EXPLOSIÓN Y LA LISTA DE REPUESTOS: Y LA LISTA DE REPUESTOS: https://service.innovamaxx.de/vtx200_spareparts RELA...
  • Page 61: Descripción Del Producto

    8. DESCRIPCIÓN DEL PRODUCTO 1. Rejilla delantera 2. Placa giratoria 3. Palas de ventilador 4. Tuerca de plástico 5. Rejilla trasera con agarradera 6. Bloqueo de la rejilla 7. Eje del motor 8. Carcasa del motor 9. Parte superior del pie 10.
  • Page 62: Montaje

    9. MONTAJE Abra la caja y saque el dispositivo y todas sus partes. IMPORTANTE 1. Retire todo el embalaje del producto. 2. Desenrolle el cable de alimentación al completo. 3. Asegúrese que el cable de alimentación no sufra daños. BASE A Coloque la base (#17) en el suelo.
  • Page 63 ROTOR Y REJILLAS Imagen (3) A Retire y deseche el embalaje plástico del eje del motor (#7). B Coloque la rejilla trasera con agarradera (#5) junto con el eje del motor (#7) frente a la carcasa del motor (#8). Asegúrese de que la agarradera de la rejilla trasera (#5) apunte hacia arriba y de que los pasadores guía de la carcasa del motor (#8) estén alineados con los orificios de la rejilla trasera (#5).
  • Page 64: Puesta En Marcha

    ATENCIÓN: Para retirar la rejilla delantera, tire ligeramente del pasador elástico hacia fuera y gire la rejilla delantera en el sentido contrario a las agujas del reloj. Apriete el bloqueo de la rejilla para asegurar el pasador. Imagen (4) 3. Retirar el pasador 1.
  • Page 65: El Panel De Control

    11. EL PANEL DE CONTROL Este ventilador cuenta con 4 niveles de potencia, 2 modos, un temporizador y un control remoto. El panel de control cuenta con las mismas funciones que el control remoto. Todos los ajustes del dispositivo se pueden realizar con el control remoto. La función W-LAN está...
  • Page 66: El Control Remoto

    12. EL CONTROL REMOTO ATENCIÓN: Retire la lámina de aislamiento de plástico que se encuentra debajo de la batería antes de utilizar el control remoto. El funcionamiento está sujeto a dos condiciones: 1. Este dispositivo no puede causar interferencias y 2.
  • Page 67: Ajustes Para Mejorar La Circulación De Aire

    13. AJUSTES PARA MEJORAR LA CIRCULACIÓN DE AIRE Este ventilador tiene tres funciones que le permiten mejorar la circulación del aire en la habitación. 1. Oscilación Para activar la función Oscilación y repartir el aire en más zonas, pulse el botón de oscila- ción .
  • Page 68: Conexión Con Otras Aplicaciones

    14. CONEXIÓN CON OTRAS APLICACIONES ATENCIÓN: Esta App solo se conecta con una red WiFi que trabaje a 2,4 Hz. Asegúrese que su teléfono móvil está conectado a una red WiFi de 2,4 Hz. Paso 1: Descargar la App Busque y descargue la App Tuya Smart en su Store Paso 2: Registrarse Tras descargar la App, iníciela y regístrese siguiendo las instrucciones.
  • Page 69 4. Presione el botón OSC en el panel de control del ventilador durante 5 segundos hasta que el indicador WiFi de la pantalla comience a parpadear rápidamente. A continuación, pulse „Confirmar que el indicador parpadea rápidamente“ en el teléfono móvil, como se muestra en la imagen siguiente.
  • Page 70: Amazon Alexa

    AMAZON ALEXA 1. Si utiliza un dispositivo Alexa, pulse „ME“ en la parte inferior derecha. 2. Elija „más servicios“ y a continuación „Alexa“. 3. Allí tendrás toda la información sobre cómo controlar Alexa. 4. Para encender o apagar el ventilador puede decir „Alexa, enciende / apaga el ventilador“. RELA...
  • Page 71: Transporte Y Almacenaje

    15. TRANSPORTE Y ALMACENAJE Un almacenamiento inadecuado puede dañar el dispositivo. Preste atención a las siguientes indicaciones. • Siga los consejos de limpieza de este manual. Asegúrese de desmontar y limpiar el ventilador antes de guardarlo. • Conserve el embalaje original para guardar el ventilador. •...
  • Page 72: Solución De Problemas

    17. SOLUCIÓN DE PROBLEMAS Si el ventilador deja de funcionar, siga estos pasos antes de ponerse en contacto con el servicio de atención al cliente: PROBLEMA POSIBLE CAUSA SOLUCIÓN El ventilador no funciona. El ventilador no está Conéctelo a la toma de corriente ade- conectado a una toma cuada y vuelva a encenderlo.
  • Page 73: Datos Técnicos

    18. DATOS TÉCNICOS Tamaño: 16`` 450 mm x 430 mm x 1350 mm Dimensiones: Tensión necesaria: 220-240 V ~50 Hz Motor: 55 W Velocidad: 4 Nivel Velocidad de ventilación: 3,8 m / s Nivel de ruido: 44 - 53 dB Longitud del cable de alimentación: 0,75 m Ángulo de giro:...
  • Page 74: Opciones De Reciclaje

    19. OPCIONES DE RECICLAJE Reciclaje loop El material de empaque puede trasladarse de nuevo al ciclo de materias primas. Deshágase del material de empaque de acuerdo a las normativas legales. Puede encontrar información en los sistemas de recolección de su comunidad. B.
  • Page 75 FRANÇAIS Cher client, Nous sommes ravis que vous ayez choisi un appareil de la gamme de produits RELAXXNOW. Avec les équipements de RELAXXNOW, vous obtenez la plus haute qualité et la meilleure technologie. Afin d'utiliser pleinement le potentiel de votre appareil et de pouvoir l'apprécier pendant de nombreuses années, lisez attentivement ce manuel avant l'utilisation et le début de votre entraînement et utilisez l'ap-...
  • Page 76 tutoriels vidéo pour vous! 3 étapes simples pour un démarrage rapide et sécurisé: construction utilisation réduction 1. Scannez le code QR 2. Regarder les vidéos 3. Démarrez rapidement et en toute sécurité. Lien vers les vidéos: https://service.innovamaxx.de/vtx200_video RELA...
  • Page 77 CONTENU 1. DONNÉES TECHNIQUES ....................78 2. CONTENU DE LA LIVRAISON ...................78 3. INFORMATIONS GÉNÉRALES ...................79 4. CONSIGNES DE SÉCURITÉ IMPORTANTES ................80 5. AVERTISSEMENTS ......................82 6. CELA POURRAIT AUSSI VOUS INTÉRESSER ..............83 7. VUE ÉCLATÉE / LISTE DES PIÈCES DE RECHANGE .............84 8.
  • Page 78: Données Techniques

    • Utilisation polyvalente pour la maison et le lieu de travail IMPORTANT L‘appareil convient uniquement à la circulation de l‘air en intérieur. 2. CONTENU DE LA LIVRAISON • 1x Ventilateur sur pied VTX200 • 1x Télécommande (piles incluses) • 1x Manuel d‘utilisation VTX200 • 1x Adaptateur pour fonction table...
  • Page 79: Informations Générales

    3. INFORMATIONS GÉNÉRALES Veuillez lire attentivement ce mode d‘emploi avant d‘utiliser l‘appareil et conservez-le dans un endroit sûr. N‘utilisez l‘appareil que comme décrit et familiarisez-vous avec toutes les instructions d‘utilisation et de sécurité avant d‘utiliser l‘appareil. Retirez l‘emballage et vérifiez que le produit n‘est pas endommagé. En cas de doute sur l‘intégrité...
  • Page 80: Consignes De Sécurité Importantes

    4. CONSIGNES DE SÉCURITÉ IMPORTANTES ATTENTION Lisez l‘intégralité de ces consignes de sécurité et de ces instructions. • Le manquement à ces consignes de sécurité ou leur transgression peut entraîner des électrocutions, des incendies et/ou des blessures graves. • L‘appareil peut être utilisé par des enfants de plus de 8 ans, mais seulement sous surveillance. •...
  • Page 81: Risque D'étouffement

    • Une INSTALLATION INCORRECTE peut provoquer un incendie, une électrocution ou des blessures graves. • NE placez JAMAIS l‘appareil sur une surface mouillée. • Ne posez pas d‘objets sur le ventilateur (par ex. des vêtements). • N‘utilisez PAS l‘appareil à l‘extérieur. •...
  • Page 82: Avertissements

    5. AVERTISSEMENTS • Tout entretien allant au-delà de l‘entretien et de l‘utilisation normale devrait être effectué par un spécialiste autorisé. • Ne pas plonger l‘appareil dans l‘eau. • Pour éviter tout risque d‘incendie ou d‘électrocution, n‘enlevez ni de quelconques pièces du ventilateur ni son boîtier.
  • Page 83: Cela Pourrait Aussi Vous Intéresser

    6. CELA POURRAIT AUSSI VOUS INTÉRESSER SPORTSTECH – DFX100 LIEU DE TRAVAIL MODERNE: Pour un entraînement accéléré au bureau ou à la maison avec une application smartphone de fitness intégrée. LA SANTÉ PAR LE MOUVEMENT: Endurance, mobilité, motricité, rééducation et concentration. Augmentez votre productivité...
  • Page 84: Vue Éclatée / Liste Des Pièces De Rechange

    7. VUE ÉCLATÉE / LISTE DES PIÈCES DE RECHANGE A L‘ADRESSE SUIVANTE A L‘ADRESSE SUIVANTE VOUS TROUVEREZ LE DESSIN ÉCLATÉ VOUS TROUVEREZ LE DESSIN ÉCLATÉ ET LA LISTE DES PIÈCES DE RECHANGE : ET LA LISTE DES PIÈCES DE RECHANGE : https://service.innovamaxx.de/vtx200_spareparts RELA...
  • Page 85: Aperçu De L'appareil

    8. APERÇU DE L‘APPAREIL 1. Grille avant 2. Plaque rotative 3. Hélice du ventilateur 4. Écrou plastique 5. Grille arrière avec poignée 6. Verrouillage de la grille 7. Arbre moteur 8. Boîtier du moteur 9. Colonne supérieure 10. Panneau de commande 11.
  • Page 86: Montage

    9. MONTAGE Ouvrez le carton et retirez l‘appareil et toutes les pièces qui l‘accompagnent. IMPORTANT 1. Retirez complètement l‘emballage de l‘appareil. 2. Déroulez complètement le cordon d‘alimentation. 3. Assurez-vous de ne pas endommager le cordon d‘alimentation ou bien qu‘il ne soit pas endommagé.
  • Page 87 ROTOR & GRIDS Image (3) A Retirez et jetez l‘emballage en plastique de l‘arbre moteur (#7). B Guidez la grille arrière avec la poignée (#5) le long de l‘arbre moteur (#7) vers l‘avant du boîtier du moteur (#8). Assurez-vous que la poignée à l‘arrière de la grille arrière (#5) soit dirigée vers le haut et que tous les ergots sur le boîtier du moteur (#8) soient alignés avec les encoches sur la grille arrière.
  • Page 88: Mise En Service

    Conseil Pour retirer la grille avant, tirez légèrement la goupille de la fermeture à ressort vers l‘extérieur tout en tournant la grille avant dans le sens contraire des aiguilles d‘une montre. Serrez la vis de blocage pour sécuriser la goupille de la fermeture à ressort. Image (4) 3.
  • Page 89: Panneau De Commande

    11. PANNEAU DE COMMANDE Ce ventilateur est doté de 4 niveaux de vitesse, de 2 modes, d‘une minuterie et d‘une télécommande. Les touches du tableau de commande ont les mêmes fonctions que celles de la télécommande. Tous les réglages de l‘appareil peuvent également être effectués à...
  • Page 90: Télécommande

    12. TÉLÉCOMMANDE Remarque: Enlevez le film isolant en plastique sous la batterie avant d‘utiliser la télécommande. L‘utilisation est soumise aux deux conditions suivantes : 1. Cet appareil ne doit pas causer d‘interférences nuisibles. 2. Cet appareil doit supporter toutes les interférences reçues, y compris celles qui peuvent causer un fonctionnement non désiré.
  • Page 91: Réglages Possibles Pour Une Meilleure Circulation De L'air

    13. RÉGLAGES POSSIBLES POUR UNE MEILLEURE CIRCULATION DE L‘AIR Le ventilateur a trois fonctions qui vous permettent de mieux réguler le bien-être apporté par la ventilation et d‘améliorer la circulation de l‘air dans la pièce. 1. Oscillation Pour activer la fonction d‘oscillation et obtenir une plus grande surface de répartition du .
  • Page 92: Application

    14. APPLICATION Remarque: Cette application n‘est prise en charge que par le réseau WiFi 2,4 Hz. Veuillez-vous assurer que votre téléphone mobile est connecté à un réseau WiFi 2,4 Hz. Pas Étape 1 : télécharger l‘application. Recherchez et téléchargez „Tuya Smart“ sur un grand marché d‘applications. Étape 2 : inscription Après avoir téléchargé...
  • Page 93 4. Appuyez sur le bouton OSC du tableau de commande du ventilateur pendant 5 secondes jusqu‘à ce que l‘indicateur WiFi de l‘écran commence à clignoter rapide- ment. Appuyez ensuite sur le bouton „Confirm indicator rapidly blink / Confirmer l‘indicateur clignote rapidement“...
  • Page 94: Amazon Alexa

    AMAZON ALEXA 1. Si vous voulez utiliser Alexa, appuyez sur „ME“ (en bas à droite). 2. Sélectionnez ensuite „more services / plus de services“ et ensuite „alexa“. 3. Vous y trouverez comment utiliser Alexa. 4. Pour allumer ou éteindre le ventilateur, vous pouvez dire „Alexa allumer/éteindre le ventilateur“.
  • Page 95: Transport Et Stockage

    15. TRANSPORT ET STOCKAGE En cas de stockage inapproprié l‘appareil pourrait être endommagé. Veuillez expressément observer les instructions suivantes. • Suivez les instructions de nettoyage de ce manuel. Veillez à démonter et à nettoyer le ventilateur avant de le ranger. •...
  • Page 96: Dépannage

    17. DÉPANNAGE Si le ventilateur devait ne plus fonctionner, veuillez suivre les étapes suivantes avant de contacter le service clientèle: PROBLÈME CAUSE POSSIBLE SOLUTION Le ventilateur ne s‘allume pas. Le ventilateur n‘est pas Branchez-le sur une prise de courant branché à une prise appropriée et allumez-le à...
  • Page 97: Données Techniques

    18. DONNÉES TECHNIQUES Taille: 16`` 450 mm x 430 mm x 1350 mm Dimensions: Tension secteur: 220-240 V ~50 Hz Rendement: 55 W Vitesses: 4 Niveau Vitesse de ventilation: 3,8 m / s Niveau sonore: 44 - 53 dB Longueur du câble: 0,75 m Angle d‘oscillation: 60°...
  • Page 98: Mise Au Rebut

    19. MISE AU REBUT Chaîne du recyclage Les matériaux d‘emballage peuvent être transportés vers le cycle des matières premières. La disposition des matériaux d‘emballage, conformément aux dispositions légales. Les informations peuvent être récupérées à partir des systèmes de retour ou de collections. B.
  • Page 99 ITALIANO Gentile cliente Siamo lieti che abbiate scelto un dispositivo della gamma RELAXXNOW. Con le attrezzature di RELAX- XNOW potrete usufruire della più alta qualità e della più recente tecnologia. Per sfruttare a pieno il potenziale del dispositivo e poterlo utilizzare per molti anni, raccomandiamo di leggere attentamente questo manuale prima di iniziare l’allenamento e di utilizzare il dispositivo seguendo...
  • Page 100 Il nostro Video Tutorial per te! 3 semplici passaggi per un inizio veloce e sicuro: Montaggio Utilizzo Smontaggio 1. Scannerizza il QR-Code 2. Guarda il Video 3. Inizia ad allenarti! Link per il Video: https://service.innovamaxx.de/vtx200_video RELA...
  • Page 101 INDICE 1. INFORMAZIONI TECNICHE ....................102 2. VOLUME DI CONSEGNA ....................102 3. INFORMAZIONI GENERALI ....................103 4. ISTRUZIONI DI SICUREZZA IMPORTANTI ................104 5. AVVERTENZE .........................106 6. POTREBBE INTERESSARTI ANCHE QUESTO ..............107 7. ELENCO DISEGNO ESPLOSO / PARTI DI RICAMBIO ............108 8. PANORAMICA DEL DISPOSITIVO ..................109 9.
  • Page 102: Informazioni Tecniche

    • Utilizzabile a casa e a lavoro IMPORTANTE Il dispositivo è adatto per la circolazione dell‘aria solo in spazi chiusi. 2. VOLUME DI CONSEGNA • 1x Ventilatore a piantana VTX200 • 1x telecomando (batterie incluse) • 1x manuale VTX200 • 1x Adattatore per funzione da tavolo...
  • Page 103: Informazioni Generali

    3. INFORMAZIONI GENERALI Leggere attentamente questo manuale prima di utilizzare il dispositivo e conservarlo in un luogo sicuro. Utilizzare il dispositivo solo come descritto e far proprie tutte le istruzioni operative e di sicurezza prima di utilizzare il prodotto. Rimuovere l‘imballaggio e verificare che il prodotto non sia danneggiato. In caso di dubbi, non utilizzare il prodotto e contattare il proprio rivenditore.
  • Page 104: Istruzioni Di Sicurezza Importanti

    4. ISTRUZIONI DI SICUREZZA IMPORTANTI ATTENZIONE Leggere le istruzioni di sicurezza e di funzionamento fino in fondo. • La mancata osservanza del presente avviso di sicurezza può provocare scosse elettriche, incendi e / o lesioni gravi. • Il dispositivo può essere utilizzato da bambini di 8 anni, ma solo se presente un supervisore.
  • Page 105 • NON posizionare MAI il ventilatore su una superficie bagnata. • Non posizionare oggetti sul ventilatore (ad es. indumenti). • NON utilizzare il dispositivo all‘aperto. • Sono vietate modifiche strutturali, estensioni e conversioni non autorizzate. • Sono vietate operazioni diverse da quelle descritte in questo manuale. •...
  • Page 106: Avvertenze

    PERICOLO DI SOFFOCAMENTO • Non lasciare in giro il materiale di imballaggio. • Potrebbe diventare un giocattolo pericoloso per i bambini. • Comportamento in caso di emergenza: • Spegni immediatamente il dispositivo. • Scollegare la ventola dall‘alimentazione estraendo la spina. •...
  • Page 107: Potrebbe Interessarti Anche Questo

    6. POTREBBE INTERESSARTI ANCHE QUESTO SPORTSTECH – DFX100 POSTO DI LAVORO MODERNO: Per un allenamento veloce a casa o in ufficio con app fitness per smartphone integrata. MOVIMENTO PER UNA FORMA SMAGLIANTE: Resistenza, mobilità, flessibilità, riabilitazione e concentrzione. Aumentate la vostra produttività e perdete peso.
  • Page 108: Elenco Disegno Esploso / Parti Di Ricambio

    7. ELENCO DISEGNO ESPLOSO / PARTI DI RICAMBIO AL SEGUENTE LINK AL SEGUENTE LINK TROVERETE IL DISEGNO ESPLOSO TROVERETE IL DISEGNO ESPLOSO E LA LISTA DEI PEZZI DI RICAMBIO: E LA LISTA DEI PEZZI DI RICAMBIO: https://service.innovamaxx.de/vtx200_spareparts RELA...
  • Page 109: Panoramica Del Dispositivo

    8. PANORAMICA DEL DISPOSITIVO 1. Griglia frontale 2. Girante 3. Pale del ventilatore 4. Dado di plastica 5. Griglia posteriore con presa 6. Blocco reticolare 7. Albero motore 8. Alloggiamento motore 9. Colonna superiore 10. Pannello di controllo 11. Pulsante colonna superiore 12.
  • Page 110: Montaggio

    9. MONTAGGIO Aprire la scatola ed estrarre tutte le parti all‘interno. IMPORTANTE 1. Rimuovere completamente l‘imballaggio dal dispositivo. 2. Svolgere completamente il cavo di alimentazione. 3. Fare attenzione a non danneggiare il cavo di alimentazione. BASE A Posizionare la base (#17) sul pavimento. B Incastrare la colonna inferiore (# 15) nella base con l‘adattatore (# 16) e fissarla ruotando la colonna (#15) in senso orario.
  • Page 111 ROTORE E GRIGLIA Figura (3) A Rimuovere e gettare l‘imballaggio di plastica (#7). B Guida la griglia posteriore con presa (#5) lungo l‘albero del motore (#7) la parte anteriore dell‘alloggiamento motore (#8). Accertarsi che la presa della griglia posteriore (#5) sia rivolta verso l‘alto e che tutti i perni guida sull‘alloggiamento del motore (#8) siano allineati con gli incavi sulla griglia posteriore.
  • Page 112: Messa In Servizio

    Nota: Per smontare la griglia anteriore, tirare delicatamente il perno di bloccaggio verso l‘esterno mentre si ruota la griglia in senso antiorario. Stringere la vite di bloccaggio per fissare il perno. Figura (4) 3. Tirare il perno di bloccaggio 1. Montare e allineare 2.
  • Page 113: Il Pannello Di Controllo

    11. IL PANNELLO DI CONTROLLO Questo ventilatore è dotato di 4 velocità, 2 modalità, un timer e un telecomando. I suoi pulsanti hanno la stessa funzione di quelli posti sul telecomando. Ciò che viene impostato direttamente sul dispositivo può essere impostato e regolato anche con il telecomando in dotazione. La funzione WiFi è...
  • Page 114: Il Telecomando

    12. IL TELECOMANDO Consiglio: Rimuovere la pellicola di plastica sotto la batteria prima di utilizzare il telecomando. Il funzionamento è soggetto alle due seguenti condizioni: 1. Questo dispositivo potrebbe non causare interferenze dannose. 2. Questo dispositivo deve accettare qualsiasi interferenza, comprese quelle che potrebbero causare un funzionamento indesiderato del dispositivo.
  • Page 115: Regolazione Dell'aria

    13. REGOLAZIONE DELL‘ARIA Il ventilatore ha tre funzioni che consentono di regolare meglio il comfort dell‘aria e miglio- rare la circolazione dell‘aria nella stanza. 1. Oscillazione Per attivare la funzione di oscillazione per distribuire l‘aria su vasta area, premere il pulsante di oscillazione.
  • Page 116: App

    14. APP Nota: Questa app è supportata solo dalla rete WiFi a 2,4Hz. Assicurati che il tuo cellulare sia collegato a una rete WiFi a 2,4Hz. Passaggio 1: scarica l‘app. Trova e scarica „Tuya Smart“ nel negozio. Passaggio 2: registrazione Apri l‘app e registrati secondo le istruzioni.
  • Page 117 4. Premere il pulsante OSC sul pannello di controllo della ventola per 5 secondi. L‘indicatore WiFi sul display inizia a lampeggiare rapidamente. Premere „Confirm indicator rapidly blink“ sul telefono cellulare. Nota: Se la connessione non riesce, premere „App Mode“ (in alto a destra) e „Confirm indicator slowly blink“...
  • Page 118: Amazon Alexa

    AMAZON ALEXA 1. Se vuoi usare Alexa, premi „ME“ (in basso a destra). 2. Seleziona „more services“ e poi „Alexa“. 3. Lì troverai come usare Alexa. 4. Utilizzare il comando vocale per accendere / spegnere il ventilatore: „Alexa attiva / disattiva la ventola.“ RELA...
  • Page 119: Trasporto E Stoccaggio

    15. TRASPORTO E STOCCAGGIO Una conservazione non corretta potrebbe danneggiare il dispositivo. Si prega di seguire attentamente quanto segue. • Seguire le istruzioni di pulizia descritte in questo manuale. Assicurati di smontare e pulire il ventilatore prima di posarlo. • Conservare l‘imballaggio originale. •...
  • Page 120: Risoluzione Dei Problemi

    17. RISOLUZIONE DEI PROBLEMI Se il ventilatore smette di funzionare, seguire questi passaggi prima di contattare il servizio clienti: PROBLEMA POSSIBILE CAUSA SOLUZIONE La ventola non si accende. La ventola non è colle- Collegalo alla presa appropriata e gata a una presa 220- riaccendilo.
  • Page 121: Dati Tecnici

    18. DATI TECNICI Dimensioni: 16`` 450 mm x 430 mm x 1350 mm Misure: Alimentazione: 220-240 V ~50 Hz Potenza: 55 W Velocità: 4 Livello Velocità della ventola: 3,8 m / s Livello di rumore: 44 - 53 dB Lunghezza del cavo: 0,75 m Rotazione: 60°...
  • Page 122: Smaltimento

    19. SMALTIMENTO Riciclaggio dei rifiuti Il materiale di imballaggio può essere trasportato di nuovo al ciclo delle materie prime. Smaltire il materiale di imballaggio in conformità alle disposizioni di legge. Le informazioni possono essere recuperate dai sistemi di ritorno o di raccolta della vostra comunità. B.
  • Page 123 GEBRUIKSAANWIJZING NEDERLANDS Geachte klant, We zijn blij dat je een apparaat uit het RELAXXNOW-assortiment hebt gekozen. RELAXXNOW biedt je de hoogste kwaliteit en de nieuwste technologie. Lees vóór gebruik deze gebruikershandleiding aandachtig door en gebruik het apparaat zoals aangege- ven. Zo zul je ten volle van de prestaties van het apparaat kunnen profiteren en er vele jaren geniet van hebben.
  • Page 124 Onze Video-tutorials voor jou! In 3 eenvoudige stappen voor een snelle en veilige start: Montage Gebruik Demontage 1. Scan de QR-code 2. Bekijk video‘s 3. Begin snel en veilig Link naar de video‘s: https://service.innovamaxx.de/vtx200_video RELA...
  • Page 125 INHOUD 1. TECHNISCHE INFORMATIE ....................126 2. LEVERINGSOMVANG ......................126 3. ALGEMENE INFORMATIE ....................127 4. BELANGRIJKE VEILIGHEIDSINSTRUCTIES ................128 5. WAARSCHUWINGEN .......................130 6. DIT KAN OOK INTERESSANT VOOR JE ZIJN ..............131 7. EXPLOSIETEKENING / ONDERDELENLIJST ................132 8. OVERZICHT VAN HET APPARAAT ..................133 9. MONTAGE ........................134 10.
  • Page 126: Technische Informatie

    • flexibele toepassing voor thuis en op de werkplek BELANGRIJK Het apparaat is alleen geschikt voor de luchtcirculatie binnenshuis. 2. LEVERINGSOMVANG • 1x Staande ventilator VTX200 • 1x Afstandsbediening (inclusief batterijen) • 1x Handboek VTX200 • 1x Adapter voor tafelfunctie...
  • Page 127: Algemene Informatie

    3. ALGEMENE INFORMATIE Lees deze handleiding aandachtig voordat je het apparaat in gebruik neemt. Bewaar de handleiding op een veilige plaats. Gebruik het apparaat alleen zoals beschreven en maak jezelf vertrouwd met alle bedienings- en veiligheidsinstructies voordat je het product in gebruik neemt.
  • Page 128: Belangrijke Veiligheidsinstructies

    4. BELANGRIJKE VEILIGHEIDSINSTRUCTIES LET OP Lees deze veiligheidsinstructies en alle aanwijzingen volledig door. • Het niet naleven van deze veiligheidsinstructies kan leiden tot elektrische schokken, brand en/of ernstig letsel. • Het apparaat mag gebruikt worden door kinderen vanaf 8 jaar, maar alleen onder toezicht. •...
  • Page 129 • VERKEERDE INSTALLATIE kan brand, elektrische schokken of ernstig letsel veroorzaken. • Plaats het toestel NOOIT op een natte ondergrond. • Plaats geen voorwerpen op het apparaat (bijv. kleding). • Gebruik het toestel NIET buitenshuis. • Ongeautoriseerde structurele wijzigingen, uitbreidingen en aanpassingen zijn verboden. •...
  • Page 130: Waarschuwingen

    VERSTIKKINGSGEVAAR: • Laat het verpakkingsmateriaal niet achteloos rondslingeren. • Het kan een levensbedreigend speelgoed voor kinderen worden. Wat te doen bij noodgevallen: • Schakel het apparaat onmiddellijk uit. • Koppel de ventilator los van het stroomnet door de stekker uit het stopcontact te trekken. •...
  • Page 131: Dit Kan Ook Interessant Voor Je Zijn

    6. DIT KAN OOK INTERESSANT VOOR JE ZIJN SPORTSTECH – DFX100 MODERNE WERKPLEK: Voor een snelle workout op kantoor of thuis met de geïntegreerde Fitness-app voor je smartphone. GEZONDHEID DOOR BEWEGING: Uithoudingsvermogen, beweging, mobiliteit, revalidatie en concentratie. Verhoog je productiviteit op lange termijn en verlies gewicht.
  • Page 132: Explosietekening / Onderdelenlijst

    7. EXPLOSIETEKENING / ONDERDELENLIJST ONDER DE VOLGENDE LINK ONDER DE VOLGENDE LINK VIND JE DE EXPLOSIETEKENING VIND JE DE EXPLOSIETEKENING EN DE RESERVEONDERDELENLIJST: EN DE RESERVEONDERDELENLIJST: https://service.innovamaxx.de/vtx200_spareparts RELA...
  • Page 133: Overzicht Van Het Apparaat

    8. OVERZICHT VAN HET APPARAAT 1. Voorste rooster 2. Draaischijf 3. Ventilatorbladen 4. Kunststof moer 5. Achterste rooster met handgreep 6. Roostervergrendeling 7. Motoras 8. Motorbehuizing 9. Bovenste kolom 10. Bedieningspaneel 11. Bovenste kolomknop 12. Netsnoer 13. Middelste kolom 14. Borgmoer voor hoogteverstelling 15.
  • Page 134: Montage

    9. MONTAGE Open de doos en verwijder het apparaat en alle onderdelen. BELANGRIJK 1. Verwijder de verpakking volledig van het apparaat. 2. Wikkel het netsnoer volledig af. 3. Pas op dat je het netsnoer niet beschadigt of let erop dat het niet is beschadigd. BASIS A Plaats de basis (#17) op de vloer.
  • Page 135 ROTOR & GRIDS Figuur (3) A Verwijder de kunststofverpakking op de motoras (#7) en voer deze af. B Leid het achterste rooster met handgreep (#5) langs de motoras (#7) naar de voorkant van de motorbehuizing (#8). Zorg ervoor dat de handgreep aan de achterkant van het achterste rooster (#5) naar boven wijst en dat alle geleidepennen op de motorbehuizing (#8) zijn uitgelijnd met de uitsparingen op het achterste rooster.
  • Page 136: Ingebruikname

    Let op: Om het voorste rooster te demonteren, trek je de klikpen iets naar buiten terwijl je het voorste rooster tegen de klok in draait. Draai de borgschroef vast om de klikpen vast te zetten. Figuur (4) 3. De borgpen uittrekken 1.
  • Page 137: Het Bedieningspaneel

    11. HET BEDIENINGSPANEEL Deze ventilator heeft 4 snelheidsniveaus, 2 modi, een timer en een afstandsbediening. De knoppen op het bedieningspaneel hebben dezelfde functie als de knoppen op de afstandsbediening. Alle instellingen van het apparaat kunnen ook met de meegeleverde afstandsbediening worden gemaakt. De WLAN-functie is vanaf het begin ingeschakeld en kan via de POWER- en OSC-knoppen worden in- en uitgeschakeld.
  • Page 138: De Afstandsbediening

    12. DE AFSTANDSBEDIENING Let op: Verwijder de kunststof isolatiefolie onder de batterij voordat je de afstandsbediening ge- bruikt. De werking is onderworpen aan de volgende twee voorwaarden: 1. Het apparaat mag geen interferentie veroorzaken. 2. Het apparaat moet alle interferentie accepteren, inclusief interferentie die tot ongewenste werking van het apparaat kan leiden.
  • Page 139: Instelmogelijkheden Voor Een Betere Luchtcirculatie

    13. INSTELMOGELIJKHEDEN VOOR EEN BETERE LUCHTCIRCULATIE De ventilator heeft drie functies die je in staat stellen het luchtcomfort beter aan te passen en de luchtcirculatie in de kamer te verbeteren. 1. Oscillatie Druk op de oscillatieknop om de oscillatiefunctie voor een grote windverdeling te activeren.
  • Page 140: App-Functies

    14. APP-FUNCTIES Let op: Deze app wordt alleen ondersteund door een 2.4Hz WiFi-netwerk. Zorg ervoor dat je mobiele telefoon is aangesloten op een 2,4Hz WiFi-netwerk. Stap 1: download de app. Zoek en download “Tuya Smart” in de store. Stap 2: registratie Open de app en registreer je volgens de instructies.
  • Page 141 4. Druk gedurende 5 seconden op de OSC-knop op het bedieningspaneel van de ventilator.De WiFi-indicator op het display begint snel te knipperen. Druk op de smarttelefoon op “Confirm indicator rapidly blink”, zoals weergegeven op de volgen- de afbeelding. Let op: Als de verbinding mislukt, druk je op “App Mode”...
  • Page 142 AMAZON ALEXA 1. Als je Alexa wilt gebruiken, drukt je op “ME” (rechtsonder). 2. Selecteer “more services” en vervolgens “Alexa”. 3. Daar vind je hoe je Alexa gebruikt. 4. Om de ventilator AAN/UIT te schakelen, gebruik je de spraakopdracht: 5. “Alexa, zet de ventilator AAN/UIT.” RELA...
  • Page 143: Transport En Opslag

    15. TRANSPORT EN OPSLAG Onjuiste opslag kan het apparaat beschadigen. Let aandachtig op de volgende opmerkingen. • Volg de reinigingsinstructies in deze handleiding op. Zorg ervoor dat je de ventilator demonteert en schoonmaakt voordat je hem bewaart. • Bewaar de originele verpakking voor de opslag van de ventilator. •...
  • Page 144: Problemen Oplossen

    17. PROBLEMEN OPLOSSEN Als de ventilator niet meer werkt, volg je deze stappen voordat je contact opneemt met de klantenservice: MOGELIJKE OOR- PROBLEEM OPLOSSING ZAAK De ventilator schakelt niet in. De ventilator is niet aan- Steek de stekker in een geschikt stop- gesloten op een stop- contact en zet hem weer aan.
  • Page 145: Technische Gegevens

    18. TECHNISCHE GEGEVENS Hoogte: 16`` 450 mm x 430 mm x 1350 mm Afmetingen: Netspanning: 220-240 V ~50 Hz Vermogen: 55 W Snelheden: 4 Niveau Ventilatorsnelheid: 3,8 m / s Geluidsniveau: 44 - 53 dB Lengte netsnoer: 0,75 m Rotatie: 60°...
  • Page 146: Verwijdering

    19. VERWIJDERING Recyclingcyclus Verpakkingsmaterialen kunnen worden teruggebracht in de grondstoffenkringloop. Voer de verpakking af volgens de geldende voorschriften. Informatie kan worden verkregen uit de retournerings- en ophaalsystemen van je gemeente. B. Instructies voor verwijdering en symbolen voor een elektrisch apparaat met verwijderbare batterij: Opmerking over de batterijwet (BattG - Duitse norm) Batterijen en accu's mogen niet met het huisvuil worden weggegooid.
  • Page 147: Declaration Of Conformity

    20. DECLARATION OF CONFORMITY UNTER FOLGENDEM LINK UNTER FOLGENDEM LINK FINDEN SIE DIE KONFORMITÄTSERKLÄRUNG: FINDEN SIE DIE KONFORMITÄTSERKLÄRUNG: AT THE FOLLOWING LINK AT THE FOLLOWING LINK YOU WILL FIND THE DECLARATION OF CONFORMITY: YOU WILL FIND THE DECLARATION OF CONFORMITY: HTTPS://SERVICE.INNOVAMAXX.DE/VTX200_CONFORMITY HTTPS://SERVICE.INNOVAMAXX.DE/VTX200_CONFORMITY RELA...
  • Page 148 Verkauf durch / Distributed by / Distribuido por / Distribué / Distribuito da/ Verkoop via Innovamaxx GmbH Postdamer Platz 11 D-10785 Berlin +49 (0)30 220 66 35 20 | Mo-Fr | 09:00 -18:00 Uhr service@innovamaxx.de www.relaxxnow.de RELA...

Table des Matières