Table des Matières

Publicité

Les langues disponibles
  • FR

Les langues disponibles

  • FRANÇAIS, page 59

Liens rapides

RELA
NOW
VTX300
Standventilator
DE/EN/ES/FR/IT/NL

Publicité

Table des Matières
loading

Sommaire des Matières pour RELAXXNOW VTX300

  • Page 1 RELA VTX300 Standventilator DE/EN/ES/FR/IT/NL...
  • Page 3 Liebe Kundinnen, wir freuen uns, dass Sie sich für ein Gerät aus der RELAXXNOW Produktpalette entschieden haben. RELAXXNOW Geräte bieten Ihnen hohe Qualität und neue Technologie. Um die Leistungsfähigkeit des Gerätes voll ausnutzen zu können und viele Jahre Freude an Ihrem Gerät zu haben, lesen Sie bitte vor der Inbetriebnahme und dem Beginn des Trainings dieses Benutzerhandbuch sorgfältig durch und verwenden Sie das Gerät den Anweisungen entsprechend.
  • Page 4: Table Des Matières

    TECHNISCHE ANGABEN ................6 ALLGEMEINE HINWEISE ................7 WARNHINWEISE ..................8 MONTAGEANLEITUNG ................8 INBETRIEBNAHME .................. 10 SPEZIFIKATIONEN ................... 13 APP FUNKTION ..................14 REINIGUNG & AUFBEWAHRUNG ............... 18 FEHLERBEHEBUNG ................. 19 ENTSORGUNG ..................20 KONFORMITÄT ..................22 RELA...
  • Page 5 Video Tutorials Unsere für dich! Aufbau Benutzung Abbau In 3 einfachen Schritten zum schnellen und sicheren Start: 1. QR-Code scannen 2. Videos anschauen 3. schnell und sicher starten Link zu den Videos: https://service.innovamaxx.de/vtx300_video Relaxxnow 5...
  • Page 6: Technische Angaben

    Kopf des Ventilators kann manuell nach oben gekippt werden (max 90°). • Luxus-Vollkunststoffgehäuse mit Patentschließfachsystem, einfache Montage und Demontage, kein Werkzeug erforderlich. • Gewichteter runder Standfuß, leicht zu montierendes Standrohr. Lieferumfang: • 1x Ventilator VTX300 • 1x Fernbedienung • 1x Bedienungsanleitung 6 Relaxxnow...
  • Page 7: Allgemeine Hinweise

    Teppichen, Läufern oder ähnlichem ab. Verlegen Sie das Kabel so, dass niemand darüber stolpern kann. • Um das Gerät vom Strom zu trennen, ziehen Sie den Stecker aus der Steckdose. Ziehen Sie dafür am Netzstecker, NIEMALS am Kabel. Relaxxnow 7...
  • Page 8: Warnhinweise

    Tisch, stecken Sie den Adapter (19) hinein und befestigen Sie ihn, indem Sie den Adapter (19) im Uhr- zeigersinn drehen. 2. Setzen Sie die obere Säule (8) auf den Verbindungsadapter (19). Ziehen Sie den oberen Knopf der Säule an (11). 8 Relaxxnow...
  • Page 9 5. Montieren Sie das vordere Gitter (1) gegen das hintere Gitter (5), indem Sie die Markierungen auf der Oberseite entsprechend ausrichten. Verbinden Sie nun beide Teile mit Hilfe der Haken am vorderen Gitter (1) und der Schlitze am hinteren Gitter (5). Der Schnappverschlussstift sollte nun in der richtigen Position einrasten. Relaxxnow 9...
  • Page 10: Inbetriebnahme

    Stellen Sie sicher, dass mögliche Gegenstände (z.B. Vorhänge, Kleidung o. ä.) den Luftstrom nicht behindern. Setzen Sie die Batterien in die Fernbedienung ein. Sind die Batterien ab Werk bereits in die Fernbedienung eingelegt, so müssen Sie noch die Schutzfolie entfernen. 10 Relaxxnow...
  • Page 11 Die Oszillation kann gesteuert werden, während der Lüfter in Betrieb ist. Die W-Lan Funtion wird 3 sec. eingeschaltet, nachdem der Knopf drei Sekun- Oszillation den gedrückt wurde. Mit diesem Knopf schalten Sie den Ventilator an und aus. Power ON/OFF Relaxxnow 11...
  • Page 12: Bedienung Der Fernbedienung

    Reinigen Sie die Batteriekontakte und die des Gerätes, bevor Sie die Batterie in die Fernbedienung legen. • Vergewissern Sie sich, dass die Batterien korrekt eingelegt wurden, in Bezug auf die Polarität (Anpassung der + / - Seiten der Batterie). • Entfernen Sie gebrauchte und beschädigte/entladene Batterien sofort. 12 Relaxxnow...
  • Page 13: Einstellmöglichkeiten Für Eine Verbesserte Luftzirkulation

    Position geneigt werden. Hinweis: Der Ventilator muss ausgeschaltet sein, wenn Sie diese Einstellung vor- nehmen. SPEZIFIKATIONEN MODEL/ SKU VTX300 SPANNUNG (V) 220-240 V AC, 50/60 HZ WATTLEISTUNG (W) 55 W VORSICHT: Um einen Stromschlag zu vermeiden, stellen Sie sicher, dass der Stecker stets richtig an der Steckdose angeschlossen ist.
  • Page 14: App Funktion

    1. Stecken Sie den Stecker des Ventilators in eine 220-240V Steckdose. Der Ventilator befindet sich nun im Standby Modus. 2. Drücken Sie „Add Device“ oder „+“ in der oberen rechten Ecke auf der Homesei- te der App, siehe Bild unten. 14 Relaxxnow...
  • Page 15 3. Drücken Sie auf „Small Home Appliances“ und auf „Ventilator“ („Fan“), wie im unteren Bild dargestellt. Relaxxnow 15...
  • Page 16 5. Wenn Ihr Mobiltelefon eine Verbindung an- zeigt und der WiFi Indikator auf dem Ventilator aufhört zu leuchten, ist die App mit dem Ventilator verbunden. Bei einer erfolgreichen Verbindung können Sie den Ventilator mit der App steuern. 16 Relaxxnow...
  • Page 17: Amazon Alexa

    Dort finden Sie, wie Sie Alexa nutzen. Um den Ventilator an- oder auszuschalten nutzen Sie den Sprachbefehl „Alexa, schalte den Ventilator an/aus“. Alternativ können Sie Ihrem Gerät über die Geräteeinstellungen der Alexa-App auch einen individuellen Namen geben, den Sie dann für die Sprachsteuerung verwenden. Relaxxnow 17...
  • Page 18: Reinigung & Aufbewahrung

    Entfernen Sie Öl und Flecken von dem Körper, um Schäden an dem Ventilator zu vermeiden. Nehmen Sie den Ventilator nach der Aufbauanleitung in umgekehrter Reihenfolge auseinander, legen Sie ihn zurück in den Karton und lagern Sie ihn an einem trockenen Ort. 18 Relaxxnow...
  • Page 19: Fehlerbehebung

    Stecker wieder an und schalten Sie das Gerät wieder ein. Die Fernbedienung Die Batterien sind Folgen Sie den Richtlinien für die funktioniert nicht. zu schwach. Verwendung der Batterien und der Die Fernbedienung Fernbedienung. ist zu weit vom Gerät entfernt. Relaxxnow 19...
  • Page 20: Entsorgung

    Kategorie 1, 2 oder 4 im Sinne von Anlage 1 ElektroG erworben haben, können Sie von uns bei der Auslieferung des bestellten Neugeräts die unentgeltliche Abholung eines vergleichbaren Elektroaltgeräts fordern. Bitte wenden Sie sich hierfür an unsere Mitarbeiter. Sie erreichen uns per E-Mail unter takeaway@sportstech.de. Weitergehende Informationen zur Abholung eines Elektroaltgeräts finden Sie unter www.sportstech.de/entsorgung. Daneben 20 Relaxxnow...
  • Page 21 Gesundheitsschutz. Jede Batterie, die Sie fachgerecht entsorgen, wird für die Herstellung neuer Batterien wiederverwendet. Recyclingkreislauf Verpackungsmaterialien können wieder dem Rohstoffkreislauf zugeführt werden. Entsorgen Sie die Verpackung gemäß den aktuellen Bestimmungen. Informationen erhalten Sie bei den Rückgabe- und Sammelsystemen Ihrer Gemeinde. Relaxxnow 21...
  • Page 22: Konformität

    KONFORMITÄT Hiermit erklärt Sportstech Brands Holding GmbH, dass der Funkanlagentyp der Richtlinie 2014/53/EU entspricht. Der vollständige Text der EU-Konformitätserklärung ist unter der folgenden Internetadresse verfügbar: https://service.innovamaxx.de/vtx300_conformity 22 Relaxxnow...
  • Page 23 Dear customer, We are pleased you chose a device from the RELAXXNOW product range. With equipment from RELAXXNOW you get high quality and new technology. In order to fully use the potential of your device and be able to enjoy it for many years, please read this manual carefully before starting up and beginning of training, and use the device according to the instructions.
  • Page 24 TECHNICAL SPECIFICATIONS ..............26 GENERAL INFORMATION ................27 WARNINGS .................... 28 ASSEMBLY INSTRUCTIONS ..............28 GETTING STARTED ................. 30 SPECIFICATIONS ..................33 APP FUNCTION ..................34 CLEANING AND STORAGE ............... 38 TROUBLESHOOTING ................39 DISPOSAL ....................40 CONFORMITY ..................40 RELA...
  • Page 25 3 simple steps for a fast and safe start: 1. scan the QR code 2. watch videos 3. start fast and safely Link to the videos: https://service.innovamaxx.de/vtx300_video Relaxxnow 25...
  • Page 26: Technical Specifications

    Head of the fan can be manually tilted upwards (max 90 °). • Luxury all-plastic casing with patent locker system, easy assembly and disassembly, no tools needed. • Weighted round base, easy to mount stand tube. Delivery contents: 1x VTX300 fan 1x remote control 1x User Manual 26 Relaxxnow...
  • Page 27: General Information

    Do not lay the cable under a carpet. Do not cover the cable with carpets, runners or similar. Lay the cable so that nobody can trip over it. • To disconnect the device from the mains, disconnect the plug from the socket. NEVER pull on the mains plug and NEVER pull on the cable. Relaxxnow 27...
  • Page 28: Warnings

    Place the pedestal (15) on a table, insert the adapter (19), and tighten it by turning the adapter (19) clockwise. 2.Put the top pillar (8) onto the connec- tion adapter (19). Tighten the top button of the column (11). 28 Relaxxnow...
  • Page 29 5. Mount the front grill (1) against the rear grill (5) by aligning the markings on the top according- ly. Now connect both parts using the hooks on the front grill (1) and the slots on the rear grill (5). The snap lock pin should now snap into place. Relaxxnow 29...
  • Page 30: Getting Started

    Make sure that possible objects (such as curtains, clothing, etc.) do not obstruct the airflow. Insert the batteries into the remote control. If the batteries are already inserted into the remote control ex works, you must remove the protective foil. 30 Relaxxnow...
  • Page 31 The oscillation can be controlled button once. while the fan is operating. The W-Lan function is activated after the 3 sec. button has been pressed for three Oscillation seconds. With this button you can turn the fan on and off. Power ON/OFF Relaxxnow 31...
  • Page 32: Operating The Remote Control

    Make sure that the batteries are inserted correctly, especially with regard to polarity, by adjusting the +/- sides of the battery to the corresponding indicators on the remote control. • Remove used and damaged / discharged batteries immediately. 32 Relaxxnow...
  • Page 33: Specifications

    To a maximum, it can be tilted almost to a horizontal position Note: The fan must be switched off if you make this adjustment SPECIFICATIONS MODEL/ SKU VTX300 VOLTAGE (V) 220-240 V AC, 50/60 HZ WATTAGE(W) 55 W CAUTION: To avoid electric shock, adjust the wide edge of the connector to the wide slot.
  • Page 34: App Function

    Step 3 - Connect the app to the fan 1. Plug the fan plug into a 220-240V outlet. The fan is in standby mode. 2. Press „Add Device“ or „+“ in the upper right corner on the home page of the app as shown below. 34 Relaxxnow...
  • Page 35 3. Press „Small Home Appliances“ and „Fan“ as shown in the picture below. Relaxxnow 35...
  • Page 36 5. When your mobile phone displays a connection and the WiFi indicator on the fan stops lighting, the app is connected to the fan. If the connection is successful, you can use the app to control the fan. 36 Relaxxnow...
  • Page 37: Amazon Alexa

    To turn the fan on or off, use the voice demand „Alexa, turn the fan on / off“. Alternatively, you can also assign an individual name to your fan via the device settings of the Alexa app, which you can then use for voice control. Relaxxnow 37...
  • Page 38: Cleaning And Storage

    Apply a few drops of lubricant to the motor shaft to prevent corrosion.Remove any excess oil and stains from the body to prevent any damage to the fan. Take the fan apart according to the assembly instructions in reverse order, put it back in the box and store it in a dry place. 38 Relaxxnow...
  • Page 39: Troubleshooting

    Follow the operating instructions of does not work. weak. the remote control and the The remote is too guidelines for using the remote far away from the control batteries. device. The remote control does not send a signal to the device. Relaxxnow 39...
  • Page 40: Disposal

    CONFORMITY Sportstech Brands Holding GmbH hereby declares that the radio system type is compliant with EU Directive 2014/53 / EU. The full text of the EU declaration of conformity is available at the following internet address: https://service.innovamaxx.de/vtx300_conformity 40 Relaxxnow...
  • Page 41 Querido cliente, Nos complace que haya elegido un dispositivo de la línea de productos RELAXXNOW. Los disposi- tivos RELAXXNOW ofrecen una gran calidad y una tecnología innovadora. Con el fin de usar todo el potencial de su dispositivo y para que pueda disfrutarlo durante muchos años, por favor lea este manual cuidadosamente antes de comenzar a ejercitarse, y use el dispo-...
  • Page 42 DATOS TÉCNICOS ................... 44 INFORMACIÓN GENERAL ................. 45 INSTRUCCIONES DE MONTAJE ..............46 ADVERTENCIAS DE SEGURIDAD ............... 46 PUESTA EN MARCHA ................48 ESPECIFICACIONES ................. 51 COMPATIBLE CON APP ................52 LIMPIEZA Y ALMACENAMIENTO ..............56 SOLUCIÓN DE ERRORES ................. 57 OPCIONES DE RECICLAJE................
  • Page 43 Nuestros para usted! Montaje Utilizar Desmontaje En 3 sencillos pasos para un arranque rápido y seguro: 1. Escanear el código QR 2. Ver vídeos 3. Comienza rápido y seguro Enlace a los videos: https://service.innovamaxx.de/vtx300_video Relaxxnow 43...
  • Page 44: Datos Técnicos

    Estructura de plástico de gran calidad con sistema de montaje y desmontaje sencillo, sin necesidad de herramientas Base redonda con peso, tubo de soporte fácil de montar. Contenido: 1x Ventilador VTX300 1x control remoto 1x manual de instrucciones 44 Relaxxnow...
  • Page 45: Información General

    Extienda el cable para que nadie se pueda tropezar con él. • Para desconectarlo de la red eléctrica, desenchufe el cable de alimentación de la toma de corriente. Nunca desconecte el cable de un tirón. Relaxxnow 45...
  • Page 46: Instrucciones De Montaje

    1. Coloque la base (15) sobre una mesa, inserte el adaptador (19) y apriételo girándolo en el sentido de las agujas del reloj. 2. Coloque el tubo superior (8) sobre el adaptador (19). Pulse el botón superior del tubo (11). 46 Relaxxnow...
  • Page 47 5. Monte la rejilla delantera (1) haciendo coincidir las muescas en la parte superior con las de la rejilla trasera (5). Una vez que coincidan, una los ganchos de la rejilla delantera (1) con los ganchos de la rejilla trasera (5). El pasador elástico debe encajar en la posición correcta. Relaxxnow 47...
  • Page 48: Puesta En Marcha

    Desenrolle por completo el cable de alimentación. Asegúrese de que ningún objeto (ej. cortinas, ropa...) obstaculice el flujo de aire. Inserte las pilas en el mando a distancia. Si las pilas vienen puestas de fábrica, aún debe retirar la película protectora. 48 Relaxxnow...
  • Page 49 La oscilación se puede controlar mientras el ventilador está funcionando. La función W-Lan 3 sec. se activa después de haber pulsado el Oscilación botón durante tres segundos. Este botón enciende o apaga el ventilador. ON/OFF Relaxxnow 49...
  • Page 50: Funcionamiento Del Control Remoto

    Limpie el contacto de las pilas antes de introducirlas. • Asegúrese de que la pila esté correctamente colocada, especialmente en términos de polaridad, haciendo coincidir los lados +/- de la pila con los indicadores correspondientes del control remoto. • inmediatamente las baterías usadas, dañadas o descargadas. 50 Relaxxnow...
  • Page 51: Ajustes Para Mejorar La Circulación De Aire

    ATENCIÓN: El ventilador debe permanecer apagado hasta que se complete el ajuste. ESPECIFICACIONES MODELO VTX300 ALIMENTACIÓN 220-240 V AC, 50/60 HZ MOTOR (En vatios) 55 vations ATENCIÓN: Para evitar descargas eléctricas, ajuste el borde ancho del enchufe a la ranura ancha.
  • Page 52: Compatible Con App

    1. Conecte el ventilador a un enchufe de 220-240V. El ventilador debe estar en modo Standby. 2. Pulse en „Añadir dispositivo“ („Add Device“) o en „+“ en la esquina superior derecha de la pantalla de inicio como se ve en la siguiente imagen. 52 Relaxxnow...
  • Page 53 3. Pulse sobre „Electrodomésticos“ („Small Home Appliances“) y después sobre el ventilador („Fan“), como se muestra en la imagen de abajo. Relaxxnow 53...
  • Page 54 5. Si su teléfono dice que está conectado y el indicador WiFi del ventilador está encendido, entonces ambos dispositivos están vinculados. Si la conexión es correcta, puede controlar el ventilador con la aplicación. 54 Relaxxnow...
  • Page 55: Amazon Alexa

    Para encender o apagar el ventilador puede decir „Alexa, enciende/apaga el ventilador“. También puede darle un nombre individual a su dispositivo a través de los ajustes del dispositivo de la aplicación Alexa, que puede utilizar para el control por voz. Relaxxnow 55...
  • Page 56: Limpieza Y Almacenamiento

    Aplique unas cuantas gotas de lubricante al eje del motor para evitar la corrosión. Retire la grasa y las manchas de la estructura para evitar daños al ventilador. Desmonte el ventilador en orden inverso a las instrucciones de montaje, vuelva a colocarlo en la caja y guardelo en un lugar seco. 56 Relaxxnow...
  • Page 57: Solución De Errores

    Siga las instrucciones en los funciona. gastado. apartados Funcionamiento del El control remoto está control remoto y Directrices para demasiado lejos del el uso de las pilas del control ventilador. remoto. El control remoto no emite ninguna señal al ventilador. Relaxxnow 57...
  • Page 58: Opciones De Reciclaje

    CONFORMIDAD Sportstech Brands Holding GmbH declara que el sistema de radio tipo cumple con la directiva 2014/53/EU. El texto completo de la Declaración UE de Conformidad está disponible en el siguiente enlace: https://service.innovamaxx.de/vtx300_conformity 58 Relaxxnow...
  • Page 59: Assurez-Vous Que Toutes Les Personnes Utilisant

    FRANÇAIS Chère clientèle, Nous sommes ravis que vous ayez choisi un appareil de la gamme de produits RELAXXNOW. Avec les équipements de RELAXXNOW, vous obtenez une qualité élevée et une technologie innovante. Afin d'utiliser pleinement le potentiel de votre appareil et de pouvoir l'apprécier pendant de nom- breuses années, lisez attentivement ce manuel avant l'utilisation et le début de votre entraînement...
  • Page 60 DONNÉES TECHNIQUES ................62 INFORMATIONS GÉNÉRALES ..............63 AVERTISSEMENTS .................. 64 NOTICE DE MONTAGE ................64 MISE EN MARCHE ................... 66 SPÉCIFICATIONS ..................69 FONCTION DE L‘APPLICATION ..............70 NETTOYAGE ET STOCKAGE ..............74 RÉSOLUTION DES PROBLÈMES ............... 75 MISE AU REBUT ..................76 CONFORMITÉ...
  • Page 61 3 étapes simples pour un démarrage rapide et sécurisé: 1. Scannez le code QR 2. Regarder les vidéos 3. Démarrez rapidement et en toute sécurité. Lien vers les vidéos: https://service.innovamaxx.de/vtx300_video Relaxxnow 61...
  • Page 62: Données Techniques

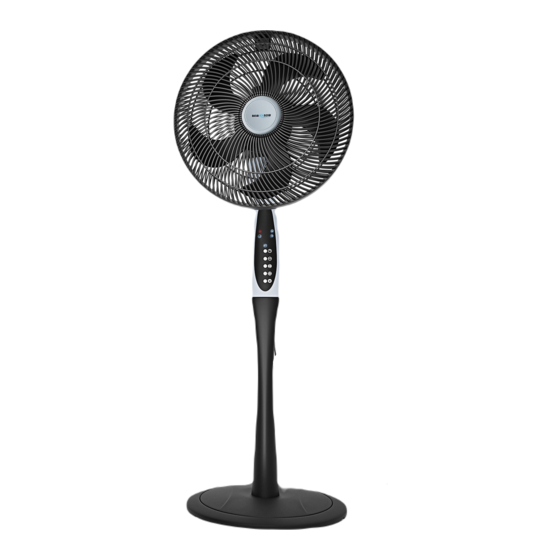
    Structure de luxe en plastique plein avec système de fermeture breveté, montage et démontage simple, aucun outil requis. • Pied rond lesté, tube facile à monter. Contenu de la livraison : 1x ventilateur VTX300 1x télécommande 1x mode d‘emploi 62 Relaxxnow...
  • Page 63: Informations Générales

    Posez le câble de façon à ce que personne ne puisse se prendre les pieds dedans. • Pour débrancher l‘appareil du secteur, retirez la fiche de la prise murale. Pour cela tirez sur la fiche secteur, NE tirez JAMAIS sur le câble. Relaxxnow 63...
  • Page 64: Avertissements

    1. Placer le pied (15) sur une table, insérer l‘adaptateur (19) et serrer en tournant l‘adaptateur (19) dans le sens des aiguilles d‘une montre. 2. Placer la colonne supérieure (8) sur l‘adaptateur de connexion (19). Serrer le bouton supérieur de la colonne (11). 64 Relaxxnow...
  • Page 65 Reliez maintenant les deux parties en utilisant les crochets de la grille avant (1) et les encoches de la grille arrière (5). La goupille de la fermeture à ressort (20) devrait maintenant s‘engager dans la bonne position. Relaxxnow 65...
  • Page 66: Mise En Marche

    Assurez-vous que d‘éventuels objets n‘obstruent pas le flux d‘air (par ex. rideaux, vêtements, etc...). Insérez les piles dans la télécommande. Si les piles sont déjà insérées dans la télécommande à l‘usine, vous devez retirer le film de protection. 66 Relaxxnow...
  • Page 67 L‘oscillation cette touche Oscillation. peut être contrôlée lorsque le ventilateur est en marche. La fonction W-Lan est activée après trois 3 sec. secondes d‘appui sur Oscillation la touche. Utilisez ce bouton pour allumer et éteindre le ventilateur. ON/OFF Relaxxnow 67...
  • Page 68: Utilisation De La Télécommande

    Veillez à ce que la pile soit correctement insérée, en particulier en ce qui concerne la polarité, en ajustant les côtés +/- de la pile aux indicateurs correspondants sur la télécommande. • Retirez immédiatement les piles usagées, endommagées ou déchargées. 68 Relaxxnow...
  • Page 69: Possibilités De Réglage Pour Une Meilleure Circulation De L'air

    REMARQUE: Le ventilateur doit être éteint lorsque vous effectuez ce réglage. SPÉCIFICATIONS MODÈLE/ SKU VTX300 TENSION (V) 220-240 V AC, 50/60 HZ UISSANCE (W) 55 vations ATTENTION: Pour éviter tout électrocution, ajustez le bord large du connecteur à la fente large.
  • Page 70: Fonction De L'application

    Étape 3 : connecter l‘application au ventilateur 1. Insérez la fiche du ventilateur dans une prise 220-240V. Le ventilateur est en mode veille. 2. Appuyez sur „Add Device“ ou „+“ dans le coin supérieur droit de la page d‘accueil de l‘application, voir image ci-dessous. 70 Relaxxnow...
  • Page 71 3. Appuyez sur „Small Home Appliances“ et sur le ventilateur („Fan“), comme indiqué sur l‘image ci-dessous. Relaxxnow 71...
  • Page 72 „ sur le téléphone mobile comme indiqué dans l‘image ci-dessous. 5. Lorsque votre téléphone mobile affiche une connexion et que l‘indicateur WiFi du ventilateur cesse de clignoter, l‘application est connectée au ventilateur. Si la connexion est réussie, vous pouvez contrôler le ventilateur avec l‘application. 72 Relaxxnow...
  • Page 73: Amazon Alexa

    Pour allumer ou éteindre le ventilateur, vous pouvez dire „Alexa allumer/éteindre le ventilateur“. Vous pouvez également donner un nom individuel à votre appareil via les paramètres de l‘application Alexa, que vous pouvez ensuite utiliser pour la commande vocale. Relaxxnow 73...
  • Page 74: Nettoyage Et Stockage

    Appliquer quelques gouttes de lubrifiant sur le moteur pour prévenir la corrosion. Enlevez l‘huile et les taches sur le corps pour éviter d‘endommager le ventilateur. Démonter le ventilateur dans l‘ordre inverse des instructions de montage, le remettre dans le carton et le conserver dans un endroit sec. 74 Relaxxnow...
  • Page 75: Résolution Des Problèmes

    Les piles sont trop Respectez le fonctionnement fonctionne pas. faibles. La télécom- de la télécommande et les mande est trop loin de instructions d‘utilisation des l‘appareil. La télécom- piles de la télécommande. mande n‘envoie pas de signal à l‘appareil. Relaxxnow 75...
  • Page 76: Mise Au Rebut

    être récupérées à partir des systèmes de retour ou de collections. CONFORMITÉ Sportstech Brands Holding GmbH déclare par la présente que l‘installation radio de type est conforme à la directive 2014/53/CE. Le texte intégral de la déclaration UE de conformité est disponible à l‘adresse Internet suivante: https://service.innovamaxx.de/vtx300_conformity 76 Relaxxnow...
  • Page 77: Assicurarsi Che Tutte Le Persone Che Usano L'attrezzo

    ITALIANO Cari client Siamo lieti che abbiate scelto un dispositivo della gamma RELAXXNOW. Con le attrezzature di RELAXXNOW potrete usufruire della alta qualità e tecnologia innovativa. Per sfruttare a pieno il potenziale del dispositivo e poterlo utilizzare per molti anni, raccomandiamo di leggere attentamente questo manuale prima di iniziare l’allenamento e di utilizzare il dispositivo...
  • Page 78 DATI TECNICI ..................80 ISTRUZIONI GENERALI ................81 AVVERTENZE ..................82 ISTRUZIONI DI MONTAGGIO ..............82 MESSA IN SERVIZIO ................84 SPECIFICHE .................... 87 FUNZIONE APP ..................88 PULIZIA & CUSTODIA ................92 RISOLUZIONE ERRORE ................93 SMALTIMENTO ..................94 CONFORMITÀ...
  • Page 79 Video Tutorial Il nostro per te! Montaggio Utilizzo Smontaggio 3 semplici passaggi per un inizio veloce e sicuro: 1. Scannerizza il QR-Code 2. Guarda il Video 3. Inizia ad allenarti! Link per il Video: https://service.innovamaxx.de/vtx300_video Relaxxnow 79...
  • Page 80: Dati Tecnici

    Alloggiamento Luxus interamente in plastica con • sistema di chiusura brevettato, montaggio e smontaggio facili da eseguire senza alcun attrezzo necessario. • Piedini d’appoggio rotondi, facile da montare al supporto principale. Contenuto di spedizione: 1x ventilatore 1x telecomando 1x istruzioni di funzionamento 80 Relaxxnow...
  • Page 81: Istruzioni Generali

    Non posare il cavo sotto un tappeto. Non coprire il cavo con tappeti, corridori o simili. • Posare il cavo in modo che nessuno possa inciamparvi sopra • Per scollegare il dispositivo dalla rete, scollegare la spina dalla presa. Trare direttamente la spina e MAI il cavo. Relaxxnow 81...
  • Page 82: Avvertenze

    ISTRUZIONI DI MONTAGGIO Installazione eutilizzo Per il ventilatore da tavolo Mettete il ventilatore (15) sul tavolo, colle- gare l‘adattatore (19) in senso orario. Mettere la colonna superiore (8) sull’adat- tatore di collegamento (19). Premere il bpttone superiore della colonna (11). 82 Relaxxnow...
  • Page 83 5. Montare la griglia anteriore #1) ala griglia posteriore (5) allineando i segni sulla parte superiore. Ora collegare entrambe le parti utilizzando i ganci sulla griglia anteriore (1) e le fessure sulla griglia posteriore (5). Il perno (20) dovrebbe quindi bloccarsi nella posizione corretta. Relaxxnow 83...
  • Page 84: Messa In Servizio

    Assicurarsi che il cavo di alimentazione sia completamente srotolato. Assicurarsi che eventuali oggetti (come tende, indumenti, ecc.) Non ostruiscano il flusso d‘aria. Inserire le batterie nel telecomando. Se le batterie sono già inserite nel telecomando è necessario rimuovere la pellicola protettiva. 84 Relaxxnow...
  • Page 85 L‘oscillazione può essere con- oscillazione. trollata mentre il ventilatore è in funzione. 3 sec. La funzione W-Lan si attiva dopo che il tasto è stato premuto Oscillazione per tre secondi. Con questo tasto accendete e spegnete il ventilatore. ON/OFF Relaxxnow 85...
  • Page 86 Il telecomando non deve essere utilizzato in locali in cui sono in funzione macchinari • pesanti. • La linea di vista tra il telecomando e il ricevitore deve essere libera. • Maneggiare con cura il telecomando. Non lasciarlo cadere. 86 Relaxxnow...
  • Page 87: Specifiche

    Massimo può essere inclinato quasi in posizione orizzontale. NOTA: la ventilatore deve essere spenta se si effettua questa impostazione SPECIFICHE MODELLO/ SKU VTX300 VOLTAGGIO (V) 220-240 V AC, 50/60 HZ WATT (W) 55 vations ATTENZIONE: Per evitare scosse elettriche, adattare il bordo largo del connettore allo slot largo.
  • Page 88: Funzione App

    Passaggio 3: collegare l‘app alla ventilatore 1. Inserire la spina della ventilatore in una presa da 220-240 V. La ventilatore è in modalità standby. 2. Premere „Aggiungi dispositivo“ o „+“ nell‘angolo in alto a destra sulla home page dell‘app come mostrato di seguito. 88 Relaxxnow...
  • Page 89 3. Cliccare su „Small Home Appliances“ e su ventilatore („Fan“), come mostrato in figura. Relaxxnow 89...
  • Page 90 „Confirm indicator slowly blink“ sul vostro telefono come indicato sulla foto di sotto. 5. Quando il vostro tetefono si collega e l’icona wifi non si illumina più, l’app è correttamente collegata al ventilatore. L’apparecchio si può quindi regolare tramite app. 90 Relaxxnow...
  • Page 91: Amazon Alexa

    Per accendere o spegnere la ventilatore, puoi premere su „Alexa attiva / disattiva la ventola.“ In alternativa, è anche possibile assegnare al proprio apparecchio un nome individua- le tramite le impostazioni dell‘apparecchio dell‘app Alexa, che si può poi utilizzare per il controllo vocale. Relaxxnow 91...
  • Page 92: Pulizia & Custodia

    Conservazione del prodotto: Applicare alcune gocce di lubrificante sull‘albero motore per prevenire la corrosione. Rimuovere l‘olio e le macchie dal corpo per evitare danni alla ventola. Smontare il ventilatore e rimetterlo nella scatola, conservandolo in un luogo asciutto. 92 Relaxxnow...
  • Page 93: Risoluzione Errore

    Il telecomando non funziona. Le batterie sono Seguire le istruzioni d’uso del troppo deboli. Il telecomando e le norma per telecomando è l’utilizzo delle batterie del troppo lontano dal telecomando. dispositivo e non invia il segnale correttamente. Relaxxnow 93...
  • Page 94: Smaltimento

    CONFORMITÀ Sportstech Brands Holding GmbH dichiara che il tipo di sistema radio è conforme alla direttiva 2014/53/UE. Il testo completo della dichiarazione di conformità UE è disponibile al seguente indirizzo internet: https://service.innovamaxx.de/vtx300_conformity 94 Relaxxnow...
  • Page 95 GEBRUIKSAANWIJZING NEDERLANDS Beste klant, We zijn blij dat je een apparaat uit het RELAXXNOW-assortiment hebt gekozen. RELAXXNOW biedt je de hoogste kwaliteit en de nieuwste technologie. Lees vóór gebruik deze gebruikershandleiding aandachtig door en gebruik het apparaat zoals aan- gegeven. Zo zul je ten volle van de prestaties van het apparaat kunnen profiteren en er vele jaren geniet van hebben.
  • Page 96 TECHNISCHE INFORMATIE ............... 98 ALGEMENE INFORMATIE ................99 WAARSCHUWINGEN ................100 MONTAGE ....................100 INGEBRUIKNAME ..................102 SPECIFICATIES ..................105 APP-FUNCTIES ..................106 REINIGING EN OPSLAG ................110 PROBLEMEN OPLOSSEN ................. 111 VERWIJDERING..................112 CONFORMITEIT ..................112 96 Relaxxnow...
  • Page 97 Video-tutorials Onze voor jou! Montage Gebruik Demontage In 3 eenvoudige stappen voor een snelle en veilige start: 1. Scan de QR-code 2. Bekijk video‘s 3. Begin snel en veilig Link naar de video's: https://service.innovamaxx.de/vtx300_video Relaxxnow 97...
  • Page 98: Technische Informatie

    • Luxueuze, volledig kunststof behuizing met een gepatenteerd sluitsysteem, eenvoudig te monteren en te demonteren, geen gereedschap nodig. • Verzwaarde ronde standaard, eenvoudig te monteren standaardbuis. LEVERINGSOMVANG: • 1x Staande ventilator VTX300 • 1x Afstandsbediening • 1x Handboek 98 Relaxxnow...
  • Page 99: Algemene Informatie

    Gebruik de ventilator niet in de buurt van gordijnen, planten, raamdecoraties of andere dingen die in de propeller terecht kunnen komen. • Trek de stekker uit het stopcontact om het apparaat van de stroom los te koppelen. Trek daarvoor aan de stekker, NOOIT aan de kabel. Relaxxnow 99...
  • Page 100: Waarschuwingen

    (19) erin en zet hem vast door de adapter (19) met de klok mee te draaien. 2. Plaats de bovenste kolom (8) op de verbindingsadapter (19). Draai de bovenste knop van de kolom (11) aan. 100 Relaxxnow...
  • Page 101 Verbind nu beide onderdelen met de haken op het voorste rooster (1) en de sleuven op het achterste rooster (5). Trek de klikpen voorzichtig naar buiten en draai het voorste rooster (1) met de klok mee tot de vergrendelstand. De klikpen moet nu in de juiste positie vastklikken. Relaxxnow 101...
  • Page 102: Ingebruikname

    Zorg ervoor dat mogelijke objecten (bijv. gordijnen, kleding, enz.) de luchtstroom niet belemmeren. Plaats de batterijen in de afstandsbediening. Als de batterijen al in de fabriek in de afstandsbediening zijn geplaatst, moet je nog steeds de beschermfolie verwijderen. 102 Relaxxnow...
  • Page 103 De oscillatie kan worden geregeld terwijl de De W-Lan-functie ventilator in werking is. wordt uitgeschakeld 3 sec. nadat je de knop Oscillatie drie seconden hebt ingedrukt. Met deze knop schakel je de ventilator aan en uit. Power ON/OFF Relaxxnow 103...
  • Page 104 • Reinig de batterijcontacten en die van het apparaat voordat je de batterij in de afstandsbediening plaatst. • Controleer of de batterijen correct zijn geplaatst overeenkomstig de polariteit (de +/- zijden van de batterij). • Verwijder onmiddellijk gebruikte en beschadigde of ontladen batterijen. 104 Relaxxnow...
  • Page 105: Specificaties

    Hij kan maximaal bijna in de horizontale positie wor- den gekanteld. Let op: Om deze instelling uit te voeren, moet de ventilator uitgeschakeld zijn. SPECIFICATIES MODEL / SKU VTX300 SPANNING (V) 220-240 V AC, 50/60 HZ VERMOGEN (W) 55 W...
  • Page 106: App-Functies

    Stap 3: verbind de app met de ventilator 1. Steek de stekker van de ventilator in een stopcontact van 220-240 V. De ventilator staat nu in de stand-bymodus. 2. Druk op “Add Device” of “+” in de rechterbovenhoek op de homepagina van de app. 106 Relaxxnow...
  • Page 107 3. Druk op “Small Home Appliance” en op “Ventilator” („Fan“). Relaxxnow 107...
  • Page 108 5. Als je mobiele telefoon een verbinding weergeeft en de WiFi-indicator op de ventilator niet meer oplicht, is de app met de ventilator verbonden. Bij een succesvolle verbinding kan je de ventilator met de app bedienen. 108 Relaxxnow...
  • Page 109 Om de ventilator AAN/UIT te schakelen, gebruik je de spraakopdracht: “Alexa, zet de ventilator AAN/UIT.“ Als alternatief kunt u uw toestel ook een individuele naam geven via de apparaatins- tellingen van de Alexa-app, die u vervolgens kunt gebruiken voor spraakbesturing. Relaxxnow 109...
  • Page 110: Reiniging En Opslag

    Breng een paar druppels smeermiddel aan op de motoras om corrosie te voorkomen. Verwijder olie en vlekken van het apparaat om schade aan de ventilator te voorkomen. Demonteer de ventilator in omgekeerde volgorde volgens de montage-instructies, plaats hem terug in de doos en bewaar hem op een droge plaats. 110 Relaxxnow...
  • Page 111: Problemen Oplossen

    De afstandsbediening werkt De batterijen zijn te Volg de richtlijnen van de bedie- niet. zwak. ning van de afstandsbediening en De afstand tussen de voor het gebruik van de batterijen afstandsbediening in de afstandsbediening. en het apparaat is te groot. Relaxxnow 111...
  • Page 112: Verwijdering

    Informatie kan worden verkregen uit de retournerings- en ophaalsystemen van je gemeente. CONFORMITEIT Hierbij verklaart Sportstech Brands Holding GmbH dat het type radioapparatuur voldoet aan de richtlijn 2014/53/EU. De volledige tekst van de EU-conformiteitsverklaring is beschikbaar op het volgende internetadres: https://service.innovamaxx.de/vtx300_conformity 112 Relaxxnow...
  • Page 113 Relaxxnow 113...
  • Page 114 Verkauf durch / Distributed by / Distribuido por / Distribué / Distribuito da/ Verkoop via Sportstech Brands Holding GmbH Postdamer Platz 11 D-10785 Berlin +49 (0)30 220 66 35 20 | Mo-Fr | 09:00 -18:00 Uhr www.sportstech.de 114 Relaxxnow...

Table des Matières