Publicité

Les langues disponibles

Les langues disponibles

Liens rapides

INSTRUCTION
MANUAL
• This is not a toy! Not suitable for children under 14 years old without adult supervision.
• Ceci n' e st pas un jouet. Ne convient pas aux enfants de moins de 14 ans sans la surveillance d'un adulte.
• Kein Spielzeug. Nichte geeignet für Kinder unter 14 Jahren ohne Aufsicht Erwachsener.
• N o e s u n j u g u e t e . N o r e c o m e n d a d o p a r a n i ñ o s m e n o r e s d e 1 4 a ñ o s .

Publicité

Table des Matières
loading

Sommaire des Matières pour Hobbytech SPIRIT NXT GP

  • Page 1 INSTRUCTION MANUAL • This is not a toy! Not suitable for children under 14 years old without adult supervision. • Ceci n’ e st pas un jouet. Ne convient pas aux enfants de moins de 14 ans sans la surveillance d’un adulte. •...
  • Page 2: Hardware List / Liste De Matériel

    TooLS rEqUIrED NoT INCLUDED IN THE kIT / OUTILLAge ReqUIS NON INCLUS dANS Le kIT EX 421970 HT 421900 Wrench-glowplug clutchnut Hex wrench complety set Phillips screwdriver Multifonction pliers complety set 10mm long (1,5-2-2,5-3mm) Tournevis cruciforme Gamme multifonction de pinces Clé...
  • Page 3: Warranty And Service Informations

    / receipts. If within the warranty period, a portion of the product fails due to manufacturing defects, then it is within the discretion of Hobbytech to repair it or replace it. The decision to repair or replace the part will be taken by Hobbytech. After the discretion of Hobbytech to repair it or replace it.
  • Page 4: Safety Precautions

    iMPortant - read this beFore running PLease read aLL instructions and FaMiLiarize YourseLF with the Products and controL beFore oPeration. This product is not a toy. It is a high performance model product. It is important to familiarize yourself with the model, its manual, and its construction before assembly and operation.
  • Page 5: Battery Installation

    even if THiS CAr iS A reAdy To run kiT, you STill HAve SoMe liTTle THinGS To do To fAMiliArize WiTH your ProduCT. PleASe folloW THeSe STePS. BATTeRY INSTALLATION ❸ Then reinstall the battery ❷ Install the batteries observing Supplied with 4 x 1.5V AA Batteries, KT2S can be operated a few hours.
  • Page 6: Pre-Run Check

    kT2S TRANSMITTeR FUNCTIONS Steering Wheel : Control direction (Left / Right) of the RC Antenna model Power Throttle Trigger : Control speed and direction (Forward/ Indicator Brake/Backward) of the driving model. Power ON / OFF Antenna : Transmit signal to the model Steering Power ON / OFF : Power ON / OFF the transmitter Reverse Switch...
  • Page 7: Programming The End-Points

    PROgRAMMINg THe eNd-POINTS Steering End-points programming Throttle End-points programming 1) Steering End-points programming • To set the Forward End point: • To set the Right End point of Steering: Similarly, hold the Throttle at Forward-most position to set Forward - During normal operation, hold the Steering wheel at right-most, and End Point, hold the BIND key over 1 sec to enter Forward End Point then hold the BIND key over 1 sec programming...
  • Page 8 INSTALL THe AIR FILTeR FOAM Shake and push the foam inside the bags around 10 times Open the plastic bag and take out the air filter foam Remove the plastic air filter cap Install the double air filter foam on it’s holder with the provided wrench INSTALL THe eNgINe gLOw PLUg (NOT PROVIded) Remove the engine cover sticker...
  • Page 9 FILLINg UP THe FUeL TANk Put some fuel in your fuel bottle Fill up the fuel tank untill the top PRIMe ANd STARTINg THe eNgINe Use the proper way to charge your glow starter Clamp the glowstarter over the glow plug and pull the pullstarter with short quick pulse Put your finger over the exhaust and pull the pull start until you see fuel enter in the carburator...
  • Page 10: Garantie De 90 Jours

    garantie de 90 jours Merci de Lire attentiVeMent Les Lignes ci-dessous : A partir de la date d’achat, le produit est couvert par une garantie de 90 jours couvrant les composants. Si durant cette période, une des pièces composant votre produit (hormis les pièces de transmission) possède un défaut de fabrication réellement constaté...
  • Page 11: Consignes De Sécurité

    iMPortant - Lire aVant de déMarrer Lire ces instructions et se FaMiLiariser aVec Le Produit aVant de s’en serVir. Ce produit n’est pas un jouet. C’est un modèle réduit de haute performance. Il est important de se familiariser avec le modèle, son manuel et sa construction avant l’assemblage et le fonctionnement.
  • Page 12: Installation Des Batteries De L'émetteur

    MêMe si ce Modèle est livré prêt-à-rouler, il reste tout de MêMe certaines opérations à effectuer, en profiter pour se faMiliariser avec le Modèle. suivre les étapes pas à pas. INSTALLATION deS BATTeRIeS de L’éMeTTeUR ❷ Insérer les piles en respectant ❸...
  • Page 13 FONCTIONS de L’éMeTTeUR Volant de direction : Contrôle de la direction (Gauche/Droite) du Antenne modèle Indicateur de marche Gâchette des gaz : Contrôle de la vitesse (Marche avant / Frein / Power Marche arrière) ON / OFF Antenne : Transmet le signal au modèle Inversion Power ON / OFF : Allume / Eteint l’émetteur de direction...
  • Page 14: Réglage Du Neutre

    PROgRAMMATION deS FINS de COURSe Programmation des points d’extrémité de direction Programmation des points d’extrémité des gaz • Pour définir le point droit d’extrémité de direction: • Pour définir le point d’extrémité avant : - En fonctionnement normal, tenir le volant de direction le plus à De la même manière, tenir la gachette des gaz au point d’extrémité...
  • Page 15: Mise En Place De La Bougie

    MISe eN PLACe de LA MOUSSe de FILTRe Appuyer sur la mousse déjà imbibée d’huile puis relâcher. Ouvrir ensuite le sachet à l’aide d’un cutter ou de ciseaux et Répéter l’opération une dizaine de fois. en sortir la mousse. à l’aide de la clé allen fournie, dévisser entièrement le support Glisser la mousse de filtre sur son support, puis revisser, de la mousse de filtre.
  • Page 16: Remplissage Du Carburant

    ReMPLISSAge dU CARBURANT Remplir la pipette de carburant Remplir le réservoir de carburant jusqu’au bord déMARRAge dU MOTeUR Charger correctement le chauffe-bougie en respectant les Clipper le chauffe bougie sur la bougie du moteur et démarrer consignes de charges le moteur en tirant quelques coups secs sur la tirette. Amorcer le moteur en bouchant la sortie d’échappement Le moteur démarre, c’est parti ! et en tirant sur la tirette jusqu’à...
  • Page 17: Garantie Und Service Informationen

    GarantieansPrUcH Mit einem Garantieanspruch -, Reparaturen wenden Sie sich bitte an Ihren Fachhändler. Dieser wird sich mit Hobbytech kurzschließen, um eine sachgerechte Entscheidung zu fällen, die Ihnen schnellst möglich hilft. Für ungültige Garantieansprüche werden Ihnen vor der Rücksendung möglicherweise Bearbeitungskosten in Rechnung gestellt. Vorab berechnet werden notwendige Reparaturen die durch Nachlässigkeit oder Mißbrauch erforderlich sind.
  • Page 18: Sicherheitshinweise

    wichtig - Lesen sie diese anLeitung Vor der Verwendung durch ! bitte Lesen sie aLLe anweisungen und Machen sie sich Mit den Produkten Vor der inbetriebnahMe Vertraut. Dieses Produkt ist kein Spielzeug. Es ist ein hochentwickeltes Hobby Produkt. Es ist wichtig, sich mit dem Modell, dem Handbuch und seiner Konstruktion vor der Montage und dem Betrieb vertraut zu machen.
  • Page 19: Einschalten Der Stromversorgung (Bind)

    AuCH Wenn dieSeS AuTo SCHon fAHrferTiG iST, MüSSen Sie TroTzdeM noCH einiGe kleine dinGe Tun, uM SiCH MiT iHreM ProduCT verTrAuT zu MACHen. BefolGen Sie BiTTe die SCHriTTe . INSTALLIeReN SIe dIe BATTeRIeN IN deN SeNdeR ❷ Installieren Sie die Batterien ❸...
  • Page 20: Pre-Run Check

    FUNkTIONeN Lenkrad : Steuer Richtung (links / rechts) des RC- Antenne Modell Betriebsanzeige Gashebel : Steuer Geschwindigkeit und Richtung (Vorwärts / Bremse / Rückwärts) des Power fahrenden RC-Modell ON / OFF Antenne : Sendesignal zum RC-Modell Lenkrücklauf Power ON / OFF : Power AN / AUS des Senders SYNC und Batterie-Anzeige : Top Green Licht...
  • Page 21: Programmierung Des Endpunktes

    PROgRAMMIeRUNg deS eNdPUNkTeS Lenk Endpunkt Programmierung Gas Endpunkt Programmierung • Um den richtigen Endpunkt der Lenkung fest zu legen: • Um den vorderen Endpunkt fest zu legen,ähnlich halten Sie das Gas an der vordersten Position, halten Sie die Setup Taste über 1 - Während des normalen Betriebs, Halten Sie das Lenkrad am Sekunde, um die vorderste Endpunkt Programmierung einzugeben...
  • Page 22 INSTALLIeReN deS SCHAUMSTOFF LUFTFILTeR Schütteln und Drücken Sie den Schaumstoff in der Tasche Öffnen Sie den Plastikbeutel und nehmen Sie den 10mal rundherum Schaumstoff Luftfilter heraus Entfernen Sie den Plastik Luftfilterdeckel Installieren Sie den doppelte Luftfilterschaumstoff auf seine Halterung mit dem mitgelieferten Schlüssel INSTALLIeReN deR MOTOR gLÜHkeRzeN (NICHT IM LIeFeRUMFANg) Aufkleber der Motorabdeckung entfernen Installieren Sie die Glühkerzen am Kreuz Schraubenschlüssel...
  • Page 23: Auffüllen Des Tanks

    AUFFÜLLeN deS TANkS Füllen Sie etwas Kraftstoff in Ihre Brennstoffflasche Füllen Sie den Kraftstofftank bis zum Rand PRIMe ANd STARTINg THe eNgINe Verwenden Sie den richtigen Weg, um Ihren Glühstarter aufzuladen Legen Sie Ihre Finger über den Auspuff und ziehen Sie den Klemmen Sie den Glühstarter über die Glühkerze und Zugstarter bis Sie den Kraftstoffeintrag im Vergaser sehen ziehen Sie den Seilzugstarter mit kurzen, schnellen Impuls...
  • Page 24 atencion : • Este coche no es un juguete. El comprador de este producto reconoce y comprende que asume la responsabilidad sobre los danos personales o materiales que pueda causar por El uso de este producto. • El usuario es el unico responsable del correcto uso de este producto. El fabricante o el vendedor no tienen ninguna responsabilidad sobre los posibles danos producidos por su mal uso.
  • Page 25 iMPortante - Leer antes de arrancar Leer estas instrucciones Y acostuMbrarse con Los Productos antes de utiLizarLos. Este producto no es un juguete es un modele reduzido y hay que aprender poco a poco bajo los consejos de un adulto. cUiDaDo Antes de danar a personas o a objetos utilizar el modelo teledirigido de manera responsable como esta detaillado mas lejos Estos modelos pueden alcanzar una velocidad de mas de 40KM/H.
  • Page 26 leer cuidadosaMente este Manual de instrucciones antes de coMenzar el rodaje : INSTALACION BATeRIAS de eMISORA ❶ ❷ ❸ Retire la tapa Instale 4 pilas alcalinas Cierre la tapa y coloquela AA tal y como muestra en su lugar Precaucion: Esta bateria es el dibujo ùnicamente para modelos de A utilisar esta bateria, dedaras que has leido y...
  • Page 27 kT2S TRANSMITTeR FUNCTIONS Steering Wheel : Control direction (Left / Right) of the RC Antenna model Power Throttle Trigger : Control speed and direction (Forward/ Indicator Brake/Backward) of the driving model. Power ON / OFF Antenna : Transmit signal to the model Steering Power ON / OFF : Power ON / OFF the transmitter Reverse Switch...
  • Page 28 COMPROBACION de LA dIReCCION NeUTRAL IzqUIeRdA deReCHA Muevar el volante de la emisora para verificar que se mueve de forma corecta NeUTRO MAXIMO gAz FReNO ❷ ❸ ❶ Abierto 1mm maximo Apertura del carburador maxima Abierto 1mm maximo INdICAdOR Led NIVeL de BATeRIA - Duante una operacion normal, la LED verde se queda encendida.
  • Page 29 MONTAJe de LA eSPUMA de FILTRO Proceder a «apretar la espuma del filtro para su correcta Abrimos la bolsa con cuidado de no cortar la espuma de filtro lubricación» Retirar la tapa del filtro Colocar la espuma de filtro y volver a colocar la tapa con su tornillo MONTAJe de LA BUJIA SOBRe eL MOTOR Retirar la protección del motor...
  • Page 30 ReLLeNAR eL dePOSITO de CARBURANTe Llenamos el biberón de combustible Llenamos el deposito con el biberón ARANCAR eL MOTOR Cargar corectamente el chispometro respetando el uso del Colocamos el chispometro debidamente cargado y cargador procedemos a tirar del arrancador con tirones secos pero no excesivamente largos Tapando la salida del escape cebamos el circuito de gasolina tirando del arranque del motor...
  • Page 31: Reference Guide

    Moteur ALPHA 21 à tirette 3 transferts culasse noir vilo SG Center Diff Mount Drive Joint center STR-016 STR-085 Paliers de Différentiel central Noix de cardan central SPIRIT NXT GP Bulldog pre-painted orange/white body Brake Disc Servo Ball End CA 284 STR-017 STR-086 Carrosserie SPIRIT NXT GP pré-peinte orange/blanc...
  • Page 32 STRX-092 STR-088 HT 501601 FRONT/REAR SHOCK SET HT-598100 HT-598106 HT 50 HT-580109 HT-595010 HT-595014 HT-590005 STRX-015 HT 510018 HT 520001 HT-510006 HT-585008 HT-598103 KN-0713 HT-585006 HT-598114 HT 501154 STR-056 HT 510006 STRX-011 STRX-209 XT 130543 STRX-088 HT 4950 STR-086 HT-598121 HT-595009 HT-598104 KN-1312...
  • Page 33: Exploded View

    EXPLODED VIEW HT 501235 SPIRIT NXT GP STR-099 STRX-135 # 1.SPIRIT.NXT.GP 01227 STR-098 STRX-108 STR-048 STRX-306 STR-061 STR-066 HT 598100 STR-062 STR-064 STR-035 STR-067 HT 595015 STRX-301 NITRO ENGINE STR-037 STR-032 STR-061 STR-067 024.KIT STR-062 STR-055 HT-530015 STRX-012 HT 495023...
  • Page 34: Option Parts

    OPTION PARTS CA-281 AFA-DC-E028009 HT-108 HT-410350 Carrosserie Pit Bull Spirit / X2 en lexan Bouchon de carter pour moteur ALPHA 21, nécessaire Filtre carburant gros volume alu Banc de démarrage universel 1/10 ou 1/8ème piste PC Spirit/X2 clear body Pit Bull Style pour l'utilisation du banc de démarrage Aluminium Big Daddy Fuel Filter Orange ou Tout terrain...
  • Page 35 STRS-102A STRS-102B STRS-102C STRS-118 Axes filetés inférieurs de triangle avant 75mm Axes inférieurs filetés de triangles 4mm Axes filetés de fixation étriers arrière 51mm Set Couronne + pignon d'attaque Hélicoïdal Uprade F / R Arm Hinge Pin 75mm Upgrade Steering Hinge Pin 40mm Upgrade Rear Hub Hinge Pin 51mm 43T.
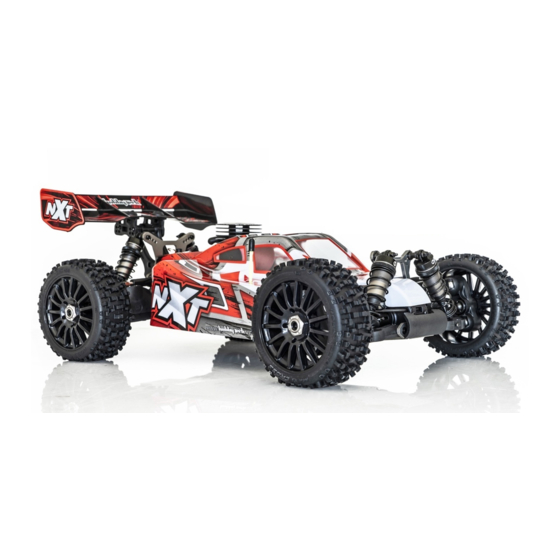
  • Page 36: General Information

    General information Specification are subject to change without notice. Spezifikation können ohne vorherige Ankündigung ändern. Photograph shows model after assembly and painting. Effektive Abbildung zeigt das Modell in Montage und Lackierung. Les spécificités peuvent changer sans information préalable. El fabricante puede modificar los kits sin previsio aviso.

Table des Matières