Table des Matières
Publicité
Les langues disponibles
Les langues disponibles
Liens rapides
ATTACH YOUR RECEIPT HERE
Serial Number ________________________________ Purchase Date _________________________________
Questions, problems, missing parts? Before returning to your retailer, call our
customer service department at 1-877-447-4768, 8:00 a.m. – 4:30 p.m. CST,
Monday – Friday or e-mail customerservice@ghpgroupinc.com.
70-01-115
Charcoal Smoker
1
Vertical
MODEL #DGX780BDC-D
Français p. 20
Español p. 39
Rev. 07/16/19
Publicité
Chapitres
Table des Matières

Manuels Connexes pour Dyna-Glo DGX780BDC-D


Sommaire des Matières pour Dyna-Glo DGX780BDC-D
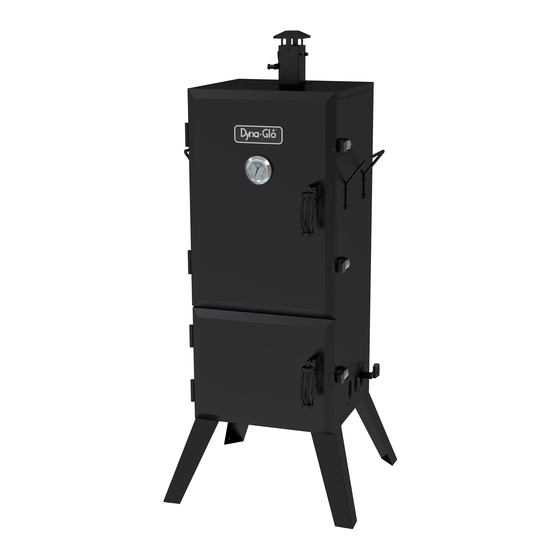
- Page 1 Vertical Charcoal Smoker MODEL #DGX780BDC-D Français p. 20 Español p. 39 ATTACH YOUR RECEIPT HERE Serial Number ________________________________ Purchase Date _________________________________ Questions, problems, missing parts? Before returning to your retailer, call our customer service department at 1-877-447-4768, 8:00 a.m. – 4:30 p.m. CST, Monday –...
-
Page 2: Table Des Matières
TABLE OF CONTENTS Safety Information ........................2 Package Contents ........................4 Hardware Contents ........................5 Preparation ..........................5 Assembly Instructions ........................ 6 Operation Instructions ......................... 13 Tips On Smoking ......................... 15 Care and Maintenance ........................ 17 Warranty ............................18 Replacement Parts List ......................19 SAFETY INFORMATION Please read and understand this entire manual before attempting to assemble, operate or install the product. - Page 3 SAFETY INFORMATION • DO NOT use this product in a manner other than its intended purpose. It is NOT intended for commercial use. It is not intended to be installed or used in or on a recreational vehicle and/or boats. •...
-
Page 4: Package Contents
PACKAGE CONTENTS PART DESCRIPTION QUANTITY PART DESCRIPTION QUANTITY Side damper Smoke stack assembly Ash tray Lifting handle Charcoal grate Temperature gauge Charcoal chamber Door handle Wood chip box Cooking grate Upper door Cooking grate support Lower door Smoker body Wood chip box support Wood chip box lid Grease cup Door latch... -
Page 5: Hardware Contents
HARDWARE CONTENTS M5 x 12 M5 Nut M6 x 12 M4 x 10 M6 Nut Shoulder Screw Screw Screw Qty. 8 Qty. 4 Qty. 28 Qty. 6 Qty. 8 PREPARATION Before beginning assembly of product, make sure all parts are present. Compare parts with package contents list and hardware contents above. -
Page 6: Assembly Instructions
ASSEMBLY INSTRUCTIONS CAUTION: Remove the upper (P) and lower (Q) doors before beginning assembly. Remove the upper (P) and lower (Q) doors by opening and sliding the doors up and off the hinges. With smoker body (G) turned upside down, attach legs (H) to smoker box (G) using twelve M6x12 screws (AA) Hardware Used... - Page 7 ASSEMBLY INSTRUCTIONS CAUTION: This unit is HEAVY! Do not attempt this step without assistance! With the assistance of a helper, stand the unit (Make sure that the legs are attached.) Place the upper (P) and lower (Q) doors back onto the hinges of the smoker body (G).
- Page 8 ASSEMBLY INSTRUCTIONS Position the square smoke stack (A) with control arm to the left as shown. Using four M6x12 screws (AA), attach square smoke stack (A) to the top of smoker body (G). Securely tighten with a Phillips screwdriver. Hardware Used M6 x 12mm Screw Insert the wood chip box supports (R) into the...
- Page 9 ASSEMBLY INSTRUCTIONS Attach each door latch (J) to smoker body-right (G) using two M4x10 screws (CC). Hardware Used M4 x 10mm Screw Attach the lifting handles (B) onto the side of smoker body (G) using four M6x12 screws (AA). Repeat on the other side. Hardware Used M6 x 12mm Screw...
- Page 10 ASSEMBLY INSTRUCTIONS Attach door handle (D) to the upper door (P) using two M6x12 screws (AA) and two M6 nuts (DD). Repeat this step for the lower door (Q). Hardware Used M6 x 12mm Screw M6 x Nut Place the wood chip box lid (S) directly onto the wood chip box (O) and slide the wood chip box onto the supports (R) located on the inside of the smoker body (G).
- Page 11 ASSEMBLY INSTRUCTIONS Place the charcoal chamber (N) directly onto the charcoal grate (M) and slide the grate onto the support brackets located on the inside of the smoker body (G). Slide the ash tray (L) under the support brackets. Slide the four cooking grates (E) onto the cooking grate supports (F) inside the smoker body (G).
- Page 12 ASSEMBLY INSTRUCTIONS Remove the pre-assembled nut from the temperature gauge (C) and insert the probe through hole of the smoker door. Secure with nut from inside panel. Tighten with wrench. Slide the grease cup (I) into the grease cup support located on the bottom of the smoker body (G).
-
Page 13: Operation Instructions
OPERATING INSTRUCTIONS BEFORE FIRST USE Remove all hangings or plastic straps, if present. Before you cook food in your smoker, it is important to “season” your smoker. Seasoning seals the To season your smoker, simply use it as you normally would only do not cook any food. You will need to follow all of the operating procedures in the next few sections of this manual. - Page 14 OPERATING INSTRUCTIONS Lighting Instrucions(Continued) Step 4 After 20-25 minutes, charcoal should be ready for cooking and/or adding woodchips. Refer to the next section before adding wood chips to pre-lit charcoal. door is opened, resulting in property loss, personal injury or death. Never attempt to add more ADDING WOOD CHIPS (BEFORE AND DURING COOKING) WARNING Presoaked Wood Chips...
-
Page 15: Tips On Smoking
TIPS ON SMOKING • Hardwoods such has hickory, pecan, apple, cherry or mesquite typically burn slower and produce more smoke over longer periods of time. • To prolong the burn cycle for wood chips, pre-soak them in a separate bowl of water for at least 30 minutes, and/or wrap the chips in perforated aluminum foil. - Page 16 SUGGESTED SMOKING AND MEAT TEMPERATURES Smoking Temperatures Accurate smoking temperatures are critical for safely cooking food when meat probes are not available. Please understand that using the factory installed temperature gauge is an acceptable tool for smoking food; but it’s not always the ideal means of measuring the most accurate smoking temperature because internal smoker temperatures can vary between the top and bottom cooking grates.
-
Page 17: Care And Maintenance
CARE AND MAINTENANCE AFTER USE SAFETY AND MAINTENANCE WARNING • Use caution when lifting and moving the smoker to avoid strain injuries. Two people are recommended to lift or move the smoker. • DO NOT store the smoker near gasoline or other combustible liquids or where combustible vapors may be present. -
Page 18: Warranty
GHP Group Inc. 6440 W. Howard Street Niles, I , USA 60714-3302 Item name: Vertical Charcoal Smoker Model #: DGX780BDC-D... -
Page 19: Replacement Parts List
70-01-170 Smoker body 70-01-230 Ash tray Lifting handle 70-01-231 Temperature gauge 211-02005 Charcoal grate 314-00001-01 Charcoal chamber Logo plate - Dyna-Glo* 211-02002 Cooking grate 312-01014-00 Wood chip box 70-01-236 Cooking grate support 302-01030-00 Upper door 70-01-232 Door latch 70-01-161 Lower door... -
Page 20: Fumoir Vertical Aux Charbons De Bois
Fumoir Vertical aux Charbons de Bois MODELE #DGX780BDC-D English p. 1 Español p. 39 JOIGNEZ VOTRE REÇU ICI Numéro de série_____________________________ Date d’achat _____________________ Des questions, des problèmes, des pièces manquantes? Avant de retourner l’article au détaillant, appelez notre service à la clientèle au 1-877-447-4768, 8 h - 16 h 30, HNC, du lundi - vendredi ou par e-mail à... -
Page 21: Consignes De Sécurité
TABLE DES MATIÈRES Consignes de sécurité ........................ 21 Contenu de l’emballage ......................23 Quincaillerie incluse ........................24 Préparation ..........................24 Instructions pour l’assemblage ....................25 Mode d’emploi ..........................32 Conseils sur le tabagisme ......................33 Entretien ............................36 Garantie ............................37 Liste des pièces de rechange .................... -
Page 22: Proposition 65 De Californie
CONSIGNES DE SÉCURITÉ • IL NE FAUT PAS cesser de surveiller les cendres chaudes avant le refroidissement complet du fumoir. • IL NE FAUT PAS • liquides très volatiles pour allumer le feu. contenant ou près du contenant. • Utilisez des gants résistants à la chaleur et de longues pinces de cuisine ou une pelle à cendres si les jeter dans un contenant non combustible. -
Page 23: Contenu De L'emballage
CONTENU DE L’EMBALLAGE PIECE DESCRIPTION PIECE DESCRIPTION Assemblage de la cheminée Poignée de levage Plateau de cendres Indicateur de température Grille à charbon Poignée de porte Chambre de charbon Grille de cuisson Boîte de copeaux de bois Support de grille à cuisson Porte supérieure Partie gauche du fumoir Porte inférieure... -
Page 24: Quincaillerie Incluse
QUINCAILLERIE INCLUSE Vis de l'épaule M5 Ecrou Vis M6 Vis M4 M6 Ecrou M5 de 12 mm de 12 mm de 10 mm Qté. 8 Qté. 4 Qté. 28 Qté. 8 Qté. 6 PRÉPARATION Avant de commencer l’assemblage du produit, assurez-vous d’avoir toutes les pièces. Comparez les pièces dans l’emballage avec la liste des pièces de la page précédente et la quincaillerie indiquée ci-dessus. -
Page 25: Instructions Pour L'assemblage
INSTRUCTIONS POUR L’ASSEMBLAGE MISE EN GARDE: Retirer les portes supérieur (P) et inférieur (Q) avant d'assembler. Retiré la partie supérieur (P) et decendé (Q) la porte ouvrant et glissant la porte d'en haut et en dehors des charnière. Avec le corps du fumeur (G) retourné à l'envers attacher la jambe (H) sur la boîte du fumeur (G) en se servant des vis M6X 12(AA). - Page 26 INSTRUCTIONS POUR L’ASSEMBLAGE ATTENTION: Cette unite est lourde. N'asseyé pas cette étape sans l'aide d'un assistant! Avec l'aide d'un assistant positionné l'unité verticalement sur les jambes sur une surface ferme et à niveau. Faite sure que les jambes sont attachés. Placer les portes supérieur et inférieur sur les charnières (G).
- Page 27 INSTRUCTIONS POUR L’ASSEMBLAGE Positionner la cheminée carré (A) avec les bras de control sur la gauche comme illustrer. Se servant de quatre vis M6X12 (AA) attaché la cheminée carrré (A) sur le haut du corps du fumeur (G). Visser en sécurité avec un tournevis Philips. Quincaillerie utilisée M6 x 12mm Insérer la boîte de copeaux de support (R) en...
- Page 28 INSTRUCTIONS POUR L’ASSEMBLAGE Attacher chaque fermeture de portes (J) au corps du fumeur (G) en se servant des vis M4X10 (CC). Quincaillerie utilisée M4 x 10mm du fumeur (G) en se servant de quatre vis M6X12 Quincaillerie utilisée M6 x 12mm...
-
Page 29: Quincaillerie Utilisée
INSTRUCTIONS POUR L’ASSEMBLAGE Attacher les pognées de portes (D) sur la porte de haut (P) en se servant de vis M6X12 (DD). Répète cette étape pour la porte dans bas (D). Quincaillerie utilisée M6 x 12mm M6 x Ecrou Placer le couvert de la boîte de copeaux de bois (S) directement sur la boîte de copeaux de bois (O) et glisser la boîte de copeaux sur les support (R) qui est localisé... - Page 30 INSTRUCTIONS POUR L’ASSEMBLAGE Placez la chambre de charbon (N) directement sur la grille à charbon (M) et coulisser la grille sur les supports d'appui situés à l'intérieur du corps droit du fumoir (G). Glissez le plateau de cendres (L) sous les supports d'appui. Glissez les grilles à...
- Page 31 INSTRUCTIONS POUR L’ASSEMBLAGE Enlever les noix pré assemblée de la jauge de température (C) et inséré la sonde en travers des trou sur la porte du fumeur. Visser les noix en dedans du panneau et serrer avec une clé. Glissez le récipient à graisse (I) sur son support en bas dans la partie gauche du fumoir (G).
-
Page 32: Mode D'emploi
MODE D’EMPLOI AVANT LA PREMIÈRE UTILISATION Il est important de «préparer» votre fumoir avant de faire cuire de la nourriture. La préparation du fonctionner normalement le fumoir sans toutefois ajouter de nourriture. Vous devrez suivre toutes Faites fonctionner le fumoir à basse température (approximativement. 175°F / 79.4°C) pendant 45 – 60 minutes. - Page 33 MODE D’EMPLOI Étape 4 utes. Ajoutez prudemment des morceaux de bois et utilisez de longues pinces de cuisine. Reportez-vous à la section suivante avant d'ajouter des copeaux de bois au charbon pré-éclairé. D'AJOUTER DES COPEAUX DE BOIS (AVANT ET PENDANT LA CUISSON) AVERTISSEMENT: Faire tremper dans l'eau la quantité...
-
Page 34: Conseils Pour Le Fumage Des Aliments
CONSEILS POUR LE FUMAGE DES ALIMENTS • Le bois dur comme le bois du noyer, pacanier, pommier, cerisier, mesquite brûlent généralement plus lentement et produisent plus de fumée sur une longue période de temps. • Pour prolonger le temps de combustion des copeaux de bois : faites tremper les copeaux de bois dans •... -
Page 35: Temperatures De Fumage Proposées
TEMPERATURES DE FUMAGE PROPOSÉES Températures fumeurs Températures de fumer acurate sont essentiels pour la nourriture en toute sécurité cuisson lorsque les sondes de viande ne sont pas disponible. Veuillez comprendre que l'utilisation de la jauge de tem- pérature installé en usine est acceptable outil pour la nourriture de fumer, mais ce n'est pas toujours le moyen idéal de mesurer le tabagisme le plus précis température, car les températures internes de fumeurs peuvent varier entre la cuisine haut et en bas grilles. -
Page 36: Entretien
ENTRETIEN SÉCURITÉ ET ENTRETIEN APRÈS UTILISATION AVERTISSEMENT Il faut que deux personnes soulèvent ou déplacent le fumoir. endroit où il y a des vapeurs combustibles. Il ne doit pas avoir de matière combustible ou de vapeurs combustibles autour du fumoir. •... -
Page 37: Garantie
Il est possible que vous disposiez également d’autres droits, qui varient d’un État ou d’une province à l’autre. GHP Group, Inc. 6440 W. Howard Street Niles, IL, États-Unis 60714-3302 Nom de l’article : Fumoir Vertical de charbon Modèle : DGX780BDC-D... -
Page 38: Liste Des Pièces De Rechange
Poignée de levage 70-01-231 Grille à charbon 314-00001-01 Chambre de charbon Indicateur température 211-02005 Boîte copeaux de bois 70-01-236 Logo plaque Dyna-Glo* 211-02002 Grille de cuisson 312-01014-00 Grille de cuisson soutien 302-01030-00 Loquet de porte 70-01-161 Porte supérieure 70-01-232 Porte inférieure 70-01-233 Poignée de porte... - Page 39 Ahumador Vertical Indirecto a Carbón MODELO #DGX780BDC-D Inglés p. 1 Francés p. 20 ADJUNTE SU RECIBO AQUÍ Número de serie _______________________ Fecha de compra __________________ ¿Preguntas, problemas, piezas faltantes? Antes de volver a la tienda, llame a nuestro Departamento de Servicio al Cliente al 1-877-447-4768, de 8:00 am - 4:30 pm, hora central, de lunes - viernes o envíe un correo electrónico a customerservice@ghpgroupinc.com.
- Page 40 INDICE Informacion de seguridad ......................40 Contenido del paquete ....................... 42 Aditamentos ..........................43 Preparacion ..........................43 Instrucciones de ensamblaje ....................... 44 Instrucciones de funcionamiento ....................51 Consejos para fumar ......................... Cuidado y mantenimiento ......................55 Garantla ............................56 Lista de piezas de repuesto ....................... 57 INFORMACION DE SEGURIDAD Lea y comprenda completamente este manual antes de intentar ensamblar, usar o instalar el producto.
-
Page 41: Informacion De Seguridad
INFORMACION DE SEGURIDAD • NO deje la unidad desatendida mientras está en uso. • NO deje ceniza caliente sin vigilancia hasta que el ahumador se enfríe completamente. • NO mueva la unidad mientras esté en uso o cenizas mientras están todavía calientes. Deje que la unidad se enfríe por completo antes de moverlo o guardarlo. -
Page 42: Contenido Del Paquete
CONTENIDO DEL PAQUETE PIEZA DESCRIPCION CANT. PIEZA DESCRIPCION CANT. Ensamble la chimenea de humo Amortiguador lateral Manija para levantar Bandeja de la ceniza Medidor de temperatura Parrilla de carbón Manija de la puerta Contenedor de carbón Parrilla de cocción Depósito desechos de madera Soporte de la parrilla de cocción Puerta superior Cuerpo ahumador... -
Page 43: Aditamentos
ADITAMENTOS Tornillo de M5 Tuerca Tornillo M6 Tuerca Tornillo hombro M4 x 10 M6 x 12 M5 x 12 Cant. 8 Cant. 4 Cant. 6 Cant. 28 Cant. 8 PREPARACION Antes de comenzar a ensamblar el praducto, asegurese de tener todas las piezas. Compare las piezas con la lista del contenido del paquete de la pagina anterior y los aditamentos que aparecen arriba. -
Page 44: Instrucciones De Ensamblaje
INSTRUCCIONES DE ENSAMBLAJE PRECAUCIÓN: Retire las puertas superior (P) e inferior (Q) antes de comenzar el montaje. Retire las puertas inferior (Q) superior (P) abriendo y arrastrando las puertas y las bisagras. pata (H) a la caja del ahumador (G) usando doce tornillos M6x12 (AA). - Page 45 INSTRUCCIONES DE ENSAMBLAJE PRECAUCIÓN: ¡Esta unidad es pesada! No intente este paso sin ayuda! Con el apoyo de un ayudante, coloque la unidad en posición vertical sobre sus patas en una superior (P) e inferior (Q) de nuevo en las bisagras del cuerpo del ahumador (G).
- Page 46 INSTRUCCIONES DE ENSAMBLAJE Coloque la chimenea de humo cuadrada (A) con el brazo de control a la izquierda como se muestra. Utilizando cuatro tornillos M6x12 (AA), junte la chimenea de humo cuadrada (A) a la parte superior del cuerpo del ahumador (G). Aditamentos utilizados M6 x 12mm Screw...
- Page 47 INSTRUCCIONES DE ENSAMBLAJE Fije cada cerrojo de la puerta (J) a del ahumador (G) con dos tornillos M4x10 (CC). Aditamentos utilizados M4 x 10mm Screw Coloque la agarradera de elevación (B) en el lado del cuerpo del ahumador (G) con cuatro tornillos M6x12 (AA).
- Page 48 INSTRUCCIONES DE ENSAMBLAJE Adjunte la manija de la puerta (D) a la puerta superior (P) usando dos tornillos M6x12 (AA) y dos tuercas M6 (.DD). Repita este paso para la puerta inferior (Q). Aditamentos utilizados M6 x 12mm Screw M6 x Nut Coloque la tapa del depósito de desechos de madera (S) directamente sobre el depósito de desechos de madera (O) y deslice la caja de...
- Page 49 INSTRUCCIONES DE ENSAMBLAJE Coloque el contenedor de carbón (N) directamente sobre la parrilla de carbón (M) y deslice la parrilla sobre las abrazaderas de soporte localizadas en el interior del cuerpo derecho del ahumador (G). Deslice la bandeja de la ceniza (L) debajo de las abrazaderas de soporte. Deslice las parrillas para cocinar (E) sobre los soportes de parrilla (F) al interior del ahumador (G).
- Page 50 INSTRUCCIONES DE ENSAMBLAJE Retire la tuerca pre-ensamblada desde el indicador de temperatura (C) e insertar la sonda a través del agujero de la puerta del ahumador. Fije con la tuerca del panel interior. Apriete con la llave. Deslice la taza para la grasa (I) en el soporte de la misma, ubicado en la parte inferior del cuerpo izquierdo del ahumador (G).
-
Page 51: Instrucciones De Funcionamiento
INSTRUCCIONES DE FUNCIONAMIENTO ANTES DEL PRIMER USO Antes de cocinar alimentos en su ahumador, es importante "curar" su ahumador. La curación sella la pintura y el interior de su ahumador para mejorar el sabor, la durabilidad y el rendimiento en general. alimento. - Page 52 INSTRUCCIONES DE FUNCIONAMIENTO Instrucciones de encendido (continuación) Paso 4 Después de 25 - 30 minutos, el carbón debería estar listo para cocinar y / o para la adición de astillas a la siguiente sección antes de la adición de virutas de madera para carbón pre-encendido. PELIGRO: El cierre de las puertas de la cámara de combustión durante el proceso de encendido podría atrapar dentro de esta los vapores del líquido encendedor de carbón y propiedad, lesiones personales o incluso la muerte.
- Page 53 CONSEJOS SOBRE AHUMADO usuario. Esta página puede ser utilizada como una guía general para adquirir el sabor ideal. • Las maderas duras tales como el nogal, pacana, manzana, cereza o mezquite suelen quemarse más lento y producen más humo durante períodos más largos de tiempo. •...
- Page 54 FUMAR Y TEMPERATURAS DE CARNE SUGERENCIAS TEMPERATURAS DE AHUMADO SUGERIDAS Temperaturas fumar ACURATE son críticos para cocinar los alimentos de manera segura cuando las sondas de carne no son disponible. Por favor, comprenda que el uso del medidor de temperatura instalado en fábrica es una aceptable herramienta para ahumar alimentos, pero no siempre es el medio ideal para medir el fumar más precisa la temperatura porque la temperatura interna fumador puede variar entre la cocina superior e inferior rejas.
-
Page 55: Cuidado Y Mantenimiento
CUIDADO Y MANTENIMIENTO PRECAUCIONES Y MANTENIMIENTO DESPUÉS DEL USO ADVERTENCIA • Tenga cuidado al levantar o mover el ahumador para evitar lesiones por esfuerzo. Se recomiendan dos personas para levantar o mover el ahumador. vapores puedan estar presentes. Mantenga el área alrededor del fumador despejada y libre de ma- teriales combustibles y vapores. -
Page 56: Garantía Limitada
Esta garantía le otorga derechos legales GHP Group Inc. 6440 W. Howard Street Niles, IL, USA 60714-3302 Nombre del artículo: Ahumador Vertical de Carbón Modelo #: DGX780BDC-D... -
Page 57: Lista De Piezas De Repuesto
Parrilla de carbón 314-00001-01 Manija para levantar 70-01-231 Medidor de temperatura 211-02005 Cámara carbón Depósito de madera 70-01-236 Placa del logo-Dyna-Glo* 211-02002 Soporte rejilla de cocción 302-01030-00 Parrilla de cocción 312-01014-00 Puerta superior 70-01-232 Cierre de puerta 70-01-161 Puerta pestillo...