Table des Matières
Publicité
Les langues disponibles
Les langues disponibles
Liens rapides
1
750
400
840
1170
2
1
2
CODICE
3
ITEM
V
5
9
SBRINAMENTO
DEFROSTING
11
SUPERF.ESP.
DISPLAY AREA
REFRIGERANTE
12
REFRIGERANT
CLASSE
14
CLASS
COMMESSA
16
W.SCHED
3
Rif. 2
Max 25mm
05060104 01 01/09/2015
G3
750
400
840
1170
6
10
8
ARNEG S.p.A.
VIA VENEZIA 58 - CAMPO SAN MARTINO - PADOVA - ITALY
Tel. +39 049 9699333 Fax +39 049 9699444 - info@arneg.it
MATRICOLA
S/N
Hz
W
W
ILLUMINAZIONE
LIGHTING
m
2
MASSA
WEIGHT
ORDINE
W.ORD.
17
Rif. 1
750
400
4
A
7
W
IP
15
kg
13
ANNO
YEAR
18
G4
840
1170
750
400
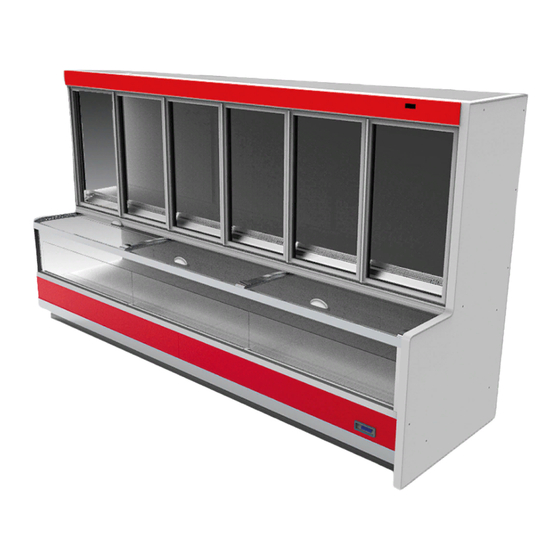
Pelican
750
400
840
1170
840
1
Publicité
Chapitres
Table des Matières

Manuels Connexes pour Arneg Pelican G3 H205


Sommaire des Matières pour Arneg Pelican G3 H205
- Page 1 ABBILDUNGEN ILLUSTRATIONS ILLUSTRACIONES 1170 1170 1170 1170 ARNEG S.p.A. VIA VENEZIA 58 - CAMPO SAN MARTINO - PADOVA - ITALY Tel. +39 049 9699333 Fax +39 049 9699444 - info@arneg.it CODICE MATRICOLA ITEM SBRINAMENTO ILLUMINAZIONE DEFROSTING LIGHTING SUPERF.ESP. DISPLAY AREA...
- Page 2 Pelican 30cm CHEMICALS Rif. 7 Rif. 6 Rif. 3 Rif. 4 mute Rif. 10 Rif. 9 HACCP Rif. 5 Rif. 8 Rif. 12 Rif. 11 Rif. 13 05060104 01 01/09/2015...
- Page 3 Pelican CAUTION!! CHEMICALS 05060104 01 01/09/2015...
- Page 4 Pelican TESTATA/HEAD CASE H O 2 H O 2 1097 H O 2 H O 2 R404 R404 1178 1178 1250 1250 2500 2356 H O 2 H O 2 H O 2 H O 2 R404 R404 1875 1875 937,5 937,5 3750...
- Page 5 Pelican 4 5 6 05060104 01 01/09/2015...
- Page 6 Pelican 05060104 01 01/09/2015...
- Page 7 Pelican Β A = Sonda aspirazione aria B = Sonda fine sbrinamento C = Sonda aria mandata D = Termostato sicurezza cavi caldi porte Α A = Air IN probe B = End-defrost probe C = Air OUT probe D = Door heating cables safety thermostat Sonda di temperatura / Temperature probe Sacet/CAREL L=4000 cod.04510153 05060104 01 01/09/2015...
- Page 8 Pelican 05060104 01 01/09/2015...
- Page 9 Pelican 05060104 01 01/09/2015...
- Page 10 Pelican 05060104 01 01/09/2015...
-
Page 11: Dati Tecnici
Pelican Dati Tecnici, Technical Data, Technische Daten, Données techniques, Datos Técnicos, Dati tecnici Technical data Technische Daten Données techniques Datos Técnicos 05060104 01 01/09/2015... - Page 12 Pelican 05060104 01 01/09/2015...
-
Page 13: Table Des Matières
Pelican Italiano Manuale di installazione e Uso INDICE ILLUSTRAZIONI................1 Dati tecnici................... 12 Introduzione - Scopo del manuale/Campo di applicazione ..15 Presentazione - Uso previsto (Fig. 1).......... 15 Norme e certificazioni, dichiarazione di conformità ..... 15 Identificazione - Dati di targa (Fig. 2) .......... 16 Il Trasporto (Fig. -
Page 14: Introduzione - Scopo Del Manuale/Campo Di Applicazione
Pelican Italiano 1. Introduzione - Scopo del manuale/Campo di applicazione Questo manuale d’istruzioni riguarda la linea di mobili refrigerati Pelican. Le informazioni che seguono hanno lo scopo di fornire indicazioni relative a: Uso del mobile - caratteristiche tecniche - installazione e montaggio - informazioni per il personale addetto all’uso - interventi di manutenzione. -
Page 15: Identificazione - Dati Di Targa (Fig. 2)
Se si perde la copia originale della Dichiarazione di Conformità fornita assieme al mobile, scaricare una copia compilando il modulo presente agli indirizzi internet: - per l’Italia: http://www.arneg.it/conformita/it - per l’estero: http://www.arneg.it/conformita/en 4. Identificazione - Dati di targa (Fig. 2) Sul retro dei mobili è... -
Page 16: Unione Dei Mobili (Fig. 11)
Pelican Italiano - all’aria aperta e quindi agli agenti atmosferici; - vicino a fonti di calore (luce solare diretta, impianti di riscaldamento, lampade a incandescenza etc.) - in prossimità di correnti d’aria (vicino a porte, finestre, impianti di climatizzazione ecc.) che superino la velocità... -
Page 17: Posizionamento Sonde (Fig. 13)
Pelican Italiano - L’installatore deve fornire i dispositivi di ancoraggio per tutti i cavi in entrata ed uscita del mobile - L’interruttore automatico magnetotermico deve essere tale da non aprire il circuito sul neutro senza contemporaneamente aprirlo sulle fasi, in ogni caso la distanza di apertura dei contatti deve essere di almeno 3 mm. -
Page 18: Sbrinamento E Scarico Acqua (Fig. 9)
Pelican Italiano - mantenere 4-5 cm di aria tra la merce e le bocchette di uscita dell’aria per consentire la normale circolazione dell’aria refrigerata. N.B.L’ingresso di aria calda nel mobile con porte è inevitabile, in caso di umidità elevata si forma un leggero strato di brina che scomparirà... -
Page 19: Pulizia Delle Porte Everclear (Optional) (Fig. 6)
Pelican Italiano 16.Pulizia delle porte EVERCLEAR (optional) (Fig. 6) ATTENZIONE!: Le porte EVERCLEAR sono porte a vetro rivestite, sulla parte interna, da una speciale copertura trasparente che impedisce la formazione della condensa. Per la pulizia delle porte EVERCLEAR attenersi alle seguenti indicazioni: - aprire e bloccare la porta - pulire con delicatezza la parte interna con uno straccio morbido umido adatto alla pulizia di parti che possono venire a contatto con derrate alimentari... -
Page 20: Consigli Utili
Pelican Italiano N.B.Tutte queste operazioni così come il trasporto ed il trattamento dei rifiuti devono essere eseguite esclusivamente da personale specializzato e autorizzato. 20.Consigli utili Si consiglia un’attenta lettura del Manuale di Installazione ed uso affinchè, l’operatore, in caso di gua- sto sarà... -
Page 21: Indicazioni Di Montaggio Per L'inversione Delle Porte
Pelican Italiano 1. Indicazioni di montaggio per l’inversione delle porte ATTENZIONE!: Togliere tensione al mobile prima di qualsiasi operazione Brema 5 - Brema LF viene fornito, di serie con porte ad apertura destra, in caso di necessità il verso dell’apertura può essere invertito da destra a sinistra. N.B.NON è... - Page 22 Pelican Italiano 5 Allentare la vite di fissaggio della forcella antisfilamento, sulla parte superiore della porta: Far scorrere e ruotare la forcella come in figura A 6 Per estarre la porta è necessario sollevarla e contemporaneamente ruotarla come in figura in modo che esca dal suo alloggiamento prima dalla parte inferiore.
- Page 23 Pelican Italiano 8 Sfilare la staffa fermaporta universale (1). 9 Trasformare la staffa universale da destra a sinistra. A) Staffa destra B) Togliere la bronzina inferiore (1) C) Capovolgere la staffa e inserire la bronzina D) Staffa sinistra. 10 A) Estrarre dalla parte superiore della porta la cerniera superiore con estrema delicatezza evitando di sollecitare troppo l’accoppiamento tra il...
- Page 24 Pelican Italiano 12 Montare il gruppo cerniera superiore dove prima era situata la cerniera inferiore. A) Rimontare la forcella antisfilamento. B) Inserire la cerniera superiore utilizzando un tubo D 16 (1) C) Battere delicatamente fino al completo inserimento della cerniera superiore D) Evitare assolutamente di battere direttamente sul perno inox 13 Smontare il gruppo piastra inferiore.
- Page 25 Pelican Italiano A) Togliere i tappi di chiusura fori telaio B) Posizionare la piastra precedentemente preparata, in corrispondenza dei fori telaio 16 A) Togliere la piastra superiore in nylon dal montante del mobile B) Forare con una punta Dmax 9mm in corrispondenza del foro predisposto sul lato sinistro, per creare la sede per il perno della cerniera superiore.
- Page 26 Pelican Italiano GRUPPO CERNIERA: 1) Blocchetto zincato per molla curva 2) Blocchetto zincato filettato per molla curva 3) Vite brunita M4x8 4) Molla sezione quadra a uncino 5) Bussola inferiore guida perno 6) Staffa fermaporta universale 7) Vite 8) Vite 9) Bronzina inferiore 10) Anello seeger universale zincato 11) Perno inferiore molla quadra fori radiali...
- Page 27 Pelican English Use and installation manual CONTENTS ILLUSTRATIONS ................1 Technical data ................12 Introduction - Manual purpose/Field of application...... 29 Presentation - Intended purpose (Fig. 1)........29 Standards and certifications, conformity statement..... 29 Identification - Plate data (Fig. 2) ..........30 Transport (Fig.
-
Page 28: Introduction - Manual Purpose/Field Of Application
Pelican English 1. Introduction - Manual purpose/Field of application This instruction manual is for the refrigeration unit line Pelican. The following information aims to provide instructions with regard to: Unit use - technical characteristics - installation and assembly - information for users - maintenance work.The manual should be considered part of the unit and must be kept for its entire working life. -
Page 29: Identification - Plate Data (Fig. 2)
If you lose the original copy of the Declaration of Conformity supplied with the cabinet, download a copy by filling out the form available on the internet addresses: - for Italy: http://www.arneg.it/conformita/it - overseas: http://www.arneg.it/conformita/en 4. Identification - Plate data (Fig. 2) -
Page 30: Multiplexing Of Cabinets (Fig. 11)
Pelican English - in environments with the presence of explosive gaseous substances; - outdoors and therefore where there are atmospheric agents; - near heat sources (direct sunlight,heating systems, incandescent lights, etc.) - near air currents (near doors, windows, air-conditioning/heating systems, etc.) exceeding speeds of 0.2 m/sec. -
Page 31: Probe Positioning (Fig. 13)
Pelican English - The installer must supply the anchorage devices for all cables in and out of the unit - The automatic thermomagnetic switch must be such as not to open the circuit on neutral, without simultaneously opening it on the phases. In any case, the opening distance of contacts must be at least 3 mm. -
Page 32: Defrost And Water Draining (Fig. 9)
Pelican English refrigerated air. Note:Hot air will inevitably enter the cabinet, if humidity levels are high, a thin layer of frost will form. This will disappear once the doors have been kept closed for 2 hours. Note:The refrigeration unit is designed to maintain the temperature of the product displayed and not to lower it. -
Page 33: Cleaning The Everclear Doors (Optional) (Fig. 6)
Pelican English 16.Cleaning the EVERCLEAR doors (optional) (Fig. 6) ATTENTION!: EVERCLEAR doors are glass doors with a special transparent interior cover that prevents condensation from forming. To clean EVERCLEAR doors, keep to the following instructions: - open and block the door - carefully clean the interior with a soft, damp cloth appropriate to cleaning parts that may come into contact with food products - use neural detergents or soap and water... -
Page 34: Useful Advice
Pelican English authorised, specialised personnel only. 20.Useful advice We recommend careful reading of the Use and installation manual to ensure that in the event of failure, the operator is able to provide Technical Assistance with the specific information required. Before carrying out any maintenance work on the refrigerator unit, please ensure that the electrical supply is disconnected. -
Page 35: Assembly Indications For Inverting The Doors
Pelican English 1. Assembly indications for inverting the doors ATTENTION!: Cut off power supply to the cabinet before proceeding with all operations Brema 5 - Brema LF refrigerated wall cabinet is normally supplied in the version with right-hand ope- ning doors. If required, the direction of door opening can be inverted from right to left .. N.B.Is not possible to invert one or more doors individually. - Page 36 Pelican English 5 Loosen the screws that fix the anti- fraying fork on the upper part of the door. Let the fork slide and rotate it as indicated in figure A: 6 In order to remove the door, it must be lifted and simultaneously rotated as indicated in the drawing so that it is first released from its housing on the...
- Page 37 Pelican English 8 Remove the universal door-blocking bracket (1) 9 Transform the universal bracket from right to left. A) Right-hand bracket B) Remove the lower brass (1); C) Turn the bracket upside down and insert the brass D) Left-hand bracke. 10 A) With the utmost delicacy, remove the upper hinge from the upper part of the door, making sure not to exert...
- Page 38 Pelican English 12 Mount the upper hinge unit where the lower hinge was previously situated. A) Re-mount the anti-fraying fork B) Insert the upper hinger using a metal pipe D 16 (1) C) Beat gently on it until the upper hinge has been fully inserted D) ABSOLUTELY DO NOT BEAT DIRECTLY 13 Dismantle the lower plate unit..
- Page 39 Pelican English 15 A) Remove the plugs that seal the frame holes; B) Position the previously prepared plate in correspondence with the frame holes 16 A) Remove the upper plaque in nylon from the cabinet riser. B) Using a bit of . max 9 mm, drill in correspondence with the predisposed hole on the left side, so as to create a housing for the pin of the upper hinge...
- Page 40 Pelican English HINGE UNIT 1) Galvanised block for curved spring 2) Threaded galvanised block for curved spring 3) Burnished screw M4x8 4) Hook-shaped square-section spring 5) Lower pin-guide sleeve 6) Universal door-block bracket 7) Screw 8) Screw 9) Lower brass 10) Universal galvanised Seeger ring 11) Square spring lower pin w/ radial holes 12) Spring-loading pin...
- Page 41 Pelican Deutsch Installations- und Betriebsanleitung INHALTSVERZEICHNIS ABBILDUNGEN ..................... 1 Technische Daten ..................12 Einleitung - Ziel der Betriebsanleitung / Anwendungsbereich...... 43 Präsentation - Vorgesehene Benutzung (Fig. 1) ......... 43 Richtlinien und Zertifizierungen, Konformitätserklärung ......43 Identifikation - Daten der Kennzeichnung (Fig. 2) ........44 Der Transport (Fig.
-
Page 42: Einleitung - Ziel Der Betriebsanleitung / Anwendungsbereich
Pelican Deutsch 1. Einleitung - Ziel der Betriebsanleitung / Anwendungsbereich Diese Betriebsanleitung bezieht sich auf die Produktlinie der Kühltruhen Pelican. Die anschließenden Anweisungen dienen dazu, über folgende Themen zu informieren: Benutzung des Geräts - technische Eigenschaften - Installation und Montage - Informationen für das zuständige Bedienungspersonal - Wartungseingriffe. -
Page 43: Identifikation - Daten Der Kennzeichnung (Fig. 2)
Produkt ausgeliefert wird, kann eine Kopie heruntergeladen werden, indem das Formular auf folgenden Internetadressen ausgefüllt wird: - für Italien: http://www.arneg.it/conformita/it - für das Ausland: http://www.arneg.it/conformita/en 4. Identifikation - Daten der Kennzeichnung (Fig. 2) Auf der Rückseite der Kühltruhen befindet sich das Kennzeichnungsschild; dieses enthält alle charak-... -
Page 44: Installation Und Umweltbedingungen (Fig. 3)
Pelican Deutsch - Jedes Bauteil des Kühlmöbels auf dessen Unversehrtheit überprüfen. - Sollten Schäden festgestellt werden, sofort das Lieferunternehmen anrufen. - Das Kühlmöbel mit neutralen Produkten erstmalig reinigen und mit einem weichen Tuch abtrocknen. Keine scheuernden Mittel oder Metallschwämme benutzen. - Keinen Alkohol oder ähnliche Produkte zur Reinigung von Metacrylat-Teilen (Plexiglas) benut- zen. -
Page 45: Stromverbindung (Fig. 14 - Fig. 15 - Fig. 16)
Pelican Deutsch 9. Stromverbindung (Fig. 14 - Fig. 15 - Fig. 16) - die elektrische Anlage muss geerdet sein - Vor dem Einleiten anderer Maßnahmen kontrollieren, dass die Versorgungsspannung den Daten auf dem Kennzeichnungsschild (Fig. 2)entspricht. - Die Zuleitung des Kühlmöbels muss mit einem automatischen magnetothermischen omnipolaren Schalter mit geeigneten Eigenschaften ausgestattet sein;... -
Page 46: Abtauen Und Wasserablass (Fig. 9)
Pelican Deutsch am Verdampfer; - die Ware gleichmäßig und geordnet verteilen und dabei vermeiden, dass die Ebenen überlastet werden (zulässiges Maximalbelastungsgewicht 160 kg/m - Die Anordnung der Waren, ohne leere Bereiche, garantiert die beste Funktion der Kühltruhe. - 30 mm Luft zwischen der Ware und der unmittelbar darüber liegenden Ebene lassen. - Es sollte zuerst die ältere Ware und danach die neu eingetroffene Ware verkauft werden (Rotationsprinzip von Lebensmitteln). -
Page 47: Wartung Und Reinigung (Fig. 6 - Fig. 7 - Fig. 8)
Pelican Deutsch 15.Wartung und Reinigung (Fig. 6 - Fig. 7 - Fig. 8) ACHTUNG!: VOR JEDER WARTUNGS- ODER REINIGUNGSARBEIT DIE ELEKTRISCHE SPANNUNG DES KÜHLMÖBELS MIT DEM HAUPTSCHAL- TER ABSCHALTEN. UM DIE HÄNDE WÄHREND DER REINIGUNGSARBEI- TEN ZU SCHÜTZEN, IMMER ARBEITSHANDSCHUHE TRAGEN. Lebensmittel können aufgrund von Mikroben und Bakterien verderben. -
Page 48: Beleuchtung (Fig. 5 - Fig. 10)
Pelican Deutsch 17.Beleuchtung (Fig. 5 - Fig. 10) Für die Außenbeleuchtung ist fakultativ ein Beleuchtungssystem mit modularer Deckenlampe, die an der oberen Außenseite der Kühltruhe angebracht wird, erhältlich (Rif. 10) Für die Vorderbeleuchtung der Wanne kann am Handlauf eine Lampe montiert werden (optional) (Rif. 11). - Page 49 Pelican Deutsch alle notwendigen Schutzvorrichtungen sind zu benutzen. - Äußerst aufmerksam alle Betriebsvorgänge durchführen (Beladen, Ausladen, Reinigen, Bedienen, Warten usw.). Bei der Ausführung der einzelnen Arbeiten müssen immer alle dafür vorgesehenen Schutzausrüstungen (DPI) benutzt werden. - Sicherstellen, dass die Temperatur- und Feuchtigkeitswerte der Umgebung nicht die vorgegebenen Werte überschreiten;...
-
Page 50: Montageanleitungen Für Die Umkehr Des Öffnungssinns Der Türen
Pelican Deutsch 1. Montageanleitungen für die Umkehr des Öffnungssinns der Türen ACHTUNG!: Vor Durchfürung der arbeiten die Spannungszufuhr des Möbels unterbrechen Das Wandkühlmöbel Brema 5 - Brema LF wird serienmäßig in der Ausführung mit Türen mit Rechtsöf- fnung geliefert Bei Bedarf kann der Öffnungssinn der Türen von rechts nach links geändert werden. ANMERKUNG:Es ist nicht möglich eine bzw. - Page 51 Brema5 - Brema LF Deutsch 5 Die Befestigungsschraube der Ausziehschutzgabel am oberen Türteil lockern. Die Gabel, wie in Abbildung A gezeigt, gleiten lassen und drehen. 6 Um die Tür herauszunehmen, muss man sie anheben und gleichzeitig, wie in Abbildung gezeigt, drehen, damit zuerst der untere Teil aus dem Sitz heraustritt.
- Page 52 Pelican Deutsch 8 Den universellen Türfeststellbügel (1) herausnehmen. 9 Den universellen Türfeststellbügel so umbauen, dass die Tür von links geöffnet werden kann. A) Rechter Bügel; B) Die untere Bronzebuchse (1) entfernen; C) Den Bügel umkehren und die Bronzebuchse einführen; D) Linker Bügel 10 A) Das obere Scharnier mit äußerster Vorsicht vom oberen Türteil herausziehen, wobei man die...
- Page 53 Brema5 - Brema LF Deutsch 12 Die obere Scharniergruppe dort einfuhren, wo sich vorher das untere Scharnier befand. A) Die Ausziehschutzgabel wieder anmontieren; B) Das obere Scharnier einfuhren, indem man ein Metallrohr verwendet . 16 (1); C) Bis zum vollstandigen Einfuhren des oberen Scharniers vorsichtig klopfen;...
- Page 54 Pelican Deutsch 15 A) Die Stöpsel, die zum Schließen der Gestellöffnungen dienen, entfernen; B) Die zuvor vorbereitete Platte in Übereinstimmung mit den Gestellöffnungen positionieren. 16 A) Das untere Nylonplattchen vom Mobelpfosten entfernen. B) Mit einer Spitze . max 9 mm in Ubereinstimmung mit der an der linken Seite vorbereiteten Offnung bohren, um den Sitz fur den Stift des oberen...
- Page 55 Brema5 - Brema LF Deutsch SCHARNIERGRUPPE 1) Verzinkter Block für gebogene Feder 2)Verzinkter Gewindeblock für gebogene Feder 3) Brünierte Schraube M4x8 4) Hakenförmige Vierkantfeder 5) Untere Stiftführungsbuchse 6) Universeller Türfestellbügel 7) Schraube 8) Schraube 9) Untere Bronzebuchse 10) Verzinkter universeller Seeger- Ring 11) Unterer Stift Vierkantfeder mit Radiallöcher 12) Federladestift PLATTENGRUPPE...
- Page 56 Pelican Français Manuel d'Installation et d'Utilisation SOMMAIRE ILLUSTRATIONS ................1 Données techniques..............12 Introduction - But du manuel / Domaine d'application ....58 Présentation - Emploi prévu (Fig. 1)..........58 Normes et certifications, déclaration de conformité ....58 Identification - Données de la plaque(Fig. 2)....... 59 Le transport (Fig.
-
Page 57: Introduction - But Du Manuel / Domaine D'application
Pelican Français 1. Introduction - But du manuel / Domaine d'application Ce manuel d'instruction concerne la ligne de meubles réfrigérés Pelican. Les informations qui suivent entendent fournir des informations relatives à : Utilisation du meuble - caractéristiques techniques - installation et montage - informations pour le per- sonnel préposé... -
Page 58: Identification - Données De La Plaque(Fig. 2)
Si l'on perd la copie originale de la déclaration de conformité fournie avec le comptoir frigorifique, télécharger une copie en remplissant le module disponible aux adresses Internet: - pour l’Italie: http://www.arneg.it/conformita/it - pour l’étranger: http://www.arneg.it/conformita/en 4. Identification - Données de la plaque(Fig. 2) A l'arrière du meuble, une plaque d'identification indique toutes les données caractéristiques :... -
Page 59: Installation Et Conditions Environnementales (Fig. 3)
Pelican Français - ne pas utiliser d'alcool ou autres produits similaires pour nettoyer les parties en méthacrylate (plexiglas). Pour mettre correctement l'emballage au rebut, ne pas oublier qu'il se compose de : Bois - Polystyrène - Polythène - PVC - Carton. Aux termes de la directive CEE 94/62, il est déclaré... -
Page 60: Positionnement Des Sondes (Fig. 13)
Pelican Français (Fig. 2) - Le meuble doit être protégé en amont par un disjoncteur magnétothermique omnipolaire présentant des caractéristiques appropriées et devant également servir d'interrupteur général de sectionnement de la ligne. - Indiquer à l'opérateur où se trouve le disjoncteur de façon à ce qu'il puisse y accéder sans retard en cas d'URGENCE. -
Page 61: Dégivrage Et Évacuation De L'eau (Fig. 9)
Pelican Français - il est conseillé d'écouler d'abord la marchandise qui se trouve depuis plus longtemps dans le meuble avant celle qui vient d'y être introduite (rotation des denrées alimentaires). - La charge maximale admissible dans le bac est de 300 kg/m - Plans inclinables 2 positions 0°;... -
Page 62: Nettoyage Des Portes Everclear (Option) (Fig. 6)
Pelican Français des consommateurs. Le nettoyage des parties extérieures (Quotidien / Hebdomadaire) - Une fois par semaine, nettoyer toutes les parties extérieures du meuble en utilisant des produits détergents neutres à usage domestique ou de l'eau et du savon. - Rincer à l'eau propre et sécher avec un chiffon doux. - NE PAS utiliser de produits abrasifs ou solvants qui risquent d'abîmer les surfaces des meubles. -
Page 63: Remplacement Des Lampes (Fig. 5 Rif. 13)
Pelican Français - une durée des ampoules de plus de six ans - une intensité et une couleur d'éclairage uniformes sur chaque porte et à tout moment - une amélioration de l'éclairage quand la température baisse. 18.Remplacement des lampes (Fig. 5 Rif. 13) Pour remplacer les ampoules, procéder de la manière suivante: - Couper l'alimentation électrique du meuble. - Page 64 Pelican Français meubles. Il faut donc éviter que les courants d'air et les bouches d'envoi du système de climatisation se dirigent vers les ouvertures des meubles. - Eviter d'exposer les marchandises directement aux rayons du soleil. - Limiter la température des surfaces irradiantes qui sont présentes dans le point de vente, par exemple en isolant les plafonds;...
-
Page 65: Indications De Montage Pour L'inversion Des Portes
Pelican Français 1. Indications de montage pour l’inversion des portes ATTENTION!: Avant toute operation, couper le courant au meuble Le meuble mural réfrigéré Brema5 est fourni de série dans une version avec des portes à ouverture droite. En cas de nécessité, le sens de l’ouverture des portes peut être inversé de droite à gauche N.B.Il n’est pas possible d’inverser une ou plusieurs portes individuellement. - Page 66 Pelican Français 5 Desserrer la vis de fixation de la fourchette anti-enlèvement sur la partie supérieure de la porte. Faire glisser et tourner la fourchette comme indiqué dans la figure A 6 Pour extraire la porte, il est nécessaire de la soulever et en même temps de la tourner comme dans la figure, de façon à...
- Page 67 Pelican Français 8 Enlever l’étrier arrête-porte universel (1). 9 Transformer l’étrier universel de droite à gauche. A) Etrier droit ; B) Enlever le coussinet inférieur (1) ; C) Renverser l’étrier et insérer le coussinet ; D) Etrier gauche. 10 A) Extraire de la partie supérieure de la porte la charnière supérieure très soigneusement en évitant de trop fatiguer l’accouplement entre le pivot...
- Page 68 Pelican Français 12 Monter le groupe charniere superieure a lfendroit ou se trouvait la charniere inferieure. A) Remonter la fourchette anti-enlevement ; B) Inserer la charniere superieure en utilisant un tube en metal D=16 (1) ; C) Frapper legerement jusqufa lfinsertiontotale de la charniere superieure ;...
- Page 69 Pelican Français 15 A) Enlever les bouchons de fermeture des trous du châssis ; B) Placer la plaque préparée auparavant en correspondance des trous du châssis 16 A) Enlever la plaquette superieure en Nylon du montant du meuble. B) Percer avec une meche . max. 9 mm en correspondance du trou prevu sur le cote gauche pour faire le siege pour le pivot de la charniere...
- Page 70 Pelican Français GROUPE CHARNIERE 1) Bloc zingué pour ressort courbé 2) Bloc zingué fileté pour ressort courbé 3) Vis brunie M4x8 4) Ressort de section carrée à crochet 5) Guide inférieur pivot 6) Etrier arrête-porte universel 7) Vis 8) Vis 9) Coussinet inférieur 10) Bague Seeger universelle zinguée 11) Pivot inférieur ressort section carrée avec...
- Page 71 Pelican Español Manual de instalación y uso ÍNDICE ILLUSTRACIONES ............... 1 Datos Técnicos................12 Introducción - Finalidad del manual/Campo de aplicación..73 Presentación - Uso previsto (Fig. 1)..........73 Normas y certificaciones, declaración de conformidad ....73 Identificación - Datos de la placa (Fig. 2) ........74 El Transporte (Fig.
-
Page 72: Introducción - Finalidad Del Manual/Campo De Aplicación
Pelican Español 1. Introducción - Finalidad del manual/Campo de aplicación Este manual de instrucciones se refiere a la línea de muebles refrigerados Pelican. Los datos siguientes tienen como fin proporcionar indicaciones relativas a: Uso del mueble - características técnicas - instalación y montaje - información para el personal encar- gado del uso - mantenimiento. -
Page 73: Identificación - Datos De La Placa (Fig. 2)
Internet: - para Italia: http://www.arneg.it/conformita/it - para el extranjero: http://www.arneg.it/conformita/en 4. Identificación - Datos de la placa (Fig. 2) En la parte trasera de los muebles se encuentra la placa de matrícula con todos los datos característi- cos: 1) Nombre y dirección del fabricante... -
Page 74: Instalación Y Condiciones Ambientales (Fig. 3)
Pelican Español - no utilizar alcohol o similares para las partes en metacrilato (plexiglás). Para una correcta eliminación del embalaje, tener en cuenta que contiene: Madera - Poliestireno - Politeno - PVC - Cartón. En virtud de la directiva CEE 94/62, se declara la idoneidad de los materiales antes citados. 7. -
Page 75: Colocación De Las Sondas (Fig. 13)
Pelican Español - Instruir al operador sobre la posición del interruptor de tal manera que se pueda alcanzar rápidamente en caso de EMERGENCIA. - Para garantizar un funcionamiento normal, es necesario que la variación máxima de tensión esté entre +/- 6% del valor nominal. - Comprobar que la línea de alimentación tenga los cables de sección adecuada y esté... -
Page 76: Descongelación Y Desagüe (Fig. 9)
Pelican Español - Los estantes se pueden inclinar en 2 posiciones 0°; -10°. ATENCIÓN!: Para el abastecimiento de la superestructura: cargar una puerta cada vez del mueble; no cargar el mueble manteniendo todas las puertas abiertas al mismo tiempo; bloquear la puerta de apertura hasta el final de la carga evitando abrir y cerrar continuamente. -
Page 77: Limpieza De Las Puertas Everclear (Opcional) (Fig. 6)
Pelican Español - aclarar con agua limpia y secar con un paño suave. - NO utilizar productos abrasivos y solventes que puedan alterar las superficies de los muebles. - NO vaporizar agua o limpiadores en las partes eléctricas del mueble. - NO utilizar alcohol para limpiar las partes en metacrilato (plexiglás). -
Page 78: Sustitución De Bombillas (Fig. 5 Rif. 13)
Pelican Español - una mejoría de la iluminación con la reducción de la temperatura. 18.Sustitución de bombillas (Fig. 5 Rif. 13) Para la sustitución de las bombillas, proceder de la manera siguiente: - Quitar la alimentación eléctrica al mueble. - Quitar los tornillos de fijación A del envoltorio de protección. - Quitar los capuchones B y el envoltorio de protección C. - Page 79 Pelican Español - evitar obstruir total o parcialmente las bocas de recogida y de caudal de aire. - introducir en el mueble solamente la mercancía que esté a la temperatura que normalmente caracteriza la cadena del frío y comprobar que el mueble sea siempre capaz de mantener dicha temperatura.
-
Page 80: Indicaciones De Montaje Para Inversión De Las Puertas
Pelican Español 1. Indicaciones de montaje para inversión de las puertas ATENCIÓN! : Desconectar electricamente el mueble antes de realizar cualquier operación El mural refrigerado Brema 5 - Brema LF de serie, en la versión con puertas y apertura derecha. Si es necesario la apertura de la puerta puede ser invertida de derecha a izquierda. - Page 81 Pelican Español 5 Aflojar el tornillo que fija la horquilla antideslizamiento, en la parte superior de la puerta. Desplazar y girar la horquilla como indicado en la figura A: 6 Para extraer la puerta, levantarla y girarla simultáneamente como en la figura de manera tal que salga de su alojamiento antes la parte inferior.
- Page 82 Pelican Español 8 Extraer el anillo universal que fija la puerta (1). 9 Transformar el anillo universal de derecho a izquierdo. A) Anillo derecho; B) Quitar el buje inferior (1); C) Invertir el anillo e introducir el buje; D) Anillo izquierdo. 10 A) Extraer de la parte superior de la puerta la bisagra superior con cuidado sin forzar demasiado el acople del...
- Page 83 Pelican Español 12 Montar el grupo de la bisagra superior en el lugar de la bisagra inferior. A) Volver a montar la horquilla antideslizamiento; B) Introducir la bisagra superior utilizando un tubo de metal D= 16 (1); C) Golpear delicadamente la bisagra superior hasta su total introduccion;...
- Page 84 Pelican Español 15 A) Quitar los tapones que cierran los orificios del cuadro; B) Colocar la placa preparada en correspondencia con los orificios del cuadro 16 A) Quitar la placa superior de nylon del montante del mueble. B) Perforar con una punta D= max. 9 mm en correspondencia del orificio predispuesto sobre la parte izquierda, para realizar el alojamiento del perno...
- Page 85 Pelican Español GRUPO DE LA BISAGRA 1) Bloque galvanizado para muelle curvo 2) Bloque galvanizado roscado para muelle curvo 3) Tornillo bruñido M4x8 4) Muelle sección cuadrada de gancho 5) Forro inferior guía perno 6) Estribo fijación puerta universal 7) Tornillo 8) Tornillo 9) Buje inferior 10) Anillo seeger universal galvanizado...
- Page 86 Pelican ................1 ............ 12 — ..88 (Fig. 1) ....88 ....88 (Fig. 2)....... 89 (Fig. 3) ............89 ............90 (Fig. 3) ....90 (Fig. 11)............. 90 (Fig. 14 - Fig. 15 - Fig. 16) 91 (Fig. 13) ..........91 (Fig.
- Page 87 Pelican — Pelican. (Fig. 1) Pelican Pelican EN ISO 14121; EN ISO 12100-1; EN ISO 12100-2; EN 378-2; EN 378-3; EN 378-4; EN 60079-10-1 2006/42 EN 61000-3-2; EN 61000-3-12; EN 55014-1; EN 55014-2 2004/108/ 2006/95/ EN 60335-1; EN 60335-2-89/A2 RoHs 2011/65/ EN 50581 EC-1935/2004 ( EN 1672-2...
- Page 88 EN ISO 23953:2012 (25 °C , 60%), EN ISO 23953 °C °C 12,6 15,2 10,8 16,7 12,0 20,0 14,8 21,1 15,8 23,9 18,8 30,0 27,3 23,9 14,3 10,2 : http://www.arneg.it/conformita/it : http://www.arneg.it/conformita/en (Fig. 2) (2); (4); (16) (Fig. 3) 05060104 01 01/09/2015...
- Page 89 Pelican 1000 . 94/62. (Fig. 3) . .); . .), 0,2 / . (Rif. 2), (Rif. 1), EN-ISO 23953-1/2 3 (+25°C; 60%). (master) + 2 (slave)) (Fig. 11) 1 0294065 8 2 0471103 2 TCEI M8X80 3 0471104 1 TCEI M8X50 4 0423060 7 5 0471104 4 TCEI M8X35...
- Page 90 Pelican 7 0471109 4 TCEI M8X25 8 0423040 2 9 0448010 4 D 6x12 10 0294004 2 11 0471505 3 TC M5X25 12 0423110 3 (Fig. 14 - Fig. 15 - Fig. 16) (Fig. 2) +/- 6%. (Fig. 13) : NTC ( ) IP67 L=4000 04510153.
- Page 91 Pelican « » ( (Fig. 5) (Rif. 8), (Rif. 12), 0°; -10°. (Rif. 3) (Rif. 6). 12_1. 05060104 01 01/09/2015...
- Page 92 Pelican (Fig. 9) (Fig. 6 - Fig. 7 - Fig. 8) Fig. 7) . A) (Fig. 4). 05060104 01 01/09/2015...
- Page 93 Pelican EVERCLEAR ( ) (Fig. 6) EVERCLEAR — EVERCLEAR (Fig. 5 - Fig. 10) (Rif. 10). ) (Rif. 11). (Fig. 5 Rif. 13) 90° ( 05060104 01 01/09/2015...
- Page 94 Pelican . .) . .) 0,2 / . .). . .) . .). . .). 05060104 01 01/09/2015...
- Page 95 Pelican ): +39 0499699333 - : +39 969944 - : 848 800225 05060104 01 01/09/2015...
- Page 96 Pelican Brema 5 - Brema LF . = 9 2/3/4. 2 A) 05060104 01 01/09/2015...
- Page 97 Pelican ÒÎË ‚Ó ‚ðÂÏ ‚ ÔÓÎÌÂÌË ¸ÚÓÈ ÓÔÂð‡ˆËË ‚ÓÁÌËÍÌÛÚ Á‡ÚðÛ‰ÌÂÌË , ÚÓ ÏÓÊÌÓ ÔÓÎ ÁÓ‚‡Ú Ò ‰Âð‚ ÌÌ Ï ð ˜‡„ÓÏ, ˜ÚÓ· Ì ÔÓ‚ð‰ËÚ ‰‚Âð . ŒÒÚÓðÓÊÌÓ ÔÓ‰Ì Ú Ì‡ ÌÂÒÍÓÎ ÍÓ ÏËÎÎËÏÂÚðÓ‚ ‰‚Âð Ú‡Í, ˜ÚÓ· ÒÌ Ú Ô‡Îˆ Ò ÌËÊÌÂ„Ó ¯‡ðÌËð‡. Õ...
- Page 98 Pelican (1). (1). 10 A) 8-9, 05060104 01 01/09/2015...
- Page 99 Pelican 16 (1). inox (1), 180°. 05060104 01 01/09/2015...
- Page 100 Pelican 15 A) 16 A) . 18 . 24 180° “ ” (“left door”). 05060104 01 01/09/2015...
- Page 101 Pelican M4x8 inox 05060104 01 01/09/2015...
- Page 103 è stata approntata per essere utilizzata esclusivamente dai nostri clienti. We reserve the right to change our technical specifications without notice. This brochure may not be reproduced, nor its contents disclosed to third parties without arneg’ s consent and it is meant only for use by our customers.