Rimage PrismPlus! Manuel D'utilisation

Rimage PrismPlus! Manuel D'utilisation

Masquer les pouces Voir aussi pour PrismPlus!:
Table des Matières

Publicité

Les langues disponibles
  • FR

Les langues disponibles

  • FRANÇAIS, page 60

Liens rapides

PrismPlus!
Printer
User Guide
Benutzerhandbuch  ユーザー ガイド  Manuel d'utilisation  Guía del usuario  Manuale per l'utente

Publicité

Table des Matières
loading

Sommaire des Matières pour Rimage PrismPlus!

  • Page 1 PrismPlus! Printer ™ User Guide Benutzerhandbuch  ユーザー ガイド  Manuel d’utilisation  Guía del usuario  Manuale per l’utente...
  • Page 2 Rimage Corporation reserves the right to make improvements to the equipment and software described in Rimage Corporation this document at any time without any prior notice. Rimage 7725 Washington Avenue South Corporation reserves the right to revise this publication and...
  • Page 3: Table Des Matières

    Indicator Lights ......................................12 Set Up a Standalone Prism Printer ........................13 Prepare the Prism Printer ................................ 13 Install the Rimage Software and Printer Driver ........................13 Install the Rimage Software ..................................13 Install or Update the Printer Driver ................................13 Operate the Prism Printer .............................17...
  • Page 4: Introduction

    About Your Product The Rimage Prism printer is a high speed printer used to print monochrome information on CD, DVD, or Blu-ray Discs. The Prism is available as a stand-alone printer for manual operation or with an AutoPrism AutoPrinter for automatic, unattended operation.
  • Page 5 Rimage PrismPlus! User Guide 110635_K...
  • Page 6: Important Information

    Current firmware and driver downloads Technical Support Support for the Rimage PrismPlus! Printer is available through your authorized reseller. Important! Make sure to register your Prism printer so that Rimage can notify you of upgrades as they become available. 110635_K...
  • Page 7: Optical Disc Recording Software Disclaimer

    Rimage-approved components to maintain the into the AC outlet. safety approval issued by UL. • Do not reach inside the printer unless absolutely necessary.
  • Page 8: Compliance Information

    Important Information Compliance Information Product PrismPlus! printer Model CDRPS Notice for USA Tested to Comply with FCC Standards FOR HOME OR OFFICE USE. NOTE: This equipment has been tested and found to comply with the limits for a Class B digital device, pursuant to part 15 of the FCC Rules.
  • Page 9: Rimage Prism Printer Specifications

    This section provides product specification information for the Prism printer. Notes: • The most up-to-date technical specification information is found at www.rimage.com/support. From the Support menu, select: Printer Series > PrismPlus! > User Manuals tab. • For autoloader specifications, refer to the specifications document found at www.rimage.com/support.
  • Page 10: Minimum Pc Requirements

    Designer Software Suite versions 8.2 and higher only, when used with a standalone printer or AutoPrism) • Windows XP Professional SP3 • Windows XP Professional SP2 (Rimage Software versions 8.1 and lower only) • Windows 2000 Professional SP4 (Rimage Software versions 8.1 and lower only) •...
  • Page 11 Rimage PrismPlus! User Guide 110635_K...
  • Page 12: Printer Requirements

    The Prism printer Windows-compatible software ships with the CD Designer label editor software. CD Designer is installed on your PC during a typical installation of the Rimage software. If you have a Windows-based PC, you can use CD Designer to design your labels.
  • Page 13 Rimage PrismPlus! User Guide 110635_K...
  • Page 14: Identify The Parts Of The Prism Printer

    Identify the Parts of the Prism Printer Identify the Parts of the Prism Printer Front View Ribbon Guides Retaining Pins Printer Tray and Centering Pin Take-up Roller Supply Roller Back View AC Power Connection Power Switch Parallel Cable USB Cable Printer Cable Connection Connection...
  • Page 15: Parts Information

    Rimage PrismPlus! User Guide Parts Information Operator Panel The operator panel is located on the front of the printer. There are four indicator Operator Button with lights and an operator button on the Error Indicator Light operator panel. Disc Not Present...
  • Page 16: Set Up A Standalone Prism Printer

    Before you can operate a standalone Prism printer or an AutoPrism AutoPrinter, install the Rimage software and Prism printer driver. Before you install the Rimage software and Prism printer driver, make sure that you have correctly prepared the Prism printer for its intended use. Refer to the Prepare the Prism Printer section on page 13.
  • Page 17 • Prism on COMX Select Delete. iii. Download the new driver file from www.rimage.com/support: From the Support menu select: Printer Series > PrismPlus! > Software, Firmware & Service Packs tab. Under Drivers and Utilities, select the appropriate driver. iii. Select the Download Now button to save the file to your desktop.
  • Page 18 Prism > Win2k_XP. Select the ccd2kxp.inf file. Select Open. vi. Select OK. Rimage Perfect Image Printer PF displays in the Printers list. vii. Select Next. • If the driver is being installed for the first time, the Name Your Printer dialog box opens. Skip to step e.
  • Page 19 Configure the Prism driver options. Right-click on the Printer icon. Select Properties. The Rimage Perfect Image Printer PF Properties window opens. Select the Device Settings tab. Select the type of installed ribbon. A monocolor ribbon is shipped with new Prism printers.
  • Page 20: Operate The Prism Printer

    Operate the Prism Printer Operate the Prism Printer This section provides information needed to operate your Prism printer. Power On and Off the Prism Printer Power On or Off a Standalone Printer Press the power switch on the rear of the printer. The printer powers on and initializes.
  • Page 21: Set Your Printing Preferences

    To increase the print head life, set the Master Print Strobe to the lowest setting that provides satisfactory printing. Select Enabled to Enable Color Sub-Strobes. Select OK to save the changes and close the Rimage Perfect Image Printer PF Properties window. Set Color Options You can print in one (monocolor) or more colors.
  • Page 22: Print In Color

    Print Strobe setting when trying to eliminate a halo effect on a printed disc. If this is a standalone printer, disable Perfect Print option. This option is only available on select Rimage autoloaders. Select Halftone Setup Properties to make changes that affect color intensity, color balance, or pattern settings.
  • Page 23 Rimage PrismPlus! User Guide 110635_K...
  • Page 24: Maintain The Prism Printer

    Maintain the Prism Printer Maintain the Prism Printer Use the information in this section to keep your Prism printer in optimal operating condition. Overview Regular preventative maintenance of your Prism printer can help to always produce clearly printed labels. Maintenance involves cleaning the system.
  • Page 25: Clean The Prism Print Head Using A Prism Cleaning Kit

    Rimage PrismPlus! User Guide Clean the Print Head Clean the print head at every ribbon change, or more often if streaks start to appear or the ribbon has torn. There are two methods for cleaning the Prism print head—the Prism cleaning kit method, and the alternate method. The alternate method can be used when a cleaning kit is not available.
  • Page 26: Clean The Print Head - Alternate Method

    Maintain the Prism Printer cleaning pad. Clean the print head. Press the operator button to close the printer tray and start the cleaning cycle. When the cleaning cycle is complete, the printer tray opens. Front Ribbon If necessary, repeat step a to begin the cleaning Guides cycle again.
  • Page 27: Change The Print Ribbon

    Change the Print Ribbon Rimage supports only the use of Rimage brand ribbons in our printers. Printer issues that occur as a result of using ribbons by manufacturers other than Rimage are not included under your Rimage warranty or maintenance agreement.
  • Page 28 Maintain the Prism Printer Load the print ribbon. Slide the print ribbon onto the supply roller. Align the two notches of the cardboard core to the metal pins on Print Ribbon the supply roller. Peel the ribbon leader from the supply ribbon. Slide the ribbon leader under the ribbon guide.
  • Page 29 Rimage PrismPlus! User Guide Load the take-up roller. Place the new empty cardboard core on the take-up roller. It is designed to fit only one way. Place the take-up roller on top of the ribbon leader as shown. Important! The gear must be on the correct side.
  • Page 30 Rimage PrismPlus!™ Benutzerhandbuch...
  • Page 31 Europäischer Hauptsitz: Dokument enthält möglicherweise Links zu Internet-Sites, Rimage Europe GmbH die das Eigentum von Drittanbietern sind und von diesen Albert-Einstein-Str. 26 verwaltet werden. Rimage Corporation ist für den Inhalt von Drittanbieter-Sites nicht verantwortlich. 63128 Dietzenbach ©2009, Rimage Corporation Deutschland ®...
  • Page 32 Bedienertaste ....................................... 12 Kontrollleuchten ......................................12 Einrichten eines eigenständigen Prism-Druckers....................13 Vorbereiten des Prism-Druckers .............................. 13 Installieren der Rimage-Software und des Druckertreibers ..................... 13 Installieren der Rimage-Software ................................. 13 Installieren oder Aktualisieren des Druckertreibers ............................13 Bedienung des Prism-Druckers ...........................17 Ein- und Ausschalten des Prism-Druckers..........................17 Ein- und Ausschalten eines eigenständigen Druckers ..........................
  • Page 33: Einführung

    Einführung Einführung In diesem Handbuch erhalten Sie Informationen über den Betrieb, die Konfiguration und die Wartung des Rimage PrismPlus!- Druckers. Die Informationen in diesem Handbuch und der Begriff „Prism“ beziehen sich auf alle PrismPlus!-Drucker, es sei denn es ist ausdrücklich etwas anderes angegeben.
  • Page 34 Rimage PrismPlus! Benutzerhandbuch 110635_K...
  • Page 35: Wichtige Informationen

    Produktspezifikationen • Die neuesten Dokumente • Downloads der aktuellen Firmware und Treiber Technischer Support Der Support für den Rimage PrismPlus! -Drucker erfolgt über Ihren Vertragshändler. Wichtig! Registrieren Sie Ihren Rimage Prism-Drucker, damit wir Sie über neue Upgrades informieren können. 110635_K...
  • Page 36: Haftungsausschluss: Aufzeichnungssoftware Für Optische Discs

    Schalter, Netzgeräte, Sicherungen, Lüftungen oder Führen Sie keine Arbeiten am Drucker durch, wenn Motoren, bei denen es sich nicht um Schrittmotoren dieser am Netz angeschlossen ist. handelt), durch von Rimage zugelassene Komponenten zu ersetzen. • Greifen Sie nicht in den Drucker, sofern dies nicht unbedingt erforderlich ist.
  • Page 37: Konformitätsinformationen

    Wichtige Informationen Konformitätsinformationen Produkt PrismPlus!-Drucker Modell CDRPS Hinweis für USA Getestet, um die FCC-Standards für PRIVATE ODER GESCHÄFTLICHE NUTZUNG einzuhalten. HINWEIS:Dieses Gerät wurde getestet und entspricht den Grenzwerten für ein digitales Gerät der Klasse B gemäß Teil 15 der FCC-Bestimmungen. Diese Grenzwerte dienen dem angemessenen Schutz vor schädlichen Störungen in Wohnanlagen.
  • Page 38: Rimage Prism-Druckerspezifikationen

    In diesem Abschnitt erhalten Sie Informationen über die Produktspezifikationen des Prisma-Druckers. Hinweise: • Aktuelle Angaben zu den technischen Spezifikationen finden Sie online unter www.rimage.com/support. Wählen Sie im Menü Support die Option: Printer Series (Druckerserie) > PrismPlus! > User Manuals (Benutzerhandbücher). •...
  • Page 39 Roboter-Station; nur Versionen 8.2 und höher der CD Designer Software Suite bei Verwendung mit eigenständigem Drucker oder AutoPrism) • Windows XP Professional SP3 • Windows XP Professional SP2 (nur bis Version 8.1 der Rimage-Software) • Windows 2000 Professional SP4 (nur bis Version 8.1 der Rimage-Software) • Windows Server 2003 Schnittstellen USB 2.0...
  • Page 40 Rimage PrismPlus! Benutzerhandbuch 110635_K...
  • Page 41: Drucker-Anforderungen

    Grafikdesign-Anforderungen Die Windows-kompatible Prism-Druckersoftware wird mit der Grafikeditor-Software „CD Designer“ geliefert. CD Designer wird bei der normalen Installation der Rimage-Software auf Ihrem PC installiert. Wenn Sie mit einem Windows-PC arbeiten, können Sie mit CD Designer Ihre Grafiken entwerfen. Wenn Sie Grafiken mit einer anderen Softwareanwendung als dem CD Designer erstellen möchten, verwenden Sie die folgenden Kriterien: •...
  • Page 42 Rimage PrismPlus! Benutzerhandbuch 110635_K...
  • Page 43: Ansicht Und Bedienelemente

    Ansicht und Bedienelemente Ansicht und Bedienelemente Vorderansicht Bandführungen Haltestifte Druckerschublade und Zentrierstift Aufnahmerolle Zuführungsrolle Rückansicht Netzanschluss Netzschalter Paralleler Anschluss USB-Anschluss Druckerkabelanschluss 110635_K...
  • Page 44: Bedienungs- Und Anzeigeelemente

    Rimage PrismPlus! Benutzerhandbuch Bedienungs- und Anzeigeelemente Bedienfeld Das Bedienfeld befindet sich an der Vorderseite des Druckers. Es enthält vier Bedienertaste mit Kontrollleuchten und eine Bedienertaste. Fehler-Kontrollleuchte Kontrollleuchte „Disc Bedienertaste nicht vorhanden“ Mit der Bedienertaste öffnen und schließen Kontrollleuchte „Aktiv“ Sie die Druckerschublade. In der Mitte...
  • Page 45: Einrichten Eines Eigenständigen Prism-Druckers

    Wichtig! Wenn Ihr Prism-Drucker Bestandteil einer Rimage-Roboter-Station ist, ist die gesamte Rimage-Software, einschließlich des Druckertreibers, bereits auf dem integrierten oder externen Control Center (PC) vorinstalliert. Bevor Sie einen eigenständigen Prism-Drucker oder einen AutoPrism AutoPrinter in Betrieb nehmen, installieren Sie die Rimage- Software und den Prism-Druckertreiber.
  • Page 46 Faxgeräte) aus. Das Dialogfeld Printers and Faxes (Drucker und Faxgeräte) wird geöffnet. Klicken Sie mit der rechten Maustaste auf die folgenden Dateien: Hinweis: Je nach Nutzungsart des Prism werden eine oder beide Dateien angezeigt. • Rimage Perfect Image Printer PF • Prism on COMX iii.
  • Page 47 Prism > Win2k_XP. Wählen Sie die Datei ccd2kxp.inf aus. Wählen Sie Open (Öffnen). vi. Klicken Sie auf OK. In der Liste Printers (Drucker) wird Rimage Perfect Image Printer PF angezeigt. vii. Wählen Sie Next (Weiter). • Wenn der Drucker zum ersten Mal installiert wird, wird das Dialogfeld Name Your Printer (Drucker benennen) geöffnet.
  • Page 48 Konfigurieren Sie die Prism-Treiberoptionen. Klicken Sie mit der rechten Maustaste auf das Druckersymbol. Wählen Sie Properties (Eigenschaften). Das Fenster Rimage Perfect Image Printer PF Properties (Rimage Perfect Image Printer PF – Eigenschaften) wird geöffnet. Klicken Sie auf die Registerkarte Geräteeinstellungen.
  • Page 49: Bedienung Des Prism-Druckers

    Bedienung des Prism-Druckers Bedienung des Prism-Druckers In diesem Abschnitt erhalten Sie alle erforderlichen Informationen für die Bedienung des Prism-Druckers. Ein- und Ausschalten des Prism-Druckers Ein- und Ausschalten eines eigenständigen Druckers Drücken Sie den Netzschalter an der Druckerrückseite. Der Drucker wird dadurch eingeschaltet und initialisiert.
  • Page 50: Festlegen Der Druckvoreinstellungen

    Sie noch einen zufriedenstellenden Druck erhalten. Aktivieren Sie den Unterpunkt Enable Color Sub-Strobes (Farbabhängige Einstellung der Druckimpulsdauer). Klicken Sie auf OK, um die Änderungen zu speichern und das Fenster Rimage Perfect Image Printer PF Properties (Rimage Perfect Image Printer PF – Eigenschaften) zu schließen.
  • Page 51: Mehrfarbiger Druck

    Wählen Sie Halftone Setup Properties (Halbton-Setup-Eigenschaften), um Änderungen vorzunehmen, die sich auf Farbintensität, Farbbalance oder Farbprofil auswirken. 10. Klicken Sie auf OK, um die Änderungen zu speichern und das Fenster Rimage Perfect Image Printer PF Properties (Rimage Perfect Image Printer PF – Eigenschaften) zu schließen.
  • Page 52 Rimage PrismPlus! Benutzerhandbuch 110635_K...
  • Page 53: Warten Des Prism-Druckers

    Warten des Prism-Druckers Warten des Prism-Druckers In diesem Abschnitt erfahren Sie, wie Sie Ihren Prism-Drucker in einem für den Betrieb optimalen Zustand bewahren. Übersicht Eine regelmäßige präventive Wartung Ihres Prism-Druckers trägt dazu bei, dass sie stets beste Druckergebnisse erzielen. Die Wartung umfasst eine Reinigung des Systems. Vorsichtsmaßnahmen Vorsicht: So vermeiden Sie eine Beschädigung des Prism-Druckers bei der Wartung: •...
  • Page 54: Reinigen Des Prism-Druckkopfs Mit Einem Prism-Reinigungskit

    Rimage PrismPlus! Benutzerhandbuch Reinigen des Druckkopfs Reinigen Sie den Druckkopf bei jedem Bandwechsel bzw. häufiger, wenn sich beim Drucken Streifen zeigen oder das Band gerissen ist. Zur Reinigung des Prism-Druckkopfs gibt es zwei Methoden: mit dem Prism-Reinigungskit oder mit der alternativen Methode.
  • Page 55: Reinigen Des Druckkopfs - Alternative Methode

    Warten des Prism-Druckers Reinigen Sie den Druckkopf. Drücken Sie die Bedienertaste, um die Druckerschublade zu schließen und den Reinigungszyklus zu starten. Nach Abschluss des Reinigungszyklus wird die Druckerschublade Vordere geöffnet. Bandführungen Falls nötig, wiederholen Sie Schritt a, um den Reinigungszyklus zu wiederholen. Reinigungsvlies Wenn der Druckkopf sauber ist, nehmen Sie das Reinigungsmittel...
  • Page 56: Austauschen Des Druckbands

    Austauschen des Druckbands Rimage unterstützt bei seinen Druckern nur die Verwendung von Original-Rimage-Bändern. Druckerprobleme, die aufgrund der Verwendung von Bändern anderer Hersteller entstehen, sind durch die Rimage-Garantie oder den Wartungsvertrag nicht abgedeckt. Tipp: Werden Bänder an einem Ort gelagert, der sich in den Umgebungsbedingungen deutlich vom Einsatzort des Druckers unterscheidet, ist sicherzustellen, dass sich die Bänder zunächst an die neuen Bedingungen anpassen können.
  • Page 57 Warten des Prism-Druckers Legen Sie das Druckband ein. Schieben Sie das Druckband auf die Zuführungsrolle. Richten Sie die beiden Kerben im Pappkern auf die Metallstifte Druckband an der Zuführungsrolle aus. Lösen Sie das Vorlaufband vom Zuführungsband ab. Schieben Sie das Vorlaufband unter die Bandführung. Pappkern Kerben Metallstifte...
  • Page 58 Rimage PrismPlus! Benutzerhandbuch Setzen Sie die Aufnahmerolle ein. Stecken Sie den neuen leeren Pappkern auf die Aufnahmerolle. Er kann nur in einer Richtung aufgesteckt werden. Setzen Sie die Aufnahmerolle auf das Vorlaufband, siehe Abbildung. Wichtig! Das Zahnrad muss sich auf der richtigen Seite befinden.
  • Page 59 Guide de l’utilisateur Rimage PrismPlus!™...
  • Page 60 Rimage Corporation se réserve le droit d’apporter des améliorations à l’équipement et au logiciel décrits dans ce Rimage Corporation document à tout moment et sans avis préalable. Rimage 7725 Washington Avenue South Corporation se réserve le droit de réviser cette publication et Minneapolis, MN 55439 d’y apporter des modifications ponctuelles sur son contenu...
  • Page 61 Configuration d’une imprimante autonome Prism .....................13 Préparation de l’imprimante Prism ............................13 Installation du logiciel Rimage et du pilote de l’imprimante ..................... 13 Installation du logiciel Rimage ..................................13 Installation ou mise à jour du pilote de l’imprimante ............................. 13 Utilisation de l’imprimante Prism.........................17...
  • Page 62: Introduction

    À propos de votre produit La Rimage Prism est une imprimante ultra rapide permettant d’imprimer des informations monochromes sur des CD, des DVD ou des disques Blu-ray. L’imprimante Prism peut être utilisée de façon manuelle (modèle autonome) ou associée à une imprimante AutoPrism AutoPrinter pour une utilisation sans assistance.
  • Page 63 Guide de l'utilisateur Rimage PrismPlus! 110635_K...
  • Page 64: Informations Importantes

    Assistance technique L’assistance technique pour l’imprimante Rimage PrismPlus! est disponible auprès de votre revendeur autorisé. Important ! Veillez à enregistrer votre imprimante Prism afin que Rimage puisse vous avertir des mises à niveau au fur et à mesure qu’elles sont disponibles.
  • Page 65: Avis D'exclusion De Responsabilité Pour Le Logiciel D'enregistrement Sur Cd Optique

    être effectué avec le cordon que pas à pas, doivent être remplacés par des d’alimentation débranché. composants agréés par Rimage afin de conserver l’agrément de sécurité émis par UL. • N’intervenez pas à l’intérieur de l’imprimante autrement qu’en cas de nécessité...
  • Page 66: Informations Relatives À La Conformité

    Informations importantes Informations relatives à la conformité Produit Imprimante PrismPlus! Modèle CDRPS Avis pour les États- Testé pour la conformité avec les normes FCC POUR UNE UTILISATION À LA MAISON OU AU Unis d’Amérique BUREAU. REMARQUE : cet équipement a été testé et déclaré conforme aux limitations prévues dans le cadre de la classe B des appareils numériques, définie par l’article 15 du règlement de la FCC.
  • Page 67: Caractéristiques De L'imprimante Rimage Prism

    Cette section fournit des informations sur les caractéristiques de l’imprimante Prism. Remarques : • Les caractéristiques techniques les plus à jour sont disponibles sur le site Web www.rimage.com/support. Dans le menu Support (Assistance), sélectionnez : Printer Series (Série Imprimantes) > PrismPlus! > onglet User Manuals (Guides de l’utilisateur).
  • Page 68: Interface

    Systèmes d’exploitation prise en charge Windows Vista Business, Enterprise et Ultimate avec SP1 (Rimage Software versions 8.2 et supérieures uniquement, pour une utilisation avec un chargeur automatique ; CD Designer Software Suite versions 8.2 et supérieures uniquement, pour une utilisation avec une imprimante autonome ou AutoPrism) •...
  • Page 69 Guide de l'utilisateur Rimage PrismPlus! 110635_K...
  • Page 70: Spécifications De L'imprimante

    Le logiciel compatible Windows de l’imprimante Prism est accompagné d’un éditeur d’étiquettes dénommé CD Designer. Ce logiciel est installé sur votre PC au cours d’une installation normale du logiciel Rimage. Si votre PC fonctionne sous Windows, vous pouvez utiliser CD Designer pour concevoir vos étiquettes.
  • Page 71 Guide de l'utilisateur Rimage PrismPlus! 110635_K...
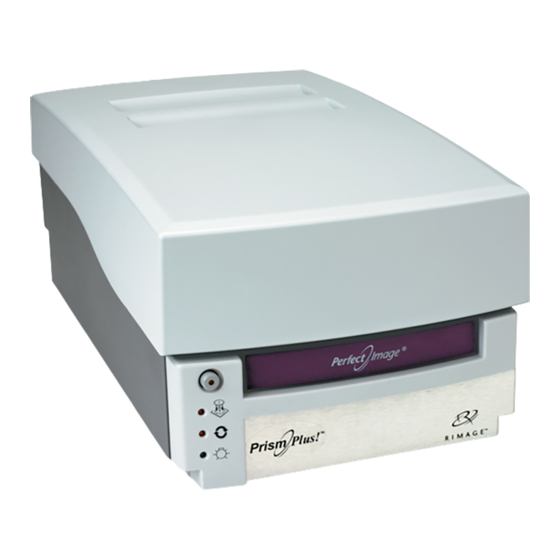
  • Page 72: Identification Des Pièces De L'imprimante Prism

    Identification des pièces de l’imprimante Prism Identification des pièces de l’imprimante Prism Vue de face Guides de ruban Broches de rétention Plateau de l’imprimante et broche de centrage Rouleau d’entraînement Rouleau d’alimentation Vue arrière Raccordement de l’alimentation secteur Interrupteur d’alimentation Raccordement du câble parallèle Raccordement du câble USB Raccordement du câble de l’imprimante...
  • Page 73: Informations Relatives Aux Différentes Parties Du Produit

    Guide de l'utilisateur Rimage PrismPlus! Informations relatives aux différentes parties du produit Panneau de l’opérateur Bouton de commande Le panneau de l’opérateur est situé sur la avec voyant face avant de l’imprimante. Vous trouverez lumineux Erreur quatre voyants lumineux et un bouton de commande sur le panneau de l’opérateur.
  • Page 74: Configuration D'une Imprimante Autonome Prism

    Consultez ces informations si votre imprimante Prism est une imprimante autonome ou si elle fait partie d’un système d’imprimante AutoPrism AutoPrinter. Important ! Si votre imprimante Prism était incluse avec un chargeur automatique Rimage, le logiciel Rimage, y compris le pilote de l’imprimante, est préinstallé sur le centre de contrôle intégré ou externe (PC).
  • Page 75 Guide de l'utilisateur Rimage PrismPlus! Dans Windows, sélectionnez : Start (Démarrer) > Run (Exécuter). La fenêtre Run (Exécuter) s’ouvre. Tapez MMC (Microsoft Management Console, Console de gestion Microsoft). Sélectionnez OK. La fenêtre Console1 s’ouvre. Ajoutez un composant logiciel enfichable. À partir de la fenêtre Console1, sélectionnez : File (Fichier) > Add/Remove Snap-In (Ajouter/Supprimer un composant logiciel enfichable).
  • Page 76 (Pilotes d’imprimantes) > Prism > Win2k_XP. Sélectionnez le fichier ccd2kxp.inf. Sélectionnez Open (Ouvrir). vi. Sélectionnez OK. Rimage Perfect Image Printer PF s’affiche dans la liste Imprimantes (Imprimantes). vii. Sélectionnez Next (Suivant). • Si vous installez le pilote pour la première fois, la boîte de dialogue Name Your Printer (Donnez un nom à...
  • Page 77 Configurez les options du pilote de l’imprimante Prism. Cliquez avec le bouton droit sur l’icône de l’imprimante. Sélectionnez Properties (Propriétés). La fenêtre Rimage Perfect Image Printer PF Properties (Propriétés Rimage Perfect Image Printer PF) s’ouvre. Sélectionnez l’onglet Device Settings (Paramètres du périphérique).
  • Page 78: Utilisation De L'imprimante Prism

    Utilisation de l’imprimante Prism Utilisation de l’imprimante Prism Cette section fournit les informations nécessaires pour utiliser l’imprimante Prism. Mise sous et hors tension de l’imprimante Prism Mise sous ou hors tension d’une imprimante autonome Appuyez sur l’interrupteur d’alimentation situé à l’arrière de l’imprimante. L’imprimante démarre et s’initialise.
  • Page 79: Configuration De Vos Préférences D'impression

    Sélectionnez Enabled (Activé) pour Enable Color Sub-Strobes (Activation sous-stroboscopique de la couleur). Sélectionnez OK pour sauvegarder les modifications et fermer la fenêtre Rimage Perfect Image Printer PF Properties (Propriétés Rimage Perfect Image Printer PF).
  • Page 80: Impression En Couleurs

    Sélectionnez Halftone Setup Properties (Propriétés de configuration des demi-teintes) pour effectuer des modifications qui affectent les réglages d’intensité des couleurs, d’équilibre chromatique ou de motifs. 10. Sélectionnez OK pour sauvegarder les modifications et fermer la fenêtre Rimage Perfect Image Printer PF Properties (Propriétés Rimage Perfect Image Printer PF).
  • Page 81 Guide de l'utilisateur Rimage PrismPlus! 110635_K...
  • Page 82: Entretien De L'imprimante Prism

    Entretien de l’imprimante Prism Entretien de l’imprimante Prism Servez-vous des informations présentées dans cette section pour maintenir votre imprimante Prism dans des conditions de fonctionnement optimales. Généralités Une maintenance préventive régulière de votre imprimante Prism vous aidera à obtenir toujours une qualité parfaite dans l’impression de vos étiquettes.
  • Page 83: Nettoyage De La Tête D'impression De L'imprimante Prism À L'aide D'un Kit De Nettoyage Prism

    Guide de l'utilisateur Rimage PrismPlus! Nettoyage de la tête d’impression Nettoyez la tête d’impression à chaque changement de ruban, ou plus souvent si des marques commencent à apparaître ou en cas de déchirure du ruban. Il existe deux méthodes de nettoyage de la tête d’impression Prism : la méthode utilisée avec le kit de nettoyage Prism et une méthode alternative.
  • Page 84: Nettoyage De La Tête D'impression - Méthode Alternative

    Entretien de l’imprimante Prism Nettoyez la tête d’impression. Appuyez sur le bouton de commande pour fermer le plateau de l’imprimante et démarrer le cycle de nettoyage. Dès que le cycle de Guides avant nettoyage est terminé, le plateau s’ouvre. du ruban Si nécessaire, répétez l’étape a pour relancer le Tampon de cycle de nettoyage.
  • Page 85: Remplacement Du Ruban D'impression

    Remplacement du ruban d’impression Rimage ne prend en charge que les rubans de la marque Rimage dans ses imprimantes. Les problèmes d’imprimante résultant de l’utilisation de rubans d’autres fabricants ne sont pas couverts par votre garantie ou votre contrat de maintenance Rimage.
  • Page 86 Entretien de l’imprimante Prism Chargez le ruban d’impression. Faites glisser le ruban d’impression sur le rouleau d’alimentation. Ruban d’impression Alignez les deux encoches de la partie centrale en carton sur les broches métalliques du rouleau d’alimentation. Décollez l’amorce du ruban d’alimentation. Partie centrale Faites glisser l’amorce du ruban sous le guide de ruban.
  • Page 87 Guide de l'utilisateur Rimage PrismPlus! Chargez le rouleau d’entraînement. Placez la nouvelle partie centrale en carton vide sur le rouleau d’entraînement. Elle porte une encoche pour ne s’adapter que d’une seule manière. Placez le rouleau d’entraînement sur l’amorce du ruban comme illustré.
  • Page 88 Guía del usuario de Rimage PrismPlus!™...
  • Page 89 Rimage Corporation se reserva el derecho de revisar Minneapolis, MN 55439 esta publicación y de realizar cambios ocasionalmente Estados Unidos al contenido de la misma y no es obligación de Rimage 800-553-8312 (asistencia telefónica gratuita Corporation avisar a ninguna persona u organización acerca en Estados Unidos) de dichas revisiones o cambios.
  • Page 90 Configuración de una impresora independiente Prism ..................13 Preparación de la impresora Prism............................13 Instalación del software de Rimage y del controlador de la impresora..................13 Instalación del software de Rimage ................................13 Instalación o actualización del controlador de la impresora ......................... 13 Funcionamiento de la impresora Prism ......................17...
  • Page 91: Introducción

    Para desembalar su impresora Prism, consulte la etiqueta de desembalaje que se encuentra en la caja de la impresora. Para configurar su impresora Prism, consulte la guía de configuración e instalación incluida en el autoloader de Rimage o la AutoPrism™ AutoPrinter, o consulte la sección Configuración de la impresora independiente Prism...
  • Page 92 Guía del usuario de Rimage PrismPlus! 110635_K...
  • Page 93: Información Importante

    Soporte técnico Puede encontrar soporte técnico para la impresora Rimage PrismPlus! a través de su distribuidor autorizado. ¡Importante! Asegúrese de registrar su impresora Prism para que Rimage pueda informarlo sobre actualizaciones cuando estén disponibles.
  • Page 94: Exención De Responsabilidad Del Software Para Grabación De Discos Ópticos

    Guía del usuario de Rimage PrismPlus! Exención de responsabilidad del software para grabación de discos ópticos Este Producto, el Software o la Documentación han sido diseñados para ayudarle a reproducir material del cual usted posee los derechos de autor o para el cual ha obtenido autorización del propietario de tales derechos para copiarlo. A menos que usted posea los derechos de autor o cuente con el permiso del propietario de estos, es posible que infrinja las leyes de derecho de autor y que, por lo tanto, esté...
  • Page 95: Información De Cumplimiento

    Información importante Información de cumplimiento Producto Impresora PrismPlus! Modelo CDRPS Aviso para los Estados Ha sido sometida a pruebas y cumple con los estándares de la FCC PARA USO DOMÉSTICO Unidos O DE OFICINA. NOTA: este equipo ha sido sometido a pruebas y se ha determinado que cumple con los límites establecidos para un dispositivo digital Clase B, conforme a la parte 15 de las Normas de la FCC.
  • Page 96: Especificaciones De La Impresora Rimage Prism

    Esta sección proporciona información sobre las especificaciones de la impresora Prism. Notas: • La información más reciente sobre las especificaciones técnicas está disponible en www.rimage.com/support. En el menú Support (Soporte), seleccione: Printer Series (Serie de la impresora) > PrismPlus! > la ficha User Manuals (Manuales del usuario).
  • Page 97 Sistemas operativos compatibles Windows Vista Business, Enterprise y Ultimate con SP1 (únicamente la versión 8.2 y superior del software de Rimage, si se utiliza con un autoloader; únicamente la versión 8.2 o superior del conjunto de software CD Designer, si se utiliza con una impresora independiente o AutoPrism) •...
  • Page 98 Guía del usuario de Rimage PrismPlus! 110635_K...
  • Page 99: Requisitos De La Impresora

    ¡Importante! Rimage sólo admite el uso de cintas de marca Rimage en la impresora Prism. Los problemas de la impresora ocasionados por el uso de cintas de otros fabricantes no están contemplados en la garantía de Rimage ni en el contrato de mantenimiento.
  • Page 100 Guía del usuario de Rimage PrismPlus! 110635_K...
  • Page 101: Identificación De Las Piezas De La Impresora Prism

    Identificación de las piezas de la impresora Prism Identificación de las piezas de la impresora Prism Vista delantera Guías de cinta Pasadores de retención Bandeja de la impresora y pasador de centrado Rodillo de recogida Rodillo de suministro Vista trasera Conexión de la alimentación de CA Interruptor de encendido...
  • Page 102: Información Sobre Las Piezas

    Guía del usuario de Rimage PrismPlus! Información sobre las piezas Panel de funcionamiento En el panel de funcionamiento, que se encuentra en el frente de la impresora, Botón de funcionamiento hay cuatro luces indicadoras y un botón con luz indicadora Error de funcionamiento.
  • Page 103: Configuración De Una Impresora Independiente Prism

    Preparación de la impresora Prism en la página 13. Instalación del software de Rimage Coloque el disco del conjunto de software CD Designer de Rimage que se envía con la impresora en la unidad de discos de su equipo. Abra el archivo setup.exe.
  • Page 104 Prism on COMX iii. Seleccione Delete (Eliminar). Descargue el archivo del nuevo controlador desde www.rimage.com/support: En el menú Support (Soporte) seleccione: Printer Series (Serie de la impresora) > PrismPlus! > la ficha Software, Firmware & Service Packs. En Drivers and Utilities (Controladores y herramientas), seleccione el controlador correspondiente.
  • Page 105 (Controladores de impresoras) > Prism > Win2k_XP. Seleccione el archivo ccd2kxp.inf. Seleccione Open (Abrir). vi. Seleccione OK (Aceptar). En la lista Printers (Impresoras) aparece Rimage Perfect Image Printer PF. vii. Seleccione Next (Siguiente). • Si el controlador se instala por primera vez, se abre el cuadro de diálogo Name Your Printer (Dar un nombre a su impresora).
  • Page 106 Configure las opciones del controlador de la impresora Prism. Haga clic con el botón derecho en el icono Printer (Impresora). Seleccione Properties (Propiedades). Se abre la ventana Rimage Perfect Image Printer PF Properties (Propiedades de Rimage Perfect Image Printer PF).
  • Page 107: Funcionamiento De La Impresora Prism

    Funcionamiento de la impresora Prism Funcionamiento de la impresora Prism En esta sección encontrará la información necesaria para utilizar la impresora Prism. Encendido y apagado de la impresora Prism Encendido o apagado de una impresora independiente Presione el interruptor de encendido en la parte trasera de la impresora. La impresora se encenderá...
  • Page 108: Configuración De Las Preferencias De Impresión

    Seleccione Enabled (Activado) en Enable Color Sub-Strobes (Activar subestroboscopios de color). Seleccione OK (Aceptar) para guardar los cambios y cerrar la ventana Rimage Perfect Image Printer PF Properties. Configuración de las opciones de color Puede imprimir en un solo color o en varios colores. Utilice estos procedimientos y configure la impresora Prism para que imprima en diferentes colores o en un solo color.
  • Page 109: Impresión A Color

    Para realizar cambios que afectan la intensidad del color, el equilibrio de colores o la configuración de patrones, seleccione Halftone Setup Properties (Propiedades de configuración de medios tonos). 10. Seleccione OK (Aceptar) para guardar los cambios y cerrar la ventana Rimage Perfect Image Printer PF Properties. Configuración de la calidad de impresión impresión.
  • Page 110 Guía del usuario de Rimage PrismPlus! 110635_K...
  • Page 111: Mantenimiento De La Impresora Prism

    Mantenimiento de la impresora Prism Mantenimiento de la impresora Prism Utilice la información de esta sección para mantener su impresora Prism en óptimas condiciones de funcionamiento. Introducción El mantenimiento preventivo regular de su impresora Prism contribuye a producir siempre etiquetas claramente impresas. El mantenimiento incluye la limpieza del sistema.
  • Page 112: Limpieza Del Cabezal De Impresión

    Guía del usuario de Rimage PrismPlus! Limpieza del cabezal de impresión Limpie el cabezal de impresión cada vez que cambie la cinta, o con mayor frecuencia si comienzan a aparecer rayas o si la cinta se rompe. Existen dos métodos para limpiar el cabezal de la impresora Prism: el método con el kit de limpieza de la impresora Prism y el método alternativo.
  • Page 113: Limpieza Del Cabezal De Impresión: Método Alternativo

    Mantenimiento de la impresora Prism Limpie el cabezal de impresión. Presione el botón de funcionamiento para cerrar la bandeja de la impresora e iniciar el ciclo de limpieza. La bandeja de la impresora se abre cuando finaliza el ciclo de limpieza. Guías de cinta Si es necesario, repita el paso a para volver a iniciar delanteras...
  • Page 114: Cambio De La Cinta De Impresión

    Rimage sólo admite el uso de cintas de marca Rimage en nuestras impresoras. Los problemas de la impresora ocasionados por el uso de cintas de otros fabricantes no están contemplados en la garantía de Rimage ni en el contrato de mantenimiento.
  • Page 115 Mantenimiento de la impresora Prism Cargue la cinta de impresión. Deslice la cinta de impresión en el rodillo de suministro. Alinee las dos muescas del tubo de cartón a los pasadores de metal del rodillo de suministro. Cinta de impresión Despegue el comienzo de la cinta de suministro.
  • Page 116 Guía del usuario de Rimage PrismPlus! Cargue el rodillo de recogida. Coloque el nuevo tubo de cartón en el rodillo de recogida. Está diseñado para calzar en una sola posición. Coloque el rodillo de recogida en la parte superior del comienzo de la cinta, tal como se indica.
  • Page 117 Rimage PrismPlus!™ ユーザー ガイ ド...
  • Page 118 ® Rimage は、 Rimage Corporation の登録商標です。 Albert-Einstein-Str. 26 Rimage PrismPlus!™、 AutoPrism™、 CD Designer™ は 63128 Dietzenbach Rimage Corporation の商標です。 Dell™ は、 Dell Computer Germany Corporation の商標です。 FireWire™ は、 Apple Computer, Inc. 電話 : +49-(0) 6074-8521-0 ® の商標、 またWindows は、 Microsoft Corporation の登録商...
  • Page 119 サポート情報 ..............................................3 詳細情報はネッ トワークから .........................................3 技術サポート ..............................................3 光ディスク記録ソフトウェアの免責条項 ....................................4 安全性および法令順守について ......................................4 安全対策 ....................................................4 法令順守について ................................................5 Rimage Prism プリンタ の仕様 ......................................6 プリンタの要件 ................................9 リボンの要件 ...............................................9 ラベル デザインの要件 ...........................................9 印刷の要件 ..............................................9 Prism プリンタ部品の確認 ............................11 正面図 ................................................ 11 背面図 ................................................ 11 部品情報...
  • Page 120: はじめに

    Rimage Prism プリンタは、 CD または DVD、 ブルーレイ ディスクに情報をモノクロ印刷するための高速プリンタです。 Prism には、 手 動のスタンドアローン型プリンタ、 また自動運転の AutoPrism AutoPrinter があります。 開梱およびセッ トアップ取扱説明書 Prism プリンタを開梱するには、 梱包箱に貼付の開梱法についてのラベルを参照してください。 Prism プリンタの設定について は、 Rimage オートローダまたは AutoPrism™ AutoPrinter に付属の 『設定および設置ガイド』 、 または本ユーザー ガイド 13 ページ スタンドアローンの Prism プリンタの設定」 を参照してください。 110635_K...
  • Page 121 Rimage PrismPlus!ユーザー ガイ ド 110635_K...
  • Page 122: 重要事項

    重要事項 重要事項 このセクションでは、 Rimage Prism プリンタに関して、 サポートについての問い合わせ先、 安全性および法令順守について、 および 製品仕様について説明します。 サポート情報 米国、 アジア/太平洋、 メキシコ/ラテンアメリカ ヨーロッパ Rimage Corporation Rimage Europe GmbH 7725 Washington Avenue South Albert-Einstein-Str. 26 Minneapolis, MN 55439 63128 Dietzenbach Germany 宛先 : Rimage Services Rimage Services 連絡先: www.rimage.com/support Rimage Services Europe 連絡先:...
  • Page 123: 光ディスク記録ソフトウェアの免責条項

    Rimage PrismPlus!ユーザー ガイ ド 光ディスク記録ソフ トウ ェアの免責条項 本製品、 ソフトウェアおよび説明書は、 著作権の所有者もしくは著作権者から書面によるコピーの許可を受けている場合、 複製する ことができます。 著作権を所有していない、 もしくは著作権者から許可を得ずこれらの複製をした場合、 著作権法を違反したとみな され、 損害賠償の支払いおよびその他の方法で賠償しなければならない可能性があります。 所有されている権利に関してご不明な 点がございましたら、 専門の弁護士にご相談ください。 著作権を所有していなかったり、 著作権者から許可を得ていない場合、 光ディ スクまたはその他のメディアに含まれる著作物の無許可のコピーは、 国内法および国際法に違反し、 厳しい刑罰を課されるおそれ があります。 安全性および法令順守について 本マニュアルおよび製品に関する指示により、 適切で安全な操作が可能になります。 以下の指示マークは、 ユーザーおよびその他の 方を身体的傷害から、 機器を損傷から保護するのに役立ちます。 警告! ANSI (American National Standard Institute: 米国規格協会) 標準に従い、 警告は、 身体的傷害を、 機器の操作またはメン...
  • Page 124: 法令順守について

    重要事項 法令順守について 製品 PrismPlus! プリンタ モデル CDRPS 米国向けの注意 家庭用またはオフィス用の FCC 規則に適合することを試験しました。 注記 :本装置は、 FCC 規則の第 15 章によって B クラスのデジタル装置の制限に適合するかの試験を 受け、 適合することが分かっています。 これらの制限は、 住宅への設置における有害な妨害に対して 妥当な保護を提供することを目的にしています。 本機は、 無線周波数エネルギーを発生、 使用および 放射します。 指示に従って取り付け、 使用しない場合、 無線通信に有害な妨害を引き起こす場合があ ります。 しかしながら、 特定の設置の場合、 妨害が発生しないという保証はありません。 本機が無線ま たはテレビの受信に有害な妨害を引き起こす場合 – これは本機の電源をオフ ・ オンすることにより確 認できますが...
  • Page 125: Rimage Prism プリンタ の仕様

    印刷品質 300 × 300 dpi または 300 × 600 dpi (1 mm 当たり 11.8 ドッ ト) 印刷方向 メディアがマシンから出て行く ときに、 画像は、 上端から下端の方向に印刷されます。 ラベル デザインの要件 ページラベル デザインの要件」 を参照してください。 メディ アの要件 断熱層付きの120 mm の CD および DVD のメディア リボンの要件 重要! Rimage の製品では、 Rimage ブランドのリボンの使用のみがサポートされ ています。 9 ページリボンの要件 」 を参照してください。 . 標準リボン カラー: 黒色、 赤色および青の各単色 印刷可能 2100 ディスク...
  • Page 126 と併用する場合は Rimage Software 8.2 以降のバージョンのみ、 スタンドアロー ン プリンタまたは AutoPrism と併用する場合は CD Designer Software Suite 8.2 以降のバージョンのみ) • Windows XP Professional SP3 • Windows XP Professional SP2 (Rimage Software 8.1 以前のバージョンのみ) • Windows 2000 Professional SP4 (Rimage Software 8.1 以前のバージョンのみ) • Windows Server 2003 インターフ ェース...
  • Page 127 Rimage PrismPlus!ユーザー ガイ ド 110635_K...
  • Page 128: プリンタの要件

    Rimage Prism プリンタの仕様」 を参照してください。 ラベル デザインの要件 Prism プリンタの Windows 対応ソフトウェアには、 CD Designer ラベル エディタ ソフトウェアが同梱されています。 CD Designer は、 Rimage ソフトウェアの標準インストール時に PC にインストールされます。 Windows が動作しているパーソナル コンピュータを ご使用の場合、 CD Designer を使用してラベルをデザインできます。 CD Designer 以外のソフトウェアでラベルをデザインする場合は、 次の基準に従ってください。 • ファイル形式: 最良の結果を得るためには、 ラベルを JPEG または TIFF 形式で保存します。...
  • Page 129 Rimage PrismPlus!ユーザー ガイ ド 110635_K...
  • Page 130: Prism プリンタ部品の確認

    Prism プリンタ部品の確認 Prism プリンタ部品の確認 正面図 リボン ガイ ド 押さえピン プリンタ トレイとセンタリ ング ピン 巻き取りローラー 供給ローラー 背面図 交流電源接続 電源スイッチ パラレル ケー ブル接続 USB ケーブル接続 プリンタ ケーブル接続 110635_K...
  • Page 131: 部品情報

    Rimage PrismPlus!ユーザー ガイ ド 部品情報 オペレータ パネル プリンタの前面にあるオペレータ パネル上 には、 4 個の表示ランプとオペレータ ボタン エラー表示ランプ付き があります。 オペレータ ボタン ディ スク配置ランプ オペレータ ボタン オペレータ ボタンを押して、 プリンタ トレイの アクテ ィ ブ表示ランプ 開閉を行います。 エラー表示ランプはオペレー 電源表示ランプ ション ボタンの中央にあります。 詳細について は 「表示ランプ」 を参照してください。 操作パネル 表示ランプ 各表示ランプの名称と機能については、 以下をご覧ください。 各表示ランプは、 スタンドアローンの Prism プリンタの状態を反映しま...
  • Page 132: スタンドアローンの Prism プリンタの設定

    Prism プリンタがスタンド アローン プリンタまたは AutoPrism AutoPrinter システムの一部の場合は、 この情報を使用します。 重要! Prism プリンタが Rimage オートローダに含まれていた場合は、 プリンタ ドライバなどの Rimage ソフトウェアはすべて組 み込み型または外付けのコントロール センタ (PC) にプレインストールされています。 スタンドアローンの Prism プリンタまたは AutoPrism AutoPrinter を使用する前に、 Rimage ソフトウェアと Prism プリンタ ドライバ をインストールします。 Rimage ソフトウェアおよび Prism プリンタ ドライバをインストールする前に、 Prism プリンタを用途に合わせて正しく準備している...
  • Page 133 プリンタ設定にアクセスします。 Windows の画面で [Start (スタート)] ボタンをクリックし、 [Printers and Faxes (プリン タと FAX)] を選択します。 [Printers and Faxes (プリンタと FAX)] ダイアログ ボックスが開きます。 以下のファイルを右クリックします。 注記: Prism の使用形態に応じて、 これらのファイルのいずれかまたは両方が表示されます。 • Rimage Perfect Image Printer PF • COMX 上の Prism iii. [Delete (削除)] を選択します。 www.rimage.com/supportから新しいドライバファイルをダウンロードします。...
  • Page 134 ドライバを初めてインストールする場合は、 ソフトウェア CD から [Printer Drivers (プリンタ ドライバ)] > [Prism] > [Win2k_XP] の順に選択します。 [ccd2kxp.inf] ファイルを選択します。 [Open (開く )] を選択します。 vi. [OK] を選択します。 プリンタリストに [Rimage Perfect Image Printer PF] が表示されます。 vii. [Next (次へ)] を選択します。 • ドライバを初めてインストールする場合は、 [Name Your Printer (プリンタ名)] ダイアログ ボックスが開きます。 ス...
  • Page 135 重要!ソフトウェアが Windows Logo 検査に合格していないことを知らせる警告が表示された場合は、 [Continue (続行)] を選択します。 Prism ドライバ オプシ ョンを設定します。 プリンタ アイコンを右クリックします。 [Properties (プロパテ ィ)] を選択します。 [Rimage Perfect Image Printer PF Properties (Rimage Perfect Image Printer PF のプロパティ)] ウィンドウが開きます。 [Device Settings (デバイスの設定)] タブを選択します。 装着されているリボンの種類を選択します。 Prism プリンタには単色リボンが付属しています。 注記: 単色リボンで使用可能なダブル プリント機能により、 ディスク上に同じラベルを 2 回印刷することができま...
  • Page 136: Prism プリンタの操作

    Prism プリンタの操作 Prism プリンタの操作 本セクションでは、 Prism プリンタの操作に必要な情報について説明します。 Prism プリンタの電源オンとオフ スタンドアローン プリンタのオンとオフ プリンタの背面の電源スイッチを押します。 プリンタの電源がオンになり、 初期化が行わ れます。 もう一度電源スイッチを押します。 プリンタの電源がオフになります。 オートローダまたは AutoPrinter に接続されたプリンタの電源のオン またはオフ 電源スイッチ Prism プリンタがオートローダまたは AutoPrinter に接続されている場合は、 次の手順に従い ます。 注記: プリンタの電源スイッチは 「オン」 の位置になければなりません。 オートローダまたは AutoPrinter の電源をオンにします。 プリンタの電源がオンになり、 初期化が行われます。 オートローダまたは AutoPrinter の電源をオフにします。 プリンタの電源がオフになります。 プリンタ...
  • Page 137: 印刷オプションの設定

    • 印刷ヘッ ドの寿命を延ばすために、 マスター印刷ストローブを、 満足の行く印刷が得られる最低値に設定します。 [Enable Color Sub-Strobes (カラー サブス トローブを有効にする)] で [Enabled (有効)] を選択します。 [OK] を選択して変更を保存し、 [Rimage Perfect Image Printer PF Properties (Rimage Perfect Image Printer PF のプロパティ)] ウィンドウを閉じます。 カラー オプシ ョ ンの設定 一色 (単色) または複数の色で印刷できます。 この手順に従って、 カラーまたは単色で印刷するように Prism をセッ トアップします。...
  • Page 138: カラー印刷

    [OK] を選択します。 [Rimage Perfect Printer PF Advanced Options (Rimage Perfect Printer PF 詳細オプション)] ダイアログ ボ ックスが閉じます。 [OK] を選択します。 [Rimage Perfect Image Printer PF Printing Preferences (Rimage Perfect Image Printer PF 印刷設定)] ウィ ンドウが閉じます。 [OK] を選択して変更を保存し、 [Rimage Perfect Image Printer PF Properties (Rimage Perfect Image Printer PF のプロパテ...
  • Page 139 Rimage PrismPlus!ユーザー ガイ ド 110635_K...
  • Page 140: Prism プリンタのメンテナンス

    Prism プリンタのメンテナンス Prism プリンタのメンテナンス このセクションの情報を使用して、 Prism プリンタを最適な動作状態に保ちます。 概要 Prism プリンタの事前メンテナンスを定期的に行えば、 常に鮮明な印刷ラベルが得られます。 メンテナンスでは、 システムをクリーニ ングします。 注意情報 注意: メンテナンス時に Prism プリンタが破損しないようにするためには、 • Prism には、 オイル、 シリコン、 またはその他の潤滑剤は絶対に使用しないでください。 • Prism プリンタの表面を拭く場合は、 研磨剤入りのクリーナーを使用しないでください。 • Prism プリンタに直接クリーナーを付けないでください。 そのかわり、 まず糸くずの出ない布にクリーナーを付けます。 事前メンテナンスのスケジュール 事前メンテナンスの作業間隔のガイドラインとして以下の表を使用します。 重要! 下記に示されているメンテナンス スケジュールに従わないと、 保証が適用されないことがあります。 ツール...
  • Page 141: 印刷ヘッ ドの清掃

    Rimage PrismPlus!ユーザー ガイ ド 印刷ヘッ ドの清掃 リボン交換のたびに印刷ヘッ ドを清掃します。 また、 すじが見え始めたり、 リボンが裂けた場合にも印刷ヘッ ドを清掃します。 Prism プリンタの印刷ヘッ ドの清掃には、 Prism クリーニング キッ トを使う方法と代替方法の 2 種類があります。 クリーニング キッ ト が手元にない場合は代替方法を使って清掃を行ってください。 このセクションでは以上 2 種類の清掃手順を説明します。 注記: Prism プリンタがオートローダまたは AutoPrinter に接続されている場合は、 清掃を開始する前にプリンタをシステムか ら取り外すとスムーズに作業を行うことができます。 • プリンタの電源をオフにします。 • プリンタの背面からケーブルおよびコードをすべて 取り外します。 11 ページ...
  • Page 142: 印刷ヘッ ドの清掃 - 代替方法

    Prism プリンタのメンテナンス 印刷ヘッ ドを清掃します。 オペレータ ボタンを押してプリンタ トレイを閉じ、 清掃サイクルを開始します。 清掃サイクルが完了す ると、 プリンタ トレイが開きます。 Vordere 必要に応じ、 ステップ a を繰り返して清掃サイクルを Bandführungen 再開します。 印刷ヘッ ドの清掃が完了したら、 プリンタ トレイか Reinigungsvlies らク リーニング パッ ドとディ スクを取り外します。 Reinigungsmittel 前面部の 2 つのリボン ガイ ドを清掃します。 イソプロピル アルコールを清潔な綿棒に塗布しま す。 リボン ガイドに綿棒を当てるようにして清掃しま す。...
  • Page 143: 印刷リボンの交換

    印刷ヘッ ドのアルコールが乾燥した後、 Prism の使用準備をします。 リボンを取り付けます。 24 ページ印刷リボンの交換」 を参照してください。 清掃開始前にオートローダまたは AutoPrinter からプリンタを取り外した場合は、 システムの上にプリンタを設置し、 すべ てのケーブルとコードをプリンタの背面に接続します。 11 ページPrism プリンタ部品の確認」 を参照してください。 印刷リボンの交換 Rimage の製品では、 Rimage ブランドのリボンの使用のみがサポートされています。 Rimage 以外のメーカーが製造したリボンを使 用した結果、 プリンタに問題が発生しても、 Rimage 保証やメンテナンス契約の対象外になります。 ヒン ト : リボンの保存環境がプリンタの保存環境と大きく異なる場合、 順応するまで多少時間がかかる場合があります。 温度や 湿度の差が大きいときは、 更に時間がかかります。 リボン部分にアクセスします。 Prism の電源をオンにします。 プリンタから上端カバーを取り外します。...
  • Page 144 Prism プリンタのメンテナンス 印刷リボンを装着します。 供給ローラーの上まで印刷リボンをスライドさせます。 厚紙の芯の 2 か所の溝を、 供給ローラーの金属ピンに合わせます。 印刷リボン 供給リボンからリボン リーダーを剥がします。 リボン リーダーをリボン ガイ ドの下に通します。 厚紙の芯 溝 金属ピン 供給ローラー 図のように、 リボン リーダーをプリンタ トレイの後ろ側にテープで貼ります。 テープ リボン ガイ ド プリンタ トレイ リボン リーダー 図のように供給ローラーを取り付けます。 リボンリーダーに幾分たるみを残します。 プリンタトレイが現れるまでオペレータ ボタンを押し続けます。 リボ ンが、 Prism の前面に出て来ます。 プリンタ トレイからテープを外します。 リボンリーダーから粘着シートを剥がします。...
  • Page 145 Rimage PrismPlus!ユーザー ガイ ド 巻き取りローラーを装着します。 新しい、 使用していない厚紙の芯を巻き取りローラーに取 り付けます。 一方向にのみ合うように設計されています。 図のように、 リボンリーダーの上端に巻き取りローラーを取 り付けます。 重要! ギアの側が正しくなければなりません。 厚紙の芯 ギア リボン リーダー 粘着シート リボン リーダーを厚紙の芯の上に引き上げます。 リボン リーダーの端が厚紙の芯の端と合うように、 粘着 シートを貼り付けます。 注記: 図中の矢印が巻き取る方向を示しています。 リボンリーダーをローラーの回りに 1 回だけ包まれるよ うに回します。 重要!STOP - Wind Leader Onto Take-up Core Stopping here.という、 リーダー上のマークを越え...
  • Page 146 Rimage PrismPlus!™ Manuale per l’utente...
  • Page 147 Rimage Corporation documento in qualsiasi momento e senza preavviso. 7725 Washington Avenue South Rimage Corporation si riserva il diritto di rivedere il presente Minneapolis, MN 55439 documento e di modificarne i contenuti senza alcun obbligo di notificare tali revisioni o modifiche a persone o organizzazioni.
  • Page 148 Spie ..........................................12 Configurazione di una stampante Prism autonoma ...................13 Preparazione della stampante Prism ............................13 Installazione del software Rimage e del driver della stampante ....................13 Installare il software Rimage..................................13 Installazione o aggiornamento del driver della stampante ........................... 13 Funzionamento della stampante Prism .......................17...
  • Page 149: Introduzione

    Informazioni sul prodotto Il modello Prism di Rimage è una stampante ad alta velocità usata per stampare informazioni in bianco e nero su CD, DVD e dischi Blu-ray. Prism è disponibile come stampante autonoma per utilizzo manuale o con AutoPrism AutoPrinter per il funzionamento in automatico non sorvegliata.
  • Page 150 Rimage PrismPlus! Manuale per l’utente 110635_K...
  • Page 151: Informazioni Importanti

    Numero di serie: Nome del prodotto: Data di acquisto: Ulteriori informazioni on line All’indirizzo www.rimage.com/support, è possibile conoscere l’ottima qualità del supporto e dei servizi Rimage. Dalla pagina iniziale Support (Supporto): Dalla pagina del prodotto è possibile accedere a quando segue: Selezionare la serie del prodotto.
  • Page 152: Liberatoria Per Il Software Di Masterizzazione Dei Dischi Ottici

    Non intervenire passo, devono essere sostituite con componenti sulla stampante con il cavo dell’alimentazione approvati da Rimage per poter mantenere inserito nella presa della corrente. l’approvazione sulla sicurezza emessa da UL. •...
  • Page 153: Informazioni Sulla Conformità

    Informazioni importanti Informazioni sulla conformità Prodotto Stampante PrismPlus! Modello CDRPS Avviso per gli USA Collaudato conformemente alle norme FCC UNICAMENTE PER USO DOMESTICO O IN UFFICIO. NOTA: l’apparecchiatura è stata testata e dichiarata conforme ai limiti di un dispositivo digitale di Classe B, secondo i dettami della Parte 15 della normativa FCC.
  • Page 154: Caratteristiche Tecniche Della Stampante Rimage Prism

    In questa sezione sono fornite le informazioni sulle caratteristiche tecniche della stampante Prism. Note: • È possibile trovare le specifiche tecniche più aggiornate per la stampante all’indirizzo www.rimage.com/support. Dal menu Support (Supporto) selezionare la scheda: Printer Series (Stampante serie) > PrismPlus! > User Manuals (Manuali per l’utente).
  • Page 155 CD Designer, solo versioni 8.2 e superiori, se utilizzato con stampante autonoma o AutoPrism) • Windows XP Professional SP3 • Windows XP Professional SP2 (Rimage Software solo versioni 8.1 e inferiori) • Windows 2000 Professional SP4 (Rimage Software solo versioni 8.1 e inferiori) •...
  • Page 156 Rimage PrismPlus! Manuale per l’utente 110635_K...
  • Page 157: Requisiti Della Stampante

    Requisiti del nastro Importante: Rimage supporta solo l’utilizzo di nastri Rimage nella stampante Prism. I problemi che si verificano alla stampante in seguito all’utilizzo di nastri non prodotti da Rimage, non sono coperti dalla garanzia o dagli accordi di manutenzione Rimage.
  • Page 158 Rimage PrismPlus! Manuale per l’utente 110635_K...
  • Page 159: Identificazione Delle Parti Della Stampante Prism

    Identificazione delle parti della stampante Prism Identificazione delle parti della stampante Prism Vista anteriore Guide nastro Perni di fissaggio Vassoio della stampante e perno di centraggio Rotolo di avvolgimento Rotolo di alimentazione Vista posteriore Collegamento alimentazione a c.a. Interruttore di accensione Collegamento a Collegamento cavo parallelo...
  • Page 160: Informazioni Sulle Parti

    Rimage PrismPlus! Manuale per l’utente Informazioni sulle parti Pannello operatore Il pannello operatore è situato nella parte anteriore della stampante. Sul pannello Pulsante operatore operatore sono presenti quattro spie e un con spia di Errore pulsante operatore. Spia di Disco non...
  • Page 161: Configurazione Di Una Stampante Prism Autonoma

    Le informazioni seguenti sono valide per le stampanti autonome o per le stampanti che fanno parte di un sistema AutoPrism AutoPrinter. Importante: se la stampante Prism fa parte di un autoloader Rimage, tutto il software Rimage, incluso il driver della stampante, è già preinstallato nel control center incorporato o esterno (PC).
  • Page 162 Prism su COMX iii. Selezionare Delete (Elimina). Scaricare il file del nuovo driver all’indirizzo www.rimage.com/support: Dal menu Supporto selezionare la scheda: Printer Series (Serie stampanti) > PrismPlus! > Software, Firmware & Service Packs (Software, Firmware e Service Pack). In Drivers and Utilities (Driver e utility), selezionare il driver appropriato.
  • Page 163 > Prism > Win2k_XP. Selezionare il fileccd2kxp.inf. Selezionare Open (Apri). vi. Scegliere OK. L’elenco Printers (Stampanti) visualizza la stampante Rimage Perfect Image PF. vii. Selezionare Next (Avanti). • In caso di prima installazione del driver, viene visualizzata la finestra di dialogo Name Your Printer (Attribuzione del nome alla stampante).
  • Page 164 Configurazione delle opzioni del driver Prism. Fare clic con il pulsante destro del mouse sull’icona della stampante. Selezionare Properties (Proprietà). Verrà visualizzata la finestra di dialogo delle Proprietà della stampante Rimage Perfect Image. Selezionare la scheda delle Device Settings (Impostazioni periferica).
  • Page 165: Funzionamento Della Stampante Prism

    Funzionamento della stampante Prism Funzionamento della stampante Prism In questa sezione sono fornite le informazioni necessarie per l’uso della stampante Prism. Accensione e spegnimento della stampante Prism Accensione e spegnimento di una stampante autonoma Premere l’interruttore di accensione sul retro della stampante. La stampante si accende ed esegue le operazioni di inizializzazione.
  • Page 166: Impostazione Delle Preferenze Di Stampa

    Selezionare Enabled (Attivato) per Enable Color Sub-strobes (Attiva i Sotto-impulsi colore). Selezionare OK per salvare le modifiche e chiudere la finestra delle proprietà di Rimage Perfect Image Printer PF. Impostare le opzioni dei colori È possibile stampare in bianco e nero o a colori. Utilizzare queste procedure per impostare la stampante Prism per la stampa a colori o in bianco e nero.
  • Page 167: Stampa A Colori

    Per effettuare modifiche che interessino l’intensità del colore, il bilanciamento o le impostazioni del modello, selezionare Halftones Setup Properties (Proprietà di configurazione mezzi toni). 10. Selezionare OK per salvare le modifiche e chiudere la finestra delle proprietà di Rimage Perfect Image Printer PF. Impostare la qualità di stampa Accesso alle Proprietà...
  • Page 168 Rimage PrismPlus! Manuale per l’utente 110635_K...
  • Page 169: Manutenzione Della Stampante Prism

    Manutenzione della stampante Prism Manutenzione della stampante Prism Utilizzare le informazioni nella presente sezione per mantenere la stampante in condizioni di funzionamento ottimali. Panoramica Una manutenzione preventiva regolare della stampante Prism può contribuire a produrre etichette stampate in modo nitido. La manutenzione riguarda la pulizia del sistema.
  • Page 170: Pulizia Della Testina Di Stampa

    Rimage PrismPlus! Manuale per l’utente Pulizia della testina di stampa Pulire la testina ad ogni sostituzione di nastro, o più spesso, se cominciano ad apparire delle strisce o se il nastro si è strappato. Esistono due metodi per pulire la testina di stampa Prism, con il kit di pulizia Prism o con metodo alternativo. Quest’ultimo può...
  • Page 171: Metodo Alternativo Per La Pulizia Della Testina Di Stampa

    Manutenzione della stampante Prism Pulire la testina di stampa. Premere il pulsante operatore per chiudere il vassoio della stampante e avviare il ciclo di pulizia. Il vassoio si apre quando il ciclo di pulizia è terminato. Guide anteriori Se necessario, ripetere il passo a per avviare nastro un altro ciclo di pulizia.
  • Page 172: Sostituzione Del Nastro Di Stampa

    Sostituzione del nastro di stampa Rimage supporta solo l’utilizzo di nastri a marchio Rimage per le stampanti. I problemi che si verificano alla stampante in seguito all’utilizzo di nastri non prodotti da Rimage, non sono coperti dalla garanzia o dagli accordi di manutenzione Rimage.
  • Page 173 Manutenzione della stampante Prism Caricare il nastro di stampa. Far scorrere il nastro di stampa sul rullo di alimentazione. Allineare le due tacche del rullo interno di cartone ai perni di Nastro di stampa metallo sul rullo di alimentazione. Staccare la parte iniziale dal nastro di alimentazione. Far scorrere la parte inizialesotto la guida del nastro.
  • Page 174 Rimage PrismPlus! Manuale per l’utente Caricare il rullo di avvolgimento. Collocare la nuova anima vuota di cartone sul rullo di avvolgimento. È stata disegnata per essere installata in un solo senso. Collocare il rullo di avvolgimento sulla parte superiore della parte iniziale del nastro, come illustrato.

Table des Matières