Table des Matières
Publicité
Les langues disponibles
Les langues disponibles
Liens rapides
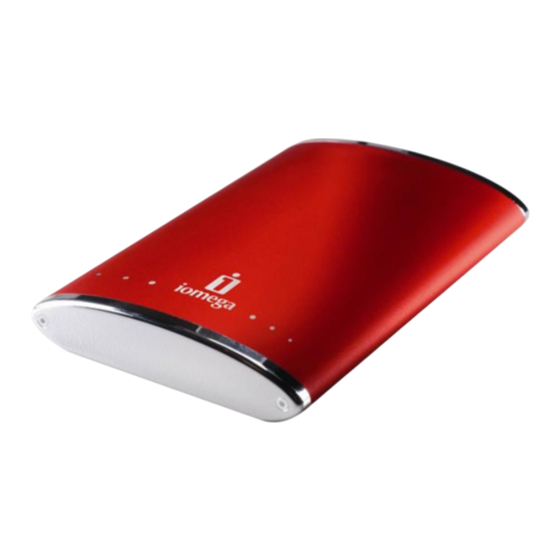
eGo
Portable Hard Drive
™
FireWire / USB
Quick Start Guide
Guide de démarrage rapide
Schnellstart-Handbuch
Guida di installazione rapida
Guía de instrucciones rápidas
Guia de uso rápido
Snel aan de slag
Snabbstartguide
Introduktion
Hurtigreferanse
Pikaopas
Gyors útmutató
Stručná příručka
Wprowadzenie
Οδηγός γρήγορης εκκίνησης
*
Publicité
Table des Matières

Manuels Connexes pour Iomega eGo


Sommaire des Matières pour Iomega eGo
- Page 1 Portable Hard Drive ™ FireWire / USB Quick Start Guide Guide de démarrage rapide Schnellstart-Handbuch Guida di installazione rapida Guía de instrucciones rápidas Guia de uso rápido Snel aan de slag Snabbstartguide Introduktion Hurtigreferanse Pikaopas Gyors útmutató Stručná příručka Wprowadzenie Οδηγός...
- Page 2 In caso di problemi, noi possiamo fornire assistenza. NON restituire questo prodotto al rivenditore! La risposta è sul Web. Sito di supporto sul Web premiato www.iomega.com. Selezionare la propria regione, quindi scegliere Supporto tecnico e download. Si tiene algún problema, podemos ayudar. ¡Por favor, NO devuelva este producto a la tienda! Su respuesta está...
-
Page 3: Table Des Matières
Contents • Matières • Inhalt • Sommario • Contenido • Conteúdo Inhoudsopgave • Innehåll • Indhold • Innhold • Sisällys • Tartalom Obsah • Spis treści • Περιεχόµενα Quick Install................4 Installation rapide . -
Page 4: Quick Install
Quick Install • Installation rapide 1. Identify the appropriate cable and connect it to 1. Identifiez le bon câble et connectez-le à l’arrière the back of the drive. du lecteur. 2. Connectez l’autre extrémité du câble au port de 2. -
Page 5: Installazione Rapida
Schnellstart • Installazione rapida 1. Individuare il cavo appropriato e collegarlo 1. Wählen Sie das richtige Kabel aus, und alla connessione situata nella parte posteriore verbinden Sie es mit einem Anschluss auf der dell’unità. Rückseite des Laufwerks. 2. -
Page 6: Instalación Rápida
Instalación rápida • Instalação rápida 1. Identifique el cable adecuado y conéctelo a la 1. Identifique o cabo apropriado e conecte-o à conexión en la parte posterior de la unidad. entrada na parte traseira da unidade. 2. Conecte el otro extremo del cable al puerto del 2. -
Page 7: Snelle Installatie
Snelle installatie • Snabbinstallation 1. Neem de geschikte kabel en sluit die aan op de 1. Lokalisera rätt kabel och anslut den till uttaget connector op de achterkant van de drive. på baksidan av enheten. 2. Sluit het andere uiteinde van de kabel aan 2. -
Page 8: Hurtig Installation
Hurtig installation • Rask installering 1. Find det korrekte kabel, og slut det til stikket på 1. Finn frem den riktige kabelen og koble den til bagsiden af drevet. på baksiden av stasjonen. 2. Slut den anden ende af kablet til porten på 2. -
Page 9: Pika-Asennus
Pika-asennus • Gyors telepítés 1. Ota tarvittava kaapeli ja kytke se kiintolevyn 1. Keresse meg a megfelelő kábelt, majd csatlakoztassa a meghajtó hátuljához. takaosassa olevaan liitäntään. 2. A kábel másik végét csatlakoztassa a 2. Kytke kaapelin toinen pää tietokoneen porttiin. számítógép egyik portjához. -
Page 10: Skrócona Instrukcja Insalacji
Rychlá instalace • Skrócona instrukcja insalacji 1. Znajdź odpowiedni kabel i podłącz go do złącza 1. Vyhledejte příslušný kabel a připojte jej do z tyłu napędu. konektoru na zadní straně jednotky. 2. Podłącz drugi koniec kabla do portu w 2. -
Page 11: Γρήγορη Εγκατάσταση
Γρήγορη εγκατάσταση 1. Εντοπίστε το κατάλληλο καλώδιο και συνδέστε το στην υποδοχή στο πίσω µέρος του δίσκου. 2. Συνδέστε το άλλο άκρο του καλωδίου σε µια υποδοχή στον υπολογιστή σας. Make sure the drive is connected to only one interface (USB or FireWire). -
Page 12: Using The Drive
Windows operating systems, and you must reformat the drive to either FAT32 or NTFS. CAUTION! Reformatting the Iomega Hard Drive will erase all existing data on the drive. Connect the Iomega Hard Drive to your computer following the instructions on page 4. - Page 13 NOTE: If you want to use the drive with other operating systems, download the Iomega FAT32 Formatter from the Support and Downloads area on www.iomega.com and use it to change the format to FAT32 (provides cross-platform compatibility). Troubleshooting Drive does not appear in My Computer or Windows Explorer or on the Mac Desktop PC Users: Make sure the drive is formatted for use with Windows.
-
Page 14: Déconnexion Du Lecteur
ATTENTION ! Le reformatage du disque dur Iomega efface l’intégralité des données enregistrées sur le disque. Connectez le disque dur Iomega à votre ordinateur en suivant les instructions de la page 4. 2. Ouvrez l’utilitaire de gestion des disques de Windows (cliquez avec le bouton droit de la souris sur Poste de travail, Gérer, puis Gestion des disques). - Page 15 REMARQUE : pour utiliser le périphérique avec d’autres systèmes d’exploitation, téléchargez Iomega FAT32 Formatter (logiciel de formatage Iomega FAT32) à partir de la section Support et Téléchargement du site www.iomega.com, puis utilisez ce logiciel pour formater le périphérique au format FAT32, permettant la compatibilité...
-
Page 16: Das Laufwerk Verwenden
Betriebssysteme erkennen dieses Format nicht, daher müssen Sie das Laufwerk entweder auf FAT32 oder auf NTFS umformatieren. Achtung! Durch das Umformatieren der Iomega Festplatte werden alle auf dem Laufwerk vorhandenen Daten gelöscht. Schließen Sie die Festplatte gemäß den Anweisungen auf Seite 5 an den Computer an. - Page 17 9. Um das Laufwerk mit einem NTFS-Dateisystem zu formatieren, klicken Sie auf Weiter und dann auf Fertig stellen. Sobald die Formatierung abgeschlossen ist, können Sie das Laufwerk verwenden. HINWEIS: Wenn Sie das Laufwerk mit anderen Betriebssystemen verwenden möchten, laden Sie Iomega FAT32 Formatter aus dem Bereich “Support & Downloads” unter www.iomega.com herunter, und ändern Sie damit das Format in FAT32 um.
-
Page 18: Scollegamento Dell'unità
L’unità viene fornito preformattato come volume Macintosh Extended (HFS+). Questo formato non è riconosciuto nei sistemi operativi Windows ed è necessario ripristinare la formattazione FAT32 o NTFS. ATTENZIONE! La riformattazione del disco rigido Iomega comporta l’eliminazione definitiva di tutti i dati presenti nell’unità. -
Page 19: Risoluzione Dei Problemi
9. Per formattare l’unità con un file system NTFS, fare clic su Avanti, quindi su Fine. L’unità potrà essere utilizzata al termine della formattazione. NOTA: per utilizzare l’unità con altri sistemi operativi, scaricare il programma Iomega FAT32 Formatter dall’area Assistenza e download all’indirizzo www.iomega.com e utilizzarlo per modificare la formattazione in FAT32 (richiesta per compatibilità... -
Page 20: Desconexión De La Unidad
¡PRECAUCIÓN! Si vuelve a formatear la unidad de disco duro Iomega, se eliminarán los datos existentes en la unidad. 1. Conecte el disco duro Iomega al ordenador siguiendo las instrucciones que se muestran en la página 6. 2. Abra Administración de discos de Windows (haga clic con el botón derecho del ratón en Mi PC, seleccione Administrar y, a continuación, haga clic en Administración de discos). -
Page 21: Solución De Problemas
Finalizar. Cuando el formateo finalice, la unidad estará lista para ser utilizada. NOTA: Si desea utilizar la unidad con otros sistemas operativos, descargue el software Iomega FAT32 Formatter (Formateador) del área de asistencia y descargas del sitio www.iomega.com y utilícelo para cambiar el formato a FAT32 (proporciona compatibilidad entre plataformas). -
Page 22: Utilização Da Unidade
CUIDADO! Reformatar o Iomega Hard Drive irá apagar todos os dados existentes na unidade. 1. Conecte o disco rígido Iomega ao seu computador, seguindo as instruções da página 6. 2. Abra o Gerenciamento de Disco do Windows (clique com o botão direito do mouse em Meu Computador, selecione Gerenciar e, em seguida, clique em Gerenciamento de Disco). -
Page 23: Solução De Problemas
Visite a área de suporte do site www.iomega.com para obter ajuda adicional na solução de problemas. Manual completo do usuário Está disponível na área de Suporte e Downloads no site www.iomega.com a versão completa do manual do usuário em formato HTML. -
Page 24: Limited Warranty
Your sole and exclusive remedy for a covered defect is repair or replacement of the defective product, at Iomega’s sole option and expense (shipping may be charged), and Iomega may use new or refurbished parts or products to do so. The replaced part/product will be warranted for the remainder of the original warranty or three (3) months from the date of shipment of such parts/products, whichever is longer. -
Page 25: Garantie Limitée
Any suit for breach of any warranty on your Product must be filed within one (1) year of the first date the suit could have been brought. Iomega garantit que ce produit est exempt de tout vice de fabrication ou de malfaçon pendant toute la période de garantie. Cette garantie limitée n’est pas transférable et ne s’applique qu’à l’utilisateur final. La garantie est effective à... -
Page 26: Eingeschränkte Garantie
à Iomega, avec son identification détaillée, un numéro d’autorisation de retour obtenu à partir de notre site Web ou fourni par votre représentant Iomega et une preuve d’achat. Iomega ne protège, ne récupère ni ne retourne des données pendant le service de garantie ; assurez-vous donc de copier vos données avant d’expédier le matériel. - Page 27 (3) Monate ab Versanddatum solcher Teile/Produkte Garantie geleistet, je nachdem, welcher Zeitraum länger ist. Falls die Reparatur bzw. der Ersatz eines defekten Produkts durch Iomega nicht möglich ist, ist Ihr einziges alternatives Rechtsmittel die Erstattung des ursprünglichen Kaufpreises. Die obigen Angaben stellen sämtliche Verpflichtungen dar, die Iomega Ihnen gegenüber im Rahmen dieser Garantie hat.
- Page 28 Europea. La presente garanzia non è da ritenersi valida per: (a) i prodotti software Iomega; (b) i materiali di consumo, come ad esempio i fusibili o le lampadine; o (c) i prodotti di terze parti, hardware o software, forniti in dotazione con il prodotto coperto da garanzia.
-
Page 29: Garantía Limitada
Su única y exclusiva compensación por un defecto cubierto es la reparación o sustitución del producto defectuoso, a elección y cargo de Iomega (el porte puede ser cobrado); Iomega puede utilizar piezas o productos nuevos o reparados para tal fin. La garantía de la pieza o producto repuesto tendrá... - Page 30 Iomega en Europa, visite nuestra página Web de asistencia: www.iomega.com/europe/support. Si tiene derecho a que su producto reciba servicio de garantía, se le pedirá que lo devuelva a Iomega, junto con la identificación adecuada, un número de autorización de devolución obtenido del sitio Web de Iomega o proporcionado por el representante, y una prueba de compra.
- Page 31 Obtenção de serviço de garantia É preciso notificar a Iomega dentro do período de garantia para receber o serviço de garantia. Os procedimentos da Iomega, assim como suas políticas específicas de suporte ao cliente (incluindo taxas de serviços), mudam conforme as condições tecnológicas e de mercado.
- Page 32 Roy, UT 84067 USA CE (European Community) This Iomega product conforms to the following European Directive(s)and Standard(s): Application of Council Directives: 73/23/EEC, 89/336/EEC. Standards to which Conformity is declared: EN60950, EN55022, EN55024, EN61000-3-2, EN61000-3-3. Importer’s Name: Iomega International, S.A. Type of Equipment: Information Technology Equipment.
- Page 33 • Consult the dealer or an experienced radio/TV technician for help. CE (Union européenne) Ce produit Iomega est certifié conforme aux normes et directives européennes suivantes : Applications des directives du Conseil : 73/23/EEC, 89/336/EEC. Conformité déclarée pour les normes suivantes : EN60950, EN55022, EN55024, EN61000-3-2, EN61000-3-3.
- Page 34 CE (Comunidad Europea) Este producto Iomega se ajusta a las siguientes directivas y estándares europeos: Aplicación de Directivas del Consejo: 73/23/EEC, 89/336/EEC. Estándares con los que se declara Conformidad: EN60950, EN55022, EN55024, EN61000- 3-2, EN61000-3-3. Nombre del importador: Iomega International, S.A. Tipo de equipo: Equipo de tecnología de la información.
- Page 35 Assistenza clienti • Asistencia al cliente • Suporte ao cliente For service and support for your Iomega product, visit us at www.iomega.com. Pour obtenir du service et de l’assistance pour votre produit Iomega, visitez notre site à l’adresse suivante : www.iomega.com.
- Page 36 Os modelos podem variar. Modellen kunnen verschillen. Copyright © 2008 Iomega Corporation. All rights reserved. Iomega, the stylized “i” logo, and eGo are either registered trademarks or trademarks of Iomega Corporation in the United States and/or other countries. Microsoft and Windows are either registered trademarks or trademarks of Microsoft Corporation in the United States and/or other countries.