Table des Matières
Publicité
Liens rapides
VACUUM CLEANER
Aspirateur
Aspiradora
MC-V5241
Operating Instructions
Manuel d'utilisation
Instrucciones de operación
Before operating your vacuum cleaner,
please read these instructions completely.
Avant d'utiliser l'appareil, il est recommandé
de lire attentivement ce manuel.
Antes de usar su aspiradora, lea
completamente estas instrucciones por favor.
Publicité
Table des Matières

Manuels Connexes pour Panasonic MC-V5241

Sommaire des Matières pour Panasonic MC-V5241
- Page 1 VACUUM CLEANER Aspirateur Aspiradora MC-V5241 Operating Instructions Manuel d’utilisation Instrucciones de operación Before operating your vacuum cleaner, please read these instructions completely. Avant d’utiliser l’appareil, il est recommandé de lire attentivement ce manuel. Antes de usar su aspiradora, lea completamente estas instrucciones por favor.
-
Page 2: Consumer Information
Read and understand all instructions. TO OUR VALUED CUSTOMER We are very pleased to welcome you to the Panasonic family of products. Thank you for purchasing this product. Our intent is that you become one of our many satisfied customers. -
Page 3: Renseignements Importants
À NOTRE CLIENTÈLE Nous vous souhaitons la bienvenue parmi la grande famille des clients des appareils Panasonic. Nous vous remercions d’avoir arrêté votre choix sur cet appareil. Nous n’avons qu’un seul but : votre entière satisfaction. -
Page 4: Información Para El Consumidor
Lea y comprenda todas las instrucciones. A NUESTRO CONSUMIDOR ESTIMADO Nos da mucho gusto a presentarle a la familia de productos de Panasonic. Le damos las gracias por comprar este producto. Estamos resueltos a hacerle uno de nuestros muchos consumidores satisfechos. -
Page 5: Important Safety Instructions
To reduce the risk of fire, electrical shock, injury: 1. Read all instructions in this manual before assembling or using your vacuum cleaner. 2. Use your vacuum cleaner only as described in this manual. Use only with Panasonic recommended attachments. -
Page 6: Importantes Mesures De Sécurité
à un Centre de Service Panasonic. 8. Ne pas tirer ou porter l'aspirateur par le cordon, ni utiliser le cordon en tant que manche, ni fermer une porte sur le cordon, ni tirer le cordon autour de coins aigus. -
Page 7: Instrucciones Importantes De Seguridad
Esta aspiradora está diseñada para uson en el hogar solamenta NOTA: Antes de enchufar su aspiradora Panasonic, esté seguro de que el voltaje indicado en la placa de clase ubicada en la parte de atrás de la aspiradora es el mismo que el de su proveedor local de electricidad. -
Page 8: Table Des Matières
TABLE OF CONTENTS CONSUMER INFORMATION ....................2 IMPORTANT SAFETY INSTRUCTIONS ..................5 PARTS IDENTIFICATION ......................10 ASSEMBLY..........................12 Attaching Handle........................ 12 FEATURES ..........................14 Using Cord Hook ........................ 14 Automatic Self Adjusting Nozzle ..................14 Edge Cleaning ........................14 Vac Gauge ..........................16 Thermal Protector........................16 TO OPERATE VACUUM CLEANER..................18 Power Cord ........................ - Page 9 Table des matières Tabla de contenido Renseignements importants ......4 Información para el consumidor ..3 Importantes mesures Instrucciones importantes de sécurité ........... 7 de seguridad ..... . . 6 Identificación de piezas .
-
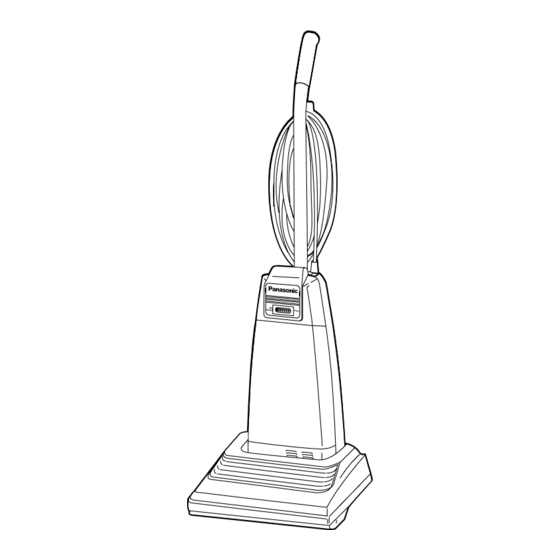
Page 10: Parts Identification
PARTS IDENTIFICATION Nomenclature Identificación de piezas Handle Manche Mango Cord Hook Crochet de rangement du cordon Sujetador Power Cord del cordón Cordon d’alimentation Cordón Cord Hook electrico Crochet de rangement du cordon Sujetador del cordón Handle Screw Vis du manche Tornillo de mango Cover (Suction Inlet) Couvercle (de l’entrée... -
Page 11: Feature Chart
FEATURE CHART Power Thermal Protector Cord Length Tools 9.1 m (30 Ft.) Optional 120V AC (60Hz) Tableau des caractéristiques Protecteur thermique Longueur du cordon Alimentation Accessoires 9,1 m (30 pi) Optionnels 120 V c.a. (60Hz) Diagrama de características Protector termal Extensión de cordón Voltaje Herramientas... -
Page 12: Assembly
ASSEMBLY Attaching Handle Handle Hole Manche DO NOT plug in until assembly is Orifice Mango Orificio complete. Remove handle screw. Screw Tornillo Insert handle with cord hooks to the back of the vacuum cleaner. Handle Insert screw. Screw Vis du manche Tighten screw. -
Page 13: Assemblage
Montaje Assemblage Montage du manche Colocación del mango Ne brancher qu’une fois l’assemblage No enchufe hasta que el montaje esté terminé. completo. Retirer la vis du manche. Quite el tornillo del mango. Insérer le manche avec les crochets de Meta el mango con los sujetadores del rangement du cordon à... -
Page 14: Features
Return the cord hook to the upright position before attempting to rewind the cord. Automatic Self Adjusting Nozzle The nozzle of your Panasonic upright Shallow vacuum cleaner automatically Pile Carpet Nozzle adjusts to any carpet pile height. -
Page 15: Caractéristiques
Tête d’aspiration autoréglable Boquilla de ajuste automático Cet aspirateur Panasonic incorpore un La boquilla de su aspiradora vertical Panasonic se ajusta automáticamente dispositif qui règle automatiquement la hauteur des brosses selon la longueur a la altura de cualquier pelo de alfombra. -
Page 16: Vac Gauge
Vac Gauge The vac gauge detects when dust bag needs changing or the vacuum cleaner is clogged. Check dust bag when vac gauge indicates FULL. If dust bag is full, change bag according to CHANGING DUST BAG section. If dust bag is not full, check for clogs according to REMOVING CLOGS section. -
Page 17: Indicateur Du Sac À Poussière
Indicateur du sac à poussière Indicador de aspiración Cet indicateur détecte si le sac à El indicador de aspiración detecta poussière est plein ou s’ily a une cuando se necesita cambiar la bolsa para polvo o hay residuos en la aspiradora. obstruction. -
Page 18: To Operate Vacuum Cleaner
TO OPERATE VACUUM CLEANER Power Cord NOTE: To reduce the risk of electrical shock, this vacuum cleaner has a polarized plug, one blade is wider than the other. This plug will fit in a polarized outlet only one way. If the plug does not fit fully in the outlet, reverse the plug. If it still does not fit, contact a qualified electrician to install the proper outlet. -
Page 19: Fonctionnement
Fonctionnement Para operar la aspiradora Cordon d’alimentation Cordón eléctrico Remarque: Afin de prévenir tout risque de chocs Nota: Para reducir el riesgo de choque eléctrico, électriques, cet appareil est muni d'une fiche esta aspiradora cuenta con una clavija secteur polarisée (lames de largeur différente). polarizada, uno de los contactos es más ancho Cette fiche ne peut être branchée dans une prise que el otro. -
Page 20: Routine Care Of Vacuum Cleaner
ROUTINE CARE OF VACUUM CLEANER Performing the following tasks will keep your new Panasonic vacuum cleaner operating at peak performance levels and will ensure these high levels for years to come. Check the BEFORE REQUESTING SERVICE section in this manual for recommendations on performing some of these tasks to help solve various problems that may occur. -
Page 21: Entretien De L'aspirateur
Panasonic agréé pour l’achat polvo en cualquier vendedor autorizado de ces sacs à poussière. Panasonic o mandar de una compañía de servicio. Tirer sur la poignée du couvercle du sac Empuje hacia afuera en la cubierta de à... - Page 22 Changing Dust Bag Spread out new dust bag, taking care not to tear bag. Attach new dust bag onto bag holder by holding cardboard portion and pushing back. Reinsert tab on end of dust cover into groove on dust compartment to allow cover to rotate closed.
- Page 23 Remplacement du sac à poussière Cambio de la bolsa para polvo Déplier le nouveau sac à poussière en Extienda la nueva bolsa de polvo prenant soin de ne pas le déchirer. teniendo cuidado de no romper la bolsa. Fixer le nouveau sac au support en le Teniendo la parte de cartón y tenant par sa partie cartonnée et en le empujando hacia atrás instale la nueva...
-
Page 24: Removing And Installing Lower Plate
WARNING Electrical Shock or Personal Injury Hazard Disconnect the electrical supply before servicing or cleaning the vacuum cleaner. Failure to do so could result in electrical shock or personal injury from vacuum cleaner suddenly starting. Removing and Installing Lower Plate Before servicing any parts, disconnect Latches vacuum cleaner from electrical outlet. -
Page 25: Enlèvement Et Installation De La Plaque Inférieure
ADVERTENCIA AVERTISSEMENT Risque de chocs électriques ou de lésions Peligro de choque eléctrico y lesión personal. corporelles. Desconecte la aspiradora antes de darle servicio o limpiarla. De lo contrario podría producirse un Débrancher avant d’entretenir ou de nettoyer l’appa- choque eléctrico o causar lesión personal si la reil. -
Page 26: Replacing Headlight Bulb
Empaquetadura de fieltro Remove agitator by carefully lifting out. Remove worn or broken belt. Clean agitator. Motor Shaft Loop new belt (Panasonic Type UB8 Install Arbre d’entraînement New Belt only) around motor shaft and du moteur Poser la agitator pulley; see illustration for... -
Page 27: Remplacement De L'ampoule De La Lampe
Enrouler la nouvelle courroie (de type Envuelva la correa nueva (Panasonic Type UB8 solamente) en el eje del UB8 Panasonic) autour de l’arbre du moteur et de la poulie de l’agitateur, motor y la polea de cepillo, véase el diagrama para envolver la correa. -
Page 28: Replacing Belt
Replacing Belt Reinstall agitator back into nozzle housing grooves. Close rear belt cover and reinstall felt packing. After reinstalling the agitator, turn it by hand to make sure that belt is not twisted or pinched and that all rotating parts turn freely. End Cap Groove Bouchon... -
Page 29: Nettoyage De L'agitateur
Remplacement de la courroie Cambio de la correa Remettre l’agitateur en place dans les Reinstale el agitador en las ranuras del ouvertures. compartimento de la boquilla. Cierre la cubierta de la corea posterior Refermer le couvercle arrière de la y instale otra vez el embalaje fieltro. courroie et remettre la cale en feutre. -
Page 30: Replacing Brushes
Replacing Brushes When the bristles on the agitator are worn so that they do not touch a card Card held across the lower plate, the Carte brushes should be replaced. Tarjeta Remove lower plate and agitator. Remove the E-clip from agitator shaft E-Clip Bride en E and end cap. -
Page 31: Remplacement Des Brosses
Remplacement des brosses Cambiar los cepillos Remplacer les brosses lorsque leurs Cuando los cepillos del agitador estén poils ne touchent pas la surface d'une gastados hasta que no pueden tocar carte tenue contre la plaque inférieure. una tarjeta tenida en la base inferior, se deben cambiar los cepillos. -
Page 32: Agitator Assembly
Agitator Assembly Brush Spacers (3) Brushes Agitator Holder Filter Filter End Cap E-Clip End Cap Agitator Holder Shaft Cleaning Exterior and Tools Unplug cord from wall outlet. Clean exterior using a clean, soft cloth that has been dipped in a solution of mild liquid detergent and water and wrung dry. -
Page 33: Assemblage De L'agitateur
Montaje de agitador / Assemblage de l’agitateur Entretoise de brosse (3) Brosse Cepillo espaciador (3) Cepillo Support de l’Agitateur Filtre Soporte del agitador Filtro Filtre Filtro Bouchons Tapas del extremo Bouchons Poulie de la courroie Tapas del extremo Polea para correa Eje del agitador Bride en E Arbre d’entraînement... -
Page 34: Removing Clogs
Removing Clogs The hose located on the back of the vacuum cleaner carries the dirt from the nozzle up to the dust bag. If the hose should become clogged: Unplug vacuum cleaner. Pull open suction inlet cover and check for clogging. Cover Remove lower plate. -
Page 35: Dégagement Des Obstructions
Quitar de los residuos de basura en Dégagement des obstructions los conductos Le tuyau situé à l’arrière de l’aspirateur La manguera situada en la parte posterior transporte la poussière de la tête de la aspiradora lleva el polvo de la boquilla d’aspiration au sac a’... -
Page 36: Before Requesting Service
BEFORE REQUESTING SERVICE WARNING Electrical Shock or Personal Injury Hazard Disconnect the electrical supply before servicing or cleaning the vacuum cleaner. Failure to do so could result in electrical shock or personal injury from vacuum cleaner suddenly starting. Review this chart to find do-it-yourself solutions for minor performance problems. -
Page 37: Guide De Dépannage
Guide de dépannage AVERTISSEMENT Risque de chocs électriques ou lésions corporelles. Débrancher avant d’entretenir ou de nettoyer l’appareil. L’omission de débrancher pourrait provoquer des chocs électriques ou des lésions corporelles du fait que l’aspirateur se met- trait soudainement en marche. Se reporter au tableau ci-dessous pour résoudre tout problème mineur éventuel. -
Page 38: Antes De Pedir Servicio
Antes de pedir servicio ADVERTENCIA Peligro de choque eléctrico y lesión personal. Desconecte la aspiradora antes de darle servicio o limpiarla. De lo contrario podría producirse un choque eléctrico o causar lesión personal si la aspiradora arranca de repente. Consulte este cuadro para encontrar soluciones que usted mismo puede realizar cuando tenga problemas menores de rendimiento. -
Page 39: Warranty
Servicenter Directory. Or call, toll free, 1-800-211-PANA (7262) to locate a PASC Authorized Servicenter. Carry-in or mail-in service in Puerto Rico can be obtained during the warranty period by calling the local Panasonic Sales Company telephone number listed in the Servicenter Directory. - Page 40 Vacuum Cleaner - Two (2) year, parts and labour In-home Service will be carried out only to locations accessible by roads and within 50 km of an authorized Panasonic service facility.
-
Page 41: Garantie
Panasonic de la série Platinum Panasonic Canada Inc. garantit cet appareil contre tout vice de fabrication et accepte, le cas échéant, de remédier à toute défectuosité pendant la période indiquée ci-dessous et commençant à partir de la date d'achat original. -
Page 42: Garantía
Panasonic, o daños resultados por los actos de Dios. - Page 43 Notes, Remarques, Notas - 43 -...
-
Page 44: What To Do When Service Is Needed
WHAT TO DO WHEN SERVICE IS NEEDED If your Panasonic Vacuum Cleaner needs service, look in the yellow pages of the telephone book under HOME APPLIANCE SERVICE for your nearest Panasonic Services Company (“PASC”) Factory Servicenter, or PASC authorized Servicenter, or call, 1-800-211-PANA (7262) toll free to find a convenient servicenter. DO NOT send the product to the Executive or Regional Sales offices.