Philips HD8030 Mode D'emploi
Masquer les pouces Voir aussi pour HD8030:
Table des Matières

Publicité

Les langues disponibles

Les langues disponibles

Liens rapides

Register your product and get support at
www.senseo.com/register
HD8030, HD8010
4203_000_7242_1_DFU Booklet_Lux_A5_v2.indd 1
5/29/12 5:49 PM

Publicité

Table des Matières
loading

Sommaire des Matières pour Philips HD8030

  • Page 1 Register your product and get support at www.senseo.com/register HD8030, HD8010 4203_000_7242_1_DFU Booklet_Lux_A5_v2.indd 1 5/29/12 5:49 PM...
  • Page 2 4203_000_7242_1_DFU Booklet_Lux_A5_v2.indd 2 5/29/12 5:49 PM...
  • Page 3 EnglisH 4 nEDErlanDs 32 Français 60 4203_000_7242_1_DFU Booklet_Lux_A5_v2.indd 3 5/29/12 5:49 PM...
  • Page 4: Table Des Matières

    SENSEO SARISTA bean-funnels are available in different varieties to suit different tastes. This user manual applies to HD8030 and HD8010. HD8030 comes standard with an insulated jug. For HD8010, you can buy an insulated jug as an accessory in the online shop at www.shop.philips.com/service...
  • Page 5: General Description (Fig. 1)

    16 ’Drip tray full’ indicator 17 Drip tray 18 Coffee grounds container 19 Lubricant 20 Coffee jug (HD8030 only) 21 Lid of coffee jug (HD8030 only) 22 Brewing unit 23 Service door 24 Grinding degree adjustment hole 25 Opening for bean-funnel...
  • Page 6: Caution

    Do not use the coffeemaker if the plug, the mains cord or the coffeemaker itself is damaged. If the mains cord is damaged, you must have it replaced by Philips, a order to avoid a hazard. Caution Always place and use the coffeemaker on a stable, level and horizontal surface.
  • Page 7: Compliance With Standards

    Never use accessories or parts made by other manufacturers or that become invalid if you use such parts or accessories. cause damage to the water tank and the coffeemaker. Compliance with standards This Philips coffeemaker complies with all standards regarding according to evidence available today. Installing the coffeemaker Never install the coffeemaker in environments where the temperature may drop to 0°...
  • Page 8: Preparing For Use

    ENGLISH Pull the round AROMA LOCK seal off the bean-funnel. ® Insert the screw thread of the bean-funnel properly into the opening in the top of the coffeemaker (1). Then turn the bean-funnel clockwise to fasten it (2). When the ‘bean-funnel empty’ light goes on, the bean-funnel is empty. To replace the empty bean-funnel with a full one, turn the bean-funnel anticlockwise (1) and remove it (2).
  • Page 9: Automatic Rinsing Cycle

    ENGLISH Note: The ‘water tank empty’ light goes on when there is not enough water in the water tank to brew one cup of coffee. Remove the water tank from the coffeemaker. Rinse the water tank under the tap. Fill the water tank with cold tap water up to the MAX indication. cause damage to the water tank and the coffeemaker.
  • Page 10: Using The Coffeemaker

    ENGLISH Press the on/off button to switch on the coffeemaker. out of the spout into the cup. Empty the cup into the sink. , When the activity light lights up continuously, the rinsing cycle is Using the coffeemaker Brewing 1 or 2 cups of coffee Check if there is enough water in the water tank.
  • Page 11: Brewing A Jug Of Coffee

    ENGLISH Place 1 or 2 cups on the drip tray cover. Press the 1-cup or 2-cup button. Tip: You can interrupt the brewing cycle at any time, which can give you a stronger coffee. To do this, press the same cup button (1-cup button or 2-cup button) that you pressed to start brewing coffee.
  • Page 12 ENGLISH Note: The coffee beans have to be visible above the matt section of the bean- funnel. If this is not the case, there are not enough coffee beans in the bean- funnel to brew six cups of coffee. Replace the bean-pack with a full one or one Note: If the bean-funnel becomes empty during brewing, the ‘bean-pack empty’...
  • Page 13: Selecting The Coffee Strength (Hd8030 Only)

    Note: To keep the coffee in the jug hot, always turn the lid to the ‘closed/ brewing’ position immediately after pouring out coffee. selecting the coffee strength (HD8030 only) The coffee strength button enables you to select the coffee strength you prefer for each cup of coffee.
  • Page 14: Adjusting The Grinding Degree

    ENGLISH Turn the bean-funnel anticlockwise to remove it. Slide the detachable coffee spout into the coffeemaker. Place a cup on the drip tray cover. Press the 1-cup button to start the rinsing cycle. Adjusting the grinding degree You can adjust the coffee grinder with the grinding degree adjustment tool to set the coffee strength to your personal taste.
  • Page 15 EnglisH Remove the coffee grounds container from the coffeemaker. Open the service door. Take the grinding degree adjustment tool out of the recess next to the brewing unit. Close the service door. Slide the coffee grounds container back into the coffeemaker. 4203_000_7242_1_DFU Booklet_Lux_A5_v2.indd 15 5/29/12 5:50 PM...
  • Page 16: Cleaning And Maintenance

    ENGLISH Insert the lug on the broad end of the grinding degree next to the cap of the grinding degree adjustment hole and press lightly. This makes the cap open automatically. Insert the narrow end of the grinding degree adjustment tool into the grinding degree adjustment hole so that the opening in the tool button, when the device starts grinding you can adjust the grinding degree.
  • Page 17 ENGLISH under the tap. Clean the water tank with hot water and some washing-up liquid and rinse it under the tap. down gently. Fill the water tank with fresh, cold tap water and slide it back into the coffeemaker. Remove the coffee grounds container from the coffeemaker and empty it.
  • Page 18: Cleaning The Detachable Coffee Spout

    ENGLISH Clean the drip tray and the drip tray cover with hot water and some washing-up liquid and rinse them under the tap. Clean the guiding grooves for the drip tray in the bottom of the coffeemaker with a moist cloth. Put the drip tray cover on the drip tray and slide the drip tray back into the coffeemaker.
  • Page 19: Cleaning The Brewing Unit

    ENGLISH Rinse the inside of the jug and the lid with warm water. Clean the outside of the jug with a damp cloth. Note: The jug is not dishwasher-proof. Put the jug in upright position without the lid on and let the inside of the jug dry.
  • Page 20 EnglisH Rinse the outside of the brewing unit under a lukewarm tap. Never use any soap or other cleaning agent to clean the brewing unit. Do not dry the brewing unit with a cloth to prevent fibres from collecting inside the brewing unit. After rinsing, just shake off excess water.
  • Page 21 EnglisH Make sure that the locking hook of the brewing unit is in the correct position. The hook is not correctly positioned if it is still in bottommost position. To position the hook correctly, push it upwards until it is uppermost position.
  • Page 22: Lubrication

    For more information on what and how to lubricate, watch the instruction movies on www.senseo.com/sarista/support. For optimal brewing results, we advise you to use the lubricant supplied by Philips. You can buy this lubricant in the online shop at www.shop.philips.com/service. Switch off the coffeemaker and unplug it.
  • Page 23: Descaling The Coffeemaker

    If this happens, repair is not covered by the terms of the guarantee. Descaling agent Only use the special Philips SENSEO SARISTA descaling solution ® (CA6400) to descale the coffeemaker. This solution has been designed to ensure continued good performance of your coffeemaker throughout its operating life.
  • Page 24 EnglisH , The CALC CLEAN light starts flashing quickly. Remove the water tank from the coffeemaker. Pour the contents of a Philips SENSEO SARISTA descaling solution ® bottle (250ml) into the water tank and then add 1 litre of tap water to fill the water tank to the MAX indication.
  • Page 25: Rinsing Cycle

    EnglisH Press the 1-cup button and the 2-cup button simultaneously for 1 second to start the descaling procedure. , The activity light and the CALC CLEAN light both flash slowly to indicate that the descaling cycle has started. The water-descaling solution mixture comes out at intervals. The coffeemaker stops descaling a few times to let the descaling solution act.
  • Page 26 EnglisH Press the 1-cup button and the 2-cup button simultaneously for 1 second to start the rinsing cycle. , The activity light and the CALC CLEAN light flash slowly. During the flushing cycle, water comes out of the coffeemaker in a continuous flow.
  • Page 27: Ordering Accessories

    To purchase accessories for this coffeemaker, please visit our online shop at www.shop.philips.com/service. If the online shop is not available in your country, go to your Philips dealer or a Philips service centre. If you Extra jug for HD8010 You can buy a jug as accessory for HD8010 under number CA6501.
  • Page 28: Meaning Of Light Signals

    ENGLISH Meaning of light signals Light signal Meaning Action ’Water tank empty’ light on Not enough water in Fill the water tank (see chapter ‘Preparing for continuously. water tank. use’). Water tank not properly Insert the water tank into the coffeemaker placed.
  • Page 29: Troubleshooting

    Consumer Care Centre in your country. On this site you can also watch instruction movies on how to use, clean and descale your Philips SENSEO SARISTA coffeemaker. ®...
  • Page 30 The coffee is too weak. Choose a bean-funnel with a stronger coffee blend. HD8030 only: Use the coffee strength button to set the coffee strength to ‘strong’. You can increase the strength of the coffee on all models by reducing the amount of water used for brewing.
  • Page 31: Technical Specifications

    EnglisH Technical specifications Feature Value / location Nominal voltage Inside of service door Power rating Inside of service door Material Plastic Cord length 1.5 m Water tank capacity 1250ml Coffee grounds container capacity 10 cakes Capacity of coffee jug 6 cups 4203_000_7242_1_DFU Booklet_Lux_A5_v2.indd 31 5/29/12 5:50 PM...
  • Page 32 ® verschillende varianten die beantwoorden aan verschillende smaken. Deze gebruiksaanwijzing is van toepassing op de HD8030 en HD8010. De HD8030 wordt standaard geleverd met een thermoskan. Voor de HD8010 kunt u een thermoskan als accessoire kopen in de Online Shop op www.shop.philips.com/service.
  • Page 33: Algemene Beschrijving

    NEDERLANDS www.senseo.com/sarista/support. Algemene beschrijving Activiteitslampje ’Waterreservoir leeg’-lampje CALC CLEAN-lampje ’Bean-funnel leeg’-lampje 1-kops knop Kanknop Aan/uitknop 10 2-kops knop 11 Bedieningspaneel 13 Waterreservoir 15 Lekplaat 16 ’Lekbak vol’-indicator 17 Lekbak 19 Smeermiddel 22 Zetgroep 23 Servicedeur 24 Maalsterkteaanpassingsgat 25 Opening voor bean-funnel 26 Hulpmiddel voor aanpassing maalsterkte 27 Bean-funnel Belangrijk...
  • Page 34: Let Op

    Gebruik het apparaat voorzichtig en op de juiste wijze om verbranding door heet water en stoom te voorkomen. Indien het netsnoer beschadigd is, moet u het laten vervangen door Philips, een door Philips geautoriseerd servicecentrum of personen met Let op horizontale ondergrond.
  • Page 35: Naleving Van Richtlijnen

    Opmerking: Zorg ervoor dat de lekbak volledig is geplaatst. De bean-funnels plaatsen en verwijderen Voor meer informatie over de bean-funnels en voor films over het plaatsen van bean-funnels in de koffiezetter, gaat u naar www.philips.com/senseo-sarista. 4203_000_7242_1_DFU Booklet_Lux_A5_v2.indd 35 5/29/12 5:50 PM...
  • Page 36 NEDERLANDS Trek de verticale strip naar beneden om de beschermende hoes van de bean-funnel te verwijderen. Trek de ronde AROMA LOCK -afdichting van de bean-funnel. ® Plaats de schroefdraad van de bean-funnel goed in de opening aan de funnel vervolgens rechtsom om deze te bevestigen (2).
  • Page 37: Klaarmaken Voor Gebruik

    NEDERLANDS Klaarmaken voor gebruik Het waterreservoir vullen Vul het waterreservoir voor elk gebruik met vers water. Opmerking: Het ‘waterreservoir leeg’-lampje gaat branden wanneer er niet Spoel het waterreservoir onder de kraan. Vul het waterreservoir tot aan de MAX-aanduiding met koud kraanwater.
  • Page 38 NEDERLANDS Plaats een kop op de lekplaat. Het activiteitslampje begint te knipperen. Na een korte opwarmtijd stroomt er water uit de tuit en in de kop. Leeg de kop in de gootsteen. , Wanneer het activiteitslampje ononderbroken brandt, is de Controleer of er genoeg water in het waterreservoir zit.
  • Page 39 NEDERLANDS Leeg de lekbak als de ‘lekbak vol’-indicator zichtbaar is. Opmerking: Als u de ‘lekbak vol’-indicator negeert, kan de lekbak tijdens het Plaats 1 of 2 koppen op de lekplaat. Druk op de 1-kops of 2-kops knop. Hiervoor drukt u op dezelfde knop (1-kops knop of 2-kops knop) waarop u dezelfde knop drukt.
  • Page 40 NEDERLANDS de kan. Opmerking: Maak de kan voor het eerste gebruik altijd schoon met warm water en een beetje afwasmiddel. Als u de kan een tijdje niet hebt gebruikt, spoel de kan dan met warm water om geuren te verwijderen. Controleer of het waterreservoir tot de MAX-aanduiding is gevuld.
  • Page 41: Handmatige Spoelcyclus

    Opmerking: Om de koffie in de kan warm te houden, draait u het deksel altijd meteen na het uitschenken van de koffie naar de stand ‘gesloten/koffiezetten’. De koffiesterkte kiezen (alleen HD8030) Met de koffiesterkteknop kiest u de gewenste koffiesterkte voor elke kop koffie.
  • Page 42: De Maalsterkte Instellen

    NEDERLANDS Controleer of het waterreservoir voldoende is gevuld en of het activiteitslampje brandt. Draai de bean-funnel linksom om deze te verwijderen. Plaats een kop op de lekplaat. Druk op de 1-kops knop om de spoelcyclus te beginnen. De maalsterkte instellen grovere maling.
  • Page 43 nEDErlanDs Verwijder de koffiedikbak uit de koffiezetter. Open de servicedeur. Neem het hulpmiddel voor het aanpassen van de maalsterkte uit de uitsparing naast de zetgroep. Sluit de servicedeur. Schuif de koffiedikbak terug in de koffiezetter. 4203_000_7242_1_DFU Booklet_Lux_A5_v2.indd 43 5/29/12 5:50 PM...
  • Page 44: Schoonmaken En Onderhoud

    NEDERLANDS Steek het nokje op het brede uiteinde van het hulpmiddel voor het aanpassen van de maalsterkte naast de dop van het maalsterkteaanpassingsgat en druk zachtjes. Hierdoor opent de dop automatisch. Plaats het smalle uiteinde van het hulpmiddel voor het aanpassen van de maalsterkte in het maalsterkteaanpassingsgat, zodat de opening in het hulpmiddel op de pin onder in het gat past.
  • Page 45 NEDERLANDS Maak het waterreservoir schoon met warm water en een beetje afwasmiddel en spoel het af onder de kraan. voorzichtig naar beneden te duwen. Vul het waterreservoir met vers, koud kraanwater en schuif het afwasmiddel en spoel het af onder de kraan. Verwijder de lekplaat en leeg de lekbak.
  • Page 46: De Kan Schoonmaken

    NEDERLANDS Maak de lekbak en de lekplaat schoon met warm water en een beetje afwasmiddel en spoel het af onder de kraan. schoon met een vochtige doek. Plaats de lekplaat op de lekbak en schuif de lekbak terug in de De kan schoonmaken Maak de kan na elk gebruik schoon.
  • Page 47: De Zetgroep Schoonmaken

    NEDERLANDS Spoel de binnenkant van de kan en het deksel af met warm water. Maak de buitenkant van de kan schoon met een vochtige doek. Opmerking: De kan is niet vaatwasmachinebestendig. Zet de kan rechtop met het deksel eraf en laat de binnenkant van de kan drogen.
  • Page 48 nEDErlanDs Spoel de buitenkant van de zetgroep af onder een lauwe kraan. Gebruik nooit zeep of een ander schoonmaakmiddel om de zetgroep schoon te maken. Droog de zetgroep niet met een doek om te voorkomen dat zich vezels ophopen in de zetgroep. Schud alleen het overtollige water na het spoelen af.
  • Page 49 nEDErlanDs Zorg dat de vergrendelhaak van de zetgroep in de juiste stand staat. De haak is niet juist geplaatst als deze nog steeds in onderste stand staat. Om de haak in de juiste stand te zetten, drukt u de haak omhoog totdat deze in de bovenste stand staat.
  • Page 50: Smeren

    Voor optimale resultaten raden wij u aan om het smeermiddel te gebruiken dat door Philips wordt geleverd. U kunt dit smeermiddel kopen via de Online Shop: www.shop.philips.com/service. Volg stap 2 tot en met 4 in ‘De zetgroep schoonmaken’ om de Smeer wat smeermiddel op de geleiderrails in de zetgroep.
  • Page 51: Ontkalkingsprocedure

    NEDERLANDS lampje brandt. Gebruik alleen de speciale Philips SENSEO SARISTA- ® www.senseo.com/sarista/support. Wanneer ontkalken CALC CLEAN-lampje ononderbroken gaat branden. Waarom ontkalken Het zorgt ervoor dat uw kop volledig wordt gevuld Het voorkomt storingen ontkalkingsprocedure niet correct uitvoert, blijven kalkresten achter in de wordt de reparatie niet door de garantie gedekt.
  • Page 52 Het CALC CLEAN-lampje begint snel te knipperen. Verwijder het waterreservoir uit de koffiezetter. Giet de inhoud van een flesje Philips SENSEO SARISTA- ® ontkalkoplossing (250 ml) in het waterreservoir en voeg vervolgens 1 liter kraanwater toe om het waterreservoir te vullen tot de MAX- aanduiding.
  • Page 53 NEDERLANDS Druk gedurende één seconde tegelijkertijd op de 1-kops knop en de 2-kops knop om de ontkalkingsprocedure te beginnen. Het activiteitslampje en het CALC CLEAN-lampje knipperen beide langzaam om aan te geven dat de ontkalkingscyclus is begonnen. De waterontkalkoplossing stroomt met tussenpozen uit de de ontkalkoplossing te laten inwerken.
  • Page 54 NEDERLANDS Druk gedurende één seconde tegelijkertijd op de 1-kops knop en de 2-kops knop om de spoelcyclus te beginnen. Het activiteitslampje en het CALC CLEAN-lampje knipperen langzaam. Tijdens het doorspoelen stroomt ononderbroken water uit de Wanneer het activiteitslampje uit gaat, het ‘waterreservoir leeg’- lampje gaat branden en het CALC CLEAN-lampje snel begint te knipperen, leegt u de kom en spoelt en vult u het waterreservoir.
  • Page 55: Accessoires Bestellen

    Accessoires bestellen Ga naar onze Online Shop op www.shop.philips.com/service om of een Philips-servicecentrum als de Online Shop niet beschikbaar is in uw land. Als u problemen hebt met het vinden van accessoires voor uw in uw land. U vindt de contactgegevens in het ‘worldwide guarantee’- vouwblad.
  • Page 56: Betekenis Van Lampjes

    NEDERLANDS Betekenis van lampjes Lampjes Betekenis Handeling Het ‘waterreservoir Er zit niet genoeg water in Vul het waterreservoir (zie hoofdstuk leeg’-lampje brandt het waterreservoir. ‘Klaarmaken voor gebruik’). ononderbroken. Het waterreservoir is niet Plaats het waterreservoir correct in de correct geplaatst. vol’-lampje brandt en leeg en reinig deze.
  • Page 57: Problemen Oplossen

    Als u het probleem niet kunt oplossen met de onderstaande informatie, gaat u naar www.senseo.com/sarista/support voor een lijst met veelgestelde vragen of neemt u contact op met het bekijken over hoe u uw Philips SENSEO ® schoonmaakt en ontkalkt.
  • Page 58 NEDERLANDS Probleem Mogelijke oplossing Controleer of het ‘waterreservoir leeg’-lampje, het ‘bean-funnel leeg’-lampje voordat de kan is brandt, vult u het waterreservoir opnieuw. Als het ‘bean-funnel leeg’-lampje gevuld. brandt, vervangt u de lege bean-funnel met een volle bean-funnel. Als het Ik krijg de zetgroep niet zijn uitgangspositie terugkeren.
  • Page 59 NEDERLANDS Probleem Mogelijke oplossing Het ‘waterreservoir leeg’-lampje, het deze dan uit en haal de stekker uit het stopcontact. Verwijder de zetgroep, funnel lampje, het ‘bean-funnel leeg’-lampje en het u deze handeling 2-3 keer herhalen voordat alle lampjes uit gaan. Als het CALC CLEAN-lampje probleem zich blijft voordoen, gaat u naar www.senseo.com/sarista/support knipperen gelijktijdig.
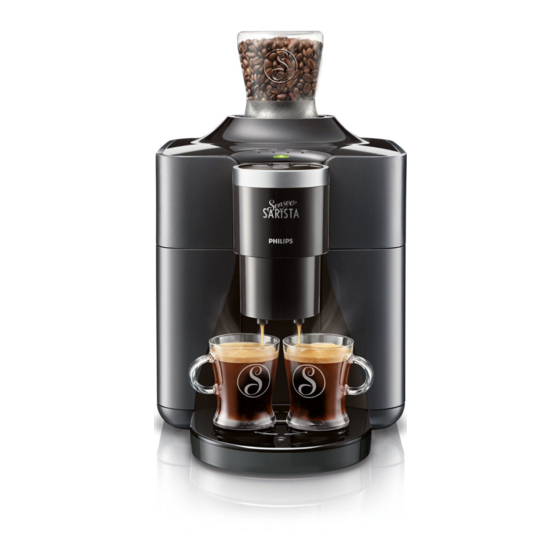
  • Page 60 Ce manuel d’utilisation s’applique aux modèles HD8030 et HD8010. Le modèle HD8030 est livré avec une verseuse thermos. Pour le modèle HD8010, vous pouvez acheter une verseuse thermos dans la rubrique accessoire de la boutique en ligne sur www.shop.philips.com/service.
  • Page 61: Description Générale

    FRANÇAIS Pour en savoir plus sur la machine à café Philips SENSEO SARISTA ® bean-funnel (à recharge de café en grain) et pour visionner des vidéos comprenant des instructions sur la façon d’utiliser la machine à café et les recharges de café en grain, allez sur www.philips.com/senseo-sarista.
  • Page 62: Avertissement

    Si le cordon d’alimentation est endommagé, il doit être remplacé par Philips, par un Centre Service Agréé Philips ou par un technicien Attention Placez et utilisez toujours la machine à café sur une surface stable, plane et horizontale.
  • Page 63: Conformité Aux Normes

    à café. Conformité aux normes Cette machine à café Philips est conforme à toutes les normes relatives aux champs électromagnétiques (CEM). Elle répond aux règles de elle est manipulée correctement et conformément aux instructions de ce manuel d’utilisation.
  • Page 64: Installation Et Retrait Des Recharges De Café En Grain

    Pour en savoir plus sur les recharges de café en grain et pour visionner des vidéos sur la façon de les placer dans la machine à café, rendez vous sur www.philips.com/senseo-sarista. Tirez sur la bande déchirable vers le bas afin de retirer la pochette de protection de la recharge de café...
  • Page 65: Avant L'utilisation

    FRANÇAIS Avant l’utilisation Remplissage du réservoir Remplissez le réservoir d’eau fraîche avant chaque utilisation. Remarque : Le voyant « Réservoir d’eau vide » s’allume lorsqu’il n’y a pas assez d’eau dans le réservoir pour préparer une tasse de café. Retirez le réservoir d’eau de la machine à café. Rincez le réservoir d’eau sous le robinet.
  • Page 66: Utilisation De La Machine À Café

    Français Placez une tasse sur la grille du plateau égouttoir. Mettez la machine à café en marche en appuyant sur le bouton marche/arrêt. Le voyant de fonctionnement commence à clignoter. Après un bref temps de chauffe, l’eau s’écoule dans la tasse. Videz l’eau dans l’évier.
  • Page 67 Français Videz le plateau égouttoir si le voyant « Plateau égouttoir plein » est allumé. Remarque : Si vous ne tenez pas compte de cet indicateur, le plateau égouttoir risque de déborder pendant la préparation. Faites glisser le bec verseur amovible dans la machine à café. Placez une ou deux tasses sur la grille du plateau égouttoir.
  • Page 68: Préparation D'une Verseuse Entière De Café

    Français Remarque : Si la machine à café s’arrête lors de la préparation du café, le réservoir d’eau ou la recharge de café en grain est probablement vide ou le bac à marcs de café est plein. Remplissez le réservoir d’eau, remplacez la recharge de café...
  • Page 69: Sélection De L'intensité Du Café (Hd8030 Uniquement)

    Remarque : Pour que le café reste chaud, faites toujours tourner le couvercle jusqu’à la position « Fermé/Préparation » juste après avoir versé le café. sélection de l’intensité du café (HD8030 uniquement) Le bouton de sélection de l’intensité du café vous permet de sélectionner l’intensité...
  • Page 70: Cycle De Rinçage Manuel

    Français Appuyez sur le bouton de sélection de l’intensité du café une fois ou plusieurs fois pour sélectionner l’intensité que vous souhaitez. Le voyant d’intensité du café correspondant s’allume. e = café court/fort d = café normal c= café long/doux Cycle de rinçage manuel Outre le cycle de rinçage automatique, vous pouvez également lancer un cycle de rinçage manuel lorsque vous le souhaitez.
  • Page 71: Réglage Du Niveau De Mouture Du Café

    Français réglage du niveau de mouture du café Vous pouvez régler le moulin à café avec l’outil de réglage du niveau de mouture pour définir l’intensité du café selon vos goûts. Lorsque vous réglez le moulin à un niveau de mouture plus fine, votre café sera plus fort.
  • Page 72: Nettoyage Et Entretien

    Français Insérez l’extrémité la plus large de l’outil de réglage du niveau de mouture à côté du capuchon de la zone de réglage de niveau de mouture et appuyez légèrement. Cette action entraîne l’ouverture automatique du capuchon. Insérez l’extrémité étroite de l’outil de réglage du degré de mouture dans le trou de réglage du degré...
  • Page 73 FRANÇAIS Retirez le réservoir d’eau de la machine à café. sous le robinet. Nettoyez le réservoir d’eau à l’eau chaude savonneuse et rincez-le sous le robinet. l’abaissant doucement. Remplissez le réservoir d’eau avec de l’eau fraîche du robinet, et faites-le glisser dans la machine à café. Enlevez le bac à...
  • Page 74: Nettoyage Du Bec Verseur De Café Amovible

    FRANÇAIS Enlevez la grille du plateau égouttoir et videz ce dernier. Nettoyez le plateau égouttoir et la grille du plateau égouttoir à l’eau chaude savonneuse et rincez-les sous le robinet. Nettoyez les rainures du plateau égouttoir au fond de la machine à café...
  • Page 75 FRANÇAIS Faites tourner le couvercle par son levier jusqu’au symbole « Ôter le couvercle ». Ensuite, retirez le couvercle de la verseuse. Rincez l’intérieur de la verseuse et le couvercle à l’eau chaude. Nettoyez l’extérieur de la verseuse avec un chiffon humide. Remarque : La verseuse ne peut pas être nettoyée au lave-vaisselle.
  • Page 76 Français Appuyez sur le bouton PUSH (1) et retirez le groupe café en le maintenant (2) pour l’enlever de la machine à café. Rincez l’extérieur du groupe café sous l’eau du robinet. N’utilisez jamais de savon ou tout autre produit de nettoyage pour nettoyer le groupe café.
  • Page 77 Français Assurez-vous que le levier est en contact avec la base du groupe café. Assurez-vous que le crochet pour le blocage du groupe café est dans la bonne position. Le crochet n’est pas correctement positionné s’il est toujours dans la position la plus basse. Pour positionner correctement le crochet, poussez-le vers le haut jusqu’à...
  • Page 78 400 tasses de café ou une fois par mois. www.senseo.com/sarista/support. Pour obtenir des résultats de mouture optimaux, nous vous conseillons dans la Boutique Philips sur www.shop.philips.com/service. Arrêtez la machine à café et débranchez-la. Suivez les étapes 2 à 4 de la section « Nettoyage du groupe café »...
  • Page 79: Détartrage De La Machine À Café

    (CA6400) pour détartrer la machine à café. Cette solution a été conçue pour assurer des performances optimales tout au long de la durée de vie de votre machine à café. Vous pouvez acheter la solution de détartrage Philips SENSEO ® SARISTA dans la Boutique Philips sur www.shop.philips.com/ service.
  • Page 80: Procédure De Détartrage

    3 secondes pour démarrer la procédure de détartrage. Le voyant CALC CLEAN commence à clignoter rapidement. Retirez le réservoir d’eau de la machine à café. Versez le contenu d’un flacon de solution de détartrage Philips SENSEO SARISTA (250 ml) dans le réservoir d’eau, puis ajoutez ®...
  • Page 81: Cycle De Rinçage

    Français Placez un bol d’une capacité de 1,5 litre sur la grille du plateau égouttoir. Appuyez sur le bouton pour 1 tasse et sur le bouton pour 2 tasses simultanément pendant 1 seconde pour démarrer la procédure de détartrage. Le voyant de fonctionnement et le voyant CALC CLEAN clignotent tous les deux lentement pour indiquer que le cycle de détartrage a démarré.
  • Page 82 Français Videz le bol (1) et placez-le sur la grille du plateau égouttoir (2). Appuyez sur le bouton pour 1 tasse et sur le bouton pour 2 tasses simultanément pendant 1 seconde pour démarrer le cycle de rinçage. Le voyant de fonctionnement et le voyant CALC CLEAN clignotent lentement.
  • Page 83: Commande D'accessoires

    à l’adresse www.shop.philips.com/service. Si la boutique en ligne n’est pas disponible dans votre pays, contactez votre revendeur Philips ou un Centre Service Agréé Philips. Si vous rencontrez des problèmes pour vous procurer des accessoires pour votre machine, contactez le Service Consommateurs Philips de votre pays.
  • Page 84: Signification Des Voyants

    Français Signification des voyants Voyant lumineux Signification Action Le voyant « Réservoir Il n’y a pas assez d’eau dans Remplissez le réservoir d’eau (voir le d’eau vide » reste allumé le réservoir d’eau. chapitre « Avant utilisation »). de manière continue. Le réservoir d’eau n’est pas Insérez-le correctement dans la machine à...
  • Page 85: Dépannage

    Service Consommateurs de votre pays. Sur ce site, vous pouvez également regarder des vidéos d’instructions sur la façon d’utiliser, de nettoyer et de détartrer votre machine à café Philips SENSEO SARISTA. ® 4203_000_7242_1_DFU Booklet_Lux_A5_v2.indd 85...
  • Page 86 FRANÇAIS Problème Solution possible La machine à café ne Branchez la machine à café et mettez-la en marche. fonctionne pas. Assurez-vous que la tension indiquée sur la machine à café correspond bien à la tension du secteur. Remplissez le réservoir d’eau. Si le voyant de fonctionnement clignote rapidement, assurez-vous que le groupe café...
  • Page 87 Choisissez une recharge de café en grain dont la variété est plus forte. fort. HD8030 uniquement : réglez le bouton de sélection de l’intensité sur « strong » (fort). Vous pouvez augmenter l’intensité du café sur tous les modèles en réduisant la quantité...
  • Page 88: Spécificités Techniques

    Français Spécificités techniques Fonction Valeur / emplacement Tension nominale Intérieur de la porte d’accès au groupe café Puissance nominale Intérieur de la porte d’accès au groupe café Matériau Plastique Longueur du cordon 1,5 m Capacité du réservoir d’eau 1 250 ml Capacité...
  • Page 89 4203_000_7242_1_DFU Booklet_Lux_A5_v2.indd 89 5/29/12 5:50 PM...
  • Page 90 4203_000_7242_1_DFU Booklet_Lux_A5_v2.indd 90 5/29/12 5:50 PM...
  • Page 91 4203_000_7242_1_DFU Booklet_Lux_A5_v2.indd 91 5/29/12 5:50 PM...
  • Page 92 15002966 - Rev00 4203.000.7242.1 4203_000_7242_1_DFU Booklet_Lux_A5_v2.indd 92 5/15/12 1:04 PM...

Ce manuel est également adapté pour:

Hd8010

Table des Matières