Table des Matières

Publicité

Les langues disponibles

Les langues disponibles

Liens rapides

Counter Top, 4 Place Setting, Dishwasher
Lavavajillas para la encimera con
capacidad para 4 cubiertos
User Manual
Manual del Usuario
HDC1804TW / TB/ TS
Quality
Innovation
Style
n
n

Publicité

Table des Matières
loading

Sommaire des Matières pour Haier HDC1804TW

  • Page 1 Counter Top, 4 Place Setting, Dishwasher Lavavajillas para la encimera con capacidad para 4 cubiertos User Manual Manual del Usuario HDC1804TW / TB/ TS Quality Innovation Style...
  • Page 2: Important Safety Instructions

    English IMPORTANT SAFETY INSTRUCTIONS READ ALL INSTRUCTIONS BEFORE USE. WARNING - To reduce the risk of fire, electric shock, or injury to persons when using your appliance, follow the basic precautions, including the following: 1. Read all of the instructions before using this appliance. 2.
  • Page 3: Unpacking Your Appliance

    1. Inspect and remove all packing materials. This includes the foam and any adhesive tape both inside and outsiide of the unit. 2. Inspect and remove any remains of packing, tape, or printed materials before powering on your Haier appliance. DANGER Risk of child entrapment. Before you throw away your old appliance, take off the door so that children may not easily get trapped inside.
  • Page 4: Safety Requirements

    English SAFETY REqUIREMENTS Electrical Requirements Grounding Instructions This appliance must be plugged into at least a 15 AMP 120 Volt 60 Hz Grounded Outlet. This appliance must be grounded. It is equipped with a 3-Wire cord having a grounding plug. The plug must be plugged into an outlet that is properly installed and grounded.
  • Page 5: Table Des Matières

    OPERATIONAL INSTRUCTIONS ........... 15 Control Panel .................. 15 CARE AND CLEANING GUIDE ............. 18 TROUBLESHOOTING ..............19 WARRANTY .................. 20 Specification Table Model HDC1804TW / TB / TSS Power input 1280W Outer dimension(LxWxH) 22.6" x 18.9" x 17.2" Weight Approximately 50 LBS Max.
  • Page 6: Parts And Features

    English PARTS AND FEATURES Front View Control Panel 1. Door Release 5. Program indicator lights 2. Outer Door 6. Program/Start/Pause button 3. Control panel 7. Power button (ON / OFF) 4. Power indicator light...
  • Page 7: Inside View

    English PARTS AND FEATURES Inside View Back View Quick Faucet Adapter Drain Hose for Premanent Installation 8. Spray assembly 14. Quick Faucet Adapter 9. Filter assembly 15. Quick connect fitting; Fits standard 7/8" diameter faucets 10. Rinse aid dispenser 16. Red Pressure release button 11.
  • Page 8: Installation Instructions

    English INSTALLATION INSTRUCTIONS Proper location 1. First determine the best location for your new Countertop Dishwasher. It must be close to a 120 Volt (15 Amp) outlet and a sink with a water supply and drain. 2. The minimum height clearance required to install your dishwasher on a countertop surface with overhead cupboards/ Kitchen cabinets is 17.8”...
  • Page 9: Quick Faucet Adaptor Connection

    English qUICk FAUCET ADAPTER CONNECTION The Quick Faucet Adapter easily connects to the sink faucet A. First remove aerator from your faucet nozzle and attach the quick connect threaded adapter to the faucet. The quick connect faucet adapter Faucet Water Connection allows easy snap-on/snap-off connection to standard (7/8”...
  • Page 10: Permanent Installation

    English H. When finished using the dishwasher, you need to close the water supply to the tap. NOTE: The water intake hose is now pressurized. Press the red pressure release button on the Quick Release Faucet Adapter, which will depressurize the water intake hose to easily remove without squirting water all around.
  • Page 11 English Drain hose: This unit has a special grey drain hose included. If you choose a permanent installation you must connect this hose to the dishwasher drain threaded connector. Use one hose clamp supplied. Hose connections for permanent installation Hose connections for permanent installation Back of Dishwasher Back of Dishwasher Sink Drain...
  • Page 12: Recommendations For Use

    English RECOMMENDATIONS FOR USE Water, Pressure and temperature For best operating results, incoming water should be HOT and the pressure should be between 0.03~1Mpa. Incoming water supply for the dishwasher is controlled by a ‘low water switch’ application, so if household water ceases, dishwasher will stop. We recommend for maximum efficiency and optimum results use HOT WATER ONLY.
  • Page 13: Loading Your Dishwasher

    English Tips to avoid stains and films: The following suggestions are recommended to prevent stains and films from dishware and utensils items: • You must rinse all dishware, silverware, glassware and food containers right a way after use. Some citric based food products, coffee, tea and iron deposits in water can cause yellow or brown film on inside surfaces when left on for a long time and not rinsed immediately.
  • Page 14: Cutlery Basket

    English Cutlery Basket Cutlery, small kitchen utensils and some plastic lids are best placed into the cutlery basket. NOTE: The standard plate is 10 1/4 inches. For ease of loading/ unloading large size dinner plates from the dish rack, it may be necessary to (temporarily) remove the cutlery basket.
  • Page 15 English Note: Manufacturer’s recommend using only "Automatic Dishwasher Detergent" for your dishwasher. The packaging sould read “made for use in dishwashers”, as other types will cause too much suds and can damage the machine. Do not use detergents that are old, dried, caked, lumpy or moist.
  • Page 16: Control Panel

    English CONTROL PANEL Select the dishwasher cycle per your washing requirements (see guide below) Heavy Wash Cycle: • This cycle is used for heavily soiled dishware, glassware, silverware and pots & pans, and cookware with dried soils. • Water Temperature: Wash <140˚F / Rinse <150˚F •...
  • Page 17 English 2) Press the door release button to open the door. 3) Check to make sure that the interior bottom filter is in the right position and clean. 4) Place the dishes on the dish rack and cutlery inside the cutlery basket. 5) Check to make sure that the rotating spray arm can turn freely all the way round.
  • Page 18 English 11. At the end of the cycle, the dishwasher will stop, the program light will stop flashing and the dishwasher will beep for several seconds. Then, the cycle light will go out. The power light will stay on until the power (ON/OFF) button is switched to the OFF position.
  • Page 19 English Cleaning Dishwasher Filter after wash: The Filter is located in the bottom front of the dishwasher, just below the lower rack. A) After the wash and dry cycle are complete, you must wait a few minutes until the dishwasher has completely cooled off.
  • Page 20: Troubleshooting

    English Troubleshooting Guide PROBLEM POSSIBLE CAUSE POSSIBLE SOLUTION Dishwasher will * Dishwasher does not have * Check electrical connection, fuse/circuit not start electrical power breaker * Close door securely. * Door is not closed. * Level unit. * Dishwasher not level. Dishes not clean * Improper loading * Arrange dishes so spray action reaches...
  • Page 21: Warranty

    This warranty does not during the specified warranty period cover incidental or consequential damages, will be repaired or replaced at Haier’s so the above limitations may not apply to discretion. ALL WARRANTY SERVICE you. Some states do not allow limitations on...
  • Page 22: Mesures De Sécurité Importantes

    Français MESURES DE SÉCURITÉ IMPORTANTES LIRE TOUTES LES INSTRUCTIONS AVANT L’UTILISATION DE L’APPAREIL AVERTISSEMENT – Pour réduire les risques d’incendie, de chocs électriques ou de blessures aux personnes lorsque vous utilisez votre appareil ménager, respectez les règles de sécurité de base, incluant celles-ci: 1.
  • Page 23: Déballage De L'appareil

    Prenez soin de noter le modèle et le numéro de série. Ils sont sur l’étiquette à l’arrière de l’appareil. Date of purchase Brochez votre facture à votre Guide de l’Utilisateur. Vous en aurez besoin pour obtenir le service garanti. S.V.P. enregistrez votre appareil en ligne au WWW.prodregister.com/Haier...
  • Page 24: Règles De Sécurité

    Français RèGLES DE SÉCURITÉ Prérequis électriques Instruction de mise à terre Cet appareil doit être branché dans une prise murale de 15 AMP 120 Volt 60Hz et munie d’un branchement mise à terre. Cet appareil est équipé d’une fiche à trois branches.
  • Page 25 INSTRUCTIONS D’UTILISATION ........... 15 Panneau De Contrôle ............... 15 NETTOYAGE DU FILTRE DU LAVE-VAISSELLE ......18 GUIDE DE DÉPANNAGE ............... 19 WARRANTY .................. 20 Table de spécification Modèle HDC1804TW/TB/TSS Alimentation électrique 1280W Dimensions extérieures 22.6 x 18.9 x 17.2 Poids Approx. 50lbs Consommation maximale d’eau...
  • Page 26: Pièces Et Caractéristiques

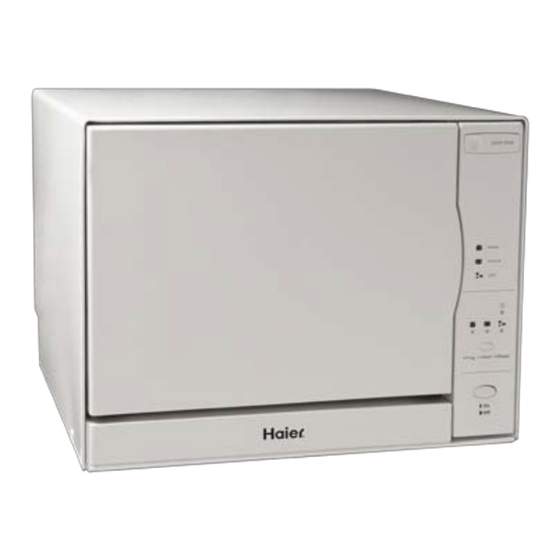
    Français PIèCES ET CARACTÉRISTIqUES Vue avant Panneau de contôle 1. Ouverture de la porte 5. Témoins lumineux de cycle 2. Porte extérieure 6. Bouton de programmation/début/ pause 3. Panneau de contrôle 7. Bouton ON/OFF 4. Témoin lumineux d’alimentation...
  • Page 27: Vue De L'intérieur

    Français PIèCES ET CARACTÉRISTIqUES Vue de l’intérieur Vue de l’arrière Connecteur rapide Tuyau de vidange d’eau pour installation permanente collier pour tuyau 8. Assemblage du jet 15. Pièces de connecteur rapide pour robinets standards de 7/8 po. 9. Assemblage du filtre 16.
  • Page 28: Instructions D'installation

    Français INSTRUCTIONS D’INSTALLATION Choisir l’endroit idéal 1. Déterminer le meilleur endroit pour installer votre nouveau lave-vaisselle de comptoir. Il doit être placé à proximité d’une prise murale de 120Volt (15Amp) et d’un évier avec eau courante et renvoi d’eau. 2. La hauteur minimale requise entre le comptoir et les armoires suspendues est de 17.8po (45 cm).
  • Page 29: Le Connecteur Amovible À Branchement Rapide

    Français LE CONNECTEUR AMOVIBLE À BRANCHEMENT RAPIDE Le connecteur amovible se connecte facilement au robinet. A. Tout d’abord, enlevez l’aérateur vissé au bout du robinet et vissez-y l’adaptateur de votre connecteur amovible. L’adaptateur vous permet de facilement et rapidement installer votre connecteur amovible à une Faucet Water Connection sortie de robinet standard (7/8 po.
  • Page 30: Installation Permanente

    Français Appuyez sur le bouton rouge du connecteur amovible, ce qui fera tomber la pression du tuyau d’alimentation d’eau et facilitera le débranchement du tuyau sans crainte d’arroser partout. Puis, enlevez l’adaptateur du robinet et le ranger, prêt pour le prochain usage. Attention: Ne laissez pas les enfants débrancher le lave-vaisselle.
  • Page 31: Recommandations D'utilisation

    Français Hose connections for permanent installation Back of Dishwasher Sink Drain Change intake valve to standard 3/4 inch dishwasher inlet hose Water Hose To the Sink HOT water pipe Special Grey Drain Hose Dishwasher Tail Pipe (Not Included) Grey "L" Hose to dishwasher drain connector Purchased hose clamp Place clamp here;...
  • Page 32: Comment Ça Fonctionne

    Français Comment ça fonctionne : Votre lave-vaisselle nettoie en projetant sur les surfaces de vaisselle souillée, un mélange d’eau chaude propre et de détergent (sous pression). L’eau est pompée à travers un bras à jet rotatif, puis ce mélange passe à travers un filtre qui retient les particules solides et l’eau est retournée dans le système rotatif.
  • Page 33: Panier À Ustensiles

    Français • Évitez de surcharger votre lave-vaisselle et placer les items en évitant de faire des tas ou de coller des assiettes ensemble. • Assurez-vous que la température de l’eau correspond à celle recommandée pour votre lave-vaisselle. • Utilisez la bonne quantité de détergent : ni trop, ni trop peu.
  • Page 34: Comment Placer Les Items Dans Le Lave-Vaisselle

    Français Comment placer les items dans le lave-vaisselle : • Placer les items pointus de manière à ce qu’ils n’abîment pas le boudin isolant de la porte. • Placer les couteaux coupants en mettant la poignée vers le haut pour réduire les risques de coupures.
  • Page 35: Utilisation D'un Agent De Rinçage

    Français N.B.: Le manufacturier de votre lave-vaisselle recommande d’utiliser seulement les détergents avec mention « Détergent pour lave-vaisselle automatique ». Vous devriez lire que ce détergent est conçu pour lave-vaisselle sur l’emballage, d’autres sortes pouvant causer un excès de mousse et endommager votre lave-vaisselle.
  • Page 36: Instructions D'utilisation

    Français PANNEAU DE CONTRÔLE Sélectionnez le cycle correspondant à vos besoins (consultez le guide ci-dessous) Cycle de lavage long: • Ce cycle est utilisé pour une vaisselle particulièrement souillée, la verrerie, les ustensiles, chaudrons, outils de cuisson qui ont des souillures séchées. •...
  • Page 37 Français 2) Appuyer sur le bouton de relâche de la porte. 3) Assurez-vous que le filtre du fond est bien en place et bien propre. 4) Placez la vaisselle dans le support prévu et la coutellerie dans le panier spécial. 5) Assurez-vous que le bras rotatif à...
  • Page 38 Français 11. À la fin du cycle, le lave-vaisselle va s’arrêter, le témoin lumineux de programmation va cesser de clignoter et le lave-vaisselle émettra un bip sonore pendant plusieurs secondes. Puis le témoin lumineux du cycle va s’éteindre. Le témoin d’alimentation restera allumé jusqu’à ce que le bouton (ON/OFF) soit en position OFF.
  • Page 39: Nettoyage Du Filtre Du Lave-Vaisselle

    Français Nettoyage du filtre du lave-vaisselle après utilisation: Le filtre est situé au bas, à l’avant de l’appareil, juste en dessous du support à vaisselle. A) Après que les cycles de lavage et de séchage sont complétés, vous devez attendre quelques minutes jusqu’à ce que le lave-vaisselle soit complètement refroidi.
  • Page 40: Guide De Dépannage

    Français Guide de dépannage Problème Cause possible Solution possible - Le lave-vaisselle ne reçoit pas de - Vérifier la connectivité électrique, fusibles, courant Le Lave-vaisselle ne disjoncteurs - La porte n’est pas fermée démarre pas - Fermez la porte convenablement - Le lave-vaisselle n’est pas au - Mettre l’appareil au niveau niveau.
  • Page 41: Garantie Limitée

    Les dommages dus à une installation d’achat de l’appareil. Le client doit fournir à inadéquate. Les dommages dus au Haier une preuve de date d’achat de même transport. Les défectuosités autres que que le reçu de paiement avec la marque, manufacturières.
  • Page 42: Instrucciones De Seguridad Importantes

    Español INSTRUCCIONES DE SEGURIDAD IMPORTANTES LEA TODAS LAS INSTRUCCIONES ANTES DE UTILIZAR EL ARTEFACTO. ADVERTENCIA. Para reducir el riesgo de incendio, descarga eléctrica o lesiones a las personas al usar el artefacto, siga las precauciones básicas, incluyendo las siguientes: 1. Lea todas las instrucciones antes de usar el artefacto. 2.
  • Page 43 Español 21. Para reducir el riesgo de lesiones, no permita que los niños jueguen dentro o sobre el artefacto. Es necesario supervisar y observar atentamente a los niños cuando estén cerca del lavavajillas. 22. Este artefacto debe conectarse a un tomacorriente adecuado con el suministro eléctrico correcto.
  • Page 44: Registro Del Producto

    1. Revise y quite todos los materiales de embalaje. Esto incluye espuma y la cinta adhesiva de dentro y fuera de la unidad. 2. Revise y quite los restos de embalaje, cinta materiales impresos antes de enchufar su artefacto Haier. PELIGRO Riesgo de que los niños queden atrapados.
  • Page 45: Requisitos Eléctricos

    Español REqUISITOS PARA SU SEGURIDAD Requisitos eléctricos Instrucciones para la conexión a tierra Este artefacto debe enchufarse en un tomacorriente de al menos 15 amperes 120 Voltios, 60 HZ con conexión a tierra. Este artefacto debe tener conexión a tierra. Está equipado con un cable de 3 hilos que cuenta con un enchufe a tier- ra.
  • Page 46 LIMPIEZA DEL FILTRO DEL LAVAVAjILLAS ........20 GUÍA PARA LA DETECCIÓN Y SOLUCIÓN ........21 GARANTÍA LIMITADA ..............22 Tabla de especificaciones Modelo HDC1804TW / TB / TSS Energía de entrada 1280W Dimensiones externas (LxAxA) 22,6" x 18,9" x 17,2"...
  • Page 47: Piezas Y Funciones

    Español PIEZAS Y FUNCIONES Vista frontal Panel de control 1. Abrir la puerta 5. Luces indicadoras de programa 2. Puerta exterior 6. Botón Program/Start/Pause (Programa/Comenzar/Pausa) 3. Panel de control 7. Botón ON / OFF (ENCENDIDO/ 4. Luz indicadora de encendido APAGADO)
  • Page 48: Vista Interior

    Español PIEZAS Y FUNCIONES Vista interior Vista posterior Adaptador para conexión rápida al grifo Manguera de desagüe para la instalación permanente Abrazadera para la manguera de salida 8. Montaje del rociador al grifo 9. Montaje del filtro 15. Adaptador de conexión rápida; adecuado para grifos estándar de 10.
  • Page 49: Instrucciones Para La Instalación

    Español INSTRUCCIONES PARA LA INSTALACIÓN Ubicación correcta 1. Primero determine la mejor ubicación para su nuevo lavavajillas para la encimera. Debe estar cerca de un tomacorriente de 120 voltios (15 amperes) y de un fregadero con suministro de agua y desagüe. 2.
  • Page 50: Conexión Rápida Con Adaptador Para El Grifo

    Español CONEXIÓN RÁPIDA CON ADAPTADOR PARA EL GRIFO El adaptador para la conexión rápida al grifo conecta fácilmente el grifo del fregadero con la unidad A. Primero saque el aireador de la boca del grifo y una el adaptador a rosca para la Faucet Water Connection conexión rápida con el grifo.
  • Page 51: Instalación Permanente

    Español Manguera de agua Botón rojo de liber- ación de presión Manguera de desagüe G. Con todos los accesorios conectados, abra el grifo para comprobar que no haya pérdidas. Conecte el cable de energía de corriente alterna y utilice el lavavajillas como se indica en el manual. H.
  • Page 52 Español Piezas necesarias para la instalación permanente Manguera de entrada: Deberá comprar una manguera de entrada al lavavajillas estándar de 3/4" y ttings para realizar una instalación permanente. Tubo de escape para lavavajillas con conexión directa: Deberá comprar un tubo de escape para lavavajillas diseñado para su conexión a un desagüe de fregadero de cocina y una abrazadera para manguera adecuada.
  • Page 53: Recomendaciones De Uso

    Español 1. Decida cuál es la mejor ubicación para extender las mangueras debajo del fregadero. Asegúrese de que las dos mangueras lleguen antes de cortar la encimera. 2. Deben quitarse de la unidad el adaptador para la conexión rápida al grifo y las mangueras, para las conexiones de entrada y desagüe.
  • Page 54 Español El agua sucia se bombea hacia afuera y se reemplaza con agua limpia al final de cada ciclo. Para que los resultados de limpieza sean óptimos, la temperatura del agua debe ser de al menos 120ºF. Para evitar daños al lavavajillas, la temperatura del agua que entra no debe superar los 158ºF.
  • Page 55: Carga De Su Lavavajillas

    Español puede dejar manchas en los artículos. Es probable que deba utilizar un ablandador para el agua. • No sobrecargue el lavavajillas. • Evite la carga inadecuada, es decir, colocar demasiados platos o apilarlos. • Asegúrese de que la temperatura del agua sea la recomendada para lavar vajilla.
  • Page 56: Uso Del Detergente Correcto

    Español Canasta para los cubiertos Es mejor ubicar los cubiertos, los utensilios pequeños de cocina y algunas tapas plásticas en la canasta para los cubiertos. NOTA: Los platos estándar son de 10 _ pulgadas. Para cargar o retirar más fácilmente platos más grandes de la rejilla para vajilla, puede ser necesario retirar (temporalmente) la canasta para los cubiertos.
  • Page 57: Uso De Un Agente De Enjuague

    Español PARA EL AGUA DURA ES NECESARIO UTILIZAR MÁS DETERGENTE PARA QUE LA VAJILLA QUEDE LIMPIA. PARA EL AGUA BLANDA ES NECESARIO UTILIZAR MENOS DETERGENTE PARA QUE LA VAJILLA QUEDE LIMPIA. Nota: El fabricante recomienda el uso únicamente de detergente para lavavajillas automático para su unidad.
  • Page 58: Instrucciones De Funcionamiento

    Español PANEL DE CONTROL Seleccione el ciclo del lavavajillas según sus requerimientos de lavado (consulte la guía a continuación) Ciclo de lavado profundo: • Este ciclo se utiliza para la vajilla, los vasos, los cubiertos y las cacerolas y los utensilios con suciedad seca.
  • Page 59 Español 2) Presione el botón para abrir la puerta para abrirla. 3) Asegúrese de que el filtro ubicado en la parte interna inferior esté en la posición correcta y limpio. 4) Ubique la vajilla en la rejilla para la vajilla y los cubiertos dentro de la canasta para cubiertos.
  • Page 60 Español NOTA: Al inicio de cada ciclo, el lavavajillas comenzará siempre en el modo “desagüe”. Esto es porque la bomba de desagüe siempre retiene una pequeña cantidad de agua (en el sumidero) del ciclo anterior. Esto es necesario para mantener la bomba cebada. Por lo tanto, no se alarme si ve una pequeña cantidad de agua que sale de la manguera de desagüe antes de comenzar el ciclo de lavado regular.
  • Page 61: Limpieza Del Filtro Del Lavavajillas

    Español Limpieza del filtro del lavavajillas después del lavado: El filtro está ubicado en la parte inferior delantera del lavavajillas, justo debajo de la rejilla inferior. A) Una vez que se finalizaron el ciclo de lavado y secado, debe esperar unos minutos hasta que el lavavajillas se haya secado completamente.
  • Page 62: Guía Para La Detección Y Solución

    Español Guía para la detección y solución de problemas PROBLEMA CAUSA POSIBLE SOLUCIÓN POSIBLE Dishwasher will * El lavavajillas no tiene corriente * Revise la conexión eléctrica, los fusibles not start eléctrica o el interruptor automático * La puerta no está cerrada. * Cierre la puerta con firmeza.
  • Page 63: Garantía Limitada

    Los clientes deben proporcionar a la falta de atención y mantenimiento apropiados, Haier una prueba de la fecha de compra y el la corriente o el voltaje incorrectos o los casos de recibo original junto con: la marca, el modelo y fuerza mayor.
  • Page 64: Important

    IMPORTANT Do Not Return This Product To The Store If you have a problem with this product, please contact the "Haier Customer Satisfaction Center" at 1-877-337-3639. DATED PROOF OF PURCHASE REqUIRED FOR WARRANTY SERVICE IMPORTANT Ne pas Réexpédier ce Produit au Magasin Pour tout problème concernant ce produit, veuillez contacter le service des...

Ce manuel est également adapté pour:

Hdc1804tbHdc1804ts

Table des Matières