Télécharger Imprimer la page

Albrecht Audio DR 460 C Guide D'instructions

Masquer les pouces Voir aussi pour DR 460 C:

Publicité

Les langues disponibles

Les langues disponibles

Liens rapides

Internet-Radio Adapter
ALBRECHT DR 460 C
Bedienungsanleitung
Deutsch / English / Français / Italiano

Publicité

loading

Sommaire des Matières pour Albrecht Audio DR 460 C

  • Page 1 Internet-Radio Adapter ALBRECHT DR 460 C Bedienungsanleitung Deutsch / English / Français / Italiano...
  • Page 2 VORSICHT ZUR VERMEIDUNG VON FEUER UND STROMSCHLAG BENUTZEN SIE DEN STECKER NICHT MIT EINER STECKDOSE ODER EINEM VERLÄNGERUNGSKABEL, WENN ER SICH NICHT VOLLSTÄNDIG EINSTECKEN LÄSST. ZUR VERMEIDUNG VON FEUER UND STROMSCHLAG SETZEN SIE DAS NICHT REGEN ODER FEUCHTIGKEIT AUS. Der Blitz im gleichseitigen WARNUNG: Zur Das Ausrufungszeichen im Dreieck weist auf gefährliche...
  • Page 3: Wichtige Sicherheitshinweise

    15.) Benutzen Sie ausschließlich von Hersteller spezifizierte Ersatzteile. Herzlich Willkommen Vielen Dank, dass Sie sich für das DR 460 C entschieden haben. Ihr DR 460 C ist als ein digitaler Musikadapter konzipiert, der Ihr bestehendes Audiosystem erweitert und Sie durch einfachen und bequemen Zugriff auf weltweit tausende Internet-Radiosender sowie weitere Streaming-Optionen mit vielen Stunden Unterhaltung versorgt.
  • Page 4: Table Des Matières

    3 Inhalt Wichtige Sicherheitshinweise ....................... 3 Herzlich Willkommen ........................3 Inhalt ............................. 4 Lieferumfang ..........................6 DR 460 C an bestehendem Audiosystem anschließen ..............7 Ausstattungsmerkmale ......................... 7 Frontblende ..........................8 Rückseite ............................8 Fernbedienung ..........................9 DR 460 C einschalten ......................... 10 Erstmalige Konfiguration ......................
  • Page 5 14.3 Dimmer ............................27 14.4 Display / Farbe ........................... 28 14.5 Sleeptimer ..........................28 14.6 Pufferspeicher ..........................29 14.7 Wetter ............................29 14.8 Taste ............................29 14.9 SMS ............................29 14.9.1 SMS Text ............................ 30 14.10 Software-Update ......................... 30 14.11 Rückstellung zu den Werkseinstellungen ...................
  • Page 6: Lieferumfang

    4 Lieferumfang Vergewissern Sie sich, dass folgende Artikel mitgeliefert wurden: DR 460 C Netzteil Fernbedienung DR 460 C Bedienungsanleitung Cinch-Anschlusskabel Deutsch...
  • Page 7: Dr 460 C An Bestehendem Audiosystem Anschließen

    4.1 DR 460 C an bestehendem Audiosystem anschließen Aktive Lautsprecher RCA-Kabel 4.2 Ausstattungsmerkmale Einzelgerät • Drahtlosanschluss • Aktuelle Liste mit mehr als 10.000 Onlinesendern • 250 Favoriten • Radioalarm • Wettervorhersage • Deutsch...
  • Page 8: Frontblende

    5 Frontblende Ihr DR 460 C hat keine Tasten auf der Frontblende. Durch die einfache und benutzerfreundliche Menüführung können Sie alle Funktionen des Radios über die mitgelieferte Fernbedienung steuern. 6 Rückseite Die Anschlüsse dieses Modells sind: 2 x Stereo Cinch und Netzteileingang USB nur für Firmware-Upgrade...
  • Page 9: Fernbedienung

    7 Fernbedienung Ein/Aus Gerät ein- und ausschalten (Standby). Menü Hauptmenü aufrufen. Lautstärke- Lautstärke verringern. Stummschaltung Audioausgang stumm schalten. Lautstärke+ Lautstärke erhöhen. Wechselt zwischen den Modi. Mode Programmierbar über das Menü „Taste“ Sleeptimer Automatische Ausschaltzeit wählen. Alarm Alarmfunktion ein- und ausschalten. Licht Lichtmodus wählen.
  • Page 10: Dr 460 C Einschalten

    Mit den Navigationstasten aufwärts/abwärts auf der Fernbedienung wählen Sie die gewünschte Sprache, dann drücken Sie OK. Wählen Sie dann, ob das DR 460 C „Check Network When Power On“ (Netzwerkprüfung beim Einschalten) aktivieren soll, benutzen Sie hierzu die Navigationstasten links/rechts und drücken Sie OK.
  • Page 11 Wählen Sie wie Ihre Netzwerkverbindung konfiguriert werden soll: Bei Auswahl von Yes werden Ihnen zunächst alle in der Umgebung verfügbaren Drahtlosnetzwerke angezeigt. Wählen Sie Ihr Netzwerk aus und bestätigen mit OK. Geben Sie Ihr Passwort ein, falls Ihre WLAN-Verbindung verschlüsselt ist. Unterstützt Ihr Router WPS und Yes (WPS) wurde gewählt, so drücken Sie die WPS-Taste auf Ihrem Router innerhalb von 120 Sekunden.
  • Page 12: Sprache Wählen

    Untermenü anzuzeigen Das Menü umfasst vier Optionen und die erste Option ist markiert. 8.2 Sprache wählen DR 460 C unterstützt bis zu acht Sprachen für die Menüoptionen. Zur Änderung der Sprache gehen Sie wie folgt vor: Wählen Sie im Hauptmenü Configure > Language. Drücken Sie die Navigationstasten aufwärts/abwärts, um durch die Sprachoptionen zu scrollen und drücken Sie Enter, um die gewählte Sprache anzuwenden.
  • Page 13: Texteingabe

    BITTE BEACHTEN SIE: Dies ist nur notwendig, wenn eine Verbindung nicht bereits beim ersten Einschalten hergestellt wurde oder das DR 460 C sich mit einem anderen Netzwerk verbinden soll. Stellen Sie sicher, dass der Zugangspunkt bereit ist weitere Teilnehmer in das Funknetz aufzunehmen.
  • Page 14 Wählen Sie ein Netzwerk, zu dem Sie Zugang haben. Ist das Netzwerk nicht gesichert, so drücken Sie Enter, um die Verbindung herzustellen. Ist es gesichert, so müssen Sie erst den Schlüssel eingeben. Geben Sie den entsprechenden Schlüssel ein und drücken Sie Enter, um die Verbindung herzustellen.
  • Page 15: Internet Radio

    Service: Hier können Sie Sender manuell suchen und hinzufügen. 9.1 Radiosender suchen Das DR 460 C hat eine aktuelle, klassifizierte Liste von weltweiten Online-Radiosendern. Sie können nach einem Sender mit dem Musikgenre oder dem Standort des Senders suchen. Sie können die kategorisierten Sender auch in alphabetischer Reihenfolge durchlaufen oder manuell die Adresse eines Senders eingeben.
  • Page 16: Suche Nach Land/Standort

    Drücken Sie die Navigationstaste aufwärts/abwärts, um ein Genre zu markieren. Möchten Sie beispielsweise Hits hören, so gehen Sie wie folgt vor: Drücken Sie die Drücken Sie die Navigationstaste links, Navigationstaste rechts, um in das vorherige um alle Hitsender anzuzeigen Menü zurückzukehren Hits ist das 15. von insgesamt 43 Genres. Drücken Sie die Navigationstaste rechts, um die verfügbaren Hitsender anzuzeigen. Markieren Sie einen Sender und drücken Sie Enter, um den Sender aufzurufen.
  • Page 17: Suche Nach Sendername

    9.1.3 Suche nach Sendername Wählen Sie im Hauptmenü Service > Search Radio Station. Die Sender sind in 10 Kategorien entsprechend ihrer Anfangsbuchstaben eingeteilt: 0-9, A-C, D-F, G-I, J-L, M-O, P-R, S-U, V-Z. Wählen Sie eine Kategorie zur Anzeige einer Liste von Sendern.
  • Page 18: Sender Aufrufen

    Geben Sie die Adresse eines Senders ein. Einzelheiten zur Texteingabe finden Sie im Kapitel „8.3 Texteingabe“. Anschließend drücken Sie Enter, um den Sender aufzurufen. 10 Sender aufrufen Ist das DR 460 C erfolgreich mit einem Sender verbunden, so haben Sie folgende Anzeige im Display: Netzwerkstatus Verbindungsstatus Dateninformationen Pufferstatus...
  • Page 19: Sender Unter My Favorite Hinzufügen

    10.1 Sender unter My Favorite hinzufügen Sie können einen aktuell spielenden Radiosender zu My Favorite hinzufügen oder auch einen Sender als Favoriten einstellen, nachdem Sie ihn in der Liste gefunden haben. Das DR 460 C hat einen Speicher für 250 Sender.
  • Page 20: My Favorite Verwalten

    Siehe Tabelle unter Kapitel 10.1.1 zum Favoritenstatus. 10.1.3 My Favorite verwalten Das DR 460 C speichert bis zu 250 Sender unter My Favorite, damit Sie einen schnellen Zugriff auf Ihre Lieblingssender haben. Zur Verwaltung Ihrer Favoritenliste gehen Sie wie folgt vor: Drücken Sie FAV auf der Fernbedienung oder wählen Sie im Hauptmenü...
  • Page 21: My Mediau

    MediaU Portal hinzugefügt haben. Auf der Website http://www.mediayou.net können Sie einfach Sender, Favoriten usw. hinzufügen. Erstellen Sie ein Konto und registrieren Sie Ihr DR 460 C für dieses Konto. Bei der Registrierung wird die Seriennummer des Radios erfragt. Dies ist die MAC-Adresse des Radios, navigieren Sie zu Information Center >...
  • Page 22: Media-Center

    Aktivieren Sie die UPnP-Funktion des Windows Media Player (Version 10 oder später). Sie • finden diese Funktion im Menü Streaming -> Medien-Streaming aktivieren. Sobald das Streaming aktiviert ist, können Sie Musik von Ihrem Computer auf dem DR 460 C wiedergeben. Darüber hinaus gibt es eine Reihe anderer Programme zum Hosten eines Mediaservers.
  • Page 23 Fügen Sie die Audiodateien und Ordner hinzu, welche Sie für das DR460 C in der Medienbibliothek freigeben möchten. Bei korrekter Einstellung des Medienservers können Sie die dort gespeicherte Musik durch Auswahl der Menüs, wie nachstehend dargestellt, abspielen. Deutsch...
  • Page 24: Bluetooth (Nur In Entsprechenden Modellen Vorhanden)

    Bluetooth-Funktion auf Ihrem Telefon oder einem anderen mobilen Gerät. Ihr Mobiltelefon wird automatisch nach „DR460“ suchen. Nachdem die Verbindung erfolgreich hergestellt wurde, können Sie Musik von Ihrem Mobiltelefon über das DR 460 C wiedergeben. Ein Doppelpfeil oben links im Display zeigt die aktive Bluetooth Verbindung an.
  • Page 25: Netzwerk

    14.1 Netzwerk Wireless Network Configuration: Automatische Suche nach Drahtlosnetzwerken (empfohlen). Wireless Network (WPS PBC): Auswahl, wenn Ihr Router WPS (Wi-Fi Protected Setup) unterstützt. Manual configuration: Auswahl, wenn Sie Ihr Netzwerk manuell konfigurieren möchten. Check Network when Power On: Netzwerkprüfung beim Einschalten aktivieren/deaktivieren. BITTE BEACHTEN SIE: Einzelheiten zur Drahtlosnetzwerkeinstellung finden Sie auf Seite 13 Datum und Uhrzeit...
  • Page 26: Alarm

    14.2 Alarm Diese Option ermöglicht Ihnen das Ein- und Ausschalten und die Programmierung eines Alarms. Mit der Taste Alarm auf der Fernbedienung können Sie das Menü ebenfalls aufrufen. Bitte beachten Sie, dass zur Nutzung der Alarmfunktion der angeschlossenen Lautsprecher bzw. das Stereosystem eingeschaltet sein muss.
  • Page 27: Alarm Programmieren

    Wählen Sie Set Alarm Sound, um den Weckton zwischen Beep (Signalton), Melody (Melodie) und Radio zu wählen (der zuletzt gehörte Sender oder der unter „Use as Alarm Sound“ eingestellte Sender). Das Symbol wird oben rechts im Display angezeigt, wenn die Alarmfunktion aktiviert ist.
  • Page 28: Display / Farbe

    14.4 Display / Farbe Im Menüpunkt Configuration > Display können Sie die Displayfarbe zwischen farbig und schwarz/weiß wechseln. 14.5 Sleeptimer Die Option Configuration > Sleep Timer ermöglicht Ihnen die Einstellung eines Zeitraums, nach dem sich das Gerät ausschaltet. Diese Funktion steht Ihnen ebenfalls mit SLEEP auf der Fernbedienung zur Verfügung.
  • Page 29: Pufferspeicher

    14.6 Pufferspeicher Die Option Configuration > Buffer ermöglicht Ihnen die Einstellung des Pufferspeichers für empfangene Daten für einen bestimmten Zeitraum. Bei Verbindung mit einem Radiosender zeigt ein Symbol die eingestellte Pufferzeit an (siehe Abbildung auf Seite 18): • 2 Sekunden: •...
  • Page 30: Sms Text

    Um eine SMS zu versenden, muss die Mode Taste mit der SMS Funktion belegt sein, siehe 14.8 und gedrückt gehalten werden, bis der Versand durch ein Icon in der oberen linken Ecke bestätigt wird. Wird ein „X“ angezeigt besteht entweder keine Internetverbindung oder die Telefonnummer wurde nicht korrekt hinterlegt.
  • Page 31: Dlna / Airmusic Control App

    15 DLNA / AirMusic Control App Das DR 460 C kann mit einem Smartphone via WLAN gesteuert werden. Wir empfehlen dafür die AirMusic Control App. Neben der Steuerung des Radios, können mittels der App auch die lokalen Musikdateien des Smartphones, auf dem DR 460 C, wiedergegeben werden. Aufgrund häufiger Updates ist die Anleitung der App nur online verfügbar.
  • Page 32: Spezifikationen

    16 Spezifikationen Konnektivität Drahtlos-Zugangspunkt Datenübertragungsraten 54 Mbit/s (WLAN) WLAN-Sicherheit WPA und WPA2-AES 64/128-Bit WEP Audioformat Decoder Real/MP3/WMA/Flac/Ogg. 32 Kbit/s~320 Kbit/s Rauschabstand >90 dB Display 128 x 64 FSTN grafisches Display Blau mit weißer LED Eingänge/Ausgänge Line Out (Cinch-Buchse) Netzteileingang USB (nur für Firmware-Upgrade) English, Deutsch, Français, Nederlands, русский, Svenska, Sprachen Norske, Dansk...
  • Page 33: Gewährleistungs- Und Recyclinginformationen

    17 Gewährleistungs- und Recyclinginformationen Wir sind verpflichtet, jedem Gerät Informationen über die Entsorgung, über die gesetzlichen Gewährleistungsbestimmungen und die EG Konformitätserklärungen mit Hinweisen über das Benutzen der Geräte in den verschiedenen Ländern beizufügen. Sie finden daher diese Informationen im folgenden Text. Gesetzliche Gewährleistung von 2 Jahren nach Kaufdatum Der Verkäufer dieses Geräts gewährt Ihnen eine gesetzliche Gewährleistung von zwei Jahren nach Kaufdatum des Geräts.
  • Page 34: Serviceanschrift Und Technische Hotline

    Serviceanschrift und technische Hotline Alan Electronics GmbH Service Daimlerstrasse 1k 63303 Dreieich Die Servicehotline ist unter bzw. per E-Mail unter 06103 9481 66 (normale Festnetzpreise) service@alan-electronics.de erreichbar. Bevor Sie bei einem Problem ein vermeintlich defektes Gerät zurückschicken, können Sie Zeit und Versandkosten sparen, indem Sie sich per Hotline helfen lassen Druckfehler vorbehalten.
  • Page 35 Internet Radio Adapter ALBRECHT DR 460 C Instruction Manual English...
  • Page 36: Important Safety Instructions

    C A U T I O N TO PREVENT FIRE OR SHOCK HAZARD, DO NOT USE THIS PLUG WITH AN EXTENSION CORD, RECEPTACLE OR OTHER OUTLET UNLESS THE BLADES CAN BE FULLY INSERTED TO PREVENT BLADE EXPOSURE. TO PREVENT FIRE OR SHOCK HAZARD, DO NOT EXPOSE THIS APPLIANCE TO RAIN OR MOISTURE. The lightning flash with WARNING: The exclamation point within...
  • Page 37: Content

    1 Content Content Welcome Package contents Connecting DR 460 C to your existing Hi-Fi Features Specifications Front panel Back panel Remote control Turning on the DR 460 C 10.1 First time configuration ..................... 43 10.2 Language selection ....................45 10.3 Text entry ........................
  • Page 38: Welcome

    Warranty and Recycling Information 2 Welcome Thank you for purchasing the DR 460 C. Your DR 460 C is designed as a digital music adapter to add to your existing Audio system and to provide you with hours of music enjoyment with simple, convenient access to thousands of Internet radio stations worldwide and furthermore music streaming options.
  • Page 39: Package Contents

    3 Package contents Please make sure that the following contents are included in the package: DR 460 C Adapter Power supply Remote control DR 460 C User Manual RCA connection cable 4 Connecting DR 460 C to your existing Hi-Fi English...
  • Page 40: Features

    5 Features Stand-alone device • Wireless connection • Up-to-date list of more than 10,000 online stations • 250 favorites • Radio alarm • Weather forecast • 6 Specifications Connectivity Wireless access point Data rates 54 Mbits ( WLAN) Wireless LAN security WPA and WPA2-AES 64/128-bit WEP Audio format decoder...
  • Page 41: Front Panel

    7 Front panel There is no keypad or buttons on your DR 460 C. All is working entirely from the enclosed remote control. The design is made simple and user - friendly so the navigation is handled completely by the R/C.
  • Page 42: Remote Control

    9 Remote control Press to switch the device between Power button standby and on mode. Menu button Press to return to the main menu. Volume- button Press to decrease the output volume. Mute button Press to mute the audio output. Volume+ button Press to increase the output volume.
  • Page 43: Turning On The Dr 460 C

    Connect RCA cables to your existing Hi-Fi stereo. First time configuration 10.1 The first time the DR 460 C is powered on you have to choose the language first: Use the up/down navigation buttons on your remote control to choose your preferred language and press OK.
  • Page 44 Enter your password if your wi-fi connection is encrypted. If your router supports WPS and Yes (WPS) was chosen simply press the WPS button on your router within 120 seconds. Congratulations you have now connected your radio to your network! The network status icon should have changed according to the picture below.
  • Page 45: Language Selection

    Or simply press the LANG button on the remote and cycle through the available languages. NOTE: The language selected applies to the DR 460 C menus and system messages only. The station names shown vary according to the different station locations.
  • Page 46: Establishing A Wireless Connection

    NOTE! This is only needed if a connection has not already been established on the first power on or the DR 460 C needs to connect to a different network. Set up your access point (AP) to receive/broadcast a wireless signal.
  • Page 47: Listening To The Radio

    Searching for a radio station 11.1 The DR 460 C has an up-to-date, well-classified list of online radio stations worldwide. You can search for a station by music genre or the location of the station. You can also go through the stations categorized in alphabetical order or manually enter the address of a station.
  • Page 48: Searching By Country/Location

    Press the up/down navigation button to highlight a genre. For example, if you want to listen to jazz music: Press the Press the navigation navigation button left button right to return to return to the to display all Jazz previous menu stations Jazz is 15th of total 43 genres. Press the right navigation button to display all jazz stations available. Highlight a station and press the enter button to connect to the station.
  • Page 49: Searching By Station Name

    11.2.2 Searching by station name From the main menu, select Service > Search Radio Station. The stations are divided into 10 categories by their name initial: 0-9, A-C, D-F, G-I, J-L, M-O, P-R, S-U, V-Z. Select a category and a list of stations is displayed. NOTE: Stations with names in Japanese, Korean, Traditional Chinese, and Simplified Chinese are in the Other group.
  • Page 50: Connecting To A Station

    Enter the address of a station. Refer to the “Text entry” section for details about inputting text. When finished, press Enter to connect to the station. Connecting to a station 11.3 If the DR 460 C is successfully connected to a station, the display shows the following: Network status Station name Data information Connection status...
  • Page 51: Adding A Station To My Favorite

    Adding a station to My Favorite 11.4 You can add a currently played radio station to My Favorite or set a station as your favorite immediately after you found it on the list. The DR 460 C has a memory of 250 stations.
  • Page 52: Managing My Favorite

    11.4.3 Managing My Favorite The DR 460 C saves up to 250 stations to My Favorite so that you have a quick access to these stations. To manage your favorites list: Press the Favorite button on the remote control or select My Favorite from the main menu.
  • Page 53: My Mediau

    This is the MAC address of the radio, go to Information Center > System Information > Wireless Info to display this information. When this is done you can access added stations etc. directly from your DR 460 C My MediaU menu.
  • Page 54 Allows to share your media to the DR 460 C. Add the audio files and folders you want to share with DR460-C to the media library. English...
  • Page 55: Bluetooth (Only With Corresponding Model)

    Bluetooth function on your phone or other mobile device. Your device will search for “DR460” automatically. After successful connection, you can play music from your mobile device through the DR 460 C. The display will show: 14 Information Center Selecting the Information Center from the main menu allows you to enter the information menu.
  • Page 56: Configuration

    15 Configuration Selecting Configuration from the main menu allows you to configure the DR 460 C. These menus are available: network, clock, alarm, language, dimmer, sleep timer, buffer, weather, software update and reset. Network 15.1 Wireless Network Configuration: Choose to automatically search for wireless networks (Recommended) Wireless Network (WPS PBC): Choose this if your router supports WPS (Wi-fi...
  • Page 57: Date & Time

    Date & Time 15.2 The Configuration > Date & Time option allows you to set the time/date and a format for displaying time. Set the time for the device when you turn it on for the first time, and the device will synchronize the clock as long as it is connected to the network. •...
  • Page 58: Alarm

    Alarm 15.3 This option allows you to turn on/off the alarm and program an alarm. You can access this menu by pressing the alarm button on the remote control too. Please note that in order to use the alarm function the connected speaker/stereo system needs to be switched on.
  • Page 59: To Program The 2Nd Alarm

    15.3.1 To program the 2nd alarm: Go to Configuration > Alarm 2 > Turn On. Repeat steps from program an alarm. 15.3.2 To program NAP alarm: Go to Configuration > NAP Alarm NAP Alarm switches the radio on after the programmed period of time is over. Choose between Off, 5 Minutes, 10 Minutes, 20 Minutes, 30 Minutes, 60 Minutes, 90 Minutes and 120 Minutes.
  • Page 60: Display Color

    Display color 15.5 The Configuration > Display lets you chance the display color between color or black/white. Sleep Timer 15.6 The Configuration > Sleep Timer option allows you to select a preset amount of time after which the device shuts off. You can also set the sleep timer by pressing the Sleep button on the remote control.
  • Page 61: Buffer

    Buffer 15.7 The Configuration > Buffer option allows you to set the buffer to hold data received for a certain amount of time. If you are connecting to a station, there will be an icon showing the buffer length you set (see the figure on page 50): •...
  • Page 62: Sms

    15.10 In this menu up to 3 numbers can be stored for the automatic SMS transmission. In order to send an SMS the Mode key function needs to be set to SMS, see chapter 15.9, and be pressed until the transmission is confirmed by an icon in the upper left corner. When the display shows an X the SMS is not sent either due to no network connection or a wrong phone number.
  • Page 63: Dlna / Airmusic Control App

    16 DLNA / AirMusic Control App The DR 460 C can be controlled with your smartphone via WiFi. It is recommended to use the AirMusic Control App. Additionally to controlling the radio, the app is able to play the smartphone’s local music files on the DR 460 C. Due to frequent updates of the app the manual is only available online.
  • Page 64: Warranty And Recycling Information

    17 Warranty and Recycling Information We are legally obliged to include disposal and warranty information as well as EU declaration of conformity with the use instructions in different countries for every unit. Please find this information on the following pages. 2-Year Warranty from Date of Purchase The manufacturer/retailer guarantees this product for two years from date of purchase.
  • Page 65 Adaptateur de Radio Internet ALBRECHT DR 460 C Guide d'instructions Français...
  • Page 66: Instructions De Sécurité Importantes

    ATTENTION POUR PRÉVENIR DES RISQUES D'INCENDIE OU D'ÉLECTROCUTION, N'UTILISEZ PAS CETTE PRISE AVEC UNE RALLONGE ÉLECTRIQUE, UN PROLONGATEUR OU TOUTE AUTRE SORTIE À MOINS QUE VOUS PUISSIEZ ENFONCER LES BROCHES JUSQU'AU FOND DE LEUR LOGEMENT POUR EMPÊCHER LEUR EXPOSITION. POUR PRÉVENIR DES RISQUES D'INCENDIE OU D'ÉLECTROCUTION, N'EXPOSEZ PAS CET APPAREIL À...
  • Page 67: Bienvenue

    Que vous vous trouviez à Zurich et que vous vouliez écouter de la musique brésilienne ou que vous recherchiez de la musique classique, du hard rock ou du jazz, le DR 460 C saura localiser la bonne station pour vous l'apporter chez vous. Français...
  • Page 68: Sommaire

    Instructions de sécurité importantes ................... 66 Bienvenue ........................... 67 Sommaire ........................... 68 Contenu de la boîte ........................70 Connexion de la radio DR 460 C à votre système audio existant ..........70 Caractéristiques .......................... 71 Spécifications ..........................71 Panneau avant ........................... 72 Panneau arrière ..........................
  • Page 69 17.3 Option Alarm ..........................90 17.3.1 Pour configurer un second réveil : ....................92 17.3.2 Pour configurer un réveil NAP : ....................92 17.3.3 Configuration du volume sonore du réveil : ................92 17.4 Option Language ........................92 17.5 Option Dimmer ........................... 92 17.6 Option couleur ..........................
  • Page 70: Contenu De La Boîte

    Vérifiez que la boîte contient tous les éléments indiqués ci-dessous. Une unité principale DR 460 C Une alimentation électrique Une télécommande Un guide d'instructions DR 460 C Cable RCA 4.1 Connexion de la radio DR 460 C à votre système audio existant Système audio Câbles RCA Français...
  • Page 71: Caractéristiques

    5 Caractéristiques • Appareil autonome • Connexion sans fil • Liste actualisée de plus de 10.000 stations de radio en ligne • Liste de 250 favoris • Fonction réveil 6 Spécifications Connectivité Point d'accès sans fil Vitesse de transmission des 54 Mbits (WLAN) données Sécurité...
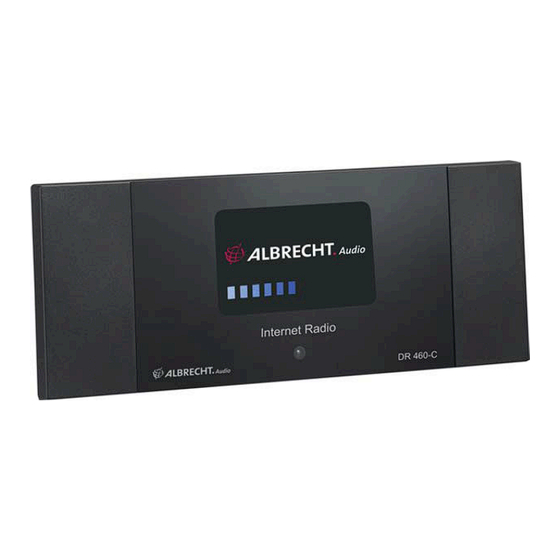
  • Page 72: Panneau Avant

    7 Panneau avant Le boîtier de votre radio DR 460 C ne comporte aucune touche. Toutes les opérations s'effectuent depuis la télécommande. La conception est simple et conviviale, et la navigation s'effectue totalement depuis la télécommande. 8 Panneau arrière Pour le modèle illustré, vous avez accès aux connecteurs suivants : 2 x connecteurs RCA stéréo et 1 x connecteur d'alimentation électrique...
  • Page 73: Télécommande

    9 Télécommande Bouton de Appuyez pour passer du mode veille au marche/arrêt mode marche et vice versa. Appuyez pour réafficher le menu Touche Menu principal. Appuyez pour diminuer le volume Touche Volume- sonore. Touche Mute Appuyez pour désactiver la sortie (Silence) audio.
  • Page 74: Mise En Route De Votre Radio Dr 460 C

    Branchez les câbles RCA sur votre système audio stéréo existant. 10.1 Configuration pour la première fois Lorsque vous branchez votre DR 460 C pour la première fois, un message vous invite à sélectionner une langue : Choisissez une langue à l'aide des touches de navigation Haut et Bas de la télécommande et appuyez sur la touche OK.
  • Page 75 Si vous répondez Yes, recherchez votre identificateur SSID dans la liste affichée sur l'écran et appuyez sur la touche ok. Tapez votre mot de passe si votre connexion wi-fi est codée. Si votre routeur gère le protocole WPS et que vous avez choisi Yes (WPS), appuyez simplement sur la touche WPS du routeur dans les 120 secondes qui suivent.
  • Page 76: Sélection De La Langue

    REMARQUE : la langue choisie de cette manière n'affecte que les menus et les messages affichés sur l'écran de votre DR 460 C. Les noms de station affichés varient selon la région de diffusion de la station.
  • Page 77: Saisie De Texte

    10.4 Saisie de texte Pour ajouter l'adresse d'une station de radio en ligne ou pour passer la sécurité WEP des réseaux sans fil, vous devez saisir des informations de type texte. La procédure est identique à celle de réglage de l'heure, de la date ou de l'heure de réveil, sauf que celle-ci ne vous permet de saisir que des chiffres.
  • Page 78 Sélectionnez le réseau auquel vous voulez accéder. S'il n'est pas sécurisé, appuyez sur la touche Entrer pour établir la connexion. S'il est sécurisé, l'invite de saisie de la phrase de passe apparaît sur l'écran. Tapez la phrase de passe exacte et appuyez sur la touche Entrer pour établir la connexion. Reportez-vous à...
  • Page 79: Écoute De La Radio

    11.1 Recherche d'une station de radio Votre radio DR 460 C a accès à une liste actualisée et classifiée de stations de radio en ligne couvrant le monde entier. Vous pouvez rechercher une station par genre de musique ou par emplacement.
  • Page 80: Recherche D'après Le Pays/La Région

    11.2 Recherche d'après le pays/la région Depuis le menu principal, sélectionnez Radio Station/Music > Country/Location. Une liste de régions géographiques, classées par ordre alphabétique, s'affiche sur l'écran : Vous avez le choix entre les régions suivantes : Africa, Asia, Europe, Latin America, Middle East, North America, Oceania/Pacific et Internet Only (pour les stations diffusant uniquement sur l'Internet).
  • Page 81: Recherche D'après Le Nom De La Station

    11.3 Recherche d'après le nom de la station Depuis le menu principal, sélectionnez Service > Search Radio Station. Les noms des stations sont réparties dans les 10 catégories suivantes, selon leur initiale : 0-9, A-C, D-F, G-I, J-L, M-O, P-R, S-U, V-Z. Sélectionnez une catégorie. La liste des stations correspondante apparaît sur l'écran.
  • Page 82: Recherche D'après L'adresse

    Appuyez sur la touche Entrer pour vous connecter à la station. 11.5 Connexion à une station Lorsque votre radio DR 460 C réussit à établir la connexion avec une station, elle affiche les informations suivantes sur l'écran : Français...
  • Page 83: Ajout D'une Station À Votre Liste De Favoris

    Vous pouvez ajouter la station de radio que vous écoutez actuellement à votre liste de favoris et également une station que vous venez juste de repérer dans la liste. Votre DR 460 C peut stocker jusqu'à 250 stations dans sa mémoire.
  • Page 84: Ajout De La Station De Radio Que Vous Écoutez Actuellement

    11.6.1 Ajout de la station de radio que vous écoutez actuellement Appuyez sur la touche +FAV de la télécommande. Selon le résultat de l'opération, l'une des icônes suivantes s'affiche à côté de l'icône d'état du réseau : La station a été ajoutée à votre liste de favoris. La station figure déjà...
  • Page 85: Gestion De Votre Liste De Favoris

    11.6.3 Gestion de votre liste de favoris Votre radio DR 460 C peut mémoriser jusqu'à 250 adresses de station dans la liste des favoris afin d'y accéder plus rapidement. Pour gérer votre liste de favoris : Appuyez sur la touche FAV de la télécommande ou sélectionnez My Favorite dans le menu principal.
  • Page 86: Sous-Menu My Mediau

    MediaU. Depuis le site Web http://www.mediayou.net, vous ajoutez facilement des stations, des favoris, etc.. Ouvrez un compte et enregistrez votre DR 460 C pour qu'il soit associé à votre compte. Le numéro de série qui vous est demandé pendant l'enregistrement de votre radio internet correspondant à...
  • Page 87: Sous-Menu Media Center

    • ultérieure), accessible depuis le menu Diffusion en continu->Activer diffusion de média en continu. Vous pouvez maintenant écouter sur votre DR 460 C la musique stockée sur votre ordinateur. Plusieurs autres programmes sont disponibles pour héberger un serveur de médias.
  • Page 88: Option Into Upnp

    Enter pour confirmer. Activez la fonction Bluetooth sur votre téléphone ou tout autre appareil mobile. Votre appareil recherchera automatiquement "DR460". Après une connexion réussie, vous pouvez lire de la musique à partir de votre appareil mobile via le DR 460 C. L'affichage affichera: Français...
  • Page 89: Sous-Menu Information Center

    Mediayou) et l'adresse IP sans fil. 17 Option Configuration L'option Configuration du menu principal vous permet de configurer votre DR 460 C. Ce menu contient les options suivantes : network, clock, alarm, language, dimmer, sleep timer, buffer, weather, software update et reset.
  • Page 90: Option Date/Time

    17.2 Option Date/Time L'option Configuration > Date & Time vous permet de définir la date, l'heure et leur format d'affichage. Vous ne devez régler l'heure que la première fois que vous mettez en route votre appareil. Ensuite, sa synchronisation s'effectue automatiquement, tant que votre appareil est connecté...
  • Page 91 Pour utiliser la fonction réveil, vous devez allumer le système de haut-parleurs stéréo qui est connecté. Pour configurer un réveil : Choisissez Configuration > Alarm > Turn On. Sélectionnez Set Alarm Time et tapez les valeurs appropriées. Reportez-vous à la section "Saisie de texte"...
  • Page 92: Pour Configurer Un Second Réveil

    17.3.1 Pour configurer un second réveil : Choisissez Configuration > Alarm 2 > Turn On. Procédez comme indiqué ci-dessus pour la programmation d'un premier réveil. 17.3.2 Pour configurer un réveil NAP : Choisissez Configuration > NAP Alarm. La fonction NAP Alarm active la radio après l'expiration d'un certain délai. Vous choisissez ce délai entre Off, 5 Minutes, 10 Minutes, 20 Minutes, 30 Minutes, 60 Minutes, 90 Minutes et 120 Minutes.
  • Page 93: Option Couleur

    17.6 Option couleur L’option configuration> Affichage vous permet de Chancé la couleur d'affichage entre la couleur ou noir / blanc. 17.7 Option Sleep Timer L'option Configuration > Sleep Timer vous permet de choisir le délai avant l'arrêt automatique de votre appareil. Vous pouvez également configurer cette option depuis la touche SLEEP de la télécommande.
  • Page 94: Option Weather

    17.9 Option Weather Cette option vous permet d'activer ou de désactiver l'affichage d'informations météorologiques sur l'écran en mode veille. Vous choisissez l'unité de mesure des températures : Celsius ou Fahrenheit. 17.10 Key Ici, la fonction de la touche Mode peut être choisie: Alarme, gradateur, égaliseur, radio locale, mode (par défaut), préréglage, minuterie de mise en veille, SMS, minuterie 17.11 SMS...
  • Page 95: Sms Text

    17.11.1 SMS Text Le texte SMS standard peut être modifié en utilisant l'application AirMusic Control, voir le chapitre 18 DLNA / AirMusic Control App. 17.12 Option Software Update Cette option vous permet de télécharger la dernière version du microprogramme de votre appareil.
  • Page 96: Dlna / Application Airmusic Control

    Rendez-vous sur la page d'accueil www.alan-electronics.de et tapez le numéro de produit 27462 dans la zone de recherche. Cliquez pour afficher la page du produit DR 460 C. Cliquez sur l'onglet Bedienungsanleitungen pour accéder au guide d'utilisation de l'application AirMusic Control.
  • Page 97: Information Importante

    19 Information importante Nous sommes légalement tenus d'inclure les dispositions et les informations de garantie et la déclaration de conformité de l'UE avec le mode d'emploi de chaque unité, et ce dans la langue de chaque pays. Veuillez trouvez ces informations dans les pages suivantes. Deux ans de garantie à...
  • Page 98: Adresse Du Service D'assistance Téléphonique (En Allemagne)

    Adresse du service d'assistance téléphonique (en Allemagne) Alan Electronics GmbH Service Daimlerstrasse 1k 63303 Dreieich Contactez notre service d'assistance téléphonique par téléphone au +49 6103 9481 66 ou par courriel au service@alan-electronics.de © 2017 Alan Electronics GmbH Les erreurs d'impression réservés. Les informations contenues dans ce manuel sont sujettes à...
  • Page 99 Adattatore radio Internet ALBRECHT DR 460 C Manuale di istruzioni Italian...
  • Page 100 Note importanti per la sicurezza PER PREVENIRE PERICOLI DI INCENDIO O SCOSSE ELETTRICHE, ACCERTARSI CHE EVENTUALI CAVI DI PROLUNGA O SPINE UTILIZZATE SIANO COMPLETAMENTE INSERITI NELLA PRESA ONDE EVITARE L'ESPOSIZIONE DEI CONTATTI. PER EVITARE INCENDI O SCOSSE ELETTRICHE NON ESPORRE QUESTO APPARECCHIO A PIOGGIA O UMIDITÀ Questo simbolo ATTENZIONE: PER Questo simbolo avvisa...
  • Page 101 • Leggere attentamente le istruzioni. • Non utilizzare questo apparecchio vicino all'acqua. • Pulire solo con un panno asciutto. • Non ostruire le aperture di ventilazione. Installare l'apparecchio in base alle indicazioni del produttore. • Non installare l’apparato vicino a sorgenti di calore quali radiatori, diffusori di aria calda, forni o altri apparecchi (compresi gli amplificatori) che generano calore.
  • Page 102 1 Indice Indice 102 Contenuto della confezione 104 Collegamento del DR 460 C all'impianto Hi-Fi esistente 104 Caratteristiche 105 Dati tecnici 105 Pannello anteriore 106 Pannello posteriore 106 Telecomando 107 Accensione 108 Prima configurazione Scelta lingua Inserimento testo Come stabilire una connessione wireless Ascolto della radio 112 10.1 Ricerca di una stazione radio 10.2 Ricerca per genere musicale 10.2.1 Ricerca per stato/area geografica 10.2.2 Ricerca per nome stazione 10.2.3 Ricerca per indirizzo 10.3 Collegamento ad una stazione 10.4 Aggiunta di una stazione in Preferite 10.4.1 Aggiunta di una stazione che si sta ascoltando 10.4.2...
  • Page 103 Assistenza tecnica (per unità vendute in Germania): 130 Grazie per avere acquistato il DR 460 C. L'adattatore digitale DR 460 C è stato progettato per essere aggiunto al proprio sistema audio esistente in modo da poter ascoltare ore di musica grazie ad un accesso a migliaia di stazioni radio via Internet in tutto il mondo, in modo semplice ed economico, ed avere altre opzioni per l'ascolto della musica in streaming.
  • Page 104: Contenuto Della Confezione

    2 Contenuto della confezione Verificare che nella confezione siano presenti tutti i seguenti elementi: Adattatore DR 460 C Alimentatore Telecomando Manuale d'uso del DR 460 C Cavo di connessione RCA 3 Collegamento del DR 460 C all'impianto Hi-Fi esistente Italiano...
  • Page 105: Caratteristiche

    4 Caratteristiche Dispositivo autonomo • Connessione wireless • Elenco aggiornato di oltre 10.000 stazioni online • 250 stazioni preferite • Sveglia radio • Bollettino meteorologico • 5 Dati tecnici Tipo di connessione Punto di accesso wireless Velocità trasmissione dati 54 Mbit ( WLAN) Sicurezza LAN wireless WPA e WPA2-AES WEP 64/128-bit...
  • Page 106: Pannello Anteriore

    6 Pannello anteriore Sul DR 460 C non sono presenti tastiere o tasti. Tutte le funzioni vengono attivate dal telecomando fornito in dotazione. Design semplice e facile da utilizzare, in modo che la navigazione possa essere gestita completamente dal telecomando.
  • Page 107: Telecomando

    8 Telecomando Premere per passare dalla modalità di Tasto accensione accensione a quella di standby e viceversa. Tasto Menu Premere per tornare al menu principale. Tasto Volume- Premere per ridurre il volume di uscita. Tasto Disattivazione Premere per disattivare l'uscita audio. audio Premere per aumentare il volume di Tasto Volume+...
  • Page 108: Accensione

    RCA allo stereo Hi-Fi esistente. Prima configurazione La prima volta che si accende l'adattatore DR 460 C è necessario prima di tutto scegliere la lingua: utilizzare i tasti di navigazione in alto e in basso, posti sul telecomando, per selezionare la lingua e premere OK.
  • Page 109 Se il router supporta il WPS ed è stato indicato Yes (Sì) (WPS), basta premere il tasto WPS sul router entro 120 secondi. La radio è stata collegata alla rete. L'icona di stato della rete dovrebbe essere cambiata come nella foto sottostante. Stato rete Ora Opzioni menu...
  • Page 110: Scelta Lingua

    LANG sul telecomando e scorrere tra le lingue disponibili. NOTA: la lingua selezionata si applica SOLO ai menu del DR 460 C e ai messaggi del sistema. I nomi indicati delle stazioni cambiano in base alle diverse aree delle stazioni.
  • Page 111: Come Stabilire Una Connessione Wireless

    Come stabilire una connessione wireless NOTA! È necessario stabilire una connessione solo se non è già stato fatto alla prima accensione del DR 460 C o nel caso in cui quest'ultimo debba essere connesso ad una rete diversa. 1. Configurare il punto di accesso (AP) di ricezione/diffusione di un segnale wireless.
  • Page 112: Ascolto Della Radio

    Ricerca di una stazione radio 10.1 Il DR 460 C dispone di un elenco aggiornato e ben classificato di stazioni radio online presenti in tutto il mondo. È possibile cercare una stazione per genere musicale o area geografica della stazione. Si può inoltre scorrere tra le stazioni inserite nell'elenco in ordine alfabetico oppure inserire manualmente l'indirizzo di una stazione.
  • Page 113: Ricerca Per Genere Musicale

    Ricerca per genere musicale 10.2 Dal menu principale, selezionare Radio Station/Music > Genre (genere musicale): viene visualizzato un elenco di generi musicali in ordine alfabetico. 2. Premere il tasto di navigazione in alto/in basso per evidenziare un genere. Ad esempio, se si desidera ascoltare della musica jazz: Premere il tasto di Premere il tasto navigazione a destra...
  • Page 114: Ricerca Per Stato/Area Geografica

    3. Premere il tasto di navigazione a destra per visualizzare tutte le stazioni jazz disponibili. Evidenziare una stazione e premere il tasto Invia per collegarsi alla stazione. 10.2.1 Ricerca per stato/area geografica Dal menu principale, selezionare Radio Station/Music > Country/Location (stato/area): viene visualizzato un elenco di aree geografiche in ordine alfabetico.
  • Page 115: Ricerca Per Indirizzo

    NOTA: le stazioni con i nomi in giapponese, coreano, cinese tradizionale e cinese semplificato sono nel gruppo Altre. Selezionare ancora una volta una qualsiasi delle stazioni per visualizzare più stazioni. Le stazioni sono elencate in base alle prime due lettere dei rispettivi nomi, in ordine alfabetico.
  • Page 116: Collegamento Ad Una Stazione

    Collegamento ad una stazione 10.3 Se il collegamento del DR 460 C ad una stazione è riuscito, il display visualizza quanto segue: Stato rete Nome stazione Informazioni sui dati Stato connessione Le barre indicano la potenza Stato buffer del segnale di connessione della stazione NOTA • Lo stato della connessione può cambiare da “Connecting” (connessione in corso) a “Buffering”...
  • Page 117: Aggiunta Di Una Stazione Radio Dall'elenco

    10.4.3 Gestione Preferite Il DR 460 C memorizza fino a 250 stazioni in Preferite in modo da avere un accesso rapido alle stesse. Per gestire l'elenco delle stazioni preferite. Premere il tasto Preferite sul telecomando o selezionare My Favorite dal menu principale.
  • Page 118: My Mediau

    MediaU. Dal sito web http://www.mediayou.net è possibile aggiungere facilmente stazioni, stazioni preferite ecc. Creare un account e registrare l'adattatore DR 460 C in modo che sia associato al proprio account. Quando si registra la radio verrà chiesto di inserire un numero di serie.
  • Page 119: Media Center

    Questa funzione si trova nel menu Streaming->Enable Media Streaming (attiva streaming multimediale). Una volta attivato lo streaming è possibile riprodurre la musica dal computer sul DR 460 C. Sono disponibili diversi altri programmi che prevedono l'hosting di server dai contenuti multimediali.
  • Page 120 Aggiungere i file audio e le cartelle che si vogliono condividere con il DR460-C sul catalogo multimediale. Quando il server dei contenuti multimediali è stato configurato correttamente è possibile riprodurre la musica da quest'ultimo selezionando i menu nel modo di seguito indicato. Italiano...
  • Page 121: Bluetooth (Solo Con Il Modello Corrispondente)

    12 Bluetooth (solo con il modello corrispondente) Premere Menu sul DR 460 C o il telecomando per scegliere Bluetooth, quindi premere il tasto invio. Attivare il Bluetooth del proprio telefono cellulare o altro dispositivo. Il proprio telefono cellulare cercherà automaticamente “DR460”. Dopo il collegamento con successo è...
  • Page 122: Network (Rete)

    Network (rete) 14.1 Wireless Network Configuration (configurazione rete wireless): scegliere per cercare automaticamente le reti wireless (raccomandato) Wireless Network (rete wireless) (WPS PBC): scegliere se il router supporta il WPS (Wi-fi Protected Setup) Manual configuration (configurazione manuale): scegliere configurare manualmente la rete. Check Network when Power On (controlla rete all'accensione): per attivare o disattivare il controllo delle reti all'accensione.
  • Page 123: Alarm (Sveglia)

    Alarm (sveglia) 14.3 Questa opzione permette di attivare/disattivare la sveglia e programmare una sveglia. È possibile accedere a questo menu anche premendo il tasto Alarm sul telecomando. Tenere presente che per utilizzare la funzione sveglia è necessario attivare l'impianto stereo/altoparlante connesso. Per programmare la sveglia: 1.
  • Page 124: Per Programmare La 2A Sveglia

    14.3.1 Per programmare la 2a sveglia: 1. andare su Configuration (configurazione) > Alarm 2 (sveglia 2) > Turn On (attivazione). 2. ripetere la procedura di programmazione della sveglia. 14.3.2 Per programmare la sveglia NAP: 1. andare su Configuration (configurazione) > NAP Alarm (sveglia NAP) 2.
  • Page 125: Sleep Timer (Timer Sospendi)

    Sleep Timer (timer sospendi) 14.6 L'opzione Configuration (configurazione) > Sleep Timer (timer sospendi) permette di selezionare un periodo di tempo predefinito trascorso il quale il dispositivo si spegne. È possibile anche impostare il timer di sospensione premendo il tasto Sleep sul telecomando.
  • Page 126: Weather (Tempo Atmosferico)

    Weather (tempo atmosferico) 14.8 Questa opzione permette di scegliere se le informazioni meteorologiche devono essere indicate sulla schermata di standby. È possibile anche scegliere tra Celsius e Fahrenheit. 14.9 Qui è possibile scegliere la funzione del tasto Mode: Allarme, Dimmer, Equalizzatore, Radio locale, Modalità (predefinito), Preset, Timer di spegnimento, SMS, Timer 14.10 In questo menu possono essere memorizzati fino a 3 numeri per la trasmissione automatica...
  • Page 127: Testo Sms

    14.10.1 Testo SMS Il testo SMS standard può essere modificato utilizzando l'app AirMusic Control, vedere il capitolo 15 DLNA / AirMusic Control App. Software update (aggiornamento software) 14.11 Questa opzione permette di scaricare la versione più aggiornata del firmware per il dispositivo. Per aggiornare la versione del firmware: andare su Configuration (configurazione) >...
  • Page 128: Dlna / App Airmusic Control

    DR 460 C può essere controllata con il proprio smartphone via WiFi. Si raccomanda di utilizzare l'App AirMusic Control. Oltre a controllare la radio, l'app è in grado di riprodurre i file musicali locali dello smartphone su DR 460 C. A causa degli aggiornamenti frequenti dell'app, il manuale è disponibile solo online.
  • Page 129: Informazioni Smaltimento E Garanzia

    16 Informazioni smaltimento e garanzia La durata della garanzia decorre dalla data di acquisto da parte del primo utilizzatore finale o dalla data della ricevuta rilasciata dal rivenditore. La garanzia prevede un periodo di: 24 mesi per l’apparato 6 mesi per gli accessori (batterie, caricatori, cavi, antenne, auricolari, ecc) La garanzia comprende tutte le anomalie causate da componenti difettosi o funzionalità...
  • Page 130: Assistenza Tecnica (Per Unità Vendute In Germania)

    15. Assistenza tecnica (per unità vendute Germania): Alan Electronics GmbH Service Daimlerstrasse 1k D- 63303 Dreieich Contattare il servizio Tecnico al num: +49 6103 9481 66 o via e-mail all’indirizzo e-mai: service@alan-electronics.de © 2017 Alan Electronics GmbH Italiano...