Table des Matières
Publicité
Les langues disponibles
Les langues disponibles
Liens rapides
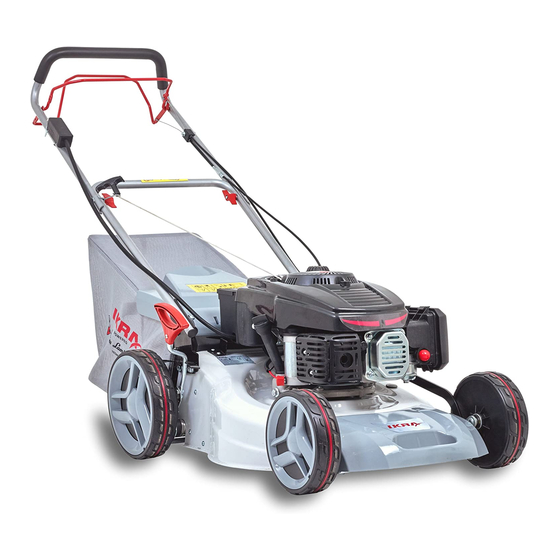
IBRM 1448E TL
BENZIN (3in1) RASENMÄHER
DE
Gebrauchsanweisung
PETROL (3in1) LAWN MOWER
GB
Operating Instructions
TONDEUSE THERMIQUE À GAZON
FR
Manuel d'utilisation
RASERBA A SCOPPIO
IT
Istruzioni per l'uso
CORTACÉSPEDES A GASOLIN
ES
Instrucciones de Manejo
CORTADOR DE GRAMA A GASOLINA
PT
Instruções de Serviço
KOSIARKA SPALINOWA
PL
Instrukcja obsługi
BENZININĖ ŽOLIAPJOVĖ
LT
Naudojimo instrukcija
73711375-02
- Originalbetriebsanleitung
- Translation of the original Operating Instructions
- Traduction du mode d'emploi d'origine
- Traduzione delle istruzioni per l'uso originali
- Traducción de las instrucciones de servicio originales
-
Tradução do manual de instruções original
– Oryginalna instrukcja obsługi
– Originalios naudojimo instrukcijos vertimas
Publicité
Chapitres
Table des Matières

Manuels Connexes pour IKRA IBRM 1448E TL


Sommaire des Matières pour IKRA IBRM 1448E TL
- Page 1 IBRM 1448E TL BENZIN (3in1) RASENMÄHER Gebrauchsanweisung - Originalbetriebsanleitung PETROL (3in1) LAWN MOWER Operating Instructions - Translation of the original Operating Instructions TONDEUSE THERMIQUE À GAZON Manuel d’utilisation - Traduction du mode d’emploi d’origine RASERBA A SCOPPIO Istruzioni per l’uso - Traduzione delle istruzioni per l’uso originali...
- Page 2 Vor Inbetriebnahme Gebrauchsanweisung lesen! Read operating instructions before use! Lire attentivement le manuel d’utilisation avant chaque mise en service ! Prima della messa in funzione leggere le istruzioni per l‘utilizzo! ¡Lea las instrucciones de manejo antes de efectuar la puesta en marcha! Antes da colocação em funcionamento leia o manual de instruções! Przed użyciem przeczytać...
- Page 36 FR | Manuel d’utilisation SOMMAIRE Application Désignation des pièces Consignes de securite Symboles de securite Consignes d’assemblage Consignes préalables à l‘utilisation Démarrer le moteur Déplacement de la tondeuse Arrêt de la tondeuse Une maintenance de base facile Dépannage Spécifications Techniques Commande de pièces de rechange Élimination et recyclage Rangement...
-
Page 37: Désignation Des Pièces
FR | Manuel d’utilisation Désignation des pièces Levier de conduite Bougie d’allumage Commutateur électrique de démarrage Filtre à air Écrou à ailettes Réservoir d‘essence Guidage du cordon en spirale Démarreur de recul Sac à herbe Batterie Levier de réglage en hauteur Câble de conduite et OPC Jauge à... -
Page 38: Consignes De Securite
FR | Manuel d’utilisation Consignes de securite versé et ne provoquer aucune étincelle tant que le carburant ne s’est pas évaporé et que Formation les vapeurs ne se sont pas dissipées. • Lire attentivement les instructions du présent - Refermer correctement le réservoir et le réci- manuel. - Page 39 FR | Manuel d’utilisation ou sous des pièces en rotation. Se tenir tou- Pour votre sécurité personnelle et la sécurité jours éloigné de l’orifice d’éjection. des personnes qui se trouvent à proximité, il • Ne jamais soulever ou transporter une ton- convient de porter une protection acoustique deuse dont le moteur est en marche.
- Page 40 FR | Manuel d’utilisation • AVERTISSEMENT ! Gaz explosifs - évitez les • Maintenez les raccordements propres et pré- flammes et les étincelles servez-les de la corrosion. • Le chargeur comprend des composants in- • Il faut débrancher l‘appareil du réseau pour tous terrupteur et fusible, par exemple capable de les travaux de nettoyage et de maintenance.
-
Page 41: Symboles De Securite
FR | Manuel d’utilisation Symboles de securite Le présent mode d’emploi décrit des symboles de sécurité ainsi que des symboles internationaux et des picto- grammes éventuellement placés sur l’appareil. Toutes les précautions d’emploi doivent être lues attentivement avant l’utilisation de cet appareil. ATTENTION! Ce symbole, marquant un point de sécurité, indique une précaution, un avertissement ou un danger. -
Page 42: Symboles Complémentaires Apposés Sur Les Appareilsà Démarrage Électronique
FR | Manuel d’utilisation Attention! Risque de projection de pièces. Maintenez les autres personnes loin de la zone dangereuse. Conforme aux normes européennes applicables. Niveau sonore garanti 98 dB(A) Symboles complémentaires apposés sur les appareilsà démarrage électronique Attention! Risque d’électrocution! Attention! Tenir le câble de connexion à... -
Page 43: Consignes D'assemblage
FR | Manuel d’utilisation Consignes d’assemblage 1. Assemblage de la poignée inférieure Fixer les boulons du guidon inférieur. Maintenir le guidon et monter le boulon inférieur en premier. Voir Fig. 1 2. Assemblage du guidon supérieur et attache de câble Assemblez l’écrou à... - Page 44 FR | Manuel d’utilisation 2. Remplissage du réservoir avec de l’essence sans plomb L’essence est hautement inflammable. Une extrême prudence est donc nécessaire lorsque vous manipu- lez ce matériau. Stockez toujours l’essence dans des conteneurs homologués et assurez-vous que l’essence utilisée pour le moteur date de moins de trois mois.
-
Page 45: Démarrer Le Moteur
FR | Manuel d’utilisation Démarrer le moteur 3. Réglage de la hauteur de coupe AVERTISSEMENT! Éteignez la tondeuseavantde- AVERTISSEMENT! Maintenez vos mains, vos régler la hauteur de coupe. pieds et vos vêtements à bonne distance des Pour de meilleurs résultats, adaptez la hauteur de coupe pièces mobiles, de l‘échappement et du capot mo- de votre tondeuse aux conditions environnantes. -
Page 46: Déplacement De La Tondeuse
FR | Manuel d’utilisation Déplacement de la tondeuse Une maintenance de base facile Démarrez votre tondeuse (cf. Démarrage du moteur). AVERTISSEMENT! Un entretien non conforme de Maintenez bien le levier de frein (OPC) (cf. fig. 15) (si la tondeuse entraîne une diminution de ses fonc- vous relâchez le levier de frein (OPC), le moteur s’arrê- tionnalités et annule les droits à... - Page 47 FR | Manuel d’utilisation Changement de l’huile moteur Avertissement! Ne redémarrez jamais le moteur sans avoir replacé le filtre à air. 1. Posez la machine sur un sol plat et stable. Faîtes chauffer le moteur pendant quelques minutes puis Charger la batterie de démarrage (option) arrêtez-le.
-
Page 48: Dépannage
FR | Manuel d’utilisation Dépannage Éteignez toujours le moteur et attendez que la lame se soit complètement arrêtée de tourner avant toute tâche de maintenance ou de nettoyage Problème Causes probables Solution Le moteur ne démarre pas Position incorrecte de la gâchette Sélectionner le réglage correct Capuchon de la bougie d’allumage Repositionner le capuchon de la... -
Page 49: Spécifications Techniques
FR | Manuel d’utilisation Spécifications Techniques Tondeuse thermique à gazon IBRM 1448E TL Type d‘entraînement Automoteur Type de moteur SL1P65FE, 4 temps, refroidissement forcé par air Puissance nominale du moteur Régime nominal du moteur 2900 Cylindrée Réglage en hauteur 7 niveaux... -
Page 50: Commande De Pièces De Rechange
Contactez votre reven- deur ou les autorités locales. bilité que le produit Tondeuse thermique à gazon IBRM 1448E TL, faisant l’objet de la déclaration sont Mise au rebut batteries: conformes aux prescriptions fondamentales en matière de sécurité et de santé stipulées dans les Directives Exclusivement par l‘intermédiaire d‘ateliers de véhicules...